1
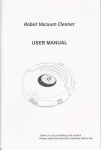
Robot Vacuum Gleaner
Robot Vacuum Gleaner
You can tEnsform the
the position, then the power is on. And then you can
ielect the distance within 2m as required by virtual wall
CD to the position, then the power is on And then you
tn" ai"u-na" within 7m as required by virtual wall'
Slide ths switch
*n
virtual wall transmitting signal head
""t"4
Transmitting infrared signal to form the virtual wall'
run outside the
Transmitting infrarad signal to make the vacuum cleaner
spae isolalor scope of socm without any impact to it'
to'' C-iaot"' tt
trigtr' ttle
When slids the toggl€ switohCDto O
8 seii"LJ V""rm cf-"-"ner works normally and the LED willflash every
@nds until the Power is not enough.
6
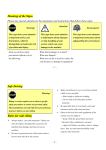
lnstallation Method of Space lsolator
l.openthebatterycoverbeforeusingtoplacetwoDsizebatteriesintothebox
not work'
Pay attention to the polarity, or the space isolator will
"oirectty.
2.Thebatteryconsumptiondurationisrelatedtotheselectedtransmittingdistance
distance and low.kansmittand working'duration, iiease select proper kansmitting
the toggle switch while unoff
turn
to
forget
noi
do
so
[attery,
the
ing po*", t6 save
used.
stair' room and any other
3.The space isolator is placed atthe entrance to the
needed areas generallY.
level of the ground where the
4.The space isolator should be placed at the same
from the blocked area to
obstacles
remove
to
yourbest
cleaner is running. AnJ try
ensuie the effect.
distance of space isolator in
S.There will be some differences in the transmitting
cleaner and
due to the comptex environment, movement of vacuum
""ir"t
battery
*"
Power.
Except the specific malntenance technicians in our company, nobody can unload, maintain and remold this
product. Or it may cauee flre, electrlc shock and personal injury.
.Do not touch power adapter wlth wet hands, or it may cause electric shock.
.Do not let the clothee or any perts of your physical harm (hair, fingers, etc) involve into the brush or wheel of
Robot Vacuum Cleaner. Or lt may cause bodily harm.
.Limited to use the power adapter whlch is equipped with the machine. Do not use other power adapters, or
it may cause produc't damage, and flre which is caused by the shock or high voltage.
.Do not bend the power cord exceeelvely or place heavy Objects on the power cord. Otherwise, the power
cord may be damaged and cauae a flre and electric shock.
.Do not approach the heat Bourcss such as cigarettes, lighters and matches or close to flammable materials
(for example, the use of gaeollne to clean the product)
.When transportlng or storlng Robot Vacuum Cleaner for a long time, you should turn off the power.
Othenivise, battery may be damaged.
.Plug the power cord of power adepter tightly, or it may cause electric shock, short circuit, smoking or fire.
.Before using, remove all the vulnerable object (luminous objects, fabrics, glasses, etc). Otherwise they may
be damaged, or lt mey affect the uee of Robot Vacuum Cleaner.
.Check whether tho powor adapter le connected to the outlet reliably, othenrvise it may result in no charging
or fire.
.ln order to avoid chlldren belng frlghtened or hurt, please use Robot Vacuum Cleaner cautiously when
children are present,
.Do not stand or slt on the Robot Vacuum Cleaner, so as not to cause damage to the machine or even
yourself.
.Do not use Robot Cacuum Clcaner ln narrow space (small tables, chairs), so as not to cause damage to it.
.Do not use Robot Vacuum Cleaner ln places of business, or it may result in damage because of excessive
use.
.Attention: Donnot let Robot Vacuum Cleaner inhale water and other liquids, so as not to cause damage.
.Avoid outdoor using, or lt may cauee damage to Robot Vacuum Cleaner.
.There are no movabl€ wlrc! whlch are longer than 150mm on the ground. ln order to avoid entangling the
hair brush.
.This product is not propcrly for the people with disabilities (the person of physical, perceived defects),
children or the people who erc not lamlllar with product usage manual.
.Appointment cleanlng functlon and automatic cleaning function will charge and work only when using
charging base to charge eutomttloally. lf you use the power adapter to charge directly, these two functions
cannot be achieved.
.ln order to ensure that Robot Vacuum Cleaner can charge automatically normally, please often wipe the
charging contact head on thc lront eholl ofthe machine and contact chips on the charging base with a dry
6.Thedistancebetweenspaceisolatorandchargingbaseshouldbemorethan
cloth.
0.5m, or there will be interferential'
.Charging base should bc lnatdlcd ln the space, which should be as wide as possible. There is no obstructions within 3 meters ln front of cherglng base, or it will block the Robot Vacuum Cleaner to recharge.
.Must use the matchlng oharglng base, and power supply must conform to the requirement of charging base.
Do not use any oth€r chtrglng baic or bettory, so as to avoid causing damage to the Vacuum Cleaner.
.ln order to extend the brttory llfo,thc flrst charging time shor,rld be 8-9hours, it's the same when you use it
again after not using for r long llmc, After the full charge-discharge cycles for 2-3 times, the battery will achieve the best resulta.
.lf the Robot Vacuum Clclnrr b not uaed for a long time, please make the battery full-charged and put it in
the cool place. And then you rhould keep the Cleaner dry.
T.Don,tmaketheinfraredtransmittingheadtowardspeople'seyes.
{3