1
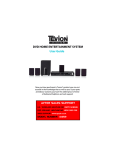
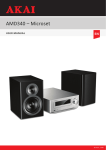
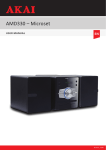
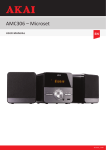
AHC 1500 – Home Theater System
User manual
EN
© Elmarc, 14/09
Table of contents
1 Intended use
3
2 Safety4
2.1Labels in this manual
4
2.2General safety instructions
4
3 Preparations for use
3.1Unpacking
3.2Package contents
6
6
6
4 Installation
4.1Install batteries
4.2Connecting the system
4.3Connecting random equipment
4.4Connecting to the mains
7
7
7
8
9
5 Functions
5.1Remote control
5.2AHC1500 Home Theater System
10
10
12
6 Operation
6.1General setup menu operation
6.2DVD/CD functions
6.3Copy content from a CD to a USB device.
6.4Radio functions
6.5USB and memory card
6.6LINE-IN
6.7AUDIO OUT
13
13
18
22
23
24
26
27
7 Cleaning and maintenance
7.1Handle and care of a disc
28
28
8 Technical data
29
9 Disposal of used electric and electronic equipment
30
2
1 Intended use
The Home Theater System plays music from CDs and music, videos and
photos from DVDs, memory card and USB. Music can also be played via
the AUDIO OUT port. The FM function lets you listen to the radio. The
appliance also plays photos from Kodak picture CDs. Read the manual
carefully before the first use.
DVDs and DVD appliances are manufactured under the worldwide agreed
DVD regional code system that the appliance will operate only with
corresponding disc of the same regional code. If the code number on the
label of a DVD does not match that on the label alongside, the DVD will
not play on this appliance.
55 The appliance has built in copyright protection technology that
prevents copying from a disc to any media. If a video recorder is
connected to the appliance, the video output image will be distorted
during recording.
Manufactured under license from Dolby Laboratories. "Dolby" and the
double-D symbol are trademarks of Dolby Laboratories. Confidential
unpublished works. Copyright 1992-1997 Dolby Laboratories. All rights
reserved.
55 Because of the great variety of products with USB ports and their
sometimes quite manufacturer-specific functions we can neither
guarantee that all devices will be recognised, nor that all operating
options that are possible in theory will actually work.
3
2 Safety
2.1 Labels in this manual
66 WARNING A warning means that injury or death is possible if the
instructions are not obeyed.
11 CAUTION A caution means that damage to the equipment is possible.
55 A note gives additional information, e.g. for a procedure.
2.2 General safety instructions
66 Please note! Install the product as indicated in this manual. If in
doubt, consult a recognised technician and always take account of
local installation codes and regulations.
66 Warning! Do not install the product in any place that might be
exposed to extreme heat or cold.
66 Warning! Do not install the product outdoors or in any place where it
might become wet.
66 Warning! It is not permitted to open the product yourself or to have
it opened, neither is it permitted to repair the product yourself
or to have it repaired. This will void the warranties. Please let any
maintenance be carried out by certified maintenance personnel.
66 WARNING Do not put force on the appliance. The appliance can fall
and can cause serious injury.
66 WARNING Do not insert any objects in the ventilation holes.
66 Warning! Only use original accessories from the manufacturer.
66 Warning! Remove the adapter from the power outlet during storms,
lightning and whenever the product will not be used for a longer
period of time.
11 CAUTION Do not spill any liquid on the appliance.
4
11 CAUTION Do not block the ventilation holes.
55 This appliance is double insulated; therefore no earth wire is
required. Always check that the mains voltage corresponds to the
voltage on the rating plate.
55 This appliance employs a laser system. To prevent direct exposure
to the laser beam, do not open the appliance. Visible laser radiation
when open and interlock defeated.
5
3 Preparations for use
3.1 Unpacking
• Unpack the appliance carefully.
• Check the package contents as described below. If any item is missing,
please contact your reseller.
• Remove the labels from the front panel carefully if present.
55 We recommend that you retain the original carton and packing
materials in case it ever becomes necessary to return your product
for service. This is the only way to safely protect the product
against damage in transit. If you do dispose of the carton and the
packing materials, please remember to recycle with due care to the
environment.
3.2 Package contents
The following items are included in the received package:
• 1 x AHC1500 Home Theatre System
• 5 x Speaker
• 1x Subwoofer
• 1 x Remote control
• 2 x Batteries (AA)
• 1 x Quick start guide
• 1x FM wire antenna
• 1x RCA Cable
55 If any item is missing, please contact your reseller.
6
4 Installation
4.1 Install batteries
1
2
3
• Remove the battery cover.
• Insert the batteries matching the (+) and (-) polarity markings.
• Re-install the battery cover.
11 CAUTION Incorrect installation can cause battery leakage and
corrosion which will damage the appliance. Corrosion, oxidation,
battery leakage and any other gradually acidic defect of this nature
will invalidate the guarantee.
4.2 Connecting the system
FL
FR
CEN
SL
SW
SR
• Determine the position of the different boxes.
7
CEN
SL
SW
FL
SR
FR
• Connect the speakers to the appliance.
4.3 Connecting random equipment
Connect the tv
• Use one of the cables as presented in the image below.
FM
Component
OR
HDMI
OR
Video
OR
S-Video
• Insert an FM aerial or a suitable cable into the FM ANT IN connection.
8
4.4 Connecting to the mains
• Connect the appliance to the mains.
• Switch on the appliance.
9
5 Functions
5.1 Remote control
20
1
21
22
2
3
5
7
9
11
13
15
17
19
24
4
26
6
28
8
30
10
32
12
34
14
36
16
38
18
40
1. STANDBY button
2. Digit buttons
3. 10+ button
4. PROGRAM button
5. Stop button
6. SOURCE button
7. Arrow key up
8. MENU/PBC button
9. Arrow key left
10.ENTER button
11.SETUP button
12.DVD/USB button
13.SEARCH button
14.SUBTITLE button
15.ANGLE button
16.CEN- button
17.SW- button
18.CEN+ button
19.SW+ button
20.MUTE button
21.OPEN/CLOSE button
23
25
27
29
31
33
35
37
39
41
22.CH- button
23.CH+ button
24.FF- button
25.FF+ button
26.VOL+ button
27.VOL- button
28.COPY button
29.PLAY/PAUSE button
30.TITLE button
31.Arrow key right
32.Arrow key down
33.N/P button
34.REPEAT button
35.LANGUAGE button
36.OSD button
37.SLOW button
38.SUR+ button
39.FRONT+ button
40.SUR- button
41.FRONT- button
10
General functions
SOURCE button
• To select the source mode TUNER/LINE-IN/DVD, press the SOURCE
button (6).
DVD
LINE-IN
TUNER
Set the volume of the loudspeakers
The front loudspeakers
• To adjust the volume, press the FRONT- (41) button or the FRONT+
button (39).
The central loudspeaker
• To adjust the volume, press the CEN- (16) button or the CEN+ button
(18).
Subwoofer
• To adjust the volume, press the SW- (17) button or the SW+ button
(19).
The loudspeakers for the surrounding noise
• To adjust the volume, press the SUR- (40) button or the SUR+ button
(38).
11
5.2 AHC1500 Home Theater System
1
14
2
15
3
4
5
6
16
7
8
17
10 11 12
18 19
24
1. STANDBY button
2. Memory card slot (SD/MMC)
3. USB slot
4. FF- button
5. FF+ button
6. CD compartment
7. LCD Display
8. NEXT button
9. PREV button
10.OPEN button
11.Play/Pause button
12.DVD/FM button
9
13
20
21 22 23
13.Volume dial
14.On / Off key (POWER)
15.Mains cable
16.Connection to speakers
17.Aerial connection (FM radio)
18.HDMI-output
19.AUDIO OUT
20.COMPONENT
21.COAXIAL
22.VIDEO
23.S-VIDEO
24.LINE-IN
12
6 Operation
55 All functions of the appliance are accessible using the remote
control. All instructions refer to operation with the remote control,
unless indicated otherwise.
6.1 General setup menu operation
7
9
11
10
31
32
This chapter explains a complete setup of the appliance: settings of
screen display, audio setup and video setup.
Preparation
• Turn on the television.
• Switch on the AHC1500.
• Press the SETUP button (11).
The Setup menu appears.
General
• Press the arrow buttons (left and right) (9,31) to select a menu. The
submenu is displayed directly.
• Press the arrow buttons (up and down) (7,32) to scroll through the
submenu.
• Press the ENTER button (10) to select a setting, or the left arrow button
to cancel the selection.
• Press the SETUP (11) button to store the settings and exit.
13
The GENERAL menu
Picture format
• In the TV DISPLAY section, press the arrow buttons (7,9,31,32) to select
4:3 4:3 PANSCAN or 4:3 LETTERBOX for a conventional TV set. Select
16:9 for a wide screen TV set.
ANGLE MARK
• In the ANGLE MARK section, press the arrow buttons to switch this
function ON or OFF. When switched ON, the appliance shows the angle
mark when multi-camera angles are available.
55 The ability to use this feature depends on the type of DVD.
OSD LANG
• In the OSD LANG section, press the arrow buttons to choose the
language.
CAPTIONS
• In the CAPTIONS section, press the arrow buttons to switch this
function ON or OFF. When switched ON, the appliance shows hidden
text when it is available.
55 The ability to use this feature depends on the type of DVD.
Screensaver on/off.
The screensaver will be turned on automatically when there is no picture.
High Definition Compatible Digital (HDCD)
• Select the value (2x, 1x or OFF) for full sound richness of HDCDencoded CDs.
LAST MEMORY
last memory: on/off
• When the DVD is paused, playback will automatically resume from
where last stopped.
The AUDIO menu
SPEAKER SETUP
DOWNMIX
• Select the desired sound with this view (STEREO, LEFT/RIGHT, 5.1CH)
FRONT SPEAKER
• The front loudspeakers
14
• Adjust the volume
CENTRE SPEAKER
• The central loudspeaker
• Adjust the volume
REAR SPEAKER
• The loudspeakers for the surrounding noise
• Adjust the volume
Subwoofer
• Adjust the volume
SPDIF SETUP
Set the digital audio signal.
• Select SPDIF OFF to switch off the digital audio signal output.
• Select SPDIF RAW to set the digital audio signal output to its raw
format (DTS/Dolby Digital 5.1).
• Select SPDIF PCM to set the digital audio signal output to PCM format.
EQUALISER
• EQ TYPE: select from the various sound effects
Bass boost
• Set the desired level
SUPER BASS
• Set the desired level
TREBLE BOOST
• Set the desired level
3D PROCESSING
• 3D processing creates a virtual sound experience for various audio
settings.
The DOLBY DIGITAL menu
Dolby digital audio setup
DUAL MONO
In the DUAL MONO area, you can choose:
• STEREO: for stereo effect.
• L-Mono: left channel only.
• R-Mono: right channel only.
• Mix-Mono: the average of both the left and right channel.
DYNAMIC
• Select the value for the dynamic range compression to avoid losing
sound details resulting from a low volume.
15
The VIDEO menu
Video setup page
COMPONENT
• S-video: Select this format when the Composite video output is used.
• YUV: Set the video output in analog component video format.
RESOLUTION
• Select the desired resolution.
QUALITY
Set the video quality.
• SHARPNESS: Adjust the screen sharpness.
• BRIGHTNESS: Adjust the screen brightness.
• CONTRAST: Adjust the contrast of the image.
• GAMMA: Adjust the colour intensity.
• HUE: Adjust the colour intensity.
• SATURATION: Adjust the saturation of the image.
• LUMA DELAY: Compensate the delay in the colour signal.
HDMI SETUP
• HDMI: select ON / OFF to turn HDMI on / off.
DEEP COLOR
• Set the depth of colour at 24, 30 or 36 bit.
The PREFERENCES menu
Preference setup page
TV TYPE
• Select the video output format to match the appliance to the TV
system: PAL, AUTO or NTSC.
55 The video output format can only be selected when the DVD tray is
empty.
55 Please note: if the wrong option has been selected, this may result in
very poor image quality. In that case, select a different setting.
AUDIO
• In the AUDIO section, choose the audio language.
SUBTITLE
• In the SUBTITLE section, choose the subtitle language.
16
DISC MENU
• In the DISC MENU section, choose the language for the disc menu.
PARENTAL
Set a rating for movies played by the appliance. Movies rated higher than
the level set for the parental lock can not be viewed.
55 This function is only available with discs that have parental rating
encoded.
PASSWORD MODE
Switch the password function on or off.
• Enter the correct password to switch the mode on or off.
PASSWORD
Change the default password.
• Enter the current password in the first box. Enter the new password
in the second box. Enter the new password again in the third box to
confirm.
55 The default password (1234) is always active. Even if the password
has been reset.
DEFAULT
Restore all default settings of the appliance, except the settings for the
menu items PARENTAL and PASSWORD.
17
6.2 DVD/CD functions
21
22
2
24
5
7
9
4
6
8
10
30
32
34
15
14
36
23
25
29
31
33
35
37
Preparation
• Turn on the television.
• Switch on the AHC1500.
• To select the source mode DVD, press the SOURCE button (6).
• Press the OPEN/CLOSE button (21).
• Insert a CD/DVD.
1
2
3
After the disc has been loaded, a content menu will display on the TV
screen.
• Press the arrow buttons (7,9,31,32) to select a menu item.
• Press the ENTER button (10) to enter the selected menu item.
• To start playback, press the PLAY/PAUSE button (29) once.
During playback, the following functions are available:
• To select a chapter (DVD) or track (CD), press the digit buttons (2).
• Press the GOTO button to acces the quick menu. Use numerical
buttons to input track number and track time. Press ENTER to confirm
a selection.
18
• To select the next or previous chapter (DVD) or track (CD), press the
PREV button (22) or the NEXT button (23).
• To forward or rewind the DVD, press the FWD button (24) or the REV
button (25). The available speed rates are: 2x, 4x, 8x, 16x, 32x.
• To pause playback, press the PLAY/PAUSE button (29) once; to resume
playback, press the button again.
• To stop playback temporarily, press the STOP button (5) once. Press the
button again to stop playback permanently, or press the PLAY/PAUSE
button (29) to resume playback.
• To select extra information of a DVD or CD (remaining time/passed
playtime/track number/chapter number), press the OSD button (36).
• Press the MENU (8) key to open the menu.
• To view a specific title of a DVD, press the TITLE button (30). Use the
arrow buttons to select the title.
• To switch on the subtitles of a DVD, press the SUBTITLE button (14).
• To select the camera angle, press the ANGLE button (15).
• To select the audio language of a DVD, press the LANGUAGE button
(35) repeatedly until the desired language is set.
• To playback in slow-motion, either forward or backward, press the
SLOW button (37) repeatedly. The available speeds are: 1/2, 1/4, 1/6,
1/8, 1/16.
• Press repeatedly on the (N/P) key in order to switch between NTSC,
PAL and AUTO playing mode.
Using the REPEAT function
• - Press the REPEAT button (34) once to repeat the current chapter or
track.
• Press the button 2 times to repeat all the numbers within the album.
• Press the button 3 times to repeat all chapters or tracks.
• Press the button once again to cancel the function.
55 Please note:
Normally, if an MP3 disc is loaded, the unit will take longer time to read
the initial data.
A DVD that does not match the region code cannot be read by this
appliance.
If a disc contains mixed content (e.g. MP3 and video files), the appliance
will only recognise, list and play one content type.
19
Program track sequence
For video discs and audio CDs
• To stop playback, press the STOP button (5).
• To play a list of tracks (max. 20) in a program, press the PROG button
(4).
• Press the up/down arrow buttons (7,32) to select a folder or a file.
• Press the ENTER button (10).
• Press the (7,9,31,32) keys to move the desired track.
• Press the ENTER button (10) to confirm the selection. Repeat the
previous step to select more tracks and confirm every selection with
the ENTER button (10).
• Press the PROG (4) key to save the program.
• Press the button PLAY/ PAUSE (29) to start program playback.
• To play the program again, press the PROG button (4) after the
program has finished. Press the PLAY/PAUSE button (29) to start the
program again.
• To stop the program during playback, press the STOP button (5).
• To delete the program during the playback, press the STOP button (5)
twice.
Using the MP3/MPEG4 playback function
• Insert an MP3/MPEG4 disc. A content menu will display on the TV
screen.
• Press the up/down arrow buttons (7,32) to select a folder or a file.
• Press ENTER (10) to enter the selected folder or file.
• To start playback, press the PLAY/PAUSE button (29) once.
• Press the MENU button (8) to return to the content menu during
playback.
20
Using the Kodak picture CD playback function
• Insert a Kodak picture CD.
• Press the STOP button (5) to enter the thumbnail mode. Choose an
option (Slide show/Menu/prev-next) and press ENTER (10).
• Select an image using the arrow keys (7,9,31,32). Press ENTER (10) to
view the image.
• In the overview with the small images you can also select the functions
SLIDE SHOW, MENU, PREV or NEXT. Use the arrow keys (7,9,31,32) to
select the desired functions and ENTER (10) to confirm.
• Press the PLAY/PAUSE button (29) to hold the slide show at the current
picture.
• Press the PLAY/PAUSE button (29) to resume the slide show.
• Press the PREV or NEXT buttons (22,23) to select the previous or next
picture.
Using the Video CD playback function
• Insert a Video CD.
• Press the PBC button (8) to switch on the playback function.
• To start playback, press the PLAY/PAUSE button (29) once.
• Press the PBC button (8) to quit the playback and return to the main
menu.
21
6.3 Copy content from a CD to a USB device.
55 Ensure there is sufficient free space on the USB device.
21
5
7
9
6
10
28
31
32
12
Preparation
• Turn on the television.
• Switch on the AHC1500.
• To select the source mode DVD, press the SOURCE button (6).
• Press the OPEN/CLOSE button (21).
• Insert a CD.
• Press the DVD/USB button (12).
• Press the STOP button (5).
• Press the COPY button (28).
Copying a file from one source to another source
• Select the desired file using the (7,9,31,32) keys.
• Press the COPY button (28).
The contents of the USB device appear.
Copy all files.
• Select SELECT ALL using the (7,9,31,32) keys.
• Press the ENTER button (10).
• Press the COPY button (28).
The contents of the USB device appear.
• Press the ENTER button (10).
22
6.4 Radio functions
22
2
24
4
23
25
6
13
Preparation
• Switch on the AHC1500.
• Press the SOURCE key (6) to select the radio mode.
Program radio stations automatically
• Press the SEARCH button (13).
20 stations are being searched and stored automatically.
• Press the PREV (22) Button or the NEXT (23) Button to select the
desired station.
Programming a radio station manually
• Turn on the television.
• Press the FF- (24) Button or the FF+ (25) Button to select the desired
station.
• Press the PROG (4) button first and then choose the desired preset
number location by pressing the numeric buttons (2) or the PREV (22)
and the NEXT (23) button.
• Touch PROG (4) to add the current station to your favourites
23
6.5 USB and memory card
22
2
5
7
6
23
29
8
10
32
12
1
TV ON
2
Preparation
• Turn on the television.
• Switch on the AHC1500.
USB functions
• Insert the USB device in the slot . The device can only be connected
one way.
• To select the source mode USB, press the SOURCE button (6).
• Press the DVD/USB button (12).
24
Memory card functions
55 Caution! The contents of a memory card can be played back only
if the device does not have a CD/DVD in it or a USB device is
connected. Remove the CD/DVD or USB device if present.
• Insert the SD/MMC device in the slot. The device can only be
connected one way.
• To select the source mode USB, press the SOURCE button (6).
• Press the DVD/USB button (12).
After the device has been connected, a content menu will display on the
TV screen.
• Press the arrow button (7,32)(up and down) to select a folder or a file.
• Press the ENTER button (10) to enter the selected folder or file. You
can also use the digit buttons (2) to select a folder or to play the file.
• Press the arrow button (7,32)(up and down) to select a folder or a file.
• Press ENTER (10) to confirm.
• Press the MENU button (8) to return to the content menu during
playback.
During playback, the following functions are available:
• To select a track, press the PREV button (22) or the NEXT button (23)
until the desired track is set.
• To pause playback, press the PLAY/PAUSE button (29) once; to resume
playback, press the button again.
• To stop playback, press the STOP button (5).
• To remove the device, gently pull it out of the slot.
55 Due to the great variety of products with USB ports and their
sometimes quite manufacturer-specific functions we can neither
guarantee that all devices will be recognised, nor that all operating
options that are possible in theory will actually work.
25
6.6 LINE-IN
6
Preparation
• Switch on the AHC1500.
LINE IN
• To connect an external audio device, insert the cable plug in the LINEIN jack .
• To select the source mode LINE-IN, press the SOURCE button (6).
“LINE-IN” appears on the display.
26
6.7 AUDIO OUT
6
AV OUT
Preparation
• Switch on the AHC1500.
AUDIO OUT
• To connect an external audio device, insert the cable plug in the
OUDIO OUT jack .
• To select the source mode LINE-IN, press the SOURCE button (6).
27
7 Cleaning and maintenance
66 WARNING Before performing any cleaning or maintenance, switch
off and unplug the appliance.
• Clean the outside of the appliance with a soft cloth. When the
appliance is very dirty, dampen the cloth slightly with water and a
neutral solution.
7.1 Handle and care of a disc
11 Hold the disc with fingers. Hold the disc outer edge and/or the centre
spindle hole. Do not touch the disc surface.
11 Do not bend or press the disc. Do not expose the disc to direct
sunlight or heating sources.
11 Clean the disc surface with a soft, dry cleaning cloth. Wipe the disc
surface gently, radially, from centre towards the outer edge.
11 Do not apply thinner, alcohol, chemical solvent, or sprays when
cleaning. Such cleaning fluids will permanently damage the disc
surface.
28
8 Technical data
AHC1500 Home Theatre System
• Voltage: 220-240VAC ~ 50/60 Hz
• Power consumption: 85W
• Frequency response: +/- 3 dB
• Speaker output: 5 x 10W RMS
• Subwoofer output: 25W
Disc output
• Television system: PAL/NTSC
• Frequency range: 20Hz ~20KHz
• Signal/noise ratio: >80dB
• Dynamic range: >80dB
connections
• USB 2.0 slot
• Memory card slot (SD/MMC)
Remote control
• Battery size: 2 x AAA
Radio
• Frequency range: 87,5~108 MHz
Supported media formats
• Disc types: DVD / DVD+R(W) / DVD-R(W) / CD / CD-R / CD-RW
• Picture formats: JPEG / Kodak Picture CD
• Video formats: MP3 / MPEG4 / WMA
• Audio formats: MP3 / AVI
Working environment
• Operating temperature: - 10 ~ +35 C(elsius)
• Relative humidity: 5% ~90%
29
9 Disposal of used electric and electronic
equipment
The meaning of the symbol on the material, its accessory or packaging
indicates that this product shall not be treated as household waste.
Please, dispose of this equipment at your applicable collection point
for the recycling of electrical and electronic equipments waste. In the
European Union and Other European countries which there are separate
collection systems for used electrical and electronic product. By ensuring
the correct disposal of this product, you will help prevent potentially
hazardous to the environment and to human health, which could
otherwise be caused by unsuitable waste handling of this product. The
recycling of materials will help conserve natural resources. Please do not
therefore dispose of your old electrical and electronic equipment with
your household waste.
Do not dispose of batteries as household waste but take them to a battery
recycling facility.
For more detailed information about recycling of this product, please
contact your local city office, your household waste disposal service or
the shop where you purchased the product.
For more information and warranty conditions, please visit: www.akai.eu
30