1
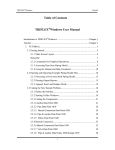
 Ucam Plus App
Apple iOS WiFi
User Manual
Ver 1.5
Contents
CHAPTER 1 SYSTEM & SOFTWARE ---------------------------------------------------------------- - 1 1.1 HARDWARE REQUIREMENT ----------------------------------------------------------------------------- - 1 1.2 OPERATIONAL SYSTEM REQUIREMENT --------------------------------------------------------------- - 1 1.3 SOFTWARE INSTALLATION -------------------------------------------------------------------------------- 1 CHAPTER 2 WIFI CONNECTION ---------------------------------------------------------------------- - 2 CHAPTER 3 OPERATING INSTRUCTIONS -------------------------------------------------------- - 5 3.1 PREVIEW --------------------------------------------------------------------------------------------------- - 6 3.1.1 Function menu ------------------------------------------------------------------------------------ - 6 3.1.2 Parameter Adjustment Menu ------------------------------------------------------------------ - 7 3.1.3 Resolution Selection Menu -------------------------------------------------------------------- - 9 3.2 SETUP ---------------------------------------------------------------------------------------------------- - 10 3.2.1 AP Client Mode Setup ------------------------------------------------------------------------- - 10 3.2.2 Modify WiFi camera SSID/PSK-------------------------------------------------------------- - 13 3.2.3 Restore All Setup ------------------------------------------------------------------------------- - 14 3.3 IMAGE AND VIDEO FILE BROWSING ------------------------------------------------------------------ - 15 3.4 REFER TO HELP ---------------------------------------------------------------------------------------- - 17 -
Chapter 1:
System Requirement & Software
1.1 Hardware Requirement
Apple iPhone 3, iPad 2 or higher.
1.2 Operational System Requirement
iOS 5.0 or higher.
1.3 Software Installation
Step 1: Install Ucam Plus
app from Apple App Store
Step 2: After installation, the following icon will appear in your IOS menu interface.
-1-
Chapter 2:
WIFI Connection
*** The WiFi microscope cameras have their own wireless network. They work independently of local WiFi networks. They can be configured to work on your local network, but they work best on the camera WiFi. *** You may need to try establishing the connection a few times before establishing a
successful connection. Simply repeat the WiFi connection instructions until
successful.
Step 1: Turn the work mode switch on your WiFi camera to WiFi work mode. Waitt for about
20 seconds until the green WiFi indicator light flashes.
Step 2: Ensure your WiFi is turned on in your IOS device
Note: The original WiFi name of WiFi camera is VideoWiFi-xxxxxx. Xxxxxx is the
internal identification number and differs in each camera model. You can change the
WiFi network name. See 4.2.2. below.
-2-
Step 3: Enter connection code and process connection.
Note: The factory default WiFi password is 12345678. You can change the WiFi
password. See .2.2. below.
.
Step 4: Click connection and wait for a few seconds. When “connected”appears, IOS device
has been successfully connected to WiFi camera.
-3-
Step 5: After successful WiFi connection, exit the setup page and return to the main menu.
Click icon
on your desktop to process WiFi Macro Camera software and enter
into the below interface.
Step 6: After entering the interface, click image preview function button
screen to appear.
-4-
for the preview
Chapter 3:
Click icon
Operating Instructions
on system desktop to display the following interface.
1.
Preview: click to enter WiFi camera image preview interface.
2.
Parameter setup: set parameters relevant to camera.
3.
File: check photographs and video files.
4.
Help: refer to software instruction help.
-5-
3.1 Preview
Preview screen is as follows:
3.1.1 Function menu
Touch the screen to display the function menu. Touch again to hide the function menu.
Back
Exposure reduction
:
Return to the previous page.
:
Reduces
exposure
when
the
preview
screen is too bright or when viewing a
darker screen. Requires manual exposure
mode below.
-6-
Automatic/Manual exposure
:
Automatic/manual exposure switch button.
Exposure intensification
:
Intensifies
exposure.
Requires
manual
exposure mode.
Zoom out
:
Zoom out is divided into 6 degrees with 1
degree minimum.
Zoom in
:
Zoom is divided into 6 degrees. Available for
lower resolutions only: 640x480, 800x600.
1024x768. 1280x720
Automatic focus
:
Automatic focus button. (selected models
only)
Camera
:
Capture current preview image and save it
to the specified file folder.
Video
:
Record video button.
View files
:
View photo and video files.
3.1.2 Parameter Adjustment Menu
Click “>”on the left side of the screen to display the camera settings. Click “<”or the
middle screen to hide parameter adjustment menu.
All the camera settings have been optimized by the factory. However, you can adjust
them, as required: Click “Restore to Default” at any time to reset to the factory settings.
-7-
Brightness
:
Adjust the brightness of your images.
Contrast
:
Adjusts image contrast
Focus
:
Auto focus button although we recommend using the
microscope. (Selected models only)
Full Screen
:
Enables full screen preview.
Tilt
:
Moves the image up and down.
Saturation
:
Adjusts the image saturation
Sharpness
:
Adjusts the image sharpness. When over adjusted, it
will increase the noise ratio.
-8-
Auto White Balance
:
Auto white balance when checked.
Hue
:
Adjusts the hue.
Gain
:
Adjusts the gain.
Gamma
:
Adjust the gamma.
Backlight contrast
:
Adjusts image contrast
Power line
:
Adjust power supply frequency. Required if you see
stripes or little ripples.
Reset to factory defaults
:
Restore to original factory default settings.
3.1.3 Resolution Selection Menu
Click “<”on the right side of the screen to pop up resolution selection menu. Click “>” or
the middle of the screen to hide resolution selection menu. You can adjust resolution from
the factory default 800x600. Click “set resolution” to display the below screen. Slide up and
down to change resolution. After selection, click
to confirm your choice.
After selecting a resolution, wait 10 seconds for the change to become effective.
You can connect up to ten IOS or iOS devices as per the following chart:
-9-
3.2 Setup
3.2.1 AP Client Mode Setup
Special instruction:
The AP client mode needs connecting to a wireless router, so you must know in
advance the required wireless router’s name and password.
1. Encryption must be WEP, WPA-PSK or WPA2-PSK.
2. Wireless DHCP must be enabled and IP addresses available.
3. Under AP client mode, image will first be transmit to wireless router and then to IOS
device. Therefore, it needs twice the image transmission bandwidth than wireless router.
Under this mode, image transmission speed is slower than that under AP mode.
4. Image transmission requires significantly greater bandwidth. As a result, AP client mode
works less well with multiple devices.
Setup steps are as follows
Step 1: click setup function button
under the homepage and enter setup page shown as
below.
- 10 -
Step 2: select AP/AP client mode setup. After entering the below image, select AP client mode.
Step 3: After entering AP client mode, the software will locate your WiFi router. Select the
router you need to connect or enter the needed router name and enter the password.
Then click “Confirm” to enter the below image (shown as below).
Finding SSID
- 11 -
Current mode: AP mode
Step 4: After clicking OK, the following interface will appear. Select OK and enter switching AP
client.
Please click OK to restart WiFi camera
Step 5: The device will start again automatically. Exit the software until WiFi indicator of the
WiFi camera flashes.
Step 6: Open IOS device, click setup
to enter WiFi setup interface, select and connect the
above wireless router.
Step 7: After “connected”displays, process WiFi Macro Camera software again. Enter the
interface, select
to enter AP/AP client mode setup and select “find device”.
Note: Depending on the signal strength of router and the number of connected devices, the
connection time may take 2 to 200 seconds. Sometimes, the WiFi camera may not be
found.
- 12 -
Successfully found
WiFi camera is available!
Step 8: After identifying the IP, return the main menu, click camera icon
and wait for a
few seconds for the preview screen.
3.2.2 Modify WiFi camera SSID/PSK
Step 1: Enter the main interface, click icon
and enter the setup interface, shown as below.
Step 2: Select “modify WiFi camera SSID/PSK” to enter modification interface. Enter the
modified WiFi name in “SSID”.
- 13 -
Step 3: Please enter WiFi original code in “WPAPSK”. The factory default code is 12345678.
The third and fourth lines are the newly set code and the two codes must be same.
After editing, click “OK” and the software shows“ restart WiFi camera” to complete
modification.
Step 4: After setting user name, original password and new password, click OK button.
Displays process “setting”. Changes are successful (If it prompts “current WiFicode is
not entered correctly and please enter again”, please check the password and enter
it again.)
Setting , SSID/PSK is set successfully, Please connect WiFi camera!
Step 5: Exit the software, go to the IOS device wireless local area network and connect the
camera. The camera name is the newly modified WiFi name and the password is the
modified one. Reenter the software to use by new WiFi name.
3.2.3 Restore All Setup
Resets all settings to factory defaults.
- 14 -
3.3 Image and Video File Browsing
Go to the main menu and select
to see your photos and videos.
3.3.1 Photo Browsing
Go to photo preview, select any photo shown as below.
- 15 -
Close software
Previous photo: browse single photo to enter the previous photo.
Next photo: browse single photo to enter the next photo.
Note: Please ensure to select “Save photo in mobile phone photo album” as
described in 3.2.3. Select “allow WiFi Macro Camera to visit your photo” in system
option “Setup – Privacy - Photo”.
Click to delete an image.
3.3.2 Video Image Play
Step 3: Go to video preview as shown in image
Step 4: Click icon
to display first image. Select export to save the video file into photo
album on the IOS device. Open IOS device – Camera – Photo/Video for checking.
- 16 -
Note: Please ensure you select “save photos on mobile phone album” as described in
3.2.3. Meanwhile, select “allow WiFi Macro Camera to visit your photo” in system
option “Setup – Privacy - Photo”.
3.4 Refer to Help
In the main menu, click help button
to check App instruction manual, App
version and firmware version.
- 17 -