1
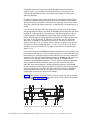
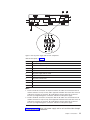
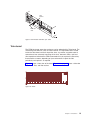
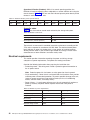
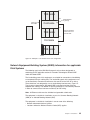
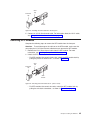
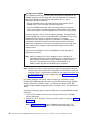
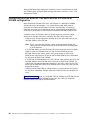
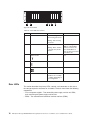
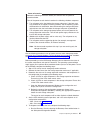
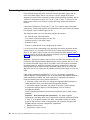
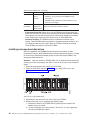
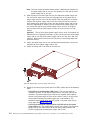
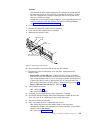
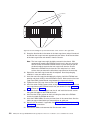
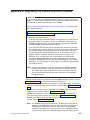
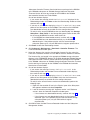
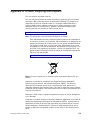
1. Unpack and install the EXP810 drive expansion enclosure. Do not insert any
drive CRUs into the enclosure drive slots.
2. Verify that the Link Rate speed is at the correct setting. You cannot add storage
expansion enclosures with different Link Rate speed settings in the same
redundant drive loop.
3. Power on the EXP810 storage expansion enclosure.
4. Make the fibre-channel connection marked �1� in Figure 48 on page 89 (drive
loop A) by connecting port 1A of the existing EXP810 to port 1B of the new
EXP810. Then verify that it is recognized by the DS Storage Manager software
GUI.
5. Move the existing fibre-channel connection marked �2� in Figure 48 on page 89
from the existing EXP810 enclosure ESM port IB to the new EXP810 enclosure
ESM port 1B.
6. Make the fibre-channel connection marked �3� in Figure 48 on page 89 (drive
loop B) by connecting port 1A of the new EXP810 to port 1B of the existing
EXP810.
7. You can use either the Storage Subsystem Profile information or the Drive
Enclosure Component icon in the Physical View of the Subsystem Management
window to verify the EXP810 ESM firmware.
Attention: For error-free operation, the ESM firmware in the EXP810 ESM
modules must be at the same level. If the ESM version does not match, wait at
least 10 minutes for the ESM automatic code synchronization to occur.
Otherwise, manually update the ESM firmware using the menu function in the
DS4000 Subsystem Management window.
8. Insert the drives into the drive slots two at a time. Wait until the drives have
spun up and been recognized by the DS4000 before inserting the next two
drives from the Physical View of the Subsystem Management window.
9. Repeat step1 to step 8 for each storage expansion enclosure you want to add.
Note: Always add a new EXP810 to the end of a drive loop. Always add new drive
expansion enclosures to the existing drive loop one at a time while the
DS4000 storage subsystem is running and in an optimal state. See the
DS4000/DS5000 Hard Drive and Storage Expansion Enclosure Installation
and Migration Guide for more information.
Removing and replacing a bezel
To access the filter and filter retainer as well as the E-DDMs, you must remove the
bezel.
To remove and replace a bezel, perform the following steps:
1. Grasp the sides of the bezel and pull it slowly toward you to remove it, as
shown in Figure 49 on page 91.
2. To replace the bezel, grasp the sides of the bezel and snap it onto the EXP810
chassis, as shown in Figure 49 on page 91.
90
IBM System Storage DS4000 EXP810 Storage Expansion Enclosure: Installation, User’s and Maintenance Guide