1
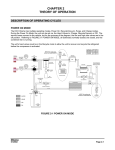
TECm
BMW E36 Plug and Play
Hardware
Installation
Manual
Electromotive Inc.
Copyright 2013
TECm User’s Manual v1.0
-1-
©2013 Electromotive, Inc.
Table of Contents
1.
Terms and Conditions........................................................ 4
1.1. Electromotive Product Warranty ................................................................................. 4
1.1.1.
Warranty Replacement........................................................................................... 4
1.1.2.
Warranty Coverage ................................................................................................ 4
1.1.3.
Length of Warranty ................................................................................................. 4
1.1.4.
Who the Warranty Protects..................................................................................... 4
1.1.5.
Warranty Exclusions............................................................................................... 4
1.1.6.
How to Obtain Warranty Service............................................................................. 5
1.1.7.
Limitation of Implied Warranties.............................................................................. 5
1.1.8.
Exclusion of Damages............................................................................................ 5
2.
Forward ............................................................................... 6
2.1.
2.2.
3.
Pre-Installation Checklist ............................................................................................ 6
Installing the TECm board in the BMW case .............................................................. 7
Fuel System ........................................................................ 7
3.1.
3.2.
3.3.
4.
Injector Sizing............................................................................................................. 7
Fuel Pump Selection ................................................................................................ 11
Fuel Pressure Regulator Selection ........................................................................... 11
Wiring the TECm............................................................... 12
4.1.
4.2.
4.3.
4.3.1.
4.3.2.
4.4.
4.5.
4.6.
4.6.1.
4.6.2.
4.7.
4.7.1.
4.8.
4.9.
4.9.1.
4.9.2.
4.9.3.
4.9.4.
4.9.5.
4.9.6.
5.
Introduction .............................................................................................................. 12
Spark Plug Selection ................................................................................................ 12
Wiring the DFU’s ...................................................................................................... 13
Spark Plug Wire Routing ...................................................................................... 13
Spark Plug Wire Selection .................................................................................... 13
Using a MAP Sensor ................................................................................................ 14
Wideband O2 Sensor Installation Instructions .......................................................... 14
Fuel Injector Wiring .................................................................................................. 15
Full Sequential Injection ....................................................................................... 15
Phased/Staged Injection....................................................................................... 15
Idle Air Control ......................................................................................................... 16
Idle Air Control Valve............................................................................................ 16
Tachometer Output .................................................................................................. 16
General Purpose Inputs (GPI’s) and Outputs (GPO’s).............................................. 16
Available General Purpose Input (GPI) Functions: ............................................... 16
Examples of GPI Wiring ....................................................................................... 17
GP I/O Wiring Harness Layout ............................................................................. 18
General Purpose Output (GPO) functions ............................................................ 18
Available GPO Functions...................................................................................... 19
Examples of Wiring GPO’s ................................................................................... 19
Diagnostics ....................................................................... 21
5.1. Trouble Codes from the LED’s Mounted on the TECm............................................. 21
5.2. Trouble Codes (turns on the Check Engine light) ..................................................... 21
5.3. Trouble Code Descriptions ....................................................................................... 22
5.3.1.
Using the Trouble Codes ...................................................................................... 23
6.
TECm ECU Specifications ............................................... 24
6.1. OUTPUTS ................................................................................................................ 24
6.1.1.
Fuel Injector Drivers ............................................................................................. 24
6.1.2.
Coil Outputs.......................................................................................................... 24
6.1.3.
General Purpose Inputs or Outputs (GP I / O’s).................................................... 24
TECm User’s Manual v1.0
-2-
©2013 Electromotive, Inc.
6.1.4.
6.1.5.
6.1.6.
6.1.7.
6.2.
6.2.1.
6.2.2.
6.2.3.
6.2.4.
6.3.
6.3.1.
6.3.2.
6.3.3.
6.3.4.
6.3.5.
6.3.6.
6.4.
6.5.
6.5.1.
6.5.2.
6.6.
6.7.
6.8.
6.8.1.
6.8.2.
6.8.3.
7.
7.1.
7.2.
7.3.
7.4.
Fuel Pump Control................................................................................................ 24
Tachometer Output............................................................................................... 24
Check Engine Light Output................................................................................... 24
ECU Diagnostic LED (internal) ............................................................................. 24
INPUTS.................................................................................................................... 24
General Purpose Inputs or Outputs (GP I / O’s).................................................... 24
Engine Sensor Inputs ........................................................................................... 24
Angle Based Timing Control ................................................................................. 25
Feedback Charging Control.................................................................................. 25
Tuning Features ....................................................................................................... 25
Ignition Timing Map .............................................................................................. 25
Fuel Map .............................................................................................................. 25
Load Sensing – Three Options ............................................................................. 25
Rev Limiters ......................................................................................................... 25
On-Fly Tuning....................................................................................................... 25
Compensation Features ....................................................................................... 25
Supported Engine Management Configurations ....................................................... 26
Data logging Features .............................................................................................. 26
Internal Data logging ............................................................................................ 26
Laptop Data logging ............................................................................................. 26
Form Factor.............................................................................................................. 26
Environmental Considerations.................................................................................. 26
PC Requirements ..................................................................................................... 26
Computer ............................................................................................................. 26
Data Drives .......................................................................................................... 26
Communications................................................................................................... 26
Calibration Software......................................................... 27
Software Coding Information .................................................................................... 27
Firmware Coding Information ................................................................................... 27
Firmware Upgrade Procedure .................................................................................. 27
Pin-out Information ................................................................................................... 28
TECm User’s Manual v1.0
-3-
©2013 Electromotive, Inc.
1. Terms and Conditions
1.1.
Electromotive Product Warranty
Only products Manufactured by Electromotive are covered by Electromotive’s limited warranty for a period of
one-year from date of shipment by Electromotive.
Products not manufactured by Electromotive are expressly excluded from any consideration under these terms
– for information regarding products not manufactured by Electromotive you must contact the specific product’s
manufacturer.
Whenever possible, Electromotive attempts to replace defective products rather than repair them.
Replacement puts the "Customer First" and offers many benefits over repair; the greatest benefit being the
timeliness of the replacement process. However, in some cases, replacement with a ‘like new’ refurbished
product is not possible, and a warranty repair situation occurs. In these situations, Electromotive strives to
keep our repair times to a minimum (on average 2 to 3 business days upon receipt - excluding the necessary
shipping time). Customers should follow the appropriate steps outlined below to initiate a warranty replacement
or repair.
1.1.1. Warranty Replacement
Contact Electromotive Technical Support at 1-703-331-0100 9am to 5pm Eastern Time. The customer must
have the serial number and original proof-of-purchase available. Electromotive’s Technical Support staff will
attempt to help you correct any minor issues that might be causing the problem. If we are unable to fix the
issue to your satisfaction, a return merchandise authorization (RMA) number will be issued. Under our
Warranty program, Electromotive will typically ship the customer a replacement unit on the same day the
defective product arrives.
The replacement product will assume the remainder of your original product's warranty or 90 days, whichever
is greater.
1.1.2. Warranty Coverage
Electromotive warrants its products to be free from defects in material and workmanship during the warranty
period. If a product proves to be defective in material or workmanship during the warranty period,
Electromotive will, at its sole option, repair or replace the product with a similar product. Replacement product
or parts may include remanufactured or refurbished parts or components.
1.1.3. Length of Warranty
Electromotive products are warranted for one (1) year parts and one (1) year labor. Warranty begins upon date
of shipment from Electromotive.
1.1.4. Who the Warranty Protects
This warranty is valid only for the purchaser from Electromotive.
1.1.5. Warranty Exclusions
Any product, on which the serial number has been defaced, modified or removed.
Damage, deterioration or malfunction resulting from:
Accident, misuse, neglect, fire, water, lightning, or other acts of nature, unauthorized product modification, or
failure to follow instructions supplied with the product
Repair or attempted repair by anyone not authorized by Electromotive.
Any damage of the product due to shipment.
Removal or installation of the product
Causes external to the product, such as electric power fluctuations or failure.
Use of supplies or parts not meeting Electromotive’s specifications
Any other cause, which does not relate to a product defect
TECm User’s Manual v1.0
-4©2013 Electromotive, Inc.
Removal, installation, and set-up service charges
Shipping Charges.
Any warranty of merchantability, express or implied, is excluded except as otherwise set forth herein.
There are no warranties that extend beyond the description on the face of this document.
There are no warranties of fitness for a particular purpose except as stated on the face of this “Electromotive
Product Warranty”.
Any and all oral warranties are excluded and will not be honored.
Consequential damages will not be covered by this warranty.
1.1.6. How to Obtain Warranty Service
For information on warranty service, contact your Electromotive Value Added Dealer or call Electromotive
Technical Support at 1-703-331-0100 from 9am to 5pm Eastern Time Monday through Friday - e-mail
[[email protected]]. To obtain warranty service, you will be required to provide:
Original dated sales receipt
Your name
Your address
The serial number of the product
A description of the problem
Contact information (daytime phone number or email address)
Take or ship the product in the original or a suitable replacement container to:
Electromotive, Inc.
9131 Centreville Road
Manassas VA 20110
1.1.7. Limitation of Implied Warranties
THERE ARE NO WARRANTIES, EXPRESS OR IMPLIED, WHICH EXTEND BEYOND THE
DESCRIPTION CONTAINED HEREIN INCLUDING THE IMPLIED WARRANTY OF
MERCHANTABILITY AND FITNESS FOR A PARTICULAR PURPOSE.
1.1.8. Exclusion of Damages
ELECTROMOTIVE’S LIABILITY IS LIMITED TO THE COST OF REPAIR OR REPLACEMENT OF THE
PRODUCT. ELECTROMOTIVE SHALL NOT BE LIABLE FOR:
DAMAGE TO OTHER PROPERTY CAUSED BY ANY DEFECTS IN THE PRODUCT, DAMAGES BASED
UPON INCONVENIENCE, LOSS OF USE OF THE PRODUCT, LOSS OF TIME, LOSS OF PROFITS, LOSS
OF BUSINESS opportunity, LOSS OF GOODWILL, INTERFERENCE WITH BUSINESS RELATIONSHIPS,
OR OTHER COMMERCIAL LOSS, EVEN IF ADVISED OF THEIR POSSIBILITY OF SUCH DAMAGES.
ANY OTHER DAMAGES, WHETHER INCIDENTAL, CONSEQUENTIAL OR OTHERWISE.
ANY CLAIM AGAINST THE CUSTOMER BY ANY OTHER PARTY
SHIPPING CHARGES.
TECm User’s Manual v1.0
-5-
©2013 Electromotive, Inc.
2. Forward
The TECm Total Engine Control system is a custom designed engine management systems for use with BMW
3-series vehicles model year 1992 to 1995. The heart of the TEC series of engine management systems has
always been a high-resolution ignition, which offers incredibly precise ignition timing even at the highest
acceleration rates. The TECm continues this tradition; only what was once done with an analog ignition circuit
is now done with a high-speed microprocessor. The TECm uses the stock BMW coils for ignition output by
default. For extreme applications, an Electromotive 6-cylinder DFU can be used.
The TECm has 6 dedicated fuel channels for high or low impedance injectors. Each output can drive up to two
2 ohm or greater injectors. Sequential operation is available and used by default in the BMW wiring harness.
Phased staged injection is available with some wiring harness changes for high power street applications.
There are thirteen (13) user-definable, general-purpose inputs / outputs (GP I/O’s) included with the TECm to
fully support all factory engine functions and to allow additional functionality. The GP I/O’s can be used to
control anything from wastegates for turbo setups to simple electric radiator or intercooler fans.
One of the GPI’s is a vehicle speed input, which can process the signal produced in the transmission. The
other GPI’s are analog inputs only, and do not feature frequency-based capabilities. These channels can
perform fuel trims, timing trims, and many other functions.
Besides the GP I/O’s, several functions are built-in to the TECm that are quite useful on most applications.
The following outputs are standard on the TECm:
Tachometer (drives the factory BMW tach and most aftermarket tachs)
Fuel Pump Relay Ground (activated at appropriate times by the TECm)
Fuel Consumption Gauge output
ECU relay control (activates many vehicle electronics)
The TECm uses the following inputs to perform engine management:
Crank Trigger (60-2)
Cam Trigger (stock BMW, optional)
Mass Air Flow Sensor or Manifold Absolute Pressure
Coolant Temperature Sensor
Manifold Air Temperature Sensor
Throttle Position Sensor
Knock Sensor (stock BMW sensor, enabled optionally)
Exhaust Gas Oxygen Sensor (O2 sensor narrow or wideband)
2.1.
Pre-Installation Checklist
To perform a complete TECm installation, the following items are required:
TECm Computer
3-series 6-cyl BMW model year 92-95
Torx T-15 screwdriver
Flat blade screwdriver
Drill with x” dirll bit
Windows-based PC-type Computer (see notes on Computer Requirements)
Serial Connector Cable (DB9) for PC and a USB to Serial Converter
WINTEC4 Software Guide
TECm User’s Manual v1.0
-6-
©2013 Electromotive, Inc.
2.2.
Installing the TECm board in the BMW case
Installing the TECm in the factory BMW case is simple but requires a number of steps and a few simple tools.
Tools required:
Torx T-15 screwdriver
Flat blade screwdriver
Pair of needle nose pliers
Drill with a 3/8” drill bit
To install the TECm:
1. Remove the BMW engine controller from it’s location in the firewall on the passenger side(for left drive
vehicles)
2. Disconnect the BMW engine harness by lifting the metal lever away from the ECU.
3. Using a flat blade screwdriver, open the 4 tabs on the bottom of the ECU. They may break off when
lifting or when closing at the end. This is not a problem, the screws actually hold the ECU together.
4. Remove the 4 Torx screws from the top and the 4 screws from the bottom. This will allow splitting the
case.
5. Using the needle nose pliers, remove the plastic support post from the middle of the circuit board. This
will release the circuit board from the ECU housing.
6. Remove the plastic post from the bottom ECU plate. Be sure to retain the plastic cover sheet for the
bottom plate.
7. Place the TECm on the bottom plate and reinstall the four Torx screws in the bottom. Be sure to keep
the plastic sheet in place before screwing the board down.
8. Using the drill, drill a hole in middle of the rear face of the ECU cover (opposite the main connector).
9. Feed the push connectors of the TECm serial cable through the hole in the ECU cover and push the
grommet on the serial cable into the hole.
10. Push the wire onto the tabs on TECm circuit board in the following order:
a. Bare – Ground
b. Black – RXD
c. Red – TXD
11. Place the ECU cover onto the ECU and install the 4 Torx screws into the top.
12. Bend the tabs on the bottom back into place (if not broken off)
13. Re-connect the ECU to the BMW harness and re-install the new ECU into the original location. Leave
the serial cable hanging out of the cover for the ECU bay to allow easy connection to the PC. Once
tuning is completed, the serial cable can be tucked into the ECU bay to hide the cable.
3. Fuel System
BMW has already done a pretty good job of designing the fuel system in your car. In many cases, you will not
need to make any changes to this configuration. Installing a TECm usually means that other changes were
made to the engine that will result in more horsepower, which in turn requires more fuel. This usually means
upgrading the injectors and possibly the fuel pump.
3.1.
Injector Sizing
The most important component of the fuel system is the fuel injector. Injectors must be flow matched to
maintain a consistent fuel supply for all cylinders. Cylinder-to-cylinder fuel variations can lead to poor
performance, increased fuel consumption, or even catastrophic detonation. Additionally, the size of the
injector plays a large role in tuning a vehicle. Injector sizes (flow rates) are generally given in either poundsper-hour (lbs/hr) or cubic centimeters per minute (cc/min). (Note that 1 lb/hr = 10.5 cc/min.) These ratings are
either made by the injector manufacturer or by an aftermarket injector modifier. In either case, the importance
of the pressure at which the flow rating was obtained must be realized. As an example, an injector that was
TECm User’s Manual v1.0
-7-
©2013 Electromotive, Inc.
rated at 40 lbs/hr at 43.5psi pressure will NOT supply 40 lbs/hr when operated at 30psi…it will flow more like
34 lbs/hr.
For an injector to be “sized” properly for an engine, a few things must be taken into consideration:
Number of Cylinders
Number of Injectors
Engine Horsepower
Peak RPM
Brake Specific Fuel Consumption (BSFC)
Injector Recovery Time (IRT)
The Brake Specific Fuel Consumption (BSFC) is a scaling factor used for fuel flow calculations. Its units are
pounds-per-hour per horsepower (lbs/hr per HP). Typically, gasoline engines run BSFC’s between 0.40 and
0.60. Alcohol engines generally run BSFC’s between 0.80 and 1.20. A lower BSFC value indicates a more
efficient engine. The original 4-cylinder BMW M3 engine has a BSFC of around 0.43. A turbo engine will
normally have a BSFC above 0.5.
Example:
Engine Horsepower = 300
BSFC = 0.50
300 HP x 0.50 lbs-per-hr/HP = 150 lb/hr
This engine would require a total of 150 lbs/hr of fuel flow.
The Injector Recovery Time is the time that is takes for an injector to open once it receives a voltage signal.
Typically, a low-impedance injector will have an IRT of around 1.3 milliseconds. A high impedance injector will
generally have an IRT of 1.5 ms. The IRT determines two things:
1. The minimum time that the injector can be pulsed
2. The maximum duty cycle
If an injector is given a pulse width that is shorter than its IRT, it will flutter. This will cause erratic fuel
metering, and ultimately horrible engine performance. This scenario sometimes occurs at idle on high-revving,
high-horsepower engines with large injectors. If the IRT is not accounted for in high-rpm situations, the duty
cycle will be too great, and the injector will flutter. This scenario occurs on engines with injectors that are too
small.
To properly size an injector, the following sequence of equations should be followed:
HP x BSFC = Total Fuel Flow Requirement for the Engine (TFFR)
TFFR ÷ (# of Injectors) = Uncorrected Injector Size (UIS)
60000 ÷ (Peak RPM) = Available Injection Time (ms) per Revolution (AIT)
(AIT – Injector Recovery Time in ms) ÷ AIT = Maximum Duty Cycle (MDC)
UIS ÷ MDC = Required Injector Size
The above calculation assumes an injection scenario in which an injector is held open for a maximum of one
engine revolution (typical phase sequential setup). For other firing options in which the injector is held open for
2 revolutions, multiply AIT by 2.
Example:
Engine Setup:
250HP 6-cylinder with 6 injectors
Sequential Injector Firing
High Impedance Injectors (1.5ms IRT)
Peak HP occurs at 6500 rpm
BSFC = 0.45
TECm User’s Manual v1.0
-8-
©2013 Electromotive, Inc.
Calculations: TFFR = 250 x 0.45 = 112.5 lb/hr
UIS = 112.5 ÷ 6 = 18.75 lb/hr
AIT = 120000 ÷ 6500 = 18.462 ms
MDC = (18.462 – 1.5) ÷ 18.462 = 0.9188
Required Injector Size = 18.75 ÷ 0.9188 = 20.40 lb/hr (214 cc/min)
Central to the topic of injector sizing is the RPM at which the engine will need the injectors to fire. High RPM’s
shorten the amount of time between TDC events, thus shortening the maximum injector pulse width. The
Figure Below shows the time per revolution as a function of RPM. The Table shows the peak injector pulse
width (assuming an injector recovery time of zero) that is possible using both once-per-revolution firing and
once-per engine-cycle (2 revolutions on a 4 stroke) firing modes. If the operating pulse width approaches the
values in Table E.1. 1, the injectors are effectively “maxed-out.” Larger injectors would be necessary if the
engine needed more fuel. Note that the injector recovery time will be at least 1.0ms is practice. Consequently,
the values given in Table E.1.1 should have 1.0ms subtracted from them to determine the actual pulse width
peak.
Time (milliseconds)
Time for One Revolution vs. RPM
30.0
29.0
28.0
27.0
26.0
25.0
24.0
23.0
22.0
21.0
20.0
19.0
18.0
17.0
16.0
15.0
14.0
13.0
12.0
11.0
10.0
9.0
8.0
7.0
6.0
5.0
4.0
3.0
2000 4000 6000 8000 10000 12000 14000 16000 18000 20000
RPM
Figure: Time between revolutions for various engine speeds.
TECm User’s Manual v1.0
-9-
©2013 Electromotive, Inc.
RPM
500
1000
2000
3000
4000
5000
6000
7000
8000
9000
10000
11000
12000
13000
14000
15000
16000
17000
18000
19000
20000
Phase
Sequential
(1 inj. per rev.)
(ms)
120.0
60.0
30.0
20.0
15.0
12.0
10.0
8.6
7.5
6.7
6.0
5.5
5.0
4.6
4.3
4.0
3.8
3.5
3.3
3.2
3.0
Full
Sequential
(1 inj. per 2 rev.)
(ms)
240.0
120.0
60.0
40.0
30.0
24.0
20.0
17.1
15.0
13.3
12.0
10.9
10.0
9.2
8.6
8.0
7.5
7.1
6.7
6.3
6.0
Table Peak injector pulse widths for phase- and full-sequential injector firing.
Injector recovery time of zero is assumed.
TECm User’s Manual v1.0
- 10 -
©2013 Electromotive, Inc.
3.2.
Fuel Pump Selection
When choosing a fuel pump, two factors are important:
Flow Rating (in lbs/hr)
Pressure Rating (in psi)
To find the flow rating required for a given engine, multiply the engine horsepower by the BSFC, and add at
least 25%.
Example:
400 HP Engine w/ 0.55 BSFC
Fuel Pump Required = (400 x 0.55) + (400 x 0.55 x .25) = 275 lb/hr minimum
As for the pressure rating, a minimum of 70psi is typically used for multi-port injection layouts. High-boost
(over 20psi) applications may suffer from problems with normal OEM fuel pumps. Since many fuel pumps are
rated at 43psi (3-Bar), there is no information on what the pumps will flow at 60 or 70psi. On a turbo engine
with 25psi boost, the fuel pump will see about 68psi. No pump will maintain it’s rated flow rate at this pressure.
As such, it is highly advised that you buy a good quality aftermarket pump when running highly boosted
engines and be sure that the minimum flow rate is maintained at the expected pressure.
If a high-pressure pump is mounted above the fuel level in a gas tank, a decreased pump lifespan will
generally result. Some high-pressure pumps will fail very quickly when mounted above the fuel level. The
reason for this failure is that high-pressure pumps often are not designed to pull suction. As such, any highpressure pump mounted above the fuel level should have a low-pressure fuel pump before it. A standard
carburetor-style fuel pump can be used for this task.
3.3.
Fuel Pressure Regulator Selection
In most cases, the factory BMW pressure regulator will be sufficient to maintain proper fuel pressure. In cases
where you have significantly increased fuel flow, the stock pressure regulator may not be able to maintain
proper fuel pressure in all operating conditions. Installing an aftermarket regulator can help with these cases.
There are some guidelines that should be followed for selecting a regulator. When you select the injector size
needed for an engine, you will need to know the pressure for which the flow rate was established. Typically,
injector sizes are rated at 3-Bar or 43.5psi. Therefore, an injector rated at 55 lb/hr at 43.5psi will only flow 55
lb/hr when it is at 43.5psi. More accurately, it will only flow 55 lb/hr when the pressure gradient across the
injector is 43.5psi.
The pressure gradient is defined as the difference between the injector spray tip pressure (this is generally the
same as the intake manifold pressure) and the fuel rail pressure (often referred to as “gauge pressure”). For a
naturally aspirated engine at idle making 15” of Hg (about -7.5psi) vacuum, you will need to decrease your fuel
rail pressure by 15” of Hg (about –7.5psi) to obtain the same pressure gradient across the injector. So for the
55 lb/hr injector to actually flow 55 lb/hr when the manifold is under –7.5psi vacuum, you will need to decrease
the fuel rail pressure by 7.5psi. The rail pressure should therefore be reduced from 43.5psi to 36psi.
The same holds true for engines under boost: for an engine with 10psi of boost pressure in the intake manifold,
the injectors will need to have 10psi added to the fuel rail pressure. The fuel rail pressure would then have to
be 53.5psi.
Though this all may sound complicated, maintaining a constant pressure gradient sounds more difficult than it
really is. The BMW regulator has a manifold pressure reference and this source can be used for an
aftermarket regulator as well.
TECm User’s Manual v1.0
- 11 -
©2013 Electromotive, Inc.
Be aware that when you use a fuel pressure regulator that regulates the fuel pressure to a value that is not the
same as the fuel injector flow rating pressure, the injector will no longer run at it’s rated flow. That is, higher
pressure will cause a higher flow rate. To keep things straightforward, try to run the fuel pressure for which
your injectors are rated.
4. Wiring the TECm
4.1.
Introduction
A normal installation of the TECm requires no wiring change be made. The system is truly plug and play on a
stock or mildly modified NA engine that can utilize the Mass-Air-Flow sensor and for those installations, the
sections after spark plug selection can be skipped. This section covers instances where the wiring harness
may be modified to use alternate sensors, Electromotive DFUs, or non-stock injection schemes like staged
injection.
WARNING: Always disconnect the battery when doing ANY electrical work on a
vehicle. Use common sense when working around electrical systems, particularly the
ignition coils. The voltage output of the coils can be well over 40,000 Volts at a given
instant.
4.2.
Spark Plug Selection
Spark plugs are generally more important to spark quality than spark plug wires. Most spark plugs exhibit
failure when exposed to a large load. Failure usually consists of either intermittent sparking or arc-over. Arcover is when the spark occurs between the spark plug wire and the engine block, instead of at the plug tip.
Arc-over is worsened by the use of low-quality wires, or wires that have cuts in the insulation.
The load at which a spark plug fails is different for all spark plugs. With the TECm’s charging circuit, the more
load you put on an engine, then more voltage will be applied to the plug. This is a beneficial situation: for a
high compression engine, the voltage at the plug will be inherently higher (since there is more load). The
detriment is that spark plugs and wires are only rated to a certain voltage (30-40,000 volts is typical), and can
begin to “blow out” at around 40,000 volts. If that voltage is exceeded by a large amount for a long enough
length of time, the spark plugs will either blow out, break down or arc to somewhere other than the electrode
(often through the insulator directly to the engine block).
The solution is to run smaller plug gaps on high-compression engines. This is perfectly acceptable with our
ignition charging method, since the high load of the cylinder pressure will allow the voltage to be quite high at
the electrode, but the small gap will keep the plug from seeing an over-voltage situation. Use the
recommendations below as a guideline for spark plug gaps:
Stock Street Engine
High Performance Street
Alcohol High Compression
High Power 75 -115 HP per Cylinder
Over 115 HP per Cylinder
Over 12:1 CR or Over 14psi Boost
0.045”-0.060” (1.1mm-1.5mm)
0.030”-0.035” (.75mm-.9mm)
0.025” (0.65mm)
0.025” (0.65mm)
0.022” (0.55mm)
0.022” (0.55mm)
Use of resistor plugs is highly recommended for optimum noise suppression. If using anything other than a
resistor spark plug wire, a resistor plug MUST be used. The bottom line is this: the TECm system uses an
inductive (long duration charge at battery voltage) charging method for the coils, which is completely different
than the capacitive (short duration charge at higher-than-battery voltage) charging method used by several
TECm User’s Manual v1.0
- 12 -
©2013 Electromotive, Inc.
other aftermarket manufacturers. What may work well for these systems may not work well for ours. Following
our recommendations about spark plug and wire selections will yield excellent results.
4.3.
Wiring the DFU’s
NOTE: Wiring in a DFU is only needed in applications where the stock BMW coils are not sufficient for
the power output of your engine. If you are using stock coils, skip this section.
When wiring a DFU, always use at least 16 Gauge wire when extending any factory wires.
The DFU connector uses pull-to-seat terminals. DO NOT crimp the terminals onto the wires until you
have fed the wires through the connector!
The 3-coil DFU’s connect to the BMW harness as shown here:
Terminal A
BMW Black/White (Coil 1)
Terminal B
BMW Black/Green (Coil 5)
Terminal C
BMW Black/Yellow (Coil 3)
Terminal D
BMW Green (+12v supply)
WARNING:
The DFU chassis MUST be grounded. A ground wire must be connected to the engine block. FAILURE TO
GROUND THE DFU’S MAY RESULT IN SEVERE ELECTRICAL SHOCK! Also, poorly grounded DFU’s may
result in poor engine performance, and can cause engine damage!! Use the drilled and tapped hole next to the
yellow connector for the ground wire. If desired, the unit may instead be grounded at one of the four bolt holes.
However, you will need to scrape off the anodizing under the bolt head. The anodizing is an electrical
insulator, so unless it is scraped down to bare aluminum, it will not provide a good connection to ground.
Additionally, make sure that the coil screws are fully tightened at all times!!
4.3.1. Spark Plug Wire Routing
The coils fire in a specific order for each engine configuration. The proper coil must be connected to the
correct cylinder in the firing order.
The Coils are connected to each cylinder via a spark plug wire in the following order:
Coil A – Cylinder 1 and 6
Coil B – Cylinder 2 and 5
Coil C – Cylinder 3 and 4
4.3.2. Spark Plug Wire Selection
The TECm outputs an extremely high-energy charge for the ignition coils. Resistor (carbon) core wires work
best with this charging method, since they absorb electrical noise generated by the coil firing events. Use
8mm or larger RFI and EMI suppression wire with GM boots. We recommend using a carbon core-style
suppression wire with a resistance of 3,000 to 5,000 ohms per foot. SOLID CORE WIRES SHOULD NEVER
BE USED. Do not be misled by spark plug wire manufacturers claiming to give you a “power increase” from
their wire. The bottom line is that with our charging method, different spark plug wires simply do not make a
difference in terms of spark energy. However, there is a huge difference in noise generated by different spark
plug wire types (solid core wires generate a very high amount of noise with our system).
Quoted from Magnecor’s Website:
“What is not generally understood (or is ignored) is that the potential 45,000 plus volts (with alternating
current characteristics) from the ignition coil does not flow through the entire the length of fine wire used for a
spiral conductor like the 1 volt DC voltage from a test ohmmeter, but flows in a magnetic field surrounding the
outermost surface of the spiral windings (skin effect). The same skin effect applies equally to the same
pulsating flow of current passing through carbon and solid metal conductors. A spiral conductor with a low
TECm User’s Manual v1.0
- 13 -
©2013 Electromotive, Inc.
electrical resistance measured by a 1 volt DC ohmmeter indicates, in reality, nothing other than less of the
expensive fine wire is used for the conductor windings!
Electrical devices, including spark plugs, use only the electrical energy necessary to perform the function for
which such devices are designed. Spark plug wires are nothing more than conductors, and whereas a bad
ignition wire's inefficient conductor can reduce the flow of electricity to the spark plug, an ignition wire that
reportedly generates an "increase" in spark energy will have no effect on the spark jumping across the spark
plug gap, since the energy consumed at the spark plug gap won't be any more than what is needed to jump
the gap. For a more obvious example of this, a 25watt light bulb won't use any more energy or produce any
more light if it's screwed into a socket wired for a 1000watt bulb.”
Due to the extremely high energy in the TECm coil charging circuit, spark plug wires may wear out faster than
with a standard ignition. As such, it is recommended that the wires be checked periodically for carbon tracking
caused by a breakdown of the internal conductor element. Looking at the plug wires in a dark area and wetting
them with a spray bottle of water will reveal carbon tracking. Pay close attention to the exposed section of the
spark plug (where the rubber boot ends) during the test. To maximize spark plug wire life, keep the lengths as
short as possible (i.e. mount the DFU as close to the engine as possible). Replacement of the wires on an
annual basis is recommended for high-rpm/high-horsepower applications.
4.4.
Using a MAP Sensor
A MAP sensor allows application of boost and allows for making horsepower beyond the rated flow of the stock
MAF sensor. Wiring in a MAP sensor is relatively simple. The MAF sensor connector can be removed and 2 of
the wires are used to connect the MAP sensor. The third wire needed is the 5v supply which is tapped off of
the TPS sensor. The wiring is as follows:
BMW Red/Yellow at TPS – 5v (must be spliced in as the TPS still needs 5v as well)
BMW White at MAF – Signal Ground
BMW Gray/Yellow at MAF – MAP Signal
The MAP sensor is wired into these signals as show in the figure below:
The MAP sensor should then be connected to the intake manifold where it can receive a solid representative
pressure reading of the pressure at the intake ports. On the stock manifold, the sensor can be connected to
4.5.
Wideband O2 Sensor Installation Instructions
The TECm supports an input from most wideband sensor controllers. The wideband controller must have an
analog 5-volt output signal. A typical configuration is shown in the figure below.
TECm User’s Manual v1.0
- 14 -
©2013 Electromotive, Inc.
The factory pre-cat narrow band O2 connector can be repurposed for wiring in a wideband O2 sensor. The
wideband module can pull 12v and power ground from the EGO heater leads (Green and Brown) and has a
signal ground available on the White wire if needed. Finally the 0-5v output of the wideband module connects
to the Yellow wire (See the chart below). The TECm would then need to be configured to use a Wideband O2
sensor in your engine calibration.
Green – +12v
Brown – Power Ground
White – Signal Ground (EGO -)
Yellow – EGO Signal (EGO +)
The installation of the oxygen sensor wiring of the controller should follow the wideband controller
manufacturer’s instructions.
*Note: Some wideband control units have a sensor ground and a ground for the heater. Other units have only
one ground. You should connect the sensor ground to the White wire. If there is only one ground, it =should
be connected to the Brown wire.
4.6.
Fuel Injector Wiring
The TECm is equipped with 6 peak and hold fuel injector channels. These channels support up to 2 injectors
per channel with either high or low impedance injectors. The driver automatically compensates for high or low
injector impedance. The factory BMW harness has each injector wired to it’s own injector channel and would
normally be configured for full sequential injection.
4.6.1. Full Sequential Injection
When using an unmodified BMW harness, this is the method used to fire the injectors. This scheme fires each
injector only once per engine cycle, aligned with the intake stroke of each cylinder. This gives the injector the
most time between each injection event and will usually produce the best idle and low throttle operation.
4.6.2. Phased/Staged Injection
This firing scenario pairs cylinders that share their TDC’s to the same injector channels. As such, one injector
channel fires two injectors: one on compression and the other on exhaust. Each injector channel will fire once
per revolution, so each cylinder will see a shot of fuel on both the exhaust and compression stroke. The
primary reason to us this mode is to free up channels for use in staged injection. This mode allows high
horsepower applications to be reasonably well mannered by allowing smaller injectors to be used, 2 per
cylinder with the second set phased in as more fuel is needed (usually with additional boost). To wire this
mode:
ECU Wire
Injector 1
Injector 2
Injector 3
Injector 4
Injector 5
Injector 6
Injector
Primary on 1, 6
Secondary on 2, 5
Primary on 3, 4
Secondary on 3, 4
Primary on 2, 5
Secondary on 1, 6
TECm User’s Manual v1.0
Figure: Parallel wiring of
fuel injectors.
- 15 -
©2013 Electromotive, Inc.
4.7.
Idle Air Control
4.7.1. Idle Air Control Valve
The Idle Air Control (IAC) Valve is responsible for maintaining a smooth engine idle. Using the Wintec
software, the IAC valve can be made to increase idle speeds during cold engine operation or air conditioner
turn-on. The IAC valve control built into the TECm can be used with the three-wire solenoid type Idle Air Valve
that is stock on the BMW or a similar two-wire solenoid. The solenoid type valve allows the IAC to move open
and closed very quickly to allow varying amounts of air into the intake manifold. This way, even with the
throttle closed, the IAC valve can supply the needed amount of air to the engine. The Software Manual covers
the tuning of the IAC Parameters.
The IAC will not be activated unless the TPS voltage is BELOW the “TPS Closed Throttle Voltage”
value. Be certain that the TPS Fully Closed voltage is set correctly to prevent drivability issues related
to the IAC.
4.8.
Tachometer Output
The tachometer output on the TECm is a +12 Volt square wave Suitable for driving the tach installed in the
factory BMW dash. In cases where the dash is replaced, the tach signal is also compatible with aftermarket 6cyl tachs. The signal can be changed to drive a different configuration tach if needed.
4.9.
General Purpose Inputs (GPI’s) and Outputs (GPO’s)
The General Purpose Inputs (GPI’s) as well as the General Purpose Outputs (GPO’s) will be referred to as GP
I/O’s, they are configurable for many different input or output functions. There are two dedicated GPO
channels (#3 and 4) – (output only). The remaining three channels (1,2 and 5), can be configured to be either
Input or Output.
A few facts that should be remembered when using the GP I/O’s :
• All the GPO’s, regardless of their function, are pull-to-ground when they are activated. That is, they
create a connection to ground when turned on.
• A MAXIMUM of 1 amp per GPO channel may be run on the TECm.
• It is HIGHLY recommended to use a relay on the GPO channels, regardless of amperage draw. Only
the FULL TABLE functions require NO RELAY or the use of a solid-state relay. A standard relay will
not switch on and off fast enough when using frequency-based functions.
An analog input is defined as a 0-5 volt signal. TPS, MAP, and EGO sensors are good examples of analog
output sensors. A speed input is defined as a frequency signal. When using a magnetic sensor as a speed
sensor, its output will be an AC sine wave. When using a Hall effect sensor, the output will be a 0-5 volt
square wave.
One of the most useful functions of the GP I/O’s is trimming. Using a simple potentiometer referenced to +5
volts and ground, it is possible to configure the inputs to trim the fuel and spark curves based on the
potentiometer knob position. These functions are quite easily configured in the Wintec software.
4.9.1. Available General Purpose Input (GPI) Functions:
Fuel Trim: Trims the fuel curve by a set amount through the use of a potentiometer. See Figure for wiring
diagram.
Ignition Advance Trim: Trims the ignition advance angle by a set amount through the use of a potentiometer.
See Figure for wiring diagram.
GPO Trim #1 and #2: These functions allow the user to add or subtract up to 50 percent Duty Cycle from the
values established in the GPO table specified by the trim number. GPO Trim #1 only effects table 1, GPO
Trim #2 only affects table 2.
TECm User’s Manual v1.0
- 16 -
©2013 Electromotive, Inc.
A/C Idle Speed Increase: On TECm installations with an idle air control motor, this feature allows the idle
speed to be increased when the air conditioner is turned on. See Figures for recommended wiring.
Valet Switch: When a speed input is used, the valet switch allows the user to set a speed limit on the vehicle.
The rev limiter will be activated when the desired speed is reached. See Figure for wiring diagram.
Nitrous Retard: Provides a set amount of ignition timing retard when nitrous is activated. When used with the
Electromotive 4-stage timing retard module, the NOS Retard should be set to –30o (consult the 4-Stage Nitrous
Retard Instructions for wiring). When used with a potentiometer, the timing will be retarded linearly from 0 to
30 degrees when a 0 to +5 volt signal is placed on a GP I/O input (channels 2-9).
Speed Input: Only available on the Speed Input channel, the speed input allows the input of a frequencybased signal. The base program has this input configured correctly for the stock final drive and wheel size.
Timed Advance: When voltage (either 12v or 5v) is applied to the chosen GP I/O channel this function allows
the user to add or subtract up to 30 degrees of timing for up to 2 secs. in .05 sec. increments. Timing will ramp
up (advance) in the time specified (up to 2 seconds in .05 sec. increments) or down (retard) when the channel
is switched on. Switching the channel off will ramp the timing back to the values in the Ignition Advance Table,
the ramp back will happen in the specified time programmed by the user within the software.
Datalog Enable: Allows the use of on board data logging function. Options are RPM to begin data logging and
Frequency (5, 10, 20 Hz) sampling rate. Wires the same as any input that is switched, such as the Valet Rev
Limiter.
Voltage Input: No options, it just gives you a recordable voltage from 0 – 5 volts.
Timed Ignition Cut: option for shifting requires minimum RPM and minimum MAP value, amount of time for
ignition cut in milliseconds, amount of time before ignition can be cut again. Finally, there is an option to pull to
12v (activate high) or pull to 0v (activate low). Additionally, the line must be released before the channel can
be activated again.
4.9.2. Examples of GPI Wiring
TECm User’s Manual v1.0
- 17 -
©2013 Electromotive, Inc.
Potentiometer wiring for Fuel, Ignition
and GPO Trim Inputs
4.9.3. GP I/O Wiring Harness Layout
GP I/O channel
CAM Output
IAC Inverted
IAC
EVAP Solenoid
GPO
A/C Control
A/C Console Switch
Ignition Retard Input
Park/Neutral Input
GPI 1
GPI 2
Speed Input
ECU Pin
Pin 7
Pin 2
Pin 29
Pin 36
Pin 9*
Pin 48
Pin 64
Pin 57
Pin 81**
Pin 10*
Pin 76*
Pin 42
Input or Output
Output (ON/OFF, PWM)
Output (ON/OFF, PWM)
Output (ON/OFF, PWM)
Output (ON/OFF, PWM)
Output (ON/OFF, PWM)
Output (ON/OFF, PWM)
Input (AC Load, Datalog Enable)
Input (ON/OFF, Analog Voltage)
Input (ON/OFF, Analog Voltage)
Input (ON/OFF, Analog Voltage)
Input (ON/OFF, Analog Voltage)
Input (ON/OFF, Speed Input)
*The BMW factory harness does not use this pin. Additional ECU pins with a pigtail can be obtained from any
BMW dealer to add this function.
**The BMW factory harness only uses this in automatic transmission vehicles. Additional ECU pins with a
pigtail can be obtained from any BMW dealer to add this function.
Most GP I/O pins are assigned to factory controls such as the CAM control or the A/C Switch. The base
program is set by default to use these channels for the default action. So The A/C Control controls the
compressor based on the input from the A/C switch on the console. In cases where a particular factory
function is removed, such as the A/C system, these inputs and outputs may be repurposed for other actions.
For example, if the A/C is removed, the output that would normally controls the A/C clutch could be used to
control a boost solenoid and the A/C console switch can be used could be used to activate internal data
logging.
4.9.4. General Purpose Output (GPO) functions
Some of the most versatile functions of the TECm computer are its GPO’s. These outputs can control virtually
any electronics device that is associated with engine operation. Take for example a simple electric radiator
fan. Instead of retrofitting a thermo-switch mounted somewhere near the radiator’s air stream to turn the fan
on and off, you can simply use one channel of the TECm’s GPO function. To accomplish this task, you would
first select the Radiator Fan option from the GPO menu for the given channel. Then, you would input the
temperature at which the fan should turn on, and the temperature at which it should turn off. The temperature
readings are all obtained from the Coolant Temperature Sensor (CLT), so they are much more accurate and
reliable than an external thermo-switch. The output of the GPO is a pull-to-ground, so you would run the
appropriate GPO wire for the channel you defined as “Radiator Fan” to a standard 4-position automotive relay
(pin 85 on the relay). The opposite side of the relay (pin 86) would be wired to +12 volts, and the relay would
be switching the power (or the ground) to the fan with pins 30 and 87.
A few facts that must be remembered when using a channel for a GP I/O function:
TECm User’s Manual v1.0
- 18 -
©2013 Electromotive, Inc.
All the GPO’s, regardless of their function, are pull-to-ground outputs when they are activated. That is, they
create a connection to ground when turned on.
A MAXIMUM of 1 amp may be drawn from each GP I/O circuit.
It is HIGHLY recommended to use a relay on the output of the GPO channels, regardless of amperage draw.
4.9.5. Available GPO Functions
Thermal Fan: This function can turn on and off something as a result of temperature (either engine coolant or
manifold air temp). This is usually used to activate a radiator fan, but could also be used to trigger a warning
light, or a mechanism for cooling an intercooler.
Shift Light: Turns on a shift light (or any other rpm-activated object) at a user-definable RPM. See Figure for
wiring diagram.
Torque Converter Control: Use this GP I/O to control a lock-up torque converter. You are able to define the
MAP and Speed points at which the torque converter clutch is activated. Since there is a multitude of different
lock-up transmissions, an electrical schematic is not included for this feature. Consult the shop manual for
your application to find the wire that engages the torque converter lock-up. Use a GPO channel to activate the
proper wire. A relay should always be used for this function.
Duty Cycle Table: This GP I/O uses a 16 x 16 table of MAP reading vs. RPM to allow the input of a duty cycle
at each MAP/RPM point. Numbers are interpolated between cells to create a smooth curve. The possibilities
of this GP I/O are extensive. Typically, it is used to control an rpm/load-dependent solenoid such as a turbo
waste gate. You can select table 1 or 2.
BMW A/C Control: This feature turns the air conditioner clutch off when the engine is above specific RPM
and MAP values, when the A/C Console switch is turned on, and the A/C Coolant pressure is sufficient.
Auxiliary Fuel Pump: This GP I/O turns on an auxiliary fuel pump at a desired RPM and MAP value. See
Figure for wiring diagram.
The Intake Runner and Nitrous Controls function in the same manner as the Auxiliary Fuel Pump Control.
That is, they activate as a function of RPM and MAP value. Note that the Nitrous Control should not be used
to turn on the nitrous directly. Instead, it should be thought of as a nitrous enable. This essentially replaces
the wide-open-throttle switch. Use Figure for similar wiring.
Custom (and) / Custom (or): Custom (and) uses both ranges RPM and MAP values. The custom (and)
function activates when within both the specified RPM range AND the specified MAP range. The custom (or)
functions when within either the RPM range OR the MAP range.
4.9.6. Examples of Wiring GPO’s
This section covers the wiring that is necessary to use the various GP I/O controls. With one exception (A/C
turn-off), the relays depicted in the schematics are all simple automotive 4-position relays. The air conditioner
turn-off request needs a 5-position relay. 4-position and 5-position relays are generally rated at 30 or 40 amps,
which should be more than adequate for most applications. High quality relays and relay sockets are available
from Electromotive under part numbers 340-91200 and 340-91201, respectively. Part number 340-91200 is a
5-position relay, so it can be used for all applications depicted below.
TECm User’s Manual v1.0
- 19 -
©2013 Electromotive, Inc.
Figure: Electric radiator fan wiring.
Figure: Shift light wiring.
Figure H.2.4: Auxiliary fuel pump wiring
TECm User’s Manual v1.0
- 20 -
©2013 Electromotive, Inc.
5. Diagnostics
The TECm has two provisions for diagnostics: an output wire for a “check engine” light and an LED on the
ECU. The two outputs perform different tasks that are outlined below.
5.1.
Trouble Codes from the LED’s Mounted on the TECm
The LED’s mounted on the TECm are used to alert the user’s attention to electrical and crank trigger problems.
They are also used to show the mode (in terms of the rpm range) in which the TECm is operating. Since these
are installed on the circuit, they are not normally visible when the ECU is fully installed. If you are having
trouble with engine start, it is useful to remove the ECU from the ECU bay is remove the top cover so these
can be seen until the problem is solved. Here are the readings from the LED’s:
Ignition key on, engine off:
Edge LED goes steady green:
Good, the processors are getting power.
Edge LED does not turn on at all:
Either the TECm is not receiving +12V power from pin (A), or the ECU has an issue.
Engine cranking (below 400 rpm):
Center LED changes color from red to green every other revolution:
Good, the crank sensor is working correctly
Center LED does not change colors:
The crank sensor is not functioning properly (signal is not being picked up).
Engine running (over 400 rpm):
Center LED is steady green:
Good, the crank trigger is functioning properly.
Center LED flashes red every so often:
The TECm is getting a bad signal from the crank trigger. The engine
Most likely misfires whenever the light flashes red.
Engine is Hitting Rev Limiter:
Center LED changes color turns orange:
The first or second stage of the rev limiter is occurring.
Center LED turns red:
The third (and final) rev limiter stage is occurring.
Note:
If a misfire occurs during normal engine operation, but the lower LED on the TECm was not observed to
momentarily flash red, the crank sensor may be at fault. To test for errors in this situation, turn the engine off
without removing power from the TECm ECU (this can be accomplished by unplugging the fuel injector
harness, or by hitting the letter “K” from the engine monitor screen when using a laptop). If the lower LED is
flashing red after the engine is shut off, there was a crank sensor problem at some point during the run.
5.2.
Trouble Codes (turns on the Check Engine light)
The trouble codes from the check engine output are related to the engine sensors. If the check engine output
wire is connected to a light bulb, it will display a sequence of flashes depending on the problem. The diagnostic
codes are arranged such that there are two digits for each code. The check engine light will give long duration
flashes for the first digit of the code and short duration flashes for the second digit. See Figure H.2.1 for a
graphical representation of the flash sequence. Here are the diagnostic codes (asterisked items are not
available with the first software release):
12:
Crank Trigger Error
13:
Cam Trigger Error
14:
ECU Internal Failure*
21:
Throttle Position Sensor High
TECm User’s Manual v1.0
- 21 -
©2013 Electromotive, Inc.
22:
23:
24:
25:
26:
31:
32:
33:
34:
35:
37:
38:
51:
52:
53:
Throttle Position Sensor Low
Manifold Air Pressure Sensor High
Manifold Air Pressure Sensor Low
Coolant Temperature Sensor High
Coolant Temperature Sensor Low
Manifold Air Temperature Sensor High
Manifold Air Temperature Sensor Low
High Battery Voltage
Low Battery Voltage
Knock too Long
Exhaust Gas Oxygen Sensor Lean too Long
Exhaust Gas Oxygen Sensor Rich too Long*
GPO 1 Failure
GP I/O 2Failure
GP I/O 5Failure
5.3.
Trouble Code Descriptions
Code 12 – Crank Trigger Error: This code will register when the ECU has detected a problem with the crank
trigger signal. If any of the failure scenarios have been detected in the section above on the crank sensor LED
diagnostic, this code will be displayed
Code 13 – Cam Trigger Error: The ECU is not getting an appropriate signal from the cam sensor. A broken
cam trigger wheel or a bad cam sensor could cause this error. This code will only be displayed on sequential
applications.
Code 14 – ECU Internal Failure: This code is displayed when there has been a substantial failure inside the
ECU. Call Technical support for further information.
Codes 21 & 22 – TPS High/Low: See above description.
Codes 23 & 24 – Manifold Air Pressure High/Low: These codes are set when the MAP sensor has gone
outside its specified range. This can be useful for a boosted application to trigger a check engine signal when
an over-boost situation has occurred. Alternately, it can be used to detect a short in the wires. When this code
is displayed, the TECm will be using the MAP Failure Default value for MAP calculations. As such, there will
be no load input to the TECm’s ECU, and the computer will enter into a “limp-home” mode.
Codes 25 & 26 – Coolant Temperature Sensor High/Low: Once again, these codes are set when the coolant
temperature reading is outside its specified range. Use this light to warn of coolant temperatures that are too
high. When this code is displayed, the TECm will be using the CLT Failure Default value for coolant-based
calculations. As such, there will be no engine temperature input to the TECm’s ECU.
Codes 31 & 32 – Manifold Air Temperature Sensor High/Low: Works identically to codes 25 & 26, except for
the MAT sensor.
Code 33 – Battery Voltage too High: The battery voltage has exceeded 17 Volts. A bad voltage regulator on
the alternator can cause this.
Code 34 – Battery Voltage too Low: The battery voltage has gone below 7.5 Volts. Check the state of charge
on the battery. Also check all power connections.
Code 35 – Knock too Long: The ECU has recorded a level of engine spark knock (from the knock sensor) for
a duration that exceeds what was established in the software. This code is indicative of either poor fuel quality,
or extreme engine temperatures leading to spark knock. Some tuning will be required for the knock sensor
trouble codes, since all engines make noises that will trigger the knock sensor, but which are not caused by
spark knock.
TECm User’s Manual v1.0
- 22 ©2013 Electromotive, Inc.
Code 37 – EGO Lean too Long: This code is set when the oxygen sensor reading is lean for a prolonged
period of time. Make sure the sensor has not come unplugged.
Code 38 – EGO Rich too Long: This code is set when the oxygen sensor reading is rich for a prolonged period
of time. Make sure the sensor is not shorted to +12 Volts.
Codes 41&42, 43&44, 45&46, 47&48 all function like Codes 23&24, except they are for the Analog to Digital
Inputs.
Codes 51-54 – GP I/O 1-9 Failure: These codes are set when the GP I/O input/outputs have been shorted to
voltage or have been over-drawn (too much current). Make sure that the total circuit draw for GP I/O’s 1-9 is
less than 10 amps (1 amp per channel).
Code 55 – Fuel Pump Output Failure: The fuel pump output has seen an over-current situation, or is shorted
to power.
Code 56 – Check Engine Output Failure: The check engine output has seen an over-current situation, or is
shorted to power. The code can only be seen with a laptop, since the check engine light is likely at fault.
.
5.3.1. Using the Trouble Codes
The trouble codes are displayed for a sensor when the maximum or minimum value for a sensor has been
exceeded. Since the maximum and minimum points are user-definable in the Wintec software, a failure code
does not necessarily indicate a failed sensor (i.e. the failure parameters may be set incorrectly).
As an example, let’s look at the Throttle Position Sensor Parameters. Before the parameters can be entered
into the software, it is necessary to know the TPS voltage at both fully closed and wide-open throttle. This can
be observed in the monitor screen by opening and closing the throttle (without the engine running). If the
closed throttle voltage was 1.0 volt and the wide-open throttle voltage was 4.6 volts, the TPS parameters
should be set as follows:
TPS Fully Closed Throttle Voltage:
TPS Wide Open Throttle Voltage:
TPS High Voltage Failure (0-5V):
TPS Low Voltage Failure (0-5 V):
TPS Failure Default Value (0-5V):
1.1 Volts
4.5 Volts
4.8 Volts
0.8 Volts
1.5 Volts
As can be seen, the Fully Closed Throttle Voltage setting is actually a bit above the actual closed throttle
voltage (1.1V > 1.0V). This is done because the Idle Speed Control will only start working when the TPS
reading is below the Fully Closed Throttle Voltage setting. The Low Voltage Failure setting is made a few
tenths of a volt lower than the actual closed throttle voltage (1.0V > 0.8V). This is done to display code 22 for
throttle position sensors that have either rotated in their mount or have failed completely by outputting a lowerthan-expected voltage. Likewise, the High Voltage Failure setting is made a few tenths of a volt higher than
the observed wide-open throttle voltage. This will allow code 21 to be displayed in the event of a high voltage
failure. The Failure Default Value is the voltage that the TECm will use for its TPS-based calculations when
the TPS sensor has failed. Since this is a fixed value, there will be no TPS-based acceleration enrichments
when the TPS has failed. However, the Failure Default Value is useful for applications using the TPS-MAP
Blend feature because it defines a fixed amount of TPS to blend with the MAP sensor during a TPS failure.
TECm User’s Manual v1.0
- 23 -
©2013 Electromotive, Inc.
6. TECm ECU Specifications
6.1.
OUTPUTS
6.1.1. Fuel Injector Drivers
6x peak and hold injector drivers
2 injectors maximum per channel
Supports both high and low impedance injectors
6.1.2. Coil Outputs
6 x 9amp direct-fire coil drivers
Feedback charging loop for ideal cylinder-to-cylinder consistency
No “ignition modules” or “CD” boxes needed
6.1.3. General Purpose Inputs or Outputs (GP I / O’s)
6 channels pull-to-ground I/O’s (1 amp max)
All output channels have pulse-width capability (up to 2 different tables and other non-table based PWM
functions), on/off activation for fan relays, torque converters, waste gates, etc.
6.1.4. Fuel Pump Control
Low current pull-to-ground output for activation of fuel pump relay
Configurable for fuel system priming
6.1.5. Tachometer Output
Drives modern 0-12 volt tachometers (including the BMW factory tach)
Amplifier available for high voltage triggered tachometers
6.1.6. Check Engine Light Output
Pull-to-ground output for instrument panel light (1 amp max current draw)
6.1.7. ECU Diagnostic LED (internal)
Warns of crank trigger problems
Multi-code diagnostics
6.2.
INPUTS
6.2.1. General Purpose Inputs or Outputs (GP I / O’s)
6 channels control input
All input channels except A/C Console Switch and Speed Input have analog voltage input functionality for trims
and other variable voltage inputs.
All input channels support on/off functionality for triggering of cuts and other ON/OFF activation
6.2.2. Engine Sensor Inputs
Crank Sensor
2-wire magnetic sensor (compatible w/ some OEM’s)
Uses Electromotive-spec 60(-2) tooth crank trigger
Ultra-high resolution engine position input
Cam Sensor
Necessary for full-sequential applications
Once-per-cam-revolution pulse
Manifold Air Pressure (MAP) Sensor (configurable for any MAP linear MAP sensor)
Mass-Air-Flow (MAF) Replaces the MAP sensor when used, configured for the BMW factory MAF
Throttle Position Sensor (TPS)
Uses throttle shaft-mounted rotary potentiometer
Compatible with BMW 3-seriesTPS
Coolant Temperature Sensor (CLT)
TECm User’s Manual v1.0
- 24 ©2013 Electromotive, Inc.
Uses NTC thermister coolant sensor (2-wire)
Manifold Air Temperature Sensor (MAT)
Uses NTC thermister manifold temperature sensor (2-wire)
Knock Sensor (KNK)
Provides ability to detect pre-ignition
Compatible with 2 BMW knock sensors (2-wire)
Oxygen Sensor (EGO)
Compatible with BMW 4-wire oxygen sensors and Wide Band converter modules (0-5v output)
6.2.3. Angle Based Timing Control
Ultra-high resolution triggering
Engine position known to within 1/8o
6.2.4. Feedback Charging Control
Monitors each coil firing event
Coil current monitoring
Consistent dwell adjustment
Full coil charging without overcharging
6.3.
Tuning Features
6.3.1. Ignition Timing Map
8 x 8 user definable tables of RPM vs. MAP for ignition advance angle
65535-point interpolation between data points
1o adjustment increments
+/-1/4o spark timing accuracy, worst case
6.3.2. Fuel Map
Two numbers define slope of fuel curve
8 x 8 tables of RPM vs. MAP for volumetric efficiency corrections
65535-point interpolation between data points
1% adjustment increments (up to 0.001millisecond resolution)
6.3.3. Load Sensing – Three Options
MAP sensor based
TPS & MAP based (using ‘TPS/MAP Blend’ feature)
TPS Based (using 100% TPS/MAP Blend)
6.3.4. Rev Limiters
Progressive “soft” rev limiter (3 stages)
Fuel injector cutoff
1000-20000rpm capability for primary rev limiter
1500-12000rpm capability for auxiliary rev limiter
6.3.5. On-Fly Tuning
Glitch-free, real-time tuning while engine is running
Full control of all fuel, ignition, and input/output parameters
6.3.6. Compensation Features
Fuel Table
Individual cylinder fuel trims
Oxygen sensor closed loop corrections
Starting (cranking) enrichments
Cold start / cold weather enrichments
TECm User’s Manual v1.0
- 25 -
©2013 Electromotive, Inc.
Accelerator pump enrichments
Deceleration fuel cutoff
Battery voltage correction for injector pulse widths
Ignition
Coolant temperature-based advance adjustments
Manifold air temperature-based advance adjustments
Smooth idle advance control (integrated w/ IAC settings)
6.4.
Supported Engine Management Configurations
BMW E36 6-cylinder using the OBD1 92-95 wiring harness without modifications and with the following
modifications:
Replace MAF with MAP
Replace factory coils with Electromotive 6-cyl DFU
Conversion to phased injection (2 injectors per channel
Conversion to staged injection (12 injectors in 2 sets, 2 injectors per channel)
6.5.
Data logging Features
6.5.1. Internal Data logging
Records all sensor data at user specified data rate
Recording time 1.7 mins to 6.8 mins depending on data rate
6.5.2. Laptop Data logging
Records to hard drive on laptop
Sampling rate is approximately 50 samples-per-second
Total data logging time is limited only by hard drive space
6.6.
Form Factor
Fits in BMW ECU for 92-95 OBD1 3-series
6.7.
Environmental Considerations
Silicon coated PCB for moisture, dust, and vibration protection
Unsealed Bosch compatible connector for BMW
6.8.
PC Requirements
6.8.1. Computer
IBM-Compatible PC
Pentium-1 233 or better
1024 x 768 monitor resolution (256 colors)
64 Mb of ram
10 MB of free hard drive space
6.8.2. Data Drives
CD-ROM or Internet connection for software installation
6.8.3. Communications
RS-232 9-pin D-sub connector (compatible with commonly available USB to serial adapters)
COM 1-14 (software selectable)
TECm User’s Manual v1.0
- 26 -
©2013 Electromotive, Inc.
7. Calibration Software
The TECm Calibration Software is called WinTec4 and is available from Electromotive’s website. Please refer
to the WinTEC4 software guide to learn how to use it and calibrate your system to your specific engine.
The TECm is designed to be fully upgradeable with respect to its software and firmware. The software is the
operating system that is used to tune the engine. The firmware is the embedded code that is installed in the
TECm’s processors. Small changes in functionality can be covered with software changes. Larger changes in
functionality, particularly the addition of new features, generally require a firmware upgrade.
Both software and firmware upgrades are available on our website.
7.1.
Software Coding Information
Electromotive calls its TECm Windows software “WinTEC 4.X.Y.” The “4.X.Y” portion of the WinTEC name is
the code that is used to tell what the version of software is made for.
The “4” means simply the software version 4 platform.
• The “X” digit states the FIRMWARE version on which the software will function.
The “Y” digit states the latest build SOFTWARE version.
The software version is displayed when the WinTEC software is opened on a computer. Software versions are
compatible with the firmware version for which they are designed. For example,
A 4.0.3 software version is compatible with a 4.0.0 firmware version.
A 4.1.2 software version is compatible with a 4.1.0 firmware version.
A 4.1.0 software version WILL NOT runs with a 4.0.0 firmware version.
Always use the PC SOFTWARE version for which the FIRMWARE is designed. The “X” digit of the PC
software must always match the “X” digit of the Firmware!
7.2.
Firmware Coding Information
The Firmware version is displayed in the Engine Monitor Screen. The firmware code is “4.X.0.T3” The “X” digit
must match the “X” digit of the software version (see above). This is the firmware version. Firmware for the
TECm starts with “WTM02”. The next two digits XX are the release version; release changes, new feature
additions or some other major change will be signified in this number. The last 3 digits are the build number.
Build number YYY indicates bug fixes from one release level to the next. Example: where firmware file number
“WTM02xxyyy” XX is the release number, YYY is the build number.
7.3.
Firmware Upgrade Procedure
Care must be taken when installing different firmware versions on your TECm ECU. Follow the steps outlined
below:
Download the Firmware upgrade from the Electromotive website.
Install the firmware upgrade on the PC that you will use to tune the engine.
Connect the TECm to the PC serial port and power it ON.
1. Startup the WinTEC software, it should show in the System console that the unit was found and
display the firmware version.
In the main menu bar of the WinTEC Software click on Tools -> Options -> firmware upgrade. A warning and
some instructions will appear. Click OK, and an open dialog will display. Find and select the new firmware file
(.em3) you have downloaded.
2. Once the upgrade is complete, cycle the power to the TEC. If the firmware upgrade was
successful, both LED’s will go GREEN. If the firmware upgrade failed, the top LED will stay RED
and the bottom will stay off. If this occurs, repeat the procedure.
Once this procedure completes successfully, you may begin or continue tuning.
TECm User’s Manual v1.0
- 27 -
©2013 Electromotive, Inc.
7.4.
Pin-out Information
Pin
1
2
3
4
5
6
7
8
9
10
11
12
13
14
15
16
17
18 - 22
23
24
25
26
27
28
29
30
31
32
33
34
35
36
37
38
39
40
41
42
43
44
45
46
47
48
49
50
51
52
53
Primary Function
Fuel Pump Output
IAC Output (inverted)
Injector 5 output
Injector 6 output
Injector 4 output
Ground
Cam timing solenoid
Check Engine Light output
NC
NC
NC
NC
EGO +
Sensor Ground
Ground
Crank Sensor +
Cam Sensor +
NC
Coil 4 output
Coil 6 output
Coil 5 output
+12v switched
ECU Relay Control
Sensor Ground
IAC Output
NC
Injector 3 output
Injector 2 output
Injector 1 output
Ground
NC
Evaporative Solenoid output
NC
O2 Sensor Heater Control
NC
EGO MAF Input
Speed input
Crank Sensor Sensor Ground
Shield Ground
Fuel Consumption gauge output
Tachometer output
A/C Compressor output
NC
Coil 1 output
Coil 2 output
Coil 3 output
NC
TECm User’s Manual v1.0
- 28 -
Alternate Function
PWM GPO
PWM GPO
Wire Color
Brown/Green
Black/Yellow
Brown/Green
Brown/Violet
Brown/Blue
Brown
Green/Blue
Green
PWM GPO
Analog GPI
Yellow
Black
Black
Yellow
Yellow
PWM GPO
Black/Blue
Black/Violet
Black/Green
Red
Brown
Brown/Orange
Black/Green
Brown/Yellow
Brown/Red
Brown/White
Brown
PWM GPO
Brown
Brown/Green
MAP Input
ON/OFF GPI
PWM GPO
Black
Gray/Yellow
Black/White
Black
Brown
Bare
White/Black
Black
Black/Blue
Black/White
Black/Red
Black/Yellow
©2013 Electromotive, Inc.
54
55
56
57
58
59
60 - 63
64
65
66 - 68
69
70
71
72
73
74 – 75
76
77
78
79 - 80
81
82 - 88
12v
Ground
12v Switched
Ignition Retard Input
NC
5v output
NC
A/C Console switch
A/C Pressure switch input
NC
Knock 2 input
Knock 1 input
Knock ground
NC
TPS
NC
NC
Intake Air Temp input
Water Temp input
NC
NC
NC
TECm User’s Manual v1.0
Analog GPI
Red/White
Brown
Green
Brown/Gray
Red/Yellow
Datalog enable
Violet/Gray
Black/Gray
Black
Black
Brown/Orange
Brown/Black
Analog GPI
Gray
Brown/Red
Analog GPI
- 29 -
©2013 Electromotive, Inc.