1
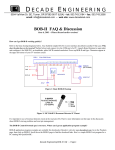
Abstract
This report covers an introductory laboratory exercise done to interface Basic
Stamp II digital I/O to various devices - an LED, a seven-segment display (TIL306), a
4x4 matrix keypad and a serial LCD display. The exercises involved include flashing an
LED, displaying numeric inputs on the TIL306 and implementing a digital stopwatch on
the LCD. Program codes used to implement the above are provided with comments so
that readers can easily see how we did it. A components/price list is also provided for
those who want to reproduce what we have done.
Lab1: Basic Stamp II Digital I/O
305-554A: Microprocessors for Mechanical Systems
6th October 1999
1 Introduction
One of the objectives of the laboratory exercise is for us to get acquainted with
the PBASIC programming language. This is easily done because the PBASIC
instruction set is relatively short and each command is well documented in the Basic
Stamp II manual. Having previous programming experience helps but when we cannot
get the program to work the way we want, the best place to go to is always the manual.
Another objective is to interface the matrix keypad. This involves both hardware
and software implementations. The hardware part is to connect the leads to the correct
pins and setting up resistors to prevent the stamp from frying. The software part is to get
the program to scan the pins for inputs (this will be elaborated later). After getting that
right, we performed digital outputs to an LED and a TIL306 according to the inputs read
from the matrix keypad. Finally, we interfaced a LCD display using a serial connection
and the SEROUT command.
1.1 Tasks
PBASIC programs have been written to perform the following tasks using abovementioned hardware:
a. Turn a LED on and off in response to a keypad input
The initial state of the LED is off, when Button 1 on the matrix keypad is pressed
flash the LED once per second. When keypad Button 4 on the matrix keypad is
pressed turn the flashing LED off. See figure 1 for hardware implementation.
b. Interfacing a Seven Segment display
Initialize the seven segment display (TIL 306) to show a blinking cursor. Then set
it up to display the last key pressed on the matrix keypad. See figure 2 for
hardware implementation.
c. Implement a digital stopwatch on the LCD
Group D:
Yeow Wei Pang
Anny Xie
When keypad Button 2 is pressed, begin flashing the LED once per second and
continuously display and update the time in seconds on the LCD. When keypad
Button 5 is pressed, stop the clock and display the elapsed time. The next time
Button 2 is pressed, the displayed elapsed time should be reset before beginning
the count again. See figure 3 for hardware implementation.
2 Hardware Used
2.1 Basic Stamp II and Board of Education
The "BASIC Stamp II" is a postage stamp sized product of Parallax Company. A
BASIC Stamp is a PIC microcontroller that has been customized to understand the
BASIC programming language. The use of the BASIC language makes it extremely
easy to create software for the controller. The microcontroller chip can be purchased on
a small carrier board that accepts a 9-volt battery, and can be programmed by plugging
it into one of the ports on a desktop computer. See table 1 for Basic Stamp II features.
RAM
26 bytes
EEPROM
2K bytes
Max program length
about 600 instructions
Execution speed
4000 lines/sec
I/O pins
16
Table1: Basic Stamp II Features
2.2 LED
This is a commonly used light emitting diode.
2.3 Seven Segment Display, TIL306
TIL306 seven-segment light-emitting-diode (LED) displays is produced by Texas
Instrument company, it contain a BCD counter, a four-bit latch, and a decoder/LED
driver in a single 16-pin package. The feature, mechanical data and terminal function
can be found in http://www.cim.mcgill.ca/~venkat/554/NOTES/LAB1/til306.pdf
2.4 Matrix Orbital LCD, LCD1621
3 Laboratory Procedures
In order to minimize the trouble during each lab exercise, before we start, we
made sure that all the devices were in good condition and that they will perform as
expected. Basically, this involves writing a test program to test the basic functions of the
devices (LCD and TIL306). A multi-meter was also used to test the matrix keypad.
While doing so, we found that one of the columns did not make a connection.
The LCD used in this lab is the product of HVW Technologies company. The
introduction, user manual, operating specifications and mechanical drawing and
command set can be found in http://www.hvwtech.com/lcd.htm
2.5 4x4 Matrix Keypad
3.1 Lab Exercise 1: Turn a LED On and Off in Response To a Keypad Input
3.1.1 Keypad Test
If one key is pressed, the corresponding row and column will be connected. So,
simply by using a multi-meter (an ohmmeter in this case) we can know which lead
corresponds to which row/column. Also we will be able to know if a connection is
actually made. Note: When using the keypad, it should always lie flat on a surface. This
is to prevent damaging the circuitry within the delicate membrane keypad.
3.1.2 LED test
This test was to determine the polarity of the LED's leads. The diagram of this
test is as follow.
The keypad used in this lab is also the product of HVW Technologies company. It
is a 4X4-membrane keypad. The configuration of the leads is as shown above.
2.6 Others
Connect all the elements on the breadboard except the LED. Then plug LED in, if
it lights up, the foot connected to the voltage is the positive polar, otherwise, it the
negative one. Normally the longer foot is the positive polar, and this was proven in the
test.
3.1.3 Procedures
Resistors, breadboard, multi-meter, wires, wire-cutter, and a computer.
1. Complete the hardware connections according to figure 1. Make sure that the
LED is connected in the right direction.
2. The other team member checks all the connections before powering up the
system.
3. In the Basic Stamp programming window, edit and run the program. Make sure
the PC is connected to the Board of Education via the serial cable.
4. Press button 1 on the keypad, check the LED.
5. If LED is not flashing correctly, plug out the power first. Repeat steps 2-5 until the
LED does the right thing. Then press button 4. Check the result and edit the
program if needed.
6. Measure and tune the accuracy of the system by comparing it with a watch/clock.
3.1.4 Documented Source Code
3.2 Lab Exercise 2: Interfacing a Seven Segment Display
''''''''''''''''''''''''''''''''''''''''''''''''''''''''''
' 305-554A Microprocessors for Mechanical Systems
'
' Group D: Pang, Yeow Wei
'
'
Xie, Ling
'
'
'
' Lab 1 - Basic Stamp II Digital I/O
'
' a) Turn a LED on and off in response to a keypad input '
'
'
' Description: Program is used to interface a matrix
'
'
keypad to an LED. Flashing of the LED is
'
'
controlled by 2 buttons. We could have
'
'
used only 2 pins (1 input, 1 output) to
'
'
implement this. However, 3 pins were used '
'
to experiment with a scanning technique. '
'
This proves to be useful for part b) of
'
'
the lab.
'
'
'
''''''''''''''''''''''''''''''''''''''''''''''''''''''''''
target
flag
var
var
byte
bit
' target is byte
' flag is either 1/0
flag = 0
target = 0
DIRS = %1000000011110000
' initialize flag
' initialize target
' initialize pin directions
LOOP1:
LOW 5
HIGH 4
BUTTON 0,1,255,0,target,1,LED_ON
GOTO LOOP2
'
'
'
'
'
scanning R1 of keypad
put pin 5 low
put pin 4 high
check if Button-1 is pressed
continues to scan R2
LOOP2:
LOW 4
HIGH 5
BUTTON 0,1,255,0,target,1,LED_OFF
IF flag = 1 THEN LED_ON
GOTO LOOP1
'
'
'
'
'
'
scanning R2 of keypad
now put pin 4 low
and pin 5 high
check if Button-4 is pressed
goto LED_ON only if flag is up
continues to scan R1
LED_ON:
flag = 1
HIGH 15
pause 50
LOW 15
pause 950
GOTO LOOP2
'
'
'
'
'
'
'
this section flashes LED
set flag up
put pin 15 high
for 50 milliseconds
put pin 15 low
for 950 milliseconds
continues to scan R2
LED_OFF:
flag = 0
GOTO LOOP1
' this section stops LED
' flag down
' continues to scan R1
3.2.1 TIL306 Tests
Connect the GND and the Vcc leads of the TIL306. All the LED's on it should
light up. If this is not the case, bring it to George Dedic or Georges Tewfik to report the
problem. If all goes well, connect the remaining leads as shown on figure 2 and write a
short program to pulse the CLK of the TIL306.
3.2.2 Procedures
1. Complete the hardware connections according to figure 2. Make sure that the
TIL306 is connected to Vcc and GND correctly.
2. The other team member checks all the connections before powering up the
system.
3. In the Basic Stamp programming window, edit and run the program. Make sure
the PC is connected to the Board of Education via the serial cable.
4. Check the TIL 306 display. It should show “0” and a blinking decimal point.
5. If TIL306 display is not correct, plug out the voltage source. Repeat steps 2-5
until it has the right display. Then press any numerical button on the keypad.
Check the result. It should display the last button pressed. Edit the program if
needed.
3.2.3 Documented Source Code
[Deleted ]
3.3 Lab Exercise 3: Implement a Digital Stopwatch On The LCD
3.3.1 LCD Preliminary Tests
Check the DB9 pin I/O table of the LCD manual. Check the DB9 pin I/O table of
the Basic Stamp II manual. Use a multi-meter (an ohmmeter in this case) to verify which
side of the serial line should go to the LCD and which side goes to the Stamp. Next,
check the jumper settings on the LCD and refer to its manual to see what it means and
what it requires from the Stamp. Next go to the Basic Stamp II manual to check out the
SEROUT command. Specifically, check how Tpin, Baudmode and OutputData should
be configured. When all the above are done, write a short test program to test the LCD
command set.
3.3.2 Procedures
1. Complete the hardware connections according to figure 3. Make sure that the
LCD is connected to Vcc and GND correctly.
2. The other team member checks all the connections before powering up the
system.
3. In the Basic Stamp programming window, edit and run the program. Make sure
the PC is connected to the Board of Education via the serial cable.
4. Unplug the PC serial cable and plug the LCD serial cable to the Board of
Education.
5. Press button 2 on the keypad, check the LED. It should flashing once per
second. The LCD should also continuously display and update the time in
second.
6. If LED and LCD display is not correct, unplug the power source. Repeat steps 26 until the LCD is displaying correctly. Then press button 5. Check the result. It
should stop the clock and display the elapsed time. Edit the program if needed.
7. Pressing button 2 again should reset the LCD before beginning the count again.
Edit the program if needed.
8. Measure and tune the accuracy of the stopwatch by comparing it with a
watch/clock.
3.3.3 Documented Source Code
[Source code deleted]
4 Component / Price List
Components
Basic Stamp II & Board of Education
Matrix Orbital LCD Display
TIL306, Numeric Display
4x4 Matrix Keypad
LED
Breadboard
1K Resistor
10k Resistor
Basic Stamp II Manual v1.9 (pdf format)
Wires
Wire-cutter
Multi-meter
Computer
Price
USD $92.65
CDN $80
CDN $9.90
CDN $15
USD $0.25
CDN $18.60
Free
Free
Free
Free
Free
Free
Free
Qty.
1
1
1
1
1
1
3
3
1
lots
1
1
1
Source
Parallaxinc
HVW tech.
Meas. Lab.
HVW tech.
Jameco
Digikey
Meas. Lab.
Meas. Lab.
Parallaxinc
Meas. Lab.
Meas. Lab.
Meas. Lab.
Meas. Lab.
5 Discussion
The laboratory exercises had been useful in helping us learn the PBASIC
language and getting us used to the Basic Stamp II working environment. Through the
exercises, we also got to see its programming limitations. For example, multitasking is
not possible and to implement an alternative would make the programming slightly more
tedious. For this reason, the matrix keypad is not responsive when we tried to stop the
stopwatch or stop the LED from flashing since the program pauses and does nothing
during that 1-second duration. Instead, it could have gone off to continue scanning for
other keypad inputs. Due to time constraints, that was not implemented in our program.
We also got the stopwatch to be reasonably accurate. In our trials, no time was
lost or gained in a 10-minute period. This could be improved of course if we had let the
stopwatch run for 18-hrs (64800-seconds) and factored in the time lost/gained in the
pause command. According to our program, approximately 33-milliseconds (1000 - 957
- 10) were used to scan the matrix keypad.
The other objectives were accomplished with the successful completion of all 3laboratory exercises. A program that combines all 3 previous programs is attached in
the Appendix (section 8.2).
6 Conclusion
We have interfaced the Basic Stamp II I/O with a matrix keypad, an LED and a
serial LCD display. We have gained some insights into the programming of a
microcontroller. The next step to all these is of course to use the knowledge learnt here
and implement other cool projects. For example, a bunch of flickering Christmas tree
lights, a calculator, a Y2K countdown clock, a fake time bomb, etc. The list is endless of
course.
7 Contributions of Each Member
Anny Xie
Wrote test program for LED
Software
Hardware
Documentation
Wrote code for LCD using the
SEROUT command
Connected circuits according to
circuit diagrams
Implemented LED and keypad
tests
Laboratory procedures
Tasks, hardware used sections
Title page, component/price list,
appendix
Yeow Wei Pang
Wrote test programs for LCD
display and TIL306
Wrote code for scanning matrix
keypad
Checked connections of circuit
before powering up system
Labeled wires and tidied up
circuit
Drew circuit diagrams
Included relevant pictures
Abstract, introduction,
discussion and conclusion
Documented source codes
8 Appendix
8.1 Referenced Websites
•
•
•
•
•
•
•
http://www.parallaxinc.com
http://www.cim.mcgill.ca/~venkat/554/NOTES/LAB1/til306.html
http://www.cim.mcgill.ca/~venkat/554/NOTES/LAB1/til306.pdf
http://www.hvwtech.com/lcd.htm
http://www.howstuffworks.com/microcontroller.htm
http://www.jameco.com/Catalog/default.html
http://canada.digikey.com
8.2 Documented Source Code of Combined Program
[Deleted]
THE END