1
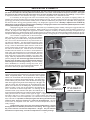
INCUBATION TROUBLESHOOTING CHART
Symptoms
Probable Causes
Many clear eggs. No blood
(Determined by candling, then
broken out appearance)
Slight blood rings
Many dead germs
Pipped eggs not hatching
Hatch non-uniform
Hatching too early
Hatching too late
Sticky Hatch
Cripples and
Malpositions
*Very large, soft-bodied
weak chicks
Mushy chicks. Dead on trays, bad odor
Rough navels
Temperature reading
not constant
Incubator fails to heat
(Continue hatch if begun. Hatch may occur later
than expected because of temperature drop.)
Fan Rattles
Hygrometer reading above 94
o
Suggestions
1. Infertility. Too few males, too many males,
males too old, Inactive, or frozen combs
2. Embryo died early 1-2 days
1. Use young, vigorous males.
2. Do not hold eggs longer than 14 days. Keep at
temperatures of 50°-55°F. in moist atmosphere. Gather often.
3. A. Improper temperature
B. Fumigation
4. Improper care of eggs before setting
3. A. Check accuracy of thermometer, Check thermostat, heating element,
current supply. Check operating temperature against instructions.
B. Do not fumigate at high concentrations during the first 5 days of age.
4. See suggestions (2) above.
5. Temperature too high or too low
6. Improper turning of eggs
7. Improper feeding of flock
8. Breeding (low hatchability inherited)
9. Improper ventilation, insufficient oxygen
5. See suggestion (3) above.
6. Turn two times daily - same time morning & evening
7. Check vitamin and mineral content of breeder mash.
8. Avoid close inbreeding
9. Increase ventilation of incubator and incubator rooms, avoid draft
10.
11.
12.
13.
10. Increase humidity during incubation (wet bulb 82°-86°)
add wick pad last 3 days (wet bulb 90°-92°) during hatching time
11. See (3) above and see “Hatching” page 3
12. See (3) above and see “Hatching” page 3
13. See (3) above and see “Hatching page 3
Insufficient rnoisture
Too much moisture
Too low temperature
Too high temperature
14. Temperature too high
15. Too low moisture
16. Improper turning or setting
17. Hatching trays too smooth
14. See (3) above and see Hatching” page 3
15. See (10) above
16. See (6) above. Set eggs large end up.
17. Use wire bottom trays or crinoline
18. Low average temperature
19. Poor Ventilation
20. Navel infection in incubator
18. See (3) above and see “Hatching” page 3
19. See (9) above
20. Careful cleaning and fumigation of incubator between hatchings.
21. High temperature or wide temperature
variations.
22. Low Moisture
21. See (3) above
22. See (10) above
23. Incubator in unheated room or barn
where temperature varies
24. Improper adjustment of thermostat (can
be caused by someone tampering with
adjusting knob
23. Keep Incubator In room with uniform temperature and where
temperature is never below 50°.
24. Readjust thermostats. Make slight adjustments with adjusting knob
and wait 15 minutes for temperature to stabilize.
25. Thermostat failure
26. Improper setting of thermostat
27. Power failure, incubator unplugged
or poor plug connection
28. Loose wire connection
25. switch to back up thermostat
26. Turn adjusting knob to increase heat until
pilot light comes on.
27. If fan is not running, electricity is not getting to
incubator check fuses and plug connections.
28. Remove back of incubator and check for loose wires.
29. Blade bent
30. End play in motor shaft
29. Remove and straighten blade or replace with
new blade
30. Place block under back legs of Incubator
31. Dry wick on hygrometer
31. Wash calcium deposits from wick or replace with new wick.
Reference
Number
Catalog
Number
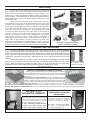
1 - POWER CORD...............................No. 3048
2 - PILOT LIGHT....................................No. 3017
3 - ELECTRONIC THERMOSTAT........No. 3255
4 - Aux. THERMOSTAT..........................No. 3124
5 - HEATER GUARD
6 - MOISTURE PAN/PAD(S).................No. 4500
7 - PORCELAIN INSULATOR
8 - HEAT ELEMENT...............................No. 3014
9 - FAN BLADE.......................................No. 3013
10-FAN MOTOR......................................No. 3011
11- TIMER WITH SWITCH....................No. 3023
12-TURNER LIGHT...............................No.3017
13-TURNERTOGGLE SWITCH...........No.3025
Reference
Number
Catalog
Number
14-DRIVE MOTOR.................................No. 3022
15 - AUTOMATIC TURNER.................No. 3021
16 - SWING ARM WITH CAM..............No. 3028
17 - ROLLER Switch for Drive Motor...No. 3024
18 - FAN MOUNT...................................No. 3026
19 - CONNECTING BAR.....................No. 3041
20 - QUAIL EGG POSITIONERS........No. 0205
21 - BACK SUPPORT...........................No. 3042
22 -1502 SET. TRAY - 24.5” x 12.75”...No. 3067
23 -1550 TRAY CVR.-25” x 14.25”......No.3068
24 -1550 HATCH TRAY - 24.5”x14”.....No. 3066
25 -1502 SETTING TRAY RACK/23”..No. 3069
LIMITED WARRANTY
GQF Mfg. Co.. Inc. guarantees against defect for a period of 1 year from date of purchase. Notify GQF Mfg. Co. of any defective Items, giving
catalogue number and name of Item and Just what is wrong with Item. Send copy of invoice showing date of purchase. GQF Mfg. Co. will send
replacement or notify regarding return. Returning of items without written permission will be at owner’s expense.
Whereas GQF Mfg. Co. has no control over usage of equipment supplied, It assumes no responsibility for losses or damage from their equipment
other than replacement of defective parts. No guarantee on hatchablilty of eggs. Do not expose electrical parts to water. Installation of electrical parts
should be done by qualified electrician.
G.Q.F. Manufacturing Company
P.O. Box 1552
Savannah, GA 31402-1552 USA
6