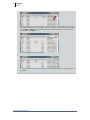
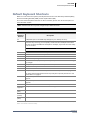
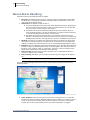
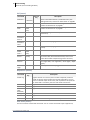
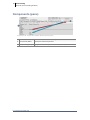
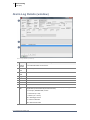
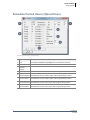
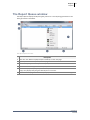
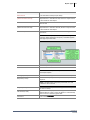
1
Innovative Business Software A/S
User Manual
interVIEW
27. maj 2015
ii
PROPRIETARY NOTICE
Copyright © 2015 Innovative Business Software A/S. All rights reserved. Information in this document is
subject to change without notice. The software described in this document is furnished under a license
agreement or nondisclosure agreement. The software may be used only in accordance with the terms
of those agreements. No part of this publication may be reproduced, stored in a retrieval system, or
transmitted in any form or any means electronic or mechanical, including photocopying and recording
for any purpose other than the purchaser's personal use without the written permission of Innovative
Business Software A/S.
Innovative Business Software A/S
Landemaerket 10, 6th floor
1119 Copenhagen K
Denmark
Phone +45 3373 4000
[email protected]
www.innovative.dk/en
Innovative Business Software A/S
iii
About this manual
This manual has been optimised for two-page spread (ie two-page layout with left and right
pages). To read the manual as it would appear in a printed version, do the following:
1. Open Adobe Reader.
2. Select Show>Page Layout and check both Two page layout and Show title page in two
page layout.
Table of Contents
Use the Table of Contents at the front of the manual. Simply click the TOC entry or the page number to open the topic. Click here to go to the TOC.
User Manual
interVIEW
iv
The Index
Use the extensive index at the back of the manual. Simply click on the page number to open the
topic. Click here to go to the index.
The "Search" feature in Adobe Reader
Adobe Reader contains the element "Search" (magnifying glass) on the toolbar at the top of the
window. Use it to find words/text in the PDF file.
Note: If the magnifying glass (icon) is not displayed on the toolbar, then select
Show>Show/hide>Elements on the toolbar>Edit>Search for or press Ctrl+F.
The navigation panel in Adobe Reader
Adobe Reader contains a navigation panel on the left. It shows headers and bookmarks in the
PDF file.
Innovative Business Software A/S
v
User Manual
interVIEW
Innovative Business Software A/S
1
Contents
INTRODUCTION
3
interVIEW
5
Introduction
The Desktop
The Remote
The System Menu
Picklists
Default Keyboard Shortcuts
The Calendar Module
About the Calendar Module
About Calendars
6
7
10
11
13
17
19
20
21
ALARM HANDLING
23
Alarm Handling
25
About Alarm Handling
Queue Windows
Menu bar (Alarm Handling window)
Installation (tab)
Contacts (tab)
Global Units (tab)
Contacts (tab)
Contact Lists (tab)
Panels (tab)
Zones (tab)
Control Signal (tab)
Panel Codes (tab)
Users (tab)
Panel info (tab)
Texts (tab)
Sum Log (tab)
Automatic Site/Customer Lookup
About Automatic Site/Customer Lookup
TESTMODE
Test Mode
26
29
37
48
49
50
51
52
54
55
57
58
59
60
62
68
97
98
101
103
About Test Mode
104
SEARCH FEATURES
109
Search Features
About Search Features
Simple Search
Advanced Search
Passcard Search
111
112
113
114
117
User Manual
interVIEW
2
REPORTS
121
Reports
123
Reports
Report Templates (interVIEW format)
About Scheduled Reports (Auto Reports)
About Custom Reports
124
131
134
148
Report Types
149
Examples(Auto Reports)
187
Example A Example B Example C Example D -
188
189
190
191
TROUBLESHOOTING
interVIEW
193
195
APPENDIX
199
INDEX
201
Innovative Business Software A/S
3
INTRODUCTION
Innovative Business Software A/S
5
InterVIEW
Introduction
The Desktop
The Remote
The System Menu
Picklists
Default Keyboard Shortcuts
6
7
10
11
13
17
6 interVIEW
Introduction
Introduction
interVIEW is an advanced software platform for receiving and handling Alarms, including the
administration of site/customer data and alarm post-processing, such as reports and logs.
interVIEW is based on a three-tier system architecture (Client, Server and Database) and
Microsoft Windows standards.
The Graphical User Interface facilitates Alarm handling and customer data. For example, you can
simultaneously work on different monitors.
Throughout the application, you may use keyboard shortcuts.
The actual Alarm Handling in interVIEW is performed in one (or more) Queues (windows) and
the Alarm Handling window. Customer Information is entered in the Data Entry window. These
applications are all launched using the "Remote", which controls the interVIEW client.
A basic interVIEW network consists of the following components:
n
n
n
one (or more) Concentrators (incl. receivers/transmitters)
one (or more) Servers (incl. databases)
one (or more) Clients
Innovative Business Software A/S
interVIEW 7
The Desktop
The Desktop
The Remote Control, the System Menu and the Data Entry window.
A. The Remote opens/closes the System Menu, the Alarm Handling window and the
(Alarm) Queue windows. See "The Remote" on page10.
B. The System Menu opens/closes the Data Entry window, picklists and any add-on modules (eg the map and video modules). See "The System Menu" on page11.
C. The Data Entry window creates Sites/Customers, Instructions, Panels, Contacts etc.
User Manual
interVIEW
8 interVIEW
The Desktop
(Alarm) Queue windows and the Alarm Handling window (AHW).
D. Queue windows display incoming and current Alarms. You can have multiple Queue windows, which contain different types of Alarms. For example, you can have a "Master
Queue", which displays all Alarms, a "Battery Alarm Queue", which only display battery
alarms and a "Test Alarm Queue", which displays alarms from Panels/Zones, which are
currently in Test Mode. By default, interVIEW contains a handful of standard Queues, but
you can easily create/customise your own. For more information, see "Queue Windows"
on page29.
E. The Alarm Handling window (AHW) is used to handle each actual Alarm. This window
presents the Operator with all relevant information for the particular Alarm. For more
information, see "The Alarm handling window (AHW)" on page36.
Innovative Business Software A/S
interVIEW 9
The Desktop
Starting the Client Application
1. Select Start>Programs>interVIEW.
Note: If you receive a message that you cannot log on to the network from this Client,
then it is because the interVIEW Client has not been activated on the network yet.
Please contact the system administrator.
2. Log on the interVIEW-network.
Note: The User ID is not case sensitive (eg. "Bob" and "bob" is the same User ID in
interVIEW). The password, however, is case sensitive (eg. "iva" and "Iva" are two different passwords).
3. Click OK.
The Remote opens. See "The Remote" on the next page.
User Manual
interVIEW
10 interVIEW
The Remote
The Remote
The Remote opens/closes the System Menu ("Menu") and the Alarm Handling program
("Alarm") and also displays the Client/Server status.
The Remote.
A. Menu opens/closes the System Menu. See "The System Menu" on the facing page.
B. Alarm starts/stops Alarm Handling (the Queue windows and the Alarm Handling window). See "Queue Windows" on page29 and "The Alarm handling window (AHW)" on
page36.
C. The Alarm Counter displays the current number of Red Alarms / total number of Alarms
(number of Operators currently handling Alarms). For example, "10/12 (2)", means that
currently, there are 10 Red Alarms out of a total of 12 Alarms and two Operators handling them.
D. Time (Windows time).
E. User ID/interVIEW Client ID.
F. Show/hide Alarm Handling windows (icon) shows/hides the Queue windows and the
Alarm Handling window.
G. Padlock (icon) closes and exits the interVIEW Client application.
Innovative Business Software A/S
interVIEW 11
The System Menu
The System Menu
The System Menu provides access to the Data Entry Window (DEW), add-on modules/interfaces,
Picklists, Reports and more.
System Menu Example.
The system menu contains the following menu groups:
n
Daily Routines contain daily tasks, such as creating new Sites/Customers, editing existing
Sites/Customers or open/close add-on modules.
Note: Several of the system menus represent separate functions, interfaces or addon module, which may require a separate license. Please contact Innovative for further information.
Data Entry Window. Opens the Data Entry window to create/edit Sites/Customers, Instructions etc.
n Backup-server Control. Opens the Backup Client.
n Map. Opens the Map ("the Map Client").
n Auto Site Lookup. Opens the window Automatic Site Lookup. See "Automatic
Site/Customer Lookup" on page97.
n Route import. Imports Routes and Route Points.
Picklist Update 1, Sites contains data about Sites and Customers.
Picklist Update 2, Alarms contains data about Alarms and Alarm Handling.
Picklist Update 3, Misc contains various types of supplemental data (eg Call Types and
Special Day Calendars)
Picklist Update 4, System contains interVIEW system data.
n
n
n
n
n
Note: The picklists in Picklist Update 4, System are system data. You can rename system data, but it is not possible to delete or add new system data.
n
Authorisation contains Personnel, Clients, Printers etc.
User Manual
interVIEW
12 interVIEW
The System Menu
n
Reports contains different types of Reports, which can be used for invoicing or statistical
purposes etc. See "Reports" on page123.
Tip! To quickly find a specific Picklist, press Ctrl+F and type the name (or part of the name) of
the Picklist, which you are looking for. interVIEW automatically displays a list of relevant picklists. Double-click on the desired picklist to open it.
Innovative Business Software A/S
interVIEW 13
Picklists
Picklists
interVIEW uses so-called "picklists" (similar to drop-down lists), which are lists containing a set of
predefined values (options). The values in the Picklists are created by the Administrator and can
then be used during system configuration, data entry, alarm handling etc.
Note: Picklists may contain other picklists.
Note: Some picklists contain system data and cannot be deleted.
You can access the picklists in the System Menu in either of the four following directories:
1.
2.
3.
4.
Sites
Alarms
Miscellaneous
System
Picklists.
User Manual
interVIEW
14 interVIEW
Picklists
Working with Picklists
You can work with picklists in various ways.
Note: Blue labels indicate that the field is mandatory and must be completed.
Working with Date Fields
1. Place the cursor in the Date field (blue background).
2. Open the Calendar (Right-click or press F12).
3. Double-click on the desired date.
Tip! Click on the month/year in the title to select a different month/year.
Note: If you use the arrows to select previous/next month, then do not click too fast,
as interVIEW will interpret this as a double-click and select the date.
4. Click OK.
Sorting Rows in picklist tables ("grids")
interVIEW inserts the rows (the picklists) in the picklist table as they are created (ie without
applying any type of automatic sorting = default order).
1. To sort the rows in ascending (^), descending (v) or default order, click the column
header.
2. To "sub sort" additional rows, press Shift while clicking on the column header, you wish
to "sub sort" as the secondary sort order and so on for an additional tertiary sort order.
Innovative Business Software A/S
interVIEW 15
Picklists
3. To cancel the sort order (and reset to the default sort order), simply click on any column
header.
Searching/Filtering Tables/Grids
You can search for/filter out specific values in the various tables/grids.
1. Click the magnifying glass icon at the top right in the table to open the search filter.
2. Type the characters, numbers, words or parts of words in the search filter (blue background).
Note: The search filter is dynamic and continuously updates the table/grid.
Note: The search filter does not apply to any underlying tables in any lower level picklists.
Note: The search filter is not case sensitive.
3. Press Esc to cancel the search.
E X A M P L E
Let's say that we want to find out how many Event Codes we have of the Event Type "Disposition".
We open the picklist with Event Codes and click the magnifying glass.
User Manual
interVIEW
16 interVIEW
Picklists
We begin typing "disp". As the search filter is dynamic, the table is continuously filtered and now
only shows the Event Codes, which contain "disp". Consequently, the filter contains both the Event
Types SysDisp and DIsposition, but also the three Event Types LocationCall, as these all contain
the description "Call/ dispatch...".
We continue typing the word "disposition".
The final result of the search shows that we have six Event Codes of the Event Type "disposition" in
the picklist.
Innovative Business Software A/S
interVIEW 17
Default Keyboard Shortcuts
Default Keyboard Shortcuts
Below is an overview of frequently used keyboard shortcuts in the Data Entry WIndow (DEW),
the Alarm Handling Window (AHW) and the System Menu (SM).
For an overview of keyboard shortcuts in add-on modules, please refer to the description of
each individual module.
Note: The Administrator may have changed and/or added shortcuts.
Note: The list does not contain keyboard shortcuts, which are linked to Event Codes.
Default
Keyboard
Shortcut
Description
F1
DEW/AHW: Opens interVIEW Help & Support ("F1" desktop version).
F2
DEW: Creates and inserts a new entry, but keeps data (except name/ID) from the
previous entry. This way, you can quickly create and insert multiple entries with
the same content, but different name/ID. For example, if you have to create many
Zones on a Panel.
Note: This feature does not apply everywhere in the DEW.
F3
DEW: Creates and inserts a new entry.
Ctrl+F3
DEW: Deletes the selected entry.
F5
DEW:/AHW: Refreshes data in the current window.
F9
DEW: Saves any changes made while in Edit Mode.
Ctrl+F9
DEW: Returns to Display Mode (read-only mode) from Edit Mode without saving
any changes.
F12
DEW/AHW: Opens the selected picklist to select/insert a value from it.
Ctrl+D
DEW: Inserts today's date in the field.
Ctrl+E
DEW: Enters Edit Mode.
Ctrl+F
DEW/AHW: Opens the window Simple Search. See "Simple Search" on page113.
SM: Opens the window Picklist Search to quickly find a specific picklist. See "The
System Menu" on page11.
Ctrl+G
DEW/AHW: Opens the window Passcard Search. See "Passcard Search" on
page117
Ctrl+Q
DEW/AHW: Opens the window Advanced Search. See "Advanced Search" on
page114.
Ctrl+Z
DEW: Deletes the value in the selected picklist.
Ctrl+Arrow DEW/AHW: Moves the selected row in a table up/down.
Up/Down
Ctrl+"+"
(plus)
DEW: Increases font size.
Ctrl+"-"
(minus)
DEW: Decreases font size.
Ctrl+0
(zero)
DEW: Restores the font size to the default size.
The default keyboard shortcuts in interVIEW (except the shortcuts in modules and shortcuts,
which are linked to Event Codes).
User Manual
interVIEW
Innovative Business Software A/S
19
The Calendar Module
About the Calendar Module
About Calendars
20
21
20 The Calendar Module
About the Calendar Module
About the Calendar Module
The Calendar Module (also known as "Open/Close" or iV-calendar) enables interVIEW to monitor and handle Open/Close (Arm/Disarm) signals on the basis of a calendar.
This way, for example, interVIEW will generate Alarms if an Open signal is received earlier than
expected, later than expected or not received at all (according to a calendar).
Innovative Business Software A/S
The Calendar Module 21
About Calendars
About Calendars
Calendars control when interVIEW shall expect arm/disarm (O/C) signals and how interVIEW
shall react, if the signals are received either too early, too late or not at all (in relation to the
scheduled/expected signal reception).
Schedules are controlled in the tab Open/Close in the Data Entry window.
Schedule Number
When you create a Schedule, you must assign a unique number/ID to it (the Schedule Number).
The Schedule Number is used to link the Calendar to a Zone or Instruction.
Global/Shared Calendars
Most Calendars are created as "Local Calendars" (ie. as a Calendar, which is only linked to the
current Site/Customer). However, if you have multiple Sites/Customers, which you want to use
the same Calendar (eg chain stores), then you can create a Global Calendar (also known as a
Shared Calendar). A Global Calendar is a Calendar, which is can be linked to all Sites/Customers
in interVIEW. The advantage is that you only need to create and maintain a single Calendar,
instead of having to create multiple identical Calendars on multiple Sites/Customers.
EML-signals
EML-signals (Early/Missing/Late) is a collective term for signals (or conditions), on which interVIEW can generate Alarms in relation to a Calendar.
Depending on how you configure the system, interVIEW will either (a) generate an Alarm or (b)
ignore the signal (log-only) on the basis of when interVIEW expects the signal (O/C-schedule) in
relation to when interVIEW actually receives the signal.
Consequently, interVIEW can generate Alarms if interVIEW:
n
n
n
receives the signal earlier than expected,
does not receive the signal at all (ie the signal is missing) or
receives the signal later than expected.
Tolerances
Tolerances indicate a given number of minutes before and after, within which you want interVIEW to accept/tolerate an O/C-signal.
E X A M P L E
Let's say that the Calendar is set up to accept an open signal at 08:00 with a tolerance of +/- five
minutes (ie from 07:55 to 08:05).
If interVIEW receives an open signal at 07:55, then interVIEW will not generate an Alarm, as the
open signal has been received within the tolerance (ie. from 07:55 to 08:05).
However, if interVIEW had received the open signal at 07:54, then interVIEW would have generated an Alarm as 07:54 is outside the tolerance.
Floating Windows
Floating Windows are time periods, which have a fixed duration, but with flexible begin and end
times.
Some activities (eg cleaning) may not necessarily always take place at the same time every day,
but can vary with several minutes or even hours. In those cases, you can create Floating Windows, which are not linked to a specific begin time, but which are activated once the Panel is disarmed (open signal) by, say, the cleaning staff. Once the Panel has been disarmed, interVIEW
User Manual
interVIEW
22 The Calendar Module
About Calendars
then monitors whether the Panel is armed again, before the period of the Floating Windows
expires (eg two hours). If the Panel is not rearmed before the Floating Window expires, then
interVIEW will generate an Alarm.
Innovative Business Software A/S
23
ALARM HANDLING
Innovative Business Software A/S
25
Alarm Handling
About Alarm Handling
Queue Windows
Menu bar (Alarm Handling window)
Installation (tab)
Contacts (tab)
Global Units (tab)
Contacts (tab)
Contact Lists (tab)
Panels (tab)
Zones (tab)
Control Signal (tab)
Panel Codes (tab)
Users (tab)
Panel info (tab)
Texts (tab)
Sum Log (tab)
26
29
37
48
49
50
51
52
54
55
57
58
59
60
62
68
26 Alarm Handling
About Alarm Handling
About Alarm Handling
A typical Incident in interVIEW proceeds as follows:
1. Reception. interVIEW receives an Alarm, assigns a unique and sequential Incident Number to the Alarm and displays the Alarm in the Main Queue. All Operators can see and
have access to the Master Queue.
2. Confirmation. The Operator takes the Alarm.
n The Alarm Handling window opens and shows detailed information regarding the
Alarm and instructs the Operator on how to handle the Alarm. etc. The Operator
also has access to various customer information.
n The Master Alarm Queue shows which Operator (User ID and Client ID) is currently handling the Alarm. This way, all Operators can quickly see which Operator
is currently handling the Alarm and from which Client.
n interVIEW also shows a copy of the Alarm in the Private Alarm Queue of the
Operator. The Private Alarm Queue presents the Alarms, which is currently being
handled by the Operator. The original Alarm remains in the Master Alarm Queue.
3. Handling. The Operator completes the relevant Instructions and Actions for the specific
Alarm (such as calling a Contact or Fire Department). At the same time, interVIEW automatically completes any Auto Instructions, such as sending SMS/Text Messages to pagers.
4. Disposition. Once the Operator has finished handling the Alarm, the Operator disposes of
the Alarm using a so-called Disposition Code. This code registers the cause/conclusion of
the Alarm, such as "Blind", "Real" or "Technical"). The Alarm is then removed from the
Master Alarm Queue (and consequently all other Queues).
5. Post Processing. Once the Alarm has been disposed, you can subsequently add comments to or edit the Alarm Incident.
6. Post processing. Afterward, you can browse the Alarm Log, Sum Log,ge nerate Reports
etc.
Note: All Events are registered in the Alarm Log.
The actual Alarm Handling is performed in one (or more) Queues (windows) and the Alarm
Handling window.
Windows used during Alarm Handling. A: Alarm Queues (windows). B: Alarm Handling window
A. Queue windows present incoming and current Alarms and Signals. You can create different Alarm Queue windows, displaying different types of Alarms. For example, you can
create an Alarm Queue window, which contains all Alarms and another Alarm Queue
window, which only contains Battery Alarms. See "Queue Windows" on page29.
Innovative Business Software A/S
Alarm Handling 27
About Alarm Handling
B. The Alarm Handling window presents all relevant details concerning the selected Alarm.
See "The Alarm handling window (AHW)" on page36.
User Manual
interVIEW
28 Alarm Handling
About Alarm Handling
Opening/Closing the Alarm Handling application
1. To open the Alarm Handling application, check Alarm.
Depending on the Client configuration, the Alarm Handling window as well as one (or
more) Alarm Queues open in separate windows.
2. To close the Alarm Handling application, click the padlock.
Note: Before closing/exiting the Alarm Handling application (and thus ending the
Alarm Handling session from the Client), make sure that you have disposed of or
released any open Alarms. See "Releasing Alarms" on page93.
The Alarm Handling window as well as any open Alarm Queue windows close.
Innovative Business Software A/S
Alarm Handling 29
Queue Windows
Queue Windows
Example of an Alarm Queue window. A: Menu bar. B: Alarm Queue lines. C: Queue Number. D:
The name of the Queue window.
The Queue windows display the incoming Alarms. You can create different Queue windows, displaying different types of Alarms. This way, for example, you can create a Queue window that
displays all incoming Alarms, another which only displays Alarms from Sites/Customers in Test
mode and a third one, which only displays Battery Alarms etc.
Each Queue window consists of the following:
n
n
n
n
The Queue window provides the frame for the Alarms and contains the menu bar and
the name of the Queue.
The Queue Filter determines which Alarms to display (eg all Alarms, only new Alarms,
Alarms from Zones currently in Test Mode or only Alarms with priority 87).
Queue Layout determines which columns to show in the Queue window (such as the
date, address, Operator ID, Response Time etc).
Queue Styles determine how the Alarms are presented in the Queue window - depending on the Alarm status (such as displaying new Alarms in bold, red text and Alarms,
which are currently being handled, are shown in green text).
interVIEW contains the following default Queue windows:
Queue
Window
Displays
Master
Queue
All Alarms (except Alarms from Zones in Service/Test Mode).
Private
Alarm
Queue
Alarms, which have been taken by the individual Operator as well
as Red Alarms.
Queue
Filter
Definition
Test/Service Alarms from Zones currently in Service/Test Mode. See "Placing
Queue
Zones in Test/Service" on page106.
Timer
Queue
Alarms, which have been temporarily postponed using the Timer
function. See "Postponing Alarms temporarily" on page92.
Red
Alarms, which await handling.
Unknown
Alarms of unknown origin.
User Manual
interVIEW
30 Alarm Handling
Queue Windows
Queue Lines
Each Queue Line represents an Alarm. By default, the following applies:
n
n
n
n
All new (ie unhandled) incoming alarms are displayed in red.
Once the operator takes the alarm, the alarm switches to green. The alarm remains
green as long as it is being handled.
If the Alarm is placed in Test Mode, Timer Mode or any other mode, then the Alarm
changes colour to indicate the new mode (of the Alarm).
The Alarm remains in the Queue until it is disposed of with a Disposition Code.
The Queue Lines can be displayed using different fonts, colours etc. (Queue Styles) depending
on the Alarm mode during alarm handling.
By default, interVIEW uses the following Queue Styles:
Colour
State/Mode
Red
New Alarms which await handling.
Green
The Alarm has been taken and is currently being handled.
Pink
The Alarm is from a Zone, which is currently in Test Mode.
Gray
Alarms from Zones, which have been temporarily postponed using the Timer feature.
Brown The Alarm was temporarily postponed using the Timer, but the Timer has now
expired.
Note: The table above presents the default Queue Styles. Please note that the Administrator
may have modified the colour scheme on your system.
Innovative Business Software A/S
Alarm Handling 31
Queue Windows
Menu bar (Alarm Queue Windows)
File (menu):
Shortcut
key
Command
Description
Only display
one alarm
-
Displays only one alarm in the queue. For example if you want to
display an Alarm on an external projector or screen.
Exit
-
Closes the Queue window.
Queue (menu):
Command
New >
Go to >
Sort >
Shortcut key
New Alarm
Window
Ctrl+Alt+0
Opens a new Alarm Handling window
Master
Ctrl+Alt+1
Opens a new Master Alarm Queue e window.
Private
Ctrl+Alt+2
Opens a new Private Alarm Queue window.
Service/Test
Ctrl+Alt+3
Opens a new Test Alarm window.
Timer
Ctrl+Alt+4
Opens a new Timer Alarm window.
Red
Ctrl+Alt+5
Opens a new Red Alarm Queue window.
Unknown
Ctrl+Alt+6
Opens a new Unknown Alarms window.
Queue 1
Alt+1
Toggles between the active windows, the
Remote and the Alarm Handling window.
Queue 2
Alt+2
Queue 3
Alt+3
Queue 4
Alt+4
Alarm
Alt+8
Remote
Alt+9
Next
Alt+0
Chronologically Alphabetically Priority
Choose >
Description
Sorts the Alarms in the active Alarm Queue.
-
Master Queue Shift+Ctrl+Alt+1 Changes the active Queue window to the
Master Queue.
Private Alarm
Queue
Shift+Ctrl+Alt+2 Changes the active Queue window to only show
the Alarms, which the Operator is currently
handling.
User Manual
interVIEW
32 Alarm Handling
Queue Windows
Command
Sound >
Blink >
Shortcut key
Description
Test/Service
Queue
Shift+Ctrl+Alt+3 Changes the active Queue window to show he
Alarms from Panels in Test Mode.
Timer Queue
Shift+Ctrl+Alt+4 Changes the active Queue window to show
Alarms, where the Timer has expired.
Red Alarms
Shift+Ctrl+Alt+5 Changes the active Queue window to only show
Red Alarms.
Unknown
Alarms
Shift+Ctrl+Alt+6 Changes the active Queue window to the
Unknown Alarms queue window.
Enable alarm
sound
Plays a sound on the Client when
interVIEW receives an Alarm. See "Activating
Aural Warning" on page35
Enable
continuous
sound
Plays a sound on the Client when
interVIEW receives an Alarm. The sound does
not stop until the Operator takes the Alarm. See
"Activating Aural Warning" on page35
Activate relay
when alarm
Activates a connected Client Relay, when the
relevant Queue window receives an Alarm.
Enable sound
on new red
alarms
Only plays a sound, when it receives a Red
Alarm. See "Activating Aural Warning" on
page35
Enable sound
on first red
alarm only.
Only plays a sound, when it receives the first
Red Alarm. See "Activating Aural Warning" on
page35
Test sound
Performs a sound test.
Stop sound
Cancels the sound test.
Blink when
alarm
Activates a Client Relay, which turns on a light.
Select whether to enable Blink at new Red
Alarms or by first Red Alarm.
Note: The visual notification requires a relay
to activate a light source.
On top >
Blink only
when new red
alarm.
Activates visual annunciation, but only at new
red alarms.
Blink only at
first red alarm.
Activates visual annunciation, but only at the first
red alarm.
Blink test
Performs a test of the visual annunciation.
On top at new
alarm
Automatically brings the queue window on top
at new alarm.
On top only
when new red
alarm
Automatically brings the queue window on top,
but only at new red alarms.
On top only
when first red
alarm
Automatically brings the queue window on top,
but only at the first red alarm.
Hide
Innovative Business Software A/S
Hides the window. Press the icon Hide/Show
window on the Remote twice to have the
window reappear. See "The Remote" on
page10.
Alarm Handling 33
Queue Windows
Navigate (menu):
Shortcut
key
Command
Queue Line >
L:1 Ctrl+1
Description
Takes the alarm currently in line 1.
Find Customer (Simple
Search)
Ctrl+F
Opens the window Simple Search. See "Simple Search"
on page113.
Advanced Search
Ctrl+Q
Opens the window Advanced Search. See "Advanced
Search" on page114.
Take (menu):
Shortcut
key
Command
Take >
Description
Take Red
Alarm
-
Takes the Red Alarm with the following properties: oldest
and highest priority.
Take
Alarm
-
Takes the currently highlighted Alarm and opens it in the
Alarm Handling window.
Show
alarm
-
Shows the currently highlighted alarm in the Alarm
Handling window.
Note: This command only shows the alarm, but does
not take it.
Help (menu):
Command
Shortcut key
Description
Help
F1
Opens interVIEW Help & Support.
interVIEW
-
Shows interVIEW version information.
User Manual
interVIEW
34 Alarm Handling
Queue Windows
The Master Alarm Queue
The Master Alarm Queue (example).
Column
Status Flag
Description
# = interVIEW has received multiple Alarms from the same Zone or the same
Instruction has been pulled multiple times.
S = Alarm from a Zone currently in Test Mode.
Note: If the time/period for the indicated Time Mode expires, then the
Alarm changes colour.
T = Alarm from Zone, which has been temporarily postponed using the Timer
feature.
T! T! = The Timer has expired on an Alarm, which had been temporarily
postponed.
V = Alarm with voice call (eg elevator alarm, Care Call or VoIP).
Time
Alarm time.
Alarm Type
The Alarm Event Code.
Priority
Zone Priority/Alarm Priority.
Phone Type
The Zone Type.
Zone Text
Zone Text.
HwID
Hardware Identification.
Client/Operator interVIEW Client ID/User ID.
Note: If empty, then the Alarm has not been taken.
Note: If the fields are in parenthesis (eg "(T01) (IVA)", then the server has
lost connection to the Alarm application on the Client, which was handling
the Alarm. This may be caused by a network problem or if the Operator
has stopped the Alarm program (logged out) without first having released
any currently handled Alarms back to the Master Alarm Queue.
Incident
Number
The Incident Number for the Alarm.
Queue
Comment
Queue Comment/Queue Text. The Operator can add/update any comments
concerning the Alarm in this field.
Instruction ID
Instruction Number/ID.
Innovative Business Software A/S
Alarm Handling 35
Queue Windows
Note: The above shows an example of a Master Queue. The Master Alarm Queue on the current interVIEW may contain other columns. Please contact the Administrator for further
information.
Activating Aural Warning
1. Open the Queue that you want to play a sound, when receiving a new Alarm.
2. Select Queue>Sound and check Enable aural warning.
From now on, interVIEW will activate an aural warning every time a new Alarm is
received.
3. (Optional) Check Enable continuous sound (Queue>Sound) to repeat the aural warning
until the alarm is taken.
4. (Optional) Check Only at new red alarms.
5. (Optional) Check Only at initial/first red alarm.
User Manual
interVIEW
36 Alarm Handling
Queue Windows
The Alarm handling window (AHW)
When you take an Alarm, all the relevant Alarm information is displayed in the Alarm Handling
window (abbreviated AHW).
The Alarm handling window (AHW).
A. The menu bar contains commands and settings. See "Menu bar (Alarm Handling window)" on the facing page.
B. The Top Line provides a quick glance of the primary Alarm parameters. See "Top Line"
on page42.
C. Customer Information displays information about the Customer. See "Customer Information" on page43.
D. The tabs contain detailed information for use during Alarm Handling.
E. Top window. See "Top Window (pane)" on page44.
F. Password. See "Codeword (pane)" on page45.
G. Components. See "Components (pane)" on page46.
Note: It is not possible to create or edit data in the Alarm Handling window.
Innovative Business Software A/S
Alarm Handling 37
Menu bar (Alarm Handling window)
Menu bar (Alarm Handling window)
File (menu):
Command
Shortcut
key
Print Instruction [List of most
recent Alarms]
-
Exit
-
Description
Opens the Report Instructions to be completed, generated and
printed. See "Instructions (Report)" on page153.
Closes the Alarm Handling window
Queue (menu):
Shortcut
key
Command
New >
Description
New Alarm
Ctrl+Alt+0 Opens a new Alarm Handling window
Handling window
Master Queue
Ctrl+Alt+1 Opens a new window containing All Alarms.
Private
Ctrl+Alt+2 Opens a new Private Alarm Queue window.
Test/Service
Ctrl+Alt+3 Opens a new Test/Service Alarm window.
Timer
Ctrl+Alt+4 Opens a new Timer Alarm window.
Red
Ctrl+Alt+5 Opens a new Red Alarm Queue window.
unknown
Ctrl+Alt+6 Opens a new Unknown Alarms window.
User Manual
interVIEW
38 Alarm Handling
Menu bar (Alarm Handling window)
Shortcut
key
Command
Go to >
Queue 1
Alt+1
Queue 2
Alt+2
Queue 3
Alt+3
Queue 4
Alt+4
Alarm
Alt+8
Remote
Alt+9
Next
Alt+0
Hide
Description
Toggles between the active windows, the Remote
and the Alarm Handling window.
Hides the queue window.
Navigate (menu):
Shortcut
key
Command
Description
Find
Ctrl+F
Customer/Simple
Search
Opens the window Simple Search. See "Simple Search" on
page113.
Advanced Search Ctrl+Q
Opens the window Advanced Search. See "Advanced Search" on
page114.
Fetch previous
Site
Opens the previous Installation.
Fetch next Site
Opens the next Installation.
Refresh data
Updates/refreshes Site/Customer data.
Passcard Search
(Contacts)
Ctrl+K
Opens the window Passcard search to search for a Contact with
Passcards on Installations. See "Passcard Search" on page117.
Passcard search
(Global Unit)
Ctrl+G
Opens the window Passcard search to search for Global Units
with Passcards. See "Passcard Search" on page117.
Log Out Passcard
Logs out the Passcard and logs the Passcard-carrier off.
Hide Log-Only
signals in Log
Hides Log-Only signals in the Alarm Log.
Open Global Alarm Log
Opens the Global Alarm Log. The Global Alarm Log enables you
to open/reopen any disposed Alarms and/or to perform postregistration tasks. Take the Alarm by double clicking on the Alarm
Queue Line.
Queue entries
for current Site
Shows the Alarm Queue for the current Installation.
Show Customer
in Data Entry
Opens the Customer/Installation in the Data Entry window.
Tabs >
Ctrl+1 ...
0
Selects the desired tab.
Take (menu):
Command
Take red
alarm
Shortcut
key
-
Innovative Business Software A/S
Description
Takes the Alarm, which is oldest and has the highest priority. See
"Taking the Alarm and performing the Instruction" on page85.
Alarm Handling 39
Menu bar (Alarm Handling window)
Shortcut
key
Command
Description
Take alarm
-
Takes the Alarm, which is currently highlighted in the queue. See
"Taking the Alarm and performing the Instruction" on page85.
Force alarm
-
Takes over (forces) the Alarm, which is currently being handled by
another Operator. See "Taking Alarms (from another Operator)" on
page94.
Release
alarm
Releases the Alarm, which is currently being handled, back to the
Master Alarm Queue. See "Releasing Alarms" on page93.
Clear
Ctrl+B
Clears the window.
Test/Service
Mode
Opens the Test Mode window to place Zones/Panels in Test Mode.
See "Test Mode" on page103.
Insert note
tab
Enables an Operator, who is not authorised to access Data Entry
window, to insert a note. See " Creating Note Tabs" on page89.
Manual
Alarm
Ctrl+A
Generates an Alarm manually (eg. testing). See "Generating Alarms
(manually)" on page95.
Treat (menu):
Shortcut
key
Command
Description
Queue
Comment
Opens a dialog, which enables the Operator to provide a
comment in the field "Comment" on the Alarm in the Alarm
Queue. All Operators can then see the Queue Comment. See
"Adding/Updating Queue Comments" on page90.
Comment
Creates a Log Comment. Depending on the configuration, the
Operator can insert a brief comment, an Event Sub Code
and/or a long text. The comment is then added to the Alarm
Log. See "Adding Log Comments" on page91.
Key Pick-up
Enter the name of the key recipient. You can also enter an
Event Sub Code and/or short text, if this function has been
activated.
You can also lend keys out.
Key Return
Enter the Event Sub Code and/or text.
Use this field when keys are returned. Enter a subcode
and/or text.
Other >
Text
Creates a Log Comment. Depending on the configuration, the
Operator can insert a brief comment, an Event Sub Code
and/or a long text. The comment is then added to the Alarm
Log. See "Adding Log Comments" on page91.
Note: This menu contains customised commands. Please
contact the Administrator for further information.
Timer >
Stop
timer
Stops/resets the Timer.
5 min
Postpones the Alarm temporarily in the selected period. See
"Postponing Alarms temporarily" on page92.
...
4 hours
Timer...
Postpones the Alarm in a user-specified period or to a certain
time. See "Postponing Alarms temporarily" on page92.
User Manual
interVIEW
40 Alarm Handling
Menu bar (Alarm Handling window)
Call (menu):
Shortcut
key
Command
Description
Customer > [Customers]
Calls the selected Customer ("Verification Call"). See
"Calling Customers, Contacts or Global Units" on page86.
Contacts
[Contacts]
Calls the selected Contact. See "Calling Customers,
Contacts or Global Units" on page86.
Global
Units
[Linked
Global
Units]
Calls the selected Global Unit. See "Calling Customers,
Contacts or Global Units" on page86.
Controls
Sends Control Signals to Panels (as defined in the
Instructions).
All
Instruction
Actions
Shows available Actions.
Current
Call
Instruction
Line >
Calls the currently highlighted line in the Instruction.
Call Directly
Calls the currently highlighted line in the Instruction
directly.
Other
Global
Units >
[Non-linked
Global
Units]
Calls a non-linked, but available Global Unit.
Follow-up
Event >
[Follow-up
Events]
Performs the selected Follow-up Event. Follow-up Events
are Event Codes, which describe Events, which occur
before the Incident is disposed (eg. "Police arrived").
Panel
Controls
Sends Control Signals, which are defined in the Panel (eg
"Turn Lights ON", "Turn Lights OFF", "Close Signal", "Open
Signal").
Passcard
Login
Calls the person currently logged in with a Passcard.
Disposition (menu):
Command
Shortcut
key
Enable reg.
Description
Registers Events on an Alarm, which has been disposed, but which
should not be part of the Incident. During post-registration, you can
choose a subcode and/or write a text, if so required for this particular
site. If the field is mandatory, then the text header will be blue
Real
Alt+F1
Registers the Alarm as REAL.
False
Alt+F2
Registers the Alarm as FALSE.
Canceled
(with
Password)
Alt+F3
Registers that the Alarm was canceled using a valid Password.
Testing
Alt+F4
Registers the Alarm as a TEST.
Technical
Alt+F5
Registers the Alarm as a TECHNICAL ERROR.
Installer
Alt+F6
Registers the Alarm as having been canceled by an Installer on site.
User Items (menu):
This menu contains customised commands. You can create commands to open applications,
Innovative Business Software A/S
Alarm Handling 41
Menu bar (Alarm Handling window)
which are not part of interVIEW (eg Microsoft Word, Notepad and web sites). Please contact
your Administrator for further information.
Command
Shortcut key
Description
[Customised Commands]
Help (menu):
Command
Shortcut
key
Help
F1
Panel Help
interVIEW
Description
Opens the interVIEW desktop Help & Support.
Opens a file or hyperlink (eg Word document or web site), which is
linked to current Panel Type.
-
Displays the current interVIEW client application version.
User Manual
interVIEW
42 Alarm Handling
Menu bar (Alarm Handling window)
Top Line
The top line highlights important information about the Active Alarm.
The Top Line in the Alarm Handling window (AHW).
Description
A Primary Alarm Information shows one of the following (depending on configuration).
n
n
n
n
n
Zone ID.
Zone Type.
Zone Text.
Zone Priority.
Detector Type.
B The Instruction Type.
C interVIEW Client ID.
D Passcard-owner. If the Operator performs actions on behalf of a Contact/Global Unit, then
the name of the Passcard-owner will be shown in this field (eg the name of the installer).
E Checked (#): There are multiple Alarms in the queue from the same Site/Customer.
F Incident Number.
Innovative Business Software A/S
Alarm Handling 43
Menu bar (Alarm Handling window)
Customer Information
Primary Customer Information
Description
A Customer Number
B Previous Customer Number.
C The Global Unit, which is linked to the Site.
D Monitoring Status. Shows the Site's/Customer's current Monitoring Status (eg Active,
Passive, Decommissioned).
Note: This field can be shown/hidden depending on the type of Monitoring Status.
E Customer Name and Address
User Manual
interVIEW
44 Alarm Handling
Menu bar (Alarm Handling window)
Top Window (pane)
Top Window (pane).
Depending on system setup, the Top Window Pane can contain the following:
n
n
n
Text
Passwords or
Alarm Log
Innovative Business Software A/S
Alarm Handling 45
Menu bar (Alarm Handling window)
Codeword (pane)
Codewords. A: Code words (table). B: Codewords (pane).
Description
A The table Codewords displays the Codewords, Rights etc. interVIEW can present Codewords
in the following ways:
codeword = the code word has been created locally (ie only for this Site).
*codeword = the Codeword is a Panel Code, which is linked to a Panel Type.
[Codeword] = the Codeword is shared.
B Codewords (pane) highlights the linked Codewords (and Security Levels) without the
Operator having to select the tab Codewords.
The format is as follows:
Codeword1-SecLevel1/Codeword2-SecLevel2/Codeword3-SecLevel3/etc.
User Manual
interVIEW
46 Alarm Handling
Menu bar (Alarm Handling window)
Components (pane)
Components. A: Components (table). B: Components (pane).
Field
Description
A Components (table)
Displays the linked Components.
B Components (pane)
Highlights selected Component Labels and/or Components.
Innovative Business Software A/S
Alarm Handling 47
Menu bar (Alarm Handling window)
Tabs (the Alarm Handling window)
Tabs (the Alarm Handling window).
User Manual
interVIEW
48 Alarm Handling
Installation (tab)
Installation (tab)
Installation (tab).
Field
Description
Site number
Site number.
Classes
Class.
Security Classes
Security class.
Install Date
Install Date. Not necessarily identical to the Monitoring Start date. See
below.
Installation Type
Installation Type.
Monitoring start
Initial date for monitoring.
Instruction Date
Date for the latest revision/approval of the Instruction.
Trade
Trade.
Service date
The date for the most recent approval/test/repair/maintenance.
Alarm Limit
The Alarm Limit.
Changed/Revised The time and date for the most recent change/revision.
Chngd by
User ID for the User, who most recently edited data.
Monitoring Status Monitoring status.
From (date)
Complete the From and To fields to indicate the dates from and to which
the status is valid (eg. from 08-05-01 and to 25-11-08).
To Date
Complete the From and To fields to indicate the dates from and to which
the status is valid (eg. from 08-05-01 and to 25-11-08).
Previous
customer
number
Previous customer number.
Miscellaneous 1- Additional fields for free use.
4
Note: Please contact Innovative for further information.
Next
The date for the next approval/test/maintenance.
test/maintenance
Is template
Checked: This Site acts as a Site Template for new Sites.
Innovative Business Software A/S
Alarm Handling 49
Contacts (tab)
Contacts (tab)
Contacts (tab)
Field
Description
A Global Units
See "Global Units (tab)" on the next page.
B Contacts (tab)
See "Contacts (tab)" on page51.
C Contact Lists (tab)
See "Contact Lists (tab)" on page52.
User Manual
interVIEW
50 Alarm Handling
Global Units (tab)
Global Units (tab)
Global Units (tab). The first Global Unit in the table is the Primary Global Unit .
Field
A Unit Label
Description
The Global Unit Label.
Global Unit ID
The Global Unit ID.
Phone Number
The Phone Number for the Global Unit.
Name
The name of the Global Unit.
Innovative Business Software A/S
Alarm Handling 51
Contacts (tab)
Contacts (tab)
Contacts (tab)
Table
A Name
Description
The name of the Contact.
Phone Number
The Phone Number.
Passcard
Passcard.
Security Level
Security Levels.
Not in instruction
Checked: Excludes the Contact from any linked Instructions.
Empty: Includes the Contact in any linked Instructions.
Links
The number of Sites, to which the Contact is linked.
Comment
Any comments.
User Manual
interVIEW
52 Alarm Handling
Contact Lists (tab)
Contact Lists (tab)
Contact Lists (tab)
Field
Description
A Contact Lists
The name/ID of the Contact List.
B Contact List ID
This field is only used to acquire information.
Contains a brief description.
C Description
D Global CList
If the Contact List is based on a Global Contact List, then the name (Site
Number - Contact List ID) of the Global Contact List will be displayed here.
E Links
The number of Sites that are linked to the Global Contact List.
F Shared
Checked: The Contact List is a Global Contact List.
G Contact List
Types
Contact List Types.
H Included
Contacts
Contacts, which are members of the Contact List.
I Excluded (but
available)
Contacts.
Contacts, which are NOT members of the Contact List.
Innovative Business Software A/S
Alarm Handling 53
Contact Lists (tab)
Instructions (tab)
Field
Description
A Instruction ID (tab)
The name of the Instruction. The format is as follows:
Instruction Type/Sub Instruction Number/Instruction
Group.
B Instruction Type
The picklist Instruction Types.
Instruction Type
(description)
Contains a brief description.
Schedule Number
The picklist Schedule Numbers.
Alternative
Instructions
The picklist Alternative Instructions.
Template
The picklist Instruction Templates.
Contact List ID
The picklist Contact List ID.
Sub Instruction
Sub Instruction.
Instruction Group
The picklist Instruction Groups.
C Top Note
D Actions/
Instruction Lines
Displays the content of the Top Note, as defined in the
Instruction Template.
Action
The name of the Action (also known as the Instruction Line).
A1
Checked (X): interVIEW automatically performs the Action as
a Primary Auto Instruction (A1).
A2
Checked (X): interVIEW automatically performs the Action as
a Secondary Auto Instruction (A2).
Call type
The Call Type (eg voice, text message or Control Signal).
To
The Phone Number.
Name
The name of the Contact or Global Unit to be called.
Comment Any comments.
Data
The Data Definition.
Definition
Data
E Free text
Data (for Control Signals, text messages, e-mails etc).
Displays any free text as created in the Data Entry window.
User Manual
interVIEW
54 Alarm Handling
Panels (tab)
Panels (tab)
The tab Panels contains information about the Panels, which are linked to the Site.
Panels (tab). A: Hardware IDs.
Field
Description
A Panels (tabs)
Each tab represents a Panel.
B Zones (tab)
See "Zones (tab)" on the facing page.
Control Signal (tab)
See "Control Signal (tab)" on page57.
Panel Codes (tab)
See "Panel Codes (tab)" on page58.
Users (tab)
See "Users (tab)" on page59.
Panel Info (tab)
See "Panel info (tab)" on page60.
Innovative Business Software A/S
Alarm Handling 55
Zones (tab)
Zones (tab)
The tab Zones contains an overview of the Zones on the selected Panel (Hardware ID).
Zones (tab). A: Zones (table).
Field
Description
Signal Time
Date/time for the most recently received signal.
# (Ct) Count
The number of received signals.
Event Code
Event Code.
S
Checked (X): The Zone is currently in Test Mode. See "Test Mode" on
page103.
PS
P = Panel Zone.
S = Slave Zone.
Zone ID
The name/ID of the Zone.
Zone Type
The Zone Type.
-/=
A/D
Alarm Generation Mode.
P
Zone Priority.
SI
The number of the linked Sub Instruction.
A = Arm signal. D = Disarm signal
Schedule Number The number of the linked O/C-schedule.
Note: This feature is an add-on module to interVIEW and requires a
separate licence.
Invert
Checked: The signal is inverted.
Rr
Checked (X): The Zone requires a Restore signal in order to be restored.
(Restore required)
Special in
Test/Protected
Zone
Checked (X): The Zone is protected from inadvertently being placed in Test
Mode. .
User Manual
interVIEW
56 Alarm Handling
Zones (tab)
Field
RZ
Description
The name/ID of the Restore Zone.
Restore Zone ID
Delay (sec)
Delay (in seconds).
CZ
The Cancel Zone.
Cancel Zone
Detector Type
The Detector Type.
Instruction ID
The Instruction, which the Zone uses in case of an Alarm.
Zone Text
The Zone Text.
Innovative Business Software A/S
Alarm Handling 57
Control Signal (tab)
Control Signal (tab)
Control Signal (tab). A: Control Signals (table).
Field
Description
A Data Definition Data Definition.
Schedule No.
Schedule Number.
At open
Checked: Transmits the Control Signal when the Alarm is opened/disarmed.
At close
Checked: Transmits the Control Signal when the Alarm is closed/armed.
Comment
Any comments.
User Manual
interVIEW
58 Alarm Handling
Panel Codes (tab)
Panel Codes (tab)
Panel Codes (tab). A: Panel Codes (table).
Column
A Panel Code
Slot Number
Description
The code that must be entered on the Panel to arm/disarm the system.
Panel Code slot number.
Panel Code Type The Panel Code Type.
Shared Code
Checked: The Panel Code is shared with another Panel.
Comment
Any comments.
Innovative Business Software A/S
Alarm Handling 59
Users (tab)
Users (tab)
The tab Users contains the individuals, who have permission to enter/exit the Site.
Users (tab). A: Users (table).
Column
A User Number
Description
User Number.
Shared User
Checked: The User is shared with another Panel.
No Floating
Window
Checked (X): The User is NOT allowed to employ the Floating Windows
feature.
Code
The User's code.
Name
The name of the User.
User Manual
interVIEW
60 Alarm Handling
Panel info (tab)
Panel info (tab)
The tab Panel info contains information about the Panel.
Panel info (tab). A: Components (table).
Column
A Component Label
Description
The Component Label.
Qty
The number of Components.
Component
The Component.
Local
Checked: Only applies to the local Site.
Comment
Any comments.
Innovative Business Software A/S
Alarm Handling 61
Panel info (tab)
Site info (tab)
The tab Site info contains information about the Site.
Site info (tab). A: Components (table).
Column
A
Description
Component Label
The Component Label.
Qty
The number of Components.
Component
The Component.
Comment
Any comments.
User Manual
interVIEW
62 Alarm Handling
Texts (tab)
Texts (tab)
The tab Texts contains supplemental information (in addition to Instructions) for the Operator.
Texts (tab)
Field
A Text tabs
Description
Each Note/Text has a separate Text tab.
Note: By default, the title in the Text tab is identical to the title in the
selected Note tab (see below).
B The Note Type
The picklist Note Types. Displays the selected Text type.
C Renaming Text
tab titles
Used to rename the title of the Text tab.
D From (date)
The effective date for the Text/Note.
E To Date
The expiry date for the Text/Note.
Note: If left blank, then the Text/Note will not expire.
F Note ID
If the displayed text is a text snippet from the Text Library, then this field
shows the Global Text ID.
G Shared
Checked: The Note is shared.
H Text Pane
Displays the contents of the Text/Note.
Innovative Business Software A/S
Alarm Handling 63
Texts (tab)
Graphics (tab)
The tab Graphics contains supplemental graphics/images.
Graphics (tab).
Field
Description
A Graphics Notes
Graphics Notes (tabs).
B Note Types
(picklist)
The picklist Note Types.
C New ID
Renames the Graphics Note. Only used when you create/edit the
Graphics Note.
D From date...
The effective date for the Graphics Note.
E To date...
The expiry date for the Graphics Note.
F Note ID (picklist) If the Text Pane (H) originates from the Note Library, then the Note ID is
displayed here.
G Graphics ID
(picklist)
The Name/ID of the Graphics in the Graphics Library.
H Text Pane
Caption. The Text Pane may include:
n
n
I Graphics Pane
Local text (RTF-format).
Global Text (via Text ID).
The contents of the graphics file (Graphics ID) from the Graphics Library.
Click the graphics to toggle between zooming in/out.
J Dot Mapping
Highlights a specific area or element, such as the location of a fire panel,
on a map.
User Manual
interVIEW
64 Alarm Handling
Texts (tab)
Codewords (tab)
Codewords (tab). A: Codewords (table).
Field
A Codewords
Description
The table Codewords displays linked Codewords as follows:
codeword = the code word has been created locally (ie only for this Site).
*codeword = the Codeword is a Panel Code, which is linked to a Panel Type.
[codeword] = the Codeword is shared and inherited from a linked Site.
Security Level Security Levels.
From (date)
Effective FROM date.
To Date
Effective TO date.
Shared
Checked (X): Codeword is shared.
Comment
Any comments.
Innovative Business Software A/S
Alarm Handling 65
Texts (tab)
Alarm Log (tab)
The tab Alarm Log contains a log of all Events on a given Site.
Alarm Log (tab). A: Alarm Log Groups (tab). B: Alarm Log entries.
Field
A Alarm Log
Groups (tabs)
Description
Depending on the amount of traffic, each tab can contain Alarm Log entries
in four levels:
n
n
n
n
[year/end month - year/begin month] (eg 10/07 - 10/03)
[year/month] (eg 10/12)
[hours]
[minutes]
Note: Each tab can contain up to 300 entries. If the number of entries
exceeds 300, then interVIEW automatically creates a new tab.
B Incident
Number
The Incident Number for the Alarm.
System Time
Server time stamp (Windows system time).
E-code
The Event Code.
Sub-code
The Event Sub Code.
HwID
Hardware Identification.
ZoneID
Zone ID.
Instruction
Type
The Zone Type.
P
Zone Priority.
Client/Operator Client ID/Operator ID.
M
Checked: The Alarm was generated manually.
T
Checked: The Alarm was generated as part of a test.
I
Checked: The Alarm contains supplemental information. Open the Alarm
Log details window (Double-click or Ctrl+Z) for additional information.
Text
Displays text based on the Event Code (eg. Zone description, Operator ID).
User Manual
interVIEW
66 Alarm Handling
Texts (tab)
Alarm Log Details (window)
Alarm Log Details (window).
Field
A Incident
Number
Description
The Incident Number for the Alarm.
System
Time
Windows system time.
Event
Code
The abbreviated name of the Event Code.
Long code The full name of the Event Code.
Sub Code
-
Sub Code
-
HwID
Hardware ID.
A-number The A-number.
SIA/CID
data
If the Alarm is based on a SIA/CID signal, then the field displays the original
SIA/CID data (as forwarded by the Concentrator).
For example, "BR13001109", where
B = Contact ID (A = SIA)
R = Restore (A = Alarm)
130 = CID Burglar Alarm
01 = CID Area Number
109 = CID Zone Number
Innovative Business Software A/S
Alarm Handling 67
Texts (tab)
Field
Description
Converted Checked: Signal has been converted using a SIA/CID Conversion.
Zone ID
Zone ID.
Zone Type Zone Type.
Detector
Type
Detector Type.
Priority
Zone Priority.
Client ID
interVIEW Client ID.
User ID
User ID.
Manual
Alarm
Checked: The Alarm was generated manually.
Test
Alarm
Checked: Alarm was generated as part of a test.
Zone
Delay
Checked: Zone Delay.
Reason
for LogOnly
This field contains a value that explains why the alarm has been suppressed.
Delay
This field shows the time delay (in seconds) between receiving the Alarm in the
Concentrator and placing it in the Alarm Queue/log. In case of missing
test/open/close alarms, this field displays the time after the last period that the
alarm was generated.
Text
Zone Text ("The small text field").
Contacts
Contacts
B Text
C Ix
1. Calendar linked to the Zone.
2. Calendar linked to the Instruction.
3. Zone Type which is only generated if the customer is already in the alarm
queue.
4. Zone Delay specified.
5. System setup, which causes the restore to not be appear in the queue.
6. Alarm initiated as log-only.
7. Expected test/open/close signal.
8. Log-only zone or supervisory status.
"The large text field".
Index.
System
Time
Windows system time.
Size
Size.
Comment Any comments.
User Manual
interVIEW
68 Alarm Handling
Sum Log (tab)
Sum Log (tab)
The Sum Log lists each Incident as a line.
Note: To see all events under the same Incident, see "Alarm Log (tab)" on page65.
Sum Log (tab). A: Sum Log Groups (tabs). B: Sum Log Entries.
Field
Description
A Sum Log Groups (tabs)
B Incident Number
The Incident Number for the Alarm.
Time
Server time stamp (Windows system time).
IId
Instruction Number/ID.
E-code
The Event Code.
Zone Type
The Zone Type.
D-code
The Disposition Event Code.
ZoneID
Zone ID.
P
Zone Priority.
HwID
Hardware Identification.
#
Displays the number of received alarms.
Comment
Any comments.
Acknowledged
Date/time when the alarm was acknowledged.
Name
Name.
Disposition Time
The time when the Alarm was disposed.
T1-T10
Checked: Displays Incident progress (eg. police called).
M
Checked: The Alarm was generated manually.
T
Checked: The Alarm was generated as part of a test.
Innovative Business Software A/S
Alarm Handling 69
Sum Log (tab)
Sum Log details (window)
Sum Log details (window).
Field
A Incident Number
Description
The Incident Number for the Alarm
Time
Time stamp (Windows time)
Instruction ID
Instruction ID
Original Instruction
Original Instruction
Event Code
Event Code
Zone Type
The Zone Type
Detector Type
The Detector Type
Disposition Code
Disposition Code (long version)
Disposition Code
Disposition Code (short version)
Disposition Sub Code
Disposition Sub Code (long version)
Disposition Sub Code
Disposition Sub Code (short version)
Zone ID
Zone ID
Priority
Zone Priority
HwID
Hardware ID
Alarm Counts
Alarm Counts
Alarm Limit Counter
The number of Alarms (as linked to any applied Alarm Limit)
Comment
Response Time
Any comments.
Response Time
Time10 - Time10
Sum Log Time Groups
Manual Alarm
Checked: The Alarm was generated manually.
User Manual
interVIEW
70 Alarm Handling
Sum Log (tab)
Field
Test Alarm
Description
Checked: The Alarm was generated as part of a test.
Data overflow
B Job information (tab)
-
C Address (tab)
Address Information.
D Images from the log (tab)
Images.
E Alarm Log
Displays the Alarm Log.
Innovative Business Software A/S
Information about the task.
Alarm Handling 71
Sum Log (tab)
Open/Close (tab)
The tab Open/Close controls Open/Close Schedules.
Note: This feature is an add-on module to interVIEW and requires a separate licence.
Open/Close (tab).
Field
A Definition
(tab)
Description
Shows the Schedule definition. See "Definition (tab)" on the next page
Result (tab) Calculates and shows the result of the O/C Schedule based on its Definition.
See "Result (tab)" on page83
History
(tab)
B Schedules
(tabs)
Shows the Schedule history. See "History (tab)" on page84.
Existing Schedules.
User Manual
interVIEW
72 Alarm Handling
Sum Log (tab)
Definition (tab)
The tab Definition defines O/C Schedules.
Definition (tab).
Field
Description
A Schedules
Each tab represents a Schedule. The tab title is identical to the Schedule
Index.
B Schedule
properties
The Schedule properties. See "Schedule properties (Open/Close)" on the
facing page.
C Schedule
Periods
Each Schedule can have multiple Periods, which can be in effect at different
times. See "Schedule Periods (Open/Close)" on page78
D Open
Tolerance.
See "Open Tolerance (Open/Close)" on page74.
E Close
Tolerance
See "Close Tolerance (Open/Close)" on page75.
F Make Alarm See "Make Alarm (Open/Close)" on page76.
See "Schedule Period Hours (Open/Close)" on page79.
G Schedule
Period Hours
H Special Days See "Special Days (Open/Close)" on page81.
I Special Dates See "Special Dates (Open/Close)" on page82.
Innovative Business Software A/S
Alarm Handling 73
Sum Log (tab)
Schedule properties (Open/Close)
Schedule properties (Open/Close).
Field
Description
Schedule Number
Schedule Number.
Schedule Name
The name/ID of the Schedule.
Share as...
This field is used, when creating a Global Calendar (in the DEW).
User Manual
interVIEW
74 Alarm Handling
Sum Log (tab)
Open Tolerance (Open/Close)
Open Tolerance (Open/Close).
Field
Description
Open
The number of minutes before the scheduled opening time, within which,
Tolerance/Before interVIEW will accept an Open signal, without generating an Alarm.
Open
Tolerance/After
The number of minutes after the scheduled opening time, within which,
interVIEW will accept an Open signal, without generating an Alarm.
Descrip.
Contains a brief description.
Innovative Business Software A/S
Alarm Handling 75
Sum Log (tab)
Close Tolerance (Open/Close)
Close Tolerance.
Field
Description
Close
The number of minutes before the scheduled closing time, within which,
Tolerance/Before interVIEW will accept a Close signal, without generating an Alarm.
Close
Tolerance/After
The number of minutes after the scheduled closing time, within which,
interVIEW will accept a Close signal, without generating an Alarm.
User Manual
interVIEW
76 Alarm Handling
Sum Log (tab)
Make Alarm (Open/Close)
Make Alarm (Open/Close).
Field
A
T
(Open
Tolerance)
Description
+ (plus) means that if interVIEW receives an OPEN/DISARM signal earlier
than the set Open Tolerance/Before, then interVIEW will generate an
Alarm.
E X A M P L E
Let's say that the calendar period is set to begin at 08:00 and that Close
Tolerance/Before is set to 10 minutes. If interVIEW receives an OPEN signal
at 07:50 (ie at 08:00 with 10 minutes Open Tolerance/Before), then
interVIEW will not generate an Alarm. However, if interVIEW receives an
OPEN/DISARM before 07:50, then interVIEW will generate an Alarm.
(empty) means that interVIEW ignores OPEN/DISARM signals, which are
received earlier than the set Open Tolerance/Before.
M
Checked ("+"): If interVIEW does not receive an OPEN/DISARM signal, then
interVIEW will generate an Alarm.
Empty: interVIEW ignores missing OPEN/DISARM signals.
S
Checked ("+"): If interVIEW receives an OPEN/DISARM signal later than the
set Open Tolerance/After, then interVIEW will generate an Alarm.
Empty: interVIEW ignores OPEN/DISARM signals received later than the set
Open Tolerance/After.
B
T
(Close
Tolerance)
Checked ("+"): If interVIEW receives a CLOSE/ARM signal earlier than the
set Close Tolerance/Before, then interVIEW will generate an Alarm.
Empty: interVIEW ignores CLOSE/ARM signals received earlier than the set
Close Tolerance/Before.
M
Checked ("+"): If interVIEW does not receive a CLOSE/ARM signal, then
interVIEW will generate an Alarm.
Empty: interVIEW ignores missing CLOSE/ARM signals.
S
Checked ("+"): If interVIEW receives a scheduled CLOSE/ARM signal later
than the set Close Tolerance/After, then interVIEW will generate an Alarm.
Empty: interVIEW ignores this type of signal.
Innovative Business Software A/S
Alarm Handling 77
Sum Log (tab)
Make Alarm (Open/Close)
Make Alarm details (Open/Close).
Reference
A
Field
Early
(Open
Tolerance)
Enter
+ (plus): generates an Alarm if interVIEW receives an OPEN/DISARM
signal earlier than the set Open Tolerance/Before.
* (asterisk): to
Empty: interVIEW ignores OPEN/DISARM signals received earlier than
the set Open Tolerance/Before.
Missing + (plus) generates an Alarm if interVIEW does NOT receive an
OPEN/DISARM signal.
* (asterisk): to
Empty: interVIEW ignores missing OPEN/DISARM signals.
Late
Checked ("+"): If interVIEW receives an OPEN/DISARM signal later than
the set Open Tolerance/After, then interVIEW will generate an Alarm.
Empty: interVIEW ignores OPEN/DISARM signals received later than the
set Open Tolerance/After.
B
Early
(Close
Tolerance)
Checked ("+"): If interVIEW receives a CLOSE/ARM signal earlier than the
set Close Tolerance/Before, then interVIEW will generate an Alarm.
Empty: interVIEW ignores CLOSE/ARM signals received earlier than the
set Close Tolerance/Before.
Missing Checked ("+"): If interVIEW does not receive a CLOSE/ARM signal, then
interVIEW will generate an Alarm.
Empty: interVIEW ignores missing CLOSE/ARM signals.
Late
Checked ("+"): If interVIEW receives a scheduled CLOSE/ARM signal later
than the set Close Tolerance/After, then interVIEW will generate an
Alarm.
Empty: interVIEW ignores this type of signal.
User Manual
interVIEW
78 Alarm Handling
Sum Log (tab)
Schedule Periods (Open/Close)
Schedule Periods and Schedule Period Hours (Open/Close).
Field
Description
A Schedule Periods The name/ID of the Schedule Period.
(tabs)
From (date)
Effective FROM date.
To Date
Effective TO date.
Local
Checked: Only applies to this Site.
Empty: Applies the globally defined value.
B Schedule Period
Hours
Innovative Business Software A/S
The table Schedule Period Hours. See "Schedule Period Hours
(Open/Close)" on the facing page.
Alarm Handling 79
Sum Log (tab)
Schedule Period Hours (Open/Close)
Schedule Period Hours (Open/Close)
Field
Description
A From
To
The effective FROM time (HH:MM) for the Schedule Period Hour.
B Weekdays
(Monday Sunday)
Checked: The Schedule Period Hour for the applicable Weekday.
The effective TO time (HH:MM) for the Schedule Period Hour.
C Extra Days (1 - 9) Checked: The Schedule Period Hour for the applicable Extra Day.
The number of minutes before the scheduled opening time, within which,
D Open
Tolerance/Before interVIEW will accept an Open signal, without generating an Alarm.
Open
Tolerance/After
The number of minutes after the scheduled opening time, within which,
interVIEW will accept an Open signal, without generating an Alarm.
Close
The number of minutes before the scheduled closing time, within which,
Tolerance/Before interVIEW will accept a Close signal, without generating an Alarm.
Close
Tolerance/After
The number of minutes after the scheduled closing time, within which,
interVIEW will accept a Close signal, without generating an Alarm.
User Manual
interVIEW
80 Alarm Handling
Sum Log (tab)
Field
E Early
Description
+ (plus) means that if interVIEW receives an OPEN/DISARM signal earlier
than the set Open Tolerance/Before, then interVIEW will generate an
Alarm.
E X A M P L E
Let's say that the Schedule period is set to begin at 08:00 and that Open
Tolerance/Before is set to 10 minutes. If interVIEW receives an
OPEN/DISARM signal at 07:50 (= 08:00 including 10 minutes Open
Tolerance/Before), then interVIEW will not generate an Alarm. However,
if interVIEW receives an OPEN/DISARM signal before 07:50, then
interVIEW will generate an Alarm.
(empty) means that interVIEW ignores OPEN/DISARM signals, which are
received earlier than the set Open Tolerance/Before.
Missing
Checked ("+"): If interVIEW does not receive an OPEN/DISARM signal,
then interVIEW will generate an Alarm.
Empty: interVIEW ignores missing OPEN/DISARM signals.
Late
Checked ("+"): If interVIEW receives an OPEN/DISARM signal later than
the set Open Tolerance/After, then interVIEW will generate an Alarm.
Empty: interVIEW ignores OPEN/DISARM signals received later than the
set Open Tolerance/After.
F Early
Checked ("+"): If interVIEW receives a CLOSE/ARM signal earlier than the
set Close Tolerance/Before, then interVIEW will generate an Alarm.
Empty: interVIEW ignores CLOSE/ARM signals received earlier than the
set Close Tolerance/Before.
Missing
Checked ("+"): If interVIEW does not receive a CLOSE/ARM signal, then
interVIEW will generate an Alarm.
Empty: interVIEW ignores missing CLOSE/ARM signals.
Late
Checked ("+"): If interVIEW receives a scheduled CLOSE/ARM signal later
than the set Close Tolerance/After, then interVIEW will generate an
Alarm.
Empty: interVIEW ignores this type of signal.
G Window (min.)
Count
The duration (minutes) of the Floating Window.
The number of allowed Floating Windows.
Note: If this field is empty, then there is no limit on the allowed
number of Floating Windows.
Innovative Business Software A/S
Alarm Handling 81
Sum Log (tab)
Special Days (Open/Close)
Special Days (Open/Close).
Field
Local
Description
Checked: Only applies to this Site.
Empty: Applies the globally defined value.
Day
The name/ID for the Special Day.
Treat as
How you want interVIEW to interpret the Special Day.
User Manual
interVIEW
82 Alarm Handling
Sum Log (tab)
Special Dates (Open/Close)
Special Dates (Open/Close).
Field
Local
Description
Checked: Only applies to this Site.
Empty: Applies the globally defined value.
Date
The calendar day for the Special Date.
Treat as
How you want interVIEW to interpret the Special Date.
Innovative Business Software A/S
Alarm Handling 83
Sum Log (tab)
Result (tab)
The tab Result displays the result of the Calendar (as defined in the tab Definition).
Result (tab). A: Result (table). B: Most recently received signal.
Field
Description
A Result
(table)
Displays the calculated result (as defined in the tab Definition) 30 days
ahead. This way, you can see what the Calendar looks like (and will
respond) for each day.
Note: If the Schedule contains multiple Schedule Periods, then each
entry displays the result of each Schedule Period.
Date
The date for the expected signal.
Time
The time (incl. any tolerances) for the expected signal.
Day
The weekday for the expected signal.
Event
Code
The Event Code.
Schedule The Schedule Day, to which the signal may be linked. For example, you
Day
can apply the same schedule for Christmas Day, Sundays and other
holidays.
Early
+ (plus sign) generates an Alarm.
* (asterisk): to
- (minus): ignores the signal.
Missing
+ (plus sign) generates an Alarm.
* (asterisk): to
- (minus): ignores the signal.
Late
+ (plus sign) generates an Alarm.
* (asterisk): to
- (minus): ignores the signal.
Minutes Duration (minutes) of the Floating Windows
Qty
The quantity of Floating Windows.
Delayed The Time (HH:MM), which the O/C has been postponed (+) or
expedited (-). For example, "+01:30" indicates that the O/C time has
been postponed one hour and thirty minutes. See
"Postponing/Expediting Open/Close (temporarily)" on page95.
B Most
recently
received
signal
Date, time and type of the most recently received signal.
User Manual
interVIEW
84 Alarm Handling
Sum Log (tab)
History (tab)
The tab History contains a log of O/C events (for the current Calendar).
History (tab).
Field
date
Description
Log entry date.
Time Log entry time.
Day
Log entry weekday.
Event The Event Code.
Code
Delay If the signal is missing, then this field displays the delay (ie. elapsed time) between the
time of the expected signal and the time, when interVIEW generated an Alarm (to
report the missing signal).
Innovative Business Software A/S
Alarm Handling 85
Sum Log (tab)
Taking the Alarm and performing the Instruction
1. Do one of the following in the Queue window:
n Check the Alarm and select Take>Take Alarm.
n Double-click on the Alarm.
Note: This option depends on the system configuration. Please contact the system administrator.
Select Take>Take Red Alarm to automatically handle the oldest and Alarm with
highest priority at any time).
The Alarm opens in the Alarm Handling window.
n
Note: If you attempt to take an Alarm, which has already been taken (and is therefore
being handled) by another Operator, then the Alarm will only be displayed in the
Alarm Handling window. It will NOT be taken. Depending on the system configuration,
interVIEW may display a warning to this effect. To take an Alarm, which is currently
being handled by another Operator, see "Taking Alarms (from another Operator)" on
page94.
Note: Although the Alarm has been taken, it will still be displayed in the Master Alarm
Queue. The Alarm will remain in the Master Alarm Queue until disposed.
Note: In the Master Alarm Queue, the Alarm changes from red to green to indicate
that it is being handled by an Operator.
2. Complete the Actions on the Instruction For example:
n call the Contact to verify that the Alarm is real
n call one (or more) Contacts
n call one (or more) Global Units
n transmit a Control Signal
n etc.
User Manual
interVIEW
86 Alarm Handling
Sum Log (tab)
Calling Customers, Contacts or Global Units
1. Take the Alarm.
2. Do one of the following:
n From the menu, select Call>[Customers], [Contacts] or [Global Units].
n Select the tabs Contacts>Contacts. Right-click the Contact and select Call.
n Select the tab Instructions. Right-click the Action/Instruction Line and select
either Call or Call Directly.
Place Call (dialog).
3.
4.
5.
6.
7.
(Optional) Check Use Autodial (bottom right corner) to enable Autodial from this Client.
Double-click on the desired Phone Type and follow the directions on the screen.
When the call is finished, then select Event Sub Code to register the outcome of the call.
Enter a brief Comment .
Do one of the following:
n Double-click on OK+Repeat to place another call.
n Double-click on OK+Close to close the dialog.
Innovative Business Software A/S
Alarm Handling 87
Sum Log (tab)
Sending SMS/SDS (manually) to Contacts/Contact Lists
You can send an SMS to one (or more) recipients as follows:
a. To send an SMS to a single Contact:
n Select the tab Contacts, right-click the Contact and select Call.
n In the window Call Contact, double-click on the desired Phone Number (must
have the Call Type "SMS/Text Message").
n In the dialogue Phone Call, type the message and click OK.
n In the window Call Contact, click either OK+Repeat to send additional text messages or click OK+Close to close the window after sending the message.
interVIEW then sends the text message to the Contact.
b. To send an SMS to all Contacts:
n Select the tab Contacts, right-click a random Contact and select Send SMS/SDS to
all.
n In the dialogue Phone Call, enter the message and click OK.
interVIEW then sends the message to all the Contacts with the Call Type "SMS".
c. To send an SMS to a specific Contact List:
n Select the tab Contact Lists, select the desired Contact List, right-click on any
Contact and do one of the following:
n Select Send SMS/SDS to all to create a new (empty) text message, type
the message and send it to the current Contact List.
n Select Create SMS/SDS using data from currently active Instruction to
create an SMS, which contains the alarm data from the currently active
Instruction and send the data as an SMS to (depending on interVIEW version):
n V2.5g: the active Contact List (ie the Contact List, which at any
given time is linked to the currently active Instruction (which has
been pulled by the Alarm) regardless from which Contact List you
are executing the command)
E X A M P L E
Let's say that we receive a fire alarm. The fire alarm pulls a fire
Instruction (ie the currently active Instruction), which is linked to
Contact List 2 (ie the currently active Contact List).
However, the Operator currently has Contact List 1 open and
executes the command.
The SMS is sent to Contact List 2, although the command is
executed from Contact List 1.
n
V2.5h: the current Contact List (ie the Contact List from which you
execute the command).
E X A M P L E
Let's say we receive a fire alarm. The fire alarm pulls a fire Instruction (ie the currently active Instruction), which is linked to Contact
List 2 (ie the currently active Contact List).
However, the Operator currently has Contact List 1 open and
executes the command.
The SMS is sent to Contact List 1, since he command has been
executed from Contact List 1.
User Manual
interVIEW
88 Alarm Handling
Sum Log (tab)
Note: The command is only available if the currently active Instruction
contains at least one Instruction Line/Action with a Contact, who is able
to receive an SMS/Text Message.
Note: You can edit the message before transmission.
Innovative Business Software A/S
Alarm Handling 89
Sum Log (tab)
Creating Note Tabs
During Alarm Handling, you can create a Note Tab. For example, if a Customer informs the Operator that he/she will be on vacation the next couple of days, then the Operator can create a Text
tab on the fly to share this information with the other Operators on the interVIEW network.
1. In the Alarm Handling window, select Take>Insert Note Tab.
Create Note Tab (dialog).
2. Select Note Type.
Note: By default, interVIEW displays the Note tab of the text type. To create another
type, simply enter the type in the field to the right.
Note: Important texts are displayed in red and at the top (depending on the entered
period). Notes, which have either expired or are currently inactive, do not appear during alarm handling.
3. (Optional) Enter effective from/to dates.
4. Do one of the following:
n Select NoteID to insert a Global Note.
n Click in the text pane and begin typing.
5. (Optional) Right-click in the text field to change style (eg bold).
Note: Pre-V2.5i: The text is always saved in RTF format.
Note: As of V2.5i: The text is saved as "raw" text (default), unless you right-click in the
text field and change style (eg bold), in which case, the text is automatically saved in
RTF format.
6. Click OK.
Note: It is not possible to subsequently edit the text, once it has been saved.
User Manual
interVIEW
90 Alarm Handling
Sum Log (tab)
Adding/Updating Queue Comments
During Alarm Handling, you can add/update comments to the Alarm in the Queue (also known
as a "Queue Comment").
1. In the Alarm Handling window, select Treat>Disposition comment.
2. Type the comment.
3. Click OK.
interVIEW adds/updates the field Comment in the Queue.
Innovative Business Software A/S
Alarm Handling 91
Sum Log (tab)
Adding Log Comments
During Alarm Handling, the Operator can add comments as free text directly to the Alarm Log
(also known as a "Log Comment").
1. In the Alarm Handling window, select Treat>Free text.
2. Type the text you want to add in the Alarm Log.
3. Click OK.
interVIEW adds the comment to the Alarm Log.
User Manual
interVIEW
92 Alarm Handling
Sum Log (tab)
Postponing Alarms temporarily
During Alarm handling, the Operator can temporarily postpone an Alarm. For example, let's say
that the Operator calls a Contact, but the Contact is busy on the phone. The Operator can then
temporarily postpone the Alarm, by adding a Timer to the Alarm for, say, five minutes (the
Timer period). After five minutes, interVIEW will automatically remind the Operator that it is
time to call the Contact again.
Note: If interVIEW receives a second Alarm from the same Site/Customer within the Timer
period, then interVIEW automatically cancels (resets) the Timer.
1. Do one of the following:
n In the Alarm Handling window, select Treat>Timer>[fixed period] to temporarily
postpone the Alarm by the respective period.
n In the Alarm Handling window, select Treat>Timer>Timer... to specify another
period (or a different time), at which the Timer shall expire.
Select either Relative Time (ie period eg "08:00" means eight hours from now) or
Real Time (ie time eg "08:00" means at eight o'clock), when the Timer shall
expire.
n Depending on the above selection, enter the Timer Period/Time of Day, when
the Timer shall expire.
n (Optional) Check Update Queue Comment to update the comment field in the
Alarm Queue.
n Click OK.
The Alarm in the Alarm Queue turns grey (to indicate that the Alarm is now on a Timer).
The Alarm will now appear in the Timer Queue. See "Queue Windows" on page29.
n
2. When the Timer Period expires, the Alarm is automatically removed from the Timer
Queue and changes its status back to Red Alarm in the Master Alarm Queue.
Innovative Business Software A/S
Alarm Handling 93
Sum Log (tab)
Releasing Alarms
During Alarm handling, the Operator can release an Alarm, which he/she had been handling.
When you release an Alarm, the following happens:
1. Alarm Handling on the current Alarm from the current Client stops.
2. The Alarm will appear in the Master Queue as being "Unhandled" (ie the fields Operator
ID/Client ID will be empty).
To release an Alarm, select Take>Free Alarm.
CAUTION! WHEN YOU RELEASE THE ALARM BACK TO THE MASTER QUEUE, THE ALARM IS
NOT BEING HANDLED UNTIL ANOTHER OPERATOR TAKES THE ALARM.
User Manual
interVIEW
94 Alarm Handling
Sum Log (tab)
Taking Alarms (from another Operator)
During Alarm Handling, you can take an Alarm, which is currently being handled by another
Operator (this is also known as "Stealing Alarms").
1. Highlight the Alarm and select Take>Take Alarm.
interVIEW then automatically releases the Alarm from the other Operator, transfers the
Alarm to you and opens it in the Alarm Handling window.
Innovative Business Software A/S
Alarm Handling 95
Sum Log (tab)
Generating Alarms (manually)
You can manually generate Alarms (for test purposes, for example). This way, for example, you
can test whether Zones, Panels, SIA/CID Conversions or Hardware ID-filters have been created
correctly.
1. In the Alarm Handling window, select Take>Make Alarm.
2. Enter the simulated Hardware ID.
Note: interVIEW automatically inserts the active Hardware ID. To use another Hardware ID, then simply overwrite the existing text.
3. Enter the simulated Zone.
Note: Depending on system configuration, interVIEW automatically inserts a default
Zone for manual Alarms. To use another Zone, then simply overwrite the existing text.
4. Select Signal Type.
5. Enter a brief Comment .
6. Click OK.
interVIEW now generates a manual Alarm in the Master Queue.
Postponing/Expediting Open/Close (temporarily)
1. In the Alarm Handling window, select the tab Open/Close > Result > [Calendar].
2. Highlight the desired date/Schedule period.
3. Right-click and select Change time.
User Manual
interVIEW
96 Alarm Handling
Sum Log (tab)
4. To temporarily postpone/expedite the O/C-time, click on the respective buttons to adjust
the time accordingly. + (plus)/- (minus) respectively postpones/expedites the
Open/Close time.
Note: Current time is standard time.
Note: interVIEW logs all events.
E X A M P L E
To postpone Open/Close time 85 minutes, click once on +60 Min, once on +15 Min and
twice on +5 Min.
5. (Optional) To temporarily change Alarm Generation Modes, click on the respective radio
buttons.
6. Click OK.
Resetting O/C times
1.
2.
3.
4.
5.
6.
In the Alarm Handling window, select the tab Open/Close > Result.
Select the desired Schedule.
Highlight the date/Schedule Period, you want to reset.
Right-click and select Reset change.
In Text , provide a reason for resetting the O/C Schedule Period.
Click OK.
Innovative Business Software A/S
97
Automatic Site/Customer
Lookup
About Automatic Site/Customer Lookup
98
98 Automatic Site/Customer Lookup
About Automatic Site/Customer Lookup
About Automatic Site/Customer Lookup
Automatic Site Lookup (Auto Site Lookup) is a window, which automatically presents relevant
Site/Customer information based on incoming calls. The Operator can then simply double-click
on the Customer and open the Customer directly in the Alarm Handling window.
Auto Site Lookup (window).
Note: interVIEW looks up the Customer using either the phone number, Site Number or
Incident Number. If Auto Site Lookup finds the Customer on the basis of the phone number,
then there may be more then one match in the Data Entry window, as the same phone number may be linked to multiple Sites, Customers, Contacts and /or Global Units.
.
For more information about using Auto Site Lookup during Alarm Handling and a description of
the window, please see "Using Auto Site Lookup" below
Using Auto Site Lookup
1. Open the window Auto Site Lookup (System menu>Daily Routines>Auto Site Lookup).
Auto Site Lookup (window).
Field
A Event
number
Description
The Incident Number for the Alarm
Site No
The Site Number.
Name
Customer name.
Alarm
Date
The Alarm date.
HwID
Hardware Identification.
Status
Monitoring status.
Innovative Business Software A/S
Automatic Site/Customer Lookup 99
About Automatic Site/Customer Lookup
Field
Description
Link Types Shows how interVIEW found the Customer in interVIEW:
Di = Matching Site Number.
Si = Matching phone number on the Site.
Cu = Matching phone number of the Customer.
Co = Matching phone number of the Contact.
Gu = Matching phone number of the Global Unit.
Zone Type The Zone Type.
Zone Text The Zone Text.
B Stopwatch The Stopwatch is automatically activated at each incoming call. This way,
you can see how long incoming calls have been waiting before being
answered.
Note: If the Stopwatch reaches a predefined time limit (eg 30
seconds), then it changes background colour.
C A-number If interVIEW looks up the Customer on the basis of the phone number
(also known as the A-number), then it will be displayed here.
D Site
Number
If interVIEW looks up the Customer on the basis of the Site Number, then
it will be displayed here.
E Event
number
If interVIEW looks up the Customer on the basis of an Incident Number,
then it will be displayed here.
F Customers Shows the number of matching Customers in the DEW.
Note: As long as the window is open, interVIEW will automatically look up Customers
on the basis of incoming calls.
2. Simply double-click the Customer result to open the Customer in the Alarm Handling window and continue handling the Alarm.
User Manual
interVIEW
Innovative Business Software A/S
101
TEST
MODE
Innovative Business Software A/S
103
Test Mode
About Test Mode
104
104 Test Mode
About Test Mode
About Test Mode
When a technician has to install, test, approve or repair a Panel/Installation, then the Operator
(together with the technician) place one (or more) Zones in Test Mode (also known as "Engineering Test State").
When placing Zones in Test Mode, please observe the following:
When placing Zones in Test Mode, you can also assign a timer to the Zones. Once the
Timer expires, the following happens:
n The Queue Line in the Test Alarm Queue changes colour from pink to brown and
n interVIEW automatically generates an Alarm in the Master Queue, indicating that
the Timer has expired.
Any Alarms from Zones in Test Mode will only appear in the Test Alarm Queue - they will
NOT appear in the Master Queue.
To remove Zones from Test Mode (to return them to active/normal mode), the Operator
must manually dispose of the Alarms in the Test Alarm Queue.
n
n
n
Note: For security reasons, it is not possible to have interVIEW automatically return
Zones from Test Mode to active/normal mode. This procedure will always require
manual intervention by the Operator.
You can do the following with Test Mode:
As Operator:
n
n
Place Zones in Test Mode. See "Placing Zones in Test/Service" on page106.
Remove Zones from Test Mode (and return them to active/normal mode). See
"Removing Zones from Test/Service" on page107.
As Technician (on customer site):
n
Contact the Operator (at the ARC) to place the Site/Customer in Test Mode.
Innovative Business Software A/S
Test Mode 105
About Test Mode
Test/Service (window)
Test/Service Mode (window).
Field
A Zones in
normal
(active)
mode
Description
Zones, which are NOT in Test Mode.
B Zones in Test Zones, which are in Test Mode.
Mode
C <- Prio ->
Prio -> (right arrow) places all Active Zones with the same Zone Priority in Test
Mode.
<- Prio (left arrow) cancels the Test Mode for all Test Zones with the same
Zone Priority and activates them.
<- Type ->
Type -> (right arrow) places all Active Zones of the same Zone Type in Test
Mode.
<- Type (left arrow) cancels the Test Mode for all Test Zones with the same
Zone Type and reactivates them as Active Zones.
<- HwID ->
HwID -> (right arrow) places all Active Zones with the same Hardware ID in
Test Mode.
<- HwID (left arrow) cancels the Test Mode for all Test Zones with the same
Hardware ID and reactivates them as Active Zones.
<- All ->
All -> (right arrow) places all Active Zones in Test Mode.
<- All (left arrow) cancels the Test Mode for all Test Zones and reactivates
them as Active Zones.
Add/remove Adds/removes the highlighted Panels.
D Time
(Period)
Checked: The time in the Time Field indicates a period (hours:minutes), after
which the Test Mode automatically expires (eg "08:30" means "eight and a
half hour from now on").
User Manual
interVIEW
106 Test Mode
About Test Mode
Field
Description
Time
(HH:MM)
Checked: The time in the Time Field indicates a specific time (hours:minutes),
at which time, the Test Mode automatically expires (eg "08:30" means "at
eight thirty in the morning").
The Test
Time field
If Time (Period) is checked, then the hh:mm in the Test Time field indicates
how many hours and minutes, which the Zones will remain in Test Mode.
If Time (HH:MM) is checked, then the hh:mm in the Test Time field indicates
to which hour the Zones will remain in Test Mode.
If the field displays "00:00", then the Timer has not been applied to the Zones.
E Include
special
Checked: Includes Protected Zones.
F Sub
Code/Text
Any comments.
G Update
Queue
Comment
Checked: The text in the field Queue Comment is automatically updated as
the active Queue Comment in Alarm Queue containing Test/Service Alarms.
Placing Zones in Test/Service
CAUTION! DEPENDING ON THE CONFIGURATION, ALARMS FROM ZONES IN TEST/SERVICE
WILL ONLY APPEAR IN THE TEST/SERVICE QUEUE. CONSEQUENTLY, THESE ALARMS MAY
NOT BE DISPLAYED IN THE MASTER ALARM QUEUE. SEE "QUEUE WINDOWS" ON PAGE29.
1. In the Alarm Handling window, select Take>Service. See "Test/Service (window)" on the
previous page.
2. Select the Zones to be placed in Test/Service.
3. (Optional) To have interVIEW automatically remind the Operator that the Zones (at any
given time either by period or specific time) are still in Test/Service, you can activate a
Timer. Do one of the following:
n To define a period (eg four hours from now), check Time (period) and enter the
length of the period in the time field (hours:minutes). For example, "08:30"
means that "eight and a half hours from now", interVIEW will automatically generate an Alarm to warn that the Zones are still in Test/Service.
n To define a specific time (eg 15:30), check Time (HH:MM) and enter specific time
in the test time field (hours:minutes). For example, "08:30" means that "at eight
thirty in the morning", interVIEW will automatically generate an Alarm to warn
that the Zones are still in Test/Service.
4. (Optional) Check Include special to include Protected Zones in Test/Service.
5. (Optional) Check Update QText to automatically update the Queue Text with new text.
6. Click OK.
7. Depending on the configuration, the Operator may be required to provide a brief
remark and/or type/select a Event Sub Code/cause to continue.
Note: When placing Zones in Test/Service, interVIEW automatically creates an instruction "1" ("minus one") in the Alarm Queue. This Queue Line remains in the Alarm Queue even if
the Zones are removed from Test/Service and returned to Active Zones.
Note: By default, any Alarms from unknown Zones (UZ) are generated as an Alarm using
Instruction 1. If all Zones on a Site/Customer have been placed in Test/Service, however, the
Alarm is generated on Instruction -1 (ie as if it were in Test/Service).
Note: To cancel the Timer, select Treat>Timer>Stop Timer.
Innovative Business Software A/S
Test Mode 107
About Test Mode
Removing Zones from Test/Service
The Operator removes Zones from Test/Service (and returns these to normal active/armed
mode) by disposing the Alarm in the Test/Service Queue.
1.
2.
3.
4.
Take the Alarm.
Select Disposition>[Disposition Code].
Click OK.
Depending on the system configuration, interVIEW may require the Operator to provide
a brief comment or enter/select an Event Sub Code in order to continue.
User Manual
interVIEW
Innovative Business Software A/S
109
SEARCH FEATURES
Innovative Business Software A/S
111
Search Features
About Search Features
Simple Search
Advanced Search
Passcard Search
112
113
114
117
112 Search Features
About Search Features
About Search Features
You can search for information in the following ways:
n
n
n
Simple Search is the fastest way to quickly find a Site, Customer etc., if you have, say, a
phone number. See "Simple Search" on the facing page.
Advanced Search enables you to perform a detailed search, including the use of wildcard characters. See "Advanced Search" on page114.
Passcard Search searches for Passcards. See "Passcard Search" on page117.
Note: This feature is an add-on module to interVIEW and requires a separate licence.
Note: The Simple and Advanced Searches are available in both the Data Entry window as well
as the Alarm Handling window. Passcard Search is only available from the Alarm Handling window.
Innovative Business Software A/S
Search Features 113
Simple Search
Simple Search
Simple Search.
Button
Shortcut
key
Description
Site
Alt+I
Searches for Site Number.
Customer
Number
Alt+K
Searches for the Customer Number.
HwID
Alt+H
Searches for Hardware ID.
Event number Alt+L
Searches for the Incident Number.
Note: Search using Incident Numbers using regular expressions
(eg "123%") may be time consuming for large databases.
Phone
Alt+T
Searches for Phone Number.
Old Customer Alt+G
Number
Searches for Old Customer Number.
External
Incident
Number
-
Searches for External Incident Number.
Key Number
Alt+N
Searches for Key Number.
Advanced
Search
Alt+A or
Ctrl-F
Opens the window Advanced Search. See "Advanced Search" on
the next page.
Camera
Server
-
Searches for Camera Server.
Cancel
-
Cancels the search and closes the window.
To perform a Simple Search:
1. Do one of the following:
n In the Data Entry window, select Customer>Find Customer (Ctrl+F).
n In the Alarm Handling window, select Navigate>Find Customer (Ctrl+F).
2. Enter the search value in the field.
3. Click the desired search button.
User Manual
interVIEW
114 Search Features
Advanced Search
Advanced Search
Advanced search enables you to:
n
n
n
Search using criteria, which are not available in a Simple Search (eg Status).
Search using multiple criteria simultaneously.
Search using wildcard characters. See "Using wildcards" on page118.
Advanced Search. A: Text fields. B: Name setting. C: Status setting. D: Search setting. E: Additional search setting. F: Buttons. G: Search result (table).
Field
A Text fields Site number
Shortcut
key
Description
Searches using the Site Number.
Customer
Number
Searches using the Customer Number.
HwID
Searches using Hardware ID
Old Cust No
Searches using the Old Customer Number
Incident
Nunmber
Searches using the Incident Number
Note: Search using Incident Numbers using
regular expressions (eg "123%") may be time
consuming for large databases.
External
Incident
Number
Searches using the External Incident Number
Passcard
Searches using Passcards
Codewords
Searches using Codewords
Class
Searches using Classes
Security Class
Searches using Security Class
Panel Type
Searches using Panel Types
Monitoring
Status
Searches using Monitoring Status
From (date)
Searches using From date
Innovative Business Software A/S
Search Features 115
Advanced Search
Field
B Name
Shortcut
key
Description
Log Date
Searches using Log Date
Camera Server
Searches using Camera Server
Name
Searches using Names. See also the settings for
"Name" below
Phone No
Searches using Phone Numbers
Address
Searches using Addresses
Postcode
Searches using ZIP Codes
City
Searches using Cities
Serial Number
Searches using Panel serial number
Zone ID
Searches using Zone ID
Component
Label
Searches using Component Label
Component
Searches using Components
Comments
Searches using Comments (for Components)
First Name
Searches for First Name
Note: When searching for names, make sure
that the following boxes are checked:
Customers, Contacts, and/or Global Units.
Last
Name/Surname
Searches for Last Name/Surname.
Both names
Searches for both First and Surnames.
C Monitoring Active
Status
D Search (I)
Log-only
Searches for Sites, whose Monitoring Status is set
to only log Alarms (ie Alarm Generation Mode "=").
Ignore
Searches for Sites, whose Monitoring Status is set
to ignore Alarms (ie Alarm Generation Mode "-").
Customers
Searches in Sites/Customers.
Panels
Searches in Panels.
Contacts
Searches in Contacts.
Global Units
Searches in Global Units.
External Events
Searches in External Events.
Components
Searches in Components.
E Search (II) Search in
Queue
F Buttons
Searches for Sites, whose Monitoring Status is set
to generate Alarms (ie Alarm Generation Mode
"+").
Searches only in the Queue.
- Test signal
Searches for Sites/Customers with missing Control
Signals.
Amux/TS
Searches for AMUX/TS.
Search
Begins the search.
Print
Prints the search result.
Clear all
Clears all search fields.
User Manual
interVIEW
116 Search Features
Advanced Search
Field
G Search
result
(table).
Shortcut
key
Description
Shows the result of the search, sorted by result
type (ie Customers, Panels, Contacts etc).
To perform an Advanced Search:
1. Do one of the following:
n In the DEW, select Customer>Advanced Search (Ctrl+Q).
n In the AHW, select Navigate>Advanced Search (Ctrl+Q).
2. Enter one (or more) search criteria.
3. Click Search.
interVIEW displays the search result in the table, divided in the respective tabs.
Note: If the search returns more than 500 posts, then interVIEW will only display the
first 500 results. If so, try to limit the search. You can increase the 500 limit. Please
contact Innovative for further information.
Note: If you search for a specific key (eg a specific Site No.), then interVIEW will
include passive Installations in the search (unless you employ wildcards).
4. To open the desired search result, do one of the following:
n Double-click on the search result.
n Highlight the search result and click OK.
Innovative Business Software A/S
Search Features 117
Passcard Search
Passcard Search
Passcard Search.
You can search for Passcards either using Contacts or Global Units.
Note: You can use wildcard characters when searching. See "Using wildcards" on the next
page.
To search for Passcards, which are linked to Contacts:
1. In the AHW, select Navigate>Find Passcard>Contact.
2. Search for Passcard:
Site Number
Passcard
Result
(blank)
(blank)
Contacts with Passcard on all Customers/Sites.
[Site Number]
(blank)
Contacts with Passcard on [Site Number].
[Site Number]
[Passcard]
Contacts with [Passcard] on [Site Number].
3. Click OK.
To search for Passcards, which are linked to Global Units:
1. In the AHW, select Navigate>Passcard Search Global Units.
2. Enter Passcard.
3. (Optional) By default, Passcard Search is limited to only search for Global Units, which are
linked to the current Customer/Site. Check Non-linked search to extend the Passcard
Search to include all Global Units.
4. Click OK.
User Manual
interVIEW
118 Search Features
Passcard Search
Using wildcards
Wildcards (or "wildcard characters") are characters, which may replace one (or more) characters. By combining wildcards (and any constants), you can create advanced expressions (also
known as regular expressions) to
n
n
n
perform advanced searches (see "Advanced Search" on page114).
match SIA/CID codes in connection with SIA/CID conversions.
filter unknown alarms .
The below overview shows examples of the use of wildcards in searches.
Wildcard
Character
%
Name
Description
percentage Matches any string
containing zero
(none) or more
characters.
Examples of wildcards
used in searches.
Examples of
wildcards used in
matching SIA/CID
signals.
%sen returns all content %A matches all SIA
ending in "sen" (eg
signals, which have
Jensen, Poulsen)
"A" as the second
letter in the SIA
%an returns all content
Event Type (eg BA,
containing "an" (eg
TA).
Daniel, Morgan).
Mc% returns content
beginning with "Mc" (eg
McBadden).
_
underscore Matches any single
character.
(
underscore
)
_ans% returns content,
which has "ans" as the
second, third and fourth
letter (eg Jansen,
Hansen).
_anne returns any string
of five characters, in
which the last four are
"anne" (eg Hanne, Janne,
Sanne).
[specifier ] square
brackets
Parentheses enclose [CK]lausen matches
either an interval or Clausen and Klausen.
a set (eg [a-f] or
[M-Z]inger matches
[abcdef]).
Minger, Ninger, Pinger,
Examples (interval): ..., Zinger.
[a-f] only matches "a,
b, c, d, e and f"
[0-9] matches 0, 1, 2,
3, 3, 5, 6, 7, 8 and 9.
Examples (set):
[abcdef] and
[fcdbae] matches the
same content (note:
the two sets are
identical in the
interval [a-f]).
The Specifier is case
sensitive.
Innovative Business Software A/S
G[HR] matches the
SIA codes GH and
GR.
E11[0-9] matches
all CID signals from
E110 to E119.
E1[0-9][0-9]
matches all CID
signals from E110 to
E199.
Search Features 119
Passcard Search
Wildcard
Character
Name
[^specifier] square
brackets
with
circumflex
Description
Examples of wildcards
used in searches.
Any single character
not within a specified
range [a-f] or some
specified characters
[a, b, c, d, e, f]
[^a-f]% returns all
entries containing a
surname beginning with
a letter, which comes
after the letter F.
Examples of
wildcards used in
matching SIA/CID
signals.
M[^c]% matches content
beginning with the letter
"M" and which does not
have the letter "c" as the
second character.
Wildcards for use in searches (overview).
User Manual
interVIEW
Innovative Business Software A/S
121
REPORTS
Innovative Business Software A/S
123
Reports
Reports
Report Templates (interVIEW format)
About Scheduled Reports (Auto Reports)
About Custom Reports
124
131
134
148
124 Reports
Reports
Reports
interVIEW can generate different types of Reports for invoicing or statistical purposes.
Note: Once the Report has been generated, interVIEW places it in the Report Queue. The
Server then processes the Reports one at a time.
Note: interVIEW automatically deletes Reports after three days.
Note: The date in "To date" is NOT included in the Report. For example, if you in "To date"
enter "10/06/2012", then the Report will only run to and include 09/06/2012 23:59:59. This
is indicated on the Reports using "(-)" meaning excluding.
n
Depending on the requirements, you can define the interval "From date" and "To date"
in three different ways:
n Leave the fields blank.
n Enter a date (DD/MM/YYYY). For example, "01/05/2010".
n Enter a date and time (DD/MM/YYYY HH:MM:SS). For example, "01/05/2010
09:00:00").
Note: Remember to insert a space between date and time ("YY HH").
n
Enter a time (HH:MM:SS). For example, "09:00:00".
Note: The date and time separators (eg "/", ":" or ",") depend on the regional
settings in Windows.
Examples
From Date
(empty)
To Date
Results in the following scope:
(empty)
From the oldest entry in the DB till now.
01/01/2010 (empty)
From 1 January 2010 00:00:00 till now.
(empty)
01/01/2010 From the oldest entry in the DB to 31
01/01/2010 31/01/2010 From 1 January 2010 00:00:00 to 30 January 2010 23:59:59.
Note: This scope does NOT generate a Report for the entire
month of January 2010, as interVIEW does not include the "To
date". See also the example below.
01/01/2010 01/02/2010 From 1 January 2010 00:00:00 to 31 January 2010 23:59:59 (ie the
entire month of January).
04/08/2009 04/08/2009 Returns an "Invalid range" error. This is because the same date is
specified, but as interVIEW does not include the "To" date in the
range, the range is zero. To generate a Report for a time range for
the same day, see below.
04/08/2009 05/08/2009 From 4 August 2009 00:00:00 to 4 August 2009 23:59:59 (ie 4
August).
04/08/2009 04/08/2009 From 4 August 2009 08:00:00 to 4 August 2009 17:00:00 (ie 4
08:00
17:00
August from 08:00 to 17:00).
Innovative Business Software A/S
Reports 125
Reports
You can do the following with Reports:
n
n
n
n
n
n
Create/Generate Reports (manually). See "Generating Reports" on the next page.
Print Reports. See "Printing Reports" on the next page.
Read Reports on the monitor. See "Previewing Reports (on the monitor)" on the next
page.
Create Report Templates. Report Templates contain a set of fixed parameters, which
you can then quickly load and the generate the Report. This way, you do not have to
enter the same parameters each time you generate a Report. See "Report Templates
(interVIEW format)" on page131.
Create Reports automatically according to a schedule (Auto Reports). You can create a schedule for when and how often you want to create and generate a Report and
also the parameters of the Report and then have inteVIEW automatically generate the
Report according to the schedule. See "About Scheduled Reports (Auto Reports)" on
page134.
Compress Reports automatically as ZIP files when above a certain size You do this in
the Control Centre.
User Manual
interVIEW
126 Reports
Reports
Generating Reports
1.
2.
3.
4.
Double-click on Reports (System Menu).
Double-click on the desired Report.
Complete the desired fields/checkboxes to define the scope of the Report.
Do one of the following:
n Click OK to generate the Report and leave the window open. This way, you can
quickly generate another Report without first having to open the System Menu.
n Click OK, close to generate the Report and close the window.
n Click Cancel to close the window without generating a Report.
n Click Reset fields to clear any values in the field.
5. Open the Report Queue in (Menu>Reports).
The next step is to see the status of the Report in the Report Queue. See "The Report Queue" on
page129.
Previewing Reports (on the monitor)
1. Ensure that the Report has been generated.
2. Right-click on the Report and select Preview.
The Report opens in a new window.
Printing Reports
1.
2.
3.
4.
Ensure that the Report has been generated.
Right-click on the Report and select Print.
Select Printer and Print Options.
Click OK.
Innovative Business Software A/S
Reports 127
Reports
The Report Queue window
The Report Queue displays the Reports (jobs), which are currently being generated or have
been generated in interVIEW.
The Report Queue window.
Description
A Menu bar. See "Menu bar (Report Queue window)" on the next page.
B Report Queue. See "The Report Queue" on page129.
C Number of Report jobs currently in the Report Queue.
D Checked: Automatically updates the Report Queue.
E Checked: Displays all Report jobs (ie for all Users).
Empty: Only displays the jobs generated by the current User.
F The context menu (right-click on the Report job). See "Context-Sensitive Menu" on page130.
User Manual
interVIEW
128 Reports
Reports
Menu bar (Report Queue window)
Menu bar (Report Queue window).
Command
File >
Description
Refresh (F5) Manually refreshes the Report Queue.
Note: You can configure interVIEW to automatically refresh
the Report Queue by checking Automatically update queue at
the bottom of the window.
Report >
Close
(Alt+F4).
Closes the window.
Properties
Displays the properties of the Report (ie when the Report was
generated, number of pages and other technical parameters).
Save As...
Saves the Report in one of the following formats: Adobe PDF,
Microsoft Excel XML, HTML, CSV, FR3, XML or JSON.
Open in
Microsoft
Excel
Opens the Report in Microsoft Excel (XML-format).
Print
Prints the Report.
Preview
Shows how the Report will look once printed.
Run again
Generates the Report again (using the same parameters and same
Job Number).
New Report Opens the Report parameter window to change parameters.
Cancel
Cancels the Report. The Report will not be generated.
Delete
Deletes the Report.
Note: You must have specific rights in order to delete other
users Report jobs.
Innovative Business Software A/S
Reports 129
Reports
The Report Queue
The Report Queue.
Field
Description
Job
Number
interVIEW automatically assigns a unique sequential number to each Report.
Report
Name
The Report Type.
Ordered
by
User ID.
Pages
Report size (number of pages).
Started
Date and time.
Monitoring The status icons indicate (a) in which format the Report will be available and (b)
Status
how far in the generation process the format is.
Microsoft
Excel
(XML)
Data
collection
Adobe
(PDF)
Printer
e-mail
Processing. The Report has Processing. Processing. Processing.
been saved as
an Excel file by
the user.
Ready.
The Report has Ready.
been saved as
an Excel file by
the user.
The Report
has been
sent to the
printer.
The Report has been
generated as a PDF file,
attached to an e-mail and
sent to the selected e-mail
recipient.
Comment Any comments.
User Manual
interVIEW
130 Reports
Reports
Context-Sensitive Menu
Right-click on a Report to open the context-sensitive menu.
The Context Sensitive Menu.
Send the
Message.
Description
Preview
Shows the Report as it will appear once printed.
Print
Prints the Report.
Regenerate
Regenerates the Report (using the same parameters and same Job Number).
New Report
Opens the Report parameter window to change parameters.
Cancel
Cancels the Report. The Report will not be generated.
Delete
Deletes the Report.
Note: You must have specific rights in order to delete other users Report
jobs.
Save As...
Saves the Report in one of the following formats: Adobe PDF, Microsoft Excel
XML, HTML, CSV, FR3, XML or JSON.
Open in
Opens the Report in Microsoft Excel XML format.
Microsoft Excel
Other formats... Opens the Report in the selected format.
Properties
Shows the properties for the Report.
Innovative Business Software A/S
Reports 131
Report Templates (interVIEW format)
Report Templates (interVIEW format)
Report Templates are Reports, which contain one or more fixed parameters. The fixed parameters can, for example, be a Site Group, a Hardware ID range or an e-mail address.
The advantage of using Report Templates is that you do not need to reenter the same set of parameters each time you generate the same Report.
For more information about parameters, see "Parameter Syntax (Auto Reports)" on page144.
You can also create Report Templates using Microsof Excel. Please contact Innovative for further
information.
Note: You can also configure interVIEW to automatically generate Reports according to a
schedule (eg. daily, weekly or on the 1st of every month). See "About Scheduled Reports
(Auto Reports)" on page134.
You can do the following with Report Templates:
n
n
n
n
n
Create Report Templates (interVIEW format). See "Creating Report Templates"
below.
Load Report Templates. See "Loading Report Templates" on the next page.
Edit Report Templates. See "Editing Report Templates" on page133.
Delete Report Templates. See "Deleting Report Templates" on page133.
Automatically generate Reports using schedules See "About Scheduled Reports
(Auto Reports)" on page134.
Creating Report Templates
1. Open the desired Report.
2. Complete the report parameters, which you want to form the Report Template.
3. In the white field below Templates, give the template a name/ID and click Save.
4. Verify that the parameters are as desired.
User Manual
interVIEW
132 Reports
Report Templates (interVIEW format)
5. Select whether you want the template to only be available for this Report Type or for all
Report Types.
6. Select which users are allowed to use the template.
Note: The "All" function is currently not supported.
7. If you want to automatically load this template every time you open this Report Type,
then check Load this template... .
8. Click Save.
The Report Template has now been created and saved. To use the Report Template form now,
you must first load it. See "Loading Report Templates" below.
Loading Report Templates
1. Open the desired Report Type.
2. In Templates, select the Report Template.
Note: If the list is empty, then no templates are available for this Report Type.
3. Click Load.
Note: If the Report contains parameters, which also exist in the Report Template
being loaded, then the former will be overwritten by the content in the template
being loaded. For example, if you have manually entered values in the HwID range
and then load a template, which also contains a HwID range, then it is the content of
the HwID range in the template being loaded, which will be used.
4. To load additional templates/parameters (to combine Report Templates), then repeat
from step 2.
The Report Template is now loaded. The next step is to generate the Report. See "Generating
Reports" on page126.
Innovative Business Software A/S
Reports 133
Report Templates (interVIEW format)
Editing Report Templates
1. Load the Report Template. See "Loading Report Templates" on the previous page.
2. Edit the content.
3. Click Save.
4. Confirm the changes.
5. Click Save.
The Report Template has now been edited.
Deleting Report Templates
1.
2.
3.
4.
Open the Report, to which the Report Template is linked.
Select the Report Template from the list.
Click Delete Report Template.
Confirm delete.
Note: This action cannot be undone.
User Manual
interVIEW
134 Reports
About Scheduled Reports (Auto Reports)
About Scheduled Reports (Auto Reports)
You can configure interVIEW to automatically generate Reports according to a schedule. This
way, for example, on the first of every month, interVIEW can automatically generate a Report
for the preceding month and send it via e-mail.
An Auto Report is a Report/Report Template (incl. parameters defining the scope), which is
linked to a schedule. When the dates on the schedule are reached, interVIEW automatically generates a Report, which is then placed in the Report Queue and run as a normal Report.
Auto Reports use a special parameter syntax to define the relative times used to define the
scope of the Report. For example, the syntax "-7d" means that the scope extends back seven
days/one week in time from now. For more information, see "Parameter Syntax (Auto Reports)"
on page144.
Note: The rules for (conventional) Reports also apply to Auto Reports. In other words, you
must keep in mind that the date in the "To Date" field, as you define the interval, is NOT
included, when interVIEW generates the Auto Report. For more information, see "Examples"
on page124
You can do the following with Auto Reports:
n
n
n
n
n
n
Create Scheduled Reports (Auto Reports). See "Create Schedule" on the facing page.
View an overview of currently active (and inactive) Auto Reports. See "Auto Report
overview" on page143.
Disable/enable Auto Reports. You can disable/enable Auto Reports at your discretion. This way, you can temporarily disable an Auto Report. The Auto Report will
remain on the list, but it will not be generated until it is enabled once again. See "Auto
Report overview" on page143.
Generating Auto Reports manually. Although interVIEW automatically generates the
Auto Report according to its schedule, it may be convenient to occasionally be able to
manually generate it at other times then scheduled. See "Auto Report overview" on
page143.
Editing Auto Reports. See "Auto Report overview" on page143.
Deleting Auto Reports. See "Auto Report overview" on page143.
Innovative Business Software A/S
Reports 135
About Scheduled Reports (Auto Reports)
Step 1 - Create Schedule
You can create anything from a simple schedule (eg every Monday) to complex schedules (eg
every other Tuesday in every other month). The initial four options in this dialog are simple (ie
fixed and predefined) runs. The fifth ("Customised") enables you to create "complex" runs.
1. Do one of the following:
n To create an Auto Report, which is not based on a Report Template, open the
Report Type, which you want to generate automatically and complete the parameters.
n To create an Auto Report based on a Report Template, open the Report Type and
load the template. For more information, see "Report Templates (interVIEW
format)" on page131.
2. Click Create Schedule.
3. Do one of the following:
n To create a simple schedule, see "Select Simple Run" on the next page.
n To create a complex/customised schedule, see "Create Advanced Run" on
page138.
User Manual
interVIEW
136 Reports
About Scheduled Reports (Auto Reports)
Step 2 - Select Simple Run
Note: If you do not want to select one of the predefined simple runs, then skip this step and
go to "advanced run".
1. Select the tab Basic.
The above example shows a simple run, which has been scheduled for "the first Monday
of every month". This is verified in the field, which calculates and displays when the next
to runs (at the current settings) will be run, that is Monday 5-5-14 and Monday 2-6-14 at
08:00 (8 AM), respectively.
2. Select one of the following recurrences:
n
n
n
n
Daily (ie every day at 08:00)
Weekly (ie every Monday at 08:00)
The first of every month (ie 1 January, 1 February, 1 March etc at 08:00)
The first Monday of every month (at 08:00)
Note: interVIEW concurrently calculates and shows when the following two runs are
scheduled for on the basis of the current settings.
2. (Optional) By default, all four simple runs are set to 08:00. To change this, simply enter a
new time (format HH:MM).
Note: The selection automatically changes to "User Defined (see advanced)". This is
normal.
Innovative Business Software A/S
Reports 137
About Scheduled Reports (Auto Reports)
Note: Depending on the number of Auto Reports, which - when scheduled to be generated - are placed in the Report Queue, then the actual run time may be delayed
some minutes. For example, if you schedule to generate four Auto Reports on the
same day at 08:00, then interVIEW will generate them on a first-come-first-serve principle and depending on the size of the four Auto Reports, numbers two, three and
four may be delayed a few seconds or minutes after 08:00.
3. Click Next.
Next step is to confirm the parameters and scope for the Auto Report. See "Defining the parameters and scope of the Auto Report." on page141.
User Manual
interVIEW
138 Reports
About Scheduled Reports (Auto Reports)
Step 3 - Create Advanced Run
Note: This step is only required if you want to automatically generate Reports at any other
time than the four predefined in the previous step "simple runs".
1. Select the tab Advanced and then selected the tab Date.
The above example generates an Auto Report every other Tuesday in every other month.
For a full explanation and more examples, see page ...
2. Check the boxes to define the desired date(s) and times of month etc.
Note: interVIEW concurrently checks that the combination of the different months,
weekdays and day of the month results in at least one valid date. This is to avoid that
you inadvertently create the date 31 February or create recurrences which are more
than six months apart (considered an error by interVIEW). Consequently, a valid date
is a date in which at least one of the fields in months, weekdays and days of the month
match each other. Within each of these three groups, interIVEW applies the logical
expression "OR" and between the groups, interVIEW applies the logical expression
"AND". Consequently, a valid date is a date, where January OR February OR March..
AND Monday OR Tuesday OR Wednesday... AND the 1st OR the 2nd OR the 3rd...
exists.
3. Select the tab Time.
Innovative Business Software A/S
Reports 139
About Scheduled Reports (Auto Reports)
The above example is set to 08:00 o'clock.
4. Check the boxes to define the desired time.
5. Select the tab Basic and confirm that the schedule for the following two runs are as
expected.
6. If not, then select the tab Advanced again and change the settings until the scheduled
runs are as desired.
7. Click Next.
User Manual
interVIEW
140 Reports
About Scheduled Reports (Auto Reports)
Next step is to confirm the parameters and scope for the Auto Report. See "Defining the parameters and scope of the Auto Report." on the facing page.
Note: Depending on the number of Auto Reports, which - when scheduled to be generated are placed in the Report Queue, then the actual run time may be delayed some minutes. For
example, if you create a schedule, which generates four Auto Reports on the same day at
08:00, then interVIEW will generate them on a first-come-first-serve principle and depending on the size of the four Auto Reports, numbers two, three and four may be delayed a few
seconds or minutes after 08:00.
Innovative Business Software A/S
Reports 141
About Scheduled Reports (Auto Reports)
Step 4 - Defining the parameters and scope of the Auto Report.
In this step, you determine which parameters you want to include in as well as the scope (ie
"from/to") of the Auto Report.
1. Check Enable for each parameter, which you want to include and also define the expression for the desired time range (eg "-1m" = "one month back in time" = "the previous
month"). For more information about the parameter syntax, see "Parameter Syntax
(Auto Reports)" on page144.
In the above example, interVIEW generates an Auto Report on the first day of every
month (as defined in the tab "Recurrence"), which contains Alarm Log Periods, Installation Dates and Day Periods, going back one month (From date = "-1m") from the time,
when interVIEW has scheduled to generate the Report (To date = "now" = "on the 1st of
every month"). interVIEW constantly calculates and displays which dates/times, which
will be used: the field "To date" is set to "now" and as the Auto Reports has been scheduled to run on "every 1st day of the month", interVIEW has calculated the next run when this example was created - to Thursday 1st May 2014. The field "From" has been
set to "-1m" and will therefore go one month back in time from 1st May 2014, which is
from (Tuesday) 1st April 2014. See more examples on page 188.
2. Give the Auto Report a name/ID.
3. Enter a brief Comment .
4. Click OK.
The Auto Report is now saved and enabled and will appear on the Auto Report overview. See
"Auto Report overview" on page143.
The next step is to test the Auto Report to ensure that it generates the desired content (ie. parameters and scope). See
Note: Depending on the number of Auto Reports, which - when scheduled to be generated are placed in the Report Queue, then the actual run time may be delayed some minutes. For
example, if you schedule to generate four Auto Reports on the same day at 08:00, then interVIEW will generate them on a first-come-first-serve principle and depending on the size of
the four Auto Reports, numbers two, three and four may be delayed a few seconds or
minutes after 08:00.
User Manual
interVIEW
142 Reports
About Scheduled Reports (Auto Reports)
Step 5 - Testing the Auto Report
In this step you test the Auto Report by generating it manually to verify that the parameters and
the scope generates the desired content.
1. Open the Auto Report overview (Reports>Auto Report overview). See "Auto Report
overview" on the facing page.
2. Highlight the Auto Report, right-click and select Run now. The Auto Report is now placed
in the Report Queue.
Tip! Note the Report job number. This will make it easier to find it in the Report
Queue afterward.
3. Open the Report Queue (Reports>Report Queue). See "The Report Queue" on page129.
4. When the Report has been generated, then highlight it, right-click and select Preview.
5. Verify that the Report contains the desired parameters and scope. Otherwise, return to
the Auto Report overview, right-click the Auto Report, select Settings, edit the desired
parameters, save the Auto Report and repeat the procedure from step 2.
6. (Optional) Highlight the Auto Report, right-click and select Delete.
7. Close the Auto Report overview and the Report Queue window.
The Auto Report has now been created as desired and will be generated at the scheduled date/time with the desired content and scope. To enable/disable, edit, delete etc. Auto Reports, open
"Auto Report overview" on the facing page.
Innovative Business Software A/S
Reports 143
About Scheduled Reports (Auto Reports)
Auto Report overview
The Auto Report overview contains the scheduled Reports.
Auto Report overview.
Description
A Menu
bar
File >
Refresh
(F5)
Refreshes the window.
Close
Close and exits the window.
(Alt+F4).
Auto
Report >
Settings
Opens the settings for the Auto Report to edit them.
Run now Generates the Auto Report now.
B Auto
Name
Reports
Enabled
Enable
Enables the Auto Report. The Auto Report is automatically
generated according to its schedule.
Disable
Disables the Auto Report. The Auto Report will not be
generated before it is enabled again.
Delete
Deletes the Auto Report.
The name of the Auto Report.
1 = The Auto Report is enabled and will be generated
according to its schedule.
0 = The Auto Report is disabled.
Most
recent
run
Date and time for the most recent run.
Number
of runs
How many times the Auto Report has been generated so far
(incl. any manual runs).
C Delete
Deletes the highlighted Auto Report.
D Enable
Enables the Auto Report.
User Manual
interVIEW
144 Reports
About Scheduled Reports (Auto Reports)
Parameter Syntax (Auto Reports)
The parameter syntax describes the times used to create schedules for Reports (see "About
Scheduled Reports (Auto Reports)" on page134).
You can define times in Auto Reports as follows:
As relative time (eg one month back in time, a week back in time and two hours forward
in time).
As absolute time (eg a specific date or a specific time).
n
n
The parameter syntax is as follows:
<relative>[,<absolute>]
The parameter syntax has the following properties:
it consists of two parts: a relative time and an absolute time
the two parts have different syntax
the meaning/interpretation of the absolute time depends on the relative time, which in
turn means that the absolute time part is optional (not required)
n
n
n
Relative times
The relative times are calculated from the time (date/time) the schedule has been set to generate the Auto Report.
The parameter syntax for <relative> is as follows:
<sign><integer><type>
where
<sign> is either - (minus/negative) or + (plus/positive). Minus indicates "back in time". Plus indicates "forward in time".
<integer> is an integer larger than or equal to 0.
<type> is one of the following five units of time: y (year), m (month), d (day), h (/hours) or i
(minutes).
E X A M P L E
-1m means "one month back in time".
-7d means "seven days/one week back in time".
-2m+2d means "two months back in time and then two days forward in time"
See more examples in the overview.
Note: To indicate weeks, use the syntax "7d" per week. For example, "21d" means three
weeks.
Note: The relative times must be indicated in descending order (ie. y m d h i).
Note: It is not possible to indicate seconds.
See more examples in the overview.
Innovative Business Software A/S
Reports 145
About Scheduled Reports (Auto Reports)
Absolute times
The parameter syntax for <absolute> is as follows:
<day>-<month> <hh>:<mm>
where
<day> is an integer between 1 and 31.
- (hyphen) separates days from months.
<month> is an integer between 1 and 12.
(space) separates months from hours.
<hh> is an integer between 0 and 23.
: (colon) separates hours from minutes.
<mm> is an integer between 0 and 59.
E X A M P L E
Let's say that we indicate the relative time as -1m (ie. "one month back in time"). In that case, the
first two values preceding the separator will be interpreted as the day. The following two values
will be interpreted as hours and then minutes.
The expression -1m,01 00:00 means "go back one month, go forward to the 1st of that month
and go to midnight").
The expression -2m+2d,04 means "go back two months, go forward two days and go to 04:00 (4
AM)".
See more examples in the overview.
The first unit in the absolute time will be the unit, which is immediately below the lowest unit in
the relative time and so on.
Note: You may leave out the following times. For example, it is sufficient to enter "08:00"
(hh:mm) to mean "08:00:00" (hh:mm:ss).
Note: The comma separates the date from the time. In other words: interVIEW will interpret
everything succeeding the comma as a time/clock indication (hh:mm).
User Manual
interVIEW
146 Reports
About Scheduled Reports (Auto Reports)
Expression
now
Description/definition
the time (date/time) at which the Auto Report is scheduled
to run according to its schedule.
Examples
09-05-14
12:00:00
(="now")
09-05-14
12:00:00
Note: The expression "now" is a separate syntax and
cannot be combined with other expressions.
See "Select Simple Run" on page136 and "Create Advanced
Run" on page138.
-1y
one year back
09-05-13
12:00:00
-1m
one month back
09-04-14
12:00:00
-1d
one day back
08-05-14
12:00:00
-1h
one hour back
09-05-14
11:00:00
-7d
one week back
09-05-14
12:00:00
-1m-1d
one month back and then one day back
08-04-14
12:00:00
-1m+1d
one month back and the one day forward
10-04-14
12:00:00
-1d,08
one day back from 08:00:00 (8 AM)
08-05-14
08:00:00
one month back from 08:00:00 (8 AM)
09-04-14
08:00:00
or
-1d,08:00
-1m-0d,08
or
-1m-0d,08:00
Note: In this case, you must insert "-0d" (zero days)
immediately following the months in the syntax
Otherwise, interVIEW will interpret the first parameter
following the comma as days and not hours. In other
words, if you only wrote -1m,08, then interVIEW would
interpret the expression as "one month back and to the
eight day".
-3m
three months (a quarter) back
09-02-14
12:00:00
-1m,01 00:00
one month back and then to the 1st of the month at 00:00
(midnight)
01-04-14
00:00:00
-2m+2d,04
two months back, two days forward and to 04:00 (4 AM).
11-03-14
04:00:00
-0d,03
today at 03:00:00 (3 AM)
or
-0d,03:00
-1m,01
Innovative Business Software A/S
one month back to the 1st of the month
01-04-14
12:00:00
Reports 147
About Scheduled Reports (Auto Reports)
Expression
Description/definition
Examples
09-05-14
12:00:00
(="now")
-1m,01 00:00
one month back to the 1st of the month and at midnight
01-04-14
00:00:00
-1m,02
one month back to the 2nd of the month
02-04-14
12:00:00
Parameter syntax for times in Auto Reports.
User Manual
interVIEW
148 Reports
About Custom Reports
About Custom Reports
*** THIS TOPIC IS UNDER REVISION ***
Custom Reports are Reports, in which you yourself can define the content.
These Reports may also be generated as Auto Reports (see "About Scheduled Reports (Auto
Reports)" on page134).
You can do the following with Custom Reports:
n
Create Custom Reports. See "Creating Report Templates" on page131.
Creating Custom Reports
*** THIS TOPIC IS UNDER REVISION ***
Innovative Business Software A/S
149
Report Types
150 Report Types
Customers (Report)
Generates a Report about Customers/Sites.
Innovative Business Software A/S
Report Types 151
Parameter
Functional Area
Instruction
Date
Select Instruction Date range.
Installation
Date
Select Installation Date range.
Site/Customer Site/Customer number range.
Number
Enter the range of the Hardware ID.
HwID
Old Customer Enter the range of the Old Customer Number.
Number
Select Site Group.
Site Group
Include
Passive
Select whether to include Passive Sites or not.
Sort by
Select sort order.
Printer Name Select Printer.
Note: You can also print the Report at a later time from the Report Queue.
Unit Type (email)
Select Global Unit Type to filter the list of e-mail recipients.
Recipient (email)
To attach the Report (as a PDF file) to an e-mail, select the recipient.
Note: The Global Unit (recipient) must have an e-mail address to be on the
list.
Subject (email)
Provide a subject (as you want it to appear in the subject line in the e-mail).
File Name (e- Type the file name (as you want it to appear on the attached Report in the email). The Report is automatically sent as soon as it has been generated.
mail)
Comment
Enter a brief Comment .
Templates
Button
Function
Load
Loads a Report Template.
Save
Saves the current Report as a Report Template.
Delete
Deletes the Report Template.
See "Report Templates (interVIEW format)" on page131.
Auto Reports
Button
Create Auto
Report
Function
Creates the current Report as an Auto Report (ie a Report,
which interVIEW automatically generates according to a
schedule).
See "About Scheduled Reports (Auto Reports)" on page134.
Button
OK
Function
Creates the Report as a job in the Report Queue and leaves the dialog open.
User Manual
interVIEW
152 Report Types
Button
Function
OK, close
Creates the Report as a job in the Report Queue and closes the dialog open.
Cancel
Closes the dialog without generating a Report.
Clear fields Deletes any values in the fields.
[Red digit] The accumulated number of Reports.
Innovative Business Software A/S
Report Types 153
Instructions (Report)
If interVIEW becomes temporarily unavailable, you can still perform manual alarm handling
using Instructions. The Instructions report is based on the HwID and contains all relevant data for
alarm handling.
User Manual
interVIEW
154 Report Types
Parameter
Functional Area
Instruction
Date
Select Instruction Date range.
Installation
Date
Select Installation Date range.
Customer
Number
Enter Site Number interval.
HwID
Enter the range of the Hardware ID.
Old
Customer
Number
Enter the range of the Old Customer Number.
Site Group
Select Site Group.
Include
Passive
Select whether to include Passive Sites or not.
Include
Includes Codewords.
Codewords
Select Printer.
Printer
Name
Note: You can also print the Report at a later time from the Report Queue.
Unit Type
(e-mail)
Select Global Unit Type to filter the list of e-mail recipients.
Recipient
(e-mail)
To attach the Report (as a PDF file) to an e-mail, select the recipient.
Note: The Global Unit (recipient) must have an e-mail address to be on the list.
Subject (email)
Provide a subject (as you want it to appear in the subject line in the e-mail).
File Name
(e-mail)
Type the file name (as you want it to appear on the attached Report in the email). The Report is automatically sent as soon as it has been generated.
Comment
Enter a brief Comment .
Templates
Button
Function
Load
Loads a Report Template.
Save
Saves the current Report as a Report Template.
Delete
Deletes the Report Template.
See "Report Templates (interVIEW format)" on page131.
Auto Reports
Button
Create Auto
Report
Function
Creates the current Report as an Auto Report (ie a Report,
which interVIEW automatically generates according to a
schedule).
See "About Scheduled Reports (Auto Reports)" on page134.
Innovative Business Software A/S
Report Types 155
Button
Function
OK
Creates the Report as a job in the Report Queue and leaves the dialog open.
OK, close
Creates the Report as a job in the Report Queue and closes the dialog open.
Cancel
Closes the dialog without generating a Report.
Clear fields Deletes any values in the fields.
[Red digit] The accumulated number of Reports.
User Manual
interVIEW
156 Report Types
Alarm log per incident (Report)
Generates a Report based on an Incident.
Innovative Business Software A/S
Report Types 157
Parameter
Functional Area
Site
Number
Enter Site Number interval.
HwID
Enter the range of the Hardware ID.
Incident
Number
Enter the Incident Number.
Old
Customer
Number
Enter Site Number interval.
Alarm Log
Period
Select range for the Alarm Log period.
Hour Period Enter time range. This way, you only include signals received within the given
period. For example, if you enter 18:00:00 and 08:00:00, respectively, then the
Report will only include signals received from 6 PM to 7 AM the following day.
Install Date
Select Installation Date range.
Site Group
Select Site Group.
Include
Passive
Select whether to include Passive Sites or not.
Global Unit Displays the total number (summation) of Global Units of a specific kind (eg
Type
vehicles or individuals), associated with each Incident. This way, you can quickly
summation get an overview of the number of resources associated with a specific Incident.
You can view two different summations:
Disposition
(pane)
(Optional) Select one (or more) Disposition Codes.
Note: If left blank, the codes will not be part of the filter.
Zone Type (Optional) Select on (or more) Zone Types from the Alarm Log, which you want to
(Alarm Log) include.
Other Event (Optional) Select on (or more) Event Codes to define a logical expression.
Codes
Panes
Note: Within each pane, interVIEW applies the logical operator OR and
(pane)
between the panes, interVIEW applies the logical operator AND.
E X A M P L E
User Manual
interVIEW
158 Report Types
Parameter
Functional Area
Deselect
(Optional) Select on (or more) Event Codes for those Incidents, which you do
Incident (by NOT want to include.
Event Code)
Zone Type
(pane)
Output:
(Optional) Select one (or more) Zone Types (on the Sum Log).
Note: If left empty, the Zone Types will be excluded from the filter.
EITHER select which details to include.
Select
details
Output:
OR select which details to exclude.
OR deselect
details
Show
Details
Includes the details as entered in the above two fields.
Note: If left blank, the details are excluded - also if the detail fields contain
data.
Include
Caller ID
Includes the Caller ID ("A-number") (ie. the incoming phone number) on the
details.
Include Log Includes Log-Only signals on the details.
Only
Include
Long Texts
Includes the content of the "large text pane" in the window Alarm Log Details.
See "Alarm Log Details (window)" on page66.
Show
Incident
data
Includes Incident Fields.
Show
Callouts
Show Sum
Log Times
Includes Sum Log Time Groups.
Insert page
break
Automatically inserts page break before each separate Incident.
Sort Order
Select sort order.
Printer
Name
Select Printer.
Note: You can also print the Report at a later time from the Report Queue.
Unit Type
(e-mail)
Select Global Unit Type to filter the list of e-mail recipients.
Recipient
(e-mail)
To attach the Report (as a PDF file) to an e-mail, select the recipient.
Note: The Global Unit (recipient) must have an e-mail address to be on the list.
Subject (email)
Provide a subject (as you want it to appear in the subject line in the e-mail).
File Name
(e-mail)
Type the file name (as you want it to appear on the attached Report in the email). The Report is automatically sent as soon as it has been generated.
Comment
Enter a brief Comment .
Innovative Business Software A/S
Report Types 159
Templates
Button
Function
Load
Loads a Report Template.
Save
Saves the current Report as a Report Template.
Delete
Deletes the Report Template.
See "Report Templates (interVIEW format)" on page131.
Auto Reports
Button
Create Auto
Report
Function
Creates the current Report as an Auto Report (ie a Report,
which interVIEW automatically generates according to a
schedule).
See "About Scheduled Reports (Auto Reports)" on page134.
Button
Function
OK
Creates the Report as a job in the Report Queue and leaves the dialog open.
OK, close
Creates the Report as a job in the Report Queue and closes the dialog open.
Cancel
Closes the dialog without generating a Report.
Clear fields Deletes any values in the fields.
[Red digit] The accumulated number of Reports.
User Manual
interVIEW
160 Report Types
Alarm Log (per Site) (Report)
Generates a Report based on an Incident (per Site).
Innovative Business Software A/S
Report Types 161
Parameter
Functional Area
Site/Customer Enter Site Number interval.
Number
HwID
Enter the range of the Hardware ID.
Alarm Log
Period
Select range for the Alarm Log period.
Install Date
Select Installation Date range.
Hour Period
Enter time range. This way, you only include signals received within the given
period. For example, if you enter 18:00:00 and 08:00:00, respectively, then
the Report will only include signals received from 6 PM to 7 AM the following
day.
Old Customer Enter Site Number interval.
Number
Site Group
Select Site Group.
Include
Passive
Select whether to include Passive Sites or not.
Sort Order
Select sort order.
Disposition
(Optional) Select one (or more) Disposition Codes.
(pane)
Zone Type
(pane)
Other Event
Codes Panes
(pane)
Note: If left blank, the codes will not be part of the filter.
(Optional) Select one (or more) Zone Types (on the Sum Log).
Note: If left empty, the Zone Types will be excluded from the filter.
(Optional) Select on (or more) Event Codes to define a logical expression.
Note: Within each pane, interVIEW applies the logical operator OR and
between the panes, interVIEW applies the logical operator AND.
E X A M P L E
Zone Type
(Alarm Log)
(Optional) Select on (or more) Zone Types from the Alarm Log, which you want
to include.
Output: Select EITHER select which details to include.
details
User Manual
interVIEW
162 Report Types
Parameter
OR deselect
details
Functional Area
OR select which details to exclude.
Include Caller Includes the Caller ID ("A-number") (ie. the incoming phone number) on the
ID
details.
Include Long
Texts
Includes the large text pane on the details.
Include all
Log-Only
Includes all Log-Only signals on the details - including the signals, which do not
form part of the Incident itself.
Printer Name Select Printer.
Note: You can also print the Report at a later time from the Report Queue.
Global Unit
Type
Select Global Unit Type to filter the list of e-mail recipients.
(e-mail)
Recipient (email)
To attach the Report (as a PDF file) to an e-mail, select the recipient.
Note: The Global Unit (recipient) must have an e-mail address to be on the
list.
Subject (email)
Provide a subject (as you want it to appear in the subject line in the e-mail).
File Name (e- Type the file name (as you want it to appear on the attached Report in the email)
mail). The Report is automatically sent as soon as it has been generated.
Comment
Enter a brief Comment .
Templates
Button
Function
Load
Loads a Report Template.
Save
Saves the current Report as a Report Template.
Delete
Deletes the Report Template.
See "Report Templates (interVIEW format)" on page131.
Auto Reports
Button
Create Auto
Report
Function
Creates the current Report as an Auto Report (ie a Report,
which interVIEW automatically generates according to a
schedule).
See "About Scheduled Reports (Auto Reports)" on page134.
Button
Function
OK
Creates the Report as a job in the Report Queue and leaves the dialog open.
OK, close
Creates the Report as a job in the Report Queue and closes the dialog open.
Cancel
Closes the dialog without generating a Report.
Clear fields Deletes any values in the fields.
[Red digit] The accumulated number of Reports.
Innovative Business Software A/S
Report Types 163
User Manual
interVIEW
164 Report Types
Open/Close (Report)
This Report identifies and sorts the Panels, which are linked to O/C-calendars and generates a list
of all data (in relation to the Calendar).
Innovative Business Software A/S
Report Types 165
Parameter
Alarm Log
Period
Functional Area
Select range for the Alarm Log period.
Site/Customer Enter Site Number interval.
Number
Enter the range of the Hardware ID.
HwID
Old Customer Enter the range of the Old Customer Number.
Number
Select Site Group.
Site Group
Include
Passive
Select whether to include Passive Sites or not.
Sort Order
Select sort order.
Printer Name Select Printer.
Note: You can also print the Report at a later time from the Report Queue.
Unit Type (email)
Select Global Unit Type to filter the list of e-mail recipients.
Recipient (email)
To attach the Report (as a PDF file) to an e-mail, select the recipient.
Note: The Global Unit (recipient) must have an e-mail address to be on the
list.
Subject (email)
Provide a subject (as you want it to appear in the subject line in the e-mail).
File Name (e- Type the file name (as you want it to appear on the attached Report in the email). The Report is automatically sent as soon as it has been generated.
mail)
Comment
Enter a brief Comment .
Templates
Button
Function
Load
Loads a Report Template.
Save
Saves the current Report as a Report Template.
Delete
Deletes the Report Template.
See "Report Templates (interVIEW format)" on page131.
Auto Reports
Button
Create Auto
Report
Function
Creates the current Report as an Auto Report (ie a Report,
which interVIEW automatically generates according to a
schedule).
See "About Scheduled Reports (Auto Reports)" on page134.
Button
Function
OK
Creates the Report as a job in the Report Queue and leaves the dialog open.
OK, close
Creates the Report as a job in the Report Queue and closes the dialog open.
User Manual
interVIEW
166 Report Types
Button
Cancel
Function
Closes the dialog without generating a Report.
Clear fields Deletes any values in the fields.
[Red digit] The accumulated number of Reports.
Innovative Business Software A/S
Report Types 167
Site Statistics (Report)
The Site Statistics report counts the number of sites that fulfill certain requirements. This way,
you can divide the number of Sites based on Class, Industry, Installation Type etc.
User Manual
interVIEW
168 Report Types
Parameter
Functional Area
Select Installation Date range.
Install Date
Site/Customer Enter Site Number interval.
Number
Enter the range of the Hardware ID.
HwID
Old Customer Enter the range of the Old Customer Number.
Number
Select Site Group.
Site Group
Select whether to include Passive Sites or not.
Include
Passive
Group by
Select Grouping.
Printer Name Select Printer.
Note: You can also print the Report at a later time from the Report Queue.
Unit Type (email)
Select Global Unit Type to filter the list of e-mail recipients.
Recipient (email)
To attach the Report (as a PDF file) to an e-mail, select the recipient.
Note: The Global Unit (recipient) must have an e-mail address to be on the
list.
Subject (email)
Provide a subject (as you want it to appear in the subject line in the e-mail).
File Name (e- Type the file name (as you want it to appear on the attached Report in the email). The Report is automatically sent as soon as it has been generated.
mail)
Comment
Enter a brief Comment .
Templates
Button
Function
Load
Loads a Report Template.
Save
Saves the current Report as a Report Template.
Delete
Deletes the Report Template.
See "Report Templates (interVIEW format)" on page131.
Auto Reports
Button
Create Auto
Report
Function
Creates the current Report as an Auto Report (ie a Report,
which interVIEW automatically generates according to a
schedule).
See "About Scheduled Reports (Auto Reports)" on page134.
Button
Function
OK
Creates the Report as a job in the Report Queue and leaves the dialog open.
OK, close
Creates the Report as a job in the Report Queue and closes the dialog open.
Cancel
Closes the dialog without generating a Report.
Clear fields Deletes any values in the fields.
Innovative Business Software A/S
Report Types 169
Button
Function
[Red digit] The accumulated number of Reports.
User Manual
interVIEW
170 Report Types
Alarm Incident Statistics (Report)
Generates a Report based on Incidents (grouped).
Innovative Business Software A/S
Report Types 171
Parameter
Functional Area
Site/Customer Site/Customer number range.
Number
HwID
Enter the range of the Hardware ID.
Alarm Log
Period
Select range for the Alarm Log period.
Hour Period
Enter time range. This way, you only include signals received within the given
period. For example, if you enter 18:00:00 and 08:00:00, respectively, then
the Report will only include signals received from 6 PM to 7 AM the following
day.
Old Customer Enter Site Number interval.
Number
Install Date
Select Installation Date range.
1. Grouping
Select grouping (first level).
2. Grouping
Select grouping (second level).
Site Group
Select Site Group.
Include
Passive
Select whether to include Passive Sites or not.
Disposition
(Optional) Select one (or more) Disposition Codes.
(pane)
Zone Type
(Alarm Log)
Other Event
Codes Panes
(pane)
Note: If left blank, the codes will not be part of the filter.
(Optional) Select on (or more) Zone Types from the Alarm Log, which you want
to include.
(Optional) Select on (or more) Event Codes to define a logical expression.
Note: Within each pane, interVIEW applies the logical operator OR and
between the panes, interVIEW applies the logical operator AND.
E X A M P L E
Excl Incidents (Optional) Select on (or more) Event Codes for those Incidents, which you do
(Event Codes) not want to include.
Zone Type
(pane)
(Optional) Select one (or more) Zone Types (on the Sum Log).
Note: If left empty, the Zone Types will be excluded from the filter.
User Manual
interVIEW
172 Report Types
Parameter
Functional Area
Printer Name Select Printer.
Note: You can also print the Report at a later time from the Report Queue.
Unit Type (email)
Select Global Unit Type to filter the list of e-mail recipients.
Recipient (email)
To attach the Report (as a PDF file) to an e-mail, select the recipient.
Note: The Global Unit (recipient) must have an e-mail address to be on the
list.
Subject (email)
Provide a subject (as you want it to appear in the subject line in the e-mail).
File Name (e- Type the file name (as you want it to appear on the attached Report in the email)
mail). The Report is automatically sent as soon as it has been generated.
Comment
Enter a brief Comment .
Templates
Button
Function
Load
Loads a Report Template.
Save
Saves the current Report as a Report Template.
Delete
Deletes the Report Template.
See "Report Templates (interVIEW format)" on page131.
Auto Reports
Button
Create Auto
Report
Function
Creates the current Report as an Auto Report (ie a Report,
which interVIEW automatically generates according to a
schedule).
See "About Scheduled Reports (Auto Reports)" on page134.
Button
Function
OK
Creates the Report as a job in the Report Queue and leaves the dialog open.
OK, close
Creates the Report as a job in the Report Queue and closes the dialog open.
Cancel
Closes the dialog without generating a Report.
Clear fields Deletes any values in the fields.
[Red digit] The accumulated number of Reports.
Innovative Business Software A/S
Report Types 173
User Manual
interVIEW
174 Report Types
Signal Count per Site (Report)
This Report identifies Panels, which have not received any signals for a given period. This is generalised to one signal per Customer/Panel report. Signals are counted as per Customer/Panel
combination.
Innovative Business Software A/S
Report Types 175
Parameter
Functional Area
Alarm Log
Period
Select range for the Alarm Log period.
Number of
Signals
Enter the number of signals from which you wish to generate the report. This
option only displays the Customers/panels that fulfil the number criteria. If left
empty, then all Customers/Panels will be displayed.
Install Date
Select Installation Date range.
Site/Customer Enter Site Number interval.
Number
HwID
Enter the range of the Hardware ID.
Old Customer Enter the range of the Old Customer Number.
Number
Site Group
Select Site Group.
Include
Passive
Select whether to include Passive Sites or not.
Sort Order
Select sort order.
Printer Name Select Printer.
Note: You can also print the Report at a later time from the Report Queue.
Unit Type (email)
Select Global Unit Type to filter the list of e-mail recipients.
Recipient (email)
To attach the Report (as a PDF file) to an e-mail, select the recipient.
Note: The Global Unit (recipient) must have an e-mail address to be on the
list.
Subject (email)
Provide a subject (as you want it to appear in the subject line in the e-mail).
File Name (e- Type the file name (as you want it to appear on the attached Report in the email)
mail). The Report is automatically sent as soon as it has been generated.
Comment
Enter a brief Comment .
Templates
Button
Function
Load
Loads a Report Template.
Save
Saves the current Report as a Report Template.
Delete
Deletes the Report Template.
See "Report Templates (interVIEW format)" on page131.
Auto Reports
Button
Create Auto
Report
Function
Creates the current Report as an Auto Report (ie a Report,
which interVIEW automatically generates according to a
schedule).
See "About Scheduled Reports (Auto Reports)" on page134.
User Manual
interVIEW
176 Report Types
Button
Function
OK
Creates the Report as a job in the Report Queue and leaves the dialog open.
OK, close
Creates the Report as a job in the Report Queue and closes the dialog open.
Cancel
Closes the dialog without generating a Report.
Clear fields Deletes any values in the fields.
[Red digit] The accumulated number of Reports.
Innovative Business Software A/S
Report Types 177
User Manual
interVIEW
178 Report Types
"Black Sheep" (Report)
This Report identifies Sites/Customers that - for one reason or another - behaves erratically or
differently than expected (eg by periodically transmitting a a large number of Signals/Alarms).
Innovative Business Software A/S
Report Types 179
Parameter
Function
Main Period
Enter the Main Period (from/to date).
Minimum number of Alarms
(within the Main Period)
Enter the minimum number of Alarms/Signals from the
Site/Customer in the Main Period, which is a requirement
to be included in the Report.
Extra Period
Provides the option to define an Extra Period within the
Main Period.
Minimum number of Alarms
(within the Extra Period).
Enter the minimum number of Alarms/Signals from the
Site/Customer in the Extra Period, which is a requirement
to be included in the Report.
Event Codes/Other Event Codes
Select one (or more) Event Codes to define a logical
expression.
Note: Wihin each pane, interVIEW applies the logical
operator OR and between the panes, interVIEW applies
the logical operator AND.
E X A M P L E
Sub Event Codes
Select one (or more) Sub Event Codes.
Printer
Select Printer.
Note: You can also print the Report at a later time from
the Report Queue.
Unit Type (e-mail)
Select Global Unit Type to filter the list of e-mail recipients.
Recipient (e-mail)
To attach the Report (as a PDF file) to an e-mail, select the
recipient.
Note: The Global Unit (recipient) must have an e-mail
address to be on the list.
Subject (e-mail)
Provide a subject (as you want it to appear in the subject
line in the e-mail).
File Name (e-mail)
Type the file name (as you want it to appear on the
attached Report in the e-mail). The Report is automatically
sent as soon as it has been generated.
Comment
Enter a brief Comment .
User Manual
interVIEW
180 Report Types
Templates
Button
Function
Load
Loads a Report Template.
Save
Saves the current Report as a Report Template.
Delete
Deletes the Report Template.
See "Report Templates (interVIEW format)" on page131.
Auto Reports
Button
Create Auto
Report
Function
Creates the current Report as an Auto Report (ie a Report,
which interVIEW automatically generates according to a
schedule).
See "About Scheduled Reports (Auto Reports)" on page134.
Button
Function
OK
Creates the Report as a job in the Report Queue and leaves the dialog open.
OK, close
Creates the Report as a job in the Report Queue and closes the dialog open.
Cancel
Closes the dialog without generating a Report.
Clear fields Deletes any values in the fields.
[Red digit] The accumulated number of Reports.
Innovative Business Software A/S
Report Types 181
Alarm Log Histogram (Report)
Generates a Report about.
User Manual
interVIEW
182 Report Types
Parameter
Functional Area
Site/Customer Number
Site/Customer number range.
Date
Date range.
Change number
Internal change number range.
email
Parameter
Functional Area
Global Unit
Type
Select Global Unit Type to filter the list of e-mail recipients.
Recipient
To attach the Report (as a PDF file) to an e-mail, select the recipient.
Note: The Global Unit (recipient) must have an e-mail address to be on the list.
Only send
Checked: Only sends the email, if the Report contains any data.
email if data
Subject
Provide a subject (as you want it to appear in the subject line in the email).
File name
Type the file name (as you want it to appear on the attached Report in the email).
The Report will automatically be sent as soon as it has been generated.
Format and Select Report format.
design
Comment
Enter a brief Comment .
Templates
Button
Function
Load
Loads a Report Template.
Save
Saves the current Report as a Report Template.
Delete
Deletes the Report Template.
See "Report Templates (interVIEW format)" on page131.
Auto Reports
Button
Create Auto
Report
Function
Creates the current Report as an Auto Report (ie a Report,
which interVIEW automatically generates according to a
schedule).
See "About Scheduled Reports (Auto Reports)" on page134.
Button
Function
OK
Creates the Report as a job in the Report Queue and leaves the dialog open.
OK, close
Creates the Report as a job in the Report Queue and closes the dialog open.
Cancel
Closes the dialog without generating a Report.
Clear fields Deletes any values in the fields.
[Red digit] The accumulated number of Reports.
Innovative Business Software A/S
Report Types 183
Site/Customer Changes (Report)
Generates a Report with changes to Customers/Sites.
User Manual
interVIEW
184 Report Types
Parameter
Functional Area
Site/Customer Site/Customer number range.
Number
Date
Date range.
Change
number
Internal change number range.
Global Unit
Type (email)
Select Global Unit Type to filter the list of e-mail recipients.
Recipient (email)
To attach the Report (as a PDF file) to an e-mail, select the recipient.
Note: The Global Unit (recipient) must have an e-mail address to be on the
list.
Only send
email if data
Checked: Only sends the email, if the Report contains any data.
Subject (email)
Provide a subject (as you want it to appear in the subject line in the e-mail).
File Name (e- Type the file name (as you want it to appear on the attached Report in the email). The Report is automatically sent as soon as it has been generated.
mail)
Select Report format.
Format and
design
Comment
Enter a brief Comment .
Templates
Button
Function
Load
Loads a Report Template.
Save
Saves the current Report as a Report Template.
Delete
Deletes the Report Template.
See "Report Templates (interVIEW format)" on page131.
Auto Reports
Button
Create Auto
Report
Function
Creates the current Report as an Auto Report (ie a Report,
which interVIEW automatically generates according to a
schedule).
See "About Scheduled Reports (Auto Reports)" on page134.
Button
Function
OK
Creates the Report as a job in the Report Queue and leaves the dialog open.
OK, close
Creates the Report as a job in the Report Queue and closes the dialog open.
Cancel
Closes the dialog without generating a Report.
Clear fields Deletes any values in the fields.
[Red digit] The accumulated number of Reports.
Innovative Business Software A/S
Report Types 185
Concentrator Configuration (Report)
This Report generates an overview of the Concentrator Configuration on the network (as seen
by interVIEW).
User Manual
interVIEW
186 Report Types
Parameter
Function
Select Printer.
Printer
Note: You can also print the Report at a later time from the Report Queue.
Unit Type
(e-mail)
Select Global Unit Type to filter the list of e-mail recipients.
Recipient
(e-mail)
To attach the Report (as a PDF file) to an e-mail, select the recipient.
Note: The Global Unit (recipient) must have an e-mail address to be on the list.
Subject (email)
Provide a subject (as you want it to appear in the subject line in the e-mail).
File Name
(e-mail)
Type the file name (as you want it to appear on the attached Report in the email). The Report is automatically sent as soon as it has been generated.
Comment
Enter a brief Comment .
Templates
Button
Function
Load
Loads a Report Template.
Save
Saves the current Report as a Report Template.
Delete
Deletes the Report Template.
See "Report Templates (interVIEW format)" on page131.
Auto Reports
Button
Create Auto
Report
Function
Creates the current Report as an Auto Report (ie a Report,
which interVIEW automatically generates according to a
schedule).
See "About Scheduled Reports (Auto Reports)" on page134.
Button
Function
OK
Creates the Report as a job in the Report Queue and leaves the dialog open.
OK, close
Creates the Report as a job in the Report Queue and closes the dialog open.
Cancel
Closes the dialog without generating a Report.
Clear fields Deletes any values in the fields.
[Red digit] The accumulated number of Reports.
Innovative Business Software A/S
187
Examples
(Auto Reports)
Example A Example B Example C Example D -
188
189
190
191
188 Examples(Auto Reports)
Example A -
Example A This Auto Report is scheduled to run every Friday at 16:30 (4:30 PM).
As "every Friday" can occur in every month and on every day in the month, then all the months
and days have been checked. In addition, only Friday has been checked as well as the time 16:30
(below the tab Time).
Innovative Business Software A/S
Examples(Auto Reports) 189
Example B -
Example B This Auto Report is scheduled to run the first Tuesday in January, March, May, July, September
and November (ie. every second month).
As "the first Tuesday of every month" can only occur between the 1st and 7th day of the month
(ie. no earlier than the 1st day of the month and no later than the 7th day of the month), then all
the days between 1 and 7 have been checked.
User Manual
interVIEW
190 Examples(Auto Reports)
Example C -
Example C This Auto Report is scheduled to run every second Tuesday in January, March, May, July,
September and November (ie. every second month).
As "the second Tuesday of every month" can only occur between the 8th and 14th day of the
month (ie. no earlier than the eighth day of the month and no later than the seventh day of the
month), then all the days between 8 and 14 have been checked.
Innovative Business Software A/S
Examples(Auto Reports) 191
Example D -
Example D This Auto Report is scheduled to run on the last Sunday in January, April, July and October.
As "the last Sunday in every month" can only occur between the 25th and 31st day of the month
(ie. no earlier than the 25th day of the month and no later than the 31st day of the month), then
all the days between 25 and 31 have been checked.
User Manual
interVIEW
Innovative Business Software A/S
193
TROUBLESHOOTING
Innovative Business Software A/S
195
InterVIEW
196 interVIEW
Troubleshooting - interVIEW
Section
Error/symptom
Possible Cause(s)
Corrective Action(s)
No connection
between Client and
Server.
1. A Firewall
may be
blocking
interVIEWtraffic.
1. Allow interVIEW-traffic on
the following ports: 20-21
and 7000-7200.
Starting the When I try to start the
interVIEW interVIEW client
Client
application, I receive a
message saying that I
am not allowed to log
on to the network,
because the Client has
not been activated.
1. The
interVIEW
client
application
has not been
activated.
1. The interVIEW client
application has not been
activated. Please contact the
system administrator.
Data Entry
Window
(DEW)
Panel Type: I have
created a Doc Link to a
PDF file, but it does
not work in the Alarm
Handling window.
1. Adobe
Reader is not
installed on
the Client.
1. Install Adobe Reader on the
Client.
Alarm
Handling
I cannot take/handle
Alarms, although I can
see and highlight them
in the Alarm Queue.
1. Windows
User
Account
Control
(UAC) may
be blocking
alarm
handling in
interVIEW.
2. Windows
may be
blocking the
Client
NameSpace.
1. Adjust the Windows User
Account Control to its
lowest setting "Never
notify").
2. Open the Configure Client
application and set "Force
local NameSpace for global
memory..:" to "Force Local
NameSpace". Save changes,
close Configure Client and
restart the interVIEW Client
application. If this does not
work, then repeat the
procedure with the setting
"Force Global NameSpace".
Alarm
Handling
I cannot start the
Alarm Handling
application (when I
check Alarm on the
Remote).
1. The Client or
User does
not have
rights to
commence
Alarm
Handling.
1. Lon on from a Client or with
a User ID with the required
rights.
Printing
I am trying to connect
a Printer to the
interVIEW-network,
but the Printer does
not appear in the
picklist Printers.
1. The Printer
has not been
installed in
Windows on
the
interVIEWserver.
2. IvSysNuc and
IvRepNuc do
not have
administrator
rights in
Windows.
1. Install the Printer in
Windows.
2. Assign IvSysNuc and
IvRepNuc with administrator
rights in Windows.
Installing
Innovative Business Software A/S
interVIEW 197
Section
Error/symptom
Possible Cause(s)
Corrective Action(s)
Reports
When I try to generate
a Report, I receive the
error: "Invalid
interval/range".
1. The date
fields (From
and To)
contain
identical
dates.
2. "To Date" is
older than
"From Date"
(ie the date
range is
negative).
1. The date fields must not
contain identical dates. For
more information about
completing the date fields,
please see page 124.
2. Ensure that "From Date" is
older than "To Date".
Reports
The Report appears
with status "Error" in
the Report Queue.
1. In rare cases,
this error
may occur.
2. One (or
more) of the
parameters
are invalid.
3. The
parameters
return a very
large result.
1. Generate the Report again.
2. Verify that all parameters in
the Report are valid.
Generate the Report again.
3. Limit the parameters.
Generate the Report again.
Reports
When I generate a
Report, it just appears
as "Waiting" in the
Report Queue and is
never generated.
1. ivRepNuc
service has
crashed.
1. Contact Innovative.
Alarm
Handling
I have created an
Event Code, but it
does not appear in the
menu in the Alarm
Handling window.
1. The
checkbox
1. Uncheck it and restart the
interVIEW Client application.
Event
Codes
Not in Menu
is checked in
the picklist
Event Codes.
Open/Close I am trying to rename
an existing Calendar,
but receive error
message 20090.
1. It is not
possible to
rename a
Calendar,
once it has
been created
and saved.
1. Create a new Calendar and
update the Calendars'
associations to Zones and
Instructions.
F1-help
1. F1-help has
not been
installed on
the server.
1. Install F1-help on the server.
.
When I press F1 to
open the webhelp, I
receive the error:
"Cannot find
Webhelp".
User Manual
interVIEW
198 interVIEW
Disabling Windows User Account Control (UAC)
In rare cases, UAC may block alarm handling in interVIEW.
Windows 7
1. Stop the interVIEW Client application.
2. Do one of the following:
n In Windows, click the Start button and type "UAC" in the search box.
n Open Control Panel > User Accounts > User Accounts.
3. Select "Change settings for UAC".
4. Ensure that the slider is all the way at the bottom "Never notify".
5. Click OK.
6. Restart Windows.
Innovative Business Software A/S
199
APPENDIX
Innovative Business Software A/S
201
Index
!
! (exclamation)
flag in Queue windows 34
#
# (number sign)
flag in Queue windows 34
flag in the Top Line in the AHW 42
[
[...] (square brackets) See also Wildcard
Character
A
A-number (Automatic Site Lookup) 99
A-Sum Log See Sum log
Advanced Search 114
AHW See Alarm Handling window (AHW)
Alarm Counter 10
Alarm Handling 26, See also Alarms
closing 10, 28
opening 10, 28
troubleshooting in connection with 196
Alarm Handling window (AHW) 36
closing 28
Codewords (pane) 45
Components (pane) 46
Menu bar 37
opening 28
Tabs 47
Top Window 44
Alarm Incident Statistics (Report) 170
Alarm Log See also Sum log
adding comments to 91
tab in AHW 65
Alarm Log details
Window 66
Alarm Log Groups (tabs) 65
Alarm Log Histogram (Report) 181
Alarm Log per Incident (Report) 156
Alarm Log per Site (report) 160
Alarm Panels See Panels
Alarm Program
closing 28
opening 28
starting/stopping 10
Alarm Queue Lines 30
Alarm Queue Windows 29
opening new 31
switching between 31
Alarm Queues See Queues (Alarm Queues)
Alarms
activating aural warning 35
adding comments to Alarm in Queue 90
adding comments to Alarm Log 91
generating manually 95
postponing temporarily 92
releasing 93
sorting in Alarm Queue 31
taking 85
taking over 94
testing 95
Arm/Disarm See Open/Close
Audio
playing in case of Alarm 35
testing by Alarm 32
Audio test 32
Auto Report overview 143
Auto Reports 134
activating 143
changing settings 143
creating 135, 138
deactivating 143
deleting 143
editing 143
generating manually 143
repeating 136
testing 142
time settings for 144
Autodial
enabling for Clients 86
Automatic Dial-Up See Autodial
Automatic Site Lookup 98
applying 98
B
Backup-server control (system menu) 11
"Black Sheep" (Report) 178
C
Calendar Module (iV-calendar)
about 20
Call (command in AHW) 86
Call Directly (command in AHW) 86
Calls
placing 86
Camera Servers
searching for 113
Central units See Panels
Centrals See Panels
User Manual
interVIEW
202 Index
Choose (command in Alarm Queue windows)
31
Classes
field in AHW 48
Client Relays
blink when Alarm 32
Close Tolerances (O/C) 75, 79
Close/Arm Signals 79
Codewords
pane in AHW 45
tab in AHW 64
Comment field (in Components)
searching for 115
Comments
adding to Alarm Log 91
Components
pane 46
searching for 115
Components (overview) 46
Concentrator Configuration (Report) 185
Contact Lists
tab in AHW 52
Contacts
contacting 86
searching for 117
tab in AHW 49, 51
Context Menus
The Report Queue 130
Control Signals See also Relays
tab in AHW 57
CSV format
saving Reports in 130
Curtain menus See Picklists
Customer Information (pane) 43
Customer Number
field in AHW 43
old 48
searching for 113-115
searching for Old 113
Customers See also Sites
contacting 86
searching for 113
view current Monitoring Status for 43
Customers (Report) 150
Customised Reports 148
creating 148
D
Daily Routines (system menu) 11
Data Entry window (system menu) 11
Date fields
working with 14
Date fields (fields with blue background) 14
Defining Times (for Auto Reports) 144
Definition (tab in AHW) 72
Desktop 7
Disposition (Alarm Handling menu) 40
Dot Mapping 63
E
Early (Open/Close) 80
EML-signals 21
Enable sound on first red alarm only (setting)
35
Innovative Business Software A/S
Enable sound on new red alarms (setting) 35
Enabling alarm sound 35
Enabling continuous sound (setting) 35
Error Messages
20090 197
Expediting Open/Close temporarily 95
Extra Days 79
F
File (menu)
menu in AHW 37
menu in Alarm Queue windows 31
Filtering
picklist table 15
Finding Customers See Simple Search
Firewall
Troubleshooting 196
Flash
blink when Alarm 32
testing 32
Floating Windows (calendar module) 21
FR3 format
saving Reports in 130
G
Gateway See Panels
Global Calendars 21
Global Units
contacting 86
field in AHW 43
searching for 117
tab in AHW 50
viewing in AHW 49
Go to (command) 31
Graphics See also Images
tab in AHW 63
Grid/table See Picklist tables/grids
H
HaID See Hardware ID
handling Alarms See Alarms
Hardware ID
searching for 113-115
Help
menu in AHW 40
menu in Alarm Queue windows 33
Hide (setting) 32
Holidays See Special Days
HTML format
saving Reports in 130
HwID See Hardware ID
I
Icons See also Images; Graphics
Images See also Graphics
In operation (field in AHW) 48
Incident Number See Incident Numbers
Incident Numbers
searching for External 113-115
searching for Internal 113-115
viewing in AHW 42
Installation (tab in AHW) 48
Index 203
Installation Date
field in AHW 48
Installation Type (field in AHW) 48
Instruction Date
field in AHW 48
Instruction Types
highlight as part of the Top Line in AHW 42
Instructions
carrying out 85
tab in AHW 53
Instructions (Report) 153
interVIEW
starting the client program 9
Troubleshooting 196
interVIEW Client ID
viewing in AHW 42
Is template (field in AHW) 48
iV-OpenClose ("Calendar Module")
about 20
J
Job Number 129
JSON format
saving Reports in 130
K
Key Number
searching for 113
Keyboard Shortcuts See also Shortcuts and
Labels
Keypads See Panels
L
Late (O/C) 80
Link Types (AutoSiteLookup) 99
log See also Alarm Log; Sum log
Log Comment
adding 91
M
Magnifying glass See Table Search
Make Alarm (O/C) 76
Manual Alarms
generating 95
Manually generating Alarms 95
Map (System Menu) 11
Master Alarm Queue 34
Menu Lines
Alarm Handling window (AHW) 37
Queue Windows 31
Report Queue window 128
Microsoft Excel
saving Reports as 128
Microsoft Excel XML format
saving Reports in 130
Missing (Open/Close) 80
Monitoring Status See also Monitoring Status
field in AHW 43, 48
viewing current for Customers 43
viewing for current Sites 43
N
Navigate (menu in AHW) 38
Navigate (menu in AQW) 33
New (command) 31
Next service (field in AHW) 48
Non-linked search (checkbox) 117
O
Old Cust. no. (field in AHW) 48
Old Customer Number
field in AHW 43
searching for 113
On top (setting) 32
Open/Close
about 20
EML (Early, Missing, Late) 77
expediting temporarily 95
History (tab in AHW) 84
Make Alarm (pane) 76-77
postponing temporarily 95
resetting O/C times 96
Result (tab in AHW) 83
Special Dates 82
Special Days (pane) 81
tab in AHW 71
Close Tolerance 75
Schedule Periods 78
Schedule properties 73
Windows 80
tolerances 74, 79
Open/Close (Report) 164
Open/Disarm Signals 79
P
Pad lock (icon) 10
Panel Codes
tab in AHW 58
Panel Info
tab in AHW 60
Panel serial number
searching for 115
Panels
tab in AHW 54
Parameter syntax (Auto Reports) 144
Passcard 41
Passcard Search 117
Passcards
dispose 38
logging off 38
searching for 117
viewing the name of the Passcard-holder in
AHW 42
Pattern Search See Wildcard Character
PDF format
saving Reports in 130
Phone Numbers See also Phone Numbers
searching for 113
Picklist fields (fields with yellow background)
14
Picklist tables/grids 13
filtering rows 15
searching for specific values 15
User Manual
interVIEW
204 Index
sorting rows 14
Picklist Updates 11, 13
Picklists 13
finding in System Menu 12
opening 13
searching for in the System Menu 12
searching in 15
sorting rows 14
using 14
working with 14
Place in Test/Service Mode
Window 105
Postponing Open/Close temporarily 95
Protected Zones
placing in Test/Service 106
Q
QText See Queue Comment
Queue (menu in AHW) 37
Queue (menu in Queue Windows) 31
Queue Comment
adding during alarm handling 90
Queues (Alarm Queues) 29
selecting 31
R
Regular Expressions See Wildcard Character
Relays
activating Client Relays upon Alarm 32
Releasing Alarms 93
Remote Control See The Remote
Report Queue window 127
Menu bar 128
Report Status (column in Report Queue) 129
Report Templates 131
creating 131
deleting 133
editing 133
loading 132
opening 132
Reports 124, See also Auto Reports; Report
Templates
"Black Sheep" 178
Alarm Incident Statistics 170
Alarm Log (per Customer) 160
Alarm Log Histogram 181
Alarm Log per Incident (Report) 156
Auto Reports 134
Concentrator configuration 185
creating Auto- 135, 138
creating Custom 148
Custom 148
Customer List 150
deleting 128
displaying status during generation 129
generating 126
Instruction List 153
Job Number 129
Number of signals (per Site) 174
Open/Close 164
Preview 128
printing 126
reading on desktop monitor 126, 128
regenerating 128
Innovative Business Software A/S
saving 128
saving as Adobe PDF file 128
saving as CSV file 128
saving as HTML-file 128
saving as Microsoft Excel XML file 128
saving as XML file 128
scheduled 134
scheduling 134
Site statistics 167
Site/Customer Changes 183
templates 131
time settings for Auto Reports 144
troubleshooting 196
Resetting Open/Close times 96
Result (tab in AHW) 83
Route Import (system menu) 11
S
S (flag in Alarm Queue windows) 34
Schedule Name
field in AHW 73
Schedule Number 21
field in AHW 73
Schedule Numbers 21
Schedule Period Hours 79
Schedule properties 73
Scheduled Reports 134
Schedules 21
creating (Auto Reports) 135
Global 21
shared 21
Schedules (O/C in AHW) 78
SDS
sending to Contacts/Contact Lists 87
Search
Advanced 114
Passcard 117
Picklist- 12
Simple 113
Search Features 112
Search filter (in picklists) 15
searching for
camera servers 113
Comment field (in Components) 115
Components 115
Customer Number 113-115
external incident number 113-115
Hardware ID 113-115
internal incident number 113-115
key number 113
old customer number 113
Panel serial number 115
Passcards 117
phone number 113
Picklists 12
Site Number 113-115
values in picklists 15
Zone ID 115
Security Classes
field in AHW 48
Segments See Trades
Serial number
searching using Panel's 115
Service (Test) Mode See Test/Service Mode
Index 205
Service date
field in AHW 48
Service/Test See Test/Service Mode
Share as
field in AHW 73
Shared Calendars 21
Shortcuts and Labels See also Keyboard
Shortcuts
overview of default 17
Signal Count Per site (report) 174
Simple Search 113
Site Components
Tab 61
Site Lookup
Automatic 98
Site No. See Site Number
Site Number
field in AHW 48
searching for 113-115
Site Statistics (Report) 167
Site/Customer Changes (Report) 183
Sites
view current Monitoring Status for 43
SMS
sending to Contacts/Contact Lists 87
Sort (command) 31
Sorting
Alarms in Alarm Queue 31
Special Dates 82
Special Days 81
Special in Test/Protected Zone See Protected
Zones
Starting the interVIEW Client 9
Starting the interVIEW Client program 9
Statistics See Reports
Stopwatch (AutoSiteLookup) 99
Sum log See also Alarm Log
tab in AHW 68
Sum Log See Sum log
Sum Log details
Window 69
Syntax
Parameter- (Auto Reports) 144
T
T (flag in Alarm Queue) 34
T1-T10 (Sum Log) 68
Table Search 15
Tabs (AHW)
Alarm Log 65
Codewords 64
Contact Lists 52
Contacts 49, 51
Control Signal 57
Definition 72
Global Units 50
Graphics 63
History 84
Open/Close 71
Panel Codes 58
Panel Info 60
Panels 54
Sum log 68
Texts 62
Users 59
Zone Count 55
Tabs (DEW)
Site 48
Site Components 61
Take (menu)
menu in AHW 38
menu in Alarm Queue windows 33
Templates
Report 131
Test Alarms
generating 95
Test/Service
placing Panels in 106
placing Zones in 106
Window 105
Test/Service Mode 104
removing Panels from 107
removing Zones from 107
Testing
alarms 95
lights at Alarm 32
sound at Alarm 32
Text fields (fields with white background) 14
Text Messages See SMS
Text tabs
creating in AHW 89
Texts
tab in AHW 62
The map (iV-map)
opening/closing 11
The Remote 10
The Report Queue 129
Context Sensitive Menu (Report Queue) 130
updating 128
The System Menu 11
closing 10
opening 10
The Test Time field 106
Timer See Timer (AHW)
Timer (Test/Service)
stopping/cancelling 106
Timer (AHW)
postponing alarms temporarily 92
Tolerances (Calendar Module) 21
Top Line (pane in AHW) 42
Top Note (pane)
in AHW 53
Top Window (pane in AHW) 44
Trades
field in AHW 48
Treat (menu in AHW) 39
Troubleshooting
Firewall 196
interVIEW 196
Reports 196
U
UAC See User Account Control (Windows)
Units See also Global Units
User Account Control (UAC) See User Account
Control (Windows)
User Account Control (Windows)
disabling 198
User menu
menu in AHW 40
User Manual
interVIEW
206 Index
Users (for Panels)
tab in AHW 59
V
Visual alarm indicator See Flash
W
Wildcard Character
applying 118
Wildcard Characters See Wildcard Character
Windows
Floating (Calendar Module) 21
showing/hiding 10, 32
Windows (Open/Close) 80
X
XML format
saving Reports in 130
Z
Zone Count
placing in Test/Service 106
removing from Test/Service Mode 107
tab in AHW 55
Zone ID
searching for 115
Innovative Business Software A/S
207
User Manual
SCN
Innovative Business Software A/S | Landemaerket 10, 6th floor | DK - 1119 Copenhagen K | Denmark | T +45 3373 4000 |
[email protected] | www.innovative.dk