1
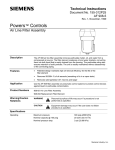
Technical Instructions Document No. 155-062P25 SW 786-1 Rev. 1, April, 2000 PowersTM Controls SW 786 Selector Switch Description The SW 786 Selector Switches are designed to deliver, stop, or redirect a pneumatic signal to air operated control devices. The switch can be mounted on a panel at a remote location or close to the devices being controlled. Features • Four ports for 3-position selection • Non-exhausting • Large Capacity (LC) switch available • Surface or panel mounted • Standard dial and nomenclature plates available Table 1. Product Numbers Description Product Number Standard Selector Switch 786-0500 Large Capacity (LC) Selector Switch 786-0520 Accessories Panel Mounting Kit Surface Mounting Kit Graphic Panel Mounting Kit 786-129 786-130 151-148 Dial Plates See Table 2 Nomenclature Plates See Table 3 Tubing Kit 786-062 Siemens Industry, Inc. Technical Instructions Document Number 155-062P25 Rev. 1, April, 2000 Application SW 786 Selector Switch The following are some typical selector switch applications. The switch can be used to change the mode of control, (e.g., auto to manual, day to night). It can also be used for positive control, (e.g. on to off, open to closed). It can also be used for a combination of the two types of control, (e.g., heat to auto to cool). Figure 1 shows an example of a selector used for auto-manual control. In the manual mode the positioning switch is used to manually position the valve. In auto mode the transmitter through the receiver-controller positions the valve to maintain a set point. Figure 1. Auto-Manual Application. Specifications Page 2 Medium Air Air Connections: Standard Switch LC Switch 1/16-inch NPT 1/8-inch NPT Ambient Temperature -20 to 160°F (- 29 to 71°C) Maximum Air Pressure 30 psig (207 kPa) Air Capacity (20 psig supply and 1 psig drop) Standard Switch LC Switch 1200 scim (328 ml/s) 2500 scim (683 ml/s) Materials See Table 8 Dimensions See Figure 9 Shipping Weight (Standard & LC) 2 lbs. (0.91 kg) Siemens Industry, Inc.. SW 786 Selector Switch Technical Instructions Document Number 155-062P25 Rev. 1, April, 2000 Accessories Figure 2. Dial and Nomenclature Plates are Finished in Gray with White Letters. Table 2. Dial Plates (See Figure 2). Lettering On Plate @A @B Part Number @C OPEN 786-094 OFF ON 786-095 COOL 786-096 HEAT AUTO COOL 786-097 DAY NITE 786-098 AUTO MAN 786-100 CLOSE AUTO OPEN 786-115 Side 1 OFF AUTO ON 786-115 Side 2 DAY AUTO NITE 786-116 Side 1 OCC AUTO UNOCC 786-116 Side 2 HEAT Table 3. Nomenclature Plates (See Figure 2). Siemens Industry, Inc. Lettering On Plate Part Number Blank (No Lettering 151-098 Humidity 151-151 Static Pressure 151-152 Damper Control 786-102 Valve Control 786-103 Thermostatic Control 786-104 Page 3 Technical Instructions Document Number 155-062P25 Rev. 1, April, 2000 SW 786 Selector Switch Operation (See Table 4 and Figure 3) Figure 3. Port Connections. Table 4. Pointer Positions and Port Connections. Knob Pointer Position Ports Connected Left 1 and 2 Up 1 and 4 Right 1 and 3 2-position Switch Make tubing connections to Ports 1, 2, and 3. Port 1 is the common port. Knob rotation is 180° between the two switch positions. Plug Port 4 to prevent a partial loss of signal in Port 1 when switching between Ports 2 and 3. If it is desirable to vent Port 1 when switching between Ports 2 and 3, leave Port 4 unplugged. Turn knob approximately 90°, knob pointing up, this will connect Ports 1 and 4. Allow Port 1 to exhaust its signal before completing the knob rotation. 3-position Switch Make tubing connections to Ports 1, 2, 3, and 4. Port 1 is the common Port. Knob rotation is 90° between adjacent ports. Starting with the switch knob pointed to the left, rotating the knob clockwise through 90° disconnects Port 1 from Port 2 and connects Port 1 to Port 4. Rotating the knob another 90° clockwise disconnects Port 1 from Port 4 and connects it to Port 3. This sequence is reversed when the knob is rotated counterclockwise. The switch is non-exhausting, that is, ports not connected are sealed off by the disc to prevent any leakage. Page 4 Siemens Industry, Inc.. SW 786 Selector Switch Technical Instructions Document Number 155-062P25 Rev. 1, April, 2000 Installation Before beginning the installation, make sure you have a selector switch, the appropriate mounting kit, a dial plate, and a nomenclature plate. Surface Mounting Surface mounting kit 786-130 is required. See Figure 4 and Table 5. 1. Remove adjusting knob from switch shaft by loosening the set screw with a 5/64-inch (2.0 mm) hex wrench. 2. Fasten washer (2) and stop screws (1) to the mounting plate (3). See Figure 5 for greater detail of the washer and stop screw. 3. Attach bracket (10) to the surface at the desired location. 4. Fasten the mounting plate to the panel with screws (4), nuts (5), and washers (6). 5. Attach air fittings or plug to the thread ports at the rear of the switch body. Port threads are 1/16-inch NPT on standard and 1/8-inch NPT on LC switch. 6. Put switch shaft through the hole in the center of the mounting plate. Fasten the switch to the mounting plate using screws (7). Stop screw heads must fit in recesses provided in the front surface of the switch body. 7. Place dial and nomenclature plates in the recesses provided in the dial face plate (8). Attach it to the mounting plate using screws (9). 8. Replace and tighten the adjusting knob to the switch shaft. The installation is now complete. Table 5. Surface Mounting Kit 786-130. Item Description Qty 1 2 - 56 x 1/4 (6.4 mm) lg. stop screw 2 2 Washer 2 3 Mounting plate 1 4 6 - 32 x 1/2" (13 mm) Ig. 100° flat. head. screw 2 5 6 - 32 hex nut 2 6 Shake proof washer 2 7 6 - 32 x 1/4" (6.4 mm) Ig. screw 2 8 Dial face plate 1 9 3 - 48 x 1/8" (3.2 mm) lg. screw 2 10 Bracket 1 Figure 4. Surface Mounting. Siemens Industry, Inc. Page 5 Technical Instructions Document Number 155-062P25 Rev. 1, April, 2000 Panel Mounting SW 786 Selector Switch Panel mounting kit 786-129 is required. See Figures 5 and 6 and Table 6. 1. Remove adjusting knob from switch shaft by loosening the set screw with a 5/64-inch (2.0 mm) hex wrench. 2. Fasten washer (2) and stop screws (1) to the mounting plate (3). 3. Fasten the mounting plate to the panel with screws (4). If the panel is less than 0.106 inch (2.7 mm) thick, drill two 0.21 inch (5.3 mm) diameter holes and use nut (5) and washer (6). 4. Attach air fittings or plug to the thread ports at the rear of the switch body. Port threads are 1/16-inch NPT on standard and 1/8-inch NPT on LC switch. 5. Put switch shaft through the hole in the center of the mounting plate. Fasten the switch to the mounting plate using screws (7). Stop screw heads must fit in recesses provided in the front surface of the switch body. 6. Place dial and nomenclature plates in the recesses provided in the dial face plate (8). Attach it to the mounting plate using screws (9). 7. Replace and tighten the adjusting knob to the switch shaft. The installation is now complete. Table 6. Panel Mounting Kit 786-129. Item Description Qty 1 Two 56 x 1/4” (6.4 mm) lg. stop screw 2 2 Washer 2 3 Mounting plate 1 4 Six 32 x 1/2” (13 mm) lg. 100° flat head 2 5 Six 32 hex nut 2 6 Shake proof washer 2 7 Six 32 x 1/4” (6.4 mm) lg. screw 2 8 Dial face plate 1 9 Three 48 x 1/3” (3.2 mm) lg. screw 2 Figure 5. Panel Mounting. Figure 6. Panel Mounting Dimensions. Page 6 Siemens Industry, Inc.. SW 786 Selector Switch Graphic Panel Mounting Technical Instructions Document Number 155-062P25 Rev. 1, April, 2000 Graphic panel mounting kit 151-148 is required. See Figure 7 and Table 7. 1. Follow steps 1, 2, and 4 of Panel Mounting. 2. Thread clamping nut (5) on the switch body. 3. Fasten the mounting plate (3) to the panel using drive screw (6) in 0.052 inch (1.3 mm) diameter hole in the panel. 4. Put the switch shaft through the hole in the center of the mounting plate. Fasten the switch to the mounting panel using screws (4). Stop screw heads must fit in the recesses provided in the front surface of the switch body. 5. Tighten the clamping nut (5). 6. Follow Step 7 of Panel Mounting. 7. If the switch knob positions don't match the markings on the panel, relocate the drive screw. The installation is now complete. Figure 7. Graphic Panel Mounting. Table 7. Graphic Panel Mounting Kit 151-148. Item Siemens Industry, Inc. Description Qty 1 Two 56 x 3/16 (4.8 mm) Ig. screw 2 2 Washer 2 3 Mounting plate 1 4 Six 32 x 5/16" (7.9 mm) lg. screw 2 5 Clamping nut 1 6 No. 11 x 1/8" (3.2 mm) Ig. drive screw 1 Page 7 Technical Instructions Document Number 155-062P25 Rev. 1, April, 2000 SW 786 Selector Switch Construction Figure 8. Construction. Table 8. Selector Switch Components. Item Page 8 Description Quantity Material 1 Adjusting knob 1 Urea 2 Anti-friction washer 1 Teflon 3 Spring flange 1 Brass 4 Spring, standard switch 1 Stainless steel 5 Backing disc 1 Stainless steel 6 Disc, standard switch 1 Graphitar Disc, LC switch 1 Teflon 7 Switch body 1 Chrome-plated brass 8 Two 56 x 3/16" (4.8 mm) lg. screw 3 Nickel-plated steel 9 Spring housing 1 Brass 10 Shaft and flange assembly 1 — Siemens Industry, Inc.. SW 786 Selector Switch Technical Instructions Document Number 155-062P25 Rev. 1, April, 2000 Dimensions Figure 9. Dimensions. Information in this publication is based on current specifications. The company reserves the right to make changes in specifications and models as design improvements are introduced. Powers is a registered trademark of Siemens Industry, Inc. Product or company names mentioned herein may be the trademarks of their respective owners. © 2000 Siemens Industry, Inc. Siemens Industry, Inc. Building Technologies Division 1000 Deerfield Parkway Buffalo Grove, IL 60089 + 1 847-215-1000 Your feedback is important to us. If you have comments about this document, please send them to [email protected] Document No. 155-062P25 Printed in the U.S.A. Page 9