1
6 U SING THE SOFTWARE
6.1 PREPARING YOUR IMAGES
In order to get the most out of iTag, you should organize your files in folders. Since it is very difficult to
implement Unicode file browsing in iTag, pathnames may only contain ASCII characters (i.e. a pathname like
C:\users\Sacha\Surveys\2014_09_11\Fifth Leg\ would be ok, whereas
C:\users\Sacha\Surveys\2014_09_11\fünfte Runde\ raises an error due to the umlaut ü). iTag works with
jpeg & bmp Images. iTag is case-insensitive, so any file ending with .jpg / .bmp or any upper / lower case
version of jpg or bmp will be found. Since iTag will need to create Subfolders and write to that particular
directory, you should also have full read / write access to that folder.
Don’t put your image folder anywhere that you don’t have access to!
iTag will create a subfolder with the name of the user and store all results inside that folder, including copies
of all tagged images.
iTag will never touch or modify your raw data!
If your data complies with the EXIF 2.1 or earlier Standard and has geographical data stored, these will be
read, otherwise the corresponding fields default to None. It is generally a good idea to sort your data by
survey date or whatever is applicable for your specific design. Once you have put all your images into one
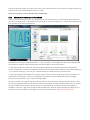
folder, you can then open up iTag and continue with setting up the session.
As Python is not very good at handling large images, there is a built in limit to the maximum allowed width or
height of an image.
The default maximum image size set to a limit of 10,000 pixels. You can override that setting by supplying iTag
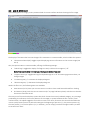
with start-up options. Right Click on your shortcut and change the target from “itag.exe” to “itag.exe –m5000”,
setting the maximum side of images to 5,000 pixels (for example).