1
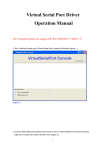
Ethernet to Serial Adapter
Installation Instructions
For use with these Beagle Software products:
Spring 2008
Copyright(c) 2004-2008 Beagle Software. All rights reserved.
Beagle Software provides this publication “as is” without warranty of any kind,
either expressed or implied. The use of the software accompanying this
documentation is subject to the Software License Agreement contained herein.
MS-DOS, Windows 95, Windows 98, Windows NT, Windows 2000,
Windows XP and Windows 2003 are trademarks of Microsoft, Inc.
1.0 Introduction
The Digi One SP device server easily allows any device with a serial port to
connect to the Ethernet. The compact Digi One SP delivers cost-effective
performance and capability in one of the smallest form factors available.
Part of Digi’s broad device server offering, the Digi One SP delivers
standard Serial-to-Ethernet connectivity and is ideal for the following
applications:
• TCP socket and UDP socket
Socket support includes serial bridging, which requires two device
servers, each providing network connectivity for a serial device that
would otherwise be limited to communication over a serial cable.
• COM Port Redirection using Digi’s patented RealPort
software, which enables applications and serial devices to
communicate over an Ethernet network as though they were
communicating in their native serial mode over a cable.
The Digi One SP is easy to install locally or remotely through a variety of IP
addressing methods. These include DHCP, ARP-Ping, static IP, and Setup,
an application on the installation CD that automatically detects all Digi One
devices on your network.
Digi One SP Key Features
Here are some key Digi One SP features:
• TCP/UDP socket services for broad device connectivity and application
use
• Support for RFC 2217
• RealPort (COM Port Redirection)
• DB9M for serial port connection
• Galvanically isolated (from earth ground)
• Industry leading low latency
• EIA-232/422/485 switch selectable
• Easy configuration using the install CD through Setup wizard, web
interface, or command line
System Requirements
• Windows 98, Windows ME, Windows 2000, Windows XP or Windows
2003 operating system.
• AMD or Intel Pentium 133MHz or better based computer.
• Ethernet 10/100 network
1.0 Unpack Device
Unpack the adapter power supply and software.
2.0 Install Hardware
2
1.
Plug the power supply into the wall and plug the plug into the adapter.
2.
Plug the serial device into the DB-9 serial port on the adapter. Once
power is connected the lights will blink while the system boots up.
3.
Plug the Ethernet cable with RJ-45 connector into the adapter.
3.0 Install Software
3.1 Digi One SP
1. Install the Digi One hardware (see sec 2)
2. Insert the CD into the drive. Select Setup The Digi Device Setup wizard
should start.
3. Discover the Digi One SP device. Verify the device’s MAC address.
Select either dynamic (recommended) or static IP addressing.
4. Choose “RealPort: COM Port Redirection” as the scenario to use.
5. The driver is now installed and the device is configured
6. Log onto via the web interface of the device (user root pwd: dbps)
7. Note the IP address of the Digi One device. Open the Configuration>System screen and change the Optimization setting to Latency (from
Throughput)
8. Open up the Windows device manager (System->Hardware->Device
Manager)
9. Find the “Multi-port Serial Adapters”
10. Open the device and select Advanced and Properties
11. Note the number of the COM port in use (not the port number, but the
COM number). The COM number can also be found in the Ports
section of the Device Manager under “Digi One SP”
12. Enter this COM port when configuring the software application.
3.2Moxa NPort 5510
1. Insert the CD into the drive
2. Install the Administrator
3.3 GDI 1000
Configuration/Administration
1. Insert the User Manual CD into the drive
2. Close Windows or antivirus program firewall.
3. Find the ETM program in the A. IP-Search-Utility directory.
4. Copy the ETM program to the host computer.
5. Run the ETM program.
Virtual COM Port
1. Insert the CD
2. Find the C. Virtual-Com directory
3. Run either the VSerPortConsole_XP.exe (Win XP) or
VSerPortConsole_2000.exe (Win 2000) program to install the virtual
COM driver.
3
4.0 Setting the IP Address
4.1Setting the IP address NPort
It is recommended that the device have a static IP address instead of a
dynamic IP address to facilitate port mapping on the host computer.
To set an Static IP address
1. Open the Administrator and go to the Configuration section
2. Scan for the device
3. Locate the NPort device
4. Double click on the device
5. Open the ‘Network’ Tab
6. Check ‘modify’ and select “Static” from the ‘IP configuration’ pull
down.
7. Check ‘modify’ and enter the IP address to assign to the adapter.
8. Press ’OK’
To set the Operating Mode
To use the adapter to connect the serial device to a host computer, it must
run in the ‘Real COM mode’. This creates a virtual serial port on the host
Device
Star Sync
Heavy
Duty Receiver
Star Sync
Standard
Duty Receiver
Star Sync
External
Receiver
DocuClock
Serial Time
stamper
Cell Sync
Receiver
Radio Sync
Receiver
Baud Rate
19200
4800
4800
9600
115200
9600
computer which the software can use to access the device.
1. Open the configuration section of the Administrator
2. Select the ‘Operating Mode’ tab
3. Select “Real Com Mode” from the ‘Operating Mode’ pull down
4. Press OK
Saving the Configuration Settings
1. Press the ‘OK’ button
2. The changes will be uploaded to the NPort device
3. The message log will show the changed configuration in the log
window.
Mapping the COM Port
In order to create the linkage between the NPort device and the operating
system, the port must be mapped in Windows. Port mapping creates a
virtual COM port within Windows. Once created, it functions like a regular
serial port.
4
1. Open up the Administrator
2. Find the ‘COM Mapping” section
3. Press the ‘Add’ button and select the NPort device installed.
4. Highlight the row of the device and press the ‘Configure’ button
5. On the ‘Basic Settings’ page select the COM port to use (COM1COM256). This will be the serial port mapped to the serial port on the
adapter. If possible, choose a single digit COM number that will be
compatible with most software.
6. On the ‘Serial Parameters” tab select the baud rate to use. This should
match the baud rate of the serial device in use.
7. The table shows the normal baud rate settings of select Beagle
Software products.
8. Press ‘OK’ and return to hightlight the row of the COM mapping list
9. Press the ‘Apply’ button to have the changes made to the port mapping
settings.
The NPort device is now ready for use. Open the software package in use
and select the comport selected above. Verify the baud rate is the same
(does not apply to DocuClock).
You can view the exchange of data between the host computer and the
serial device from the “Port Monitor’ section of the administrator.
4.1.2 Making the Driver Visible in Windows Nport(optional)
With NPort mapping the port is equivalent to installing a driver. If you would
like to see the virtual port listed in the Windows device manager then you
need to install the visual device driver in Windows.
1.
2.
3.
4.
5.
6.
7.
8.
9.
10.
11.
12.
13.
Clink on Start>Control Panel>Add Hardware
After the computer serch for new device it will ask you if the hardware
is already connected. Select “Yes”
Select “Add New Hardware device” and click on next.
Select “Install the hardware that I manually select from a list” and click
on next
Select “Multi-port serial adapters” and click on “next”
Click on “Have Disk”
Clock on “Browse”
Locate the 5510 driver folder. In the directory you should see the
following: NPort Tool (folder), NPORT (.inf file), NPSERVER (.inf file)
Open NPORT .inf file. Clock OK
Select “MOXA Nport 5510” from the populated list and select next.
At the Windows XP warning select “Continue Anyway:
If the installer asks for the NPCFG.DLL file find it Nport directory on
the CD.
The computer will scan for a 5110 on the network. Select the 5110
shown and click net. If your 5510 is not shown, then manually enter
the IP address of the device.
5
14. Click on finish to complete the install
15. “Found New hardware Wizard” should ten pop up. Select Install from a
list of specific location” and click on “Next”
16. Once again select the 5110 driver.
17. Once, again you can ignore the XP warning screen.
18. Click on “Finish” to complete the Port installation.
19. To confirm the installation, go to the Windows Device Manager. You
should see both an entry in the “Multi-port” serial adapters and the
“Ports” section of the Device Manager.
20. The Ports section should contain a device “MOXA Communication
Port 1” (COMx)”, where x is the port selected in the port mapping
section of the Administrator.
4.2 Setting the IP Address on GDI 1000
1. Install and connect the hardware
2. Install the software, run the ETM program
3. You will see the initial IP address. ( usually 192.168.0.10 )
4.If your pc IP address is not same as the converter, jump to step six.
5. Check the PCs current IP address. To do this you can use the ipconfig
command from the command line.
6. In the case of a different IP address:
6-1.1 Select Network Connections of Control Panel of PC.
6-1.2 Select Local Area Connection Connected of Network Connections.
6-1.3 Right click the mouse then choose properties button of Network
Connections.
6-1.4 Select Internet protocol ( TCP / IP ) item of Local Area Connection
properties.
6-1.5 Select properties button Internet protocol ( TCP / IP ).
6-1.6 Select Advanced button of Internet Protocol ( TCP / IP ) Properties.
6-1.7 Select Add button of IP address.
6-1.8 Add new IP address of TCP / IP Address.
6-1.9 Press the OK button of Advanced TCP/ IP Settings.
6-2. Change both converter and PC in the same IP address through ETM
program.
7. Select Device settings item of config of ETM program.
8. Press Enter button of ETM program.
9. Press the Login button of ETM program.
10. Get into controller setup screen of ETM program.
11. Set whatever additional parameters are necessary (baud rate, parity,
etc). After setting the parameters press update button of ETM program.
4.2.1 Installing the Vistual Comport on GDI 1000
Run VSerPortConsole_XP.exe of VirtualSerialPort Console for Win XP.
6
2.If did not add RS232 port, move mouse to the area of Virtual Serial Port
Console and right clock mouse to select “Add Port”.
3. Select “Add Port” of Virtual Serial Port Console program.
Press “OK” button of the Add port for auto assign .
4. Press the “Continue Anyway” button of Hardware Installation .
5. You will get a new COM port .
6. right click mouse then choose “Add Net” item of Virtual Serial Port
console.
7. Select “Add Net “ item of Virtual Serial Port console.
8. Change “Remote Address “ and “Remote Port” parameters same with IP
address and socket port of converter
9. Press “OK” button of Add Net.
10. Confirm with the success screen of Virtual Serial Port Console.
5.0 Troubleshooting
5.1 Digi One SP Troubleshooting
Open the web interface by entering the device’s IP address and check that
RealPort is selected (Configuration, Serial Port, Port Profile) (user root pwd:
dbps)
Check that the Dip Switch on the Digi One SP device are set correctly (1 up, 2,3,4, down for
RS-232)
The driver is installed properly, but the device is not working:
First check to see that the Beagle Software application is set to the correct
COM port number. To determine the COM port number assigned to the
adapter, check the Device Manager (see section 2.3).
It is also possible that the COM port number assigned is too high.
Sometimes a device won't work with the Ethernet-to-Serial adapter even
though everything appears to have installed correctly because some
computers will only scan a limited number of COM ports.
For instance, it is possible that a computers has a limitation of scanning
the first four COM ports. If the adapter is installed on COM5, a device with
such a limitation will not work until the COM port is reassigned to COM1 COM4.
1. Right click on the "Multi-port serial adapters" Open up the Digi One SP
device, and click on Properties
2. Select the Advanced Tab, Click on the "Properties" button .
3. Select the Digi One AP device on the tree on the left
4. Pull down the scrollbar on the right side, and select COM 1, 2, 3
7
5.1.1DocuClock Troubleshooting when connected to the Digi One
Open the web interface by entering the device’s IP address and select
Administration and Device Information.
Select the port in use (Port 1) to get device specific information.
Note the various areas for status and information
Configuration
RealPort sets the settings automatically based on the application and the device. In any case verify the settings currently in use:
Profile: RealPort Port Type: RS-232
Baud Rate: 9600
Data bits: 8
Parity: none
Stop bits: 1
Flow Control: None
Signals (bold indicates green)
RTS CTS DTR DSR DCD IFC OFC
Serial Statistics
Total Data In: <value>
Total Data Out: <value>
Printer Prints very slowly
Verify configuration:
Open the Configuration and System screen from the web interface (see
above) and check that the Optimization setting is set to Latency
6.0 Technical Support:
If you are having problems with the Ethernet-to-Serial Adapter that this
document does not address, please feel free to contact us at:
E-mail:
Phone:
Fax:
Mail:
[email protected]
612-370-1091
612-605-7138
Beagle Software
126 N 3rd St, Ste 407
Minneapolis, MN 55401 USA
8