Download Quick Start Guide!
Transcript
Commander Quick Start Guide
Version 1.0
http://www.cruiseEmail.com
31 October 2015
Contents
Welcome . . . . . . . . . . . . . . . . . . . . . . . . . . . . . . . . . . . .
3
Benefits . . . . . . . . . . . . . . . . . . . . . . . . . . . . . . . . . .
3
System Requirements . . . . . . . . . . . . . . . . . . . . . . . . . . .
3
Limits . . . . . . . . . . . . . . . . . . . . . . . . . . . . . . . . . . .
4
Cautionary Notes
. . . . . . . . . . . . . . . . . . . . . . . . . . . . .
4
Installation . . . . . . . . . . . . . . . . . . . . . . . . . . . . . . . . . . .
4
Windows . . . . . . . . . . . . . . . . . . . . . . . . . . . . . . . . . .
4
Linux . . . . . . . . . . . . . . . . . . . . . . . . . . . . . . . . . . . .
5
Really Quick Start . . . . . . . . . . . . . . . . . . . . . . . . . . . . . . . .
5
General Flow of a Connection . . . . . . . . . . . . . . . . . . . . . . . . . .
5
Action Buttons . . . . . . . . . . . . . . . . . . . . . . . . . . . . . . .
6
Registration . . . . . . . . . . . . . . . . . . . . . . . . . . . . . . . .
6
Commander Overview . . . . . . . . . . . . . . . . . . . . . . . . . . .
6
Configuration
. . . . . . . . . . . . . . . . . . . . . . . . . . . . . . .
7
. . . . . . . . . . . . . . . . . . . . . . . . . . . . . . . . . .
8
Writing . . . . . . . . . . . . . . . . . . . . . . . . . . . . . . . . . . .
8
Attachments . . . . . . . . . . . . . . . . . . . . . . . . . . . . . . . .
8
Text Messaging . . . . . . . . . . . . . . . . . . . . . . . . . . . . . . .
9
Transmitting the Messages in Outbox . . . . . . . . . . . . . . . . . . . .
9
Normal Connect sequence . . . . . . . . . . . . . . . . . . . . . . . . .
9
Gateway Callsign Box . . . . . . . . . . . . . . . . . . . . . . . .
9
Modem Status
9
Sending Mail
. . . . . . . . . . . . . . . . . . . . . . . . . . .
1
CONTENTS
Commander
Status box
CONTENTS
. . . . . . . . . . . . . . . . . . . . . . . . . . . . .
Progress Indicator
10
. . . . . . . . . . . . . . . . . . . . . . . . .
10
Receiving Mail . . . . . . . . . . . . . . . . . . . . . . . . . . . . . . . . . .
10
Listing Mail . . . . . . . . . . . . . . . . . . . . . . . . . . . . . . . . .
10
Mark the Messages for Download
. . . . . . . . . . . . . . . . . . . . .
11
Download the Messages . . . . . . . . . . . . . . . . . . . . . . . . . .
11
Managing Messages . . . . . . . . . . . . . . . . . . . . . . . . . . . .
11
Deleting . . . . . . . . . . . . . . . . . . . . . . . . . . . . . . . . . .
12
Getting Support . . . . . . . . . . . . . . . . . . . . . . . . . . . . . . . . .
13
2
WELCOME
Commander
CONTENTS
Welcome
Welcome to the CruiseEmail (CE) HF E-mail system. You will be able to use your HF radio, SCS
Pactor modem and Commander to exchange electronic mail and text messages with other
Internet users when the Internet is not available. This document provides the minimum
information you need to get started using the CruiseEmail system.
Benefits
Commander provides a user interface specifically designed to work with a HF radio system.
Commander optimizes the user experience better than any other system on the market
today. For example, Commander:
• Uses a unique work flow to spot SPAM before wasting precious HF air time.
• Interfaces directly with the Internet using standard Internet tools
• Filters SPAM before it gets to your account
• Uses web mail to Send/Recieve mails, when connected to the Internet
• Transmits user passwords securely for better protection of your e-mail
• Easily send and receive text messages using the e-mail interface
• Error free e-mails.
• Runs on multiple operating systems
System Requirements
Commander currently runs on a PC based system using either Linux or Windows. The hardware should have the following specifications:
• 1.2 GHz Processor or faster
• 1 GB of RAM or more
• Serial port, with cable or USB-Serial Adapter, with cable
• Internet connection for downloading software
• SCS Pactor Modem, any model
• HF Radio and antenna, tested and working properly
The Pactor modem connects to your HF radio. See the Pactor manuals for connectivity.
Commander does not control the HF radio in any way. Commander assumes the HF radio
system is working properly.
3
INSTALLATION
Commander
CONTENTS
Limits
Sending e-mail over HF radio is much slower than using a standard Internet connection.
So you must minimize the size of your e-mails. For example, a 10 Kilobyte e-mail will take
several minutes to transmit over the HF radio. Commander provides the size of the e-mails
(with any attachments) to help you decide which e-mails to download. Once you do this a
few times, you’ll get a feel for how much data you can send and receive in a session. In
general, keep the size of the e-mails below 10KB-20KB. This is large enough to allow you to
send several paragraphs of text or a small JPEG picture.
Cautionary Notes
HF Radio depends on the ability of the Earth’s ionosphere to reflect radio waves back to
earth. This is known as ‘propagation’. A ‘path’ between your station and one of the gateways
may not always be available. CruiseEmail operates shore stations in strategic locations to
attempt to provide 24x7 coverage, but this may not always be the case. You will need at
least one S-Unit (or 1 bar on a Marine Radio) above noise on your HF Radio signal meter
to establish a reliable connection. To measure noise, look at your signal strength meter
without a Pactor signal Present.
Propagation prediction software packages are available on the Internet, but you can also
experiment to find the best time of day to use one of the CruiseEmail gateways. The gateway
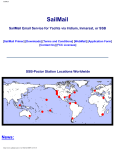
locations are published on our website.
Installation
The latest version is available on our website. The version number appears in the title bar.
Windows
For XP: Download Commander from the CruiseEmail web site. Double click on the downloaded file and answer ‘Yes’ then ‘Install’. This will install the program, set up a desktop icon,
install the program in the Start menu (under CruiseEmail) and start the program.
For Win7 and Above Download Commander from the CruiseEmail web site. Right click on
the download program and choose ‘Run as Administrator’. Answer ‘Yes’ and press ‘Install’ to
4
REALLY QUICK START
Commander
CONTENTS
install the program. This will install the program, set up a desktop icon, install the program
in the Start menu (under CruiseEmail) and start the program.
If you see a message about ‘Access Denied’, you didn’t install as administrator.
Linux
Really Quick Start
• Configure Commander via File/Config - Enter Client Call Sign, password, Serial Port
and Gateway Call Sign.
• Commander will ‘Register’ with gateway on first attempt, which sets up the secrete
session password for protecting the account password over the air. So you have to
connect twice the first time you connect to a gateway. Once registered, Commander
will disconnect. Reconnect and use one of Action Buttons.
• ‘Get List’ to retrieve a list of messages waiting on the Internet server. List will be in
‘Headers’ box, which you can mark for download or deletion.
• ‘Write’ to compose a message. Post it to the Outbox for sending. Press ‘Get/Send’ or
‘Send Mail’ to actually send the message to the Gateway.
• ‘Get/Send’ does everything at once including retrieve marked messages, send mail in
the Outbox and delete marked messages.
• ‘Mark Messages’ by highlighting a ‘Header’, right click to bring up menu and select
‘Mark for Deletion’ or ‘Mark for Download’
• Watch Gateway Callsign, Modem Status and Status Message box for clues about the
progress of the connection.
• It’s very important to use the ‘Delete’ function to reduce the number of e-mails waiting for you. A list of all waiting e-mail is downloaded each time you press ‘Get List’.
• Log files are available via Help/Log View.
General Flow of a Connection
Let’s start sending and receiving e-mail. In general, there are two work flows - sending
mail and receiving mail. You use Commander to send e-mail through the HF radio system
(e.g. HF radio on your boat to an HF radio on the shore) to a gateway system on the shore.
The gateway system relays the e-mail to our cloud based Internet system, which relays your
mail to its final destination. The following sections only provide high level instructions to
5
GENERAL FLOW OF A CONNECTION
Commander
CONTENTS
get you started fast. If you have questions, you can either contact tech support or download
the full user manual.
Action Buttons
The action buttons are located on the button bar. Press these buttons to do stuff.
• Write - Create an E-mail message
• Get List - Connect to the Gateway and retrieve a list of messages waiting on the e-mail
server.
• Get/Send - Connect to the Gateway and get any marked messages, send anything in
the Outbox and delete any marked messages.
• Send Mail - Connect to the Gateway and send any messages in the Outbox.
• Delete - Connect to the Gateway and delete any marked messages.
• Abort - Immediately stop all operations. For example, immediately disconnect from
the gateway.
• Quit - Exit the program.
Registration
The first time you connect to a gateway, Commander will ‘register’ you with the gateway.
This process sets up a session key known only to you and the gateway. The key is used to
encrypt the account password it can’t be intercepted as it’s transmitted over the air.
The Gateway Callsign field on the main screen will turn ORANGE when the Commander
is registering with the gateway. Messages will appear in the Status box at the bottom of
Commander to let you know what’s happening.
After a successful registration, Commander will disconnect and you don’t need to go through
the process with that gateway again. You can press any of the other action buttons to conduct a normal connection.
Commander Overview
Important - Commander uses context sensitive menus to do things. In general, you select
an item and ‘Right-Click’ (i.e. press the right mouse button) to bring up a menu. For example,
to read a message, you press the left mouse button to highlight the mail and then press the
6
GENERAL FLOW OF A CONNECTION
Commander
CONTENTS
right mouse button to bring up a menu. Then, use the left mouse button to select ‘read’ or
whatever you want to do.
Looking at the Commander program, you will immediately notice several main components
of the interface.
• There is the ‘button bar’, which contains ‘buttons’ or ‘icons’, which start the various
functions of the program. (e.g. Write - allows you to write a message.)
• The ‘message folders’ contains two folders, ‘Gateway’ and ‘Client’. These folders contain the various mail boxes, such as Inbox, Trash, etc.
• Menu Items, such as File and Help. These contain menus to access less accessed
functions, such as ‘Configure’, which allows you to set up the client.
• Mail List, which shows a listing of the messages. It contains information such as
from, to, date, etc. Note - an ‘asterisk’ before the message means the message has
an attachment.
• Gateway call sign. This shows the call sign of the gateway to connect.
• Modem Status box reflects the status of the Pactor modem.
• Status Box, which is located at the bottom of Commander. This box provides messages to let you know what’s happening.
• The progress bar is located in the lower right hand corner of Commander. It will
show estimated progress of the transmissions. It’s only an estimate!
Configuration
To configure Commander, choose File/Config.
On the Account tab:
• Enter the Client Call Sign. This is the call sign of the vessel. It’s also the username
portion of your e-mail address.
• Password - This is the password to access your account. It will be assigned to you
when you first register with CE. Using the Internet based tools, you will be able to
change the password, when connected to the Internet. Gateway operators and CE
support personnel do not have access to this password!!
• Hide Password - check to reveal your password.
• Enable Tool Tips - check to enable tool tips, which are short descriptions that pop up
when you hover your mouse over a control in the program. This helps you figure out
what the button does.
7
SENDING MAIL
Commander
CONTENTS
On the Modem tab:
• Gateway Call Sign - select the call sign of the gateway you want to use.
• COM Port - select the serial port connected to the Pactor.
Sending Mail
You can use Commander to send e-mail, including attachments. Pay attention to the file
sizes! The larger the file, the longer it will take to transmit. If you try sending files larger than
about 10KB-20KB, the Pactor connection may time out before the transmission is complete.
Writing
In general, the idea is to ‘Write’ a message and post it to the Outbox. Then, press either
‘Send/Get’ or ‘Send’ to send the message to the gateway. It’s that simple!
Clicking the ‘Write’ button will bring up a form. Fill it in as you would with any other e-mail
package. When you are satisfied with the message, press the ‘Post’ button to save it to the
Outbox.
Attachments
When the Write Mail form is up, you can click on the ‘Attachments’ button to add an attachment. Once the form pops up, press ‘Add’, which will bring up a file browser. Navigate to
the file you want to attach and press ‘Open’. This will add the file to the attachment list. You
can attach as many files as you want.
Important - the Total Size is listed on the attachment form. If the total size exceeds 20KB, it
will show in RED. This indicates you have exceeded the size limit. Commander doesn’t stop
you from sending large files, but it warns you!
After you attach a file, press Close. Note the Attachments button turns YELLOW, indicating
an attachment.
8
SENDING MAIL
Commander
CONTENTS
Text Messaging
To exchange text messages with somebody, just use the ‘Write’ form to create an e-mail.
Address the e-mail to their text message address. For example, to send a text message to a
Verizon customer, use [email protected].
Users on shore can send text messages to you by address them to ‘vessel call sign’@cruiseemail.com
Transmitting the Messages in Outbox
Press ‘Get/Send’ or ‘Send’ Action button to connect to the Gateway and send any messages
in the ‘Outbox’.
Normal Connect sequence
HF Radio can be fickle. It’s important to know what ‘normal’ looks like. Here’s what to expect
when you press one of the Action Buttons to connect to the gateway. There are four places
to watch, the Gateway Callsign, the Modem Status, the Status box and Progress Indicator.
Gateway Callsign Box
• RED - Disconnected
• YELLOW - Connecting, but not Authenticated to the gateway
• GREEN - Connected and authenticated to the gateway.
Modem Status
These lights reflect the status of the modem. It’s based on the status messages from the
modem. They may may not precisely reflect the same condition as seen on the Pactor lights
because the data is slightly delayed over the serial port.
• SEND - turns GREEN to indicate the modem is the ‘sender’, i.e. sending data TO the
gateway.
• Connect - turns GREEN to indicate the modem is connect to the gateway’s modem.
• Traffic - turns GREEN when traffic is flowing between the Pactors.
• Error - turns RED when the modem detects an error. If you see this light often, it
means the radio path is poor.
9
RECEIVING MAIL
Commander
CONTENTS
Status box
This shows a series of messages to let you know what’s happening. It will give you a clue to
the success or failure of the connection. A normal connect sequence goes like this (Using
‘Get List’ as an example)
• Retrieving a list of messages from the Internet.
• Connecting to Gateway’s Pactor.
• Verifying user credentials.
• Access Authorized. 6 messages waiting.
• Retrieving list of messages. (Headers)
• Check Headers in Gateway Folder for list.
Progress Indicator
The progress bar will provide an estimated indication of the overall all progress of the transmission.
Receiving Mail
It’s a three step process for receiving e-mail. This reduces the chances of downloading really
large messages, SPAM or other undesirable messages. This is almost as easy as sending a
message.
• List Messages - Press ‘Get List’
• Mark the Messages for Download
• Download Messages - Press ‘Get/Send’ or ‘Get Mail’
Listing Mail
Pressing ‘Get List’ will connect to the gateway and download a list of messages waiting on
the server. The message list (headers) will appear in the ‘Headers’ box under the ‘Gateway’
folder.
Note, the message header shows the message size. Don’t download large messages!
10
RECEIVING MAIL
Commander
CONTENTS
Note - ALL message headers are downloaded every time you press this button. So it’s very
important to manage your e-mail by downloading and deleting the mail to keep this list
small. Otherwise, you will have to download a list of unwanted messages every time you
‘Get List’.
Mark the Messages for Download
Click on the ‘Headers’ box to show a list of message headers. Highlight the one you want to
download using the left mouse button. Right Click (right mouse button) to bring up a menu,
choose ‘Download’ with the left mouse button. This puts the letter ‘G’ next to the message
on the right hand side of the message header.
Download the Messages
Press ‘Get/Send’ or ‘Get Mail’, which will connect to the gateway and download the message.
The messages will be in the ‘Inbox’ after the connection completes. A normal set of status
messages looks like this:
• Downloading mail from sever.
• Connecting to Gateway’s Pactor.
• Verifying user credentials.
• Access Authorized. 6 messages waiting.
• Retrieving Mail. 3152 total bytes. (Estimate)
• Acknowledging message.
• Waiting for the Gateway.
• Received mail. Check Inbox.
When Commander finishes, the messages will be available in the ‘Inbox’. Left click (left
mouse button) on the ‘Inbox’ box under ‘Client’ folder.
Managing Messages
There are several mail boxes under the Client Folder. They are:
Inbox - Incoming messages Outbox - messages queued to send to Gateway Saved - place
to save messages for later Drafts - messages you create, but not ready for sending Sent copies of messages you sent from Commander Trash - messages you deleted
11
RECEIVING MAIL
Commander
CONTENTS
In general, you click on the box and the messages in the box appear in the Commander mail
listing pane. To manage the messages, highlight one of them (or several), right click (brings
up a menu) and choose something from the menu.
For example, to read a message in the Inbox do these steps:
• Click on the ‘Inbox’
• Click on a message in the Messages pane
• Right click to bring up a menu
• Click ‘Read’ in the menu.
This work flow allows you to do things like reply, forward or delete messages.
Note - deleting a message moves the message to the Trash box. Note - once you delete a
message from the Trash box, it’s gone forever! Note - there is no way to move messages to
a different folder in the mail service located on the cloud. Commander only interacts with
the ‘Inbox’ on the mail service.
Deleting
It’s very important to delete your messages on the mail service. (Remember, mail is delivered to the mail service in the cloud on the Internet. The gateway simply acts as an intermediary to retrieve the messages for you and transmits them over HF.) If you don’t delete
them, you will have to retrieve the message headers each time you press ‘Get List’.
To delete, mark the e-mails to delete and press ‘Get/Send’ or ‘Delete’ action buttons.
To mark a message to delete, do the following:
• Click on ‘Headers’ box in the Gateway folder
• Click on the message to delete in the Mail List pane, this selects the message and
highlights it.
• Right Click to bring up a menu
• Choose ‘Mark For Deletion’
An ‘X’ will appear next to the messages marked for delete.
Press ‘Get/Send’ or ‘Delete’, which will connect to the Gateway and delete the messages on
the Cloud based E-mail server. The list in the ‘Headers’ box will adjust accordingly, once the
gateway actually confirms the messages were deleted.
12
GETTING SUPPORT
Commander
CONTENTS
Getting Support
For support, go to http://cruiseemail.com and look for the support contact information.
Phone and E-mail support are available.
13


