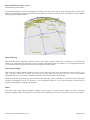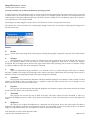
1
Lunar Discoverer ®
A Lunar Photographic Atlas
And
Encyclopedia
User Manual
Standard and Deluxe Editions
Copyright © 2008-2009
AstroHawk Corp.
All Rights Reserved
Lunar Discoverer User Manual, Version 1.40
Page 1 of 57
Welcome to Lunar Discoverer
When Lunar Discoverer opens in default mode, it displays the most popular features. The software provides the user
with a wide range of options to customize the display and to get the most out of the experience.
Unlike a book or printed atlas, Lunar Discoverer allows the user to create and use custom dynamic and interactive lunar
feature labels that change as the mouse points to different locations on the photographic Moon map.
Lunar Discoverer features several different Moon maps, each showing different amounts of detail and shadowing. The
observer can select the most appropriate map to help feature identification during a particular study or observing session.
Additional features:
• Point and click to bring up more information about a particular lunar location
• Zoom in on features of interest
• Create customized maps of features that can be saved for future reference
• Find the best night to observe a favorite feature
• Access details on lunar features including names, size, depths of craters, heights of mountains, and more
• Read the in-depth database on famous people who have lunar features named after them
• Choose between English or Metric system display of measurements
• Search the catalog to quickly find and zoom in on any one of thousands of features
• Hear Pronunciations — available for over 1,200 lunar features with difficult names
• Use the Personal Observing Log to enter your own observations
• At-the-Eyepiece Views — enter your telescope or binocular data and see the Moon exactly as it will appear in
your eyepiece
• Close-up images of hundreds of important features
Also Includes:
• A Location Setter — View from anywhere around the world, with accurate views and lunar data displayed
• A Night-By-Night Guide— to help plan observing sessions on what to view
• Lunar Data — rise and set times, phase, position in the sky, distance from Earth, and more
• A Calendar — find the view from any date, past or future (Deluxe edition)
• Image Gallery Browser — for viewing incredible close up images under various illuminations (Deluxe edition)
• Breathtaking full-color images from Apollo manned missions and lunar landers
• Satellite photos from unmanned missions such as Lunar Prospector and Galileo Orbiter
• Meteor impacts on Earth. Over a dozen photos of major collisions with fact sheets
Lunar Discoverer User Manual, Version 1.40
Page 2 of 57
WELCOME TO LUNAR DISCOVERER ....................................................................................................................................................2
FIRST THINGS FIRST....................................................................................................................................................................................6
REGISTERING ...................................................................................................................................................................................................6
SETTING YOUR VIEWING LOCATION..............................................................................................................................................................6
QUICK START .................................................................................................................................................................................................7
GENERAL SUGGESTIONS FOR GETTING THE MOST FROM LUNAR DISCOVERER ..........................................................................................7
Labeling .....................................................................................................................................................................................................7
Mouse .........................................................................................................................................................................................................7
Option Clicking..........................................................................................................................................................................................7
Keyboard Use ............................................................................................................................................................................................7
Lunar Phases and the Terminator............................................................................................................................................................7
Font Selection:...........................................................................................................................................................................................8
Pronouncing ..............................................................................................................................................................................................8
Working with the Terminator....................................................................................................................................................................9
Quick Keys Summary (Keyboard Shortcuts) ...........................................................................................................................................9
Regular Keyboard Use in Moon Window ................................................................................................................................................9
DETAILED MANUAL.................................................................................................................................................................................. 10
THE MAIN WINDOW..................................................................................................................................................................................... 10
Status Bar................................................................................................................................................................................................ 10
Using the Mouse ..................................................................................................................................................................................... 10
Single Click................................................................................................................................................................................................................10
Click and Drag ...........................................................................................................................................................................................................10
Option-Click (right mouse).......................................................................................................................................................................................10
Double Click ..............................................................................................................................................................................................................10
Using the Keyboard................................................................................................................................................................................ 11
THE MENUS .................................................................................................................................................................................................. 11
FILE MENU ................................................................................................................................................................................................... 12
New.......................................................................................................................................................................................................... 12
Open ........................................................................................................................................................................................................ 13
Close........................................................................................................................................................................................................ 14
Save ......................................................................................................................................................................................................... 14
Save As… ................................................................................................................................................................................................ 14
Print (Deluxe Edition)............................................................................................................................................................................ 15
Open List (Deluxe Edition) ................................................................................................................................................................... 15
Quit.......................................................................................................................................................................................................... 15
EDIT MENU ................................................................................................................................................................................................... 16
Undo ........................................................................................................................................................................................................ 16
Cut ........................................................................................................................................................................................................... 16
Copy ........................................................................................................................................................................................................ 16
Paste ........................................................................................................................................................................................................ 16
Find ......................................................................................................................................................................................................... 16
Search Entire Catalog................................................................................................................................................................................................17
Entering a Name ........................................................................................................................................................................................................17
Exact Match ...............................................................................................................................................................................................................18
Center .........................................................................................................................................................................................................................18
Zoom ..........................................................................................................................................................................................................................18
(Edit Menu Continued)........................................................................................................................................................................... 18
Find Nearest ........................................................................................................................................................................................... 18
Center ...................................................................................................................................................................................................... 18
Pronounce ............................................................................................................................................................................................... 18
OPTIONS MENU ............................................................................................................................................................................................ 19
Home ....................................................................................................................................................................................................... 19
Zoom In ................................................................................................................................................................................................... 19
Zoom Out ................................................................................................................................................................................................ 19
Full Size................................................................................................................................................................................................... 19
Show Moon Photo (Deluxe edition) ...................................................................................................................................................... 20
Moon North Up....................................................................................................................................................................................... 20
Lunar Discoverer User Manual, Version 1.40
Page 3 of 57
Moon East On Right............................................................................................................................................................................... 20
Metric ...................................................................................................................................................................................................... 20
Modify Showings .................................................................................................................................................................................... 21
Size of features: .........................................................................................................................................................................................................21
Name Range...............................................................................................................................................................................................................22
Location of features:..................................................................................................................................................................................................22
Auto Scale text...........................................................................................................................................................................................................22
Use Defaults...............................................................................................................................................................................................................22
Feature Attributes Area of Modify Showings .........................................................................................................................................................23
Show Feature Size (Deluxe edition) ...................................................................................................................................................................23
Mark Center..........................................................................................................................................................................................................23
Label .....................................................................................................................................................................................................................24
Position .................................................................................................................................................................................................................24
Draw Arrow..........................................................................................................................................................................................................24
3D Text .................................................................................................................................................................................................................24
Font .......................................................................................................................................................................................................................24
Color .....................................................................................................................................................................................................................24
Preferences ............................................................................................................................................................................................. 26
Gridlines.....................................................................................................................................................................................................................26
Use Degree, minutes, seconds format ......................................................................................................................................................................26
Use Modern naming ..................................................................................................................................................................................................26
Detailed Calendar (Deluxe edition)..........................................................................................................................................................................26
Live Identification .....................................................................................................................................................................................................26
Auto-Save on Quit.....................................................................................................................................................................................................27
Pronounce Features ...................................................................................................................................................................................................27
Read Text Using ........................................................................................................................................................................................................27
Set Date and Time .....................................................................................................................................................................................................27
Date Field .............................................................................................................................................................................................................27
Time Field ............................................................................................................................................................................................................27
Moon Map..................................................................................................................................................................................................................27
Show Terminator .......................................................................................................................................................................................................27
Rotate Moon to Match Sky .......................................................................................................................................................................................27
Your Telescope (Equipment).................................................................................................................................................................. 29
Field of View .............................................................................................................................................................................................................29
Focal Length ..............................................................................................................................................................................................................29
Barlow ........................................................................................................................................................................................................................29
Calculate.....................................................................................................................................................................................................................29
Show View.................................................................................................................................................................................................................30
Print ............................................................................................................................................................................................................................32
Export.........................................................................................................................................................................................................................32
Viewing Location.................................................................................................................................................................................... 33
WINDOWS MENU.......................................................................................................................................................................................... 34
Browser (Deluxe edition) ....................................................................................................................................................................... 35
Check boxes...............................................................................................................................................................................................................35
Buttons .......................................................................................................................................................................................................................35
Using the Keyboard...................................................................................................................................................................................................35
Using the Mouse........................................................................................................................................................................................................36
Double Click ........................................................................................................................................................................................................36
Option-Click (right mouse) .................................................................................................................................................................................36
Calendar (Deluxe edition) ..................................................................................................................................................................... 37
Changing the Date .....................................................................................................................................................................................................38
Changing Months.................................................................................................................................................................................................38
Specific Dates.......................................................................................................................................................................................................38
Using the Keyboard...................................................................................................................................................................................................38
Clear View .............................................................................................................................................................................................. 39
Closeup Window..................................................................................................................................................................................... 40
Eclipses ................................................................................................................................................................................................... 42
Start of the Eclipse.....................................................................................................................................................................................................42
End of the Eclipse......................................................................................................................................................................................................42
Other Dates ................................................................................................................................................................................................................43
New Button ................................................................................................................................................................................................................43
Search Range .............................................................................................................................................................................................................43
Search for Date ..........................................................................................................................................................................................................43
Total............................................................................................................................................................................................................................43
Partial .........................................................................................................................................................................................................................43
Feature Information ............................................................................................................................................................................... 44
Lunar Discoverer User Manual, Version 1.40
Page 4 of 57
Upper Panel Information (gray area) .......................................................................................................................................................................44
Lower Panel Information ..........................................................................................................................................................................................44
Buttons..................................................................................................................................................................................................................44
Magnifying Glass Shown...............................................................................................................................................................................44
Face/Crater......................................................................................................................................................................................................45
Face Icon Shown ............................................................................................................................................................................................45
Using the Mouse.............................................................................................................................................................................................45
Crater Icon Shown..........................................................................................................................................................................................46
Using the Mouse.............................................................................................................................................................................................46
Guide ....................................................................................................................................................................................................... 47
Nightly Views ......................................................................................................................................................................................................48
There is more information specific to each feature found in the Feature Information window when the crater icon button is
showing. .................................................................................................................................................................................................. 48
History (Deluxe edition)......................................................................................................................................................................... 49
Using the Mouse........................................................................................................................................................................................................49
Keyboard ....................................................................................................................................................................................................................49
Buttons .......................................................................................................................................................................................................................49
Phase Details .......................................................................................................................................................................................... 50
Terminator List ....................................................................................................................................................................................... 51
Image Effects (Deluxe edition) .............................................................................................................................................................. 53
Buttons .......................................................................................................................................................................................................................53
R Restore..........................................................................................................................................................................................................53
S Sharpen .........................................................................................................................................................................................................53
F Fuzz...............................................................................................................................................................................................................53
A Automatic.....................................................................................................................................................................................................53
E Equalize ........................................................................................................................................................................................................53
T Threshold......................................................................................................................................................................................................53
B Brightness.....................................................................................................................................................................................................53
C Contrast ........................................................................................................................................................................................................54
Toolbar.................................................................................................................................................................................................... 55
Buttons .......................................................................................................................................................................................................................55
I Identify...........................................................................................................................................................................................................55
M Measure .......................................................................................................................................................................................................55
+ Zoom In ........................................................................................................................................................................................................55
- Zoom Out.......................................................................................................................................................................................................55
C Closeup.........................................................................................................................................................................................................55
H Hide Closeup ...............................................................................................................................................................................................55
Favorites ................................................................................................................................................................................................. 56
Buttons .......................................................................................................................................................................................................................56
Add........................................................................................................................................................................................................................56
Delete....................................................................................................................................................................................................................56
FINISHING UP .............................................................................................................................................................................................. 57
CONTACTING US ........................................................................................................................................................................................... 57
Lunar Discoverer User Manual, Version 1.40
Page 5 of 57
First Things First
The very first time you start Lunar Discoverer you will be asked to type in your name and registration key. Following
that, you will be asked to specify your location. Immediately after that, you are ready to begin enjoying Lunar Discoverer.
Registering
Enter your name. Your name must be at least 4 letters in length. Following that, locate your registration key and type that
in the box below your name. Be sure to enter the dashes from the key, they help you in reading the key. After the key is
entered, click OK, and if you typed your registration key correctly, you can proceed. You have 3 tries to get it correct, then
the program exits. You may start Lunar Discoverer again and retry entering the key if you fail. The key is case insensitive,
so you may use lowercase letters. There are no numbers used in the key.
Microsoft Windows
Apple OS X
Setting Your Viewing Location
After Registering with your key, the next thing you are presented with is a window asking for your location. This
information is used to accurately calculate the rise and sets times of the Moon, as well as the phase and other important
information on the Moon as seen from your exact viewing location on earth. You can change the location at any time in
the future by using the menu option Location.
Microsoft Windows
Apple OS X
The cities are listed alphabetically by country first. If your city is not located in the list, you may enter your Latitude and
Longitude in the fields provided. This information can be easily obtained from the Internet using a Google search for
latitude and zip. The Time Zone is measured from Greenwich Mean Time; if you are West of Greenwich, England it is a
positive number; East is negative. If your longitude is negative, the time zone should be a positive number of hours; if the
longitude is positive, the time zone hours will be negative. Look for a nearby city if you are in doubt.
Daylight Savings Time is automatically used as read from your computer’s internal clock.
Lunar Discoverer User Manual, Version 1.40
Page 6 of 57
Quick Start
In this section we discuss how to get the basics going so you can quickly start enjoying the program.
General Suggestions for Getting the Most from Lunar Discoverer
Labeling
Lunar Discoverer has completely customizable labeling of lunar features. Use the Modify Showings menu to get to the
window that allows you complete control over the many options.
Mouse
Most modern computer mice have a second, right button. Lunar Discoverer allows using this in many windows as a
convenient way to bring up options. Scrolling is also available by thumbwheel.
Option Clicking
Many extended features are accessed by holding down the option key while clicking (this is the same as using the right
mouse button on two-button mice.) Try the option-click (or right mouse click) in every window to access additional
functionality.
Keyboard Use
Your experience with Lunar Discoverer will be enhanced if you use the keyboard. In particular, you may always use the
arrow keys as an alternative to using the mouse. For example, you can scroll the large lunar map in the main window
using the arrow keys, rather than using the mouse to click and drag it. Use whichever method you prefer.
Many dialogs and windows allow typing one character to speed access through a list of items. For example, in a search,
typing a character will quickly take you to the first item that begins with that character.
Lunar Phases and the Terminator
Lunar Discoverer allows for powerful customization of the lunar map. Sometimes it is possible to get into confusing
situations with the several options and their combinations. If the map does not show what you expect, with labels or the
screen is black, here are some quick things to check:
1.
Is the date near a new Moon? Near the new Moon, the Moon is mostly dark. (Check by opening the Calendar
Window.)
2.
If set to Phases, and the date near a new Moon, little of the Moon will be seen. The Moon appears as a thin sliver
or crescent for 1-2 days both before and after a new Moon)
3.
Are Phases set to be shown? (Check the Preferences Options menu)
4.
Is the Auto-Longitude option on? Only features seen at the current phase are labeled when this option is on.
5.
Is the Moon map set for Phases or the full Moon? If Phases are being used, then you might only see a sliver if the
phase is near the new Moon (note: on the new Moon date, a full Moon is substituted for the map).
6.
If the screen appears all black, it may be that the Moon map is zoomed in while using a phase photograph as the
Moon map. Try zooming out (command -) and then dragging the Moon back into view on the screen (or use the
arrow keys). You may also simply do a search for a feature and use the center option to bring the Moon into the
view of the screen. If those do not help, you may also change the map used (see the Preferences Options menu).
You can then change back to the previous map and it should be reset to the default position.
Lunar Discoverer User Manual, Version 1.40
Page 7 of 57
Font Selection:
Many windows display text, and you may change the text to use whatever font style, color and size you prefer. When you
option-click on a text window, a dialog appears which allows you to specify how the text appears.
Microsoft Windows
Apple OS X
For example, in the snapshot below a list of objects on the Moon’s terminator is shown in the Terminator List window.
The font used in this window was set to Apple Chancery (a script-like font) colored blue, and used in a 10-point size.
Macintosh screenshot showing font selection
Pronouncing
Lunar Discoverer can help you learn how to correctly pronounce lunar features – something many lunar experts cannot
do!
You need never be embarrassed again at star parties or any event when speaking of the Moon’s many features. Turn this
pronouncing feature on in the Preferences panel and afterwards every time you click on a feature it will pronounce it for
you!
Lunar Discoverer User Manual, Version 1.40
Page 8 of 57
Working with the Terminator
Lunar Discoverer’s ability to show where the terminator will appear is key to getting the most benefit from a viewing
session. Due to librations of the Moon, the Moon map image and the terminator as seen in the program is only
approximate on a given date. You can adjust the exact position to better match what you see in the telescope by using the
Set Date and Time option in the Preferences.
Adjust the time field in the Preferences window and when the Show Terminator is checked you can observe how the
terminator moves. You can adjust the time to get the terminator to line up very closely to what you actually observe. It
will automatically move through the night to stay in synch with the Moon at the time interval you specify in the
preferences. The terminator is seen as a line drawn in red.
Quick Keys Summary (Keyboard Shortcuts)
Below is an alphabetical list of all the shortcut keys, along with a brief description. For Microsoft Windows, use the Ctrl
key with the following key to invoke the desired shortcut. For Apple OSX, use the Apple key with the key below:
A
B
C
D
E
F
G
H
I
J
K
L
M
N
O
P
Q
S
T
U
V
W
X
Y
Z
+
0
1
Clear view window opened
Browser window opened
Copy to clipboard
Moon Phase Details window opened
Eclipse window opened
Find window opened
Guide window opened
History of a viewing session, features selected
Feature Information window opened
Close-up window opened
Calendar window opened
Log window opened
Modify Showings window opened
New (no features labeled/shown)
Open a presets file of labeled settings
Print a Moon map
Quit the application
Save a presets file of the labeled feature colors fonts etc.
Terminator window opened
feature Information window opened
Paste from clipboard
Close front most window
Cut selected text
Your Telescope window opened
Undo (unused)
Zoom In (magnify) [shift key use is not required, i.e. = key used]
Zoom Out
Home position for Moon
1:1 Zoom (Full Size Map), best detail
Regular Keyboard Use in Moon Window
Space
S
=
Center selected feature
speak (say) name of selected feature
move the terminator back in time
move the terminator forward in time
Lunar Discoverer User Manual, Version 1.40
Page 9 of 57
Detailed Manual
The Main Window
This window is where much of the action takes place. Lunar Discoverer always shows at least the main window, with a
map of the entire Moon. Closing this window is the same as quitting (exiting) the application. The main window is the
Moon Map window.
The main window shows the lunar features, normally with a photographic image of the Moon, although you can change
this in the Preferences, or use a menu option to not display the photo.
Status Bar
At the bottom of the main window is a status area. This shows the resolution and number of features that are labeled
(regardless of whether they are labeled by text or a mark or their size). When phases are shown (see Preferences), the
number of features seen is limited to those that are visible for that phase of the Moon. The detail seen is shown for the
various zoom levels for each map.
Using the Mouse
Single Click
A single click on the Moon map window will select the closest feature. Information on that feature will be updated in the
Feature Information window. If the option to Pronounce names is set (in the Preferences window), the name will be
spoken. If the option to Read Text is set (available under Apple OS X only), the information in the Feature Information
window will be spoken using the synthesized voice.
If the feature clicked on is not labeled, the label will appear and will remain visible until either a) the Moon map is moved
(by dragging it) or b) the zoom is changed. This allows you to see the names of unidentified features but still preserves the
label options selected under Modify Showings. The History window can be used to review those items that were clicked
on, if desired.
If Live Identification is on, it will also lock onto the feature. When a feature is locked, the Live Identification of features as
you move the mouse over the Moon stops. To release the lock and re-enable Live Identification, simply click a second
time on the same feature.
Click and Drag
The mouse may also be used to move about the large lunar map. At full size, the map is too large to be seen in its entirety
on a computer screen. Clicking and holding the left mouse button down while moving the mouse is used to move the
Moon map (pan) and bring various desired features into view. Note: if the Measure mode is selected in the Tools
window, you cannot drag the Moon map.
Option-Click (right mouse)
The default is to identify any feature on the Moon map, regardless if it is labeled or not, but it is possible to limit what is
identified to only the labeled features by holding the option key down (or using the right mouse to click). This allows any
feature clicked on to be identified. Some object lie on top of each other and you may get a different object than expected. If
you only want information or pronunciation to be those of labeled features, use the right mouse button to click on or near
the object.
Double Click
Double clicking in the Moon map window will select and lock the feature in the main Moon window. If the feature
information window is open, the information will be shown, and the close-up window will display an alternate image of
the feature if available.
Lunar Discoverer User Manual, Version 1.40
Page 10 of 57
Using the Keyboard
The main window displaying the Moon map responds to several keys.
The arrow keys can be used to move the map of the Moon around on the screen.
The space bar will instantly center a selected feature.
The ‘s’ key is a shortcut that will say (pronounce) a selected feature (this works regardless of the option to pronounce all
features).
Using the ‘-‘ key will move the terminator back in time (to an earlier time); the ‘=’ key will advance the terminator
forward in time (to a later time).
The Menus
You can use the pull-down menus to customize many of the program’s settings and access its many capabilities. See
examples below. Besides the usual standard File and Edit Menus, there are two additional menus: one for controlling
various Options, and one for controlling which Windows are open.
Lunar Discoverer User Manual, Version 1.40
Page 11 of 57
File Menu
Microsoft Windows
Apple OS X
The menu items seen under File are pretty much the standard File menu options found on most applications you already
use and are familiar with. Each is covered in the following section, in the order that they appear under the menu.
New
Selecting the New menu item clears existing display settings (the identified features on the moon), setting them back to
the defaults when you started Lunar Discoverer for the first time. Use the ‘Modify Showings’ menu item in the Options
menu to change labels on the lunar map.
Things to Try:
When ‘Live Identification’ is on (checked) via the Preferences dialog, features will be identified in the
Feature Information window as the mouse is moved over them. This can be a convenient way to test how
well you have learned various features. You can click on a feature and check the Feature Information
window to see if it is the name you expected.
Lunar Discoverer User Manual, Version 1.40
Page 12 of 57
Open
This menu item allows you to view previously saved Favorite sets of identified (labeled) features. The Favorites
window (see) appears, showing favorites that are shipped with Lunar Discoverer as well as any previously saved
sets that you have created. Clicking on a saved favorite set opens it and allows you to very quickly switch
between many customized views with ease.
Lunar Discoverer comes with several predefined sets (favorites).
Some Presets that are supplied with Lunar Discoverer:
SingleLetterID - displays craters with just a single letter, rather than using the entire name. This file
preset demonstrates the effect when used with craters, but you can set any feature type to be labeled this
way, and you may elect to use as few or as many letters as you wish.
Catena - labels the catena of the Moon
30mi Craters - all craters greater than 30 miles across are labeled
Mts Prom - displays all mountains and prominences on the face of the Moon
Sinus – displays the ‘Bays’ on the Moon
Rima - all rilles, rima and similar features are labeled with an arrow
Vallis – all valleys size and name shown
Mare - Shows the lunar mare (actually, maria) only
Landings - displays all of the exploratory spacecraft that have landed or impacted on the lunar surface
You may use the check box labeled Use Defaults in the Modify Showings option to restore the program to the
default settings, or set each feature individually in the same dialog. You never lose data, so experiment!
Things to Try:
Save several sets with different types of features turned on. For example: only craters greater than 30
miles across, only mountains labeled with arrows, only Rilles labeled in yellow. There are many
combinations that can be easily and quickly saved. Colors, fonts used and marking identifiers are all
preserved in a set.
Turn on ‘Show Size’ for craters, and the circumference of each will be drawn.
You can use the Save or Save As menu option to save combination sets, for example, just mountains and valleys
that are labeled (or marked in any way you prefer).
You can later open these saved sets and have all the settings instantly displayed. Some examples are included and
shown below:
Lunar Discoverer User Manual, Version 1.40
Page 13 of 57
The top left snapshot has craters and seas, with rimae shown.
The top-right screenshot has only some non-crater objects labeled.
The bottom-left shows seas only, with a yellow latitude and longitude grid.
The bottom-right screenshot shows landings only, with a purple grid.
Close
This menu item closes the currently active window.
Note: closing the main Moon window is the same as quitting the program.
Save
When you have a map with lunar objects labeled in a way you like, you may save it for future reference. If you
make changes to the appearance after a save, you can then revert back to a previous look by using the Open
menu command and opening the set that you previously saved.
Save As…
Allows you to specify a new name for a new collection of the settings used on the photograph of the Moon.
This lets you make a collection of styles and experiment with the settings and then quickly restore favorites.
Lunar Discoverer User Manual, Version 1.40
Page 14 of 57
Print (Deluxe Edition)
A Moon map can be printed as seen on the main window. Set the options you want before printing.
Things to Try:
Turn on ‘Show Size’ for craters and turn off the ‘Show Moon Photo’ for a detailed printout in situations
where you can’t take Lunar Discoverer for an observing session. You can save your displayed options for
future use (in a file named ‘Printing’ for example) and then load it whenever a printout is desired. Be sure
to save the settings for computer use beforehand so you can quickly restore your preferences after
printing, if desired.
Open List (Deluxe Edition)
For even more control over what features are displayed, you can make up custom lists of just the actual features
you wish to be shown on the lunar map. This menu selection opens plain text files (as created with Notepad in
Microsoft Windows, or plain text from Text Edit on OS X). Place each feature on its own line.
As an example, you can make a list like the following:
Apollo 11
Apollo 12
Apollo 13
Apollo 14
Save as a plain text file (no formatting). Open it as a list. You will get a message that Apollo 13 is not found
(because it did not land on the Moon). Only the Apollo sites in the list will be labeled, no craters, mountains or
any other features. This can be very useful for presentations to show certain features desire or to reduce label
clutter when zooming out.
Several lists are pre-made and supplied with Lunar Discoverer, look in the Try These folder.
Example: the Lunar 100 used by the Association of Lunar and Planetary Observers (ALPO).
Quit
Use this menu item to quit (exit) the program.
Many session settings are automatically saved, such as the positions and sizes of all windows, which ones are
opened, etc. The next time you launch Lunar Discoverer, it picks up right where you left off and the windows
appear right where you last had them (its just like you never quit).
If auto-save is on, the current labeling options for features on the Moon map are saved; otherwise you will be
asked if you want to save the current display options in the view.
Lunar Discoverer User Manual, Version 1.40
Page 15 of 57
Edit Menu
Microsoft Windows
Undo
Cut
Copy
Paste
Apple OS X
This menu item is not currently used, but is here as a placeholder to keep items where they are normally expected
to be located.
This menu item may be used on text entered when entering personal observation in the Log or in any of the
dialogs.
This menu item may be used when entering text in the personal observation in the Log or in any of the dialogs.
This menu item may be used when entering text in the personal observation in the Log or in any of the dialogs.
Find
Being able to search and quickly find a feature of interest is part of what sets Lunar Discoverer apart from a
photographic lunar atlas book. Search capabilities are sophisticated to make it easy for you to find what you seek.
Lunar Discoverer has a powerful Find tool to help locate features on the Moon. This menu item invokes the
search engine.
Below are shown the Find dialog boxes for Microsoft Windows and Macintosh OS X.
Microsoft Windows
Lunar Discoverer User Manual, Version 1.40
Apple OS X
Page 16 of 57
The first thing to notice in this dialog is the menu at the top of the window, below the title bar. By default, it will
search for all features (as shown in the previous Macintosh snapshot). You may also search for only a particular
type of lunar feature. For example, in the above Windows screen shot, it has been set to search just for lunar lakes
(Lacus). If you know what type of object you are searching for, this can be used to help the program find the exact
feature more quickly and accurately.
Clicking on the Feature type menu at the top of screen will display types of objects, as seen below:
Microsoft Windows
Apple OS X
A list of the feature types (Latin term, followed by the English term) can be selected, and the list of features of that
type will then appear in a list below it. To go to the object, click on it to select it and click on the Find button.
Search Entire Catalog
You can search the entire catalog of features, rather than from just those displayed by checking this box.
Entering a Name
As you type, the list will scroll to help you to locate the correct name or spelling. It is not necessary to spell the
name perfectly or completely (which can be difficult); it will try to find what you want from just a few letters,
even those from the middle of a name. For example, typing ‘ernic’ without having the ‘Exact Match’ checked, will
find Copernicus, as ‘ernic’ appears in that feature’s
name.
In the window below, Plato is highlighted and selected after typing ‘Plat’ - even before the last letter is typed, as
smart searching is used.
Lunar Discoverer User Manual, Version 1.40
Page 17 of 57
Exact Match
If you are confident of your spelling and the wrong object is located, select the ‘Exact Match’ check box option.
Center
To have the program automatically center the object on the screen, check the Center check box.
Zoom
To have it zoom in when going to the object, select the check box marked Zoom.
(Edit Menu Continued)
Find Nearest
This menu item finds the nearest feature to the currently selected object by distance on the lunar surface when
this menu item is selected.
Center
This menu item centers the currently selected feature in the main window. You may also use the space bar in the
main window to center a selected feature.
Pronounce
This menu item may be used to pronounce the name of the currently selected feature. Clicking on the feature will
also allow the name to be pronounced. Note: this will pronounce the name even when the general control for
pronouncing is off. This allows you to hear a name for just one selected feature if you do not want the names
pronounced every time you select or click on a feature. You may also use the ‘s’ key on the keyboard in the main
window to have the program speak (say) the name.
Lunar Discoverer User Manual, Version 1.40
Page 18 of 57
Options Menu
Many options can be set from this menu. Below is a screen shot of the Options Menu, followed by detailed descriptions of
its features.
Microsoft Windows
Apple OS X
Home
This menu item may be used to return the Moon map to its home position: the top left position that will not clip the photo
at the current scale.
Zoom In
This menu item may be used to zoom in on features of interest. How far you can zoom in is controlled by the source
image being used; a beep will be made if you try to go past what is allowed. If more detail is desired on a feature, open
the Close-up Window or use the magnifying glass button in the Information window (if the magnifier is not there, a
detailed image is not available; not every feature will have a detailed photograph.)
You can also zoom in by using a keyboard shortcut: the Command key with the ‘+’
Zoom Out
This menu item may be used to zoom out to get a quick view of surrounding features and get an overview of location in a
larger perspective. See how it might look through the naked eye or low-power instruments.
How far you can zoom out is controlled by the source image being used; a beep will be made if you try to go past what is
allowed.
You can also zoom out by using a keyboard shortcut: the Command key with the ‘-’.
Full Size
This menu item may be used to set the Moon map to the largest possible size without scaling the image up (i.e. 100%
scale.) This matches each pixel in the photograph to a pixel on the screen, for seeing the best detail possible.
Lunar Discoverer User Manual, Version 1.40
Page 19 of 57
Show Moon Photo (Deluxe edition)
(Found under Options Menu)
The standard setting is to show a photograph of the Moon. This menu item may be used to turning this off. This can be
useful for printing and to study and learn the general position and shape of features (if the size option is on in the Modify
Showings panel). Snapshot below:
Moon North Up
This menu item selects whether the Moon’s North is up (as with a refractor, binoculars, or naked eye), or inverted with
South up (as with Newtonian telescopes.) east is normally on the Right in this case. However, if your equipment requires
it, you can have North up and East to the Left by using the next menu option.
Moon East On Right
This menu item controls whether the Moon’s East is to the right side of the screen or the left side. When North is up (as
with a refractor, binoculars, or naked eye), the East is on the right side normally. However, if your astronomical
equipment requires it, you can have North up and East to the Left by using this menu option.
When inverted such that South is up (as with Newtonian telescopes), East is normally seen at the Left side of the screen
and this is automatically set for you. However, if your equipment requires it, you can set the display to have South up
and East on the Right by using this menu option.
Metric
This menu item selects between English or Metric system display of measurements. These are used in reporting
diameters, heights, depths, and distances. Lunar Discoverer automatically converts all units to the system of your choice.
Lunar Discoverer User Manual, Version 1.40
Page 20 of 57
Modify Showings
(Found under Options Menu)
One of the most important features of maps is the means to control what is labeled. With thousands of interesting
features, control over this massive amount of detail on the Moon’s surface is necessary. Lunar Discoverer provides quick
and convenient means of controlling how thousands of features are identified.
Click on the menu to select Modify Showings and the following dialog box will appear, where all of a feature's attributes
can easily be set and previewed.
Microsoft Windows
Apple OS X
The upper half of the dialog controls general information, which is applied across all types of features. It limits what is
displayed and labeled over the photograph of the Moon.
Size of features:
To limit the size of features which are displayed, two controls are used, one to limit the largest size, and one to limit the
smallest size identified. Checking the box and specifying the diameter will sort and select features according to what is
specified. If Metric is used, the units are specified in kilometers, otherwise miles are used.
For example to see only craters which are over 50 km in size, turn the Metric option on and then bring up the Modify
Showings dialog and click ‘Size Greater than’ and then type 50 in the edit box to its right.
If you also wanted to see features that are less than 2 kilometers, checking the ‘Size Less Than’ and setting the edit box at
the right would result in only craters less than 2 km appearing. Use the Apply button to instantly see how the Moon
surface will appear with your choices. In this example, all craters larger than 2 km but less than 50 km would not be
shown. This provides a powerful way to limit clutter and study the moon.
Things to Try
Lunar Discoverer User Manual, Version 1.40
Page 21 of 57
How many identified craters are between 5 and 10 miles in diameter on a full Moon? (Use Greater than 5, Less
than 10.) Answer: 1,402!
How many craters can be identified that are between 10 and 20 miles in diameter on a full Moon? (Greater than
10, Less than 20.) Answer: 1,170!
Leave both check boxes unchecked to see all the features of any size on the map.
Name Range
For quizzing and other interesting studies, select the Name Range check box and limit features that are displayed based
on the letter they begin with.
Location of features:
To limit features that are seen, based on their location on the lunar surface, you specify the latitude and longitude.
Latitude controls how far north and south of the equator you are able to see (it is normally the entire surface from North
to South pole).
Longitude is set automatically to display only those features that are visible on the particular date on which the viewing is
taking place. To specify a different range, check the box off and enter the values you want.
Auto Scale text
Check this to allow the font size to automatically change as the zoom is changed on the Moon. This will help it stay in
proportion to the scale of the map. When this is not selected, the font stays at the same size you set it, regardless of the
zoom.
Use Defaults
To quickly restore all settings to the standards, use this option and then click the Apply or OK button.
Lunar Discoverer User Manual, Version 1.40
Page 22 of 57
Feature Attributes Area of Modify Showings
This section of the dialog is used to completely customize how features are identified on the surface of the Moon. Each
type of feature can have its own unique identification: its own color, markings, text style, number of characters used in
name, and more. You can set up dozens of custom settings and views and save them for specific studies (see the Save
menu option).
Each type of feature can be controlled independently of the others. For example craters can be labeled with text, landings
with a mark, and mountain ranges and fissures outlined by their size. This is controlled through the Popup menu, which
is by default set to affect Craters. Clicking on the menu allows the settings below it to be applied to that particular type of
feature. After the characteristics for a feature have been set, they are applied and saved whenever the menu is changed.
To make all features use the same font or color, select All Features in the menu and then apply the settings below it.
Use the Cancel button if you want to restore all settings to where they were before the dialog was opened.
Microsoft Windows
Apple OS X
Each type of customization is explained below. To see the effect of the various buttons without committing to a change,
use the Apply button (using the Cancel button will restore the appearance regardless of the changes you may have
applied; clicking OK will keep the appearance the same).
Show Feature Size (Deluxe edition)
When this option is checked, the shape and boundary of the feature on top of it will appear in the specified color. It is
almost essential to use this when the Moon photo is not shown. It is perhaps most useful on craters. Due to their small
size, it is of no practical use for landing sites. By using the Apply button, you can immediately view the effect of selecting
this option.
Mark Center
This option allows a feature to be marked with any of the symbols shown beneath the check box. It can be a nice
alternative to showing the features size to identify the position. The feature is marked with the chosen symbol at its
Lunar Discoverer User Manual, Version 1.40
Page 23 of 57
center. This is also very useful for marking landing sites. Click on the desired symbol to select and use the mark. By using
the Apply button, you can immediately view the effect of selecting this option.
Label
Turn this option on to display the official name of each feature. You can choose between the traditional Latin name and
the modern English name by use of the Display Settings menu item under the Options menu.
Limit to use __ characters
Use this feature to specify how many letters are used in labeling. Leave it blank
(or type 0) to show the full name. For example, typing in a 1 would label the future using just the first letter of the
name. Limiting to 3 characters would result in just the first 3 characters of the name being used on the labeled
features.
wrap text
Most useful for names which consist of multiple words, this allows them to use several lines to
take up less space across the screen and reduce clutter. When wrap is on (checked), the name will use several
lines. Very often used for Mare with the center position option.
Things to Try
The default is to label with the entire name of a feature. Try using abbreviations of 3-5 letters and test how well
you know the features, with just the abbreviation used as a clue.
Try using just 1 character to identify a feature location. You will still see the full name in the information window.
Position
The series of buttons show where the labels will appear around the feature. To center the text at the center of the feature,
use the center position.
To see the effect of the various position buttons, click on the Apply button.
Draw Arrow
You can use this option to move the text label further away from the feature and draw a line to the center of the feature.
The Position (see above) is used to specify the direction in which the text will be moved (if it is in the center position, no
line will be seen). See the above diagram to see how arrows will be drawn (you can test the position and effect by using
the Apply button).
3D Text
Use this option to enhance the appearance of the labels and make the text more readable against bright and dark areas. It
works best on larger font sizes (14 point or larger).
Font
This option allows you to select the font and the font style used in labeling the feature.
Color
Use this option to display features in any color you wish. It is best to use darker colors for light areas of the moon and
lighter colors for the dark areas such as Mare (seas). Any text, arrows, object size, or marks selected will use the color
selected.
Lunar Discoverer User Manual, Version 1.40
Page 24 of 57
Microsoft Windows
Things to Try
To see the effect of the various buttons, without committing to a change (and losing the settings used before the
dialog was opened), use the Apply button.
Using the Cancel button will restore the appearance regardless of the changes you may have applied; clicking the OK will
keep the appearance unchanged).
Lunar Discoverer User Manual, Version 1.40
Page 25 of 57
Preferences
(Found under Options Menu)
This menu allows you to change settings that affect the overall appearance of the Moon. Some of the items controlled by
this menu include the displayed date, naming conventions, and the lunar map image used (see figures below).
Microsoft Windows
Apple OS X
Gridlines
This allows you to control the display of latitude and longitude grid lines. Check the box to see them displayed
on the Moon. Typically, a grid of 15 degrees is useful. Multiples of 5 or 10 degrees are common (5, 10, 15, 30
degrees typically).
The color of the lines is changed by clicking on the box to the right (labeled Color in the Microsoft Windows
version; the Macintosh shows the current color). You may then select from a color palette.
Check the Label check box to show the latitude and longitude degree values on the map.
Use Degree, minutes, seconds format
Angular measurements and time may be displayed in either decimal format (12.6 degrees) or as degrees, minutes,
and seconds (12 degrees, 30 minutes, 5 seconds). Physical time is computed only to the nearest minute, so seconds
are not shown on times.
Use Modern naming
Latin names have traditionally been used to name the Moon’s features. Checking this option allows more modern
English naming to be used instead. For example, Mare Serentatis becomes Sea of Serenity when this is checked.
Detailed Calendar (Deluxe edition)
The basic calendar shows when the quarterly phases occur and shows a picture of the phases of the moon in the
area above the calendar (see). The detailed calendar draws the phase in each day of the month in the calendar,
and labels the age of the Moon for each day.
Live Identification
When this option is selected, the computer tracks the mouse, and the feature beneath the cursor is instantly
identified in the Feature Info window. A close-up of the feature is also shown in the Close-up Window when that
window is open. Additionally, the Clear View windows will display the lunar map without labels and track the
mouse as you move it.
Lunar Discoverer User Manual, Version 1.40
Page 26 of 57
Live Identification allows you to lock onto a feature by simply clicking on it. Clicking on the same feature a second
time turns off the locking and puts you back in ‘live’ identification mode again.
Auto-Save on Quit
When this option is checked, all settings are automatically saved when you quit the program, including window
positions, colors, and all other options. If you change any settings and this is not checked, you will be asked if you
want to save the settings. Most users prefer the convenience of working with the auto-save
Pronounce Features
When this checkbox is selected Lunar Discoverer will pronounce each feature as it is selected (by clicking on the
feature or searching for a feature). This is not available for every feature, but is available for well over a thousand
lunar objects (All those named by the International Astronomical Union, the IAU)!
Read Text Using
(Apple OS X Only)
Check this option to hear text read aloud on computers that support synthesized speech. You will hear
information about the crater features as shown in the Feature Info window. To stop the reading at any time, click
in any window, such as the Clear View or in the Feature Information window’s top panel.
You can select the synthetic voice that you prefer from the pop-up menu. This is a fun option to experiment with.
Its nice to use at the telescope so you can have the information read while you observe in an eyepiece.
Set Date and Time
Date Field
This is an alternative to using the Calendar window. It has the added capability of quickly going to any date of
any year.
Time Field
Normally you needn’t change this, unless you want to see the appearance of the Moon at a specific past or future
or past time or date. However, setting the Time can be very useful to fine-tune the location of the terminator and
the position of the phase drawn. This requires that Show Terminator option be checked. Due to librations of the
Moon, the Moon map image and the terminator as seen in the program is only approximate on a given date. You
can adjust the exact position shown to better match what you see in the telescope by changing the time in this
field. Changing the time will cause the program to calculate and move the terminator.
You can adjust the time to get the terminator to line up very closely to what you actually observe. It will
automatically move through the night to stay in synch with the Moon at the time interval you specify in the
preferences.
Moon Map
With advanced versions of the software, you may choose between using several different maps of the Moon, such
as photographic, simulated, or false-color elevation. You may also use this to select between using a full Moon
map of the Moon or photographs of the Moon each night at different phases. When a Phase series is chosen,
changing the date (for example, by clicking on the calendar) will display the Moon that closest matches the phase
of the Moon for that date.
Show Terminator
To see what may be coming up into view or will soon pass into shadow on the Moon, check this box.
If this is checked, the current phase of the Moon will be drawn, with the terminator represented as a line drawn in
red. Since the terminator and phase change from moment to moment, with visible effects on what is viewable,
you may choose to allow the program update this periodically. A value of 10 to 30 minutes is suggested.
If the Moon Map used is a full Moon type (rather than a series of photographs of the phases), the entire near side
of the Moon with all features will be visible if this option is not selected.
Rotate Moon to Match Sky
The Moon map is normally drawn with the North-South pole line oriented vertically, with North or South up. To
match how the Moon appears in the sky at any particular moment, check this box. The map will then be rotated
to closely match the sky.
Lunar Discoverer User Manual, Version 1.40
Page 27 of 57
If your telescope view requires it, you can specify the angle of rotation in degrees by entering a number other
than 0 in the box to the right of this control. Valid values range from -90 to 90 (positive being clockwise, negative
being counter clockwise).
Be aware that using the rotation option will slightly reduce the image quality; this cannot be avoided when
rotating images. For maximum detail, you can quickly temporarily turn it off and then turn it back on so the
orientation in the program exactly matches what you see in the eyepiece of the telescope.
Lunar Discoverer User Manual, Version 1.40
Page 28 of 57
Your Telescope (Equipment)
(Found under Options Menu)
This feature allows you to enter specific information about the equipment, calculating the power and view—even
allowing you to see the Moon through the eyepiece, if desired. The window appears as below:
Microsoft Windows
Apple OS X
In the example above, English units are used for the telescope, but by checking the Metrics Units box, you can enter
metric measurements instead (Eyepiece focal lengths are universally given in metric units). Refer to the eyepiece
specifications that came with the telescope to find the eyepiece True Field of View.
The top section is where you enter your telescope specifics. You must enter the diameter of the main lens or mirror. The
line below that allows you to enter either the focal length of the telescope or the f-number. Use whichever is known. The fnumber is often printed on the edge of the lens; if not there, check your telescope manual or use the focal length.
Below the telescope section is the eyepiece panel, where you supply information on the eyepiece you are viewing with.
Two items must be supplied to calculate power and view: the True field of view and the eyepiece focal length. Both are
available from the eyepiece manufacturer. You may also try searching the web for your eyepiece and FOV; there are too
many to list here and the specifications of a manufacturer’s eyepieces change, so it is best to check your owner’s papers.
Field of View
Enter the value, given in degrees, from the eyepiece manufacturer. An eyepiece's field of view (the apparent field of view)
is the diameter, expressed in degrees, of the circle of light that the eye sees. Eyepiece apparent fields range from narrow
(25 – 30 degrees for short focal length) to extra-wide angle (80 degrees or more). The true field (or real field) of view is the
angle of sky seen through the eyepiece when it's attached to the telescope.
Focal Length
All eyepieces have the focal length printed on their barrel, as it is important to selecting magnification power. Enter the
value shown on the eyepiece. Eyepiece focal lengths are universally given in metric units (millimeters, mm).
Barlow
If you are using a Barlow lens to amplify the magnification of your eyepiece, check the box and enter the power in the box
to the right (2X- 5X is normal, although it is possible to successfully stack high quality Barlow lenses).
Calculate
Clicking on this button will calculate the Magnification of your equipment and indicate the true Field Of View (FOV), i.e.,
how much is seen through the eyepiece. The Moon is about a half degree in diameter (0.5 degrees, or 30 minutes).
The power per inch of aperture (PPI) is shown in parenthesis to the right of the magnification. A power of 50X per inch is
a good rule of thumb for the maximum useable power possible under excellent skies—if you also have excellent optics in
a telescope. Using magnification beyond that will only produce blurriness.
Lunar Discoverer User Manual, Version 1.40
Page 29 of 57
Show View
Below is a snapshot of the computer screen when the Show View box is checked. This will show the Moon map exactly as
it appears in your eyepiece. You see on the screen only what is visible at the eyepiece of the telescope; the rest is blanked
out. This powerful technique helps you to identify features and match them to the view in the eyepiece.
Lunar Discoverer User Manual, Version 1.40
Page 30 of 57
Observing Log
(Deluxe edition)
(Found under Options Menu)
You will probably want to take notes while observing and studying the Moon. With the computer nearby, you may enter
your notes right in Lunar Discoverer with the Observer Log. The date and current time are automatically set for you, as is
the object name (it uses the currently selected object—whatever was clicked on). Enter the Power used, and your
equipment (instrument), both of which are remembered to save you time and work for future sessions. Following that,
just setting the night seeing conditions and sky transparency if desired, and enter your notes.
Macintosh Screen shot:
On the Macintosh, the history may be viewed or printed by clicking on the expansion arrow below and to the left of the
Cancel button.
Lunar Discoverer User Manual, Version 1.40
Page 31 of 57
Windows Screen shot:
Under Microsoft Windows, the history can be viewed by clicking on the Show Log button. A window will then be
opened, showing your previous entries, such as shown below:
Print
Used to print the observing log.
Export
You may export (save) your Observer Log to open in a word processor or web browser. The button allows saving an html
text file, which most editors can edit.
Lunar Discoverer User Manual, Version 1.40
Page 32 of 57
Viewing Location
(Found under Options Menu)
You may change your viewing location at any time using this menu option. A window opens to present you with a list of
major cities across the world, as seen below:
Microsoft Windows
Apple OS X
The cities are listed alphabetically by country first. If your city is not located in the list, you may enter your Latitude and
Longitude in the fields provided. This information can be easily obtained from the Internet using a Google search for
latitude and zip.
The Time Zone is measured from Greenwich Mean Time; if you are West of Greenwich, England it is a positive number;
East is negative. If your longitude is negative, the time zone should be a positive number of hours; if the longitude is
positive, the time zone hours will be negative. Look for a nearby city if you are in doubt.
Daylight Savings Time is automatically used as read from your computer’s internal clock.
Lunar Discoverer User Manual, Version 1.40
Page 33 of 57
Windows Menu
Lunar Discoverer has many windows can be either shown or hidden; you should choose to show or hide them depending
on the types of information you are seeking. Unless you have a very large screen, you will probably just want to leave
some of these windows closed, depending on what you want to accomplish.
Seen below is a screen shot of the Windows menu, which lists all the available windows that can be opened.
Microsoft Windows
Apple OS X
This section will give by detailed descriptions of how to use each of the windows.
Lunar Discoverer User Manual, Version 1.40
Page 34 of 57
Browser (Deluxe edition)
(Found under Windows Menu)
This window is used to browse through or search through the thousands of close-up, detailed images for features on the
Moon. Snapshots of this window for each of the computer platforms are shown below:
Microsoft Windows
Apple OS X
Check boxes
Full—draws the photograph full-size (1:1). Some images are very highly magnified, and using this option allows
you to see them in maximum detail. They may not be entirely seen if the Browser window is not large enough to
display them full size. To see the entire image, use the mouse to resize the Browser window, or use the Resize
check box (see below).
When the Full check box is off, the image is scaled to fit in the window. Enlarging the window will scale the
image up appropriately. A green border around the image is shown when it is at full resolution (1:1 pixel). A red
border indicates you are scaling the image up to fit the window (that is, magnifying it, which causes pixilation). A
blue border indicates the image has been scaled down (shrunk in size) to fit in the window, and may be enlarged
to see more detail without causing blurriness or pixilation.
Changing the size of the window will change how much scaling is used whenever Full is not checked.
Resize—causes the window to automatically size itself to fit the image at a 1:1 ratio. It automatically sets the
image to be displayed at a 1:1 (Full) size. Each image that is opened in this option will cause the window to
automatically resize itself to show the entire image.
Buttons
Back—takes you back one image to the previous in the list (alphabetically).
Next—takes you forward one image to the next in the list (alphabetically).
Using the Keyboard
The arrow keys can be used to quickly move through the thousands of Browser close-up images. You may use the right
arrow (or up arrow) to advance to the next image. Use the left arrow (or down arrow) to select the previous image.
Typing any letter of the alphabet will take you immediately to the features that begin with that letter.
Lunar Discoverer User Manual, Version 1.40
Page 35 of 57
Using the Mouse
Double Click
Double clicking in the Browser window will select and center the feature whose image is displayed in the Browser
window in the main Moon window. If the feature information window is open, the information will be shown, and the
close-up window will display an alternate image of the feature if available.
Option-Click (right mouse)
The default is to search all categories of features, but it is possible to limit the browser to searching only selected
categories of images. Holding the option key with the mouse click (or clicking with the right mouse button) will bring up
a popup menu of categories, as seen in the snapshots below:
Microsoft Windows
Apple OS X
As many features may be seen in each of the categories, this can be useful to find only those of a certain desired type.
All Folders and Images—the default, uses all images supplied with Lunar Discoverer.
Apollo—images taken by the Apollo missions, courtesy of NASA
Best of Amateurs—images taken by amateur astronomers, courtesy of the individuals.
Clementine—images taken by the Clementine lunar missions, courtesy of NASA.
LAC_LM—these are charts, not photographs, taken from the Lunar Astronautical Chart. They show contour lines
of elevation. These are made available courtesy of the Lunar and Planetary Institute.
Lunar Greats—images corresponding to some of the best or most interesting features of the Moon.
Lunar Orbiter PhotoAtlasMoon—images taken by the NASA Lunar Orbiter satellite mission.
LunarProbes—images taken by the various lunar probes missions, courtesy of NASA.
Various—images taken from a variety of sources that do not fall into one of the above categories.
Lunar Discoverer User Manual, Version 1.40
Page 36 of 57
Calendar (Deluxe edition)
(Found under Windows Menu)
There are two options for depicting the calendar: detailed or standard. At the bottom of the calendar window, the phase
name is show, along with the date of the selected day.
The standard view looks like a conventional calendar with a photo above it, and shows icons for just the major phases (by
Quarters), along with the day of the month in the lower right corner for each day.
Standard Calendar
The detailed calendar is shown below; it shows an icon for the phase at the start of each day (at just after midnight). The
age of the Moon is displayed in black text at top left of the moon icon.
Detailed Calendar
Use the Preferences dialog, found under the Options menu, to select which style of calendar you prefer.
As with all windows in Lunar Discoverer, the calendar window can be resized according to your preference. The font and
color used for drawing the calendar can be set by option clicking on the calendar window (or clicking with the right
mouse).
Lunar Discoverer User Manual, Version 1.40
Page 37 of 57
Changing the Date
To select the date for which the Moon’s features will be displayed, click on that date on the calendar. If phases are shown,
the terminator will be shown overlaid on the Moon photo. If Auto set to Latitude is on, the labeled features will be
adjusted for the phase as seen on the selected date.
Changing Months
You can easily go back a month by clicking in the calendar window itself on a day square before the first day of the
month (to the left of it). To go forward a month, clicking on a square after the last day of the month (to the right).
Specific Dates
To change the date to a month or year other than the current displayed calendar, use the Preferences dialog (in
the Options menu). This contains a field that allows you to enter any desired date. When changed, the program
will automatically go to that date.
To quickly return to the current date and time, use the Set Date to Now menu under the Options menu.
Using the Keyboard
You can also use the arrow keys to navigate through days in the calendar. The right arrow takes you forward one day; the
left arrow takes you back a day. Going past the first or last day of the month will cause the month to change. When
Phases are selected for the Lunar Map, the photograph with the nearest appropriate phase is automatically loaded and
displayed.
Using the right arrow key to pass the last day of the month will advance you to the next month; using the left arrow key
to pass the first day of the month will take you to the previous month.
Lunar Discoverer User Manual, Version 1.40
Page 38 of 57
Clear View
(Found under Windows Menu)
The Clear View window shows the Moon’s surface without any labels or markings.
The screen shot below shows the Clear View window placed bear the labeled area it is displaying. Because the size of the
craters is not shown on this window, it is possible to see more detail in the crater walls, yet the main window provides
helpful labels, so you get the best of both worlds.
Note: the Clear View window is not used if a lunar photograph is not used for the main display window (see the Options
menu).
When Live Identification is turned on, the image shown in the Clear View window follows the cursor as it is moved over
the surface of the Moon map that is shown in the main window. Otherwise it displays the area of the moon centered on
wherever you click.
This window can be resized according to your preference and moved to a convenient location. It always displays the
Moon photograph at full size and best resolution, that is, at 100% size (not scaled), for maximum detail without distortion
or pixilation.
Lunar Discoverer User Manual, Version 1.40
Page 39 of 57
Closeup Window
(Found under Windows Menu)
Many features on the Moon have detailed close-up photographs, to help you learn the details that may be visible for that
particular feature. More detail can be seen in these close-ups than in the photograph that shows the entire Moon.
The screen below on the left shows a close-up of the crater Nielsen; the one on the right shows Plato.
Notice that the close up image on the screen shot on the left has a green border around it; this indicates that the size is at
optimal viewing (100% of the source image). Changing the size of this window using the grow icon at the lower right
corner of the window results in the image being scaled to fit the size of the window.
A blue border indicates that the image is smaller than optimal size; a red border indicates it has been enlarged beyond
100% and is scaled up. The blue border indicates the source image is scaled down and can be made larger (by resizing the
window) without any loss of detail. By setting the size of this window, you can limit the space used for close-ups yet still
see a high magnification view of the feature when available (not all craters will have a close-up image available).
Below, the Closeup of Plato is scaled to best fit the window size; the blue border around it indicates that it can be scaled
up without any loss of detail.
Close ups are snapshots of the feature for a particular night and phase of the Moon. They will not appear exactly as they
will on the night you are viewing, due to the changing shadows and their effect on the appearance of a feature. For
Lunar Discoverer User Manual, Version 1.40
Page 40 of 57
example, the main window will often show the full moon, where shadows are very short (it is like noon on the moon’s
surface), so the detail seen on the craters is low. It is difficult to see how deep Copernicus is from this photo.
The close-up image shown below was taken when Copernicus was near the terminator; the lighting shows nice detail on
the crater walls, and the rubble is nicely seen. Of course, you can look for these details under other lighting (such as the
full moon), and may pick out even more details that are missing in a particular close-up. This is part of the enjoyment in
studying the Moon—the ever-changing lighting on the surface brings new details to light.
Because no two nights are ever the same, viewing features on the Moon is always a fresh experience. For the astute
observer, there will also be some new and potentially exciting thing to notice and take note of.
When Live Identification is enabled, this window will track and display features as you move the mouse over the moon.
To see a particular close-up under a different lighting condition, one may use the Browser window (see), where many
images may exist for a particular feature.
Use of the Mouse
Option clicking (right mouse click) in this window will change the magnification automatically to 100%, and back again
on repeating.
Double-clicking in this window will center the object in the main lunar window, making it easier to locate.
Lunar Discoverer User Manual, Version 1.40
Page 41 of 57
Eclipses
(Found under Windows Menu)
The Eclipses window shows detailed data for lunar eclipses. When first opened, it shows any eclipses that will occur for
the current year. Below are screen shots for different years (2006 and 2008):
Microsoft Windows
Apple OS X
At the top of the window you can see how many lunar eclipses will occur during the selected year(s). Note: not all
eclipses can be seen from a fixed location on Earth (i.e., your location). You will need to check the times and another
source to determine whether the eclipse will be visible from your location; this program does not have the capability to
determine that.
Several major details are displayed for each lunar eclipse that is found during the year
If the eclipse is a full eclipse (the Moon totally shadowed), the words “Total Eclipse” will appear on the first line;
otherwise, “Annular Eclipse” will appear on the line that shows the date of the eclipse. An annular eclipse occurs when
the shadow of the earth does not completely cover the Moon (see the Guide in Lunar Discoverer for more details on
eclipse).
Start of the Eclipse
An eclipse starts when the leading Penumbral shadow of the Earth contacts the Moon. Penumbra shadow contact
information is shown in the next section, below the single line—the time it begins, and when the umbral contact begins.
End of the Eclipse
An eclipse ends when the trailing Penumbral shadow of the Earth last contacts the Moon. The totality ends when the last
umbral shadow exits the Moon. These times and their lengths are given in this section.
A double line separates individual (different) lunar eclipses from each other.
Lunar Discoverer User Manual, Version 1.40
Page 42 of 57
Other Dates
You can change the year and see predictions for eclipses in the future or even explore when eclipses happened in the
past— over the course of centuries or for a specific date. This is most easily done by using the New button to see a new
list of lunar eclipses.
New Button
Clicking the New button at the top right of the window allows you to pick a date for searching for new eclipses over a
specified period of time. A window opens, with a variety of options (see below):
Microsoft Windows
Apple OS X
Search Range
You may search for lunar eclipses that occur over a span of years, up to 2000 years at a time. Or you can enter a single
year (as seen in the Apple OS X window at the right.
Search for Date
By checking this checkbox, you may search for lunar eclipses that occur on a specific day, such as a birthday or an
anniversary date.
Checkboxes
You must check at least one of the checkboxes below to get eclipse results.
Total
By checking this option, only those eclipses that will be a total lunar eclipse will be reported to you.
Partial
By checking this option, only those eclipses that will be partial lunar eclipses will be reported to you.
After clicking OK, the eclipse detailed information results will appear as before, but for the dates you specified.
Lunar Discoverer User Manual, Version 1.40
Page 43 of 57
Feature Information
(Found under Windows Menu)
This window is perhaps the most often used. It is used so frequently that it automatically opens when you ‘lock on’ to, or
double click, a feature. It shows all the information for a given feature on the Moon’s surface. It has two panels; the upper
one is gray.
Right-mouse clicking allows you to customize the size and color of text used in the window.
Microsoft Windows
Apple OS X
Upper Panel Information (gray area)
The first line of information shown is the feature name. (If you want the name displayed in Latin instead of modern
English, or vice versa, go to the Options menu in the Preferences window.) Further to the right is a short note on the
interest level of the feature. In this example, it is noted that Gerard is a difficult object to see, and does not have extensive
unique features which would make it more interesting. Notes on other—more notable—lunar features may state that they
are in the 100 Best objects to study or of high interest.
Immediately below the feature name is its latitude and longitude on the Moon (this can appear as
degrees/minutes/seconds or decimal degrees, and is also controlled by an option in the Preferences window).
The next line below the latitude and longitude is quick information about the feature. Its size is shown as the diameter
and depth (or height, in the case of plateaus or mountains). The ratio of its diameter to depth is also given; this is relevant
to the type and general features of a crater.
Below the basic information on the feature is a reference to more information on the feature in three of the standard
textbooks used for lunar study—those written by Rukl, Viscardi and Hatfield.
Lower Panel Information
Below the general upper panel area (drawn on a gray background) is a panel whose content changes depending on the
buttons of this window. This lower part of the window (below the gray area) contains information about the feature or
the person for whom it is named.
Buttons
Two buttons are normally seen in the top right hand portion of the Feature Information window; they control what is
seen in the lower panel of the window. The left one is a magnifying glass for viewing images; to its right is a button to
control textual information.
Magnifying Glass Shown
A magnifying glass appears if the feature has a close-up image available for it. Click on the magnifier when you wish to
view the close-up instead of the text. Note: if the feature does not have a close-up view available, the magnifying glass
will not be displayed.
Lunar Discoverer User Manual, Version 1.40
Page 44 of 57
Click on the magnifier icon to see a close-up image for the feature. The image will be scaled to fit the lower panel of this
window, as seen in the screenshot below:
Microsoft Windows
Face/Crater
To the right of the magnifying glass button (when present) is a button that allows you to toggle between information
about the person for whom the crater is named (or sometimes, information about the Earth location for which it is named)
and information about the feature itself—when it is best viewed, and what to look for.
A crater icon on this button indicates that you are viewing information about the feature itself; the icon of a face (Albert
Einstein) indicates that you are viewing information about the person (or place) for whom the feature is named. Most
lunar features are named after prominent scientists, and there is a small encyclopedia of information for each of them in
Lunar Discoverer.
Face Icon Shown
When a face is seen on the button, one usually reads information about a famous scientist, inventor, doctor, or other
person for whom the feature has been named. When they were alive and what they were noted for is covered in some
detail. The screenshots below show examples of what you will see when the image of a man is seen on the button:
Using the Mouse
If you double-click on a feature name seen in the lower portion of the window, the program will locate that feature on the
Moon map and take you there, selecting it and centering it in the main window (this feature is available under Microsoft
Windows only).
Lunar Discoverer User Manual, Version 1.40
Page 45 of 57
If you double-click on a word other than a feature name, the Guide Window will open the Guide Window and display the
closest Definition, to help you locate the definition of that term.
Crater Icon Shown
When you click the button on the right, the button image changes from that of a face to that of a crater. New text appears,
giving you more details about the feature. You will be told which nights are best for viewing (when it is close to the
terminator, normally), and which attributes might be interesting to look for, as seen in the screen shot below:
Double-clicking on a feature name found in the lower portion will locate that feature on the Moon map and take you
there, selecting it and centering it in the main window. It will also open the Guide Window to help you locate the
definition of any term that you click on.
Using the Mouse
If you double-click in the lower part of the window, the Close-up Window will open at full size for that feature. The
Closeup window can be resized (see Closeup Window).
To save screen space, you may view the close-ups in the Feature Information Window here or in a separate window
(which allows you to read textual information about the feature or about the scientist for whom the feature is named.
Lunar Discoverer User Manual, Version 1.40
Page 46 of 57
Guide
(Found under Windows Menu)
The Guide is a convenient place to find lots of detailed background information on the Moon. In fact, it is like a small
electronic encyclopedia of the Moon. As you can see in the figure below from the menu, over a dozen chapters deal with
major areas of study about the Moon. Following the Introduction to the Moon, observing tools (binoculars, telescopes) are
discussed, as are the current theories on the origin of the Moon, and mankind’s exploration of the surface. There is even a
chapter discussing craters located on the Earth!
Following the General section of the Guide there is a night-by-night summary (Nightly Views) of what should be looked
for over the course of an entire month of observing the Moon.
Using the Mouse
If you double-click on a lunar feature name on any Guide page, the program will locate that feature on the Moon map and
take you there, selecting it and centering it in the main window (available for Microsoft Windows only).
If you double-click on a word on any Guide page other than a feature name, the program will open the Guide Window to
the closest Definition section to help you locate the definition of that term.
Lunar Discoverer User Manual, Version 1.40
Page 47 of 57
Nightly Views
The Guide provides key assistance in helping make an observing strategy for on each day; this is found under the Nightly
Views section. In this area you will find out which craters are visible and best viewed on a given day or night. You’ll see
what specific details one should look for in and around a feature—covered in some detail—as seen under the lighting for
that particular phase of the Moon. A sample of what is covered is shown below.
There is more information specific to each feature found in the Feature Information window when the crater
icon button is showing.
Lunar Discoverer User Manual, Version 1.40
Page 48 of 57
History (Deluxe edition)
(Found under Windows Menu)
The History Window shows which features have been visited on a given session of running Lunar Discoverer. Every time
a feature is clicked on, its name is added to the list. This window can be helpful at the end of an observing session, when
you’re writing up a personal log for an evening. It lets you easily review the objects you’ve looked at.
Lunar features having a close-up image have a mark to the left of their name.
As each item is selected, the lunar map will move to show that feature at the center of the screen, and the Feature
Information window will display that feature.
Microsoft Windows
Apple OS X
Using the Mouse
To select a feature, click on its name in the window. The view will shift so that the object appears at the center of the
screen.
Keyboard
You can also use the up and down arrows on the keyboard to go through the list, selecting the features.
Buttons
The history can be sorted alphabetically or listed in the order you selected them on the Moon map. This is controlled
using the button at the top right of the window. The button to the right of the list of viewed items allows toggling
between the two. An ‘A’ indicates the list is sorted alphabetically, and ‘E’ indicates that the features are listed in the order
in which they were viewed.
Note on text styles displayed in windows:
In a window that contains text, you can change the style and color of the text by right-mouse clicking or option clicking in
the window and scrolling through your choices.
The Microsoft window version on the left has an italicized, bold text chosen; the Macintosh example on the right shows a
font that uses all capital letters in its display. You can use any of your own fonts for the text in these windows, and set the
size and color you desire.
The window may also be resized. Its position and size are remembered when it is closed so that it will appear in the same
location when next opened or when the program is resumed at a later date.
Lunar Discoverer User Manual, Version 1.40
Page 49 of 57
Phase Details
(Found under Windows Menu)
The basic information about the Moon itself is shown in this window. The first section shows the rise and set times at
your location, and tells you when the Moon will reach its zenith. Below that is information regarding the phase of the
moon for the date shown, and then its distance from the Earth, and size in the sky.
At the bottom of the window, you will find general information for the month—dates of nearest approach and farthest, as
well as the major phase dates.
Microsoft Windows
Apple OS X
All of this information is updated throughout the day at the intervals specified in the Preferences window.
As a window with text, the Phase Details window may have its color and text style set by right-mouse clicking or option
clicking in the window.
The window may also be resized. Its position and size are remembered when it is closed so that it will appear in the same
location when next opened or when the program is resumed at a later date.
Lunar Discoverer User Manual, Version 1.40
Page 50 of 57
Terminator List
(Found under Windows Menu)
The list of objects that will appear at the Moon's terminator for the current date are shown in the Terminator List window.
This list is created and updated regardless of whether the phase is set to be shown on the Moon map of the main window.
Microsoft Windows
Apple OS X
The order of the list is normally from top to bottom (with North up), by latitude, along the terminator.
A bullet to the left of the name indicates that there are one or more close-up images available for the feature. These are
seen in the Close-ups window. You can browse through all the close-up images by using the Browser window.
Buttons
To see the list alphabetically, use the button marked ‘L’ (for longitude) in the area that indicates the number of features.
The button will then change to an ‘A’ to indicate the list is sorted alphabetically.
Use of the Mouse
When you click on a feature’s name in the window, the program will select it and move the feature into the center of the
screen. You can also use the up and down arrows on the keyboard to go through the list.
Use of Keyboard
The arrow keys may be used to advance through the list. Use the up arrow to move up, the down arrow to move down.
As a window with text, it may have its color and text style set by right-mouse clicking or option clicking in the window.
The window may also be resized. Its position and size are remembered when it is closed so that it will appear in the same
location when next opened or when the program is resumed at a later date.
Lunar Discoverer User Manual, Version 1.40
Page 51 of 57
Things to Try
Wondering when a favorite feature is best seen? Combine the Calendar with the Terminator List.
Clicking on a day on the calendar will instantly show you the features that can be seen on the terminator on that date. For
example, on the night of October 28 below, 133 features are near the terminator and will be excellent for observing.
If you were to click on the 29th of October, as shown below, you will see that some of those features from the 28th of
October are no longer on the terminator list, as the Moon’s terminator has moved.
Click on any day on the calendar to look for the features near the terminator that you want to study.
Lunar Discoverer User Manual, Version 1.40
Page 52 of 57
Image Effects (Deluxe edition)
(Found under Windows Menu)
Currently available only on Microsoft Windows operating systems.
Use this window to adjust brightness and/or contrast of the lunar map displayed in the main window. This can be used
to optimize the view of lunar surface map for various regions. For example, typically the limb is much brighter than the
central portion of the Moon; adjusting the map with these controls can help you see and identify features in an under or
over-exposed area, such as the lunar limb.
The changes you make using this window are not saved between sessions of using Lunar Discoverer.
The window has a series of buttons for controlling the settings, followed by an area below displaying the histogram for
the entire lunar map.
Buttons
R
Restore
Sets the Moon map image back to the program’s default photographic image after using any of the other buttons
below.
S
Sharpen
F
Fuzz
A
Automatic
E
Equalize
T
Threshold
B
Brightness
Adds sharpening to the Moon image. Can sometimes be used to good effect to see more details. The amount to
use is very subjective; often it will also result in a more unnatural appearance. Each time it is clicked, the image is
sharpened. The percentage used is shown to the right of the buttons (the percentage can be used as a reference to help
you quickly adjust it back to this same setting later if desired).
Adjust for deteriorated seeing conditions, or to simulate views in a smaller telescope. Each time it is clicked,
fuzziness is added to the image. The percentage used is shown to the right of the buttons (the percentage can be used as a
reference to help you quickly adjust it back to this same setting later if desired).
The program will automatically determine and adjust both the brightness and contrast to what normally will best
enhance overall detail for the entire image. This is a subjective science; the other controls allow you to change it as you
desire. Note: the slider is not used for this control.
The program will automatically determine the brightness and contrast to equalize the number of blacks and white
shades. Note: the slider is not used for this control.
The program will convert the map to black and white. The slider controls what the threshold is when it is
converted; the brightness level at which a gray pixel becomes black or white. Click the button to select, then adjust the
slider.
This allows you to adjust the brightness for a particular area of the Moon. Due to the wide range in the Moon’s
brightness and lighting conditions from terminator to limb, it is impossible to have one setting that gives an optimal
image across the entire surface. You may adjust it to better see details with this button.
Click the button to select it, then adjust the slider.
Lunar Discoverer User Manual, Version 1.40
Page 53 of 57
Use the slider below the histogram diagram to adjust the amount. The percentage used is shown to the right of the
buttons (the percentage can be used as a reference to help you quickly adjust it back to this same setting later if desired).
The Contrast can be adjusted along with the Brightness to obtain the best view.
C
Contrast
This allows you to adjust the contrast for a particular area of the Moon. Due to the wide range in the Moon’s
brightness and lighting conditions from terminator to limb, it is impossible to have one setting that gives an optimal
image across the entire surface. You may adjust it to better see details with this button.
Click the button to select, then adjust the slider.
Use the slider below the histogram diagram to adjust the amount. The percentage used is shown to the right of the
buttons (the percentage can be used as a reference to help you quickly adjust it back to this same setting later if desired).
The Brightness can be adjusted along with the Contrast to obtain the best view.
Lunar Discoverer User Manual, Version 1.40
Page 54 of 57
Toolbar
(Found under Windows Menu)
The Toolbar window is used to allow certain operations with a mouse click. A series of buttons is shown, with a line for
explanatory text below it. The font is user selectable (right mouse or option click). This window is also resizable. The
window typically appears as follows:
Microsoft Windows
Apple OS X
Buttons
I
Identify
The normal default mode of operation; this identifies features when you click on the Lunar map. It allows dragging the
moon on a click and drag operation.
M
Measure
Used to measure the distance between features on the lunar surface. After pressing this button, when you click and drag
on the lunar map it will find the craters nearest the mouse positions. The distance between the features will be reported in
the Feature Information window, as seen below:
Reported results may be in metric or English units (see the menu option).
Note: using the mouse to drag the lunar map is not functional when this option is selected.
+
Zoom In
-
Zoom Out
C
Closeup
H
Hide Closeup
Used for zooming in on the lunar map (increasing the magnification). This is an alternative method to using the menus or
their keyboard equivalent for changing the scale.
Used for zooming out from the lunar map (decreasing the magnification). This is an alternative method to using the
menus or their keyboard equivalent for changing the scale.
Shows the Closeup Window.
Hides the Closeup Window.
Lunar Discoverer User Manual, Version 1.40
Page 55 of 57
Favorites
(Found under Windows Menu)
The Favorites window is used to very quickly change labels used over top of the Moon Map photo. It is found under the
Windows Menu.
The Favorites window shows a list of pre-supplied and save settings that allow you to very quickly change labels used on
the Moon map, by simply clicking on one of the names in the list. Samples are shown below:
Microsoft Windows
Apple OS X
This very powerful feature needs to be tried to be really appreciated. Colors, text size, fonts, all the parameters for every
type of feature that is available in the Modify Showings dialog can instantly be saved and restored with just a single
mouse click in this window.
Buttons
Add
This saves current settings with the name you supply; it is an alternative to using the Save As menu item in the File menu.
Delete
Allows removal of a favorite setting that is no longer wanted in the list.
Note:
To rename a list setting, click on it to activate it, then delete it, and use the add button, using a new name.
Lunar Discoverer User Manual, Version 1.40
Page 56 of 57
Finishing Up
Thank you for purchasing Lunar Discoverer. If you have any questions or issues not covered here, please visit us on the
web. Updates and other products are available through the web site, so be sure to visit frequently to stay current!
Contacting us
On the world-wide web:
http://www.astrohawk.com
or
http://www.lunardiscoverer.com
By email:
[email protected]
or
[email protected]
- END -
Lunar Discoverer User Manual, Version 1.40
Page 57 of 57