1
13.0 - POSTest for Linux
After following the common steps above, perform the steps below to set up POSTest on Linux.
• Copy the file “CortexJPOSApplications.jar” from the CortexJPOS™ installation directory
(/usr/local/CortexJPOS) to the POSTest directory.
• In the POSTest directory, add the following line to the POSTest.sh batch file:
- CLASSPATH=$CLASSPATH:CortexJPOSApplications.jar
•
Open the POSTest program by running the POSTest.sh file from its directory using a terminal program.
•
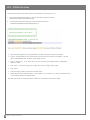
Click the “Configured Devices” tab to see the devices that have been setup to work with the program. The Code
reader (“Code Barcode Reader” by default) should appear on the list.
•
Click the “Scanner” tab. In the “Logical name” box, type the name of your configured reader (“Code Barcode
Reader” by default).
•
Press “Open”. The state to the right of the “Logical name” box will change to JPOS_S_IDLE.
•
Press “Claim”.
•
Check the “Device enabled” and “Data event enabled” boxes.
•
Read a barcode with your connected reader. It should appear in the “Scan Data” box. Check the “Decode data” box
to see the parsed data from the barcode reader.
Note: after each decode, the “Data event enabled” boxke must be rechecked to enable data to appear.
D008733_01 CortexJPOS User Manual
11