1
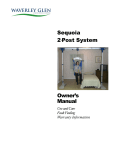
Children’s Registry and Information System
Reports Manual
Technical Support Information
5665 Ponce de Leon Blvd.
Coral Gables, FL 33146
(800) 231-5747
[email protected]
http://www.chris.miami.edu
About This Manual
This manual was created to guide the usage of standard reports in the Children’s
Registry and Information System (CHRIS) program. It includes instructions and
step-by-step examples for creating standard reports.
For additional information on the CHRIS Project, refer to the User Manual, Data
Facilitator Manual, Field Reference Guide, Advanced Reporter Manual, and Interactive
Online FileMaker Training. All support documentation can be retrieved from the CHRIS
website at http://www.chris.miami.edu.
This document was developed by the University of Miami, Department of Psychology,
through CHRIS, a special project funded by the Florida Department of Education,
Division of Public Schools, Bureau of Exceptional Education and Student Services
(BEESS), through federal assistance under the Individuals with Disabilities Education
Act (IDEA), Part B.
Copyright
State of Florida
Department of State
2015
Authorization for reproduction is hereby granted to the state system of public
education consistent with section 1006.39(2), Florida Statutes. No authorization is
granted for distribution or reproduction outside the state system of public education
without prior approval in writing.
ii
CHRIS Reports Manual
Legend
The following is a list of conventions used throughout this manual:
Bold
The titles of CHRIS Gold screens and screen sections are presented in
bold-faced type.
Italics
Field names, as well as references to tables, figures, and hands-on
exercises, are presented in italics.
UPPERCASE
CHRIS buttons and main menu options are presented in
UPPERCASE letters.
Title Case
CHRIS-related reports, event names, functions, and lists (e.g.,
Duplicate Child Report, Service Coordination, Child Record
Locator, Code List) are presented in Title Case.
The IMPORTANT icon is used in the left margin to highlight
information essential to the integrity and/or performance of
CHRIS Gold.
IMPORTANT
The NOTE icon is used in the left margin to highlight
information that deserves special attention.
NOTE
The HANDS-ON icon is used in the left margin to indicate a
hands-on exercise for the user to complete.
CHRIS Help Desk: (800) 231-5747
iii
iv
CHRIS Reports Manual
Table of Contents
Reports in CHRIS..............................��������������������������������������������������������������������������������1
Reports Find Screen..........................��������������������������������������������������������������������������������4
Performing Accurate Finds...................��������������������������������������������������������������������9
Find Operators......................................������������������������������������������������������������������10
Standard Report Examples...............������������������������������������������������������������������������������11
Demographic Reports...........................������������������������������������������������������������������11
Basic Reports........................................������������������������������������������������������������������13
Complex Reports..................................������������������������������������������������������������������15
Reports with an Or Find........................������������������������������������������������������������������16
Reports with an Omit Request..............������������������������������������������������������������������17
Action Needed Report...........................������������������������������������������������������������������19
Allsites Report......................................������������������������������������������������������������������21
Timeline Reports...................................������������������������������������������������������������������24
Providers & Contacts Reports...............������������������������������������������������������������������28
Custom Reports..................................������������������������������������������������������������������������������29
CHRIS Help Desk: (800) 231-5747
v
vi
CHRIS Reports Manual
Reports in CHRIS
The CHRIS software program contains a variety of standard reports to assist users in
creating commonly used reports. In addition, CHRIS also contains a Reporter program
that allows users to create custom reports. To access the reporting features in the CHRIS
program, click the REPORTS button from the CHRIS main menu (see Figure 1).
Figure 1
Child Record Locator Screen
CHRIS Help Desk: (800) 231-5747
1
Clicking the REPORTS button on the main menu will display the Reporting screen (see
Figure 2). The Reporting screen displays all of the report options for the CHRIS program.
Figure 2
Reporting Screen
Options
The following reporting options are described in this manual:
• STANDARD (TRACKING) REPORTS – Contains standard reports
• TIMELINE REPORTS – Contains Timeline-specific reports
• REPORTER (CUSTOM) REPORTS – Allows for the creation of custom reports
• ACTION NEEDED REPORT – Contains Action Needed Reports for
case management
• ALLSITES REPORT – Contains Allsites Reports that can be run by Center, Site, or
County (These reports can only be run by the Help Desk.)
• PROVIDERS & CONTACTS REPORT – Contains data entry and directory reports
for Providers & Contacts
NOTE
2
Information on Mass Screening can be found in the User Manual. Information on
managing Definitions can be found in the Data Facilitator Manual.
CHRIS Reports Manual
New Reports
• DAYS ELAPSED BETWEEN SCREENING AND PARENT CONSENT– Contains a report of days elapsed from Screening to Parent Consent for Evaluation.
Includes average number of days and can be displayed graphically and/or in a list.
• 60-DAY RULE REPORT – Contains a report of days elapsed from Parent Consent
for Evaluation to Evaluation Completion Date. Includes average number of days and
can be displayed graphically and/or in a list.
• SOD REFERRAL REPORT– (Schedule Of Deliverables Referral Report) Displays
the number of children who have a Referral First Contact or Referral In Date within
a chosen date range. This report breaks down the results by individual county (if applicable).
• SOD COMPLETED SCREENINGS REPORT – Displays the number of children
who have a completed screening within a chosen date range. This report breaks down
the results by individual county (if applicable).
CHRIS Help Desk: (800) 231-5747
3
Reports Find Screen
Clicking either the STANDARD (TRACKING) REPORTS button or the REPORTER
(CUSTOM) REPORTS button on the Reporting screen (see Figure 2) will display the
Reports Find screen (see Figure 3). The Reports Find screen is used to select the data
needed to create standard and custom reports for the CHRIS database.
Figure 3
4
Reports Find Screen
CHRIS Reports Manual
Each section of the Reports Find screen allows users to enter search criteria that will be
used to find data related to the desired report (see Figure 4).
Figure 4
Reports Find Screen Section
The Table field allows users to select the source of data needed. Select the table by
clicking the circle to the left of the table name (see Figure 5).
Figure 5
IMPORTANT
Reports Find Screen Table Field
If demographic information is part of the find, Demo should be selected as the Table in
the first section of the Reports Find screen.
If either Timeline or Service Coordination is selected as the table, the Event field will
automatically display a list of the events pertaining to the table chosen (see Figure 6). The
appropriate event should be selected from the drop-down list. If Demo, Action Needed, or
Addresses is selected as the table, the Event field is bypassed.
Figure 6
Reports Find Screen Event Field
CHRIS Help Desk: (800) 231-5747
5
Once a table and an event (if necessary) are chosen, a list of fields unique to the selected
table and event selected will automatically be displayed (see Figure 7). The appropriate
field should be selected from the drop-down list.
Figure 7
Reports Find Screen Field Field
The find criteria are entered into the Value field (see Figure 8). For example, a date range
would be entered as 01/01/2014...03/31/2014.
Figure 8
Reports Find Screen Value Field
To execute the find, click the PERFORM FIND button (see Figure 3). The CANCEL
FIND button cancels the find and returns the user to the Reporting screen (see Figure 2).
Figure 9
Reports Find Options
The Reports Find screen (see Figure 3) contains the following options for performing
complex finds (see Figure 9):
• OR – Includes records that meet the criteria from that section, regardless of the
criteria specified in other sections.
• OMIT – Omits a set of records from the find results. The OMIT button should be
used in the last section of the Reports Find screen.
When find criteria are entered in more than one section, the find functions as an “And”
find (results will contain only those records that meet all the criteria specified in all the
sections), unless the OR or OMIT option is selected.
6
CHRIS Reports Manual
After clicking the PERFORM FIND button on the Reports Find screen, the Sorting
screen is displayed (see Figure 10). This screen provides options for sorting the data in
the report. Click the button associated with the desired sort option.
Figure 10
Sorting Screen
On the Sorting screen, COR refers to County of Residence.
NOTE
NOTE
The GO TO REPORTS button leaves the records unsorted and takes the user to the
Standard Reports screen (see Figure 11).
CHRIS Help Desk: (800) 231-5747
7
Once the sort option is selected, the Standard Reports screen will be displayed (see
Figure 11). This screen lists the standard report options available. Click the button to
select the desired report.
Figure 11
Standard Reports Screen
The EXIT REPORTS button returns the user to the Reporting screen (see Figure 2).
NOTE
8
CHRIS Reports Manual
Performing Accurate Finds
Performing an accurate find is very important because the find provides the information
on which reports will be based. Incorrect finds will produce inaccurate results. The
following tips will assist users in performing accurate finds:
1. Know what specific data are required to create the desired report.
2. Be specific when performing finds. Given the number of records in the statewide
database, it helps to be specific when performing finds. Enter date ranges, ID
numbers, database numbers, or special terms to narrow the find criteria and return the
data desired.
3. Limit the use of excessive search criteria. The Reports Find screen allows users to
enter search criteria in up to six separate find sections. However, using numerous
search criteria in a single report can cause inaccurate results. If you need to perform
complicated finds to develop your report, contact the Help Desk for assistance.
CHRIS Help Desk: (800) 231-5747
9
Find Operators
Use the find operators below to improve the search criteria for records (see Table 1).
Table 1
Find Operators Table
To find values that:
10
Are less than the value of the item
Are less than or equal to the value of the item
Are greater than the value of the item
Are greater than or equal to the value of the item
Have some or all of a field’s contents
Use this
operator:
<
<=
>
>=
=
Are an exact match of the field’s contents
==
Are within the range specified
Are duplicated values
...
!
Include today’s date
Have invalid dates or times
Have any one character
Have any one digit
Have zero or more unknown or variable text characters
Escape next character
Include literal text (including spaces and punctuation) in a field (text exactly as it appears, but
regardless of uppercase or lowercase)
Match phrase from anywhere (not only word start)
Have empty fields
//
?
@
#
*
Example:
\
“”
<40 or <09/09/1998
<=50
>10/10/1998
>=10
=Ann (finds Ann or
Ann Marie but not
Annie)
==Anne (finds Anne
but not Ann Marie or
Annie)
12:30...17:30
!Ann (finds Ann or
Annie or Annette)
//
?
@
#
*Anne* (finds Anne or
Annette or Brianne)
\e
“Jean-Louis”
*“”
=
“Louis”
=
CHRIS Reports Manual
Standard Report Examples
Standard reports are pre-formatted reports that can be based on Demographic, Timeline,
and/or Service Coordination data.
Demographic Reports
To run a Demographic Report, select the appropriate find criteria. In this example, only
demographic data are selected (see Figure 12).
The following data are entered for the first section of the Reports Find screen:
Table: Demo
Event: (bypassed when Demo table is selected)
Field: DOB
Value: 01/15/2011...03/15/2011
Figure 12
Reports Find Screen with Demographic Find
In this example, the found set of records will include children born between January 15,
2011, and March 15, 2011.
After the find has been performed, select the sort option (see Figure 10) and then the
report type (see Figure 11).
CHRIS Help Desk: (800) 231-5747
11
The demographic reporting options include the following:
•CHILDREN’S LIST – Generates a list of children’s records.
•ADDRESS LABELS – Generates address labels for the records selected.
•CODE SUMMARY – Generates a summary of the values contained in the Code
Definitions List. Each Florida Diagnostic and Learning Resources System (FDLRS)
site can use the Code field in whatever way is most beneficial to that site and the data
faciliator can update this list.
•ES REFERRAL FOLLOW-UP REPORT – Generates a follow-up report of Early
Steps referrals.
Demographic Reports can be created using finds based on any of the table options.
IMPORTANT
NOTE
Complex Demographic Reports can be run with more than one find criteria. See the
Complex Reports section of this manual.
Hands-on Exercise 1: Running a Demographic Report
1. Select the REPORTS option from the main menu.
2. Click the STANDARD (TRACKING) REPORTS button.
3. Select the DEMO option.
4. Select the DOB field from the drop-down list.
5. Enter the following information:
DOB: 6/2011
6. Click the PERFORM FIND button.
7. Click the SORT BY NAME button.
8. Click the CHILDREN’S LIST button.
9. Select FILE from the FileMaker Menu.
10. Select the EXIT REPORT option.
12
CHRIS Reports Manual
Basic Reports
To run a Basic Report using a single table, select a table, an event (if necessary), a field,
and a value. In this example, the Referral In Service Coordination event is selected (see
Figure 13).
The following data are entered for the first section of the Reports Find screen:
Table: ServiceCoordination
Event: ReferralIn
Field: ReferralInDate
Value: 1/2014...2/2014
Figure 13
Reports Find Screen with Basic Find
In this example, the found set of records will include children with a Referral In Date
during the months of January and February 2014.
After the find has been performed, select the sort option (see Figure 10) and then the
report type (see Figure 11).
CHRIS Help Desk: (800) 231-5747
13
Hands-on Exercise 2: Running a Basic Report
1. Select the REPORTS option from the main menu.
2. Click the STANDARD (TRACKING) REPORTS button.
3. Select the SERVICE COORDINATION option.
4. Select Appointments from the event drop-down list.
5. Select ApptDate from the field drop-down list.
6. Enter the following information:
Appt Date: 1/2014…3/2014
7. Click the PERFORM FIND button.
8. Click the SORT BY DATE AND TIME FOR APPOINTMENTS button.
9. Click the APPOINTMENT SCHEDULE button.
10. Scroll to the bottom to make a note of the number of records found.
11. Click the OMIT END TIMELINE button.
12. Click the OMIT REF INACTIVE button.
13. Select FILE from the FileMaker Menu.
14. Select the EXIT REPORT option.
14
CHRIS Reports Manual
Complex Reports
Complex reports are based on multiple tables. The Reports Find screen allows users to
enter search criteria in up to six separate find sections. In this example, both the Part C to
Part B Transition (Timeline) and Referral First Contact with FDLRS (Service
Coordination) events are selected (see Figure 14).
The following data are entered for the first section of the Reports Find screen:
Table: Timeline
Event: Transition
Field: TrnTransitionMeetingDate
Value: 1/2014
The following data are entered for the second section of the Reports Find screen:
Table: ServiceCoordination
Event: ReferralFirstContact
Field: ReferralFirstContactDate
Value: 1/2014
Figure 14
Reports Find Screen with Complex Find
In this example, the found set of records will include children who had both a Transition
Meeting Date and a Referral First Contact Date in January 2014.
After the find has been performed, select the sort option (see Figure 10) and then the
report type (see Figure 11).
NOTE
If you choose to include demographic information, put it in the top section of the Reports
Find screen.
CHRIS Help Desk: (800) 231-5747
15
Reports with an Or Find
The Or option is used to include records that meet the criteria from a section of the
Reports Find sceen regardless of the criteria specified in any other sections. In this
example, a find is performed on the Referral First Contact with FDLRS event, and then
that found set is expanded by adding records with a Referral In event (see Figure 15).
The following data are entered for the first section of the Reports Find screen:
Table: ServiceCoordination
Event: ReferralFirstContact
Field: ReferralFirstContactDate
Value: 6/2013
The following data are entered for the second section of the Reports Find screen:
Table: ServiceCoordination
Event: ReferralIn
Field: ReferralInDate
Value: 6/2013
Option: Or
Figure 15
Reports Find Screen with Or Find
In this example, the found set of records will include children who had either a Referral
First Contact Date or a Referral In Date in June 2013.
After the find has been performed, select the sort option (see Figure 10) and then the
report type (see Figure 11).
16
CHRIS Reports Manual
Reports with an Omit Request
The Omit option is used to exclude information from a find. In this example, a find is
performed on demographic data, and then that found set is narrowed by eliminating any
records that contain an open timeline (see Figure 16).
The following data are entered for the first section of the Reports Find screen:
Table: Demo
Event: (bypassed when Demo table is selected)
Field: DOB
Value: 1/2011
The following data are entered for the second section of the Reports Find screen:
Table: Timeline
Event: EndTimeline
Field: EndDate
Value: = (finds all records with an empty EndDate field)
Option: Omit
Figure 16
Reports Find Screen with Omit Request
In this example, the found set of records will contain data from the first section of the
Reports Find screen and omit the data from the second section of the Reports Find
screen. In this example, the find would result in a list of children born in January 2011
with a completed Timeline.
After the find has been performed, select the sort option (see Figure 10) and then the
report type (see Figure 11).
CHRIS Help Desk: (800) 231-5747
17
Hands-on Exercise 3: Running a Complex Report
1. Select the REPORTS option from the main menu.
2. Click the STANDARD (TRACKING) REPORTS button.
3. Select the TIMELINE option.
4. Select End Timeline from the event drop-down list.
5. Select EndDate from the field drop-down list.
6. Type the following information:
EndDate: 1/2014
7. Click the SERVICE COORDINATION button in the next section.
8. Select Referral Inactive from the event drop-down list.
9. Select ReferralInactiveDate from the field drop-down list.
10. Type the following information:
Referral Inactive: 1/2014
11. Click the OR button.
12. Click the PERFORM FIND button.
13. Click the SORT BY NAME button.
14. Click the END TIMELINE/INACTIVE REASON REPORT button.
13. Select FILE from the FileMaker Menu.
14. Select the EXIT REPORT option.
18
CHRIS Reports Manual
Action Needed Report
The Action Needed Report contains information that can be used for creating daily or
weekly reports to assist in developing task lists for individual case managers or for Child
Find team activities. To run an Action Needed Report, select the appropriate find criteria
(see Figure 17).
The following data are entered for the first section of the Reports Find screen:
Table: ActionNeeded
Event: (bypassed when ActionNeeded table is selected)
Field: ANFollowUpDate
Value: 1/2014
Figure 17
Reports Find Screen Action Needed Find
In this example, the found set of records would include children who had an Action
Needed Follow Up Date during the month of January 2014.
After the find has been performed, select the sort option (see Figure 10) and then the
ACTION NEEDED REPORT button (see Figure 11).
CHRIS Help Desk: (800) 231-5747
19
Hands-on Exercise 4: Running an Action Needed Report
1. Select the REPORTS option from the main menu.
2. Click the STANDARD (TRACKING) REPORTS button.
3. Select the ACTION NEEDED option.
4. Select ANCompletedDate from the field drop-down list.
5. Enter the following information:
ActionNeededCompDate: 1/2014
6. Click the PERFORM FIND button.
7. Click the SORT BY NAME button.
8. Click the ACTION NEEDED REPORT button.
9. Select FILE from the FileMaker Menu.
10. Select the EXIT REPORT option.
20
CHRIS Reports Manual
Allsites Report
The Allsites Report provides a summary of FDLRS Child Find activities by month and
year for the three previous school years. Reports can be generated by center, county,
or site.
Two types of reports can be generated: Workload and Unduplicated. The Workload
Report is based on a set of seven events and counts the total number of those events.
The Unduplicated Report is based on six events and counts the total number of
children served. For instance, if a child has two Screening events, the child would
count only once in the Unduplicated Report, but both Screening events would be
counted in the Workload Report.
Due to the complexity of these reports, only the CHRIS Help Desk can generate Allsites
Reports. If a user clicks the ALLSITES REPORT button from the Reporting screen, a
message will be displayed indicating that this report must be run by the Help Desk (see
Figure 18). The data facilitator is responsible for contacting the Help Desk to request an
Allsites Report.
Figure 18
Allsites Report Message
CHRIS Help Desk: (800) 231-5747
21
Workload Report
The Workload Report is based on a set of seven events. This includes the total number of
Referral First Contact with FDLRS (First Contact with FDLRS Date), Referral In
(Referral In Date), Transition (Part C to Part B Transition Notification Date), Screening
(Screening Final Result Date), Evaluation (Final Result Date), Exceptional Student
Education Eligibility (ESE Eligibility Date), and Individal Education Plan/Individual
Family Service Plan (IEP/IFSP Date) events for each school year (see Figure 19).
Allsites Workload Report
Figure 19
22
CHRIS Reports Manual
Unduplicated Report
The Unduplicated Report is based on the number of children served and contains the
total number of children who have a Referral First Contact with FDLRS (First Contact
with FDLRS Date), Transition (Part C to Part B Transition Notification Date), Screening
(Screening Final Result Date), Evaluation (Final Result Date), Exceptional Student
Education Eligibility (ESE Eligibility Date), and Individal Education Plan/Individual
Family Service Plan (IEP/IFSP Date) event for each school year (see Figure 20).
Allsites Unduplicated Report
Figure 20
CHRIS Help Desk: (800) 231-5747
23
Timeline Reports
Timeline Reports display the number of completed Timelines grouped by days elapsed.
Based on the initial search for the Transition Conference Date, Referral for
Screening Date, or Staff Assigned (see Figure 21), the Timeline Report will calculate
the total number of completed Timelines (within 45, 60, 90, 120, or more days) for each
category listed.
A Timeline is considered complete when there is an End Timeline event.
NOTE
Figure 21
Timelines Interval Summary Report Criteria Screen
To run a Timeline report, complete the following steps:
Step 1. Select the REPORTS option from the main menu. The Reporting screen will be
displayed (see Figure 2).
Step 2. Click the TIMELINE REPORTS button. The Timelines Interval Summary
Report Criteria screen will be displayed (see Figure 21).
Clicking the CANCEL button will return you to the Reporting screen.
NOTE
24
CHRIS Reports Manual
Step 3. Enter the Transition Conference Date, Referral for Screening Date, and/or
Staff Assigned.
Step 4. Click the PERFORM FIND button. The Timelines Interval Summary Report
Selection screen will be displayed (see Figure 22).
Figure 22
Timelines Interval Summary Report Selection Screen
Step 5. Select a summary report type. Choose one of the following options:
• INTERVALS BY COUNTY – Displays the number of completed Timelines by
county name.
• INTERVALS BY SIZE ALIKE – Displays the number of completed Timelines by
county size. For example: small, medium/small, medium, large, and very large.
• INTERVALS BY PRIMARY EXCEPTIONALITY – Displays the number of
completed Timelines by primary exceptionality.
• INTERVALS COMBINED – Displays the number of completed Timelines by any
combination of the categories listed above.
• MORE INTERVALS BY COUNTY (SUMMARY ONLY) – Displays the number of
completed timelines by county name along with additional timeline detail.
Clicking the CANCEL button will return you to the Reporting screen.
NOTE
CHRIS Help Desk: (800) 231-5747
25
Step 6. After making a report selection, a warning is displayed to indicate that the
Timeline Interval Summary Report must be displayed in Preview Mode (see
Figure 23). Click the OK button to display the report.
Figure 23
Timelines Interval Preview Warning
A sample Timeline Interval by County Report in Preview Mode is shown in Figure 24.
This is how the report will be displayed when printed.
Figure 24
Timelines Interval by County Report Screen (Preview Mode)
FDLRS Site Name
Street
City, State Zip Code
Report Date:
05/06/14
Report Time: 12:24:56 PM
Timelines Interval Summary Report By County Of Residence
1 to 45
46 to 60
61 to 90
91 to 120
Greater
Than 120
49
30
70
30
10
County Of Residence
Sample
26
CHRIS Reports Manual
Hands-on Exercise 5: Running Timeline Reports
1. Select the REPORTS option from the main menu.
2. Click the TIMELINE REPORTS button.
3. Enter the following information:
Referral For Screening Date: 7/1/2013…1/1/2014
4. Click the PERFORM FIND button.
5. Click the INTERVALS BY COUNTY button.
6. Click the OK button.
7. Select FILE from the FileMaker Menu.
8. Select the BACK TO REPORTS option.
9. Select another Timeline Interval Report (if desired).
10. Click the OK button.
11. Select FILE from the FileMaker Menu.
12. Select the EXIT REPORTS option.
CHRIS Help Desk: (800) 231-5747
27
Providers & Contacts Reports
The Providers & Contacts Reports include listings of the provider and contact personnel
who work with an individual FDLRS site.
To run a Providers & Contacts Report, complete the following steps:
Step 1. Select the REPORTS option from the main menu. The Reporting screen will be
displayed (see Figure 2).
Step 2. Click the PROVIDER & CONTACTS REPORT button. The Providers &
Contacts Reporting screen will be displayed (see Figure 25).
Figure 25
Providers & Contacts Reporting Screen
Step 3. Select one of the following report options:
• RUN ALL PROVIDER REPORT – Produces a list of providers
• RUN ALL CONTACT REPORT – Produces a list of contacts
• RUN ACRONYM REPORT – Produces a list of agency acronyms
• RUN ACTIVE PROVIDER REPORT – Produces a list of active providers
• RUN ACTIVE CONTACT REPORT – Produces a list of active contacts
Clicking the EXIT TO MAIN FILE button will return you to the Reporting screen.
NOTE
28
CHRIS Reports Manual
Custom Reports
Custom reports can be created in CHRIS using the Reporter program.
Reporter
The Reporter program was developed to provide users with the flexibility to create
custom report layouts and to modify existing report layouts. Reporter can be used to
produce letters, forms, lists, tables, and other types of summarized data as well as to
provide data to site managers and administrators. Reporter has no permission restrictions
and is available to all CHRIS users. Users can duplicate, rename, change, or add on to
layouts to produce more advanced reports. The Reporter program also allows the
creation of FileMaker scripts, which can be customized in any report to facilitate
performing finds, sorting, and printing. As such, a basic understanding of the CHRIS
program and the FileMaker Pro application is required to design custom reports.
If you are interested in learning more about creating custom CHRIS reports, contact
the CHRIS Help Desk to schedule an Advanced Reports training session. Additional
information about custom reports is available in the Advanced Reports Manual.
CHRIS Help Desk: (800) 231-5747
29
30
CHRIS Reports Manual