1
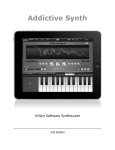
MiniSynth PRO User Manual – updated September 2011
1
Welcome
to the MiniSynth PRO user manual!
MiniSynth PRO is the first fully featured synthesizer for the iPad, available on the
opening of the iPad app store, on April 2nd, 2010. MiniSynth PRO was based on
the original miniSynth, the first synthesizer for the iPhone. With an innovative,
completely brand-new engine, a redesigned filter, and a no-nonsense interface,
miniSynth PRO invites those rich, shimmering, clear analog tones to your
fingertips. miniSynth PRO marks the debut of our cutting-edge YASSE synthesis
/ sequencing platform. Thanks to its innovative wave processing, voice
parameterization and sound sculpting algorithms, YASSE lends a bell-like clarity
to every sound one can evoke from miniSynth PRO, and makes patch design
even more exciting than before!
For video demonstrations and tutorials, visit our YouTube channel:
http://www.youtube.com/yonacsoftware
Check our Twitter feed and website for information on app updates, new apps,
and updates to this manual.
http://www.twitter.com/yonacsoftware
http://www.yonac.com
MiniSynth PRO User Manual – updated September 2011
2
Table of Contents
This guide will describe all the available features by order of the Menu screens.
To access the menu, hit the MENU button in the upper right corner.
I.
Dual Keyboards p. 4 key resizing
II. Oscillators p. 5 mod matrix, oscillator settings
(waveform, pitch, frequency modulation), key hold, mono/poly mode,
glide
III. Filters p. 7 vcf, vcf envelope, amp envelope, noise
IV. LFO & Delay p. 9 lfo, delay, master volume
V. Arpeggiator, Presets, & Recording
p. 11 arp settings, presets, recording, saved files, wifi export,
copy/paste
VI. Preferences p. 14 keyboard note overlay, mod matrix
settings, external keyboard settings
VII. External Keyboards p. 16 camera connection
kit
MiniSynth PRO User Manual – updated September 2011
3
I. Dual KBs
The Dual Keyboards screen fills the screen with two keyboards. The buttons
seen here at the top are always available:
A. KB Lower/Upper Switch - Selects between the upper or lower
keyboard.
B. Keyboard Rows - Select this button to toggle between 1 keyboard on
the screen or two rows of keyboards.
C. Key Size - Changes the key size of the selected keyboard (upper or
lower).
D. MIDI Panic - Use this button if you are using USB MIDI through the
camera connection kit and a note becomes stuck.
MiniSynth PRO User Manual – updated September 2011
4
II. OSC
The Oscillators screen displays controls related to the oscillators and other
features.
A. Mod Matrix - Allows you to modify selected parameters live while
playing. Up to two parameters can be chosen, one each for the X-axis (left
to right) and the Y-axis (up and down). Mod Matrix parameters can be
chosen from the PREFS screen.
B. OSC 1 & C. OSC 2 - Oscillators provide the basic signal that is sculpted
and enhanced in the subsequent stages of sound synthesis. The factors
that manipulate the sound generated by each oscillator are the shape of
the wave (or "waveform"), its basic frequency range, its relative pitch, and
its volume.
Use the selectors for waveform to specify the shape of the audio
wave. You can select the basic range by using the range selector buttons:
LOW corresponds to the lowest audible tone, whereas 5 corresponds to
the highest.
You can fine-tune the pitch for an oscillator by the associated
FINE TUNE slider. A value between -7 and +7 will specify the separation
MiniSynth PRO User Manual – updated September 2011
5
between the frequency emitted by the oscillator and the note assigned to a
key in the manuals. You can set the output volume of an oscillator via the
VOL slider.
D. OSC1&2 Sync - When you select the oscillators to sync, oscillator 2
will restart with each period of oscillator 1, so that they will have the same
base frequency. The result is usually a brighter, slightly louder signal.
E. KB Sync – When keyboard sync is turned off, oscillator 2 becomes
unhooked from the keyboard and generates a single frequency specified
by the octave and fine tune controls.
F. FM Amount - Controls the amount that oscillator 1 is modulated by
oscillator 2.
G. Key Hold Switch- When turned on, notes you select on the keyboard
will hold continuously.
H. Poly/Mono Switch - Selecting "Poly" sets the keyboard in polyphonic
mode, allowing you to play up to 12 keys (or voices) at once. Selecting
"Mono" sets the keyboard in monophonic mode, allowing you to only play
one voice at a time.
I. Glide - Use the glide switch to obtain a glissando effect between
various notes. Use the Glide Time slider to select the time it takes to
glissando between notes.
MiniSynth PRO User Manual – updated September 2011
6
III. Filters
Use miniSynth PRO's filter to sculpt the signal generated by the oscillators.
A. VCF - These sliders affect the timbre of the sound.
1. Initial - This is the initial filtration factor when a key is pressed.
As its value ranges from low to high (0 to 1), the signal varies from
silent (no-pass) to very rich and shrill (all-pass).
2. Peak - This is the filtration factor at the end of the attack period.
The higher the value, the less filtration will be applied.
3. Sustain - This is the filtration factor reached at the sustain stage.
The higher the value, the less filtration will be applied.
4. Final - This is the filtration factor reached at the final stage, when
the key is released. The higher the value, the less filtration will be
applied.
5. Resonance - This affects the richness of the resulting tone.
MiniSynth PRO User Manual – updated September 2011
7
Lower values correspond to a pure, but slightly amplified tone, while
higher values correspond to a more nasal, ringing sound.
B. VCF Envelope - These sliders determine the filtration curve of the
sound.
1. Attack Length - The time allotted for the attack stage. The
signal will start at the level specified by INITIAL and end at PEAK.
2. Decay Length - The time allotted to the decay stage. The signal
will start at the level specified by PEAK and end at SUSTAIN.
3. Release Length - The time allotted to the release stage when
the key is released. The signal will finish at the setting specified by
INITIAL.
C. Amp Envelope - The Amp settings influence the amplitude behavior of
the generated signal. The attack, decay, sustain, and release (ADSR)
settings determine the amplitude curve when a key is just engaged.
1. Attack Length - The time allotted to the attack stage. The
signal's amplitude will peak at the end of this stage. Increasing the
attack length creates a volume-swell effect.
2. Decay Length - The time allotted to the decay stage. After the
attack period is over, the signal will be reduced to the level
specified by the SUSTAIN LEVEL.
3. Sustain Level - The level at which the signal remains after
completing the attack and decay stages. So long as the key is
engaged, the level will remain at this.
4. Release Length - When the key is disengaged, the amount of
time that it takes for the signal to reach zero.
D. Noise - Use the Noise switch to obtain additional sound effects. You
can employ noise in tandem with the filter or filter modulator to obtain
interesting sweep or jet-like effects. Use the NOISE VOL slider to
determine the loudness of noise in the mix.
MiniSynth PRO User Manual – updated September 2011
8
IV. LFO & Delay
You can use the low-frequency oscillator to vary the timbre, pitch, and amplitude
of the signal to obtain various effects.
A. The selected waveform will affect the "shape" of the modulation,
resulting in a different modulation effect as a function of time.
B. The base octave will determine the fundamental speed of the
oscillation. Higher numbers correspond to faster speeds.
C. The Fine Tune slider allows you to adjust the speed of oscillation more
finely within the selected fundamental range.
D. KB Sync syncs the frequency with the keyboard. When this is turned
on, the higher the note, the higher the frequency.
E. Osc1 Pitch & Osc2 Pitch Sliders allow you to alter the pitch of the
oscillators, creating a vibrato effect.
F. FM Slider modulates the frequency modulation.
MiniSynth PRO User Manual – updated September 2011
9
G. VCF Slider modulates the filter.
H. The Amp Slider alters the amplitude (volume), creating a tremolo
effect.
I. The Delay Module is separated into stereo left and right channels. A
delay effect creates the sound of a repeating, decaying echo. Use the
Delay Time slider to control the length of the delay (11 to 998
milliseconds). Use the Delay Feedback slider to control the amount of
feedback, which creates a reverb effect.
J. The Master Volume Slider controls the volume of the entire
synthesizer. If the sound is overloading, try turning the master volume
down.
MiniSynth PRO User Manual – updated September 2011
10
V. Arpeggiator, Presets, & Recording
The Arpeggiator allows you to play several selected notes in a precise pattern.
A. Ctrl KB1 or Both Switch - Allows the arpeggiator to control only one
keyboard or both keyboards.
B. Tempo - Controls the tempo of the arpeggiator. Also use this to control
the tempo of the Metronome. The number indicates the number of beats
per minute.
C. Note Value - Selects a note value for the arpeggiator. They are in order
(left to right) from faster to slower: sixteenth note, eighth note, quarter
note, half note, and whole note.
D. Octave Repeat Count - Selects how many times the arpeggiator will
repeat an octave before moving to the next octave.
E. Octave Count - Selects how many times the arpeggiator will play the
notes at a higher octave. If you just want one octave, select "1."
MiniSynth PRO User Manual – updated September 2011
11
F. Mode - Use these different selectors to program your pattern. Here are
some examples…
Let's say the Octave Count is "2," the Octave Repeat Count is "1," and the
Note Value is Eighth Note. Also the "Up" bottom is selected.
TRACK: Select "Track" and select the "On" button. If you press and
release the F1 note (on the keyboard), it will continuously play F1 and F2.
Now press and release A1. It will continuously play F1, A1, F2, A2. If you
press and release C2 next, it will play F1, A1, C2, F2, A2, C3.
HOLD: Select "Hold" and select the "On" button. If you press and hold the
F1 note, it will continuously play F1 and F2. While still holding F1, also
press and hold A1. It will continuously play F1, A1, F2, A2. While still
holding F1 and A1, now press and hold C2. It will play F1, A1, C2, F2, A2,
C3.
TRIG: Use “Trig” with the “Track” function to change the key of your
pattern. Once you have created a pattern in “Track” mode, select the “Trig”
button. When you press the F1 note (after creating our pattern used
above), it will play F1, A1, C2, F2, A2, C3. Now press A1. It will play A1,
C#2, E2, A2, C#3, E3. Now press C2. It will play C2, E2, G2, C3, E3, G3.
UP: Used in the examples above, select this to have your pattern play
upwards: F1, A1, C2.
DOWN: Select this to have your pattern play downwards: C2, A1, F1
IN: Select this to have your pattern play in the order of the notes you
select.
RAND: Use this to have your pattern play your selected notes in a random
order.
PRESETS - MiniSynth PRO comes with 82 factory presets. You can browse
these by selecting a category under "Bank" and then a preset under "Patches." It
also allows an unlimited number of user presets.
G. WI-FI EXPORT - Use this button to download saved user presets in
MiniSynth PRO or upload presets from your computer. Once selected,
enter the given IP address into your computer's web browser. You will see
a list of your user presets. Right click on the file name to save it to your
computer. Use the Upload box to upload presets from your computer.
After you have uploaded the preset and closed the WiFi box on MiniSynth
MiniSynth PRO User Manual – updated September 2011
12
PRO, the preset will not appear until you close and re-open the app.
H. SAVE PATCH - When you create your own user presets use this
button to save them under the "User" bank. Presets save information from
the oscillators, glide, filters, LFO, delay, and arpeggiator.
RECORDING
I. REC - Use this button to start recording.
J. STOP - Use this button to stop recording or stop playing a selected file.
K. PLAY - Use this button to playback the sound you just recorded or to
play a selected file from the Files list.
L. SAVE - Allows you to save your sound and adds it to the Files list.
M. Loop On/Off Switch - When turned on, select a file and hit the PLAY
button for the recording to play on a continuous loop.
N. Metronome - Use the on/off switch to control the metronome. Below
the switch is the time signature, which can be changed by the button next
to the signature reading. The choices are 2/4, 3/4, 4/4, 5/4, 6/4, 7/8, 9/8,
and 11/8.
O. COPY & PASTE - Select a file and hit the COPY button when you wish
to export that file to an iOS app that allows Audio Paste. Use the PASTE
button to paste sound files into the Files list.
P. WI-FI - Use this feature to download or upload sound files via Wi-Fi. Hit
the button and enter the given IP address into your computer's web
browser. Right click on a file to save it to your computer. Use the Upload
box to upload sound files from your computer to MiniSynth PRO.
Q. DEL - Select a file from the Files list and hit this button to delete it.
iTunes File Download (not pictured) – When you connect your iPad to iTunes
on your computer, you will be able to download your presets or saved sound
files. Once connected, select your iPad under “Devices” in iTunes. Then choose
the “Apps” tab. At the bottom, you will see a list of file sharing apps on your
device. Choose miniSynth PRO from the list. The “patches” folder contains your
preset files and the “rec” folder contains your saved sound recordings.
MiniSynth PRO User Manual – updated September 2011
13
VI. Preferences
Keyboard Note Overlay Switch - Use this to turn note overlays on or off.
Mod Matrix X/Y Axis Snapback Switches - Use these to turn the
snapback on or off for the X or Y axis on the mod matrix. Snapback on
means that when you lift your finger off the mod matrix, the value for that
axis will return to zero (the center).
Mod Matrix X/Y Axis Assign - Use these to assign a value to either the X
or Y axis. Options include:
No Destination
Pitch Bend
Tempo
LFO: LFO Range
LFO: LFO Fine Tune
LFO: Osc1 Pitch
LFO: Osc2 Pitch
LFO: Osc Pitch Coupled
LFO: FM Modulation
LFO: VCF Modulation
MiniSynth PRO User Manual – updated September 2011
14
LFO: Amp Modulation
VCF: Initial
VCF: Peak
VCF: Sustain
VCF: Final
VCF: Attack
VCF: Decay
VCF: Release
VCF: Resonance
Amp: Attack
Amp: Decay
Amp: Sustain
Amp: Release
Glide/Noise: Glide Time
Glide/Noise: Noise Volume
Oscillators: Osc1 Fine Tune
Oscillators: Osc1 Volume
Oscillators: Osc2 Fine Tune
Oscillators: Osc2 Volume
Oscillators: FM Amount
Delay: Delay Left Time
Delay: Delay Left Feedback
Delay: Delay Right Time
Delay: Delay Right Feedback
Delay: Delay Coupled Time
Delay: Delay Coupled Feedback
External Keyboard Key Velocity Switch - When using a MIDI keyboard
via the camera connection kit, use this switch to choose key velocity on or
off.
External Keyboard MIDI Controls Map - When using a MIDI keyboard
via the camera connection kit, use this feature to assign effects to specific
commands.
MiniSynth PRO User Manual – updated September 2011
15
VIII.
External Keyboards
Camera Connection Kit – MiniSynth PRO has Core Audio MIDI
capabilities with Appleʼs camera connection kit. Plug in the USB
adaptor to your iPad, and then use the USB connection to connect to
your MIDI keyboard. Not every USB MIDI keyboard will work with the
iPad, but there are several online resources to help you find out if
yours will (http://iosmidi.com/devices).
Velocity and other external keyboard settings can be found under
MENU -> PREFS.
MiniSynth PRO User Manual – updated September 2011
16