1
Getting Started
Removal
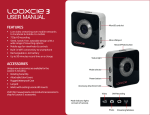
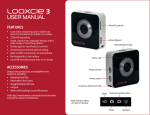
You may need a coin or a screwdriver to remove the Looxcie 3 from
the plastic mount in the box. The Looxcie 3 sits on a black 1/4-20
Tripod Mount. Do not discard this mount as you can use it later to
mount on any accessory that has a 1/4-20 connector.
Charge
Fully charge the camera’s battery before first use.
1. Plug the USB cable into the camera’s micro-USB port.
2. Plug the other end into a USB wall charger (not included) or
computer.
Note: Full charge time is about 1.5 hours on a wall charger. The
camera’s status light flashes orange while charging. It stops
flashing and goes solid orange when charging is complete. A full
charge provides 80-90 minutes of recording time.
Install Memory Card
The Looxcie 3 requires a microSD card (sold separately) to record
video and take photos. Class 4 and greater microSD cards up to
64GB are supported. Camera will not operate without an microSD
card.
To install a microSD card:
• Insert a microSD card straight into the microSD slot on the
Looxcie 3 until it clicks audibly into place. Do not force.
To remove the microSD card:
• Push the edge of the card with your fingernail, and the card
pops out for removal.
2
Download & Update
LooxcieDesktop Utility
You must download the free LooxcieDesktop utility to update
your camera’s firmware and transfer recorded video from your
camera to your computer. Check back for future firmware updates
for better performance and new features.
Visit http://www.looxcie.com/products/apps/ to download,
install, and launch the LooxcieDesktop utility on a PC or Mac.
1. Download, install and launch LooxcieDesktop.
2. Push the camera’s power button to turn the camera on.
3. Connect the camera to your computer with the provided USB
cable. The LooxcieDesktop tool automatically discovers your
attached camera and checks for firmware updates.
4. You must click Update Firmware to install the update if the
Looxcie Desktop indicates an update is available.
Note: To transfer video from your camera to your computer, see
“DELETE VIDEO ON YOUR CAMERA”, on page 5.
Install Mobile App & Create Account
The free Looxcie Mobile App for Android and iOS enables you to:
• View live video streams and recorded video from the Looxcie
community and your friends.
• View and share videos from your Looxcie camera.
• Use your smartphone as a viewfinder for videos recorded on
your Looxcie camera.
• Loop Record video in your Looxcie camera.
• Stream live video from your camera to selected Facebook
or Looxcie friends, or publically to the Looxcie community or
Facebook.
3
Getting Started/Record & Capture
DOWNLOAD & CREATE ACCOUNT
1. Download the Looxcie Mobile App for your phone:
http://www.looxcie.com/products/apps/
2. Install and launch the app on your smartphone or tablet.
3. Choose a method to sign up for a Looxcie account, either Facebook or
Other Ways to Sign In.
Note: If you choose Other Ways to Sign In you must sign up for a
Looxcie account before you can sign in.
4. Record and stream live video or watch video from your friends and
the Looxcie community.
Record & Capture
The Looxcie 3 can record video both as a standalone device (when
not connected to the mobile app) and when connected by WiFi to
your smartphone or tablet. Currently, still photos can only be taken
in standalone mode. A microSD card (sold separately) must be
installed in the camera to record video and capture photos.
RECORD & CAPTURE IN STANDALONE MODE
Record video:
Note: For detailed instructions on using the Looxcie mobile app to view,
record, and stream video, see the Looxcie Mobile App User’s Guide.
1. Press the Mode button to select Video mode.
Connect
Take a photo:
The Looxcie 3 connects via WiFi to your smartphone or tablet to stream
live video. To establish a connection between your camera and mobile
device for the first time:
1. Turn on WiFi on your mobile device and look for Looxcie3_####:
2. Press the Record/Photo button to start and stop recording.
1. Press the Mode button to select Photo mode.
2. Press the Record/Photo button to take a photo.
Take looping video:
• Android: under Settings/Wireless & Networks/WiFi
1. Press the Mode button to select Loop Recording mode.
• iOS: under Settings/WiFi
2. Press the camera’s power button for 5 seconds.
2. Press the Record/Photo button to start Loop Recording. The
Looxcie 3 will record and overwrite prior Loop recordings.
3. Wait until orange flashing WiFi icon on back turns solid, and the
status light on front will be solid green.
3. Use the LooxcieDesktop utility to access, capture, and
download Loop recordings.
4. Start the Looxcie mobile app and sign into your account.
5. Select the Looxcie 3 from your list of WiFi devices.
6. Enter password and camera will restart. IOS users will need to
reconnect manually.
7. You can also establish or reestablish a connection with the camera by
selecting Record or Stream from the app’s home screen or when you
change Camera options on a right swipe from preview screen.
8. You will need a solid 3G/4G connection to stream but not to record.
Make an instant clip:
Instant clip allows you to make a stored recording of an event that
just happened, like a whale breach or a car accident.
1. You must be recording in Loop Recording mode.
2. Press and briefly hold the Record/Photo to create a clip of the
last 30 seconds of looping video. It takes a few seconds to
make the clip.