1
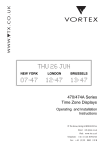
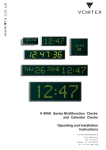
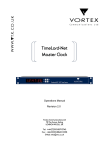
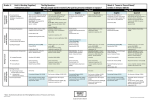
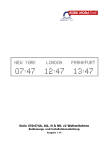
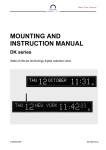
NEW YORK
LONDON
BRUSSELS
V-470A/V-474A, AIL, N & NIL v2 series
Time Zone Displays
Operating and Installation
Issue 1.1h
75 The Grove, Ealing LONDON W5 5LL
Email: info @vtx.co.uk
Web: www.vtx.co.uk
Telephone: +44 (0)20 8579 2743
Fax: +44 (0)20 8840 0018
V-470A/V-474A v2 Series Time Zone Displays
Operating and Installation Instructions
© 2005 - 2010 Vortex Communications Ltd. All rights reserved.
Trademarks
Vortex Communications and Timelord are trademarks of Vortex Communications Ltd. All other
trademarks and registered trademarks are property of their respective owners.
Statutory Notices
Warning - To prevent fire or shock hazard, do not expose the internals of the unit to rain
or moisture.
This equipment has a built-in Lithium battery which in normal operation should have a
service life greater than 10 years. The Lithium battery should only be changed by a suitably
qualified engineer.
CAUTION - Danger of explosion if battery is incorrectly replaced.
Replace only with the same type or equivalent type recommended by the manufacturer.
Dispose of used batteries according to the manufacturer’s instructions. You can return
unwanted Lithium batteries to the manufacturer or their agent. Note: In some areas
disposal of Lithium batteries in household or business refuse may be prohibited.
Caution: Do not handle damaged or leaking Lithium batteries.
Electromagnetic Compatibility & Safety
The V-470A/V-474A v2 Series Time Zone Displays, when used in accordance with our
recommendations, comply with both the European Community Electromagnetic
Compatibility Directive, 89/336/EEC (as amended by 91/263/EEC, 92/31/EEC and 93/68/EEC)
and European Community Low Voltage Directive 73/23/EEC (as amended by 93/68/EEC) and
conform to the following standards:
•
EN 61000-6-1
•
EN 61000-6-3
•
EN 60950
Warranty
The V-470A/V-474A v2 Series Time Zone Displays are fully guaranteed, on a return to works basis,
against failure due to faulty parts or workmanship for one year from date of purchase. In the
event of failure, either within or outside the warranty period, please pack the unit with care
and return to the manufacturer, or their agent, for examination and repair.
In no event shall the manufacturer, or their agent be liable for any direct, incidental or
consequential damages of any nature, or losses or expenses resulting from any defective
product or the use of any product, irrespective of whether the manufacturer, or their agent,
has advance notice of the possibility of such damages.
Product Development
Our products are subject to continuous development and the technical specifications and
sizes detailed are subject to change without notice.
Issue 1.1h
V-470A/V-474A v2 Series Time Zone Displays
Operating and Installation Instructions
Contents
1
Introduction
Operating Modes
2
3
4
1-1
Installation
Power Supply Connection
2-1
Synchronisation Signal Connection
2-1
PC Update Port
2-2
Multiple Unit Expansion Port
2-2
Local Link Output
2-3
Function Programming
Programming menus
3-1
System setup
3-2
Location & Calendar Setup
User Programmable Time Zone
4-1
Setting the Location
4-1
City / Location table
4-3
Programming the Calendar display
4-4
5
Time and Date Setting
6
Synchronisation Setup
Synchronisation status indication
6-2
GPS time code synchronisation
6-3
MSF & DCF radio time code synchronisation
6-4
w482 code synchronisation
6-5
7
Programmable Location Displays
8
Ethernet Network Connection
A
External Signal Connections
B
Cable Specifications
C
Mounting Details
D
Frequently Asked Questions
Issue 1.1h
V-470A/V-474A v2 Series Time Zone Displays
Operating and Installation Instructions
1 - Introduction
The V-470A v2 series time zone displays are designed to show the local time in a number of
different national and international locations. The V-470A v2 series comprises a number of
different models offering a choice of zones, horizontal or vertical display format, character
height and calendar display options.
The v2 range of V-470A series time zone displays provides advanced time zone functionality
originally introduced in the Timelord series master clock ranges. Regardless of time
synchronisation source, the V-470A/V-474A v2 series time zone displays can display time and date
information referenced to UTC, user ‘local’ time or other custom time zone.
Incorporating ‘Set-Once’ technology, the V-470A/V-474A v2 series time zone displays
automatically calculate future seasonal time changes for all 78 preset time location code
settings.
Units are supplied either with the customers choice of factory fitted location legends (A
versions), or with illuminated LED location legends that may be reprogrammed in the field
using the supplied ‘ZoneControl’ software (AIL versions) or via the time zone display’s web
interface (NIL versions).
Operating Modes
The V-470A/V-474A v2 series time zone displays are user programmable to provide a wide range
of operating features.
•
V-470A/V-474A v2 series time zone displays can be used as stand-alone units, deriving
their timekeeping from a highly accurate internal quartz crystal oscillator, or to
operate as slave displays controlled by time signals from many different sources.
•
Each time zone can be programmed to automatically display the ‘local’ time and
adjust for individual seasonal time changes in one of 78 preset locations.
•
V-470/V-474AIL units with illuminated location legends may be reprogrammed in the field
to display any LED location legend consisting of a maximum of 10 alphanumeric
characters using the supplied ‘ZoneControl’ software - please refer to chapter 7.
•
V-470A/V-474A v2 series time zone displays can be synchronised from:
~ Radio time code signals when connected to a V-484 series DCF or MSF radio receiver please refer to chapter 6.
~ GPS satellite time signals when connected to a V-488GPS receiver system - please
refer to chapter 6.
~ w482® multi-zone code signals from a Timelord series master clock - please refer
to chapter 6.
~ NTP (Network Time Protocol) across a computer network (N / NIL versions only) please refer to chapter 8.
~ MOBALine® time code signals from a MOBALine® master clock - please refer to
chapter 6.
•
The display brightness may be adjusted through a range of 7 settings - please refer to
chapter 3.
•
Units fitted with a calendar display show the abbreviated day of week, day of month
and abbreviated month - please refer to chapter 4 for further information.
1-1
Issue 1.1h
V-470A/V-474A v2 Series Time Zone Displays
Operating and Installation Instructions
2 - Installation
The V-470A/V-474A v2 series time zone displays are available with cases suitable for surface wall
mounting, flush mounting in a panel with rear access, flush mounting in a wall box and
single or double sided ceiling suspension. The surface wall mounting case is supplied with
wall mounting brackets. Please refer to appendix C for further mounting information.
Power Supply Connection
V-470/V-474A v2 series time zone displays are manufactured with universal mains power
supplies enabling operation at voltages from 100 to 240V ac 50/60Hz without adjustment.
Units for surface or flush mounting applications have an IEC mains socket located in the
external interface connector module and are supplied with a 2m mains cable preterminated
with either a UK, European, US or Australian style mains plug. The external interface
connector module may be found recessed into the rear of the clock as shown in appendix A.
Units for single or double sided ceiling suspension mounting applications are supplied with
a 3m unterminated captive mains cable (units for supply to the USA or Canada are supplied
with a 3m captive mains cable preterminated with a US style moulded plug).
A connection to the earth line must be made to ensure safe operation and compliance
with EMC regulations.
To ensure conformance with EN60950:
(A)
For installations where the V-470/V-474A v2 clock is to be permanently connected
into the mains power circuit, a readily accessible disconnect device should be
incorporated in the fixed wiring.
(B)
For installations where the V-470/V-474A v2 clock is to be plugged into the mains
power circuit, a socketed outlet should be installed near the equipment and should be
easily accessible.
All installation work should be performed in accordance with current Building
Regulations and the Sixteenth Edition of the IEE Wiring Regulations, or equivalent local
standard.
When time zone displays are used as stand-alone units, an internal Lithium battery will
maintain the internal time count if the mains supply is interrupted. In normal operation, this
battery should have a service life of greater than 10 years.
The power supply is fitted with an internal fuse. In case of fault the fuse should only be
replaced with a fuse of the same rating, by a suitably qualified engineer after disconnection
from the mains power supply and correction of the fault condition.
Synchronisation Signal Connection
A six way terminal block is located on the rear panel of the clock to enable the connection of
synchronisation signals, a GPS receiver system or a radio time code receiver. Details of the
connections for various signal configurations are detailed in appendix A. Please refer to
chapter 6 for information on synchronisation setup.
The mains power supply must be disconnected when making connections to external
signals.
Clocks supplied for ceiling suspension are supplied with a 6 way cable to enable connection
of external synchronisation signals.
Issue 1.1h
2-1
V-470A/V-474A v2 Series Time Zone Displays
Operating and Installation Instructions
PC Update Port
The PC update port may be found located in the External Interface Connector Module
recessed into the rear of the clock, as shown in appendix A. This port enables remote
programming of the time zone location settings and additionally on AIL type units with
programmable illuminated locations, remote programming of the alphanumeric location
characters.
If you wish to remotely alter the time zone location settings or alphanumeric location
characters, the ‘ZoneControl’ software should be installed on a Windows PC (as detailed in
the ZoneControl software instructions provided) and a connection made between the PC
update port and a spare COM port on the Windows PC using the 9 way serial cable supplied.
A connection between the PC update port and a Windows PC is only required
temporarily when you wish to remotely update the time zone location settings or
alphanumeric location characters.
Please refer to chapter 7 and appendix A for further details relating to this interface. Please
note that a PC Update Port connection is not required on N or NIL units with a network
connection - please refer to chapter 8 for further details.
Multiple Unit Expansion Port
V-470/V-474A v2 series time zone displays in larger case sizes may be supplied in two or more
sections due to shipping or installation issues. Multiple sections should be joined using the
supplied cable as shown in figure 1 below.
The multiple unit expansion port allows all sections of the clock to be controlled from the
master section in a fully transparent manner as if they were in one complete unit. All
sections will require both a local mains power supply connection and a connection via the
multiple unit expansion port. All other connections (e.g. synchronisation connections) should
be made only to the master unit.
The Master Part A section should be installed on the right hand side when viewed from
the front. The secondary units should be installed in sequence to the left of the Master.
figure 1 - Rear view detailing Multiple Unit Expansion Port connection
2-2
Issue 1.1h
V-470A/V-474A v2 Series Time Zone Displays
Operating and Installation Instructions
Local Link Output
In small / medium sized installations, the local link output from a V-470/V-474A v2 series time
zone display may be used to synchronise a maximum of ten further V-470A series displays as
secondary clocks. This output enables the timebase of all connected clocks to be controlled
from the master V-470/V-474A v2 series timezone display .
V-470A series displays to be synchronised from a local link output should be programmed for
48x0 synchronisation. Please note that the location setting should be programmed for each
time zone (please refer to chapter 4 for further details).
The local link output connection is located on the 6 way synchronisation signal terminal block
on the rear of the unit, as detailed in appendix A. Units to be synchronised from a local link
output should be connected using the w482 time code input as shown in figure 2 below.
The system should be connected in a single daisy chain configuration, using a minimum
24AWG (0.22mm2 or 7/0.2) cable pair. The total cable length should not exceed 200m.
Local Link Master Unit
Generates Local Link output to
synchronise a further ten
V-474A v2 units
Local Link synchronisation
cable connection. Polarity
not critical
Local Link Slave Unit
Timebase synchronised
from Local Link Master
unit
Local Link Slave Unit
Timebase synchronised
from Local Link Master
unit
figure 2 - Local Link system connection
Issue 1.1h
2-3
V-470A/V-474A v2 Series Time Zone Displays
Operating and Installation Instructions
3 - Function Programming
The V-470A/V-474A v2 Series Time Zone Displays have a user friendly interface based on the use
of four switches. Surface mounting units have switches located on the right hand rear of the
display. On other case mounting types, the switches may be accessed remotely via the
supplied V-408 type remote control handset .
Please refer to the table below for further details of function programming procedures.
Normal time display
Function ‘Time Setting Mode’. See page 5-1. Press ‘+’ once to
move to location setting mode. Please note that this option is not
present on w482 synchronised units.
Function ‘Location Setting Mode’. See page 4-1. Press ‘+’ once to
move to synchronisation setting mode. Please note that this option
is not present on w482 synchronised units.
Function ‘Synchronisation Setting Mode’. See page 6-1. Press ‘+’ once to
move to system setting mode. This option is followed by a Zone option (Zo) on
w482 synchronised units and an NTP option (Nt) on NTP synchronised units.
Function ‘System Setting Mode’. See page 3-2. Press ‘o’ once to
move to normal time display.
Normal time display
3-1
Issue 1.1h
V-470A/V-474A v2 Series Time Zone Displays
Operating and Installation Instructions
System setup
The system setup menu contains general setup options for the V-470A/V-474A v2 Series Time
Zone Displays.
Please refer to the diagram below for further information regarding this function.
Normal time display
Function ‘Time Setting Mode’.
Press ‘+’ three times to enter
system setting mode*.
Va software version. Press ‘<‘
to step on.
Function ‘System Setting
Mode’. Press ‘<’ to enter
menu.
Vb software version. Press ‘<‘
to step on.
Display Brightness Setting.
Press ‘+’ or ‘-’ to adjust or ‘<‘
to step on.
Display ID number. Contact
Technical Dept. for further
details. Press ‘<‘ to step on.
* Please note that the ‘Time’ and ‘Location’
setting modes are replaced by a ‘Zone’
setting mode on w482 synchronised units.
12 hour display mode. Press
‘+’ or ‘-’ to adjust or ‘<‘ to
step on.
New 12 Hour Display Mode
When 12 hour display is enabled, location times between 00:00 and 11:59 (AM time) will
have the colons turned off while location times between 12:00 and 23:59 (PM time) will
have the colons turned on. When unit is unsynchronised, first set of colons will flash.
Issue 1.1h
3-2
V-470A/V-474A v2 Series Time Zone Displays
Operating and Installation Instructions
System Settup (cont..)
Engineering mode. Factory
use only. Press ‘<‘ to step on.
Normal time display
3-3
Issue 1.1h
V-470A/V-474A v2 Series Time Zone Displays
Operating and Installation Instructions
4 - Location and Calendar Setup
The V-470A/V-474A v2 Series Time Zone Displays provide advanced time zone functionality.
Regardless of time synchronisation source*, each time display can be programmed to
indicate the time in one of 78 preset locations. Incorporating ‘Set Once’ technology, the
V-470A/V-474A v2 Series Time Zone Display will automatically calculate future seasonal time
changes for all preset time location code settings.
* Please note that the location setting is not present on units synchronised from a Timelord
master clock using w482 time code. Please refer to chapter 6 for further information.
User Programmable Time Zone
To allow for custom time zones and future changes in legislation, setting any time zone to
location code 52 enables users to program a 6 byte code representing the local time offset
and seasonal time change-over dates for that zone. Please contact our technical department
for further details of this function.
Setting the Location
All V-470A/V-474A v2 Series Time Zone Displays are supplied with time zone location codes
preprogrammed to customers specification.
However, if for example your unit has been supplied with programmable location displays,
you may wish to alter the displayed time zones. Rather than manually adjusting the time on
a time zone you wish to alter, the time zone location code should be reprogrammed. This
will automatically adjust the time displayed on that location without altering all the other
displayed time zones.
The table on page 4-3 details the time displayed for each location code. Please refer to the
diagram below for further details of this setting procedure.
Normal time display
Function ‘Time Setting Mode’. Press ‘+’ once to move to location
setting mode.
Function ‘Location Setting Mode’. Press ‘<’ to select.
Issue 1.1h
4-1
V-470A/V-474A v2 Series Time Zone Displays
Operating and Installation Instructions
Preset locations displayed with current selected zone flashing. If
required, press ‘+’ or ‘-’ to select zone for adjustment.
Current selected zone flashing. Press ‘<’ to enter location
adjustment mode.
Location code for current selected zone flashing. Press ‘+’ or ‘-’ to
adjust. Please refer to table on page 4-2 for details of location
codes.
Revised location code for current selected zone flashing. Press ‘<’
to save and return to normal time display.
Normal time display
4-2
Issue 1.1h
Issue 1.1h
GMT, UTC, Monrovia, Casablanca
Dublin, Edinburgh, London, Lisbon
Amsterdam, Berlin, Brussels, Paris
Belgrade, Budapest, Prague, Zagreb
Athens, Istanbul, Minsk
Bucharest
Cairo - pre 2008
Harare, Pretoria
Helsinki, Riga, Tallinn
Israel (Standard Time)
Kuwait, Riyadh, Nairobi, Israel (daylight
savings time)
Moscow, St. Petersberg, Volgograd
Tehran (non leap-year)
Abu Dhabi, Muscat, Tbilisi
Kabul
Ekaterinburg
Tashkent
Chennai, Colombo, Mumbai, New Delhi
Almaty
Bangkok, Hanoi, Jakarta
Beijing, Chongqing, Hong Kong, Urumqi
Singapore, Taipei
Osaka, Sapporo, Seoul, Toyko
Yakutsk
Adelaide - pre 2008
Darwin
Brisbane, Guam, Port Moresby - pre 2008
Canberra, Melbourne, Sydney - pre 2008
Hobart - pre 2008
Vladivostok
Magadan, Solomon Is., New Caledonia
Auckland, Wellington - pre 2008
Fiji, Kamchatka, Marshall Is.
Azores
Mid-Atlantic
Brasilia - pre 2007
Buenos Aires - pre 2008
Newfoundland - pre 2007
Atlantic Time (Canada) - pre 2007
Caracas, La Paz - pre 2008
00
01
02
03
04
05
06
07
08
09
11
12
13
14
15
16
17
18
19
20
21
22
23
24
25
26
27
28
29
30
31
32
33
34
35
36
37
38
39
10
City / Location
Time Zone Locations
Code
+3
+31/2
+4
+41/2
+5
+5
+51/2
+6
+7
+8
+8
+9
+9
+91/2
+91/2
+10
+10
+10
+10
+11
+12
+12
-1
-2
-3
-3
-31/2
-4
-4
+3
GMT
offset
0
0
+1
+1
+2
+2
+2
+2
+2
+2
Yes
Yes
No
No
Yes
No
No
No
No
No
No
No
Yes
Yes
No
No
Yes
Yes
Yes
No
Yes
No
Yes
Yes
Yes
No
Yes
Yes
No
No
Daylight
Savings?
No
Yes
Yes
Yes
Yes
Yes
Yes
No
Yes
No
51
52
53
54
55
56
57
58
59
60
61
62
63
64
65
66
67
68
69
70
71
72
73
74
75
76
77
78
99
50
40
41
42
43
44
45
46
47
48
49
Eniwetok, Kwajalein
User programmable time zone
Amman
Baghdad
Tehran (leap-year only)
Kathmandu
Santiago, Chile
Newfoundland - 2007+ (US Energy Policy Act 2005)
Atlantic Time - 2007+ (US Energy Policy Act 2005)
Eastern Time - 2007+ (US Energy Policy Act 2005)
Central Time - 2007+ (US Energy Policy Act 2005)
Mountain Time - 2007+ (US Energy Policy Act 2005)
Pacific Time - 2007+ (US Energy Policy Act 2005)
Alaska - 2007+ (US Energy Policy Act 2005)
Luanda
Baku
Perth - 2007+
Adelaide - (2007 - 2008)
Adelaide - 2008+
Sydney & Melbourne - (2007 - 2008)
Sydney, Melbourne & Tasmania - 2008+
New Zealand - 2008+
Cape Verde
Greenland
Nuuk (Greenland)
Brasilia - (2007 - 2009)
Falkland Islands
Venezuela - 2008+
Display blanking option
Midway Island, Samoa
Bogota, Lima, Quito
Eastern Time (US & Canada) - pre 2007
Indiana (East)
Central Time (US & Canada), Mexico City - pre 2007
Tegucigalpa
Arizona
Mountain Time (US & Canada) - pre 2007
Pacific Time (US & Canada) - pre 2007
Alaska - pre 2007
Hawaii
City / Location
Time Zone Locations cont
Code
-12
+2
+3
+31/2
+53/4
-4
-31/2
-4
-5
-6
-7
-8
-9
+1
+4
+8
+9.5
+9.5
+10
+10
+12
-1
-2
-3
-3
-4
-4.5
-
-11
GMT
offset
-5
-5
-5
-6
-6
-7
-7
-8
-9
-10
No
Yes
Yes
Yes
No
Yes
Yes
Yes
Yes
Yes
Yes
Yes
Yes
No
Yes
Yes
Yes
Yes
Yes
Yes
Yes
No
No
Yes
Yes
Yes
No
-
No
Daylight
Savings?
No
Yes
No
Yes
No
No
Yes
Yes
Yes
No
V-470A/V-474A v2 Series Time Zone Displays
Operating and Installation Instructions
4-3
V-470A/V-474A v2 Series Time Zone Displays
Operating and Installation Instructions
Programming the Calendar display
V-470A & V-475A type units have an integral calendar display showing the day-of-week, the dayof-month and an abbreviated month. The calendar display may be programmed to be
referenced to any of the displayed time zones and to indicate the day-of-week and month in
one of 20 different languages as shown in the language table below:
Language Table
Code
Language
Code
Language
Code
Language
CA
Catalan
GB
English
PL
Polish
Russian
CR
Czech
H
Hungarian
RU
D
German
HR
Croat
S
Swedish
DK
Danish
I
Italian
SF
Finnish
E
Spanish
N
Norwegian
SK
Slovakian
F
French
NL
Dutch
W
Welsh
GA
Gallician
P
Portuguese
Please refer to the diagram below for further programming and setup information.
4-4
Normal time display
Calendar reference zone flashing. Press
‘<’ to adjust language.
Function ‘Time Setting Mode’. Press ‘+’
to move to Calendar setting mode.
Current language flashing. Press ‘+’ or ‘-’
to adjust.
Function ‘Calendar Setting Mode’. Press
‘<’ to select.
Current language flashing. Press ‘<’ to
return to normal time display.
Function ‘Calendar Setting Mode’ with
current calendar reference zone flashing.
Press ‘+’ or ‘-’ to adjust.
Normal time display
Issue 1.1h
V-470A/V-474A v2 Series Time Zone Displays
Operating and Installation Instructions
5 - Time and Date Setting
The V-470A/V-474A v2 Series Time Zone Displays may be synchronised from a number of
different time sources. When coupled with the advanced time zone functionality provided by
the ‘Set Once’ technology, the time on a V-470A/V-474A v2 Series Time Zone Display should never
need to be manually set.
However, if your V-470A/V-474A v2 Series Time Zone Display is running standalone, you may
occasionally need to manually adjust the time. Please note, only the time on one zone
(usually the local zone) will need to be adjusted.
Please refer to the diagram below for further information.
Normal time display
Function ‘Time Setting Mode’. Press ‘<‘ to select.
Location times displayed with current selected timezone flashing. If
required, press ‘+’ or ‘-’ to select timezone for adjustment.
Location times displayed with current selected timezone flashing.
Press ‘<’ to enter time adjustment mode.
Time adjustment mode with ‘Seconds’ flashing. Press ‘+’ or ‘-’ to
adjust, or ‘<’ to move to minutes setting.
Issue 1.1h
5-1
V-470A/V-474A v2 Series Time Zone Displays
Operating and Installation Instructions
Time adjustment mode with ‘Minutes’ flashing. Press ‘+’ or ‘-’ to
adjust, or ‘<’ to move to hours setting.
Time adjustment mode with ‘Hours’ flashing. Press ‘+’ or ‘-’ to
adjust, or ‘<’ to move to years setting.
Time adjustment mode with ‘Year’ flashing. Press ‘+’ or ‘-’ to
adjust, or ‘<’ to move to month setting.
Time adjustment mode with ‘Month’ flashing. Press ‘+’ or ‘-’ to
adjust, or ‘<’ to move to day-of-month setting.
Time adjustment mode with ‘Day-of-Month’ flashing. Press ‘+’ or ‘-’
to adjust, or ‘<’ to save and exit time setting mode.
Normal time display
5-2
Issue 1.1h
V-470A/V-474A v2Series Time Zone Displays
Operating and Installation Instructions
6 - Synchronisation Setup
The V-470A/V-474A v2 series time zone displays are supplied as standard with no external time
reference using their internal quartz crystal oscillator to provide a timekeeping accuracy of
better than 0.1 sec/day @ 20-25ºC.
However, for applications where an increased level of accuracy is required, units may be
externally synchronised via the GPS navigation network, MSF or DCF radio time codes, NTP
across an ethernet network (N/NIL versions only - please refer to chapter 8), or in larger
installations, w482 time code generated from a Timelord series master clock.
The table below details the available options. Please refer to the diagram at the bottom of
this page for further programming and setup information.
Synchronisation Setup
Code
Synchronisation source
Notes
None
Standalone operation using internal quartz
ctystal oscillator.
No external reference, timekeeping accuracy better
than 0.1 sec/day @ 20-25ºC.
GPS
V-488GPS Receiver System Synchronisation from GPS satellites.
Very accurate time synchronisation.
Can be used anywhere in the world.
DCF
V-484 DCF Receiver - Synchronisation from the
DCF time signal.
MSF
V-484 MSF Receiver - Synchronisation from the
MSF time signal.
w482
Timelord Master Clock - Synchronisation cny Used for the control of mutliple clock displays in
from w482 time code.
large installations.
48x0
Special 'Local Link' UTC synchronisation from
w482 time code zo e 0.
Used for mutliple clock installations connected via
'Local Link'.
CUST
Custom setting
Special order only.
MOBA
MOBALine - Synchronisation from a
MOBALine Master Clock.
Synchronisation of minutes and seconds count only
to the nearest hour.
N tP
NTP (Network Time Protocol) from a remote
NTP time server across a computer network.
N/NIL versions only. Please refer to chapter 8 for
further details.
Synchronisation setting mode
Normal time display
Function ‘Time Setting Mode’. Press ‘+‘ twice to move to
synchronisation setting mode.
Issue 1.1h
6-1
V-470A/V-474A v2 Series Time Zone Displays
Operating and Installation Instructions
Function ‘Synchronisation Setting Mode’. Press ‘<’ to select.
Synchronisation setting mode with current selected synchronisation
source flashing. Press ‘+’ or ‘-’ to adjust, or ‘<’ to return to normal
time display.
Synchronisation setting mode with current selected synchronisation
source flashing. Press ‘<’ to save and return to normal time display.
Normal time display. Please note that when programmed for w482
time code synchronisation, location times will not be displayed until
time code is received from the Timelord master clock.
Synchronisation status indication
Synchronisation status is indicated visually by the ‘synchronisation status LEDs’ as shown
below. When the unit is unsynchronised, the synchronisation status LEDs will flash. When the
unit is synchronised (or programmed for stand-alone operation), the synchronisation status
LEDs will be illuminated.
On units synchronised via w482 timecode (from a Timelord Master Clock), the time
displays will be blank when the unit is unsynchronised and illuminated when synchronised.
V-470A /V-472A Digital Clocks
V-474A /V-475A Digital Clocks
un-synchronised
(flashing)
synchronised
un-synchronised
(flashing)
6-2
synchronised
Issue 1.1h
V-470A/V-474A v2 Series Time Zone Displays
Operating and Installation Instructions
GPS Synchronisation
The V-488GPS receiver system is designed to be automatically synchronised to time
signals transmitted from the Global Positioning System (GPS) navigation network. The GPS
constellation consists of 28 operational satellites, operating in 12 hour orbits at an altitude of
20,200km.
The V-488GPS receiver has been designed for simple installation and operation by the
end-user, requiring only a 4 wire interconnection to the V-470A/V-474A v2 series time zone
display. When synchronised to a V-488GPS receiver system the V-470A/V-474A v2 series time
zone display timebase is maintained within 50uS of UTC.
Advantages of V-488GPS time synchronisation:
•
Very accurate synchronisation
•
Can be used anywhere in the world
•
Better resistance to EM interference
Disadvantages of GPS time synchronisation:
•
Antenna needs to be mounted externally with a clear view of 75% of the sky.
The V-488GPS Antenna/receiver module
The V-488GPS synchronisation system is housed in a single IP66 rated case containing an
advanced combined Sony active antenna and 12 channel parallel GPS receiver module and a
microprocessor based communications interface.
The system is supplied complete with a post mounting clamp to enable the unit to be fixed
to a suitable horizontal or vertical post of up to 2cm diameter. The antenna should be
mounted on the roof of a building or under a suitable skylight.
The reception gain pattern is designed for full, upper hemispherical coverage with the gain
diminishing at low elevations. This cross-section is consistent through 360 degrees and so
the 3 dimensional gain pattern is a symmetrical spheroid surface.
Installation
To ensure ease of operation and to remove the possibility of operator error, the V-488GPS
system is designed to self initialise.
Ensure that the V-470A/V-474A v2 series time zone display is disconnected from the mains
power supply when making connections to the V-488GPS receiver system.
1
Install the V-488GPS unit horizontally using the post mounting kit provided. Ensure that
the unit has a clear view of at least 75% of the sky. If the sky view is reduced the
interval between ‘switch-on’ and system time synchronisation will be considerably
increased.
2
The V-488GPS should be connected to the V-470A/V-474A v2 series time zone display
using the captive 25 metre four core cable supplied. For distances of up to 50 metres
the length can be extended by adding an additional length of 7/0.2 cable. For greater
distances, up to a maximum of 200m, 16/0.2 (0.5mm2) cable should be used. The
cable should be connected to the 6 way terminal block on the rear of the V-470A/V-474A v2
series time zone display as shown in figure 3. The cable screen should be connected
to the EMC ground connection on the 6 way terminal block.
3
Connect the power supply to the V-470A/V-474A v2 series time zone display.
Issue 1.1h
6-3
V-470A/V-474A v 2 Series Time Zone Displays
Operating and Installation Instructions
Connection to V-474Av2 digital
clock (please refer to appendix
A & B for further details)
V-488GPS antenna /
receiver module
25m four core
screened cable
Red
Blue
Yellow
Green
20mm dia post
(not supplied)
figure 3 - V-488GPS receiver system connections
4
Once the power has been applied the receiver will automatically begin to search the
sky for all available satellites. During this process the green LED inside the V-488GPS
unit will flash. After three satellites have been acquired the green LED will stop
flashing and become constantly illuminated, indicating that a precise date and time
has been calculated from the satellite data transmissions. From a ‘cold’ start this
process will typically take less than 10 minutes.
5
Ensure that the V-470A/V-474A v2 series time zone display is configured to synchronise
from the GPS signal by following the procedure on page 6-1.
Once the green LED has illuminated the synchronising time signals are transmitted from the
receiver/decoder module to the V-470A/V-474A v2 series time zone display. The V-470A/V-474A v2
series time zone display should lock in and display the correct time within 5 minutes.
MSF and DCF synchronisation
MSF and DCF are the two most widely used radio time code signals. The DCF signal is
derived from the atomic clocks at the Physics Institute of Brunswick and transmitted at a
frequency of 77.5KHz from Manflingen, near Frankfurt in Germany. The MSF signal is
referenced to the Caesium Beam Oscillators at the National Physical Laboratory and
transmitted on a frequency of 60KHz from Anthorn in the United Kingdom.
Under normal circumstances the DCF signal provides reliable operation at distances of up to
1500km, MSF signals are normally usable up to 1000km from the transmitter. Greater
operating ranges are possible at night.
When synchronised to MSF or DCF using a 484 radio receiver the V-470A/V-474A v2 series time
zone display timebase is maintained within 30mS of UTC.
Advantages of MSF and DCF time synchronisation:
•
Lower purchase cost than GPS
•
Can sometimes be installed internally.
Disadvantages of MSF and DCF time synchronisation:
•
Can be difficult to find good location for signal reception.
•
Suffers greatly from EM interference - Avoid locating near computers, electronic
equipment, fluorescent lighting, lift equipment, metal girders, reinforced concrete
walls and all other sources of electrical noise.
•
MSF is off-air for maintenance on the second Thursday of every March, June,
September and December. MSF status can be checked by telephoning 020 8943 6493.
6-4
Issue 1.1h
V-470A/V-474A v2 Series Time Zone Displays
Operating and Installation Instructions
Installation
The V-484 series time code receiver should be mounted:
•
At least 2.5 metres from the V-470A/V-474A v2 series time zone display.
•
At greatest practical distance from:
Other electronic equipment including computers, fluorescent lights and signs, metal
girders, reinforced concrete walls and any other sources of electrical noise.
•
On the side of the building nearest Anthorn (MSF) or Frankfurt (DCF).
•
Preferably on the outside of the building (V-484.02 and V-484.03 only) as high as possible.
The case is weatherproof to IP65 (V-484.02 and V-484.03 only) but it is preferable to
provide some protection from direct rain.
•
With the cable entry on the lower face of the case. (V-484.02 and V-484.03 only)
The antenna is supplied with 3 metres of two core cable, if a longer cable distance is
required Appendix B should be consulted for suitable cable specifications. The maximum
distance between the 484 radio receiver and the V-470A/V-474A v2 series time zone display is
200m.
If a screened cable is used, the cable screen should be connected to the EMC grounding
terminal on the rear of the V-470A/V-474A v2 series time zone display.
Alignment
The V-484.02 (MSF) and V-484.03 (DCF) radio receivers have dual ferrite antennas, which
normally permit location regardless of orientation to the transmitter. The receiver is
mounted by means of four fixing holes in the rear surface which are accessed after removing
the front cover. The four mounting holes are located outside of the central sealed
compartment.
The V-484.06 (MSF) and V-484.07 (DCF) receivers have a single antenna element and are
supplied with an adjustable mounting bracket so that the installer can ensure that the
orientation of the longest face of the receiver is at 90o to the direction of the transmitter.
The front cover of the V-484.02 and V-484.03 receivers may be removed to enable the indicator
LED to be viewed. The indicator LED on the V-484.06 and V-484.07 receiver is located on the
front face of the unit.
The alignment of the receiver is correct when the LED flashes on/off once per second.
Signal reception
In good conditions the V-470A/V-474A v2 series time zone display will take three minutes to
synchronise with the transmitted time code from either DCF or MSF. When the V-470A/V-474A v2
series time zone display is ‘locked’ to the transmitted signal, the colon LEDs located
between the hours and minutes displays on each time zone are illuminated continuously.
During periods of signal failure or signal corruption the clock will maintain timekeeping
using its internal quartz crystal oscillator.
w482 Time Code Synchronisation
In large installations, multiple V-470A/V-474A v2 series time zone displays may be controlled via
a Timelord master clock. The master clock provides centralised control for a maximum
of 50 displays using the w482 time code system.
Issue 1.1h
6-5
V-470A/V-474A v2 Series Time Zone Displays
Operating and Installation Instructions
The w482 Time Code Signal
The w482 signal was developed for controlling electronic clocks, using a single cable pair
data interconnection, in electrically noisy environments. A principle advantage of w482 is the
ability to provide time information in any one of fifteen different synchronised time zones.
All fifteen time zones can be individually configured on the master clock to provide
automatic seasonal time change correction.
The w482 signal is transmitted at 4-24v amplitude at a rate of 50 bits per second. The
signal is virtually immune to electromagnetic interference. One Timelord master clock
can control up to fifty V-470A/V-474A v2 series time zone displays located up to 1km from the
master clock using a simple, non-critical cable pair.
Installation
If your V-470A/V-474A v2 series time zone display has been supplied with a master clock, it will
already be programmed so that the individual time zones are set to display the correct w482
zones, (i.e. - if the master clock is setup so the Zone 1 is New York time, then the zone
labelled ‘New York’ on the V-470/V-474A time zone display should be set to zone 1 or Z1).
If the V-470A/V-474A v2 series time zone display is to be used with an existing system, the zones
should be set to correspond with the zone settings in the master clock. Please refer to the
diagram below for further details of this setting procedure.
Please refer to Appendix A for connection information and Appendix B for recommended
cable specifications.
Please note that the ‘time setting’ & ‘location’ options normally found in the function
programming menu are not present when the unit is programmed for w482 time code
synchronisation.
w482 Zone setting mode
Normal time display
Function ‘Synchronisation Setting Mode’. Press ‘+‘ once to move to
zone setting mode.
Function ‘Zone Setting Mode’. Press ‘<‘ to select.
6-6
Issue 1.1h
V-470A/V-474A v2 Series Time Zone Displays
Operating and Installation Instructions
Zone setting mode with current selected timezone flashing. If
required, press’+’ or ‘-’ to select alternate timezone for adjustment.
Zone setting mode with current selected timezone flashing. Press
‘<‘ to enter zone adjustment mode.
Zone adjustment mode with current selected zone setting flashing.
Press ‘+’ or ‘-’ to adjust, or ‘<‘ to exit Zone setting mode.
Zone adjustment mode with current selected zone setting flashing.
Press ‘<‘ to save and exit Zone setting mode.
Normal time display. Note that location times will not be displayed
until time code is received from the master clock.
Normal time display after time code has been received from the
master clock. Time code should be received within 2 minutes of
connection and setup.
Issue 1.1h
6-7
V-470A/V-474A v2 Series Time Zone Displays
Operating and Installation Instructions
w482 Time Code System Interconnection
A maximum of 50 V-400A series digital clocks or V-470A/V-474A v2 series time zone displays may
be controlled via w482 time code from a Timelord master clock. The digital clocks may
be connected in a ‘daisy-chain’ or ‘star-wire’ configuration as shown in the diagram below.
Please refer to Appendix A for recommended cable specifications.
Timelord-net master clock
V-474AIL/x.057.x.S time zone display
V-401A.05.x.S digital clock
V-474AIL/x.05.x.S time zone display
V-450A.05.x.S digital calendar clock
figure 4 - w482 time code system interconnection
Local Link Synchronisation
In small / medium sized installations, the local link output from a V-470/V-474A v2 series time
zone display may be used to synchronise a maximum of ten further V-470A series displays.
Please refer to page 2.3 for further details.
NTP Synchronisation (N/NIL versions only)
V-470N /V-470NIL type units may be synchronised via NTP (Network Time Protocol) across an
Ethernet network. Please refer to chapter 8 for further details.
6-8
Issue 1.1h
V-470A/V-474A v2 Series Time Zone Displays
Operating and Installation Instructions
7 - Programmable Location Displays
V-470/V-474AIL v2 series time zone displays are fitted with illuminated LED location legends. If
required, the displayed location text may be reprogrammed in the field to display a
maximum of 10 alphanumeric characters.
V-470AIL versions may be reprogrammed via the ‘PC update port’ using the supplied
‘ZoneControl’ software. V-470NIL versions may be reprogrammed via the Ethernet network
connection (please refer to section 8 for details of the network connection).
If you wish to alter the displayed locations using the PC update port, the supplied
‘ZoneControl’ software should be installed on a Windows 2000 / XP PC. This software may
be used to remotely adjust the zone identifier and location time displayed on each zone.
The supplied serial cable should be connected between the PC update port on the rear of
the V-470AIL/V-474AIL v2 Series Time Zone Display and the serial port on your PC. Please refer to
Appendix A for cable connection details.
Please follow the instructions below to install and operate the ‘ZoneControl’ software.
Installation and Setup
Administrative privileges may be required for the installation of this software.
1.
Insert the ZoneControl CD-ROM supplied with the V-470/V-474AIL series time zone
display into a computer running Windows 2000 or Windows XP.
2.
Run the ‘setup.exe’ program.
3.
Follow the instructions on screen.
4.
When the software is installed, click ‘Finish’. If the check-box is ticked, this will launch
the ZoneControl software.
5.
If the program is not already running, run the ‘zc2’ program from the Start menu or
double-click the ‘zc2’ icon on your Desktop.
6.
Open the File menu and click ‘Config’. Select a free COM port and click ‘OK’.
7.
Connect the supplied RS232 serial cable between the selected COM port and the ‘PC
Update Port’ on the V-470/V-474AIL series time zone display.
Adding a Clock
1.
Click ‘Add Clock’. The ‘Add Time
Zone Clock’ window will appear,
as shown in figure 5.
2.
Select the ‘Unit Type’ of your V-470
/V-474AIL series time zone display.
For example, if you have a time
zone display with 4 time zones,
select the V-474AIL/4 option.
3.
Select the ‘Unit ID’ of your V-470/
V-474AIL series time zone display.
The Unit ID may be found on the
rear of the unit.
figure 5 - Adding a timezone clock
Issue 1.1h
7-1
V-470A/V-474A v2 Series Time Zone Displays
Operating and Installation Instructions
Note: The Unit ID may be configured in the V-470/V-474AIL digital clock system setup
menu. Please refer to page 3.2 for further details.
4.
If required, the clock may be given a unique name which should be entered in the
‘Unit Name’ field. This optional name may be used to ease the management and
setup of installations with multiple clock displays. Note: This name is only used
within the software program to enable users to easily identify a specific clock unit and
does not effect the information displayed on the clock display.
5.
Select the ‘Software Version’ of your V-470/V-474AIL series time zone display. If you are
configuring a unit using ‘ZoneControl’ installed from the CD-ROM supplied with the
xtime zone display, the pre-selected software version will be correct. If you are using
the ‘ZoneControl’ software to configure a previously supplied unit, please check the
software version of your V-470/V-474AIL series time zone display and select the
appropriate sofware version from the drop-down menu. Note: Please refer to page
3.2 for instructions for viewing your V-470/V-474AIL series time zone display software
version.
6.
Click ‘OK’ to save and exit the Add Time Zone Clock window.
7.
Repeat steps 2 - 5 until all connected time zone displays are added.
Editing a Location
1.
Select the clock and then the zone location
you wish to edit. Note: Clocks entered in
the ‘Adding a Clock’ section will now be
shown graphically in the Wharton
ZoneControl window, with each unedited
location represented by the text ‘Zone’.
2.
Click ‘Edit Selected’. The ‘Edit Location
Display’ window will appear, as shown in
figure 6.
3.
Enter the location text you wish to display
into the ‘Location Display’ field.
4.
Select the ‘Zone Time’ location code from the list displayed. Note: Please refer to
page 4.3 for a full list of locations. If your required location is not covered by the
standard location codes, please contact your technical support representative for
details of how to input a user programmable location code.
figure 6 - Editing a location display
5.
Click ‘OK’ to save and exit the Edit Location Display window.
6.
Repeat steps 1 - 5 until all locations are edited.
Updating the display
1.
Open the ‘Update’ drop-down menu.
2.
Click on ‘Update Selected’ to update the selected zone only. If you wish to update all
connected clocks, click on ‘Update All’. Note: This function will update all connected
clocks (including unedited locations).
Deleting a Clock
1.
Select the clock you wish to delete.
2.
Click ‘Delete Clock’.
3.
A confirmation window will appear. Click ‘OK’.
7-2
Issue 1.1h
V-470A/V-474A v2 Series Time Zone Displays
Operating and Installation Instructions
8 - Ethernet Network Connection (N/NIL units only)
V-470/V-474N/NIL series time zone displays are designed to synchronise to a remote NTP
(Network Time Protocol) time server across a TCP/IP computer network. The units are fitted
with a dual speed 10/100Base-T RJ45 Ethernet interface and may be connected either to a
dedicated 10Base-T or 100Base-T port or to a switchable 10/100Base-T port on your network.
Upon initial installation, the unit IP address, subnet mask, gateway and NTP time server IP
address should be programmed as detailed in the setup procedure below. Alternatively, the
DHCP setting may be selected to enable the unit to obtain it’s IP address, subnet mask and
gateway settings automatically.
With the unit connected to your computer network, settings may be remotely monitored and
adjusted via the web interface. Additionally, if your unit has illuminated locations (NIL
versions only), the displayed location text may be remotely adjusted using the web interface.
Initial Setup Procedure
Before connecting the V-470/V-474N/NIL unit to your computer network, the following procedure
should be performed using the setting switches located on the right hand rear of the display.
Attention: If you are unsure about any of the following settings, please contact your
network administrator. Incorrect settings may have adverse affects on the performance
of your network.
1)
Ensure the unit is programmed for NTP synchronisation. Please refer to chapter 6.
2)
Configure the DHCP setting for correct operation on your network. If you wish to
manually program the unit IP address, subnet mask and gateway, the DHCP setting
should be set to ‘NO’. If you wish the unit to obtain it’s network settings automatically
and your network is configured for DHCP, the DHCP setting should be set to ‘YES’.
If you have selected DHCP operation, please omit steps 3, 4 and 5 below. These options will
not be visible in the setting menu.
3)
Program the unit IP address in dotted-decimal notation (e.g. 192.168.0.44). Use the
plus and minus switches to increment and decrement each value. The arrow switch
will move on to the next value, the circle switch will return to the previous value.
Network Settings Table
IP
Display
Code
Setting
dhCP
DHCP (Dynamic Host
Control Protocol) setting.
a
Unit
Enables automatic allocation of unit IP address, Subnet and Gateway
settings when connected to a network configured for DHCP.
This is the Internet Protocol address that the 470N/NIL digital clock
on the computer network. Not visible in NTP setting menu when DHCP
setting is set to yes.
Sub
Subnet mask.
The subnet mask when combined with the IP address identifies the subnet
(part of the bigger network) that the 470N/NIL unit is connected to. Not
visible in NTP setting menu when DHCP setting is set to yes.
GtU
Gateway.
The gateway address is used by the digital clock when it needs to send
information to computers and devices connected to other networks and
subnets. Not visible in NTP setting menu when DHCP setting is set to yes.
NtP
NTP time server IP
address.
This is the Internet Protocol address of the NTP time server that the
470N/NIL digital clock uses as a time source.
Issue 1.1h
8-1
V-470A/V-474A v2 Series Time Zone Displays
Operating and Installation Instructions
4)
Program the unit Subnet Mask in dotted-decimal notation (e.g. 255.255.255.192). Use
the plus and minus switches to increment and decrement each value. The arrow
switch will move on to the next value, the circle switch will return to the previous value.
5)
Program the Gateway in dotted-decimal notation (e.g. 192.168.0.1). Use the plus and
minus switches to increment and decrement each value. The arrow switch will move
on to the next value, the circle switch will return to the previous value.
6)
Program the IP address of the NTP Time Server in dotted-decimal notation (e.g.
192.168.0.21). Use the plus and minus switches to increment and decrement each
value. The arrow switch will move on to the next value, the circle switch will return to
the previous value.
7)
Using the supplied CAT5 patch cable, connect the V-470/V-474N/NIL series time zone
display to your TCP/IP computer network. Check that the orange link LED illuminates
confirming that correct connection has been made to the network.
The unit will now automatically request time information from the programmed NTP time
server and should synchronise within 3 minutes. Please refer to page 6.2 for details of
confirming the unit synchronisation status.
Network Setting Mode
Normal time display
Function ‘Time Setting Mode’. Press ‘+‘ three times to move to NTP
setting mode.
Function ‘NTP Setting Mode’. Press ‘<‘ to select.
Function ‘NTP Setting Mode’ with DHCP setting flashing. Press ‘+‘
to enable DHCP. Press ‘<‘ to step on to set the unit IP address.
Note: If DHCP is enabled, the unit IP address, Subnet mask and
Gateway settings will not be visible.
8-2
Issue 1.1h
V-470A/V-474A v2 Series Time Zone Displays
Operating and Installation Instructions
Network Setting Mode (cont..)
Function ‘NTP Setting Mode’ with unit IP address 1st byte flashing.
Press ‘+‘ or ‘-’ to change setting. Press ‘<‘ to step on to the 2nd
byte of the unit IP address.
Function ‘NTP Setting Mode’ with unit IP address 2nd byte flashing.
Press ‘+‘ or ‘-’ to change setting. Press ‘<‘ to step on to the 3rd
byte of the unit IP address.
Function ‘NTP Setting Mode’ with unit IP address 3rd byte flashing.
Press ‘+‘ or ‘-’ to change setting. Press ‘<‘ to step on to the 4th
byte of the unit IP address.
Function ‘NTP Setting Mode’ with unit IP address 4th byte flashing.
Press ‘+‘ or ‘-’ to change setting. Press ‘<‘ to step on to the Subnet
mask.
Function ‘NTP Setting Mode’ with Subnet mask 1st byte flashing.
Press ‘+‘ or ‘-’ to change setting. Press ‘<‘ to step on to the 2nd
byte of the Subnet mask.
Function ‘NTP Setting Mode’ with Subnet mask 2nd byte flashing.
Press ‘+‘ or ‘-’ to change setting. Press ‘<‘ to step on to the 3rd
byte of the Subnet mask.
Issue 1.1h
8-3
V-470A/V-474A v2 Series Time Zone Displays
Operating and Installation Instructions
Network Setting Mode (cont..)
Function ‘NTP Setting Mode’ with Subnet mask 3rd byte flashing.
Press ‘+‘ or ‘-’ to change setting. Press ‘<‘ to step on to the 4th
byte of the Subnet mask.
Function ‘NTP Setting Mode’ with Subnet mask 4th byte flashing.
Press ‘+‘ or ‘-’ to change setting. Press ‘<‘ to step on to the
Gateway.
Function ‘NTP Setting Mode’ with Gateway 1st byte flashing. Press
‘+‘ or ‘-’ to change setting. Press ‘<‘ to step on to the 2nd byte of
the Gateway.
Function ‘NTP Setting Mode’ with Gateway 2nd byte flashing. Press
‘+‘ or ‘-’ to change setting. Press ‘<‘ to step on to the 3rd byte of
the Gateway.
Function ‘NTP Setting Mode’ with Gateway 3rd byte flashing. Press
‘+‘ or ‘-’ to change setting. Press ‘<‘ to step on to the 4th byte of
the Gateway.
Function ‘NTP Setting Mode’ with Gateway 4th byte flashing. Press
‘+‘ or ‘-’ to change setting. Press ‘<‘ to step on to the NTP server IP
address.
8-4
Issue 1.1h
V-470A/V-474A v2 Series Time Zone Displays
Operating and Installation Instructions
Network Setting Mode (cont..)
Function ‘NTP Setting Mode’ with NTP server IP address 1st byte
flashing. Press ‘+‘ or ‘-’ to change setting. Press ‘<‘ to step on to
the 2nd byte of the NTP server IP address.
Function ‘NTP Setting Mode’ with NTP server IP address 2nd byte
flashing. Press ‘+‘ or ‘-’ to change setting. Press ‘<‘ to step on to
the 3rd byte of the NTP server IP address.
Function ‘NTP Setting Mode’ with NTP server IP address 3rd byte
flashing. Press ‘+‘ or ‘-’ to change setting. Press ‘<‘ to step on to
the 4th byte of the NTP server IP address.
Function ‘NTP Setting Mode’ with NTP server IP address 4th byte
flashing. Press ‘+‘ or ‘-’ to change setting. Press ‘<‘ to exit setting
mode and return to normal time display.
Normal time display.
Issue 1.1h
8-5
470A/474A v2 Series Time Zone Displays
Operating and Installation Instructions
Web Interface
The status of the 470N / NIL series digital clock can be remotely monitored and various
settings adjusted by use of the web interface. Having performed the initial setup procedure
and connected the 470N / NIL series digital clock to your computer network, the web
interface may be accessed by entering the unit IP address into a standard web browser.
Status screen
Figure 7 shows the main Status
screen.
V-474N / V-474NIL Time Zone Clock
The status screen indicates
general setup and status
information including product
type and firmware versions,
synchronisation source and
status along with network
setup information.
This screen has no password
protection security and may be
accessed by any user.
figure 7 - Web interface status screen
Administration Password protection
The ‘NTP Client’, ‘Locations’ and ‘Security’ screens in the administration section of the web
interface are all password protected to prevent unauthorised user access. Clicking on any of
these three links will cause the
‘Enter Network Password’
screen to be displayed.
The user name for all 470N /
NIL units is ‘admin’. Units are
supplied with the password
preset to ‘password’.
V-474N / V-474NIL Time Zone Clock
Please note that the system
will automatically log-out any
user after a short period of
inactivity. Additionally, users
are automatically logged-out
upon closure of the web
browser.
If required, the preset
password may be
reprogrammed via the
‘Security’ screen.
figure 8 - Web interface password protection
Attention: It is not possible to alter the administration password without first inputting
the current password. If adjusting the administration password, please ensure that
records are kept in a secure location.
8-6
Issue 1.1h
470A/474A v2 Series Time Zone Displays
Operating and Installation Instructions
NTP Client Setup
The NTP Client setup screen
indicates in detail the
synchronisation status of the
470N / NIL digital clock.
V-474N / V-474NIL Time Zone Clock
Initially, the screen will detail
the IP address of the NTP time
server (as programmed in the
initial setup process) along
with a status code (as detailed
in the table below) and the unit
stratum code.
From this screen, it is possible
to enter IP addresses for an
additional three NTP time
servers.
If multiple NTP time servers
figure 9 - NTP Client setup screen
have been enabled, the 470N /
NIL digital clock will monitor the status of these servers and select the most suitable source.
This selection is based on a number of factors including long-term stability and stratum. The
currently selected NTP time server is indicated visually by a star.
NTP Synchronisation Status Table
Display
Code
00
Initialising
The Ethernet port is initialising.
01
Error
There is a non-specific error.
02
Transmission failure
The 470N / NIL digital clock is unable to transmit data to the NTP Time Server.
03
Receive failure
The 470N / NIL digital clock is not receiving data from the NTP Time Server.
04
Receive error
The 470N / NIL digital clock is receiving unreliable data from the NTP Time Server.
05
Synchronised
The 470N / NIL digital clock is synchronised to the NTP Time Server.
06
Receiption success
The 470N / NIL digital clock is receiving data and is sycnhronised to the NTP Time Server.
Issue 1.1h
8-7
470A/474A v2 Series Time Zone Displays
Operating and Installation Instructions
NTP Stratum definitions
Stratum
Definition
0
Unspecified or Unavailable
This stratum is used to describe the stratum level of the orignal time signal source. In the case of
GPS the actual GPS signal from the satellites can be viewed as stratum 0.
1
Primary Reference Server
A server that derives its time from a external time reference, e.g. GPS or radio time code, is defined
as a stratum 1 time server. Stratum time servers are at the root of the synchronisation subnet.
2-15
Secondary and Greater Stratum Devices
A client synchronised to a time server operates at one stratum higher than the synchronisation
source.
If the 470N / NIL display is synchronised to a Stratum 1 device, the 470N / NIL display will be at
Stratum 2.
Illuminated Location Setup
470 / 474NIL series time zone displays are fitted with illuminated LED location legends. If
required, the displayed location text may be reprogrammed in the field to display a
maximum of 10 alphanumeric characters.
Figure 10 shows the location setup screen. To reprogram a timezone or location, the correct
display number should first be selected and the ‘Config’ button clicked. The displays are
numbered from left to right (or top to bottom on 470 versions) when viewed from the front
of the unit.
When the correct display
number has been selected,
the ‘Location Setting’ data at
the bottom of the screen will
be updated to display the
current settings.
V-474N / V-474NIL Time Zone Clock
To amend the displayed text,
enter a maximum of 10
alphanumeric characters in
the Zone Legend box. The
correct location code should
then be selected from the
drop down list (please refer
to page 4.3 for a full list of
location codes). Click on
‘Apply’ to update the selected
display
Please refer to page 4.1 for
details of the programmable
timezone function.
figure 10 - Location setup screen
8-8
Issue 1.1h
V-470A/V-474A v2 Series Time Zone Displays
Operating and Installation Instructions
Appendix A - External Signal Connections
Serial Number Label
Section Identifier Label
Time, Date &
Program Setting
Switches
External Interface
Connector Module
Synchronisation
Signal Connector
Rear view of V-474A/AIL digital clock
V-488GPS
Receiver System
Red
V-484 Series DCF or
MSF Radio Time
Code Receiver
Blue
Green or
uncovered
Red or
clear
Yellow
Green
w482 time code
from Timelord
Master Clock
Connector
polarity not
critical
Local Master input
‘A’
Local Link output
‘A’
‘B’
Connector
polarity not
critical
‘B’
External Interface Connector Module
RJ45 10/100Base-T
Ethernet Connection
(N/NIL versions only)
IEC Mains
Power Inlet
DB9 PC Update
Port
Multiple Unit
Expansion Port
6-way synchronisation cable fitted
to Ceiling Suspended units
Red
Yellow
6-way cable
White
Black
Red
Blue
Green
Green
Ceiling suspended unit have an
additional 6 way cable to enable
access to the synchronisation
signal connector. This cable is
connected internally as follows:
Issue 1.1h
Clock case
Blue
Yellow
White
Black
A-1
V-470A/V-474A v2 Series Time Zone Displays
Operating and Installation Instructions
Appendix B - Cable Specifications
V-470A/V-474A v2 -> V-488GPS interconnection
The V-488GPS Receiver system is supplied with 25 metres of four core 7/0.2 (0.22mm2)
screened cable. The cable screen should be grounded at the V-470A/V-474A v2 end by means of
the EMC rear grounding terminal.
For distances of up to 50 metres the length can be extended by adding an additional length
of 7/0.2 cable. For greater distances, up to a maximum of 200m, 16/0.2 (0.5mm2) cable
should be used.
V-470A/V-474A v2 -> V-484 MSF and DCF radio receiver interconnection
The V-484 series radio receiver is supplied with a 3m long unscreened cable as standard. The
cable length may be extended to 10m using unscreened cable, RS 528-2235 - 22 awg or
equivalent. In areas of high electrical noise a screened twisted pair should be used. The
cable screen should be grounded at the V-470A/V-474A v2 end only.
The cable length may be extended to 200m using a screened twisted pair cable, RS 5281917 - 22 awg or equivalent. (UL style 2092, Alpha 2401). For screened LSOH (Low Smoke
Zero Halogen) applications RS 528-2308 (two pairs 7/0.25 - 22 awg) may be used. Equivalent
to UL style 2493.
V-470A/V-474A v2 -> Timelord master clock interconnection
The w482 time code transmitted from a Timelord series master clock is designed to have
considerable immunity to external electrical interference and screened cable is only required
in areas of high electrical noise.
Normal installations may use standard mains cable. (e.g. twin 1.5mm2) The size of the cable
depends on the overall cable length, the number of clocks and their spacing on the cable.
The use of twin 1.5mm2 cable will be adequate for installations of up to 50 V-470A/V-474A v2
using up to 1km of cable.
Unscreened data cables should not be run in proximity to power cables supplying
fluorescent lighting or other sources of electrical noise. In areas of high electrical noise a
screened twisted pair should be used. The cable screen should be grounded at the
Timelord end only by means of the rear grounding terminal. A suitable screened cable is RS 5282241, (twin 16/0.254 - 18 awg) equivalent to Alpha 2421, BICC H8093, UL style 2092 which is
adequate for a spur controlling 25 clocks over a 1km cable run or a greater number of clocks
over a shorter distance.
For a Cat 5 installation, (24 awg) a single pair can be used to connect up to 10 V-470A/V-474A v2
series time zone displays at a distance of up to 250m. For further distances or greater
numbers of clocks, additional cores should be paired together, lowering the cable resistance.
If in doubt one should always consider the use of the next heavier gauge cable as this
invariably increases system integrity at minimal additional system cost and allows for future
system expansion.
All installation work should be performed in accordance with the Sixteenth Edition of the IEE
Wiring Regulations, or equivalent local regulations.
B-1
Issue 1.1h
V-470A/V-474A v2 Series Time Zone Displays
Operating and Installation Instructions
Appendix C - Mounting Details
Ceiling Suspended Case
mounting rose & upper
tube supplied by customer
20mm tube
50mm square
connecting section
mains & data cable
suspended ceiling
20mm support tube
single or double
sided clock
Case style .SS. - ‘X’ = 66
Case style .DS. - ‘X’ = 120
‘X’
note: please refer to the relevant application note for further details of case sizes
Issue 1.1h
C-1
V-470A/V-474A v2 Series Time Zone Displays
Operating and Installation Instructions
Surface Mounting Case
66
16
‘X’
Flush Fitting Panel Case
3
55
6
‘X’
6
22 - maximum panel thickness
‘X’ = standard surface mounting
case body height
Flush Fitting Case with Mounting Box
80
‘X’
Spring loaded
mounting spigot
Steel mounting box
C-2
Issue 1.1h
V-470A/V-474A v2 Series Time Zone Displays
Operating and Installation Instructions
Appendix D - Frequently Asked Questions
How can I tell if the V-470A/V-474A v2 series time zone display has synchronised to
my chosen synchronisation time source?
When the V-470A/V-474A v2 series time zone display is synchronised (or programmed for standalone operation), the colon LEDs between the hours and minutes display of the left-hand
time zone will illuminate continually. If the unit is unsynchronised, the colon LEDs between
the hours and minutes display of the left-hand time zone will flash.
Why are some or all of the times shown on the V-470A/V-474A v2 series time zone
display not correct, even though the unit is synchronised?
Check that the location is set correctly for each zone - please refer to chapter 4 for further
details.
Why have some or all of the zones on the V-470A/V-474A v2 series time zone display
not performed seasonal time changes?
Check that the location is set correctly for each zone - please refer to chapter 4 for further
details.
If the unit is unsynchronised, check the date is correctly programmed - please refer to
chapter 5 for further details.
Will the V-488GPS receiver system work internally?
The V-488GPS receiver system is designed for external mounting. We would recommend
positioning the system on the roof of the building with a clear view of at least 75% of the sky
- please refer to chapter 6 for further information.
Can I extend the cable supplied with the V-488GPS receiver system?
The system is supplied with 25 metres of four-core screened cable for connection to a V-470A/
V-474A v2 series time zone display. This cable length may be increased up to a maximum of
50 metres using a similar type of cable or up to a maximum of 200 metres using a heavier
gauge cable - please refer to chapter 6 and appendix B for further information.
Why will the V-470A/V-474A v2 series time zone display not synchronise to the MSF or
DCF radio time code signal?
Under normal circumstances the MSF signal provides reliable operation at distances of up to
1000km from Anthorn in the United Kingdom. The DCF signal is normally usable up to
1500km from Frankfurt in Germany.
In good conditions the V-470A/V-474A v2 series time zone display, when used with a V-484 series
radio time code receiver should synchronise to MSF or DCF within 3 minutes. During this
period, the ‘code’ LED housed inside the 484 series radio time code receiver should flash
once per second.
However, MSF and DCF suffer greatly from electromagnetic interference which can cause the
V-470A/V-474A v2 series time zone display not to synchronise. In this instance, the ‘code’ LED
housed inside the V-484 series radio time code receiver may flash erratically. To minimise
interference problems, we would recommend mounting the 484 series radio time code
receiver away from any computer or electronic equipment, fluorescent lighting, lift
equipment, metal girders, reinforced concrete walls or any other sources of electrical noise.
Issue 1.1h
D-1
V-470A/V-474A v2 Series Time Zone Displays
Operating and Installation Instructions
MSF is off-air for maintenance on the second Thursday of every March, June, September and
December - please refer to chapter 6 for further information.
Will the V-484 series radio time code receiver work internally?
The V-484.02 MSF and V-484.03 DCF radio time code receivers are suitable for either internal or
protected external mounting. For reliable operation, we would recommend mounting these
units externally if possible.
The V-484.06 MSF and V-484.07 DCF radio time code receivers are suitable for internal use only please refer to chapter 6 for further information.
Can I extend the cable to my V-484 series radio time code receiver?
The cable connection to a V-484 series radio time code receiver may be extended up to a
maximum of 10m using a similar specification cable. This connection may be extended up to
a maximum of 200 metres using a screened twisted pair cable as specified in appendix B.
How do I change the locations on a single sided (.SS) and double sided (.DS)
ceiling suspended AIL type time zone display?
Ceiling suspended AIL type time zone displays are supplied with an additional data cable
and a serial cable which are used to configure the user programmable location legends.
Please connect the PC Update cable to the Serial cable are detailed below - please refer to
chapter 7 for further information regarding programming location legends.
D-2
Issue 1.1h
V-470A/V-474A v2 Series Time Zone Displays
Operating and Installation Instructions
Issue 1.1h
V-470A/V-474A v2 Series Time Zone Displays
Operating and Installation Instructions
Issue 1.1h
V-470A/V-474A v2 Series Time Zone Displays
Operating and Installation Instructions
Issue 1.1h
Vortex Communications Ltd
75 The Grove, Ealing, London W5 5LL
Email: [email protected] WWW: http://www.vtx.co.uk
Telephone: +44 (0) 208 579 2743
Fax: +44 (0) 208 840 0018