1
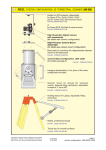
GY301 Geomorphology
Lab 5: Total Station Project
Introduction
For this lab you will use the Total Station to survey a topographic map of the campus area
corresponding to the area outlined in Figure 5. Your project can begin by choosing any
convenient location in Figure 5 (ST01-ST16), however, make sure that you can resection to 3
mirror targets established on benchmarks when setting up your instrument. If you can’t resection
to 3 target benchmarks backsight by coordinate to a benchmark after setting up the instrument on
another benchmark. Shoot back to that benchmark or another visible benchmark to verify
accuracy. The mapping will use the UTM NAD27 zone 16 coordinate system, therefore, you
must make sure that your total station instrument is set to use meters. You can download a list of
the benchmark UTM coordinates and elevations at:
http://www.usouthal.edu/geography/allison/GY301/TotalStationLabBenchmarks.xls
Use/include the following on the ArcGIS contour final map:
1. Scale of 1:2,000.
2. Contour Interval of 0.2m, labeled index contours every 1.0m.
3. Post map of data points (red crosses).
4. Title = “Total Station Project”.
5. Name and date due in lower right corner.
6. The corners of the Library, LSCB, LSCB Biology Lecture, and new Administration Building
(Meisler) should be identified as points on the survey. In ArcGIS draw polygons that connect
these points.
7. Survey the trees 1-9 that are the “white” course used in the pace & compass project.
8. Add UTM grid to map frame.
Total Station Setup
Your instructor will demonstrate for your group the leveling and initial setup of the Total Station.
After leveling the instrument on a known benchmark location select another known point for the
target (or use another Total Station instrument) for “locking-in” to the coordinate system (UTM
NAD27). You will need a print-out of the UTM coordinates and elevations of the benchmarks,
and you need to record the instrument height of the instrument in meters with a tape measure.
Measure the height from the ground to the gray horizontal index line on the side of the
instrument. (NOTE: there are 3.28 feet per meter if you need to convert from feet to meters).
In general the Total Station step-by-step procedure for measuring UTM coordinate data goes as
follows:
Page -1-
GY301 Geomorphology
Lab 5: Total Station Project
1. Level the instrument
2. Power up and initialize the instrument
3. Select and make active the proper job name (i.e. “G1" for Group 1, etc.)
4. Enter any XYZ data given to you (benchmarks, etc.) as “known data”.
5. In the “[MEAS]” menu select “[COORD]” to define the station position, select a backsight,
and test the calibration of the instrument. After this step you will be ready to collect data. To
successfully complete this step you MUST have the instrument leveled on a known coordinate
point, and the target must be setup on another known point.
6. Continue to use [COORD] to collect data at target points in the mapping area:
a. Use “T01", “T02" for Group 1 tree control points
b. Use “C01", “C02", etc. for Group1 corner points on buildings
c. Use “E01", “E02", etc. for ground surface topographic control points
d. Use “I01", “I02", etc. for instrument station control points.
7. When you are shooting tree positions it will of course be impossible to place a target mirror in
the center of the tree therefore the “[OFFSET]” command should be used. The offset command
allows you to place the mirror target on the left or right of the target, or in front or behind the
target. You can use a tape measure to measure the offset distance (must be meters for UTM)
between the mirror target and the actual target position. See a detailed description below.
Keep a notebook as backup on the X,Y,Z coordinates and notes on what each point collected
actually corresponds to (ex. C1 = NE corner of Student Union).
8. Download the instrument data to an Excel spreadsheet for contouring and posting with
ArcGIS.
All of the survey gear except for the Total Station and batteries will be stored in the trailer. Make
sure you return this gear to the trailer and lock the trailer when finished. Return the Total Station
to your instructor.
A detailed description of operating the SET610 Total Station for the above steps follows below.
The description uses references to the SET610 user manual so make sure it is accessible.
Step 1: Level the instrument
Refer to the SET 610 manual section 7.
Comments:
When first placing the tripod over the benchmark make sure that the legs are extended to
Page -2-
GY301 Geomorphology
Lab 5: Total Station Project
approximately chest height of the shortest person that will be using the instrument. Make sure the
tripod head is approximately level, and then look directly down through the centering screw to
ensure that the tripod is centered or nearly centered over the benchmark aluminum plate. If it is
not, pick up the tripod and move it so that it is centered. Proceed to mount the instrument on the
tripod.
A common mistake is to skip the step at the end where you shift the instrument to center the
optical plummet on the benchmark. (Section 7.2, step 7). If someone accidentally “bumps” the
tripod after the instrument is leveled causing the “out of range” error (un-leveled), simply repeat
section 7.2.
Step 2: Power-up and Initializing the Instrument
Refer to sections 6.1 and 6.2 for charging and installing the SET 610 battery. Press the “on”
button to power-up the instrument. The instrument always initially activates to the [MEAS]
(measurement) menu. Press the “ESC” button to backup to the main (top) menu.
Initializing the instrument allows one to enter useful data and settings in the comfort of the office
to reduce time on-site. For this project you need to first clear out any data left from previous
projects, and set units and job name. Also, benchmark data may be entered as known data at this
time to reduce the amount of typing on-site.
From the top menu select [CNFG] (configuration), and then “Obs. condition”. Cursor to the
“Coord.” option. Use the right or left cursor to change the coordinate format to “E-N-Z” (easting
1st, northing 2nd, elevation 3rd). Press <enter> key to select the “E-N-Z” format. Press <ESC> to
return to the Config menu.
Cursor up or down in the “Config” menu until “Unit” is selected and press <enter>. Cursor
up/down until “Dist” is highlighted, and then use the right/left cursor until “meter” is highlighted,
and the press <enter>. Press <ESC> to return to top menu.
Step 3: Select a Job Name
From the <MEM> menu select “Edit Job Name” and set the name to match your group. Change
“JOB1" to “G1" for group 1 for example. Make sure that the new job name is selected as the
active job.
Refer to section 22.1 in the manual.
Page -3-
GY301 Geomorphology
Lab 5: Total Station Project
Step 4: Enter Known Data
Since all of the benchmarks have been previously surveyed in UTM NAD1927 coordinates it
makes sense to enter all of the benchmark data into the instrument before actually setting it up
on-site to collect data. This speeds up the setup of the instrument because you can occupy any
benchmark and use any other benchmark as the backsight for calibration. Rather than having to
type in the long UTM coordinates on-site you can do this in the office. Even if you do this on site
it is convenient to do this since you will never have to re-type the coordinates if you have to use
the benchmarks in a future setup. Also, all of the benchmark data can be used to generate
contours in Surfer so you should add all of the points eventually anyway.
Refer to section 23.1 to enter known data. You will need the spreadsheet printout of benchmark
data at this point.
If the known data has been pre-loaded into the instruments your instructor will let you know.
Regardless, you should double check the coordinates against the online spreadsheet values.
Step 5: Backsight or Resection Instrument
Backsighting the total station instrument “locks” the instrument into a designated mapping
coordinate system. For this project this will be UTM NAD27 coordinates. There are 2 different
ways to backsight: by angle and by coordinate. We will use the “by coordinate” method because
we already have a pre-defined network of benchmarks on campus surveyed in UTM coordinates.
Before backsighting the instrument should be leveled initialized on one of the benchmarks, and
the mirror target should be visible on another benchmark point. At this point you may want to
review section 8 on “Focusing and Target Sighting”. Also, measure the instrument height and
verify the target height at this time. Use meters!
Refer to section 12 on “Coordinate Measurement” to backsight instrument.
Comments:
In this section setting the “horizontal azimuth angle” is conceptually the same as backsighting the
instrument.
Remember that wherever XYZ coordinates can be entered on a screen you can alternatively
select the [READ] function key to read XYZ from a previously stored “known” data point (or a
point recorded through shooting a target). If all of the benchmark points have been previously
entered as known data you can quickly backsight from any benchmark point.
Page -4-
GY301 Geomorphology
Lab 5: Total Station Project
After the station coordinates and the backsight coordinates have been specified make sure you
select the “Yes” option on the last screen to lock in the coordinate system. If you do not hit “Yes”
the coordinate system used by the instrument remains random, and that means any data collected
is incorrect.
Remember that the backsight procedure is simply an alignment of the instrument to an azimuth
indicated by the XYZ coordinates of the occupied and backsight points. It is very important that
the vertical cross hair be aligned exactly on the target before indicating “yes” on the coordinate
backsight.
To ensure that the backsight “lock-in” to the UTM system is correct, you need to “shoot” it as if
it were a regular data point and compare the XYZ values obtained with the ones listed in the
spreadsheet. They should be with several cm’s of the listed values for X, Y and Z. Press <ESC>
from the backsight menu until you see “Observation”. Site the target on the benchmark used for
the backsight and press <enter> with “Observation” highlighted. Compare the coordinates. They
should agree to within several cm’s for XYZ. (NOTE: you can use any known point to test the
instrument calibration- it’s just more convenient to use the backsight point since your target is
already there).
Step 6: Use the [COORD] function to Collect Data
Refer to section 12.3 in the manual for 3D coordinate measurement details.
Comments:
Use the [COORD] function from the [MEAS] menu to measure and record the position of points
where the mirror target can be positioned directly on the target. This will be true of all of the
elevation control points and the building corners.
Remember that if you have already backsighted for the session that you don’t have to redo that
procedure unless you suspect the instrument has been accidentally moved.
You can change the target height or instrument height within this menu if needed. The target
height may change often if you are shooting over shrubs or vehicles. Make sure these values are
updated before recording. If you record a point with an incorrect target height, re-shoot and
record over the existing point.
NOTE: You can use the “resection” method to determine the XYZ coordinates of an instrument
position if you can sight 3 or more benchmark positions. Refer to section 13 in the manual.
Page -5-
GY301 Geomorphology
Lab 5: Total Station Project
Step 7: Use the [OFFSET] function to Measure the Tree Positions
Refer to section 18.1 Single-distance Offset Measurement.
Comments:
Select the [OFFSET] function from the [MEAS] menu. Then select “Offset by distance”.
Position the mirror target either left or right of the tree target and press the “[Obs]” function. The
XYZ coordinates listed are the coordinates of the mirror target- not the tree. Edit the offset
distance to match the distance measured with a tape from the center of the tree to the mirror
target. This should be in meters. Use the cursor key to change the arrow indicator to point right if
the mirror target is right of the tree as viewed from the instrument, or left if the mirror target is
left of the tree. Selecting the [OK] function adjusts the observed XYZ to take into account the
offset. The calculation assumes that the angle inscribed by drawing a line from the instrument to
the center of the tree target to the mirror target is a 90 degree angle.
Step 8: Downloading the data from the SET 610
In order to download data from the SET 610 to a file you need the data cable and the “Sokkia
ProLink” software installed on a computer. Connect the cable to the SET610 and the serial port
of the host computer. Start the ProLink software and power up the SET610. In the [MEM] menu
select “Job” and then the appropriate “JOB” name. Then proceed to “Comm setup” settings. Set
the following communications port parameters:
Baud rate: 9600 baud
Data bits: 8 bits
Parity: none
Stop bit: 1
Xon/Xoff: no
Checksum: no
Back out of the menu to “Comms output”. Cursor up/down to your job name. Note that any
“Known Data” that was entered into the instrument will also be downloaded no matter which job
name is selected. Hit the <enter> key to select job name. The number of data points in the job
listed to the right of the job name should now change to “out”. Select the <F4> key to “OK” the
downloading of the job. Cursor up/down to select “SDR” on the next screen, but do not hit the
enter key yet (you will do that later).
Page -6-
GY301 Geomorphology
Lab 5: Total Station Project
1. Start the “ProLink” application from the start menu. Find the “Download/Upload” button on
the toolbar and select it. The Download/Upload window should now display. At the bottom of
the screen set the device type to “SDR33/31 (SDR) format”.
2. Select the “Settings” button to check the communications port setup (Figure 1). Make sure
that the port number matches the port that the cable is connected to on the computer (generally
COM1), and that the communications parameters match those on the SET610 (generally 9600
baud, 8 data bits, 1 stop bit, No parity). These settings must match those set on the Total Station
“Comms setup”.
3. Select the “Connect” button option. The right window should display “Use Job Name SDR”.
This means that the downloaded file will have the same name as the job name with an SDR
extention. The “Connect” button should change to “Disconnect”. In the left window navigate to
the folder where you want the downloaded file to be sent. Now highlight the “Use Job Name
SDR” in the right window (see Figure 2), then select the left pointing arrow between the 2
windows. The ProLink program is now waiting to receive data from the SET610.
4. On the total station hit the <enter> button to send the data to the computer. You can now exit
out of ProLink.
5. The downloaded SDR file is a simple text file that can be imported into Excel. Figure 3
displays the SDR file in Notepad.
6. You will now need to import the file into Excel so that it can be used by ArcGIS. Start Excel
and then open the downloaded SDR file. Excel will automatically recognize that the file is a
“text” file and pop-up an import menu. Select the “fixed column width” option and proceed. Set
the column widths so that the point number is separated from the easting (UTM X coordinate)
number (Figure 4).
After importing the data copy just the easting, northing, and elevation data along with point
identifiers to the 2nd worksheet. Add headers so that when imported into ArcGIS you will see
“UTM_X” or “Easting” when ArcGIS refers to the data column.
Using ArcGIS to Complete the Topographic Map
Note: The below steps assume that ArcGIS 10.x is being used. Older or newer versions may
operate slightly differently, but you should still be able to use the logic of the below steps to
accomplish the task.
Page -7-
GY301 Geomorphology
Lab 5: Total Station Project
Step 1: Load the Campus Aerial Base Map
In this step you will load a georeferenced aerial base map that uses the UTM NAD1927
coordinate system. Therefore, because we used this same system for surveying the campus with
the Total Station the coordinates should be exactly aligned with the base map. This is the
ultimate check on the accuracy of your data.
At this time you need to create a folder for your group, and create a ArcGIS base map to plot
your data and topographic contours on. Create the following folder on your flash drive:
C:\ArcGIS_Data\GY301\CampusTopoProject\
In this folder are a variety of files that compose the base map aerial, the mapping project
boundary, and an Excel spreadsheet containing the UTM coordinates of the total station
benchmarks on campus. Download the campus project files to this folder using a web browser.
Before proceeding make sure this folder exists and contains:
1. TotalStationLabBenchmarks.xlsx
2. 21616143_NAD27.tif
3. 21616143_NAD27.tfw
4. CapusTopo_Start.mdb
Any files created by ArcGIS should be saved in this folder on the flash drive.
To begin, start ArcMap from the desktop or start menu. From the opening window select “New
Empty Map”. Use the “Add Data” toolbar button to activate the Figure 6 dialog window. The
“Add Data” button is a yellow triangle with a black “+” on top. Add the “21616143_NAD27.tif”
aerial campus base map to the project.
Next, right-click on the “Layer” (Data Frame) name in the table of contents window (left
window) and set the following:
1. “General” tab: Set the reference scale to 1:2,000 (Figure 7)
2. “Coordinate System” tab: set to projected > UTM > NAD1927 > zone 16 (Figure 8)
Add the project border from the “CampusTopo_Start.mdb” file by selecting the “Add Data”
toolbar button, and then the “Boundary” folder under “CampusTopo_Start.mdb”. Right-click on
the “Boundary” feature in the TOC window, and pick “Properties” and then the “Symbology”
tab. Change the line type to a red line (i.e. highway ramp; Figure 9).
Step 2: Post Total Station Points on Map
Page -8-
GY301 Geomorphology
Lab 5: Total Station Project
After downloading the data from the Total Station to a spreadsheet (see above) make sure this
spreadsheet is in your group folder. From the main menu in ArcGIS select “File” > “Add XY
Data”. Left-click on the “Connect to Folder” button (yellow folder icon) and navigate to the
working folder. Indicate the spreadsheet file and then choose the proper worksheet (Probably
Sheet2). For the x coordinate use “UTM_X”, for the y coordinate select “UTM_Y”. Set the XY
coordinate system to UTM NAD27 zone 16. Figure 10 contains the dialog window with all
parameters set. When the “OK” button is selected the data points should appear on the map as
“dots”.
You should now make the posted data points more visible and activate the elevation labels for
each point. Double-click on the posted data points symbol “dot”, and then select the “Cross1"
symbol. Change the color to magenta, and symbol point size to 5 as in Figure 11. To activate the
labels, right-click on the post map name in the TOC window, select “properties” and then the
“label” tab. Set the properties as in Figure 12. The map should now display the total station data
as magenta crosses with magenta labels. You will have to zoom in to read the labels. Your map
should appear similar to Figure 13.
Remember that the benchmark stations represent valid X,Y,Z data that can be used in the final
topographic contour map, so whether or not you use a benchmark survey point you should enter
it into the instrument as known data so that it will be part of your downloaded data spreadsheet.
NOTE: In some versions of ArcGIS 10.x seem to have problems using spreadsheet data posted
on the map with the “Add XY Data option”. If you have problems with generating contours in
the next step this “bug” could be the culprit. Try right-clicking on the feature name of the
imported spreadsheet data, and then select “Properties > Data > Export”. This will export the
spreadsheet data to a true ArcGIS point geometry. The various utilities in the “toolbox” seem to
work better with this type of feature. In the next step use this as the input XYZ data rather than
the spreadsheet added with “Add XY data”.
Step 3: Generate Contours from the Survey Data
Before starting this step make sure that you have all of the XYZ data in single spreadsheet and
that you know where it is located on the computer (i.e. the file “path”). When contouring
topographic data it is generally best to “grid” the irregularly spaced data with a mathematical
method termed “Natural Neighbor”. This method will be used to generate a interpolated grid of
XYZ data that can then be contoured. To begin, select the “ArcToolbox” button from the toolbar,
then “Spatial Analyst Tools > Interpolation > Natural Neighbor”. This will activate the dialog
window in Figure 14. Leave all of the defaults as is except for the destination file that should be
“Topo_Raster” and stored in your project folder. After selecting the “OK” button the inverse
Page -9-
GY301 Geomorphology
Lab 5: Total Station Project
distance grid will be generated and automatically added to the map. The color zones will
represent the grid values interpolated by the procedure. You can see the elevation ranges of each
color in the TOC window.
Next, generate the contours by selecting “Spatial Analyst Tools” > “Surface” > “Contour” to
activate the contouring window dialog. Set the dialog parameters as in Figure 15. Make sure that
the destination for the contour file is in your folder. After selecting the “OK” button in the dialog
the contours will be automatically drawn on the map. To turn on the contour labels right-click on
the “contours” in the TOC window and select “properties” and then the “Labels” tab. Set this
dialog window as in Figure 16. After clicking on the “OK” button the contour lines will be
labeled. At this time observe the labels and judge wether or not they make sense relative to the
topography that you have observed first-hand. Problem points will generate anomalous hills and
depressions.
Step 4: Editing and Annotating the Map
You will need to delete the contour lines where they stray outside the map boundary so you will
learn how to use the editing tools in this section. As the first step, add the “Project Area” polygon
from the “CampusTopo_Start.mdb” file. The polygon is the same outline as the project area
border. The polygon will be used with the “Clip” geoprocessing tool to truncate the contours at
the polygon edge.
If the “Editor” toolbar is not visible right-click on the toolbar area and check the “Editor” option.
The toolbar may be floating or docked (your choice). Select the “Editor” pull-down menu and
select “Start Editing”, and then highlight “Shape files” for the edit target. Next, select from the
main menu “Geoprocessing > Clip”. Fill out the parameters as in Figure 17. Note that the
contours are the “input features” and the “project area” polygon is the clip feature. After clicking
“OK” the original contours will be clipped at the edge of the project area. You can turn off the
original contours and now work with the clipped contours. Label these as you did the original
contours.
Although the clipping operation takes care of contours outside the project area, invariably there
are areas that are not well constrained by data points where the kriging algorithm generates
“noisy” contours that do not look reasonable or “smooth”. You can use the edit mode to edit
these contours into smoother lines. Note the below operations that can be used on the contour
lines:
1. Insert a vertex between 2 existing vertices on a contour line. This can be used to
“smooth” an angular curve.
Page -10-
GY301 Geomorphology
Lab 5: Total Station Project
2. Delete a vertex or vertices on a meandering line that is too “noisy”.
3. Split an existing contour line at two places so that a segment can be deleted. This may
be done in the area that will be covered by one of the surveyed buildings.
To used one of the above methods you need to enter “edit vertex” mode. Select a contour line
that needs to be modified with the “Edit tool” (black triangle button on the editor button bar).
When the contour line is highlighted, right-click on it to bring up a pop-up menu, and then select
“Edit vertices”. In this mode the individual vertex points that make up the contour line are
highlighted as in Figure 18. To move one of the vertices simply hover the mouse pointer over a
vertex and “drag” it where you want it. If you want to delete a vertex right-click on the vertex and
select “Delete vertex”. To split one contour into 2 contour lines first select the contour line with
the edit tool, then select the “Split” tool from the editor toolbar. Hover the pointer over the split
point to split the line.
To draw a polygon to map out the extents of a building zoom in until you can see the corner
points from your survey. If necessary turn on labels for the Total Station points to determine
which points are building corner points. Turn on the “Draw” toolbar by right-clicking on the gray
area where existing toolbars are displayed. Usually the draw toolbar will display as a floating
pallette. On the “Draw” toolbar change the shape tool to “Polygon”. Zoom in to see enough
detail to accurately click on your survey points. Left-click to set a polygon corner vertex, and
then double left-click to finish the last point. You can right-click on the polygon and then select
properties to change the object color, border, etc., on the polygon. Figure 19 displays a polygon
inserted on the map at the LSCB corners.
Step 5: Defining the Print Layout
Before setting the print layout you need to define the media size from the “File” > “Page and
Print Setup”. Set the parameters as in the Figure 20 dialog. Next, select the “zoom full extent”
from the “view” menu to center the map in the main window. Then select “View” > “Layout
View” to change over to layout mode. In this mode the large white rectangle represents the print
media and the black rectangle is the “data frame” where the map appears. Set a “fixed scale” by
right-clicking on the data frame and selecting “properties” and then choosing the “data frame”
tab. Set the scale to 1:2,000. Adjust the data frame in the layout window until all of the map is
visible as in Figure 21. Right-click on the data frame and select “Properties” from the pop-up
window. Then select the “Data Frame” tab and set a scale of “1:2000". Figure 22 has an example
of setting the scale displayed. Next, create the UTM grid on the map by right-clicking on the map
frame, select “properties”, and then the “Grid” tab. Create a new grid that divides the map frame
into a grid in map units (50m spacing for x and y). After the grid appears right-click on the grid
numbers and select “modify” grid. Under the “Labels” tab select the “number format” button and
Page -11-
GY301 Geomorphology
Lab 5: Total Station Project
then number of decimal places and set that to “0". The labels on the grid should be rounded to the
nearest meter as in Figure 23.
Next, add the north arrow, title, scale bar, RF, and legend to the map. To do this use the “Insert”
menu in the layout view. Figure 24 contains a map with all elements inserted.
Step 6: Optimizing the Contour Symbology
As a final step we can use a few simple Python code segments to improve the contours:
1. Only index contours will be labeled, and they will be rounded to nearest 1 decimal
place (decimeter).
2. Index contours will be bolder than other contour lines.
To print only index contours, right-click on the contour feature class name in the TOC, and then
select properties. Fill out the “Label” tab as indicated in Figure 25. This Python code will allow
printing of only index contour labels.
To plot index contours as bolder lines compared to non-index contours you will need to create an
attribute field variable that is set to a zero value for non-index contours, and a value of 1 for
index contours. A Python code section will be used in a calculation query to process this. At this
time open the contour feature class attribute table, and select from the table options drop-down
list to add a new field. Name the new field “cindex” and let it default to “short integer” (See
Figure 26).
Use the “editor” toolbar to enter edit mode. Right-click on the “cindex” field name in the
attribute table. Select the “Field Calculator” option, and fill in the dialog as in Figure 27. Click
the OK button to run the query. The cindex field should have values = 1 for index contours, 0
otherwise. You can now use the “Symbology” tab of the contour feature class to “categorize” the
contours into index vs. non-index values based on the cindex value. Figure 28 contains the
symbology dialog window for the contour feature class. Figure 29 displays a zoomed in view of
the contours after the above modifications.
Page -12-
GY301 Geomorphology
Lab 5: Total Station Project
Point
ST01
ST02
ST03
ST04
ST05
ST06
ST07
ST08
ST09
ST10
ST11
ST12
ST13
ST14
ST15
ST16
UTM_X
387296.145
387296.771
387315.789
387309.002
387209.076
387292.285
387264.934
387167.993
387071.056
387093.214
387160.069
387151.002
387147.160
387278.577
387186.262
387246.863
UTM_Y
Elev_m
3396444.897
47.184
3396376.301
50.132
3396465.035
46.726
3396366.881
50.764
3396374.492
49.732
3396309.819
54.095
3396562.144
42.508
3396519.713
41.348
3396522.000
37.571
3396400.365
45.244
3396396.142
47.123
3396495.526
40.512
3396350.509
49.349
3396489.798
45.519
3396427.010
46.907
3396429.979
47.345
Page -13-
GY301 Geomorphology
Lab 5: Total Station Project
Figure 1: Port settings window in ProLink.
Page -14-
GY301 Geomorphology
Lab 5: Total Station Project
Figure 2: ProLink “download/upload” window.
Page -15-
GY301 Geomorphology
Lab 5: Total Station Project
Figure 3: Downloaded data file (.SDR) in Notepad.
Page -16-
GY301 Geomorphology
Lab 5: Total Station Project
Figure 4: Step 2 of text file import in Excel- note that the 19th column contains the point
number.
Page -17-
GY301 Geomorphology
Lab 5: Total Station Project
Figure 5: Campus aerial base map with location of survey benchmarks.
Page -18-
GY301 Geomorphology
Lab 5: Total Station Project
Figure 6: Dialog window for adding the aerial base map to the ArcGIS
project.
Page -19-
GY301 Geomorphology
Lab 5: Total Station Project
Figure 7: General tab in the data frame properties dialog window.
Page -20-
GY301 Geomorphology
Lab 5: Total Station Project
Figure 8: Setting the coordinate system in the Data Frame properties dialog
window.
Page -21-
GY301 Geomorphology
Lab 5: Total Station Project
Figure 9: Setting the project boundary line symbology.
Page -22-
GY301 Geomorphology
Lab 5: Total Station Project
Figure 10: Settings for the add XY data option for Total
Station data points.
Page -23-
GY301 Geomorphology
Lab 5: Total Station Project
Figure 11: Setting the post map symbol properties.
Page -24-
GY301 Geomorphology
Lab 5: Total Station Project
Figure 12: Setting the post data label properties.
Page -25-
GY301 Geomorphology
Lab 5: Total Station Project
Figure 13: Total Station project map with data points posted.
Page -26-
GY301 Geomorphology
Lab 5: Total Station Project
Figure 14: Natural Neighbor interpolation setup dialog window settings.
Page -27-
GY301 Geomorphology
Lab 5: Total Station Project
Figure 15: Setup of the contour dialog window.
Page -28-
GY301 Geomorphology
Lab 5: Total Station Project
Figure 16: Contour labels window dialog setup.
Page -29-
GY301 Geomorphology
Lab 5: Total Station Project
Figure 17: Clipping contours with project area polygon.
Page -30-
GY301 Geomorphology
Lab 5: Total Station Project
Figure 18: Edit vertex mode for a contour line (note the green individual vertices).
Page -31-
GY301 Geomorphology
Lab 5: Total Station Project
Figure 19: Adding building polygons to the map.
Page -32-
GY301 Geomorphology
Lab 5: Total Station Project
Figure 20: Page and print setup dialog window.
Page -33-
GY301 Geomorphology
Lab 5: Total Station Project
Figure 21: View of map layout with data frame scale set to 1:2,000.
Page -34-
GY301 Geomorphology
Lab 5: Total Station Project
Figure 22: Setting the map scale to 1:2000 in the data frame dialog window.
Page -35-
GY301 Geomorphology
Lab 5: Total Station Project
Figure 23: Appearance of properly formatted map grid.
Page -36-
GY301 Geomorphology
Lab 5: Total Station Project
Figure 24: Final map layout example.
Page -37-
GY301 Geomorphology
Lab 5: Total Station Project
Figure 25: Contour labels Python code to print only index contour labels.
Page -38-
GY301 Geomorphology
Lab 5: Total Station Project
Figure 26: The “Add Field” dialog to create the cindex
field in the attribute table of the contour feature class.
Page -39-
GY301 Geomorphology
Lab 5: Total Station Project
Figure 27: Calculation query Python code for the “cindex” attribute
field.
Page -40-
GY301 Geomorphology
Lab 5: Total Station Project
Figure 28: Symbology setting for topographic contours categorized by the “cindex” attribute.
Page -41-
GY301 Geomorphology
Lab 5: Total Station Project
Figure 29: Setup of the symbology for topographic contours.
Page -42-
GY301 Geomorphology
Lab 5: Total Station Project
Figure 30: Proper labeling and symbology for topographic contours.
Page -43-