1
Text - PMS 294U
Cool Gray 7 U
+
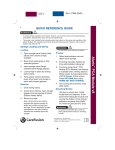
QUICK REFERENCE GUIDE
WARNINGS:
•
To ensure proper operation of the Alaris™ System, you must be familiar with related features,
disposables, administration sets, set-up, and programming.
•
This guide is not intended to be comprehensive instructions for the setup and operation of the
Alaris™ System. For complete instructions along with Warnings and Cautions, refer to Alaris™
System User Manual (v9).
Programming an Infusion using
Guardrails™ Suite MX Protection
Set Priming, Loading and
Removal, Manual Priming of
Non-Dedicated Sets
1.
Ensure set is not connected to
patient and that device is level with
patient.
2. If used, hold pressure sensing disc
between two fingers and invert
disc so patient side is up.
3. Slowly prine set while gently
massaging disc to ensure disc
does not become over or under
filled and all air is expelled.
4. When priming is complete, clamp
set.
Note: Starting infusion before
attaching set to patient minimizes any
potential bolus that could be released
from pressure build up in set due to
normal priming and syringe loading.
Device Priming
1.
Ensure set is not connected to
patient and that device is level with
patient.
2. Load and select syringe type and
size.
3. Program infusion parameters but
do not start infusion.
4. Press OPTIONS.
5. Select Prime Set with Syringe.
6. If used, hold pressure sensing disc
between two fingers and invert
disc so patient side is up.
5. Load syringe into device and install
pressure sensing disc (for proper
placement information, refer to the
Alaris User Manual).
7.
6. Program infusion.
8. Release PRIME when fluid flow is
observed at end of set.
7.
Release clamp and press Auto
START.
Press and hold PRIME while
gently massaging disc to ensure
disc does not become over or
under filled and all air is expelled.
9. Install pressure sensing disc.
San Diego, CA, 800.854.7128
© 2003-2014 CareFusion Corporation or one of its
affiliates. All rights reserved.
Alaris™ Syringe Module v9
The programming user interface is
identical for the Alaris™ Pump Module
and the Alaris™ Syringe Module.
8. Attach set to patient.
+
10. Press EXIT.
11. Press START.
12. Attached set to patient.
Drive Head
Loading:
Gripper Control/
Drive Head
Release
(closed position)
Plunger Grippers
(closed position)
Infusions
1.
Open syringe barrel clamp until it
clears syringe chamber.
Barrel
Flange
Grippers
2. Twist gripper control clockwise and
raise drive head to fully extended
position.
3. Insert syringe barrel flange
between barrel flange grippers.
60
4. Lock syringe in place by closing
barrel clamp.
2
oz
55
50
45
1½
40
35
5. Twist gripper control clockwise,
lower drive head, lock plunger in
place with plunger grippers.
1
oz
30
25
20
½
15
10
5
Alaris™ Syringe Module v9
Note: Infusions programmed to infuse
at low flow rates (<1.0mL/hr) may
encounter a delay upon start up. When
manual priming is complete, use Prime Set
with Syringe feature to decrease potential
start up delays.
6. Insert pressure disc (if used) with
membrane facing device. Apply
upward pressure until disc snaps
into disc housing.
Syringe
Barrel
Clamp
Note: At the start of an infusion program,
the system prompts to select and confirm
syringe type and size. Ensure syringe
manufacturer and size correctly identify the
installed approved syringe. Mismatches
may cause under-infusion or over-infusion
to the patient.
To prevent free flow, close set
tubing clamp before loading or
unloading syringe.
Syringe
Barrel
Clamp
WARNING:
+
Removal:
1.
Close tubing clamp.
2. Open plunger grippers and syringe
barrel clamp (silence safety alarm).
3. Remove syringe, apply downward
pressure to remove disc from
housing.
Near End of Infusion
•
Main display alternates between
NEAR END and remaining VTBI.
•
Yellow standby status indicator
flashes.
•
An audio prompt sounds which
requires being silenced just once,
and will not reoccur following initial
silencing.
All Mode Enabled
If the ALL option is enabled for the
VTBI, entire contents of the syringe will
be delivered (unless your facility has
established a KVO volume).
1.
Press CHANNEL SELECT key.
2. Press OPTIONS key.
3. Press Pressure Limit soft key.
4. To enter a new pressure limit
value, press Change Value soft
key and use numeric keys. If Auto
Pressure feature is enabled, press
Auto Pressure soft key.
Note: If Auto Pressure is selected and
current pressure is:
•
•
100 mmHg or less - system adds 30
mmHg to current pressure, to create a
new alarm limit.
Greater than 100 mmHg- system adds
30% to current pressure, to create a
new alarm limit.
5. Press CONFIRM soft key.
Pressure Sensing Disc Not
Installed
1.
Press CHANNEL SELECT key.
2. Press OPTIONS key.
3. Press Pressure Limit soft key.
Note: KVO is not available for
intermittent infusions.
4. Press appropriate soft key: Low,
Med, High.
All Mode Disabled
5. Press CONFIRM soft key.
If the ALL option is disabled for the
VTBI, a syringe volume estimate will
be dispalyed after the VTBI soft key is
selected.
Alaris™ Syringe Module v9
When infusion is near completion,
Near End of Infusion is enabled:
Selecting Pressure Limits
Pressure Sensing Disc Installed
+
Alarms and Troubleshooting:
Alarms
Alaris™ Syringe Module v9
Alarm
Meaning
Response
Channel
Disconnected
Channel(s) disconnected
while in operation or there is a
communication problem.
To silence alarm and clear
message from screen, press
CONFIRM soft key. Reattach
channel if desired, ensuring it is
securely “clicked” into place at
Channel Release Latch. If alarm
is still present, replace module
with an operational instrument.
Check Syringe
Securely lock plunger grippers,
Plunger grippers opened during
infusion and then closed. Infusion press CHANNEL SELECT key,
stops on affected module.
and reselect syringe.
Syringe barrel clamp opened
during infusion and then closed.
Infusion stops on affected
module.
Securely lock syringe barrel
clamp and press RESTART key.
Syringe plunger not captured
while in idle state. System alarms
after 30 seconds, to indicate
potential siphoning condition.
Check for potential siphoning.
Ensure administration set clamp
(roller/slide) is in closed position.
Securely lock plunger grippers
over syringe plunger.
Occlusion
Increased back pressure
sensed while infusing. Infusion
stops on affected module.
Clear occlusion. Press
RESTART key, or press
CHANNEL SELECT key and
then START soft key.
Pressure Disc
Installed
Pressure sensing disc installed
during an infusion. Infusion
stops on affected module.
Press CONFIRM soft key and
restart infusion.
+
Alarms and Troubleshooting:
Alarms Continued
Alarm
Meaning
Response
Pressure sensing disc removed. Reinsert pressure sensing disc
Infusion stops on affected
and press RESTART key.
module.
Syringe Empty
Syringe is empty. If syringe is not
empty, other possibilities are:
Set up new infusion or press
CHANNEL OFF key.
•
Pressure sensing disc
inappropriate/defective.
Verify appropriate pressure
sensing disc is in use and
functioning properly.
•
Syringe plunger travel
impeded.
•
Pressure transducer
defective.
Verify syringe plunger movement
is not impeded.
If syringe is not empty and
above actions do not correct
alarm, contact qualified service
personnel.
Alaris™ Syringe Module v9
Pressure Disc
Removed
+
Errors
Alaris™ Syringe Module v9
Alarm
Meaning
Response
Channel Error
Error detected. Operation stops
on affected module.
To silence alarm and continue
operation of unaffected
modules, press CONFIRM
soft key. Replace module with
an operational instrument, as
required. Service by qualified
personnel is required.
Syringe Calibration
Required
Error on infusing module
indicating calibration is required.
Infusion stops on affected
module. CALIBRATE scrolls in
Message Display.
To silence alarm and continue
operation of unaffected
modules, press CONFIRM soft
key. Replace instrument with
an operational instrument, as
required. Service by qualified
personnel is required.
Syringe Driver
Head Error.
Noninfusing module, with
plunger grippers open, senses
excessive pressure being
applied downward on Drive
Head. OCCLUSION scrolls in
Message Display.
To silence alarm and continue
normal operation, press
CONFIRM soft key.
P00000067