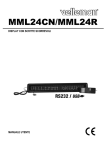
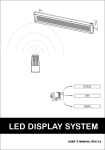
1
RS232
LAN
EMAIL
LED DISPLAY SYSTEM
USER'S MANUAL REV.2.0
(封面页)
(03127英文说明书)
材料:封面/封底:双铜纸(厚度:0.16mm). 内心:书纸.双面印刷,共31页。
规格:148x210mm
编号:
TABLE OF CONTENTS
Key Features .................................................................1
Installation and set up..........................................................2
Keyboard layout...............................................................3
IR remote operation instruction diagram.........................................4
IR SECTION
Getting started................................................................5
Programming a simple message
Programming alternate characters................................................6
Display letters, numbers, symbols,
European, Pre-leading messages,
Graphics page.
Attention getting features..................................................... 7-8
Selecting text colors, font sizes.
Advanced features...........................................................8-10
Special effects schedule display
Display Date&Time, Running combined pages,
Resetting system, Setting ID address,
Setting brightness, Setting system clock.
SOFTWARE SECTION
System Requirements and Running the setup.................................11-13
The Software Screen..........................................................13
Set-Up.......................................................................13
Connecting the cable
The menu bar.............................................................14-16
Menu Bar functions and features, European
char table.
Sending a message...........................................................16
Sending a message to sign after Set-Up
The bmp graphic editor......................................................17-20
Editting and displaying graphics, Color
window, Edit button, Edit function,
Display zoom in or out, Color selection
LAN communication........................................................20-23
Setting up the RSC and TMC to send
messages via the LAN
TABLE OF CONTENTS
Internet e-mail communication...............................................23-24
Setting up the RTC and TMC to send
messages via the Internet.
! QUICK REFERENCE SECTION................................24
Color code table...............................................................24
Font size table.......................................................... ......24
European table................................................................25
Special effects table............................................................25
Display effect, speed, time.....................................................26
Help section...............................................................27-28
The USB-RS232 Converter User Manual.............29
PLEASE READ BEFORE STARTING
This manual contains three overall sections:
IR Remote Section
Programming your new sign using the included IR Remote Keyboard
Software Section
Programming your new sign using the included Software
Quick Reference Section
Corresponding Codes for IR Remote Keyboard
Help Section
Most commonly asked questions, troubleshooting, contacting technical support
The step-by-step process of explanation will help you accomplish a few examples before starting on
your own.
ACCESSORIES SUPPLIED
Accessories, supplied with the product are:
USB cable incorporating a USB to UART bridge
RS232 cable
Power supply, output 12Vdc/2.5A or output 12Vac/2.5A
Software disc
KEY FEATURES
COLORS AND FONT SIZES
By combining colors (RED/BLACK for single color sign, RED/BLACK/YELLOW/GREEN for tri-color sign) and
different font sizes, the LED display will allow you to advertise and capture
your customers attention like never before.
VISUAL TEXT EFFECTS AND GRAPHICS
With such functions as cycling, scroll-up, scroll down, and overlap, advertising
has never been so much fun! powerful graphics editor can create your own to
make your messages stand out!
DEPENDABILITY AND DURABILITY
All of our signs are manufactured under strict quality controls for years of problem free operation. The aluminum casing minimizes interference and assures
reliability wherever it is installed.
LARGE MEMORY AND MESSAGE STORAGE
The led display system is equipped with 32K of memory with the capability to retain
your programmed information for up to 30 days when not used.
* Internal back-up battery.
SCHEDULE DISPLAY FUNCTION
To display different message with different time/date. One touch easy
operation press one key to display date and time or pre-loading message.
Led display system Software for use with Windows 98 and higher
Please see the Software Section, for all the features!
1
INSTALLATION AND SET UP
AC
Power Adaptor
1.
2.
3.
4.
Mount the brackets onto the chosen wall location. Use the mounting screws
included with the display to fasten the brackets onto the sign.
There are two wires from the power adapter. First connect the two-prong
end to any AC wall outlet. Second, connect the single prong
end to the display via the location on the end cap.
As soon as you connect the single prong end to the sign, the sign should
automatically light up and start displaying the "demo" message that is a
preprogrammed message showing all the features of the display. Note : If
your sign does not turn "ON", please turn to the user manual Help Section on
page 27 .
Surge protectors are recommended if you are in an area where power outages are frequent.
IR SENSOR
2
KEYBOARD LAYOUT
INFRA-RED REMOTE KEYBOARD LAYOUT
Command Keys
Keys located in the yellow area
Character Keys
Keys outside the yellow area
Upper Case Keys (26) A-Z
Lower Case Keys (26) a-z
Numeric (10) 0-9
Symbols (29) !; ...
European (60) A
Please refer to page 7-8 for
instructions on displaying
European characters
NOTE:
IR keyboard must be pointed
at the built-in infra-red sensor
located on the top left hand
corner of the sign.
Optimum operating distance
should be around 5' to 30'.
DO NOT subject the remote
keyboard to impact, water or
excessive humidity.
The remote keyboard operates
on two R6 (UM/SUM-3, AA) or
AAA 1.5-volt batteries.
Batteries not included.
Inserting Batteries
Battery Cover
3
IR REMOTE OPERATION INSTRUCTION DIAGRAM
START
ON/OFF
TIME/DATE
CANCEL
ESC
Q-PROG
INPUT MESSAGE
A...Z.
SHIFT (a..z,0..9,!..,)
` ..Z)
EUROP-CHAR (A
FONT (4x7,5x7,6x7)
SPACE
DEL
ENTER
V
PROG
SELECT PAGE EDIT
INPUT MESSAGE
SELECT
ENTER
LEADING AND
DISPLAY EFFECT
ENTER
* Refer Q-prog
SELECT
ENTER
DISPLAY TIME
ENTER
SELECT SCHEDULE DISPLAY
SET START YEAR
ENTER
MONTH
ENTER
SELECT SEHEDULE(A..E)
ENTER
INPUT DISPLAY ENTER
PAGES(A...Z)
ENTER
SELECT ID ADDRESS 00..FF
ENTER
SET BRIGHTNESS
SELECT BRIGHTNESS .A..D
SET CLOCK YEAR
SELECT YEAR 00..99
ENTER
ENTER
SELECT MONTH 01..12
SET CLOCK MONTH
SELECT DATE 01..31
SET CLOCK DATE
SELECT HOUR 00..23
SET CLOCK HOUR
INPUT PAGE ABC...Z
** For 2 line display only.
4
ENTER
ENTER
ENTER
ENTER
SELECT MINUTE 00..59
SET CLOCK MINUTE
RUN PAGE
ENTER
MINUTE
ENTER
CLEAR ALL
SET ID
SELECT
CLOSING
EFFECT
SELECT
MOVING SPEED
SET CLOSE YEAR
ENTER
MONTH
MINUTE
ENTER
FUNCT
ENTER
CHANGE PAGE(A..Z)
ENTER
ESC
IR SECTION
GETTING STARTED BY REMOTE CONTROL
PRESS ON/OFF
The sign will display on and off
PRESS TIME/DATE - - - ESC ((OFF))
To display the time and date message only, press ESC to cancel time/date
display function.
Programming a simple message with Q-PROG
Let's practice how to program a simple message by following the steps below.
Make sure your sign is currently running a message.
Display
Press
1.
Q-PROG
Description
Stop the sign and wait for message
input
2. H E L L O SPACE
HELLO
TIP If you key-in a wrong character, press
TIP:
entered.
3.
ENTRE
HELLO HELLO
Key-in "HELLO" using the
character keys
DEL to delete the last character
Runs the message you
programmed
PROGRAMMING ALTERNATE CHARACTERS
Display lower-case Letters, numbers, and symbols using the
SHIFT key.
Please take notice of the INDICATION BLOCK, which appears on the left hand
corner of the sign whenever the SHIFT key is pressed in the following steps.
1.
Press
2.
3.
Press A to display the letter" A".
Press the SHIFT key once. Now press any one of the letter
character keys on the IR Remote. character keys active
(lower-case mode).
4.
Press SHIFT again. Now press any one of the white number character
keys on the IR Remote. white character keys active (numerical
numerical mode).
mode
Press the SHIFT key again. Now press any one of the green symbols
character keys on the IR Remote. green character keys active
(symbols mode).
5.
6.
Q-PROG
to stop the sign. and program a message
Press SHIFT again to return you to the upper-case mode. Press any letter
key to verify that you are back in the upper-case mode.
5
NOTE: Upper-Case mode is the default selection when beginning to program.
Once you press the SHIFT key, you are no longer in the upper-case mode.
Follow steps 3 - 6 to toggle between modes.
7.
Press ENTER to run your message.
Displaying European characters using the EUROP-CHAR key.
1.
2.
3.
Press Q-PROG to stop the sign. and program a message.
Press A to display the letter "A".
Now press the EUROP-CHAR key. As you will notice, the letter "A" has now
changed its shape to the European letter. Continue to press the
key until you reach the European style "A" of your choice.
EUROP-CHAR
TIP: To revert back to the normal character, continue to press EUROP-CHAR.
Also, you can press any letter at any time to continue to type normal characters.
4.
5.
Following previous steps 2 and 3, try to display the European character for
the letter "U".
Press ENTER to run your message.
PROGRAMMING ALTERNATE CHARACTERS
Displaying European characters in lower-case using the and SHIFT
EUROP-CHAR key.
1.
Press
2.
Press the SHIFT key once to go into the lower-case mode. Remember,
the SHIFT key toggles you from 4 different modes. Upper case, lower-
Q-PROG
to stop the sign. Press and program a message.
case, numerical, and symbols mode.
3.
Now press C to display the letter" C "in lower-case.
4.
Now press the EUROP-CHAR key. As you will notice, the letter" c "has now
changed its shape to the European.
5.
While staying in the lower-case mode, try to display the European character
for the letter "o".
6.
Press
ENTER
to run your message.
NOTE: There are 60 European characters that you can choose from. Please
NOTE
refer to the Quick Reference Guide for the European Characters Table and corresponding letters.
6
ATTENTION GETTING FEATURES
Displaying pre-loading message or graphics page.
Let's say you had pre-loaded a message to page e and you wanted to display
Press
Display
Description
1.
RUN-PAGE
STOP MODE
2.
E
(PG: E )
Stops the sign and wait page
data
Display PAGE E
3.
Runs your message
ENTER
NOTE : There are 26 pages can pre-loading message that you can select to display
from A To Z.
Link display pre-loading message
Press
1. RUN-PAGE
2. A B E
3. ENTER
Display
Description
STOP MODE
STOP AND WAIT PAGE DATA
DISPLAY PAGE A,B,E
RUNS YOUR MESSAGE.
(PG:A,B,E)
ATTENTION GETTING FEATURES
Using the COLOR key to select a text color.
1.
2.
3.
4.
Press Q-PROG to stop the sign and program a message.
Press S U to display the letter.
Press the COLOR key. as you will notice "SU" have now changed to different color.
Now press COLOR key again to view the different text colors. Once you see
the color you wish to use, Your color has now been selected. The color you select
will stay active until another color is chosen.
5. Key in the word "SUCCESS" .
6. Press ENTER to run your message.
NOTE
NOTE: Please refer to the quick reference section for the color table.
.
Using the FONT key to select font sizes.
1.
2.
3.
4.
Press Q-PROG to stop the sign and program a message.
Press A B to display the letter.
Press the FONT key, as you will notice "AB" have now changed to different font.
Now press the FONT key again to view the different font sizes.
Once you see the font size you which to use. Your font size has now been selected.
The font you select will stay active until another font is chosen.
7
5.
6.
Key in the word " ABLE " .
Press ENTER to run your message.
NOTE : There are many font sizes that you can select from. Please refer to the
Quick Reference Section, for the Font Size Table.
ADVANCED FEATURES
Adding special effects to your message using the PROG key.
Now the real fun begins! Let's program a message using the effect
1.
2.
Press PROG to program a message.
Press
select page edit function.
3.
Press
to select PAGE A.(Total 26 page can be selected from A..Z)
4. Press
to program PAGE A. The sign will read: (PAG: A)
5. Press the ENTER to edit PAGE A
6. Key-in the word "COOL".
7. Press the ENTER The Sign will wait for effect input.
8. Now press the
keys to scroll through the various leading and display effect.
9. Press ENTER when you confirm the effect selection.
10.
Press
keys to scroll through the closing effect.
11. Press ENTER when you confirm the effect selection.
12. Press
keys to select the display time.
13. Press ENTER to confirm the display time.
14. press
keys to select leading and closing effect moving speed from "0..3".
15. Press ENTER when you confirm.
NOTE : There are many effects that you can select from. Please refer to quick
Reference Guide for the Effects Table and corresponding letters.
Adding schedule display using the PROG key
1.
2.
3.
4.
Press PROG to stop the display.
Press
to program schedule display.
Press
to enter the schedule selection.
Press
to select schedule, max 5 schedule can be set up from
A to E.
5. Press ENTER to confirm schedule selection.
6. Press
to select starting year field.
7. Press
to edit the year.
8. Press ENTER to confirm year input and go to start, month input.
9. Press
to select starting month field.
10. Press
to edit the month.
11. Press ENTER to confirm month input and goto start date input.
12. Press
to select starting date field.
8
13.
14.
15.
16.
17.
18.
19.
20.
21.
22.
Press
to edit the date.
Press ENTER to confirm date input and goto start hour input.
Press
to select starting hour field.
Press
to edit the hour.
Press ENTER to confirm hour input and goto start minute input.
Press
to select starting minute field.
Press
to edit the minute.
Press ENTER to confirm minute input and goto closing year input.
Repeat step 6 to 20 to complete the closing timer set up and you will see "*".
Press characters key A,B,C...Z to input display page for the schedule.
* Press DEL if input is wrong.
23.
Press ENTER to confirm the schedule set up.
* There are max 5 display schedule from A to E can be set. Please repeat step
1 to 23 to complete the next schedule setting.
* If you want to cancel the schedule display, please refer "resetting system using
the FUNCT key " procedure.
ADVANCED FEATURES
Displaying the time and date using the TIME/DATE key.
1. Press the TIME/DATE key to ENTER
the date/time display mode, date & time will display alternatively
for 3 second.
Cancel display the time and date using the ESC key.
1.Press ESC and wait 3 sec.
the display will back to normal message display.
Running combined Pages using the RUN PAGE key.
This feature allows you to link up to 26 pages together as one long message.
Remember to have your messages programmed before setting this feature.
1. Press RUN PAGE to stop the sign.
2. Press the A to Z key. to select the 'select run' pages, press ENTER to confirm
3. Key in the pages A B C to run the page link A and B and C.
4. Key in ENTER to run message.
Resetting system using the FUNCT key
ESC to skip the set up process.
Press FUNCT to enter the set up function
Press
key select "clear all Y?"
Press ENTER key.
* Any time you can press
1.
2.
3.
9
Setting id address using the
FUNCT key
1.Press FUNCT to enter set up function
2. Press
key to select "ADD00"
3. Press
to select the address field
4. Press
to edit the address from 00 to ZZ
5. Press ENTER to confirm address set up.
6. Press ESC to return to normal display
*Address ID set up only for more than one display sign connect with one data
cable. That the data can be separated send to the display from PC with ID address.
Setting brightness using the FUNCT key
1. Press FUNCT to enter set up function
2. Press
to brightness set up function
3. Press
to select brightness field.
4. Press
to edit brightness level from high to low "A..D".
5. Press ENTER to confirm brightness set up.
6. Press ESC to return to normal display
ADVANCED FEATURES
Setting system clock using the FUNCT key.
1.
2.
3.
4.
5.
6.
7.
8.
9.
10.
11.
12.
13.
14.
15.
16.
17.
18.
19.
20.
21.
22.
Press
Press
Press
Press
Press
Press
Press
Press
Press
Press
Press
Press
Press
Press
Press
Press
Press
Press
Press
Press
Press
Press
FUNCT to enter set up function
to set up year data
to select the year field.
to edit the year data.
ENTER to confirm year setting.
to set up month data.
to select the month field.
to edit the month data.
ENTER to confirm month setting.
to set up date data.
to select the date field.
to edit the date data.
ENTER to confirm date setting.
to set up hour data.
to select the hour field.
to edit the hour setting.
ENTER to confirm hour setting.
to setup minute data.
to select the minute field.
to edit the minute data.
ENTER to confirm minute setting.
ESC back to normal message display.
10
SOFTWARE SECTION
PC system required
Operating System: Win98/Win me/Win NT/ Win 2000/Win XP
CPU: Intel Pentium 166 or above
RAM: 32M or above
Monitor: VGA or higher
Serial Output: RS232 port
Software installation instructions
Insert the LED Display System disk into your CD-ROM
drive. That will auto-run and the first screen comes up.
Click INSTALL to go installation. Choose READ ME to show you the
required system. EXIT will quit the installation.
Click INSTALL to go ahead the installation and continue the
Choose Next to continue, Click
BROWSE to select the directory to install the program. The system
preset is C:\Program Files\New sign.
11
Click NEXT to keep on installation
Choose NEXT to run the file installation to copy
the file to your PC hard disk. Choose CANCEL to quit installation
program or BACK to change the directory setting.
After copying the file is complete, click on Finish.
Finish the installation, and shortcut icon for quick
start will be on the desktop screen. And simultaneously create
DIRECTORY in your PC program group.
If you want to uninstall the system, just double-click the unwise.
exe at the Program Group\ New Sign.
12
Select Automatic and click NEXT. The program will automatically
uninstall.
SOFTWARE SCREEN
Tool Bar: Buttons that serve as
shortcuts to execute commands.
Menu Bar
See as follows for
descriptions.
Message Window:
Area where you can type
and see the message that
will be transmitted to the sign.
Character Count:
Displays the number of
characters typed by the user.
SET-UP
Connecting the cable
1.
2.
3.
Connect the Phone Clip end of the Phone Type Cable to the sign.
On the back of your computer, identify a COM PORT. If you have trouble
locating a COM PORT on your computer, please reference your
computer user manual or contact the manufacturer of your computer.
Connect the 9-Pin connector end to the COM PORT you will be using.
If the 9-pin connector is not connected to the correct COM PORT,
computer communication to your sign will not work.
13
RS232
L.E.D.SIGN
GND
RS232
PHONE JACK
PIN2
RXD(Green)
PIN3
TXD(Black)
PIN5
GND(Red)
TXD(Black)
TXD
RXD(Green)
RXD
GND(Red)
Toolbar
Opens a new Message Window.
Opens an existing File.
Saves the current message in the Message Window.
Cut the highlighted selection and put it on the clipboard.
Copy the highlighted selection and put it on the clipboard.
Paste the contents of the clipboard.
Sends the message in the Message Window to the sign.
Sends the message through LAN.
THE MENU BAR
File
New
Open
Save
Set Comm
Exit
: opens a new window.
: opens an existing file.
: saves the file currently open.
: allows you to set the communication settings.
: exit the software program.
Edit
Cut
Copy
Paste
Delete
: Cut the highlighted selection and put it on the clipboard.
: Copy the highlighted selection and put it on the clipboard.
: Paste the contents of the clipboard onto the active
document.
: Use this command to remove selected content from the
Message Window.
14
Default European characters table for select.
USER FONT MAKE
Select the char code where the
character you will change, and
then select font size. Click
to
add the item in the list box. Then
select this item to draw the font.
Repeat the process for the same
character with different font size,
example:U40-4x7,U40-5x7,U40-6x7.
Click Transfer|Transfer to Sign
to update the user font of the sign.
Click File|Save Font on this window
to save a file.
RECALL DEFAULT FONT
Use for recall the above default European characters font to the Sign and software.
15
Run Page
Link pages To Run
Set ID
: Run a specified page on the LED Display Board.
: Link some pages in order to Run more than one Page.
For example, type in 'abc', the sign will display
page A, page B, page C content consecutively.
: Set ID of the Led Display Board .
Note: ID00 represents global call. If yon hare more than one sign, you might
want to connect all the signs in a network, e.g. from ID01to ID05 you can
send message to any sign in the network by individual ID. To broadcast to all
the signs, use ID 00.
Set Clock
: Set the Date and Time the Display Board system Clock.
Delete Page
: Delete a specified page information on the sign.
Set Brightness
: Set Display brightness, there are 4 levels of brightness.
Display by Schedule : Schedule a message to be displayed.
you may make some pages display from sometime
to another time. max can set up to 5 Schedule items
one time.
Delete page
:Delete some pages in the running messages.
Delete Schedule
:Delete some items in Schedule table.
Delete All
:Delete all messages in the LED Display Board.
(Except system clock)
CONFIGURE SOFTWARE
1.
Go to File and Set Communication
Select the Com Port
2.
Click on OK when your settings are complete.
SENDING A MESSAGE
The Send Message icon is used to transmit the message to the sign.
1. In the Message Window, type in a test message such as 'Welcome to my
message".
2. Click on the icon on the Toolbar to bring up the
Message window.
Enter the Sign ID Number
** Select a page to send
your message to.
** You have pages A-Z available. Each page can be used to store a
different message.
3. Click on OK to send your message to the sign. If your sign did not
receive your message, try sending the message again.
16
BMP GRAPHIC EDITOR
Use the Graphic Editor to edit or create graphics of your own. To open the Edit Graphic window, click on bmp Graphics on the
menu bar, then click on Edit Graphics
Editor area
Edit erea selection
Editor tools box
Graphic
library
display zoom in
and zoom out
select color to edit
(RED/BLACK for single color sign,
RED/BLACK/YELLOW/GREEN for
tri-color sign)
Graphic data function select
Select Graphic window
Click on any one of the graphics from the Select Graphic list to view the graphic
in the Graphic window.
Stored graphics list.
From G1 to G16
Max 16 pages graphic can be stored
BMP GRAPHIC EDITOR
Color window
Select any one color (RED/BLACK for single color sign, RED/BLACK/YELLOW/GREEN for tri-color sign) to edit an
existing graphic or to create a graphic.
Current selected color.
Colors to select from:
black, red, green, yellow
Edit graphic buttons
Functions of buttons are described below.
SAVE the current graphic displayed in the "Graphic" window.
Graphic will be saved in the "Library".
DELETE a graphic from the "Library".
INSERT the current graphic in the "Graphic" window into your
message.
17
Edit function
Editor tools box
Pen tool: Click this tool, and move the mouse to Editor Area. Press
and hold down the left button of your mouse, and move your mouse
to free hand draw.
Brush tool: Click this tool, and move the mouse to Editor Area.
Press and hold down the left button of your mouse and move your
mouse to get brushing function.
Line tool: Click this tool. Move your cursor to select the starting
point of the line. Then hold down the left button of your mouse,
moving your mouse to the end point of the line. Then release mouse
button.
Outline rectangle tool: Click this tool. To select the starting point
by moving your cursor and hold down the left botton of your mouse.
Then move at the end and release mouse button.
Rectangle tool: Same operation step as outline rectangle tool.
Outline ellipse tool: Same operation step as outline rectangle tool.
Ellipse tool: Same operation step as outline rectangle tool.
Pointer tool: Click this tool. Select the edit area by press and hold
down the left button of your mouse. Then the select area be round
by release your mouse button. Moving the round area by hold down
the left button of your mouse until the position you want. Then
release the mouse button. Right click to fix the position.
Polygon pointer tool: Same operation step as pointer tool.
Erase tool: Click this tool. Just press and hold down the left button
of your mouse and move your mouse to erase the area you want.
Clear tool: Click this tool and select the color. Then moving cursor
to edit area left click your mouse. That the whole edit area will turn
to that color. If you select black color, the whole edit area will be
covered by black in color. Same as clear function.
Text tool: Click this tool. Move cursor to the starting point you
want to put the text. Left click your mouse and text input will bring up.
That you can type in your words or use windows cut and Paste function
to input text. Then select the fonts and fonts size. Click OK Button
to finish the text input. Then move the object to the position you
want and right click your mouse to fix it.
18
After clicking the Ok button in dialog box, move the rectangle area
to proper position and right click the mouse to fix the information position.
Clear function key: Left click this button to clear the whole edit area.
Bmp file function key: Left click this button That can easily export the editing
content to Bmp file, or import Bmp file edited by other program.
19
Preview
screen
Output and save the whole screen to
a bmp file
Input bmp file to editing area
Display zoom in, zoom out function
The zoom size can be selected from 1 to 8. 1 is the smallest. You can zoom in or zoom
out to affect you edit job as
Color selection function
Just easily to left click the color button to select the color you want. If you edit a triple
color frame, then you have four color boxes to select as. If you edit a single color
frame, then you can select either red or black color box as
LAN COMMUNICATION
How it works
The display is first connected to the Serial Communication Port of a
computer in the LAN environment which we refer to as the R eceiving S lave
C omputer (RSC). The computer that will actually be transmitting messages to
the display is referred to as the T ransmitting M aster C omputer (TMC)
. The TMC
will have the display control software installed. It is not necessary to install the
software on the RSC . The next step is to set-up a Generic/ Text Only printer
driver on the RSC and share it with the TMC. Once the set-up is done and a
message created, a simple click on the button for "Send via Network" will bring
up the "PRINT" dialog window. You then select the Generic/Text Only printer
created and click on "OK" and your message is on its way.
20
RSC Printer Driver Set -Up
Begin by clicking on " Start ", " Settings ", and " Printer ". The " Printers " dialog window will appear.
2. Double-click on the " Add Printer " icon. The "Add
Add Printer Wizard
Wizard" window
will appear.
3. Click on " Next ". Select "Local
Local printer
printer" and click on " Next
Next" again.
4. Under " Manufacturers ", search for " Generic ". Select " Generic
ON "Next". lf prompted: "A driver is already installed for this printer",
then select to "Keep existing driver" and click on "Next".
5. Select the Communications Port on the RSC the display will be connected
Next For Example: lf the display is connected to COM1,
to and click on "Next".
COM
select "COM".
1.
LAN COMMUNICATION
6.
Under "Printer
Printer name
name", type in the name you want for the Display
Printer Driver. This name must be 12 characters in length.
In the example below we used the initials " F.D. " to represent " Front
Desk ". Select "No
No " to select the printer as the default printer and click
on " Next".
Next
21
7.
Click on "Finish
Finish " to complete the set-up. If prompted for the Windows 95
CD or disk, insert CD or disk into the proper drive and click " OK".
8. Now select the printer you created. Go to " File " and click on "Properties".
Properties
9. Click on the " Details " tab then click on "Port
Port Settings ".
10. Make sure the settings below are set accordingly. Click on "OK" when
done.
Set to the "BAUD RATE"
setting on PAGE 20.
Settings should be
as shown.
11. Click on the " Sharing
Sharing" tab and click on " Shared As ". In the "Share Name "
box, type in the 12 character "Printer
Printer name
name" you used in step 6. If you
want to "password protect" the use of the Display Printer Driver, type in a
password in the "Password
Password" box. Only the user with the password can
access the "Printer
Printer Driver " to send a message to the display.
12. RSC
.
Printer Driver set -up complete
LAN COMMUNICATION
TMC Printer Driver Set-Up
1.
2.
3.
4.
5.
Click on " Start ", " Settings ", and " Printer ". The " Printers " dialog window
will appear.
Double-click on the " Add
Add Printer
Printer" icon. The "Add
Add Printer Wizard
Wizard" window
will appear.
Click on " Next ". Select "Network
Network printer
printer" and click on " Next " again.
Select " No " to print from "MS-DOS-based
MS-DOS-based programs
programs". Click on " Browse".
Double-click on the name of the RSC on the network and select the Display
Printer Driver created.
22
6.
7.
Click on "OK
OK ". Now click on " Next".
Next
Under "Printer
Printer name
name", type in the 12 character "Printer
Printer name
name" used in
Step 6 of the RSC Printer driver set-up.
8. Select " No
No" to select the printer as the default printer and click on " Next".
Next
9. Click on "Finish
Finish " to complete the set-up. If prompted for the Windows 95
CD or disk, insert CD or disk into the proper drive and click "OK".
10. TMC Printer Driver set -up complete
1.
2.
3.
SENDING A MESSAGE through the LAN
Start the TruColorII Software program. Create your message.
Click on " "for "Send
Send via Network
Network". Input the " Sign ID Number " and
" Page Number
Number", Now click on "OK".
Select the Display Printer Driver from the Printer Name box and click on
"OK ". Message sent successfully!
INTERNET E-MAIL COMMUNICATION
How it works
The display is first connected to the serial Communication Port of the computer
at the remote location which we refer to as the Receive Transmit Computer
(RTC). The computer that will be transmitting the e-mail is referred to as the
Transmitting Master Computer(TMC). Both the TMC and RTC will have the display
control software installed. The user at the TMC will create a message using the
provided software and save it. Once the message is saved, the user can start
the software program used to send e-mail(such as Microsoft Exchange, outlook,
Eudora Pro, Netscape Mail etc) and attach the saved message file to the e-mail
message and send it. The recipient at the RTC is then notified that new mail has
arrived. The user can then open at attachment and send the message to the sign.
Begin by installing the software program on the TMC and RTC.
Configure the sign and software on the RTC.
TMC instructions
1. Start the software program on the TMC and create a message,
Now save it and exit the program.
23
2.
3.
4.
5.
Start the software program used to send e-mail and select to send a
new message.
Type in the "TO" address.
Now click on the icon that will allow you to attach a file. Select the file
you want to be displayed in the sign.
your e-mail message should look similar to the following:
6. Now send the e-mail message.
RTC instructions
1. The recipient at the RTC should automatically be notified when new mail
has arrived.
2. The recipient should open the message and see that the attached file is
for the sign.
3. The recipient should run the newsign software and then open the
message file.
4. Now just click on the icon on the toolbar to send the message to the sign.
Your message is now being displayed.
! QUICK REFERENCE SECTION
Color Code Table
OPTIONAL:
(A & D) for single color sign
(A to J) for tri color sign
To select a COLOR, press COLOR once,
Letter
A
B
C
D
E
F
G
H
I
J
Foreground
Color
Background
Color
RED
GREEN
YELLOW
BLACK
BLACK
BLACK
RED
GREEN
R/Y/G
RANDOM
BLACK
BLACK
BLACK
RED
GREEN
YELLOW
GREEN
RED
BLACK
BLACK
! QUICK REFERENCE SECTION
Font size table
To select a FONT SIZE, press FONT to toggle between the fonts listed below.
24
Letter
A
B
C
D
E
F
Character Font Size
NORMAL
BOLD
ITALIC
Narrow
High
Big
European Character Table
To display a EUROPEAN CHARACTER, press the Corresponding Letter, then
press the EUROP-CHAR key until the European letter of your choice is reached.
Once you see the European letter you which to use, press any other letter to
continue to type your message.
Letter in
Upper "PPER CASE"
Foreground
Color
Letter in
Lower "OWER CASE"
Foreground
Color
! QUICK REFERENCE SECTION
Special effects table
After you complete message editing, you can select the leading
and closing effect by and key and confirm by enter key.
Letter
Type
Effet
Description
A
L, T
Immediate
Image will be immediately appeared
25
B
C
D
E
F
G
L, T
L, T
L, T
L, T
L, T
L, T
Xopen
Curtain UP
Curtain Down
Scroll Left
Scroll Right
Vopen
H
L, T
I
J
K
L
L, T
L, T
L, T
L
Scroll Up
Scroll Down
Hold
Snow
M
N
L
L
Twinkle
Block Move
P
Q
R
L
L
L
Random
Pen writing
Pen writing
Vclose
Image will be shown from center and extend to 4 side
Image will be shown one line by one line from bottom to top
Image will be shown one line by one line from Top to Bottom
Image will be scrolled from Right to Left
Image will be scrolled from Right to Left
Image will be shown from center to top and Bottom one line
by one line
Image will be shown from Top and Bottom to Center one line
by one line
Image will be scroll from Bottom to Top
Image will be scrolled from Bottom to Top
Previous Screen will be kept
Pixels will be dropped down from top and stack up to build
the image
a blank diagonal line will be scrolling on the image
8 pixel width display block will be moved from right to left
one by one
Random Pixel will be appeared to build the image
Hello World
Welcome
L = Leading commands - how the text will appear.
T = Closing commands - how the text will disappear.
Display effect
A
B
C
D
E
Normal
Blinking
Play song 1
Play song 2
Play song 3
Moving speed
3
2
1
0
Fast
Medium 1
Medium 2
Slow
Bell duration
A Short
B Medium 1
C Medium 2
D Long
Display time
0.5sec - 25 sec
Date display format
DD/MM/YY
Time display format
hh/mm
26
? HELP SECTION - IR(Infrared Remote Keyboard)
Most Commonly Asked Questions
Can l run multiple pages when the SCHEDULE DISPLAY.
Yes, you can refer page 8-adding schedule setting.
HOW CAN I CONTROL MORE THAN ONE SIGN FROM A CENTRAL LOCATION?
Set the different ID address. software will allow you to control up to 255 signs
by setting.
How do l remove the demo message on the sign?
The demo message is permanently programmed onto the sign and is designed
to run automatically when there are no messages programmed by the user.
When you program a message onto a page, the demo message will no longer
show.
How much text can l program onto each PAGE?
You can program up to 210 characters per page. there 26 pages text message
and 16 pages graphic can be programmed.
Will l lose my messages if l remove the power to the sign?
No, there is a built-in battery in the sign.
After l unplug my sign, l lose the current TIME and DATE setting. Why?
The battery on the cpu board is gone. you should replace with same
battery. The battery normally can keep 2 years.
How do I display lower-case letters?
Please refer to page 6 SHIFT key function.
I plugged the sign in but nothing comes ON?
Unplug the power to the sign and plug it in again.
Make sure the power adaptor plug is plugged into the sign and AC connect
firmly. Try using another wall outlet. Refer page 9 resetting system using the
FUNCT key.
? HELP SECTION - SOFTWARE
Most Commonly Asked Questions
How do l turn my sign OFF and ON automatically everyday.
Please refer page 16 under the function control display by schedule.
Trouble Shooting
My sign does not show after setting schedule display.
Clear the schedule display and reset the system.
Refer page 16 resetting system using the DELECT all.
27
? HELP SECTION - SOFTWARE
Troubleshooting
The software is not communicating with the sign?
Use the checklist below to verify your settings.
I have found the ID setting of the sign and entered
them into the software. Page 16.
I am using the cable supplied by. Page 14.
NOTE: The cable may not be extended with any other cable. The cable must be
one complete cable from the 9-Pin connector to the sign.
"OPEN COM ERROR" .
If the error message is "OPEN COM ERROR", this means the Com Port you
have selected is not available for your use or is being used by an internal
device in your computer. A computer normally has 4 COM PORTS. Two external
ports which are available to connect external devices to the computer and two
Internal ports which are available, in most cases, for computer use only. Please
check the back of your computer to see if it is labeled COM1 or COM2. lf not,
please refer to your computer user' s manual or contact the computer manufactuer for more information.
28
The USB-RS232 Converter User Manual
1. INTRODUCTION
The USB-RS232 converter can convert a USB1.1 interface to a RS232 serial interface. It
provides a simple solution for updating RS232 Interface Of peripheral products to USB
interface.
Features:
USB Specification 1.1 compliant
Over baud rates 1Mbps
Working with existing COM port applications
Support Win98/2000/ME/XP
2. INSTALLING DRIVERS
The enclosed CD-ROM contains the Virtual COM Port Drivers for the Converter. You
will find the drivers files are included in the directory \usb driver\WIN on the CD-ROM.
The following instructions refers to the Windows XP. On other Operating System, the
installation steps are similar.
2.1) Virtual COM Port Driver Installation in Windows XP
a Insert the provided CD-ROM into the CD-ROM drive. Connect the USB cable
between the host computer and the target device.
b Windows will open a "Found New Hardware Wizard" window. Press Next to
continue.
c Select "Install from a list or specific location(advanced)" and press Next.
29
d Check "Include this location in the Search", and press Browse to locate the
“slabw2k.inf” driver installation file. The file location is the "[CD-ROM Drive]\usb
driver\win" directory. Once this location is selected press Next.
e Press Finish to complete installing the USB Device drivers.
3. USB-RS232 CONVERTER SERIAL INTERFACE
After finishing the drivers installation, Click on Start/settings/control panel/system/
device manage and you will see a USB port will appear as a COM port in the Device
Manager.
30
USB-RS232 Converter will usually use the lowest available COM port for operation.
For instance, if COM ports 1 to 3 are in use by other peripherals and applications,
USB-RS232 Converter will use COM 4.
USB-RS232 Converter functions identically to a COM port from the reference point of
both the host application and the serial device, and it can support serial device
control requests defined in the Win32 Communications API.
When you connect the USB cable to the USB port, Windows will now detect USB
device. Since you have already installed the device drives, all you need to do is
check which COM port was created and tell your serial device's software to use the
corresponding port.
4. UPDATE THE MAPPED COM PORT
If USB-RS232 Converter is assigned to a high COM Port, e.g. COM8, however the
application do not support it, you need to update the mapped port. In the Device
Manager, double Click the entry “CP2101 USB to UART Bridge Controller(COM8)”
under the category “Ports(COM & LPT)”.
Select the tab box “Port Settings”.
31
Click the Advanced… button, and select a low COM port which the application
support. e.g. COM2, and then Click OK button.
You will see the port mapped to COM2.
32
1M03127
(封底页)