1
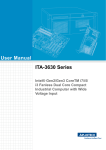
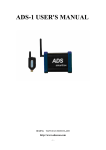
USER MANUAL
Date of issue: February 2013
PC-Software: V.3.04
Hardware-Main: V.3.07b | Hardware Display: V.2.12a
Control Unit
CLT-2000NW / CLT-2000NW-5
Work place control for electric screwdriver
Im Martelacker 12 – D-79588 Efringen-Kirchen – Telefon 0 76 28 - 91 11- 0 – Telefax 0 76 28 - 91 11-90
E-Mail: [email protected] – Internet: www.hs-technik.com
Inhaltsverzeichnis_______________________________________________________
1.
Principle information....................................................................................................................................................................................... Page 3
1.1.
Rating of the instruction manual................................................................................................................................................................. Page 3
1.2.
Using according to this manual................................................................................................................................................................... Page 3
1.2.1.
Improper use....................................................................................................................................................................................................... Page 3
1.3.
Warrenty and liability....................................................................................................................................................................................... Page 3
2.
Principle safety information.......................................................................................................................................................................... Page 5
2.1.
Consideration of the directions of this manual...................................................................................................................................... Page 5
2.2.
Operator‘s duty.................................................................................................................................................................................................. Page 5
2.2.1.
Staff‘s duty........................................................................................................................................................................................................... Page 5
2.2.2.
Training of staff................................................................................................................................................................................................... Page 5
2.3.
Perils in view of working with the control unit CLT-2000NW / NW-5............................................................................................. Page 5
2.4.
Perils caused by electric shock..................................................................................................................................................................... Page 6
2.5.
Alterations of the control unit CLT-2000NW / NW-5............................................................................................................................. Page 6
2.6.
Cleaning an waste disposal of the control unit...................................................................................................................................... Page 6
2.7.Installation........................................................................................................................................................................................................... Page 6
2.8.
Power supply....................................................................................................................................................................................................... Page 6
3.
Operation of the control unit CLT-2000NW /NW5................................................................................................................................. Page 7
3.1.
Basic concepts.................................................................................................................................................................................................... Page 7
3.1.1.
Key switch............................................................................................................................................................................................................ Page 7
3.1.2.
Program push button...................................................................................................................................................................................... Page 7
3.1.3.
Programs (installation of the manufacturer)........................................................................................................................................... Page 7
3.1.4.LED.......................................................................................................................................................................................................................... Page 7
3.1.5.Output................................................................................................................................................................................................................... Page 8
3.2.
PC-Software CLT-2000NW / CLT-2000NW-5......................................................................................................... ................................. Page 10
3.2.1.
Setup (a)..................................................................................................................................................................……………………… Page 10
3.2.2.
Installation USB Driver................................................................................................................................................. ................................. Page 12
3.2.3.Login.................................................................................................................................................................................. ................................. Page 15
3.3.
Selection of device........................................................................................................................................................ ................................. Page 16
3.4.Programs................................................................................................................................................................... ................................. Page 17+18
3.4.1.
Control unit CLT-2000NW / CLT-2000NW-5.......................................................................................................... ................................. Page 19
3.4.2.Parameters.................................................................................................................................................................................................. Page 20-22
3.4.3.
Comlpetely reading-out all programs – Read and Send.......................................................................……………………… Page 23
3.4.4.
Test run....................................................................................................................................................................……………………… Page 25
3.4.5.
Sending all the programs.................................................................................................................................……………………… Page 26
3.4.6.
Setup (b).........................................................................................................................................................……………………… Page 27+28
3.4.7.Display.....................................................................................................................................................................……………………… Page 29
3.4.8.Network..................................................................................................................................................................……………………… Page 30
3.4.9.
Potential compensation....................................................................................................................................……………………… Page 32
4.
Pinning RS232 CLT-2000NW / NW-5 ...................................................................................................................... ................................. Page 33
5.
Connection with the PC.............................................................................................................................................. ................................. Page 33
6.
Pinning Port 1 / 2, CLT-2000NW / NW-5................................................................................................................. ................................. Page 33
6.1.General.............................................................................................................................................................................. ................................. Page 33
6.2.
Data relays contact – potential free........................................................................................................................ ................................. Page 33
6.3.
Output NPN..................................................................................................................................................................... ................................. Page 33
7.
Input - potential free.................................................................................................................................................... ................................. Page 33
8.
Pinning Port 1, CLT-2000NW / NW-5 ...................................................................................................................... ................................. Page 34
8.1.Output............................................................................................................................................................................... ................................. Page 34
8.2.Input................................................................................................................................................................................... ................................. Page 34
9.
Steckerbelegung Port 2, CLT-2000NW / NW-5.................................................................................................... ................................. Page 35
9.1.Output............................................................................................................................................................................... ................................. Page 35
9.2.Input................................................................................................................................................................................... ................................. Page 35
9.3. Jumper adjustment ....................................................................................................................................................................................... Page 35
10.
Network connection..................................................................................................................................................... ................................. Page 38
11.
Speed chart.............................................................................................................................................................. ................................. Page 40+41
-2-
Im Martelacker 12 – D-79588 Efringen-Kirchen – Telefon 0 76 28 - 91 11- 0 – Telefax 0 76 28 - 91 11-90
E-Mail: [email protected] – Internet: www.hs-technik.com
1. Grundlegende Hinweise________________________________________________
1.1. Rating of this manual
This information has been written to be read, understood and to be taken into consideration from
those people who are responsible for this control unit.
Errors on the workplace can only be avoided and the operation without any disturbances can only
be reached with knowledge of this instruction manual.
Please note that we do not overtake any responsibility for damages or disturbances which result
out of non-observance of the instruction manual.
In the case of any difficulties in spite of consideration of the tips of the instruction manual, please
contact us, we should be glad to be at your disposal for any further information you might require.
1.2. Using according to this manual
!
This device is exclusively meant for the control of HIOS screwdrivers CL and α-Series
and HST-A- and HST-CL-screwdrivers from the HS-Technik-GmbH.
The use for any other devices is regarded as non-directed; that means that the company
HS-Technik GmbH does not overtake any responsibility for any damages resulting out of such an
improper use.
!
The proper use of the device includes also
• the consideration of the directions in this manual
• the observance of inspection and maintenance service
1.2.1. Improper use
We do not overtake any responsibility for damages caused by an improper use of this control unit
or the non observance of this instruction manual.
1.3. Warranty and libility
Warranty and liability claims – with personal injury and material damage – are impossible,
in one or more of the following cases:
•
•
•
•
•
•
improper use of the control unit
improper mounting, operation and maintenance of the control unit
operation of the device with damaged safety devices or safety devices which are not installed
properly or safety devices which are out of order
non observance of the directions of the instruction manual regarding transport, stocking,
mounting, operation and maintenance of the control unit
unauthorized conversion of the control unit
improper reparations
-3-
Im Martelacker 12 – D-79588 Efringen-Kirchen – Telefon 0 76 28 - 91 11- 0 – Telefax 0 76 28 - 91 11-90
E-Mail: [email protected] – Internet: www.hs-technik.com
Copyright
This manual is only meant for the operator and its staff.
It contains the directions which you are not allowed to
• copy,
• distribute or
• inform about in any other way.
This copyright remains to the company HS-Technik GmbH.
Address of the manufacturer:
Im Martelacker 12
D-79588 Efringen-Kirchen
Telefon 0 76 28 - 91 11- 0
Telefax 0 76 28 - 91 11-90
E-Mail: [email protected]
Internet: www.hs-technik.com
-4-
Im Martelacker 12 – D-79588 Efringen-Kirchen – Telefon 0 76 28 - 91 11- 0 – Telefax 0 76 28 - 91 11-90
E-Mail: [email protected] – Internet: www.hs-technik.com
2. Principle safety instruction______________________________________________
2.1. Consideration of the directions of this manual
• Basic requirement for a safe and disturbance free operation of the device is the knowledge
of the principle safety rules.
• Moreover, the rules and directions for the workplace have to be taken into consideration.
2.2. Operator‘s duty
It is the duty of the operator to ensure that only people who are familiar with the principle
directions of work safety and accident prevention and who are trained in the correct handling
of the workplace have access to the device. The personnel will be tested regularly if they work
according to the safety instructions.
2.2.1. Staff‘s duty
All persons who are entrusted to work with the control unit have the duty to inform themselves
about the principle directions of work safety and accident prevention before they start working.
2.2.2. Training of staff
Only trained personnel are allowed to work at this working environment.
The responsibility for mounting, operation, maintenance and repair has to be fixed clearly.
The training of new staff has to be done under supervision of an experienced person.
2.3. Perils in view of working with the control unit CLT-2000NW / CLT-2000NW-5
Disturbances, which have an adverse affect on the safety, have to be eliminated promptly.
The control unit CLT-2000NW / NW5 has been built according to state of the
art and the approved safety rules.
In spite of this fact, however, there can occur situations which build perils for life
and limb of the user or third or which could lead to material damage.
!
The work place is only meant:
• for a proper use
• in an impeccable state
-5-
Im Martelacker 12 – D-79588 Efringen-Kirchen – Telefon 0 76 28 - 91 11- 0 – Telefax 0 76 28 - 91 11-90
E-Mail: [email protected] – Internet: www.hs-technik.com
2.4. Perils caused by an electric shock
Work on the electrical connection and the power supply should only be
done by an electrician.
The electrical equipment of the control unit has to be checked regularly.
Remove loose connections and “roasted” cables immediately.
If it is necessary to work on the control unit, the power plug has to be removed
out of the socket before opening it.
The control unit has to be kept close constantly.
Only authorized personnel with proper tools should have access to the device.
2.5. Alterations of the control unit
Do not carry out any changes, conversions or extensions on the control unit without
authorization of the manufacturer.
All reconstructions had to be authorized in writing through HS-Technik GmbH.
Parts which are not in an impeccable state have to be changed immediately but only with
original spare parts.
!
Use only original spare parts.
2.6. Cleaning an waste disposal of the control unit
Used materials have to be handled and disposed properly, especially in view of the cleaning
with solvents.
2.7. Installation
The control unit CLT-2000NW / NW-5 is only meant for the operation in dry rooms. The device
should be installed far from heating and sun light, as a high temperature of the environment could
lead
to disturbances.
2.8. Power supply
The CLT-2000NW / NW-5 is ready for use after you have plugged in the power connector and
actuated the power switch on the back of the device.
Now the display should show the type of device.
!
Please consider the directions regarding voltage, frequency and current on the type
plate before connecting the control unit with the power supply.
-6-
Im Martelacker 12 – D-79588 Efringen-Kirchen – Telefon 0 76 28 - 91 11- 0 – Telefax 0 76 28 - 91 11-90
E-Mail: [email protected] – Internet: www.hs-technik.com
3. Operation of the control unit
CLT-2000NW / CLT-2000NW-5___________________________________________
3.1. Basic concepts
3.1.1. Key switch
If the key switch is in vertical position, the CLT-2000NW/CLT-2000NW5 is in the operation mode.
In this mode the screwdriver can be used.
If the key switch is in horizontal position, the CLT-2000NW/NW5 is in the program choose mode.
With the two arrows ▼▲, the desired program can be chosen.
In this mode the operation of the screwdriver is not possible.
The current program and its parameters are shown on the display.
3.1.2. Programmtasten
With the two program choose arrows▼▲, the desired program can be chosen
(but only if the key switch is in horizontal position).
The chosen program is immediately at your disposal.
3.1.3. Programms (installation of the manufacturer)
The current program number is shown in the right corner of the display.
The display of the program parameter belonging to it follow consecutively.
You can choose between the following programs:
•
•
25 normal programs (on the places 1-25)
10 special programs ( on the places 26-35)
3.1.4. LED
Power:
Lightening green, if the device is switched on.
NG:
Lightening red, if the tightening is no good.
Ready:Lightening green, if the device is ready.
Torque Stop:
Lightening yellow, if the tightening is OK.
-7-
Im Martelacker 12 – D-79588 Efringen-Kirchen – Telefon 0 76 28 - 91 11- 0 – Telefax 0 76 28 - 91 11-90
E-Mail: [email protected] – Internet: www.hs-technik.com
3.1.5. Output jack
The output jack is meant for the connection with the electro-screw cable.
A description of the pins can be found below the jack.
Seizure of output
3 „–“ Negative pole
4 Status
2 Switch off
5 Ground
1 „+“ Positive pole
-8-
Im Martelacker 12 – D-79588 Efringen-Kirchen – Telefon 0 76 28 - 91 11- 0 – Telefax 0 76 28 - 91 11-90
E-Mail: [email protected] – Internet: www.hs-technik.com
CLT-2000NW
Front
screw mode
Program selection
mode
Program choice
button
CLT-2000NW-5
Back
screw mode
Program selection
mode
Program choice
button
!
While the CLT-2000NW / CLT-2000NW-5 is in the programming mode,
it is not possible to tighten.
ATTENTION
You can pull out the key in both positions.
-9-
Im Martelacker 12 – D-79588 Efringen-Kirchen – Telefon 0 76 28 - 91 11- 0 – Telefax 0 76 28 - 91 11-90
E-Mail: [email protected] – Internet: www.hs-technik.com
3.2. PC-Software CLT-2000NW / CLT-2000NW-5
3.2.1. Setup
Setup.exe will be startet with the program.
Put the CD in the CD-ROM drive and start it with a double-click on <CD-ROM>:\Setup.exe,
how <CD-ROM> shall be the letter of your CD-ROM drive.
Follow the instructions on the screen.
Start the program after the installation with a double-click on the desktop icon.
Installation conditions
!
Supported operating system:
Windows 98/98SE/NT4.0 ab SP5/ME/2000/XP
Setup under Windows 9x/NT4.0
Step 1:
Make sure, that the Internet Explorer 5.0 or higher ist installed on your PC.
If the Internet Explorer 5.0 or higher is installed look at Step 2.
!
For user from NT4.0:
If on your Computer is not installed Service Pack 5 at least, install the Service Pack 5 for
NT4.0 provided on the CD!
Go to the folder <CDROM-Laufwerk>:\NT4 and start the file „NT4SP5_i386.exe“.
To establish the version of the Internet Explorer, start the Internet Explorer on your desktop.
If there is no shortcut on the desktop, start the file „IEXPLORE.EXE“ in the folder
C:\Programme\Internet Explorer.
After starting go to the menu „?“ and klick on „Info“, as shown on the next page.
- 10 -
Im Martelacker 12 – D-79588 Efringen-Kirchen – Telefon 0 76 28 - 91 11- 0 – Telefax 0 76 28 - 91 11-90
E-Mail: [email protected] – Internet: www.hs-technik.com
Following window will be opening:
Behind the entry version the versionsnumber of the installed program is given.
Is the version numer not at least beginning with a 5 you have to install the
Internet Explorer from the CD which is included.
Go to the folder <CDROM-Laufwerk>:\IE5 and start the file „ie5setup.exe“.
If the is an error with NT4.0 start the file „vbrun60sp6.exe“ in the folder
<CDROM-Laufwerk>:\NT4 from the CD and try the installation of the
Internet Explorer again.
- 11 -
Im Martelacker 12 – D-79588 Efringen-Kirchen – Telefon 0 76 28 - 91 11- 0 – Telefax 0 76 28 - 91 11-90
E-Mail: [email protected] – Internet: www.hs-technik.com
Step 2:
Install DCOM98.
Go to the folder <CDROM-Laufwerk>:\DCOM98 and start the file „DCOM98.EXE“.
Step 3:
Install MDAC 2.5.
Go to the folder <CDROM-Laufwerk>:\MDAC and start the file „mdac_typ.exe“.
Step 4:
Install the CLT-Programm.
Go to the equivalent folder and start the file „setup.exe“.
Setup under Windows ME/2000/XP
Install the CLT-Programm.
Go to the equivalent folder and start the file „setup.exe“.
3.2.2. Installation USB Driver
To make sure that all device driver can be coose you have to install the program
CP2101_Drivers.exe
Installation under Windows 2000
Step 1:
Connect the USB cable between the host computer and the control unit.
Step 2:
Windows will open a „Found New Hardware Wizard“ window. Press NEXT to continue.
Step 3:
Select „Search for a suitable driver for my device (recommended)“ and press NEXT.
Step 4:
Check „Specify a location“ an press NEXT.
Step 5:
Press BROWSE to locate the „slabbus.inf“ driver install file. The default location is the
„C:\SiLabs\MCU\CP2101\WIN“ dirctory. Once this file is selected press OK.
Step 6:
Verify that the correct path and filename are shown and press NEXT.
Step 7:
Press FINISH ti finish installing the „CP2101 USB Composite Device“.
- 12 -
Im Martelacker 12 – D-79588 Efringen-Kirchen – Telefon 0 76 28 - 91 11- 0 – Telefax 0 76 28 - 91 11-90
E-Mail: [email protected] – Internet: www.hs-technik.com
Step 8:
Windows will open a second „Found New Hardware Wizard“.
Press NEXT to continue.
Step 9:
Select „Search for a suitable driver for my device (recommended)“ and press NEXT.
Step 10:
Check „Specify a location“ and press NEXT.
Step 11:
Press BROWSE to locate the „slabw2k.inf“ driver installation file. The default location is the
„C:\SiLabs\MCU\CP2101\WIN“ directory. Once this file is selected press OK.
Step 12:
Verify that the correct path and filename are shown and press NEXT.
Step 13:
Press FINISH to finish installing the „CP2101 USB to UART Bridge Controller“.
Installation under Windows XP
Step 1:
Connect the USB cable between the host computer and the control unit.
Step 2:
Windows will open a „Found New Hardware Wizard“ window.
Step 3:
Select „Install from a list or specific location (advanced)“ and press NEXT.
Step 4:
Select „Include this location in the search“.
Step 5:
Press BROWSE to locate the „C:\SiLabs\MCU\CP2101\WIN“ directory.
Once this directory is selected press OK.
Step 6:
Verify that the correct path and filename are shown and press NEXT.
Step 7:
Press FINISH to finish installing the „CP2101 USB Composite Device“.
- 13 -
Im Martelacker 12 – D-79588 Efringen-Kirchen – Telefon 0 76 28 - 91 11- 0 – Telefax 0 76 28 - 91 11-90
E-Mail: [email protected] – Internet: www.hs-technik.com
Step 8:
Windows will open a second „Found New Hardware Wizard“ window.
Step 9:
Select „Install from a list or specific location (advanced)“ and press NEXT.
Step 10:
Select „Include this location in the search“.
Step 11:
Press BROWSE to locate the „C:\SiLabs\MCU\CP2101\WIN“ directory.
Once this directory is selected press OK.
Step 12:
Verify that the correct path and filename are shown and press NEXT.
Step 13:
Press FINISH to finish installing the „CP2101 USB to UART Bridge Controller“.
Installation under Windows 98SE
Step 1:
Connect the USB cable between the host computer and the control unit.
Step 2:
Windows will open a „Found New Hardware Wizard“ window.
Step 3:
Select „Search for the best driver for your device (recommended)“ und press NEXT.
Step 4:
Select „Specify a location“.
Step 5:
Press BROWSE to locate the „C:\SiLabs\MCU\CP2101\WIN“ directory.
Once this directory is selected press OK.
Step 6:
Verify that the correct path and filename are shown and press NEXT.
Step 7:
Select FINISH to finish installing the „CP2101 USB Composite Device“.
- 14 -
Im Martelacker 12 – D-79588 Efringen-Kirchen – Telefon 0 76 28 - 91 11- 0 – Telefax 0 76 28 - 91 11-90
E-Mail: [email protected] – Internet: www.hs-technik.com
Step 8:
Windows will open a second „Found New Hardware Wizard“ window.
Press NEXT to continue.
Step 9:
Select „Search for the best driver for your device (recommended)“ and press NEXT.
Step 10:
Select „Specify a location“.
Step 11:
Press BROWSE to locate the „C:\SiLabs\MCU\CP2101\WIN“ directory.
Once this directory is selected press OK.
Step 12:
Verify that the correct path and filename are shown and press NEXT.
Step 13:
Press FINISH to finish installing the „CP2101 USB to UART Bridge Controller“.
3.2.3. Login
The administrator has unlimited access to all parts of the program of the CLT.
!
The administrator has to install the users.
The user can change all programs and parameters.
The access to the functions „entire sending“, „setup“ and „display“ is denied.
These functions are restricted to the administrator.
From the manufacturing works the below mentioned passwords are deposited:
UserPassword
Administrator
admin
Useruser
!
These two passwords can only be changed by the administrator.
- 15 -
Im Martelacker 12 – D-79588 Efringen-Kirchen – Telefon 0 76 28 - 91 11- 0 – Telefax 0 76 28 - 91 11-90
E-Mail: [email protected] – Internet: www.hs-technik.com
3.3. Selection of device
The device which will be used with the interface RS 232 has to be chosen here by clicking
on the name – for example CLT-2000NW/NW5 or CLT-201 or CLT-202.
- 16 -
Im Martelacker 12 – D-79588 Efringen-Kirchen – Telefon 0 76 28 - 91 11- 0 – Telefax 0 76 28 - 91 11-90
E-Mail: [email protected] – Internet: www.hs-technik.com
3.4. Programs
„Switch cw/ccw“
activate moving backwards if time 1 / time 2 and time 3 have gone on or the screwdriver
switchs off through the torque.
„Total tightening time“
The total tightening time is generated of time 1 / time 2 and time 3.
„Direction of rotation“
CW
= tighten a screw
CCW = unscrew a screw,
or tighten left-hand thread screws.
0CW
1CCW
2 Search-run CCW then tighten CW
3 Search-run CW then tighten CCW
The „screw tightening time min.“ is composed of time 1 and time 2.
This value should be corrected into a advisable time.
- 17 -
Im Martelacker 12 – D-79588 Efringen-Kirchen – Telefon 0 76 28 - 91 11- 0 – Telefax 0 76 28 - 91 11-90
E-Mail: [email protected] – Internet: www.hs-technik.com
„External release“
Choose only if port 2, pin 9 is connected or if the key switch to reset is available
(look at pinning port 1 and port 2)
CAUTION!
You can adjust the initial level by yourself:
0 = statically
- 0V or +24V
1 = negative flank
- change from +24V to 0V
2 = positive flank
- change from 0V to+24V
4 = static with supervision
5 = negative flank with supervision
6 = positive flank with static supervision
Funktion only at change of the
stress laid out.
If the input signal changes
during the tightening process
will be actuated NG if NG Quit
is activated.
With the key switch you can reset „External release“.
„Send adress“
Set the device address in the network area 0 till 250
0 = no network funktion
„Save“
If you click on the 2. symbol (diskette), you save the adjusted values .
„Send“
Preparation to „send“:
On the backside of CLT-2000NW / CLT-2000NW-5 between port 1 and RS232
there is a small switch (lay lower). Move this switch upwards.
In the display on the frontside should appear this:
CLT-2000NW / CLT-2000NW-5
STOP ! ! !
Now the CLT-2000NW / CLT-2000NW-5 is recipient.
„Output“ (exists at NW5 only)
The classification of the output to the program-no.
- 18 -
Im Martelacker 12 – D-79588 Efringen-Kirchen – Telefon 0 76 28 - 91 11- 0 – Telefax 0 76 28 - 91 11-90
E-Mail: [email protected] – Internet: www.hs-technik.com
3.4.1. Control unit CLT-2000NW / CLT-2000NW-5
First enter in the rubric „Select program“ a program name,
e.g. Muster 01.
!
The OUTPUT (screwdriver 1 till 5) have to be named for each program
by CLT-2000NW-5.
Speed start ramp
value
min.
max.
TIME 1
0,2 – 1,5 sec.
0,025s
25s
START VALUE
20% – 70%
10%
100%
FINAL VALUE
70% – 100%
10%
100%
Speed engagement
value
min.
max.
TIME 2
0,2 – 1,5 sec.
0,025s
25s
START VALUE
70% – 100%
10%
100%
FINAL VALUE
70% – 100%
10%
100%
Speed tightening
value
min.
max.
TIME 3
0,1 – 5 sec.
0,025s
25s
START VALUE
25% – 40%
10%
100%
FINAL VALUE
25% – 40%
10%
100%
Speed return rate
value
min.
max.
TIME 4
0,2 – 1,5 sec.
0,025s
25s
START VALUE
20% – 70%
10%
100%
FINAL VALUE
70% – 100%
10%
100%
!
Key in suitable
values depending
on the length of
the screws.
START VALUE
and FINAL VALUE
should always be
the same with
„Speed engagement“.
START VALUE
and FINAL VALUE
should always be
the same with
„Speed tightening“.
The TOTAL TIGHTENING TIME is calculated. This value cannot be changed and is
composed of the times 1,2,3 and 4. If one of these times is changed – automatically
the total tightening time is calculated new.
The „tightening time min.“ is calculated of TIME 1 and TIME 2.
This value can be changed individually but it have to be less than the total tightening time.
- 19 -
Im Martelacker 12 – D-79588 Efringen-Kirchen – Telefon 0 76 28 - 91 11- 0 – Telefax 0 76 28 - 91 11-90
E-Mail: [email protected] – Internet: www.hs-technik.com
3.4.2. Parameters
„Type of screwdriver“
Choose handset or machine screwdriver, look at pinning port 1 and port 2.
Handset
screwdriver
Valid adjustment for screwdrivers
with lever start
Machine screwdriver
Start tighten function over port 1 and port 2
„External ramp“ (only in connection with machine screwdriver)
Look at pinning port 1 and port 2.
!
Select only if port 1, pin 10 is connected.
- 20 -
Im Martelacker 12 – D-79588 Efringen-Kirchen – Telefon 0 76 28 - 91 11- 0 – Telefax 0 76 28 - 91 11-90
E-Mail: [email protected] – Internet: www.hs-technik.com
„Screwdriver type (A max.)“
we recommend to enter following values:
Screwdriver type
A max.
s max.
CL-2000
CL-3000
CL-4000
CL-6500
CL-7000
CL-9000
30%2
40%3
40%3
70%3
80%3
100%3
Alpha-4500 70%3
Alpha-5000 80%3
Alpha-6500 90%3
Alpha-6500 HT
100%
3
HST-A-xx100%
HST-CL-xx70%
3
3
Current time value max.
Time to release (s)
Current time value typ.
Time to release (s)
“Current time value max.”
These values should always be smaller than the value of the screwdriver type.
“Tightness counter”
With normal use it should always be 1.
In the automation mode the torque can be revised e.g. 2 or 3 times on the same
screw connection.
Through this simple action, the process safety will be increased.
So the reasonable entry would be 2 or at the maximum 3.
No torque supervision is carried out in the setting Ø (Zero).
(The screwdriver is working though the mechanical coupler is operating.)
“Screws counter“
Here you can key in the number of the screws of the tool.
However, only OK tighten connections will be counted. (max. 250)
To use this function, Pin 11, 12, 24 or 25 should be wired at port 2.
- 21 -
Im Martelacker 12 – D-79588 Efringen-Kirchen – Telefon 0 76 28 - 91 11- 0 – Telefax 0 76 28 - 91 11-90
E-Mail: [email protected] – Internet: www.hs-technik.com
“NIO Quit“
If NIO Quit is in operation pin 11 and pin 22 should be wired at port 1.
It is possible to delete the NG-signal tough an external switch.
Program time max. = 0 till 300 sec
Einstellung Ø = OFF
If the entered time is up the installation will be starting up automatically.
“Waiting time at NIO“
Reasonable entry: 1 till 300 sec
By an entry of 300 sec the time does not expire anymore.
The NG-signal have to be resetted externally.
“Min. time NIO“
During this time there is no error check procedure (NG-interpretation),
e.g. short start up to carry the screws.
Reasonable entry: 0,1 sec till max. 0,35 sec.
“Program time max.“
Here you can specify the time which is max. needed to tighten alle screws in the workpiece.
Please note that you consider the assembly time.
If the screwdriver is starting up the first time, the time begins to run.
“Program text“
Program name
the choosen programm
Remark
this text will be shown in line 2
on the CLT-2000NW display
Date of setting up and author
free lettered; will be saved in the device
“Save“
If you click on the second symbol on the bottom (diskette) the entered values will be saved.
“Send“
Preparation to “Send“:
On the backside of CLT-2000NW / CLT-2000NW-5 between port 1 and RS232
there is a small switch (lay lower). Move this switch upwards.
In the display on the frontside should appear this:
CLT-2000NW / CLT-2000NW-5
STOP ! ! !
Now the CLT-2000NW / CLT-2000NW-5 is recipient.
- 22 -
Im Martelacker 12 – D-79588 Efringen-Kirchen – Telefon 0 76 28 - 91 11- 0 – Telefax 0 76 28 - 91 11-90
E-Mail: [email protected] – Internet: www.hs-technik.com
3.4.3. Completely reading-out all programs – Read and Send
“Read all“ or “Send“
Preparation to “Read“ oder “Send“:
On the backside of CLT-2000NW / CLT-2000NW-5 between port 1 and RS232
there is a small switch (lay lower). Move this switch upwards.
In the display on the frontside should appear this:
CLT-2000NW / CLT-2000NW-5
STOP ! ! !
Now the CLT-2000NW / CLT-2000NW-5 is recipient.
!
Move the small switch down after programming!
- 23 -
Im Martelacker 12 – D-79588 Efringen-Kirchen – Telefon 0 76 28 - 91 11- 0 – Telefax 0 76 28 - 91 11-90
E-Mail: [email protected] – Internet: www.hs-technik.com
“Read“ -> “Send“
“Read all programs“
All programm will be read back.
“Send all programs“
You copy the program back to the device or
you can copy the programs to an other device.
“Read from database“
The programs you recently read from the device are restored from the database.
- 24 -
Im Martelacker 12 – D-79588 Efringen-Kirchen – Telefon 0 76 28 - 91 11- 0 – Telefax 0 76 28 - 91 11-90
E-Mail: [email protected] – Internet: www.hs-technik.com
3.4.4. Test run
!
Before you start the Test Run, you must set the Network address to 0.
You have to give the file a unique name.
“Start test run“
Activates the test run. You can start with the tighening test.
“Stop“
End of the test run.
On the left side there are the established values numerical and
on the right side they are shown graphical.
“Save“
If you click on the second symbol on the bottom (diskette)
the established values will be saved.
- 25 -
Im Martelacker 12 – D-79588 Efringen-Kirchen – Telefon 0 76 28 - 91 11- 0 – Telefax 0 76 28 - 91 11-90
E-Mail: [email protected] – Internet: www.hs-technik.com
3.4.5. Sending all the programs
“Read default settings“
Standard programs will be read.
You can change the program settings by opening the program.
“Send all programs“
Send all programs to the control unit.
“Save“
If you click on the second symbol on the bottom (diskette)
the entered values will be saved.
- 26 -
Im Martelacker 12 – D-79588 Efringen-Kirchen – Telefon 0 76 28 - 91 11- 0 – Telefax 0 76 28 - 91 11-90
E-Mail: [email protected] – Internet: www.hs-technik.com
3.4.6. Setup
“COM Port“
Adjust the serial interface.
“Password management“
Change or give new passwords.
“Output working contents reached“
Invert the output signal
(look at port 1 and port 2)
“Language“
Select the national language.
After you have selected the language press “SAVE“ and restart the program.
- 27 -
Im Martelacker 12 – D-79588 Efringen-Kirchen – Telefon 0 76 28 - 91 11- 0 – Telefax 0 76 28 - 91 11-90
E-Mail: [email protected] – Internet: www.hs-technik.com
“Program Import / Export“
“Special Program Import / Export“
With this buttons you can safe the database at a freely choose place.
“Save“
If you click on the second symbol on the bottom (diskette) the entered values will be saved.
“Program database“
Choose your own database.
Generate your own database:
Please copy this
database into your
own folder.
“Send“
Preparation to “Send“:
On the backside of CLT-2000NW / CLT-2000NW-5 between port 1 and RS232
there is a small switch (lay lower). Move this switch upwards.
In the display on the frontside should appear this:
CLT-2000NW / CLT-2000NW-5
STOP ! ! !
Now the CLT-2000NW / CLT-2000NW-5 is recipient.
- 28 -
Im Martelacker 12 – D-79588 Efringen-Kirchen – Telefon 0 76 28 - 91 11- 0 – Telefax 0 76 28 - 91 11-90
E-Mail: [email protected] – Internet: www.hs-technik.com
3.4.7. Display
“Send all lines to display“
You can edit, store and send the standard settings to the CLT-2000NW/NW5 .
They document the display values.
One should change them only at urgently necessary applications!
“Save“
If you click on the second symbol on the bottom (diskette)
the entered values will be saved.
- 29 -
Im Martelacker 12 – D-79588 Efringen-Kirchen – Telefon 0 76 28 - 91 11- 0 – Telefax 0 76 28 - 91 11-90
E-Mail: [email protected] – Internet: www.hs-technik.com
3.4.8. Network
All CLT-2000NW/NW5 should have an own network address.
In the same network there must not be assigned an address several times.
The address-no. is diplayed next to the abbreviation AD (e.g. AD 5).
Address
Display
- 30 -
Im Martelacker 12 – D-79588 Efringen-Kirchen – Telefon 0 76 28 - 91 11- 0 – Telefax 0 76 28 - 91 11-90
E-Mail: [email protected] – Internet: www.hs-technik.com
Address number
The device number which is communicated via network.
(an address must not be assigned several times)
Read all addresses
Establish all device addresses which are connected with
the network.
Actual program-no.
Give back the current program of the choosen device.
Actual special program-no.
Look at “Actual program-no.“
Program status
Shows the current condition of the device.
Set program-no. to
Change the program to the choose number.
Reset CLT
Reset the addressed control unit.
Stop external release
Stop the external release of the addressed control unit.
Clear NG
Delete the NG status of the addresses control unit.
Screw counter to 0
Put the screw counter of the control unit to 0.
Stop after tightening
Set the control unit to end stop mode.
Can only be reseted by the „END STOP MODE“ button.
- 31 -
Im Martelacker 12 – D-79588 Efringen-Kirchen – Telefon 0 76 28 - 91 11- 0 – Telefax 0 76 28 - 91 11-90
E-Mail: [email protected] – Internet: www.hs-technik.com
3.4.9. Potential compensation
Operating ground
Connection unic
Potential
compensation
Port 1
RS232 USB
Network
Port 2
Operating ground
Potential compensation
- 32 -
Im Martelacker 12 – D-79588 Efringen-Kirchen – Telefon 0 76 28 - 91 11- 0 – Telefax 0 76 28 - 91 11-90
E-Mail: [email protected] – Internet: www.hs-technik.com
4. Pinning CLT-2000NW / CLT-2000NW-5
RS232______________________________________________________________
Pinning
Function
Pin2
TX
Send data
Pin3
RX
Receive data
Pin5
GND
Mass
5. Connection with the PC________________________________________________
Direct connection to the 9 pole RS232 plug (serial) of the PC.
6. Pinning CLT-2000NW / CLT-2000NW-5
Port 1 / 2____________________________________________________________
6.1. General
A voltage of 24V at port 1 and 2 is provided for the circuitry of the opto coupler and the external
devices.
The maximum electric current is 0,5 A.
6.2. Data relays contact – potential free
Switching voltage30V ≃
Switching current100mA ≃
Data opto coupler – potential free
6.3. Output NPN
UCE Max24V
ICE Max50mA
With inductive charge, a protective diode should always be used.
7. Input - potential free__________________________________________________
U max H24V
I max11mA
U max L3V
U min H
18 V
- 33 -
Im Martelacker 12 – D-79588 Efringen-Kirchen – Telefon 0 76 28 - 91 11- 0 – Telefax 0 76 28 - 91 11-90
E-Mail: [email protected] – Internet: www.hs-technik.com
8. Pinning CLT-2000NW / CLT-2000NW-5
Port 1 (25-poles)_____________________________________________________
8.1. Output
Pinning
Function
Pin1
Collector
motor operates
Pin14
Emitter
potential free
Pin2
Kollektor
torque reached
Pin15
Emitter
potential free
Pin3
Kollektor
prepared
Pin16
Emitter
potential free
Pin4
Kollektor
NG (tightening)
Pin17
Emitter
potential free
Pin5
Relay
motor operates
Pin18
Pin6
potential free
Relay
torque reached
Pin19
potential free
Pin13 / 24 / 25
+24V
Pin20 / 21 / 23
GND
8.2. Input
Pinning
Function
Pin7
start
Pin8
stop
Pin9
backwards
Pin10
ramp start
Pin11
NG quit
Pin12
back stop
Pin22
opto coupler GND
- 34 -
Im Martelacker 12 – D-79588 Efringen-Kirchen – Telefon 0 76 28 - 91 11- 0 – Telefax 0 76 28 - 91 11-90
E-Mail: [email protected] – Internet: www.hs-technik.com
9. Pinning CLT-2000NW / CLT-2000NW-5
Port 2 (25-poles)_____________________________________________________
Pinning
Function
Pin1 / 2
+24V
Pin14 / 15
+24V
Pin5 / 6
GND
Pin18 / 19
GND
9.1. Output
Pinning
Function
Pin11
Collector
work content reached
Pin24
Emitter
work content reached
Pin12
Relay
work content reached
Pin25
Relay
work content reached
Pin7
Collector
reserve
Pin20
Emitter
reserve
Pin8
Collector
single tightening OK
Pin21
Emitter
single tightening OK
Pin10
Relay
single tightening OK
Pin23
Relay
single tightening OK
9.2. Input
Pinning
Function
Pin9
external release
Pin22
master reset
Pin13
opto coupler
9.3. Jumper adjustment
RS 232 Connector
Jumper USB
RS 232 Connector
Jumper RS 232
1)
2)
3)
For choosing between USB and
R232 remove the cover and the backside.
Put the jumper with a tweezers to
the desired position.
After adjustment tighten the
cover and the backside again.
- 35 -
Im Martelacker 12 – D-79588 Efringen-Kirchen – Telefon 0 76 28 - 91 11- 0 – Telefax 0 76 28 - 91 11-90
E-Mail: [email protected] – Internet: www.hs-technik.com
Switching example CLT2000 internal supply
connector CLT2000
connector CLT2000
internal supply
- 36 -
Im Martelacker 12 – D-79588 Efringen-Kirchen – Telefon 0 76 28 - 91 11- 0 – Telefax 0 76 28 - 91 11-90
E-Mail: [email protected] – Internet: www.hs-technik.com
Switching example CLT2000 external supply
connector CLT2000
connector CLT2000
external supply
- 37 -
Im Martelacker 12 – D-79588 Efringen-Kirchen – Telefon 0 76 28 - 91 11- 0 – Telefax 0 76 28 - 91 11-90
E-Mail: [email protected] – Internet: www.hs-technik.com
10. Network connection__________________________________________________
Network bushes on the back of the device:
1
4
RJ 45
8
1
4
8
RJ 45
To connect several CLT-2000 units (up to 250 devices),
the following instructions has to be taken into consideration:
On the end devices at pin 1 and pin 4, a termination resistor (120 Ω)
has to be installed.
•
Termination resistors
Order-no.: CLT-2000NWA
can be purchased via HS-Technik GmbH.
The cables (red or blue) are available in
the length 0,5m / 3m and 10m.
connection socket
RJ 45 cable
final socket
RS 232
to PC
or SPS
CLT equipment 1
address 1
CLT equipment 2
address 2
end device
CLT equipment 3
address 3
end device
- 38 -
Im Martelacker 12 – D-79588 Efringen-Kirchen – Telefon 0 76 28 - 91 11- 0 – Telefax 0 76 28 - 91 11-90
E-Mail: [email protected] – Internet: www.hs-technik.com
Instruction list for the network control
Start
Address
Order
Sub order
Action
Questions / order for the CLT2000NW/NW-5 with its own address
@
X
L
P
programm parameter
only the
own address
@
X
L
K
list program by series
only the
own address
@
X
L
U
list T-switch type
(hardware)
only the
own address
max. T-switch /
max. time /
work contact
Questions / order for the CLT2000NW/NW-5 equipments on the CAN BUS
@
X
L
S
list status
active / NG / external release /
wate to start
@
X
L
Z
aktive time
tightening time of the
last screw
@
X
L
P
program
read program number
@
X
L
s
screw /
work piece counter
screw counter and
work piece counter
@
X
L
a
program
read program number
show display
@
X
e
extern ramp
@
X
Rr
reset CLT
@
X
N
screw counter = 0
@
X
n
workpiece counter = 0
@
X
E
finish external release
@
X
S
@
X
P
@
X
H
after tightening the control unit stops
@
X
h
control unit fininsh the the stop mode
start (NG time clear)
number
place program number
Address had a value between 0 - 250 and became received and send too
The particulars would be always send with address. The first information is “AD” (value)
If the address is unequal zero – you can see it on the display.
Contents of the status Bit 0 to Bit 3 as number of 0x00 to 0x0f
0x00
idle position
Bit 4 to Bit 7 as Bit information
Bit 4
screwdriver is avtive
0x01
electric current fault
Bit 5
screwdriver is o.k.
0x02
electric current
fault (stop)
Bit 6
free
Bit 7
waiting mode (port B7 active)
(I 0x80 from display)
0x03
NG waiting time
0x04
entrance stop
active
0x05
wait extern
0x06
wait on clear
X = binary value (reset, because of
hardware fault)
number = binary value of the program number
- 39 -
Im Martelacker 12 – D-79588 Efringen-Kirchen – Telefon 0 76 28 - 91 11- 0 – Telefax 0 76 28 - 91 11-90
E-Mail: [email protected] – Internet: www.hs-technik.com
11. Speed chart CLT-2000NW / CLT-2000NW-5 ________________________________
Speed chart with screwdriver
10%
15%
20%
25%
30%
35%
40%
45%
50%
55%
60%
65%
70%
75%
80%
85%
90%
95%
100%
10%
15%
20%
25%
30%
35%
40%
45%
50%
55%
60%
65%
70%
75%
80%
85%
90%
95%
100%
CL-2000NL
CL-3000NLX
CL-4000NLX
CL-6500NLX
CL-7000NLX
CL-9000NLX
rpm
60
100
135
170
205
235
270
305
340
375
410
440
475
510
545
580
615
650
680
rpm
100
150
200
250
300
350
400
450
500
550
600
650
700
750
800
850
900
950
1000
rpm
100
150
200
250
300
350
400
450
500
550
600
650
700
750
800
850
900
950
1000
rpm
90
135
180
225
270
315
360
405
450
495
540
585
630
675
720
765
810
855
900
rpm
75
115
150
190
225
265
300
340
375
415
450
490
525
565
600
640
675
715
750
rpm
50
75
100
125
150
175
200
225
250
275
300
325
350
375
700
425
450
475
500
CLS-4000NLX
CLS-6500NLX
CLS-7000NLX
CL-6500PX
a-4500NLX
a-5000NLX
rpm
180
270
360
450
540
630
720
810
900
990
1080
1170
1260
1350
1440
1530
1620
1710
1800
rpm
140
210
280
350
420
490
560
630
700
770
840
910
980
1050
1120
1190
1260
1330
1400
rpm
130
195
260
325
390
455
520
585
650
715
780
745
910
975
1040
1105
1170
1235
1300
rpm
90
135
180
225
270
315
360
405
450
495
540
585
630
675
720
765
810
855
900
rpm
170
255
340
425
510
595
680
765
850
935
1020
1105
1190
1275
1360
1445
1530
1615
1700
rpm
100
150
200
250
300
350
400
450
500
550
600
650
700
750
800
850
900
950
1000
10%
15%
20%
25%
30%
35%
40%
45%
50%
55%
60%
65%
70%
75%
80%
85%
90%
95%
100%
10%
15%
20%
25%
30%
35%
40%
45%
50%
55%
60%
65%
70%
75%
80%
85%
90%
95%
100%
All speed details have a tolerance of approx. ± 5%
After the programming the speeds should always be checked.
- 40 -
Im Martelacker 12 – D-79588 Efringen-Kirchen – Telefon 0 76 28 - 91 11- 0 – Telefax 0 76 28 - 91 11-90
E-Mail: [email protected] – Internet: www.hs-technik.com
Speed chart with screwdriver
10%
15%
20%
25%
30%
35%
40%
45%
50%
55%
60%
65%
70%
75%
80%
85%
90%
95%
100%
10%
15%
20%
25%
30%
35%
40%
45%
50%
55%
60%
65%
70%
75%
80%
85%
90%
95%
100%
a-6500NLX
a-6500NLX
-HT
a-7000NLX-K
HST-A-6500
-HS
HST-A-6500
-HT
rpm
170
225
340
425
510
595
680
765
850
935
1020
1105
1190
1275
1360
1445
1530
1615
1700
rpm
75
115
150
190
225
265
300
340
375
415
450
490
525
565
600
640
675
715
750
rpm
120
180
240
300
360
420
480
540
600
660
720
780
840
900
960
1020
1080
1140
1200
rpm
170
225
340
425
510
595
680
765
850
935
1020
1105
1190
1275
1360
1445
1530
1615
1700
rpm
75
115
150
190
225
265
300
340
375
415
450
490
525
565
600
640
675
715
750
HST-A-6500M
HST-A-6500S
HST-A-6500H
HST-CL-6500
rpm
50
75
100
125
150
175
200
225
250
275
300
325
350
375
400
425
450
475
500
rpm
60
100
135
170
205
235
270
305
340
375
410
440
475
510
545
580
615
650
680
rpm
70
105
140
175
210
245
280
315
350
385
420
455
490
525
560
595
630
665
700
rpm
90
135
180
225
270
315
360
405
450
495
540
585
630
675
720
765
810
885
900
10%
15%
20%
25%
30%
35%
40%
45%
50%
55%
60%
65%
70%
75%
80%
85%
90%
95%
100%
10%
15%
20%
25%
30%
35%
40%
45%
50%
55%
60%
65%
70%
75%
80%
85%
90%
95%
100%
All speed details have a tolerance of approx. ± 5%
After the programming the speeds should always be checked.
- 41 -
Im Martelacker 12 – D-79588 Efringen-Kirchen – Telefon 0 76 28 - 91 11- 0 – Telefax 0 76 28 - 91 11-90
E-Mail: [email protected] – Internet: www.hs-technik.com
Declaration of Conformity
We declare under our sole responsibility, that this product is in compliance with
the relevant guidelines listed below in accordance with design and construction.
If the equipment should be modified without our consent, this explanation gets invalid.
The equipment listed below complies with currentls valid EGB / EMV norms.
Manufacturer:
Company:
HS-Technik GmbH
Village:
Im Martelacker 12
D-79588 Efringen-Kirchen
Phone:
+49 (0)7628-9111-0
Fax:
+49 (0)7628-9111-90
E-Mail:[email protected]
Equipment description:
Control unit for all CL-, SB- and α-, HST-A, HST-CL-screwdriver
with ramp and variable speed setting.
Type name:
CLT-2000NW / CLT-2000NW-5
Used EG guidelines:
89/336 EWG changed through 92/31 EWG and Art. 5, 93 / 68 EWG
89/392 EWG changed through 91/368 / EWG, 93 / 44 EWG and
Art. 6, 93 / 68 / EWG 73/ 23 EWG
HS-Technik GmbH
Im Martelacker 12, D-79588 Efringen-Kirchen
H.-Martin Hanke
GeschäftsführerDatum: 25.05.2006
- 42 -
Im Martelacker 12 – D-79588 Efringen-Kirchen – Telefon 0 76 28 - 91 11- 0 – Telefax 0 76 28 - 91 11-90
E-Mail: [email protected] – Internet: www.hs-technik.com