1
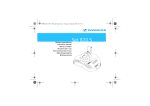
SanDisk® Dash Cam
2 Channels Full HD
USER MANUAL
SDDCV-V7
SDDCV-V7
2Channel Full HD Dash Cam - SDDCV-V7
This User Instructions describe how to use the Dash Cam system. Before using the product,
please read all the user instructions and the warranty for correct use.
Note
After purchasing the product, please check the product, components and the warranty.
The color printed in the user manual may differ from the actual color according to the
printing conditions and surrounding lighting.
The design and specifications of the product are subject to changes without prior notice
for the improvement of performance and quality.
01
CONTENTS
SDDCV-V7
1. Dash Cam Overview
1) Main Features of Product
2) Product Specifications
3) Product Components
4) Product Detail Specifications
5) Product Assembly
03
03
04
05
06
2. Basic Operation
1) Name
2) Insert the microSDTM card
3) Power ON/OFF
4) Rear Camera
5) GPS
6) LED
7) Audio Guide
8) Normal Recording/Parking Surveillance
9) Switch of Recording Mode
10) Recording Status
11) Recording File
12) Self-protection Mode
13) LCD Proetection Mode
14) Firmware Upgrade
08
08
08
09
09
10
11
12
12
13
14
15
15
15
3. LCD
1) Live Screen
2) Main Menu
3) Video Playback
4) Memory card Management
5) Basic Configuration
6) Advanced Configuration
7) System Information
16
17
17
18
19
19
19
4. PC Viewer
1) Description of Button
2) Structure of Screen
3) File Playback/Deletion
4) Change of Screen Mode
5) Program Setup
6) Dash Cam Setup
20
20
21
22
23
23
5. Mobile Viewer
1) Automatic Updates
2) Home
3) Menu
4) Playback List
5) Video Playback
6) Check the User Manual
24
24
24
24
25
25
6. Notices
1) Product Warranty
2) Checkpoints before Application for A/S
3) Quality Assurance & Product Warranty
26
27
28
02
1. Dash Cam Overview
SDDCV-V7
1) Main Features of Product
This device is designed for real time video and audio recording of the front/rear side when the car is in
motion or in a stationary state. The videos can be referred later on, in case of accident or impact.
Design of highly low-power consumption (4W of power consumption)
This product is designed to consume less than 4W of electricity in recording full HD to minimize the
reduction of car battery life
Application of double super capacitor (For the protection of recording files)
In case of a sudden power cut-off, this super capacitor enables saving a file under and allows the
product to end the system properly
Insulation from high/low temperature (Protection of video files)
Car/Truck auto detection function and protection of automotive battery
This product supports voltage setting function to protect battery
As the default value is "12V for a passenger car", you need to set up the battery protection voltage
for your vehicle.
-For a light vehicle, it is required to set up the battery protection voltage to be 12.4V.
-In winter, it is recommended to set up the voltage as 12.4V.
De-Warping (Video distortion can be corrected)
This product stores images real-time which are the same as the reality by correcting distorted parts
around boundaries with De-Warping function
30 frames for the front + 30 frames for the rear
This product records the front and rear videos by 30 frames, respectively so that it can provide you
a very clear video image
Dedicated PC Viewer
Time correction and location indication by using the GPS (Only in case of a GPS unit is installed)
2) Product Specifications
3D G-sensor auto detection
Parked security mode
3.5" LCD touch screen
2-Channels Full HD
2-Year
Warranty
High Endurance Card
F2.0 lowlight conditions
Note
The user Manual contain the description of the PC-dedicated Viewer and the Smartphone
viewer.
03
1. Dash Cam Overview
Front Camera
Front Camera Cradle
Front/Rear connection cable
SDDCV-V7
Rear Camera
Power cable (3-lines)
microSD™ card
Double-sided tape
for Front Camera (2ea)
Quick Guide
Double-sided tape
for Rear Camera (2ea)
(1ea is pre-attached
to the cradle
for the rear camera)
External GPS (Optional)
Note
This is subject to changes without prior notice at our discretion or for the improvement of
product performance.
Not to be used with tinted glass
Make sure that the lens is within the wiping range of the windscreen wiper th ensure a clear
view even when it rains.
Precautions When Using Product
This product is an assitive vehicle safety device that provides data to be referenced in the
event of a vehicular incident with video and audio data recorded.
Depending on the operation environment, there can be situations where the device does not
record; therefore, it is recommended that this User Manual be used as reference to check
vehicle operation footage.
Please throughly read through this User Manual to understand the proper and safe methods of operations before using the product.
In the event of an accident or damage to vehicle, please remove microSD™ card from the
device to preserve data. If the microSD™ card is continuously used after an event, there can
be damage to the event footage due to new files being recorded and saved.
For issues related to faulty usage or operation of this product, please contact customer
service immediately to receive the appropriate service.
Thank you for understanding that the contents stated in this User Manual can be changed
without prior notice to improve the product.
Depending on the print of this User Manual, the colors in the pictures and diagrams can
appear to be slightly than the actual product.
04
1. Dash Cam Overview
SDDCV-V7
3) Product Detail Specifications
Item
Standard
Remark
Model name
SDDCV-V7
2 Channel Full HD Real time recording.
Size/Weight
Front Camera (W x D x H)
101.9 X 31.09 X 63.9mm/128g
Rear Camera (W x D x H)
59.0 X 22.4 X 28.5mm/19.8g
Whole Packing State
Including Rear Camera 480g
Memory
32GB: Max Recording time 320min
64GB: Max Recording time 640min
SanDisk Memory card: Warranty for 2 years
Recording type
Normal Recording
Continuously recording.
Impact Recording
In the event of shock to the unit, 10 seconds previous
+ 20 seconds after of 50 seconds are recorded.
User Recording
If the button is pressed, 10 seconds previous +20 seconds
after or 50 seconds are recorded based on when the
button is pressed.
Motion Recording
(Parking surveillance)
In the event of Motion, 10 seconds previous +20 seconds
after or 50 seconds are recorded. (Only parking surveillance)
Sensor
Sony Exmor Full HD CMOS Image
Sensor(High video quality)
Same specification applied to both front and rear camera.
Valid Pixel
1984(H) x 1105(V), 1080p
Same specification applied to both front and rear camera.
Resolution
Full HD 1920 x 1080
(1080p, H.264, Extension mp4)
Same specification applied to both front and rear camera.
Lens
All Glass F2.0 -Full HD Lens
High quality lens for Enhancement in low light condition.
Frame
30fps
Same specification applied to both front and rear camera.
Angle of view
Front : 141°(D) / 116°(H) / 61°(V)
Rear : 120°(D) / 99°(H) / 52°(V)
Wide view angle for Front/Rear camera
Display panel
1/3.5" LCD (480 x 272)
Audio
AAC (Advanced Audio Coding)
Speaker, Embed Mic
GPS
GPS socket
External type, Option
Power Input
DC 12/24V support
Acceleration sensor
Triaxis acceleration sensor
Rear camera
V-IN socket
Power auxiliary device
Super capacitor
LED
Front side : Security LED
Rear side : PWR/REC/Mic LED (3EA)
Micro USB Port
Operating temperature -10 ~ 60 ℃
Note
1. In parking surveillance, a video may pause or break intermittently, according to the surrounding conditions.
2. The microSD™ card is of the dedicated high-endurance SanDisk card, designed for thousands
of hours of continuous capturing. We shall not warrant our product's normal functioning, if
any other microSD™ card is used.
3. To check on the video files on a frequent basis, to check on the consistency.
4. In parking surveillance, the recording only occurs only when motion or impact is detected,
the duration of recording may differ according to the parking conditions.
5. Risk of explosion if battery is replaced by an incorrect type. Dispose of used batteries
according to the instructions.
05
1. Dash Cam Overview
SDDCV-V7
4) Product Assembly
1. Hide the cable connecting camera between front and rear
camera into the top of the vehicle.
2. After removing the film of the double-sided tape on the
cradle of the rear camera, attach the camera on the surface
of the rear window.
Clean any dirt off the window surface before attachment.
Adhesion will be reduced if you attach the cradle again after
removal.
Be careful for the rear window defroster not to be in contact
with the cradle.
3. Remove the film on the lens of the rear camera.
Be careful not to leave dirt of fingerprint on the lens when
removing the protection film.
4. Adjust the rear camera at a proper angle.
5. Insert the front/rear camera connection cable to the rear
camera.
Rear Camera
Connection
6. Attach the double-sided tape to the cradle.
7. Assemble the cradle to be properly fit to the connection
part of the front camera.
8. After moving the film of the double-sided tape attached to
the cradle, attach the cradle on the window surface at
which can be easily done.
Attach the cradle at a place you can easily operate the buttons.
Clean any dirt off the window surface before attachment.
Adhesion will be reduced if you attach the cradle again after
removal.
06
1. Dash Cam Overview
SDDCV-V7
Please set the Dash Cam at least a hand span or 20cm away
from the navigation.
9. After adjusting the front camera at a proper angle, fasten
the screws of the cradle.
In case of installing the product on the edge of a window, not
its center, the length of a power cable will be shorter. It can be
a problem with connection.
10. Insert the front/rear camera connection cable to the front
camera.
Front Camera
Connection
11. Connect the power cable to the front camera.
Adjust the camera as much as 1/8~1/4 of the bonnet can be seen.
Please use the Dash Cam after remove the protective film
of the LCD screen.
1/8 1/4
FUSE
BOX
Note
As the conditions of a window may affect the video quality, keep the window clean.
07
2.Basic Operation
SDDCV-V7
1) NAME
GPS Socket
Connection to the cradle
Rear Camera Socket
Power Socket
microSD™ Card Slot
Touch LCD
Recording Button
Speaker
Mic
Mic LED
Recording LED
Power Button
Camera lens
Power LED
Security LED
2) Insert the microSD™ card
1. Open the microSD™ card cover.
2. Insert the microSD™ card as shown
in the picture.
3) Power ON/OFF
Connect the 3-pole jack to a power supply.
If starting the vehicle, the voice information system starts
and the LED turns on.
You can turn the product ON/OFF by pressing the power button
(
) for more than 3 seconds.
Turn Off : Press it for more than three seconds
Turn On : Press it once (No time limit)
08
2.Basic Operation
SDDCV-V7
4) Rear Camera
If you turn the product on after connecting the rear camera socket
to the Dash Cam V-IN socket to record the rear side on video when
power is off, you may see the video image on the PIP screen of LCD
as well as the recorded video of the rear camera after you turn it on.
Note
If you use a rear camera that we don’t provide, it may
affect the entire system of the Dash Cam.
If you connects of disconnects the rear camera during
product operation, it may cause a trouble. It is necessarily required to connect/disconnect the rear camera
after turning it off.
5) GPS
If connecting a GPS unit to the product, you can hear buzzer and
see the GPS indication on the upper left side to be activated.
You may check any location information identified with the GPS
with the PC Viewer.
Note
If you use an external GPS unit that we don’t provide,
the GPS terminal may be damaged.
The GPS receiver is sold separately.
09
2.Basic Operation
SDDCV-V7
6) LED
Front Camera - Front Side
Front Camera - Rear Side
BLUE(Security)
BLUE(Power)
RED(Recording)
GREEN(Mic)
BLUE(Power)
Rear Camera
Camera
Position
Name
Color
Front Camera
Front
Security LED
BLUE
Rear
Recording LED
RED
Mic LED
GREEN
Power LED
BLUE
Power LED
BLUE
Rear Camera
Front
Shape
Operation Mode
Operation status LED
Power
Lighting of the Power LED
Firmware Upgrade
Recording, Mic LEDs will switch on and off twice every second.
Normal Recording
Recording, Security LEDs will switch on and off once every two seconds.
Impact/Motion/User Recording
Recording, Security LED will switch on and off once every second.
Microphone Recording
Lighting of the Mic LED
Parking surveillance
Security LED will switch on and off once every two seconds.
*Rear Power LED will switch on and off once every two seconds, regardless of the operation mode.
10
2.Basic Operation
SDDCV-V7
7) Audio Guide
Content
Operation Status
Audio Guide
Start to firmware upgrade
Start firmware upgrade.
Do not turn off the power.
Firmware Upgrade has been completed.
Completed. Please wait.
Normal Recording
Access to Normal Recording mode
Recording starts.
Event
Recording
When there is user input during Event
Recording
Envent recording is wroking now.
Motion / Impact /
User Recording
Motion / Impact / User recording will start
Beep sound
Parking surveillance
Access to Parking surveillance
Starting to Parking surveillance.
Including Audio
Recording
Power ON Mic
Audio recording is
Excluding Audio
Recording
Power OFF Mic
Audio recording is turned off.
LCD Protection Mode
When there is user input
LCD Protection Mode.
Reset time
When the time of the Dash Cam is reset
Please check the time settings.
microSD™ card
Format
Initializing the memory card.
Removed during operation
Bell sound
When there is no microSD™ card or if a
faulty microSD™ card has been inserted.
Please check the memory card
in the slot.
GPS(Optional)
Connect to GPS after reboot
Bell sound
Power
When the power is switeched off
Bell sound
Firmware Upgrade
turned on.
11
2.Basic Operation
SDDCV-V7
8) Normal Recording/Parking Surveillance
If both ACC and B+ of a vehicle are on, the Dash Cam will operate its general recording mode.
If ACC is off and B+ is on, Dash Cam will be converted to the parking surveillance mode after 10 seconds.
Please refer to 9) Switch of Recording Mode for details.
Normal Recording
Parking Surveillance
ACC ON
ACC OFF
9) Switch of Recording Mode
If the Dash Cam is kept running
for more than 1 hour
above 85℃ or below -20℃,
then the device goes
into sleep mode and resumes
after the optimal conditions are reached.
Normal
Recording
Impact
Recording
Button
Protection
Mode
10 seconds later
after ACC is turned off
10 seconds later
after ACC is turned on
Impact
Recording
User
Recording
Motion
Recording
If the Dash Cam is kept running
for more than 1 hour
above 85℃ or below -20℃,
then the device goes
into sleep mode and resumes
after the optimal conditions are reached.
Parking
Surveillance
Impact
Recording
Button
MOTION
12
2.Basic Operation
SDDCV-V7
10) Recording Status
Normal Recording
- The system stores the video footage recorded during
drive in the Normal folder every minute.
- During recording, the LED(Red) switch on and off
once every two seconds.
Impact Recording
- If impact occurs during drive or parking, the indication
of Impact recording will be activated on the upper left
side of the LCD.
- 20/50 seconds of video footage after 10 seconds
before an impact will be stored in the Event folder.
- During recording, the LED switch on and off once
every second.
- Buzzer beeping.
Motion Recording
- If any motion is detected around during parking,
the indication of motion recording will activated
on the upper left side of the LCD.
- 20/50 seconds of video footage after 10 seconds
before motion recording will be stored in Motion folder.
- During recording, the LED switch on and off once
every second.
- Buzzer beeping.
User Recording
- If pressing the user recording button during drive or
parking, the indication of user recording will be
activated on the upper left side of the LCD.
- 20/50 seconds of video footage after 10 seconds
before User recording will be stored in Event Folder.
(to be selected at PC Viewer)
- During recording, the LED switch on and off once
every second.
- Buzzer beeping.
Note
If the microSD™ card is out of space, the system deletes the oldest video footage and
saves a new one.
Please back up your important videos in another storage device.
13
2.Basic Operation
SDDCV-V7
11) Recording file
Recording file is saved in each folder.
Recording file name is made from recording start time.
000001_20150603152435_F_normal.MP4
YEAR
DAY
MIN
Front Camera Record
MONTH HOUR SEC
000001_20150603152435_R_normal.MP4
YEAR
DAY
MIN
Rear Camera Record
MONTH HOUR SEC
095_20150603151658_F_N.MP4
095_20150603151658_R_N.MP4
095_20150603152232_F_N.MP4
095_20150603152232_R_N.MP4
095_20150603152435_F_N.MP4
095_20150603152435_(_N.MP4
095_20150603173827_F_N.MP4
095_20150603173827_F_N.MP4
Note
Please separate the microSD™ card after Dash Cam has been terminated completely.
Please do not save the user data (doc, video, music file etc) in the microSD™ card.
Saved recording video can be deleted or Dash Cam malfunction can happen.
Please be cautious with changing recording allocation settings because the system will reboot
after deleting all existing video files.
For microSD™ cards with less than 32GB capacity, it must be formatted to FAT32, 32KB in
order to be able to save video recordings.
For microSD™ cards with 64GB capacity, it must be formatted to exFAT, 128KB in order to be
able to save video recordings.
microSD™ cards with less than 32GB capacity
microSD™ cards with 64GB capacity
14
2.Basic Operation
SDDCV-V7
12) Self-protection Mode
85℃ 80℃ Once in self-protection mode, recording does not work.
When the temperature of the Dash Cam goes over 85℃ for more than one
hour, the Dash Cam enters self-protection mode.
When the temperature of the Dash Cam drops to 80℃ and below for 5
seconds, normal recording starts.
0℃ -15℃ -20℃ When the temperature of the Dash Cam drops below -20℃ for more than
one hour, the Dash Cam enters self-protection mode.
When the temperature of the Dash Cam rises to over -15℃ for 5seconds,
normal recording starts.
13) LCD Protection Mode
If the temperature of the Dash Cam unit exceeds 70°C or drops below -15°C the unit switches to 'LCD Protection
Mode' to protect the LCD. The LCD Protection Mode is automatically toggled OFF once the temperature of the
Dash Cam unit drops back to below 65°C and above -10°C. When the LCD is touched while in LCD Protection
Mode, the LCD does not turn ON and sounds the audio alert 'LCD Protection Mode.'
14) Firmware Upgrade
Download the upgrade file from our website www.sandisk.co.kr/dashcam
1. Upgrade microSD™ card of Dash Cam through PC.
Save the upgraded file in the microSD™ card.
2. Turn on the power after inserting microSD™ card
into the Dash Cam.
3. When the power is provided, Dash Cam checks if
there exist firmware upgrade file in the microSD™
card.
4. If you touch the OK button, upgrade will be started.
15
3. LCD
SDDCV-V7
1) Live Screen
1
2
3
4
5
6
7
8
9
10
11
① REC Status
Normal
Impact
Motion
User
② Status of Voice recording
Mic ON
Mic OFF
③ Front/Rear Channel
Ch. ON
Ch. OFF
④ Status of GPS : Marked when connected at GPS
GPS ON
GPS OFF
⑤ OSD : Recording Date, Vehicle Voltage
⑥ Default Playback for Rear Camera.
Front/Rear camera toggle when touched.
⑦ Menu Bar : Vitalize when touched on LCD screen.
Disappeared menu bar after 7 seconds if not touched.
⑧ Main menu button
⑨ PIP ON/OFF button
⑩ Mic ON/OFF button
⑪ LCD OFF button
16
3. LCD
SDDCV-V7
2) Main Menu
The following 6 menus can be accessed from
the main menu.
1. Playback
2. Memory Card Management
3. Basic Configuration
4. Advanced Configuration
5. System Information
6. Exit
3) Video Playback
The saved video list can be viewed by video
type. if you click on a video file in the video list,
the video will be displayed and the recorded file
can be viewed.
Note
As recording stops when entering the
main menu, please keep live screen
when you need to record.
1
Video Playback Screen
① Front/Rear Channel Mark
② Playback Progress Bar
③ Back to the file list
④ Backward Playback
⑤ Play/Pause
2
⑥ Forward Playback
⑦ Front/Rear Channel Toggle
3
We offer two application and for step by step detail
on each.
Please visit our website: www.sandisk.co.kr/dashcam
1. PC Viewer : PC application to check the recording
video
2. Mobile Viewer(only for Androids) :
Mobile application to check the recording video
4
5
6
7
17
3. LCD
SDDCV-V7
4) Memory Card Management
Recording Partition Setup
In recording partition setup, you can assign storage
capacity of microSD™ card as the value you desire.
Distribution rates are as the table below.
Value
Normal Impact Motion User
Normal-centered
65%
15%
15%
5%
Motion, Normal-centered
45%
25%
25%
5%
Normal, Impact-centered
45%
35%
15%
5%
Note
Please take caution when modifying recording partition setup since all the recording
files will be deleted and the system will be
rebooted.
Initialization(Format)
If you select the Initialization(Format), all recording files
in the microSD™ card will be deleted.
18
3. LCD
SDDCV-V7
5) Basic Configuration
Time Setup
Date and time are changeable
and standard time can be set for
each country.
LCD Setup
You can set brightness of LCD and
automatic turn-off time.
Recording Setup
You can set image quality, impact,
and motion sensitivity and also set
recording mode and duration of
recording when the car is parked as
well as battery protection function.
Volume Setup
Setting the Volume on the device
6) Advanced Configuration
Camera Brightness Setup
You can set the brightness of
front and rear camera.
Factory Default
All settings will be initialized to
the default values.
Event Alarm Setup
You can set the event alarm
of parking surveillance.
Language
Setting language
7) System Information
It provides information on Dash Cam version, model name and microSD™ card capacity.
19
4. PC Viewer
SDDCV-V7
1) Description of Buttons
8
① Playback Progress Bar
② Playback Buttons
Stop
Pause
Revers Playback
(Backward Playback)
Forward Playback
Move to Previous Frame
(Backward by 1 sec)
Move to Next Frame
③ Video Playback Speed
④ Adjustment of PC Viewer’s Sound Volume
⑤ Open GPS Information Window
⑥ Speed
⑦ Other Function Buttons
Settings
Printout
Change the Language(Korean or English)
Open File
1
3
2
4
5
1
2) Structure of Screen
2
3
6
⑧ Change of Screen Mode Buttons
7
5
4
6
Delete Selected File
Full Screen
Minimize
Maximize
End
7
8
① Front/Rear Video Playback Segment
② Motion Information Segment
(Shock Sensor, Speed)
③ Play Time/Total Time
④ Front/Rear Image Playback Segment
⑤ View of Recording List
- View of Normal Recording
- View of Impact Recording
- View of Motion Recording
- View of User Recording
⑥ Play List Window
⑦ Map and Drive Path
⑧ Current Coordinates
20
4. PC Viewer
SDDCV-V7
3) File Playback/Deletion
① Playing by choosing a recorded video in mobile disk: Double click a file you want to play.
② Deleting a recorded video in mobile disk : You can delete a file by choosing the file. (You want to delete)
4) Change of Screen Mode
① Full Screen Mode
Click the
button at the top of the viewer to change to the Full Screen Mode.
② Return to Previous Mode
Click the
button to return the screen to the Previous Mode.
③ Minimized Mode
Click the
button at the top of the viewr for the Minimized Mode.
④ Maximized Mode
Click the
button at the top of the viewer for the Maximized Mode.
⑤ Program End
Click the
button at the top of the viewer to end the PC viewer program.
21
4. PC Viewer
SDDCV-V7
5) Program Setup
Set values can be changed by clicking the “
1
” button on the main screen of PC Viewer.
4
2
3
① Playback Mode
You can set up the playback mode as 1Ch/2Ch/Auto.
If it is set up for Auto, the viewer program will automatically recognize 1Ch / 2Ch.
② Playback Speed
If you select All Frames Playback at all times, the program will play back all recorded frames at any playback.
If you select Key Frame Playback at more than 2x speed, the program will play back only I frame which is a key
frame among the recorded frames at a playback speed of more than 2x speed.
If you select Key Frame Playback at 4x speed, the program will playback only I frame which is a key frame
among the recorded frames at 4x speed playback. (the frame consists of I Frame and P Frame)
Note
In case of playing back only a key frame, the program will play back the frame at high
speed while palying breaks at an interval of 1 second. This occurs due to the limited performance of a computer, not the problem of the product.
③ Flip : This menu sets up the up / down and left / right inversion.
④ Zoom PIP
In case of using the video enlargement/reduction, you may assign the place of the enlarged / reduced video
to be displayed.
The location of the PIP is on the top right by default, but it can be changed to bottom right, top right, bottom
left and top left.
22
4. PC Viewer
SDDCV-V7
4) Dash Cam Setup
You may change settings by clicking the “
” icon on the main screen of the dedicated viewer.
Any changed Dash Cam settings will be saved in a SD card and then, will take effect at next booting of the DashCam.
1
5
2
6
3
7
4
8
9
① Video Quality : Video Quality can be set from Standard, High, Highest.
② Event Record Dwell Time
You may select the length of video to be recorded after sensing shock or motion by 20 seconds or 50 seconds.
③ G-Sensor Sensitivity on Normal Recording
Select the sensitivity on Normal Recording to be Insensitive of Normal or Sensitive.
④ G-Sensor Sensitivity on Parking Surveillance
Select the sensitivity on Parking Surveillance to be Insensitive of Normal or Sensitive.
⑤ Parking Surveillance : Parking Surveillance can be set from Motion+ Impact, Impact, Off
⑥ Motion Sensitivity on Front Cam :
Select the Motion Sensitivity of Front Cam to be Insensitive or Normal or Sensitive.
⑦ Motion Sensitivity on Rear Cam
Select the Motion Sensitivity of Rear Cam to be Insensitive or Normal or Sensitive.
⑧ Open Setup file
Open setup file is used for applying separately saved configuration files.
⑨ Memory Card Format : Delete everything in the microSD™ card and initialized.
⑩ Initialize settings
The Initialize settings of the PC viewer are reset to the Dash Cam default settings.
Note
Changed Dash Cam setting is stored in the microSD™ card is applied at the time of booting of
Dash Cam.
23
5. Mobile Viewer
SDDCV-V7
1) Automatic Updates
When the viewer program start, it will check whether it is the latest version or not.
If the program is not the latest version, it will display an update alert message. If you want to update, it will move to
the relevant page.
2) Home
3) Menu
4) Playback List
You may move to Menu screen
by touching the "Model Name"
button on the Home screen of
this viewer.
You may move from the menu
screen to “LIST” or “HELP”.
The recording files of the DashCam
are divided into Normal, Event,
Motion and User Recordings.
You may play back a file by selecting
it on the file list.
24
5. Mobile Viewer
SDDCV-V7
5) Video Playback
The playback menu pops up when you
touch the playback screen.
Recording file playback and pause can
be available in playback menu.
Previous and next files can be played in
playback menu.
Front and rear videos can be exchanged
in playback menu.
6) Check the User Manual
You can check the User Manual of the Dash Cam on the Mobile Viewer.
If you select the HELP on the menu screen, you may connect to the Quick Guide page , product website and license.
25
6. Notices
SDDCV-V7
1) Product Warranty
This device has been guaranteed pursuant to Fair Trade Commission.
This device is assist device for safety drive. There is no guarantee damage of breakdown, data, using this device.
There is no guarantee that video recording/saving of every accident. In case of accident by fine shock, it can be
not recorded.
The device is under warranty for 1 year, the cost under warranty is for free. (Defects that occur during normal use)
The Part Holding period of this device is 1 year since this device has stopped producing.
Get the warranty information in the product warranty, Keep product warranty.
(Warranty can be a standard of pay/not.)
Even under warranty period, the service fee occur in case of below situation.
Warranty covers
(In the case of failure of the naturally occurring performance and function under normal conditions)
Contents
Customer requests
under warranty
Request important repair within 10 days of purchase.
product exchange
Request repair for important part within 1 month of purchase.
product exchange
Request important repair within 1 month of repair.
product exchange
Can’t exchange.
occur defect
NA
full refund
warranty for free
Repairable Problem reoccurs 4 times.
It was repaired 3 times for the same defect.
Problem reoccurs 5 times.
It was repaired 4 times for different parts defect.
after warranty
service
product exchange
manufacturer loss the requested product of customer
Irrepairable Parts for repair Run out.
Irrepairable
warranty
at a cost
or exchange
product
at a cost
exchange
product
at a cost
Not Covered
Defects or damage from resulting use of products in other than it normal and customary manner.
Defects or damage from natural disaster such as fire, earthquake, storm, flood and so on.
Defects or damage from falling when user are doing installation by itself or after that.
Defects or damage from resulting disassemble a product or remodeled product by user or third party.
In case of that the life of the consumable parts has expired.
Product Warranty
Main body : 1 year (The date of purchase : check the receipt
/ Without receipt : The date of manufacture + 2 months)
microSD™ card: Guaranteed for 2 years
26
6. Notices
SDDCV-V7
2) Check points before Application for A/S
Product cannot be powered on
-Please check if power cable is connected to the product
-Cigar jack power cable is not included
-If product doesn't work after installation, please contact installation shop or manufacturer
Product cannot be started
-Please check if genuine car power cable is used
-Please check if power button is on
-Please check if power LED light is on
-Please check if microSD™ card is inserted
-Please check if microSD™ card has other data
-Please check if microSD™ card is defective
Car is discharged due to constant power connection
-Car battery can be discharged if power cable without shut-off function is used
-Product is set to shut off the power in 12.0V as default, it can be changed with configuration program
-Low volume battery of small sized car can be discharged after parking for long period time
-Car cannot be started if outdated battery is used of generator has a problem
ACC power(Red)
Ground connection(-, Black)
Battery Power(+, Yellow)
Before requesting A/S
We are not responsible for any data lost during A/S.
It is required for users to back up important data by themselves before requesting A/S.
Checkpoints before application for A/S
Check for the problem through the website online, PDF manual(download on the website), simple-manual
included package, installation shop, service center.
Most of the times the problem can be solved by going through the User Manual.
Application A/S
(in case of sending a package by delivery service, please send that by specified courier)
Check A/S center on the website (www.sandisk.co.kr/dashcam)
Send a package by safety packing. If not, the product may break.
Please write details for after A/S (Name, Contact number,problems to be fixed, requests, etc.)and enclose it
with the product and send them to us.
In the case there is a need for a paid repair, repairs will be offered after the customer is contacted to explain
the issues related to the repair.
27
6. Notices
SDDCV-V7
3) Quality Assurance & Product Warranty
Viwer program Recommended minimum specifications
- CPU : Over Pentium class(recommend over Dual-Core)
- Memory : Recommend over RAM 2GB
- Graphic : Graphic card that available over Direct-X 10
- OS : Over Windows™ 7
- Mobile : Over Android™ 4.0 (unavailable iOS)
Product Inquiries & Customer Support
Website: www.sandisk.co.kr/dashcam
SanDisk is a trademark of SanDisk Corporation, registered in the United States and other countries.
The microSD mark and logo are trademarks of SD-3C, LLC.
Android™ and Google Play™ are trademarks of Google Inc. Windows™ is a registered trademark of Microsoft
Corporation in the United States and/or other countries.
Product Warranty
Warranty period
Within 1 year of purchase
Purchased date
Product name
Address
Customer
information
Name
Tel.
Address
Seller
information
Name
Tel.
MSIP-REM-TAD-SDDCVV7
Model name : SDDCV-V7
Website : www.sandisk.co.kr
28
www.sandisk.co.kr
Seller : SanDisk Korea Ltd.
Address : 9F Asia Tower, 430 Nonhyeon-ro, Gangnam-gu Seoul 135-719, Korea