1
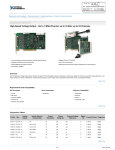
BF-830X
User’s Manual V2.0
2008.06.14
Table of Contents
1
About BF-830X
2
Features
2.1
Characteristics
2.2
Support Functions
3
Operation window
4
User’s Menu
4.1
For Card+Password verify user
4.2
For Card verify user
5
Administrator Manu
5.1
User
5.1.1 Add User
5.1.1.1 Single:Register a new user
5.1.1.2 Continuous:Register new user continuously
5.1.2 Delete User:Delete a registered user
5.1.3 Activate User:To enable authority of user for using BF-830X
5.1.4 Deactivate Use:To disable authority of user for using BF-830X
5.2
Settings
5.2.1 Date & Time:Set Time、Date and Week
5.2.2 Administrator
5.2.2.1 Login P/W:Change manager’s password
5.2.2.2 Set Manager
5.2.2.2.1
Add Manager:Create one user to be manager
5.2.2.2.2
Del Manager:Delete one manager
5.2.3 IP Config:Set IP Data of BF-830X
5.3
Reset
5.3.1 Reset Users:Delete all registered users
5.3.2 Reset Logs:Delete all logs
5.3.3 IP Config:Reset IP to factory default
5.3.4 Reset Group:Delete all group、time zone and holiday setting
5.4
Misc.
5.4.1 User&Log:Display total number of registered users and total number of logs
5.4.2 BF20/485 Reader:Show the status of BF-20 and reader
5.4.3 SET TM Card
5.4.3.1 Init TM Card:Initial TM card to EM format
5.4.3.2 Write TM Card:Write ID number to TM card
6
Specifications
7
Appendix
7.1
Notes
7.2
External connector specifications
1
1
About BF-830X
BF-830X is developed to manage entrance security, work place time and attendance, over-work time
verification and other situation requiring the presence of the authorized personnel.
BF-830X within 1 Card Reader, 128 X 64 pixel LCD screen, 10 push buttons, 6 function keys, 1 door bell
button and 1 buzzer. These equipments make BF-830X user-friendly.
Through the build-in web , you can manage the branch office easily. Beside that, the user can check the in/out
log by using IE.
2
Features
2.1
Characteristics
z
Entrance security, time and attendance, over-time management and other applications
BF-830X system allows for entrance security, work place time and attendance, over-time work. Also,
situations that require the presence of the authorized persons at a secured point can take advantage of our
BF-830X system.
z
Special function keys may be configured to time and attendance and entrance access management
4 programmable function keys can be used to manage time and attendance. One BF-830X can be adapted to
manage many different kinds of work involving site security control and time and attendance.
z
Use of stand-alone modules or working as reader of BF-660X/670X/870X
BF-830X entrance control system may be used as stand-alone units to control entrance traffic. Also, direct
connection to a PC is possible via RS-232/RS-485 or TCP/IP protocol or working as reader of
BF-660X/670X/870X by communication with BF-660X/670X/870X via TCP/IP. Because BF-830X content
RTC and log management capabilities (up to 32,768 records), entrance security and other event management
are possible without an ACU.
z
Convenient
With build-in http server administrator can download data、modify setting、manager users and maintain
system via Internet Explorer.
2.2
Support functions
2.2.1 User management
¾ Register a user, provides 2 type of register (1.Password 2.Card)
¾ Provide 32 designations and 32 departments
¾ User can set the employee limit period separately by truly situation
¾ User can set the attendance and time by the group
¾ Activate or deactivate user’s authority
¾ View all registered ID list
¾ Delete a user or all users
2.2.2 System management
¾ You can use http server inside to revise the data and manage employee on Internet Explorer
¾ The system sets 2 level accounts and passwords to prevent the setting from change purposely
¾ You can set the terminal number, title, description, maintenance time, card ID display format and
working stand alone or as reader of BF-660X/670X/870X
¾ Set the communicate status on line. For example, IP ADDRESS, Gateway, DNS, Port Number,
Host Name.
¾ Set the clock on line. You can revise it by your hand or connect to the time server to revise
everyday
¾ Provide 40 function key define and can used for in/out trigger setup
¾ Upgrade firmware on line
¾ You can backup or restore the user data directly
¾ You can import all user data directly on line
2
2.2.3 Door mode
¾ Provide 64 time set, 64 time zone, 32 group, 50 holiday
¾ You can connect door lock controller to set lock release time zone、exit button work time zone
and enable anti-pass back function(BF-20 and wiegand reader are required)
¾ Monitor entrance status on line
¾ You can turn on or close door security by real situation
2.2.4 Log
¾
¾
¾
¾
¾
Access log: each user or employee can check in or out log by through any computer
Query log by user number, terminal number, department, function key or time period
Query user first in and last out log in one day
Export the in/out log (TXT and XLS format)
Download the log by using the software
2.2.5 Authentication
¾ Authentication at the terminal by Card/Card+Password
¾ Collocate with group, time zone to set card+password identification time zone
2.2.6 Real time event
¾ Display user I.D. Name on LCD at authentication time.
2.2.7 Auxiliary function
¾
Exit button
¾
Relay out for lock driver
3
3
Operation window
Operation window
SAT Jun-14-08
01:52 GMT
+08
Press F1
twice
Present Manager
XXXXXX
Manager login
Enter ID
+ #
SAT Jun-14-08
01:52 GMT
+08
User Denied
Input unregistered ID
Place Card
Directly
Chang
Eric
11647520
01:52
Verify success
User password:
XXXXXXXXXX
User Denied
Asking password
verify
User with password
identification
☞ Function key description:
:Enter Administrator Mode
F1
Function key for Time & Attendance
:Delete (Backspace)
Function key for Time & Attendance
F4 :Function key for Time & Attendance
# :Confirm
* :Cancel
0
~
9
User password:
XXXXXXXXXX
Asking password
verify
User with password
identification
F2 :Function key for Time & Attendance
F3
Illegal card
:Number key
4
4
User’s Menu
4.1
For Card + Password verify user
SAT Jun-14-08
01:52 GMT
+08
Place card directly
Enter ID + #
SAT Jun-14-08 Unregistered ID SAT Jun-14-08
01:52 GMT
01:52 GMT
+08
+08
User Denied
XXXXXXXXXX
Illegal Card
User Denied
Legal Card
Registered ID
User password:
XXXXXXXXXX
Correct
Error
Chang
Eric
11647520
01:52
User password:
XXXXXXXXXX
Password Error
User Denied
☞ Function key description:
☞ Operation description:
Max. 950 users
Method 1:
0
~
9
F1
Enter ID
F2 :Function key for Time & Attendance
# Press #
0
~
9
:Enter Administrator Mode
Function key for Time & Attendance
F3
Enter password
6~10 digit
:Delete (Backspace)
Function key for Time & Attendance
F4 :Function key for Time & Attendance
# Press #
# :Confirm
Method 2:
Place sensor card on the coil directly
0 ~
9 Enter password
6~10 digit
* :Cancel
0
# Press #
Note:1. If you use function key please press function
key first
2. If you want to show name on LCD then you
must enter name in BF-830’s web setting
5
~
9
:Number key
4.2
For card verify user
SAT Jun-14-08
01:52 GMT
+08
Place sensor card
on the coil directly
Illegal card
Legal card
Chang
Eric
11647520
01:52
User Denied
☞ Function key description:
☞ Operation description:
Max. 950 users
Place sensor card on the coil directly
F1
Note:1. If you use function key please press function
key first
2. If you want to show name on LCD then you
must enter name in BF-830’s web setting
:Enter Administrator Mode
Function key for Time & Attendance
F2 :Function key for Time & Attendance
F3
:Delete (Backspace)
Function key for Time & Attendance
F4 :Function key for Time & Attendance
# :Confirm
* :Cancel
0
6
~
9
:Number key
5
Administrator Menu
Administrator menu allows new user registration and deletion, and system configuration. Press “F1” twice to
enter. Default password is “111111”。
SAT Jun-14-08
01:52 GMT
+08
Press F1 twice
Present Manager
XXXXXX
Correct
Error
1. User
2. Settings
3. Reset
4. Misc.
Present Manager
XXXXXX
Password Error
☞ Function key description:
☞ Operation description:
F1
Press F1 twice
F1 :Enter Administrator Mode/Page Up
0
~
F2 :Page Down
9
Enter 6 digit password
default value is 111111
F3 :Delete (Backspace)
# Press #
0
*
~
9
F4 :No use
Press 1~4 to select
# :Confirm
Press * to exit
* :Cancel
0
7
~
9
:Number key
5.1
User
5.1.1 Add User : register a new user
5.1.1.1 Single
5.1.1.1.1 Card + Password verify user
1. Add User
2. Delete User
3. Activate User
4.Deactivate use
1
1. Single
2. Continuous
*
1
Reg Already
Modify User?
YES(#)/NO(*)
Present card …
Or Input id:
xxxxxxxxxx
Registered
Unregistered
#
Reg Password ?
YES(#)/NO(*)
#
User password:
xxxxxxxxxx
Enter password + #
User password:
xxxxxxxxxx
Reg Success
☞ Function key description:
☞ Operation description:
0
~
9
Press 1
0
~
9
Press 1
9
Enter ID or Place
sensor card on the coil
0
~
F1 :Enter Administrator Mode/Page Up
F2 :Page Down
F3 :Delete (Backspace)
# Press #
F4 :No use
# Press # to register password
0
~
9
# :Confirm
Enter password
6~10 digit
* :Cancel
# Press #
0
8
~
9
:Number key
5.1.1.1.2 Card verify user
1. Add User
2. Delete User
3.Activate User
4.Deactivate use
1
1. Single
2. Continuous
*
1
Reg Already
Modify User?
YES(#)/NO(*)
Present card …
Or Input id:
Registered xxxxxxxxxx
#
Unregistered
Reg Password ?
YES(#)/NO(*)
Reg Password ?
YES(#)/NO(*)
*
*
Only Reg User ?
YES(#)/NO(*)
Reg Password ?
YES(#)/NO(*)
User Cancel
#
Only Reg User ?
YES(#)/NO(*)
Reg Success
☞ Function key description:
☞ Operation description:
0
~
9
Press 1
0
~
9
Press 1
F1 :Enter Administrator Mode/Page Up
F2 :Page Down
Place sensor card on the coil
F3 :Delete (Backspace)
* Press *to cancel password register
F4 :No use
# Press # to confirm
# :Confirm
* :Cancel
0
9
~
9
:Number key
5.1.1.2 Continuous
1. Add User
2. Delete User
3.Activate User
4.Deactivate use
1
1. Single
2. Continuous
2
Present card …
Or Input id:
Reg Already
Present card …
Or Input id:
Registered
Unregistered
Present card …
Or Input id:
Xxxxxxxxxx
Reg Success
☞ Function key description:
☞ Operation description:
0
~
9
Press 1
0
~
9
Press 2
F1 :Enter Administrator Mode/Page Up
F2 :Page Down
Place sensor card on the coil
F3 :Delete (Backspace)
F4 :No use
# :Confirm
* :Cancel
0
10
~
9
:Number key
5.1.2 Delete User : Del one registered user
1. Add User
2. Delete User
3.Activate User
4.Deactivate use
2
Present card …
Or Input id:
xxxxxxxxxx
Unregistered
Registered
Place card …
Or Input id:
Place card …
Or Input id:
xxxxxxxxxx
Del Success
UnReged User
☞ Function key description:
☞ Operation description:
0
~
9
Press 2
F1 :Enter Administrator Mode/Page Up
0
~
9
Enter ID or Place
sensor card on the coil
F2 :Page Down
# Press #
F3 :Delete (Backspace)
F4 :No use
# :Confirm
* :Cancel
0
11
~
9
:Number key
5.1.3 Activate User : To enable authority of user for using BF-830X
1. Add User
2. Delete User
3.Activate User
4.Deactivate use
3
Present card …
Or Input id:
xxxxxxxxxx
Unregistered
Registered
Place card …
Or Input id:
status:
Active
UnReged User
☞ Function key description:
☞ Operation description:
0
~
9
Press 3
F1 :Enter Administrator Mode/Page Up
0
~
9
Enter ID or Place
sensor card on the coil
F2 :Page Down
# Press #
F3 :Delete (Backspace)
F4 :No use
# :Confirm
* :Cancel
0
12
~
9
:Number key
5.1.4 Deactivate Use : To disenable authority of user for using BF-830X
1. Add User
2. Delete User
3.Activate User
4.Deactivate use
4
Present card …
Or Input id:
xxxxxxxxxx
Unregistered
Registered
Place card …
Or Input id:
status:Deactive
UnReged User
☞ Function key description:
☞ Operation description:
0
~
9
Press 4
F1 :Enter Administrator Mode/Page Up
0
~
9
Enter ID or Place
sensor card on the coil
F2 :Page Down
# Press #
F3 :Delete (Backspace)
F4 :No use
# :Confirm
* :Cancel
0
13
~
9
:Number key
5.2
Settings
5.2.1 Date & Time: Set time、date and week of BF-830X
1. Date & Time
2. Administrator
3. IP Config
☞ Operation description:
1
*
Input Time
HHMMSS
0
~
9
Press 1
0
~
9
Enter time
HHMMSS
9
Enter date
YYMMDD
9
Enter week 1~7
Means MON ~SUN
#
0
Enter
Time +
#
#
Input Date
YYMMDD
*
0
#
Enter
Date +
☞ Function key description:
:Enter Administrator Mode
F1
Page Up
Press #
~
F2 :Page Down
F3 :Delete (Backspace)
F4 :No use
Press #
~
# :Confirm
* :Cancel
Press #
~
0
#
:Number key
9
Input Day
* X
5.2.2 Administrator
5.2.2.1 Login P/W:Change manager’s password
1. Date & Time
2. Administrator
3. IP Config
☞ Operation description:
2
* 1. Login P/W
0
~
9
Press 2
F1
:Enter Administrator Mode
Page Up
0
~
9
Enter 6 digits
password
F2
:Page Down
F3
:Delete(Backspace)
F4
:No use
#
:Confirm
*
:Cancel
#
2. Set Manager
0
1
*
#
Input New P/W
XXXXXX
☞ Function key description:
Press #
~
9
Press #
Enter 6 digits
password
0
*
Input P/W Again
XXXXXX
Match
Input P/W Again
XXXXXX
P/W Set Success
Mismatch
Input P/W Again
XXXXXX
Input P/W Error
14
~
9
:Number key
5.2.2.2 Set Manager
5.2.2.2.1 Add Manager:Create one Manager (Max 5)
☞ Operation description:
1. Date & Time
2. Administrator
3. IP Config
2
0
~
9
Press 2
0
~
9
Press 2
0
~
9
Press 1
0
~
9
Enter ID or
place card
* 1. Login P/W
2. Set Manager
#
2
1. Add Manager
* 2. Del Manager
Present card …
Or Input id:
xxxxxxxxxx
User Full
1
5 Managers
were registered
* Present card …
Or Input id:
Registered
Manager
I Present card …
Or Input id:
xxxxxxxxxx
Reg Already
Registered ID
I Present card …
Or Input id:
xxxxxxxxxx
Reg Success
Press # if enter ID by keypad
Note:Password for login
management will be disabled after
assigning manager
☞ Function key description:
F1
:Enter Administrator Mode
Page Up
F2
:Page Down
F3
:Delete(Backspace)
F4
:No use
#
:Confirm
*
:Cancel
Unregistered ID
I Present card …
Or Input id:
xxxxxxxxxx
UnReged User
0
~
9
:Number key
5.2.2.2.2 Del Manager:Delete one Manager
☞ Operation description:
0
~
9
Press 2
0
~
9
Press 2
2
0
~
9
Press 2
* 1. Login P/W
0
~
9
Enter ID or
place card
1. Date & Time
2. Administrator
3. IP Config
2. Set Manager
#
Note:If all managers are deleted
then user must use login password
to enter management Menu
2
1. Add Manager
* 2. Del Manager
☞ Function key description:
2
* Present card …
Or Input id:
Registered
Manager
I Present card …
Or Input id:
xxxxxxxxxx
Del Success
Press # if enter ID by keypad
Unregistered
Manager
I Present card …
Or Input id:
xxxxxxxxxx
UnReged User
F1
:Enter Administrator Mode
Page Up
F2
:Page Down
F3
:Delete(Backspace)
F4
:No use
#
:Confirm
*
:Cancel
0
15
~
9
:Number key
5.2.3 IP Config: Set IP data of BF-830X
☞ Operation description:
1. Date & Time
2. Password
3. IP Config
4
IP: 192168000012
☞ Function key description:
0
~
9
Press 3
F1
:Enter Administrator Mode
Page Up
0
~
9
Enter IP、Subnet mask、
Gateway
F2
:Page Down
F3
:Delete(Backspace)
F4
:No use
#
:Confirm
*
:Cancel
#
Press #
* SM: 255255255000
GW: 192168000001
IP:
SAT Jun-14-08
01:52 GMT
+08
5.3
Note:
The format of IP、subnet mask and gateway are as follow
If you want to set IP as 192.168.0.12 then enter
192168000012
If you want to set subnet mask as 255.255.255.0 then
enter 255255255000
If you want to set gateway as 192.168.0.1 then enter
192168000001
~
0
9
:Number key
Reset
5.3.1 Reset Users:Delete all registered users
1. Reset Users
2. Reset Logs
3.IP Config
4.Reset Group
1
☞ Operation description:
0
#
~
9
Press #
Del All user
Press 1
☞ Function key description:
:Enter Administrator Mode
F1
Page Up
F2 :Page Down
F3 :Delete (Backspace)
* Are You Sure ?
YES(#)/NO(*)
F4 :No use
#
# :Confirm
Del All user
Are You Sure ?
YES(#)/NO(*)
Deleting …
* :Cancel
0
Del All user
Are You Sure ?
YES(#)/NO(*)
Del Success
16
~
9
:Number key
5.3.2 Reset Logs:Delete all logs
1. Reset Users
2. Reset Logs
☞ Operation description:
3.IP Config
4.Reset Group
2
0
#
~
Press 2
9
☞ Function key description:
:Enter Administrator Mode
F1
Page Up
Press #
F2 :Page Down
* Del All LOG
F3 :Delete (Backspace)
Are You Sure ?
YES(#)/NO(*)
F4 :No use
#
# :Confirm
Del All LOG
Are You Sure ?
YES(#)/NO(*)
Deleting …
* :Cancel
~
0
9
:Number key
Del All LOG
Are You Sure ?
YES(#)/NO(*)
Del Success
5.3.3 IP Config:Reset IP to factory default
1. Reset Users
2. Reset Logs
3.IP Config
4.Reset Group
3
☞ Operation description:
0
#
~
9
Press 3
Press #
☞ Function key description:
:Enter Administrator Mode
F1
Page Up
F2 :Page Down
Reset IP Config
F3 :Delete (Backspace)
* Are You Sure ?
YES(#)/NO(*)
F4 :No use
#
# :Confirm
Please Wait…
* :Cancel
0
SAT Jun-14-08
01:52 GMT
+08
17
~
9
:Number key
5.3.4 Reset Group:Delete Group、Time Zone and Holiday setting
☞ Function key description:
:Enter Administrator Mode
Press 4
F1
Page Up
☞ Operation description:
1. Reset Users
2. Reset Logs
0
3.IP Config
4.Reset Group
#
4
~
9
F2 :Page Down
Press #
F3 :Delete (Backspace)
Del GP/TZ/HD
* Are You Sure ?
YES(#)/NO(*)
F4 :No use
#
# :Confirm
Del GP/TZ/HD
Are You Sure ?
YES(#)/NO(*)
Deleting…
* :Cancel
~
0
9
:Number key
Del GP/TZ/HD
Are You Sure ?
YES(#)/NO(*)
Del Success
5.4
Misc.
5.4.1 User&Log:Display total number of registered users and total number of logs
1. User&Log
2.BF20/485Read
3.Set TM Card
☞ Operation description:
0
~
Press 1
9
☞ Function key description:
F1 :Enter Administrator Mode
Page Up
F2 :Page Down
1
F3 :Delete (Backspace)
User:00000
Log:00000
F4 :No use
# :Confirm
* :Cancel
0
18
~
9
:Number key
5.4.2 BF20/485 Reader:Display BF-20 and Reader that connected to BF-830X
1. User&Log
2.BF20/485Read
3.Set TM Card
☞ Operation description:
0
~
9
Press 2
☞ Function key description:
:Enter Administrator Mode
F1
Page Up
F2 :Page Down
2
F3 :Delete (Backspace)
Entry:-xxxxxxxx
* Exit: -xxxxxxxxx
BF20:xxxxxxxxx
F4 :No use
# :Confirm
* :Cancel
~
0
:Number key
9
5.4.3 Set TM Card
5.4.3.1 Init TM Card:Initial TM card to EM format
☞ Operation description:
1. User&Log
2.BF20/485Read
3.Set TM Card
3
0
~
9
Press 3
0
~
9
Press 1
#
1. Init TM Card
2.Write TM Card
☞ Function key description:
:Enter Administrator Mode
F1
Page Up
F2 :Page Down
Press #
Place sensor card on the coil
F3 :Delete (Backspace)
F4 :No use
1
*
# :Confirm
Present Card
Push # Init Card
* :Cancel
0
#
Init Success
* Init Other card?
#
YES(#)/NO(*)
19
~
9
:Number key
5.4.3.2 Write TM Card:Write ID number to TM card
☞ Operation description:
1. User&Log
2.BF20/485Read
3.Set TM Card
3
0
~
9
Press 3
0
~
9
Press 2
Enter ID+ #
ID must less than
4294967295
Place sensor card on the coil
0
1. Init Card
2.Write TM Card
~
☞ Function key description:
:Enter Administrator Mode
F1
Page Up
F2 :Page Down
9
2
F3 :Delete (Backspace)
F4 :No use
# :Confirm
Input Card ID:
* :Cancel
*
0
Enter ID
+ #
*
Input Card ID:
XXXXXXXX
Place TM Card…
Write Success
* Write Other card?
#
YES(#)/NO(*)
20
~
9
:Number key
6
Specifications
6.1
Module Features
¾ CPU board
¾ LCD and Keypad board
6.2
Power Supply
6.2.1 Voltage
¾ +9V to +30V DC
6.2.2 Current
¾ Average: 600mA, 12V
¾ Maximum power consumption: 800mA, 12V
6.3
Environment
6.3.1 Temperature and humidity
¾ Operating temperature: 0℃ to 55℃
¾ Storage temperature: -20℃ to 70℃
¾ Operating humidity: 0% to 90%
¾ Storage humidity: 0% to 905%
6.3.2 Immunity to electro static discharge
¾ Serial port 15kv ESD。
¾ Ethernet port 1.5kv。
6.4
Communication
¾ 1 RJ-45 port(10/100M) for management
¾ 1 wiegand output
¾ 1 RS-485 port meet RS485 specifications
6.5
Drivers
¾ Door Relay * 1
¾ Door bell * 1
¾ Exit button contact * 1
¾ Emergency contact * 1 (For fire alarm)
¾ Case open alarm * 1
6.6
Capacity
¾ 950 persons with 1 card/1 password per person.
6.7
Log entry memory
¾ 32768 log entries total.
6.8
Size(yet to be set)
¾ CPU board: 109 mm (H) X 82 mm(W)
¾ LCD and Keypad board: 106 mm (H) X 82 mm (W)
¾ BF-830X: 125 mm(H) X 145 mm(W) X 33 mm(D)
6.9
Weight
¾ 300g
6.10
Authentication time
¾ Average : shorter than 1 second.
6.11
Input
¾ 10 number keys + 6 function keys + 1 door bell key
6.12
Display
¾ 1 Buzzer
¾ 1 LCD: 128 X 64 pixels
¾ 4 LED
21
7
Appendix
7.1
External connector specifications
Power
VIN-
contact
VIN+ DC 12V positive pole
RS485
contact
Exit
button
Emergency
button
485485+
IN0
DC 12V negative pole
For BF-20 and using BF-20’s
wiegand in to connect wiegand
reader to substitute exit button
for recording exit log
Short with VIN+ to active door
relay
Short with VIN+ to active door
IN1
relay and keep on opening until
reboot
GND
GND
Wiegand
OD0
Output Card ID for other
output
OD1
equipment
NO
Door relay NO contact
Door
Relay
COM Door relay COM contact
NC
Door relay NC contact
BF-830X
Open when
power on
Open when
power off
1.
Positive pole of power supply connects to positive pole of EM lock.
2.
Negative pole of power supply connects to COM of door relay.
3.
NO of door relay connects to negative pole of EM lock.
1.
Positive pole of power supply connects to positive pole of EM lock.
2.
Negative pole of power supply connects to COM of door relay.
3.
NC of door relay connects to negative pole of EM lock.1.
22