Download F+D GmbH - F+D Feinwerk
Transcript
User Manual
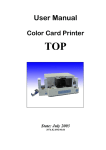
Card printer
Plus
User manual PLUS
Contents
1.
2.
Introduction ....................................................................................................... 4
Starting.............................................................................................................. 5
2.1
2.2
2.3
2.4
2.5
2.6
2.7
2.8
2.9
3.
Preparation of location .......................................................................................................5
Unpacking..........................................................................................................................5
Connection of mains cable .................................................................................................5
Print process......................................................................................................................6
Insert card and load ribbon.................................................................................................6
Printout of test data record .................................................................................................6
Parallel interface ................................................................................................................7
Serial interface...................................................................................................................7
Transportation of printer.....................................................................................................7
Operating instructions ....................................................................................... 8
3.1 Control panel .....................................................................................................................8
3.1.1 LCD screen.................................................................................................................8
3.1.2 Power- and error-LED .................................................................................................9
3.1.3 Operation keys............................................................................................................9
3.2 Main menu mode ...............................................................................................................10
3.3 Submenu mode .................................................................................................................10
3.3.1 Menu and parameter overview ....................................................................................12
3.3.2 PRINTER INFOS ........................................................................................................13
3.3.3 CARD DATA...............................................................................................................14
3.3.4 PRINT PARAMETERS................................................................................................14
3.3.5 PRINTER SPECS. ......................................................................................................15
3.3.6 CHARACTER / LCD....................................................................................................17
3.4 Adjustment of card thickness..............................................................................................18
4.
5.
6.
Maintenance ..................................................................................................... 19
4.1
4.2
4.3
4.4
4.5
4.6
4.7
Change ribbon ...................................................................................................................19
Clean thermal print head ....................................................................................................19
Clean transportation rolls ...................................................................................................19
Replace thermal print head ................................................................................................20
Adjust thermal print head ...................................................................................................21
Angular adjustment thermal print head ...............................................................................22
Update of printer software ..................................................................................................22
Hardware modifications..................................................................................... 23
5.1
5.2
5.3
5.4
5.5
5.6
Thermal direct printing .......................................................................................................23
Thermal transfer printing ....................................................................................................23
Automatic card feeding ......................................................................................................23
Manual card feeding ..........................................................................................................23
Supporting table (for card input) .........................................................................................23
RFID unit ...........................................................................................................................24
Printout quality and errors ................................................................................. 25
6.1 Improvement of printout quality ..........................................................................................25
6.2 Error correction ..................................................................................................................26
6.2.1 Error level 1 ................................................................................................................27
6.2.2 Error level 2 ................................................................................................................27
6.2.3 Error level 3 ................................................................................................................27
7.
8.
9.
10.
Accessories, options ......................................................................................... 28
Technical data................................................................................................... 29
Declaration of conformity .................................................................................. 30
Index ................................................................................................................. 31
Document: 3090.02.098.90.06
Revision: Mai 2006
F+D Feinwerk- und Drucktechnik GmbH
Kirchenstraße 38, 69239 Neckarsteinach, Germany
Phone: +49 (0) 6229 7000, fax: +49 (0) 6229 70067
E-Mail: [email protected], internet: http://www.fuddruck.de
3
4
User manual PLUS
Introduction
1. Introduction
The Plus card printer is a thermal transfer printer for printing
on credit card size cardboard- as well as platic-cards.
The thermal transfer technology and the true edge thermal
print head with a 12 dots/mm resolution guarantee a high
printout quality.
Due to an extensive command range, the Plus offers
considerable possibilities to create a layout. Text as well as
barcodes and logos can be printed at will on a card in various
forms and directions.
Version with manual card feeding:
It is very easy to print a card. After the transfer of the data record from the PC, inserting a card into the
printer's front slot initiates the printing of the card.
The Plus recognizes automatically that the card is present, starts the input rollers, prints the card which is
then output at the printer's front slot.
Version with automatic card feeding:
With the internal automatic card feeder the card is automatically input from the card feeder.
Version with automatic card feeder and half-automatic card output:
Allows to use manual card feeding and automatic card feeding.
The LCD screen with two lines of 16 characters and the 6 operation keys guarantee an easy manual
operating of the Plus.
Data records as well as logos and character fonts can be stored into the printer. The access to the stored
data is achieved by menu as well as from the external PC.
Furthermore a Plus version with an internal RFID unit is available.
Recommandation for a quick work in
Users who are already familiar with F+D printers will certainly quickly obtain the required results information
if they use the commands of the software manual and the print parameters which can be defined by menu.
Users which are using the Plus for the first time should read the whole manual before starting to print cards.
Those users, which do not have the time, should proceed as follows:
1. Read about printer operating (see user manual / operating instructions, chapter 3, page 8).
2. Read about job control language to define data records (see software manual / ESC sequences).
3. Definition of a data record using the example mentioned in the software manual (see software manual /
example for a data record).
Attention!
Always observe the safety notice in chapter 2.1, page 5.
F+D Feinwerk- und Drucktechnik GmbH
Kirchenstraße 38, 69239 Neckarsteinach, Germany
Phone: +49 (0) 6229 7000, fax: +49 (0) 6229 70067
E-Mail: [email protected], internet: http://www.fuddruck.de
User manual PLUS
5
Starting
2. Starting
2.1 Preparation of location
The machine must be placed on an even and stable working surface. Ensure that there is enough space to
work. Then:
• connect the cables, and
• operate the printer.
The printer has to be used according to the operational conditions for which it is designed (see technical
data, chapter 8, page 29).
Safety notice
•
•
•
•
•
•
•
The housing nor the interior of the printer should not come into contact with liquids.
Before operating the printer, please ensure that the mains supply is operated at 230V~, 50 Hz or 115V~,
60 Hz.
To avoid the risk of an electric shock, do not lift up the cover. The interior of the Plus does not contain
any parts that can be serviced by the user.
Maintenance work shall only be carried out by qualified service personnel.
If the printer is not used for a while, unplug the mains plug from socket. Always pull at the plug, never
pull at the cable.
Stop immediately any operation if liquids or parts enter into the interior of the Plus. Unplug the mains
plug and inform the qualified service personnel.
Before transporting the printer, all cards and ribbons must be removed.
2.2 Unpacking
After unpacking the printer, please check content of the box.
• Plus printer
• Mains cable (DIN standard)
• Centronics cable
• User manual and software manual
• Printer driver and installation notice (disc)
• Offset screwdriver
• Adjusting plate for thermal print head adjustment
• 10 cards with a thickness of 0,76 mm
• Sample roll 60 mm x 10 m
• Cardboard core
2.3 Connection of mains cable
The connection for mains cable and the mains switch are located at the rear of the printer.
• Switch off the Plus ("0" must be pressed on the mains switch at the rear of the machine).
• Connect mains cable (check that connection is tight). Only use an earthed socket.
• Switch on the Plus („1“ must be pressed on mains switch at the rear of the machine).
F+D Feinwerk- und Drucktechnik GmbH
Kirchenstraße 38, 69239 Neckarsteinach, Germany
Phone: +49 (0) 6229 7000, fax: +49 (0) 6229 70067
E-Mail: [email protected], internet: http://www.fuddruck.de
6
User manual PLUS
Starting
2.4 Print process
To obtain a good printing quality, the cards should be clean and have a flat surface. It is very easy to print a
card. After the transfer of the data record from the PC, the card being placed into the printer's front slot
initiates the printing.
The Plus recognizes automatically the card, starts the rollers, prints the card which is then transported to the
given output position (either at the rear of the printer or at the printer's front slot. This can be set by menu).
2.5 Insert card and load ribbon
1. Lift up the cover.
2. Load the enclosed delivered transfer ribbon (see illustration above).
3. On versions with automatic card feeding:
Insert the plastic cards to be printed in the card feeder which is placed on the left at the rear of the
printer.
Place the card rest (grey plastic part) on top of the cards in the card feeder. Fix the output stacker plate
on the two fixing points on the printer's front.
Check that the card thickness is correctly adjusted (see chapter 3.4 page 18) (default: card thickness of
0.76 mm).
4. Close the cover.
Notice: The quality of the printed cards is essentially depending on the cards used and their handling. To
obtain a best colour printing, the ribbon and the cards should be purchased from F+D Feinwerk- und
Drucktechnik GmbH. Never touch the surface of the card with the fingers.
2.6 Printout of test data record
1.
2.
3.
4.
5.
Switch on the printer.
Select main menu PRINTER INFOS / submenu Cards.
Push on the l key to choose the data record "company adress".
Print the data record onto the card by pushing on the save key.
The data record is printed and at the same time a black rectangle
appears on the screen.
6. Push again briefly on the print key to print a new data record.
F+D Feinwerk- und Drucktechnik GmbH
Kirchenstraße 38, 69239 Neckarsteinach, Germany
Phone: +49 (0) 6229 7000, fax: +49 (0) 6229 70067
E-Mail: [email protected], internet: http://www.fuddruck.de
Plus
ok
-> g
#0000
User manual PLUS
Starting
2.7 Parallel interface
To connect the parallel cable, align the wider side of the plug to the wider side of the printer connection.
Afterwards, fix the plug with the two existing screws in order to obtain a stable electrical contact.
Then, connect the cable to the PC (parallel interface).
Notice: Ensure the printer and the PC are switched off before connecting the cable.
2.8 Serial interface
To connect the serial cable, align the wider side of the plug to the wider side of the printer connection.
Afterwards, fix the plug with the two existing screws in order to obtain a stable electrical contact.
Then, connect the cable to the computer (serial interface).
The serial interface is also used to communicate with the PC, but it is slower than the parallel interface.
Using the keys you can define:
Baud rate:
Data bits:
Stop bit:
Parity:
Protocol:
4800, 9600, 19200, 38400
7, 8
1, 2
without, with (even, odd)
without XON / XOFF, with XON / XOFF
Defaults are printed in bold.
Notice: Ensure the printer and the PC are switched off before connecting the cable.
2.9 Transportation of printer
1. Switch off the printer.
2. Unplug carefully the mains cable and the interface cable (serial- and/or centronics-cable).
3. It is recommended that the original packing boxes are used for transportation.
Notice: Before transporting the printer, all cards and ribbon rolls must absolutely be removed.
F+D Feinwerk- und Drucktechnik GmbH
Kirchenstraße 38, 69239 Neckarsteinach, Germany
Phone: +49 (0) 6229 7000, fax: +49 (0) 6229 70067
E-Mail: [email protected], internet: http://www.fuddruck.de
7
8
User manual PLUS
Operating instructions
3. Operating instructions
3.1 Control panel
The control panel consists of:
•
•
•
LCD screen (with 2x16 characters)
1 two-coloured LED (power and error)
6 operation keys:
Print key
Menu key
Status / ▼ key
Feet / 4 key
Clear / l key
Eject / Save key
3.1.1 LCD screen
The information displayed on the screen depends on the operating mode of the printer. There are 4 different
modes.
Standard display:
Plus
ok
->
#0000
This display shows the status of the printer during the printing process.
It should always be visible after the printer is switched on (see opposite
illustration).
Meaning of status symbols:
->
|
XON status
XOFF status
No data record edited
Data record edited
Number of cards still to be printed by current data record
n
#
Menu display:
Will be shown when the menu key is pushed. Within the menu structure, the upper line shows the main
menu and the lower line shows the submenu.
Error display:
Always schown in case of errors.
Status display:
Will be shown when the status key is pushed. By pushing on the key again, the second part of the status
display is shown. Then by pushing on it again, the standard display is shown, or in case of an error the error
listing (see software manual / status message).
TFK +
S02/V1.00
=00#0000*0131072
1st status part
DEVICE #
31-05-2002
1008
ECP
2nd status part
F+D Feinwerk- und Drucktechnik GmbH
Kirchenstraße 38, 69239 Neckarsteinach, Germany
Phone: +49 (0) 6229 7000, fax: +49 (0) 6229 70067
E-Mail: [email protected], internet: http://www.fuddruck.de
User manual PLUS
9
Operating instructions
3.1.2 Power- and error-LED
Power LED:
The LED always lights up in green when the printer is switched on and no error is anounced.
Error LED:
The LED always lights up or blinks in red when an error is anounced.
3.1.3 Operation keys
Print key
One card is printed with the current data record.
Menu key
The menus are shown. The user can check the printer configuration and change them. Quit the menu by
pushing on the same key again.
While printing, it is possible to stop the print job by holding in the menu key and to restart it where it was
stopped by pushing on the key again.
Status key
The status is shown. If there is an error, by pushing on this key 2 times, the 2nd status part is shown with up
to 8 error codes. Quit the menu by pushing on the key again.
On versions with automatic card feeder and half-automatic card output:
For this version a switch function is activated. Holding the status key for 2 seconds, it allows to switch
quickly from the automatic card feeding modus to the manual card feeding modus.
Plus
ok
Insert
card
->
#0000
Automatic card feeding from stacker
->
#0000
Manual card feeding inserting a card into the printer's front
slot
Feed key
Starts the card transportation from the card feeder to the print position without printing.
Clear key
Functions only when an error is displayed on the screen. By pushing on the clear key, the displayed warning
message can be deleted. Then, if there is more than one warning at the same time, the next warning
message with the highest priority will be displayed. The clear key can be pressed until all warning messages
were displayed and deleted.
ERROR- and HARDWARE-messages cannot be deleted.
Eject key
Starts the card output without printing.
F+D Feinwerk- und Drucktechnik GmbH
Kirchenstraße 38, 69239 Neckarsteinach, Germany
Phone: +49 (0) 6229 7000, fax: +49 (0) 6229 70067
E-Mail: [email protected], internet: http://www.fuddruck.de
10
User manual PLUS
Operating instructions
3.2 Main menu mode
Push on the menu key to enter into the main menu. By a short push,
the first main menu is shown. By a longer push, the previous main
menu is displayed.
When entering into the main menu, the operation keys have a new
function shown above the keys.
Main menus are always displayed in capital letters in the first line of the
LCD screen. Use the ▼ key to scroll in the main menu.
PRINTER INFOS
CARD DATA
PRINT PARAMETERS
In this example, the main menu PRINTER SPECS. is selected.
PRINTER SPECS.
By pushing on the menu key, the main menu mode can be quit.
PRINTER SPECS.
CHARACTER / LCD
3.3 Submenu mode
In general
Enter into the submenu of the selected main menu with the 4key. Continue to push on the 4key to scroll
in and choose the submenus of the selected main menu.
Submenus are shown in capital and small letter in the 2nd line of the LCD screen as long as you scroll in the
submenu.
By pushing on the l key, enter into the options of the selected submenu. Continue to push on the l key to
see the different options of the selected submenu. Current active settings are marked with a hook (√) and
most of the time also displayed as the first option.
In this example, the main menu CARD DATA and the submenu 'Copies' have been selected.
CARD DATA
Copies
By pushing on the 4key and then on the menu key, the sub- and main-menu mode can be quit.
Save key
If an option of the submenu is selected, it can be taken over with the save key and stored. A confirmation will
be displayed for about 2 seconds on the screen:
After the storing, the menu option will automatically be quit.This value is
------------------------only stored temporaryly and is deleted after the new start.
------------------------By pushing on the key longer, the value can be stored constantly. Then,
-the value is again active after the new start.
-------Permanent---By pushing on the l key, it is possible to check the stored value again.
By pushing on the 4key and then on the menu key, the sub- and mainmenu mode can be quit.
F+D Feinwerk- und Drucktechnik GmbH
Kirchenstraße 38, 69239 Neckarsteinach, Germany
Phone: +49 (0) 6229 7000, fax: +49 (0) 6229 70067
E-Mail: [email protected], internet: http://www.fuddruck.de
--------------------------
11
User manual PLUS
Operating instructions
Input of numerical values
Calling options of a submenu can also mean that further choices have to be made. Depending on the
selected submenu option the input of a numerical value could also be required. To input data, the Plus has a
simple editor.
E. g.: main menu: CARD DATA, submenu: Copies
Change the number of cards from 10 to 60!
Push on l key to start the editor
Copies
0010
Push on l key again for the first digit
Copies
<0...>
Push on l key again for the next digit
Copies
<00..>
Push on l key again for the next digit
Copies
<000.>
Push on 4key to increase current digit (6x)
Copies
<006.>
Push on l key for the next digit
Copies
<0060>
Push on l key to quit editor
Copies
0060
If the number is incorrect, the editor can be called again by pushing on the l key once again. The option is
quit either by pushing on the 4key or save key.
F+D Feinwerk- und Drucktechnik GmbH
Kirchenstraße 38, 69239 Neckarsteinach, Germany
Phone: +49 (0) 6229 7000, fax: +49 (0) 6229 70067
E-Mail: [email protected], internet: http://www.fuddruck.de
3.3.1 Menu and parameter overview
Plus ok
Push MENU
PRINTER INFOS
Print-status
Cards
l firm address
CARD DATA
Copies
l 0000
PRINT PARAMETERS
heating time tph
l +30% to –30%
PRINTER SPECS.
Printer mode
l without print key
l with print key
l ANSI
l ASCII
l multilingual
l COURI06F COURI14F
l ARIAL08FARIAL18F
Logos
l FDLogo
Printing speed
l 75 mm/s
l 100 mm/s
Transfer
l not present
l present
Country
l USA
l England
l Germany
l Denmark
l France
l Sweden
l Italy
l Spain
l Norway
l Netherlands
Insert data
Byteam.:XXXXH
Warnings
l acknowledge
l display only
l ignore
l #70 ignore
Operation key and character explanation
▼ key: scrolling in the main menu
l 0: 0672 x 1024
l 1: 0672 x 1024
l 2: 0672 x 1024
l 3: 0672 x 1024
l A: 0672 x 1024
l yes
l no
Schedule
l EAN 8/13
l C_2o5_I
l C_39
l C_128
l EAN128
l PDF417
Fonts
Select card
PNP
CHARACTER / LCD
Barcodes
4key:
scrolling in the sub menu
l key: select an option
l
default value
Queue process
l no
l yes
Transponder
l not present
l present
USB Mode
l single
l multi
Update FlashDa
l Send data
aut Cards
l yes
l no
auto. Status
l no
l yes
Scrolling
l no
l yes
RS232
l 4800 Baud
l 9600 Baud
l 19200 Baud
l 38400 Baud
key lock
l <PRINT>
l <STATUS>
l <MENU>
Language
l German
l English
l French
Indexoffset
1190 dots 99 mm
User manual PLUS
13
Operating instructions
3.3.2 PRINTER INFOS
Print status
The status printout includes all parameters which can be defined. Main menu PRINTER INFOS / submenu
print status. Push on the l key to print it.
Cards:
All in the printer stored data records are shown. Push on the save key to print the chosen data record.
Print stored data record
1. Select the menu PRINTER INFOS / submenu Cards.
Plus
2. Push on the l key to select the required data record.
3. Push on the save key to print the selected dara record.
4. The data record is printed and a black rectangle is displayed on the screen
5. A new short push on the print key initiates the printout of a new data record.
ok
Barcodes:
All in the printer stored barcodes are shown. Push on the save key to print the chosen barcode.
Fonts:
All in the printer stored fonts are shown. Push on the save key to print the chosen font.
Logos:
All in the printer stored logos are shown. Push on the save key to print the chosen logos.
Insert data:
Number of the data transferred to the Plus. The number is specified in hexadecimal.
Warnings:
Warning details and options (see chapter 6.2.1, page 27).
F+D Feinwerk- und Drucktechnik GmbH
Kirchenstraße 38, 69239 Neckarsteinach, Germany
Phone: +49 (0) 6229 7000, fax: +49 (0) 6229 70067
E-Mail: [email protected], internet: http://www.fuddruck.de
-> g
#0000
14
User manual PLUS
Operating instructions
3.3.3 CARD DATA
Copies
- 0000 - 9999
The number of cards to be printed.
Select card
0: 0672 x 1024
1: 0672 x 1024
2: 0672 x 1024
3: 0672 x 1024
A: 0672 x 1024
fixed format
This format can only be changed via interface
Format:
5 formats are available. Format 0 is a fixed format. Format 1-3 can be changed via menu and format A only
using ESC sequences / interfaces.
The chosen format can be changed with the status key.
With:
d = width e. g.: 0672
The width defines the widths of the print area.
Parameter: d = width * 12 / mm in number of dots
Minimum width = 5.3 mm (d = 64), maximum width = 56 mm (d = 672)
The value of the width can be smaller than the actual card format. The resulting print area is then centred in
the card.
Height:
d = Height e. g.: 1024
The height defines the height of the print area.
Parameter: d = height * 12 / mm in number of motor steps
Minimum height = 10 mm (d = 120), maximum height = 85,3 mm (d = 1024)
3.3.4 PRINT PARAMETERS
Heating time TPH
From -30 % to +30 % in 5 % steps
The control sequence allows the change of the black density by increasing or decreasing the thermal print
head heating time between -30% and +30%. The higher this value, the higher the blackening.
Notice: The higher this value, the higher the charge of the thermal print head.
Printing speed
The printing speed defines the transportation speed of the card within the print area..
- 75 and 100 mm/s
Queue process
- no
- yes
Normally, parameters can be transferred before and behind the data record. This way, additional changes
can be made. If several data records are in the input memory (queue) the printer specifications between 2
data records cannot be clearly distinguished. The printer specifications of the following data record could
possibly influence the current data record. To avoid it, following menus has to be called:
In the Main menu PRINT PARAMETERS / submenu Queue process select the option yes.
Push on the save key to store the option in the current macro.
With this setting, the printer specifications are only processed before the data record. The following printer
specifications including the new data record are only used after the required number of cards have been
printed.
F+D Feinwerk- und Drucktechnik GmbH
Kirchenstraße 38, 69239 Neckarsteinach, Germany
Phone: +49 (0) 6229 7000, fax: +49 (0) 6229 70067
E-Mail: [email protected], internet: http://www.fuddruck.de
User manual PLUS
15
Operating instructions
3.3.5 PRINTER SPECS.
Printer mode
- without print key
- with print key
The printout is only possible by pushing on the print key.
Transfer
The transfer printing device can be used in connection with all other components.
- not present
- present
When the transfer device is present, the transfer ribbon as well as the drive of the transfer ribbon re winder
are monitored.
Transponder
To encode transponders, the optional hardware RFID unit must be present.
- not present
- present
Before printing, the data is written on the transponder and a write control is executed simultaneously. In case
of a successful write process a short signal tone can be heard. In case of a write error a long signal tone can
be heard and the error is displayed on the screen. Where there is an error the card is not printed.
Card feeder
- yes
The cards in the internal card feeder will be used.
- no
The card to be printed can be input into the printer's front slot.
RS232
- 4800, 9600,19200, 38400 Baud
- 7 data bits, 8 data bits
- 1 stop bit, 2 stop bits
- no parity, even parity, odd parity
- non XON/XOFF, with XON/XOFF
PNP
Plug and Play
The driver installation of the connected printer starts automatically after switching on the PC.
- yes
Plug and Play is active
- no
Plug and Play isn’t active
USB Mode
During the use of the Windows driver this attitude is not used. This attitude is used only for F+D programs.
- single
Only one printer can be used.
- multi
Several printers can be used.
F+D Feinwerk- und Drucktechnik GmbH
Kirchenstraße 38, 69239 Neckarsteinach, Germany
Phone: +49 (0) 6229 7000, fax: +49 (0) 6229 70067
E-Mail: [email protected], internet: http://www.fuddruck.de
16
User manual PLUS
Operating instructions
Auto. Status
The short status is sent automatically to each printer over the active interface.
- no
automatically short status isn’t active.
- yes
automatically short status is active.
Key lock
To prevent problems you can disable different keys. The following keys can be deactivated:
<PRINT>
<STATUS>
<MENU>
If the menu key is disabled, you arrive nevertheless with the combination of keys < MENU > and < STATUS>
in the printer menu.
Indexoffset
F+D Feinwerk- und Drucktechnik GmbH
Kirchenstraße 38, 69239 Neckarsteinach, Germany
Phone: +49 (0) 6229 7000, fax: +49 (0) 6229 70067
E-Mail: [email protected], internet: http://www.fuddruck.de
Printing area
Indexoffset
1190 dot 99 mm
Indexoffset
This setting has no function in case of a standard Plus printer.
It is only valid for special Plus versions (K6).
Then, it defines the printing start position from the end of the card when
using the long cards and the manual card feeding.
User manual PLUS
17
Operating instructions
3.3.6 CHARACTER / LCD
Schedule
- ANSI
- ASCII
- Multilingual
Country
- USA
- England
- Germany
- Denmark
- France
- Sweden
- Italy
- Spain
- Norway
- Netherlands
Update flashdata
Logos and fonts can be stored into the printer. The data is transferred via serial or parallel interface.
1. Connect the printer via the parallel interface to the LPT port of the PC.
2. Select the main menu CHARACTER/LCD / submenu Update flashdata.
3. Activate the update mode by pushing on the l key.
4. The following message will be displayed on the screen
* FLASH – DATA *
5. The data has to be edited for the printer before
Send data
it is transferred.
6. Activate the MS-DOS mode at the PC.
7. Now, via MS-DOS mode, new data can be transferred to the printer
using the command line
copy/b file name lptx
E. g.:
copy/b logos.upd lpt1 <Enter>
8. During the transfer process the message `....BUSY....´ is displayed.
9. After successful transfer, the printer states `....READY....´
10. The data is now stored into the printer.
Scrolling
The menu text appears on the screen, displayed from the side.
- no
- yes
Language
The messages on the screen can be displayed in 3 different languages which can be chosen in the menu
CHARACTER / LCD
- German
- English
- French
F+D Feinwerk- und Drucktechnik GmbH
Kirchenstraße 38, 69239 Neckarsteinach, Germany
Phone: +49 (0) 6229 7000, fax: +49 (0) 6229 70067
E-Mail: [email protected], internet: http://www.fuddruck.de
18
User manual PLUS
Operating instructions
3.4 Adjustment of card thickness
Only for the versions with automatic card feeding.
The default setting for the card thickness is 0.76 mm. To use cards with another thickness, the slot device at
the front of the card hopper and transportation device must be adjusted.
The slot device unmatches the cards. It must be placed approx. 0.2 mm higher than the card thickness
(default: approx. 1.0 mm). The transportation device is used for the card transportation. It must be placed
approx. 0.2 mm lower thant the card thickness (default: approx. 0,5 mm).
Transportation device
slot device
Card
F+D Feinwerk- und Drucktechnik GmbH
Kirchenstraße 38, 69239 Neckarsteinach, Germany
Phone: +49 (0) 6229 7000, fax: +49 (0) 6229 70067
E-Mail: [email protected], internet: http://www.fuddruck.de
User manual PLUS
19
Maintenance
4. Maintenance
The Plus is specially made for easy maintenance and change of the main components. After having lifted up
the cover, released and lifted up the printing unit with the thermal print head, the transfer ribbon can be
easily loaded or changed and the thermal print head cleaned or replaced. The motors and bearings of the
driving components are designed for a maintenance free working.
4.1 Change ribbon
Change the transfer ribbon as mentioned in chapter 2.5 page 6.
4.2 Clean thermal print head
Depending on the application- as well as the environmental- conditions, the print head must be cleaned
every 10 to 20 working hours.
1. Switch off the printer.
2. Lift up the cover, release and lift up the printing unit with the thermal print head.
3. Push the ribbon aside to access at the thermal print head dot line.
4. With a soft pressure, wipe several times the dot line with a special cleaner of F+D dampened cloth.
5. When dry, replace the ribbon correctly.
6. Lower the printing unit with the thermal print head and latch it. Lower the cover.
Notice: Do not use any hard or acute objects.
4.3 Clean transportation rolls
Dust and paper particles adhere to the transportation rolls. It must be removed.
1. Switch off the printer.
2. Lift up the cover, release and lift up the printing unit with the thermal print head.
3. Clean the transportation rolls with special cleaner of F+D and a lint free cloth.
4. When dry, lower the printing unit with the thermal print head and latch it. Lower the cover.
Notice: Do not use any aceton or other solvents.
F+D Feinwerk- und Drucktechnik GmbH
Kirchenstraße 38, 69239 Neckarsteinach, Germany
Phone: +49 (0) 6229 7000, fax: +49 (0) 6229 70067
E-Mail: [email protected], internet: http://www.fuddruck.de
20
User manual PLUS
Maintenance
4.4 Replace thermal print head
Attention: The thermal print head is a sensitive component (mechanical, electronic and electrostatic). Do
not use any sharp objects and take care that you are not electrostatically charged. Electrostatic charges
can damage the thermal print head. Thus, it is absolutely necessary to ensure a charge alignment before, i.
e. ensure that you touch an earthed object to discharge any electrostatic charge you may have build up
before touching the head.
1. Switch off the printer.
2. Lift up the cover, release and lift up the printing unit with
the thermal print head.
3. Remove the transfer ribbon.
Thermal print head
4. Disconnect the cables from the print head (pull up).
5. Unscrew the two screws fixing the print head using the
enclosed offset screwdriver.
6. Pull forward the print head with the heat sink.
7. Insert the new thermal print head carefully.
8. Adjust the thermal print head (see chapter 4.5 page 21).
9. Connect the cables to the print head. Check that
connection is tight.
10. Load the transfer ribbon (see chapter 2.5 page 6).
11. Switch on the printer.
12. Make a test printout.
13. If the printout quality is not satisfactory,
make an angular adjustment (see chapter 4.6, page 22).
F+D Feinwerk- und Drucktechnik GmbH
Kirchenstraße 38, 69239 Neckarsteinach, Germany
Phone: +49 (0) 6229 7000, fax: +49 (0) 6229 70067
E-Mail: [email protected], internet: http://www.fuddruck.de
User manual PLUS
21
Maintenance
4.5 Adjust thermal print head
1.
2.
3.
4.
5.
When the printer is on, the pressure roll is down.
Insert adjusting plate to adjust thermal print head.
Slightly press against thermal print head.
Tighten the screws fixing the print head.
Remove adjusting plate.
3.
4.
2.
1.
Notice: Unfortunately it is not possible to guarantee the working life of the thermal print head as it depends
on marginal conditions such as card quality, printing speed, heating time, ribbon quality etc...
F+D Feinwerk- und Drucktechnik GmbH
Kirchenstraße 38, 69239 Neckarsteinach, Germany
Phone: +49 (0) 6229 7000, fax: +49 (0) 6229 70067
E-Mail: [email protected], internet: http://www.fuddruck.de
22
User manual PLUS
Maintenance
4.6 Angular adjustment thermal print head
Only make an angular adjustment in case of poor printout quality after a thermal print head replacement.
This adjustment compensates production related tolerances of the thermal print head.
Proceed as follows:
Lever
Screw
1. Unscrew the screw only a little bit
2. Move the lever about 1 to 2° in one
direction. The lever standard position
is vertical.
3. Tighten the screw.
4. Make a printout of test data record
(see chapter 2.6, page 6).
5. In case the quality is not better, repeat
the first 4 steps. Then try in the other
direction.
6. When this adjustment is finished,
repeat the steps of chapter 4.5 page
21.
4.7 Update of printer software
A new printer software / firmware can be loaded to the Plus via the parallel interface. Please note that an
update is only possible from version 1.02 on.
Execute update
1. Connect the printer via the parallel interface to the LPT port of the PC.
2. While switching on the printer, hold the „feed“ and „clear“ operation keys pressed to activate the
programming mode.
3. The message „PROGRAM UPDATE“ is displayed on the screen.
4. Activate the MS-DOS mode at the PC.
5. Now, via MS-DOS mode, the new printer software / firmware version can be stored into the printer using
the command line:
copy/b file name lptx
(e. g.: copy/b PRDS2119.upd lpt1 <Enter>).
6. During the data transfer the message „READ DATA“ is displayed on the screen (process lasts approx.
15 sec.).
7. When the data transfer is finished „.....READY.....“ is displayed on the screen.
8. Restart the printer.
9. The new software is now operable.
10. To check it, press the status key to display the software version on the screen.
F+D Feinwerk- und Drucktechnik GmbH
Kirchenstraße 38, 69239 Neckarsteinach, Germany
Phone: +49 (0) 6229 7000, fax: +49 (0) 6229 70067
E-Mail: [email protected], internet: http://www.fuddruck.de
User manual PLUS
23
Hardware modifications
5. Hardware modifications
5.1 Thermal direct printing
The thermal direct printing requires a special thermal direct paper which reacts to temperature due to a
special pretreatment. This enables to print without a ribbon, but the printout is sensitive to light, heat and
various chemicals.
5.2 Thermal transfer printing
A stronger printout is obtained using wax- or resin-coated ribbons which colour film is heated by the thermal
print head and transferred onto the card material. The transfer device consists of a retarding winding device
and a motor driven rewinding device.
5.3 Automatic card feeding
With the automatic card feeding version, the card input happens automatically from the card feeder and must
not be made manually card by card. A version which combines an automatic card feeder and manual card
feeding is also available.
5.4 Manual card feeding
With the manual card feeding version, the card input happens by manually feeding a card into the printer's
front slot.
5.5 Supporting table (for card input)
The Supporting table allows the manual input of cards with different widths. It can be used for cards with a
width of 40 mm to 54 mm. It is fixed to the printer tightening the 2 screws below. Please adjust it to the
required width and tighten the screw fixing the width.
Screw fixing the
chosen width
F+D Feinwerk- und Drucktechnik GmbH
Kirchenstraße 38, 69239 Neckarsteinach, Germany
Phone: +49 (0) 6229 7000, fax: +49 (0) 6229 70067
E-Mail: [email protected], internet: http://www.fuddruck.de
Screws fixing the
Supporting table
to the printer
24
User manual PLUS
Hardware modifications
5.6 RFID unit
The optional RFID unit (Radio Frequency IDentification) is a device to print a card and encode the integrated
RFID chip at the same time. Using the principle of electromagnetic induction, the data exchange between
transponder and read unit happens via antenna coil, without contac.
The transponder encoding meets the international standard ISO15693 and is used world-wide with a
frequency of 13.56 MHz. Following transponders can be encoded: Philips i-CodeTM, Texas Instruments TagitTM or Infineon my-d.
F+D Feinwerk- und Drucktechnik GmbH
Kirchenstraße 38, 69239 Neckarsteinach, Germany
Phone: +49 (0) 6229 7000, fax: +49 (0) 6229 70067
E-Mail: [email protected], internet: http://www.fuddruck.de
User manual PLUS
25
Printout quality and errors
6. Printout quality and errors
6.1 Improvement of printout quality
Unprinted stripes spread over the printout in printing direction
•
•
Soil particles can be on the thermal print head and must be removed with a special cleaner of F+D
dampened cloth.
Dot failure due to mechanical effect or electrostatic stroke. The thermal print head must be replaced (see
chapter 4.4, page 20).
Whole printout too light
•
•
•
Check print parameters and change them if necessary (reduce printing speed, increase heating time).
Switch off the printer and clean the thermal print head with a special cleaner of F+D dampened cloth. Do
not use any hard or sharp objects (see chapter 4.2 page 19,).
Using the thermal transfer printing mode without using the correct card/ribbon combination. Use the
correct combination given by the manufacturer or try to find out a right combination.
Printout where small areas of the card are not printed
•
•
Soil particles on the card can lift up the thermal print head at this place and prevent the printing.
A defective platen results in a lack of pressure at this place and prevents the printing. The printer must
be sent to F+D for repair and check (see chapter transportation of printer 2.9 page 7).
Printout too light on one side
•
Thermal print head needs to be adjusted anew horizontally (see chapter 4.5 page 21,).
Unprinted stripes diagonally across the printed card
•
•
•
•
•
•
Can be due to folds occuring in the tranfer ribbon
Check guidance of thermal ribbon
Adjust roll with thermal transfer ribbon laterally until ribbon is free of folds
Remove unwound ribbon and reload thermal transfer ribbon
If thermal transfer ribbon crinkles which can result in folds in the ribbon the heating time is set too high
Reduce heating time.
If the rolls on the winder and re winder are no longer parallel to each other they have to be corrected.
F+D Feinwerk- und Drucktechnik GmbH
Kirchenstraße 38, 69239 Neckarsteinach, Germany
Phone: +49 (0) 6229 7000, fax: +49 (0) 6229 70067
E-Mail: [email protected], internet: http://www.fuddruck.de
26
User manual PLUS
Printout quality and errors
6.2 Error correction
Description
Reason
Measure
No lighting LED
Mains cable
Mains plug
Mains fuse
Internal power supply defect
Print parameters incorrect
Incorrect load of transfer ribbon
Change mains cable
Establish correct contact
Change mains fuse
à Service
Adjust print parameter again
Load transfer ribbon (see chapter 2.5
page 6)
Use transfer ribbon recommended by
manufacturer
Clean transportation rolls (see
chapter 4.3 page 19)
à Service
No printout
Transfer ribbon has another
quality
Dirty transportation rolls
Card transportation is
insufficient (buckled printout)
No card transportation
Transportation rolls are not
driven
Transfer ribbon broken
No transfer ribbon
transportation
Load transfer ribbon again
Each error initiates a switch from the standard display to the error display and activates the error LED.
Several errors can occur at the same time, e. g. sequence errors. The error with the highest priority is always
displayed. The priority increases according to the increasing error code number.
In the status display, up to 8 error codes will be displayed in the 2nd status part (push on status key 2x).
The error-messages displayed in the LCD screen are subdivided into 3 categories:
Error codes:
01 - 99
-
WARNING
100 - 239
-
ERROR
240 - 255
-
HARDWARE
lowest priority
highest priority
F+D Feinwerk- und Drucktechnik GmbH
Kirchenstraße 38, 69239 Neckarsteinach, Germany
Phone: +49 (0) 6229 7000, fax: +49 (0) 6229 70067
E-Mail: [email protected], internet: http://www.fuddruck.de
User manual PLUS
27
Printout quality and errors
6.2.1 Error level 1
In the error level 1 status all printer functions are still allowed. Push the clear key to confirm that you have
noticed the warning message and to start the printing (The printing will not start otherwise). The printing can
be incorrect.
Most of the time, this error category results from incorrect user defined control- or object-sequences. As far
as possible, the incorrect data are automatically replaced by defaults by the driver.
WARNING messages can always be deleted by pushing on the clear key.
Reaction of LED: blinks slowly in red.
The first displayed line indicates the error category as well as the error
WARNING
#023
number. The second displayed line shows the possible error reason.
Control sequence
Other warning options can be defined via menu:
Menu: PRINTER INFOS / Warnings / Aknowledge
This option corresponds to the above one. Warnings are confirmed and deleted by pushing on the clear key.
Menu: PRINTER INFOS / Warnings / Display only
Warnings are displayed as usual, but must not be confirmed by the user. The printing process is not
interrupted.
Menu: PRINTER INFOS / Warnings / ignore
Warnings are neither displayed nor must be confirmed. They can be called in via status request and status
display.
Menu: PRINTER INFOS / Warnings / #70ignore
The warning #70 (character?) will be completely ignored and is defined as default for the printer.
6.2.2 Error level 2
In the error level 2 status all printer functions are still allowed, but no printing is possible.
Most of the time, this error category results from serious data record errors, memory overflows or card errors.
Card errors can normally be removed. Other errors mostly require that the printer is switched off and then
switched back on.
ERROR messages cannot be deleted via clear key.
Reaction of LED: blinks quickly in red.
The first displayed line indicates the error category as well as the error
WARNING
#185
number. The second displayed line shows the possible error reason.
Input memory
6.2.3 Error level 3
In the error level 3 status all printer functions are still allowed, but no printing is possible.
This error category results from an incorrect printer configuration or a hardware error. Hardware errors due to
an incorrect printer configuration can be removed by the user. In case of real hardware errors, the user
should contact the service department.
HARDWARE messages cannot be deleted via clear key.
Reaction of LED: constantly lightened in red
The first displayed line indicates the error category as well as the error
WARNING
#242
number. The second displayed line shows the possible error reason.
Platen ?
F+D Feinwerk- und Drucktechnik GmbH
Kirchenstraße 38, 69239 Neckarsteinach, Germany
Phone: +49 (0) 6229 7000, fax: +49 (0) 6229 70067
E-Mail: [email protected], internet: http://www.fuddruck.de
28
User manual PLUS
Accessories, options
7. Accessories, options
F+D order form
Fax no.: +49 (0) 62 29-7 00 67
Customer:
Contact person:
Phone:
..............................................................
..............................................................
..............................................................
Printer:
..............................................................
Spare parts:
Quantity
Description
Thermal print head
Serial cable
Parallel cable
Cleaning set
Ribbons:
Quantity
Format
Width/Length
60 mm x 200 m
60 mm x 200 m
60 mm x 200 m
60 mm x 200 m
60 mm x 200 m
60 mm x 180 m
60 mm x 180 m
60 mm x 180 m
60 mm x 100 m
60 mm x 100 m
Cards:
Quantity
Format
Width/Length/Thickness
85.72 x 54.03 x 0.76 mm
85.72 x 54.03 x 0.33 mm
85.72 x 54.03 x 0.5 mm
85.72 x 54.03 x 0.76 mm
85.72 x 54.03 x 0.76 mm
Comments
2m
2m
... m
DB9 - DB9
DB9 - DB25
DB9 - DB ...
2m
Centronics
Colour
Black
Black
Black
White
Blue
Red
Green
Yellow
Gold
Silver
according to customer
specification
recommended by F+D
Comments
Transfer ribbon standard, for plastic cards
Transfer ribbon high quality, for plastic cards
Transfer ribbon for cardboard cards
Transfer ribbon for plastic cards
Transfer ribbon for plastic cards
Transfer ribbon for plastic cards
Transfer ribbon for plastic cards
Transfer ribbon for plastic cards
Transfer ribbon for plastic cards
Transfer ribbon for plastic cards
recommended by F+D
Comments
Plastic card, ISO standard; white, blank, shiny; laminated
Plastic card, ISO standard; white, blank, shiny; laminated
Plastic card, ISO standard; white, blank, shiny; laminated
Plastic card; gold, blank
Plastic card; silver, blank
F+D Feinwerk- und Drucktechnik GmbH
Kirchenstraße 38, 69239 Neckarsteinach, Germany
Phone: +49 (0) 6229 7000, fax: +49 (0) 6229 70067
E-Mail: [email protected], internet: http://www.fuddruck.de
Article number
3073.01.921.40.40
3073.01.922.40.40
3073.01.914.40.40
9120.11.303.20.00
3069.01.301.90.40
Article number
100100
100102
3070.99.815.90.89
100103
3070.99.838.90.89
100387
100132
100641
100128
3070.99.842.90.89
Article number
3070.99.820.90.89
3070.99.821.90.89
3070.99.833.90.89
3070.99.836.90.89
3070.99.837.90.89
User manual PLUS
29
Technical data
8. Technical data
Printing method:
Thermal direct or thermal transfer printing
Printing resolution:
12 dots / mm
Printing speed:
50, 75 and 100 mm / sec.
History control:
Sofware
Fonts:
2 internal bitmap fonts: Courier bold, Arial bold; optional: bitmap fonts loadable
Font sizes:
Internal: width and height 2 - 6 mm,
Courier: 6/8/10/12/14, Arial: 6/8/9/10/12/14/16/18
as well as by steps up to 255
Barcodes:
Code 2 of 5 Interleaved, Code 39, Code 128, EAN 8, EAN 13, EAN 128, PDF
417A
Barcodes changeable in height, module width, and ratio. Optionally with
control line, check digit, subscript line, and start/stop code
Drawing capability:
Lines and boxes with various line widths
Specialities:
2-level-technology for fixed and variable objects (text, barcode, logo)
All objects can be copied into the images memory in transparent/not
transparent mode. Text- as well as barcode objects can be placed precisely
and indexed numerically
Processor:
Intel 32 bit
RAM:
8 MB
Interfaces:
Parallel IEEE 1284 (ECP) , RS 232C 4,800 - 38,400 bauds, USB 1.1 optional and
Ethernet optional
Operation panel:
6 operation keys, LCD with 2 x 16 characters, 1 two-coloured LED
Card material*:
PVC, ABS, PET and PC dimensions according ISO 7810**
Card thickness: 0.3 – 1.5 mm; cardboard material up to 350 g/m²
Transfer ribbon*:
Resin-, wax- or mixed quality ribbons in a variety of colours, special ribbons;
Length: 200 m, width: 60 mm, core diameter: 25.4 mm
Monitoring:
Automatic card recognition and print release, ribbon end
Dimensions (HxWxD in mm) 170 x 250 x 350
Weight:
Approx. 9 kg
Mains connections:
230 / 115 V (auto-switch), 50 / 60 Hz, nominal current 1.1 / 2.2 A, fuse T 2.5 A
Environmental conditions:
10 - 40°C, 20 - 80% humidity (non condensing)
Versions:
With card feeding manually and/or with automatic card feeding
Options:
RFID-unit: Transponder-encoding according to ISO15693 standard / 13.56
MHz card stacking module, Ethernet-Interface (10/100 MBits), chip encoding
device and magnetic strip encoder (in preparation)
Driver:
WindowsTM NT4.0, 2000 and XP
Software:
FLabel: Software to create and manage data records
* F+D also supplies custom tailored consumables such as transfer ribbons, cardboard- or plastic cards in
blank as well as pre-printed cards
** Special formats upon request
F+D Feinwerk- und Drucktechnik GmbH
Kirchenstraße 38, 69239 Neckarsteinach, Germany
Phone: +49 (0) 6229 7000, fax: +49 (0) 6229 70067
E-Mail: [email protected], internet: http://www.fuddruck.de
30
User manual PLUS
Declaration of conformity
9. Declaration of conformity
F+D Feinwerk- und Drucktechnik GmbH
Kirchenstraße 38, 69239 Neckarsteinach, Germany
Phone: +49 (0) 6229 7000, fax: +49 (0) 6229 70067
E-Mail: [email protected], internet: http://www.fuddruck.de
User manual PLUS
31
Index
10. Index
Accessories, options .........................................28
Adjust thermal print head ..................................21
Adjustable card feeder ......................................23
Adjustment of card thickness ............................18
Angular adjustment thermal print head ..............22
Auto. Status......................................................16
Automatic card feeding .....................................23
Barcodes ..........................................................13
CARD DATA.....................................................14
Card feeder.......................................................15
Card rest.............................................................6
Card stacker plate...............................................6
Card thickness....................................................6
Cards................................................................13
Change ribbon ..................................................19
CHARACTER / LCD .........................................17
Clean thermal print head...................................19
Clean transportation rolls ..................................19
Clear key ............................................................9
Connection of mains cable..................................5
Control panel ......................................................8
Copies ..............................................................14
Country.............................................................17
Declaration of conformity ..................................30
Eject key.............................................................9
Error correction.................................................26
Error display .......................................................8
Error LED ...........................................................9
Error level 1 ......................................................27
Error level 2 ......................................................27
Error level 3 ......................................................27
Feed key.............................................................9
Folds ................................................................25
Fonts ................................................................13
Hardware modifications.....................................23
Heating time TPH .............................................14
Improvement of printout quality .........................25
Indexoffset........................................................16
Input of numerical values ..................................11
Insert card and load ribbon..................................6
Insert data ........................................................13
Introduction.........................................................4
Key lock............................................................16
Keys ...............................................................8, 9
Language .........................................................17
LCD screen.........................................................8
Location..............................................................5
Logos ...............................................................13
Main menu mode ..............................................10
Mains cable ........................................................5
Mains switch .......................................................5
Maintenance .....................................................19
Manual card feeding .........................................23
Menu and parameter overview..........................12
Menu display ......................................................8
Menu key........................................................... 9
Operating instructions ........................................ 8
Parallel interface ................................................ 7
Plastic card ........................................................ 6
Plug and Play....................................................15
PNP..................................................................15
Power- and error-LED ........................................ 9
Power LED ........................................................ 9
Print key ............................................................ 9
PRINT PARAMETERS......................................14
Print process...................................................... 6
Print stored data record.....................................13
PRINTER INFOS ..............................................13
Printer mode .....................................................15
PRINTER SPECS. ............................................15
Printing speed...................................................14
Printout of test data record ................................. 6
Printout quality..............................................6, 22
Printout quality and errors .................................25
Queue process .................................................14
Recommandation for a quick work in.................. 4
Replace thermal print head ...............................20
RFID unit ..........................................................24
RS232 ..............................................................15
Safety notice .......................................... 5
Save key...........................................................10
Schedule ..........................................................17
Scrolling............................................................17
Select card........................................................14
Serial interface................................................... 7
Standard display ................................................ 8
Starting .............................................................. 5
Status display .................................................... 8
Status key.......................................................... 9
Status printout...................................................13
Submenu mode ................................................10
Supporting table................................................23
Switch function................................................... 9
Technical data ..................................................29
Test card ........................................................... 6
Test printout......................................................20
Thermal direct printing ......................................23
Thermal print head.......................... 19, 20, 21, 22
Thermal transfer printing ...................................23
Transfer ............................................................15
Transfer ribbon .................................................. 6
Transponder .....................................................15
Transportation of printer..................................... 7
True edge .......................................................... 4
Unpacking.......................................................... 5
Update flashdata...............................................17
Update logos and fonts .....................................17
Update of printer software .................................22
Warnings ..........................................................13
F+D Feinwerk- und Drucktechnik GmbH
Kirchenstraße 38, 69239 Neckarsteinach, Germany
Phone: +49 (0) 6229 7000, fax: +49 (0) 6229 70067
E-Mail: [email protected], internet: http://www.fuddruck.de
F+D Feinwerk- und Drucktechnik GmbH
Kirchenstr. 38
69239 Neckarsteinach, Germany
Phone:
Fax:
Mail:
Web:
+049 (0) 06229 / 700-0
+049 (0) 06229 / 700-67
[email protected]
www.FuDdruck.de
Copyright by F+D 3090.02.098.90.06
F+D is not liable for errors contained in this brochure, and reserve the right to change technical content
without prior notice.


