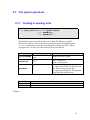
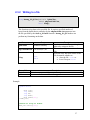
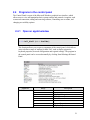
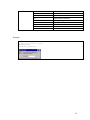
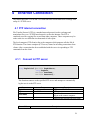
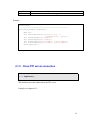
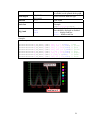
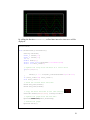
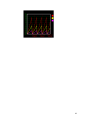
1
EzLIB API
User Manual
(Version 4.3)
1
Warranty
All products manufactured by ICPDAS Inc. are warranted against
defective materials for a period of one year from the date of delivery to the
original purchaser.
Warning
ICPDAS Inc. assumes no liability for damages consequent to the use of
this product. ICPDAS Inc. reserves the right to change this manual at any
time without notice. The information furnished by ICPDAS Inc. is believed
to be accurate and reliable. However, no responsibility is assumed by
ICPDAS Inc. for its use, or for any infringements of patents or other rights
of third parties resulting from its use.
Copyright
Copyright 1997-2009 by ICPDAS Inc., LTD. All rights reserved
worldwide.
Trademark
The names used for identification only maybe registered trademarks of
their respective companies.
License
The user can use, modify and backup this software on a single
machine. The user may not reproduce, transfer or distribute this software,
or any copy, in whole or in part.
Technical Support
If you have problems about using the product, please
contact ICP DAS Product Support.
Email: [email protected]
2
Table of Contents
1
2
Introduction................................................................................................................. 5
General APIs............................................................................................................... 6
2.1
String conversion ................................................................................................ 6
2.1.1
CString to float............................................................................................ 6
2.1.2
Float to CString........................................................................................... 8
2.1.3
CString to double ........................................................................................ 9
2.1.4
Double to CString ..................................................................................... 10
2.2
Copying of memory blocks............................................................................... 11
2.2.1
DWORD to float ....................................................................................... 11
2.2.2
Float to DWORD ...................................................................................... 12
2.2.3
Double to DWORD array ......................................................................... 13
2.2.4
DWORD array to double .......................................................................... 13
2.2.5
Double to BYTE array .............................................................................. 14
2.2.6
BYTE array to double............................................................................... 15
2.3
File system operations....................................................................................... 16
2.3.1
Creating or opening a file ......................................................................... 16
2.3.2
Writing to a file......................................................................................... 17
2.3.3
Reading from a file ................................................................................... 19
2.3.4
Get the file size ......................................................................................... 20
2.4
Programs in the control panel ........................................................................... 21
2.4.1
Open an applet window ............................................................................ 21
2.5
Date and Time................................................................................................... 23
2.5.1
Get local date and time ............................................................................. 23
2.5.2
Get local date ............................................................................................ 25
2.5.3
Get local time............................................................................................ 26
3
Context drawing........................................................................................................ 27
3.1
BMP CDC interface.......................................................................................... 28
3.1.1
Load a BMP file........................................................................................ 28
3.1.2
Save BMP image....................................................................................... 31
3.1.3
Height of BMP image ............................................................................... 31
3.1.4
Width of BMP image ................................................................................ 32
3.1.5
Width of BMP image ................................................................................ 32
3.1.6
Load BMP to CDC.................................................................................... 33
3.1.7
BMP location on CDC .............................................................................. 34
3.1.8
Retrieve the CDC of the BMP .................................................................. 35
3.2
Monitor CDC interface ..................................................................................... 36
3.2.1
Retrieve the monitor CDC ........................................................................ 36
4
Ethernet Connection.................................................................................................. 38
4.1
FTP internet connection.................................................................................... 38
4.1.1
Connect to FTP server .............................................................................. 38
4.1.2
Close FTP server connection .................................................................... 39
4.1.3
Change remote directory........................................................................... 40
4.1.4
Change local directory .............................................................................. 40
4.1.5
File transfer to FTP server ........................................................................ 41
3
4.1.6
File transfer to FTP client ......................................................................... 42
4.2
TCP/IP connection ............................................................................................ 43
4.2.1
Initializing a TCP/IP socket ...................................................................... 43
4.2.2
Close a TCP/IP connection ....................................................................... 43
4.2.3
Send data................................................................................................... 44
4.2.4
Receive data callback function ................................................................. 45
4.2.5
Receive data callback function ................................................................. 46
5
Trend View ............................................................................................................... 47
5.1
Main configuration............................................................................................ 47
5.1.1
Creating a trend view object ..................................................................... 48
5.1.2
Assign a parent window............................................................................ 50
5.1.3
Scaling, gridlines and labels ..................................................................... 50
5.1.4
Legend setting........................................................................................... 52
5.2
Line properties .................................................................................................. 52
5.2.1
Frame and gridline property setting.......................................................... 52
5.2.2
Trend line property setting........................................................................ 53
5.3
Adding new data readings to the graph............................................................. 55
5.3.1
Method 1 ................................................................................................... 55
5.3.2
Method 2 ................................................................................................... 57
5.3.3
Delete all trend lines ................................................................................. 58
5.3.4
Redraw graph ............................................................................................ 58
5.4
Change the display status and range ................................................................. 59
5.4.1
Display or hide a trend line....................................................................... 59
5.4.2
Modifying vertical axis range ................................................................... 60
5.4.3
Modifying horizontal axis range............................................................... 60
5.5
Example ............................................................................................................ 62
6
Appendix................................................................................................................... 65
6.1
Error Table ........................................................................................................ 65
4
1
Introduction
EzLib is a collection of reusable software components and assists software developers to
write application programs for the Window CE platform. The library is written and
optimized for the Microsoft Visual Studio 2008 IDE.
The ExLib library consists of four classes:
1. CEzLIB class
a. String to number conversion and vice versa.
b. Manipulation of data types
c. Reading from and writing to file.
d. Date and time functions
e. FTP communication
f. TCP/IP communication
g. Open applet window
2. CEzBMP class
a. Create a bitmap drawing
b. Display a bitmap on dialog window
c. Save a bitmap to file
3. CTRENDA class
a. Creating a trend line graph
5
2
General APIs
This chapter describes API for the following actions:
• CString type conversions
• Manipulation of data types
• Reading from file / writing to file
• Retrieving current date and time
• Open programs in the control panel
2.1
String conversion
2.1.1 CString to float
float CString_To_Float(CString CStr);
This function converts a CString string to a floating-point value by interpreting
the input characters as a number. The function stops reading the input string at the
first character that it cannot recognize as part of a number. Space or tab characters
will be ignored.
Parameter
Range
CStr
Maximum 50 characters
Return Value
0.0
3.4E +/- 38
Description
CString to be converted
Description
The return value is 0.0 if the input cannot be converted to a float value.
Floating point range
Example:
CEzLIB EzLIB;
float fRet=0;
CString fString_1(L"1.1");
CString fString_2(L"1.12345678");
CString fString_3(L"-1.12345678");
CString fString_4(L"k1.3");
CString fString_5(L"0");
6
fRet=EzLIB.CString_To_Float(fString_1);
fRet=EzLIB.CString_To_Float(fString_2);
fRet=EzLIB.CString_To_Float(fString_3);
fRet=EzLIB.CString_To_Float(fString_4);
fRet=EzLIB.CString_To_Float(fString_5);
//-->
//-->
//-->
//-->
//-->
1.1
1.1234568
-1.1234568
0.0
ÆERROR
0.0
7
2.1.2 Float to CString
CString Float_To_CString(float fData, long DotNo);
This function converts the value of a float variable into a CString string.
Parameter
Range
fData
3.4E +/- 38
DotNo
Description
Float value to be converted
Specifies is the maximum number of digits to
be printed after the decimal point.
0 to 7
0 – will not format the number of digits of
the float value.
Return Value
Character
array
Description
CString string displays the float value as a wide character array. Each
digit of the double value is represented by one Unicode character.
Example:
CEzLIB EzLIB;
float fData=3.1234567;
CString fString(L"");
fString=EzLIB.Float_To_CString(fData,0);
fString=EzLIB.Float_To_CString(fData,1);
fString=EzLIB.Float_To_CString(fData,2);
fString=EzLIB.Float_To_CString(fData,3);
fString=EzLIB.Float_To_CString(fData,4);
fString=EzLIB.Float_To_CString(fData,5);
fString=EzLIB.Float_To_CString(fData,6);
fString=EzLIB.Float_To_CString(fData,7);
//-->
//-->
//-->
//-->
//-->
//-->
//-->
//-->
"3.12346"
"3.1"
"3.12"
"3.123"
"3.1235"
"3.12346"
"3.12357"
"3.12357"
8
2.1.3 CString to double
double CString_To_DOUBLE(CString CStr)
This function returns the double value produced by interpreting the CString string
characters as a number. The function stops reading the input string at the first
character that it cannot recognize as part of a number. Space or tab characters will
be ignored.
Parameter
Range
CStr
Maximum 50 characters
Return Value
0.0
1.7E +/- 308
Description
CString to be converted
Description
The return value is 0.0 if the input cannot be converted to a double
value.
Double value range
Example:
9
2.1.4 Double to CString
CString DOUBLE_To_CString (double DData, long DotNo):
This function converts the value of a double variable into a CString string.
Parameter
Range
DData
1.7E +/- 308
DotNo
Description
Double value to be converted
Specifies is the maximum number of digits to
be printed after the decimal point.
0 to 15
0 – will not format the number of digits of
the float value.
Return Value
Unicode
Character
array
Description
CString string displays the double value as a wide character array. Each
digit of the double value is represented by one Unicode character.
10
2.2
Copying of memory blocks
The APIs in this section copies a bit field from the memory of a specific data type to a
memory of another data type of the same size. The bit field is not altered during the
copying process. Therefore not the value of a data type is copied but only the bit field
data. No data conversion takes place.
2.2.1 DWORD to float
float DWORD_To_Float(DWORD dwData);
This function copies a DWORD bit field of four bytes to a float variable. The bit
field of the entire DWORD memory is copied to the float memory without
changing any bits.
Parameter
Range
dwData
0 to 4,294,967,295
Return Value
3.4E +/- 38
Description
Bit field source
Description
Floating point range
Example:
CEzLIB EzLIB;
DWORD dw_BitField=0;
float f_BitField=0;
dw_BitField = 0;
f_BitField = EzLIB.DWORD_To_Float(dw_BitField); //--> 0
dw_BitField = 1000000000;
f_BitField = EzLIB.DWORD_To_Float(dw_BitField); //--> 0.0047237873
dw_BitField = 123456789;
f_BitField = EzLIB.DWORD_To_Float(dw_BitField); //--> 1.6535997e-034
11
2.2.2 Float to DWORD
DWORD Float_To_DWORD(float fData);
This function copies the bit field of the float variable to the memory block of the
DWORD variable. No data conversion takes place.
Parameter
Range
fData
3.4E +/- 38
Description
Source memory block
Return Value
Description
0 to
The copied bit field will be interpreted as a float type
4,294,967,295
Example:
CEzLIB EzLIB;
DWORD dw_BitField = 0;
float f_BitField = 0;
f_BitField = 0;
dw_BitField = EzLIB.Float_To_DWORD(f_BitField); //--> 0
f_BitField = 100;
dw_BitField = EzLIB.Float_To_DWORD(f_BitField); //--> 1120403456
f_BitField = 1000;
dw_BitField = EzLIB.Float_To_DWORD(f_BitField); //--> 1148846080
12
2.2.3 Double to DWORD array
void DOUBLE_To_DWORDS (DWORD dwData[2] ,
double DData);
This function copies an eight byte long bit field of a double variable to two
DWORD variables with four bytes memory blocks each. The memory of the
entire double variable is copied to the memory of two DWORD variables without
changing the bit order.
Parameter
Range
DData
1.7E +/- 308
dwData[2] Pointer to a DWORD array
Description
Source memory
Destination memory
Example:
CEzLIB EzLIB;
double Da=25245245.23525;
DWORD DArry[2]={0,0};
EzLIB.DOUBLE_To_DWORDS(DArry,Da);
2.2.4 DWORD array to double
double DWORDS_To_DOUBLE (DWORD dwData[2]);
This function copies the memory of an array of two DWORDs to the memory
block of a double variable.
Parameter
Range
dwData[2] Pointer to DWORD array
Description
Source memory block
13
Return Value
1.7E +/- 308
Description
The copied bit field will be interpreted as a double type
Example:
CEzLIB EzLIB;
double Da = 0;
DWORD DArry[2] = {20000,145525};
DaRET = EzLIB.DWORDS_To_DOUBLE(DArry);
2.2.5 Double to BYTE array
void DOUBLE_To_BYTES (BYTE BData[8] , double DData);
This function copies an eight byte long bit field of a double variable to a BYTE
array with a length of eight elements. The memory of the entire double variable is
copied to the memory of a BYTE array without changing the bit order.
Parameter
DData
Range
1.7E +/- 308
BData[8] Pointer to an eight BYTE
array
Description
Source memory
Destination memory
Make sure that the BYTE array has at least
eight elements.
Example:
CEzLIB EzLIB;
double Da = 25245245.23525;
BYTE BArry[8]={0,0,0,0,0,0,0,0};
EzLIB.DOUBLE_To_BYTES(BArry,Da);
14
2.2.6 BYTE array to double
double BYTES_To_DOUBLE ( BYTE
BData[8] );
This function copies the memory of a BYTE array with a length of eight elements
to the memory block of a double variable.
Parameter
Range
BData[8] Pointer to BYTE array
Return Value
1.7E +/- 308
Description
Source memory block
Description
The copied bit field will be interpreted as a double type
Example:
CEzLIB EzLIB;
double Da = 0;
BYTE BArry[8] = {12,33,87,56,11,45,0,100};
Da = EzLIB.BYTES_To_DOUBLE(BArry);
15
2.3
File system operations
2.3.1 Creating or opening a file
long Start_FileIO(LPCTSTR lpszFileName,
bool ReadWrite,
BYTE OpenMode );
This function creates a new file or opens an existing file. When you call this
function it searches for a file in the directory that you specify. Depending on the
ReadWrite parameter you can open an existing file or create a new file. When
you open a file, you have to set the read/write access for that file.
Parameter
Range
Pointer
to
wide character
lpszFileName
array
ReadWrite
true
false
OpenMode
1
2
3
Return Value
0
Nonzero
Description
Name of the file to open
true - write to file
false - read from file
1- Creates and opens a new file.
2- Opens a file. If the file does not exist,
the function creates a new file.
3 - Opens an existing file. The function
fails if the file does not exist.
Description
Execution was successful
Error: consult the error table at the appendix
Example:
16
2.3.2 Writing to a file
long Array_TO_File(LPCVOID lpBuffer,
DWORD nBytesToWrite,
bool Flag);
This function writes data to the specified file. It copies a specified number of
bytes from the buffer that is pointed to by the nBytesToWrite parameter into
the file specified by the Start_FileIO function. Array_TO_File does not
perform any formatting on the data.
Parameter
lpBuffer
Range
Pointer to an array
nBytesToWrite 0 to 4,294,967,295
Flag
Return Value
0
Nonzero
true
false
Description
A pointer to the buffer containing the
data to be written to the file.
The number of bytes to write to the
file.
After the array has been written to the
file, determine whether to
• close the file – true or
• leave file open - false
Description
Execution was successful
Error: consult the error table at the appendix
Example:
typedef struct
{
BYTE TYPE;
long PARA;
long BB;
long WORK;
BYTE ARRAY[100];
}DEMO_Data;
//Define an array as buffer:
DEMO_Data DArray[100];
17
//file name:
TCHAR PATH[100]= TEXT("\\ArrayFile.dat");
void OnFillArrayData()
{
int i,j;
for (j=0; j<100; j++)
{
for (i=0; i<100; i++)
DArray[j].ARRAY[i]= i;
}
}
// Write data to a file:
void OnWriteArraytoFile()
{
CEzLIB EzLIB;
OnFillArrayData();
// Create and open a new file for writing data:
if (EzLIB.Start_FileIO(PATH,true,1) == 0)
{
//Write data to the file. Close the file after
// the write operation has completed.
EzLIB.Array_To_File(&DArray,sizeof(DArray),true);
}
}
18
2.3.3 Reading from a file
long File_TO_Array (LPVOID lpBuffer,
DWORD nBytesToRead,
bool Flag)
This function reads data from a file. It copies a specified number of bytes from the
file to the buffer pointed to by the lpBuffer parameter. Before using this
function open the file with the Start_FileIO function. During the copying
process no data is formatted; the data is read exactly as it exists in the file.
Parameter
lpBuffer
Range
Pointer to an array
nBytesToWrite 0 to 4,294,967,295
Flag
true
false
Description
A pointer to the buffer that receives the
data read from a file.
The maximum number of bytes to
read.
After the file has been copied to the
array, determine whether
• to close the file – true
• or to leave the file open false
Return Value
0
Nonzero
Description
Execution was successful
Error: consult the error table at the appendix
Example:
typedef struct
{
BYTE TYPE;
long PARA;
long BB;
long WORK;
BYTE ARRAY[100];
}DEMO_Data;
//Define an array as buffer:
DEMO_Data DArray[100];
19
//file name:
TCHAR PATH[100]= TEXT("\\ArrayFile.dat");
// Read data from a file:
void CRW_ArrayFileDlg::OnReadArrayfromFile()
{
CEzLIB EzLIB;
//Open an existing file for reading data:
if (EzLIB.Start_FileIO(PATH,false,3)==0)
{
//Copy data from the file to an array. Close the file after
// the read operation has finished.
EzLIB.File_To_Array(&DArray,sizeof(DArray),true);
}
}
2.3.4 Get the file size
DWORD Get_File_Length(DWORD *HighDWORD);
This function retrieves the size of the specified file.
Parameter
Range
Pointer to an array
HighDWORD
Return Value
0 to
File size in bytes.
4,294,967,295
Description
A pointer to the variable where the
high-order double word of the file size
is returned
Description
20
2.4
Programs in the control panel
The Control Panel is a part of the Microsoft Windows graphical user interface which
allows users to view and manipulate basic system settings and controls via applets, such
as network connection, adding and removing software, controlling user accounts, and
changing accessibility options.
2.4.1 Open an applet window
void Call_Shell(WORD ShellNo);
This function allows you to open a component of the control panel, which allows
users to define a range of settings for their PAC, such as display properties,
keyboard properties, network configuration and regional settings. The program in
the control panel can be accessed manually by clicking StartÆSettingsÆControl
Panel.
Parameter
ShellNo
Range
0
1
2
3
4
5
6
7
Description
Keyboard Properties
Enter Password
Enter Password
System Properties
Display Properties
21
8
9
10
11
12
13
14
15
16
Mouse Properties
Input Panel Properties
Remove Programs
Date/Time Properties
Certificates
-
Example:
// Open the password window:
CEzLIB EzLIB;
EzLIB.Call_Shell(3);
22
2.5 Date and Time
2.5.1 Get local date and time
void Get_DT(TCHAR tcDT[30],
bool Year, bool Month, bool Week, bool Day,
bool Hour, bool Minute, bool Second, bool mSecond);
This function retrieves the current date and time.
Parameter
Range
tcDT[30]
Pointer to an UNICODE
character array
Year
true
false
Description
A pointer to a 30 element array which
stores the date and time
Example:
"2009/12/1/07 13:35:45.45265"
Month
true
false
Week
true
false
Day
true
false
Hour
true
false
Minute
true
false
Second
true
false
Reads the year
Ignores the year
Retrieves the month, based on local
time, in the range 1 through 12 (1 =
January)
Ignores the month
Retrieves the day of the week based on
local time
Ignores the week number
Retrieves the day of the month, based
on local time, in the range 1 through
31
Ignores the day
Retrieves the hour, based on local
time, in the range 0 through 23
Ignores the hour
Retrieves the minute, based on local
time, in the range 0 through 59
Ignores the year
Retrieves the second, based on local
time, in the range 0 through 59
Ignores the year
23
mSecond
true
false
Reads the milliseconds
Ignores the milliseconds
Example:
CEzLIB EzLIB;
TCHAR tcDT[30];
//Read the local date and time:
EzLIB.Get_DT(tcDT, true, true, true, true, true, true, true, true);
// Example output: "2009/12/1/07 13:35:45.45265"
24
2.5.2 Get local date
void Get_Date(TCHAR tcDate[15]);
This function retrieves the current date.
Parameter
tcDate[15]
Range
Pointer to an UNICODE
character array
Description
A pointer to a 15 element array which
stores the date.
Example:
"2009/12/07"
Example:
CEzLIB EzLIB;
TCHAR tcDate[15];
//Read the current date:
EzLIB.Get_Date(tcDate);
// Example output: "2009/12/07"
25
2.5.3 Get local time
void Get_Time(TCHAR tcTime[15]);
This function retrieves the current date.
Parameter
tcTime[15]
Range
Pointer to an UNICODE
character array
Description
A pointer to a 15 element array which
receives the time string.
Example:
"14:32:59"
Example:
CEzLIB EzLIB;
TCHAR tcTime[15];
//Read the current time:
EzLIB.Get_Time(tcTime);
// Example output: "14:32:59"
26
3
Context drawing
The device context (DC) enables the programmer to draw and write on the device context
and to directly display, save and print its content independent of the hardware. MFC for
Windows CE supports the following methods of the CDC class:
CDC::BitBlt
CDC::GetMapMode
CDC::DrawEdge
CDC::MaskBlt
CDC::DrawText
CDC::Polygon
CDC::ExtTextOut
CDC::PolyPolygon
CDC::GetDeviceCaps CDC::SelectStockObject
CDC::GetHalftoneBrush CDC::StretchBlt
The APIs provided by ICPDAS allows you to directly
• display the CDC on the screen,
• save the CDC to file or
• print the CDC.
Example:
// Define a bitmap object
CEzBMP m_BMP;
CDC WorkCDC;
CEzDEMO7_CDCDlg * th;
BOOL CEzDEMO7_CDCDlg::OnInitDialog()
{
CDialog::OnInitDialog();
// Set the icon for this dialog. The framework does this automatically
// when the application's main window is not a dialog
SetIcon(m_hIcon, TRUE);
// Set big icon
SetIcon(m_hIcon, FALSE);
// Set small icon
CenterWindow(GetDesktopWindow());
// center to the hpc screen
// TODO: Add extra initialization here
th = this;
return TRUE;
// return TRUE
unless you set the focus to a control
}
27
// Draw to the screen
void Draw_Work()
{
//===== Draw Lines ================
WorkCDC.MoveTo(0,0);
WorkCDC.LineTo(300,200);
WorkCDC.MoveTo(300,0);
WorkCDC.LineTo(0,200);
//===== Select font ================
CFont font;
VERIFY(font.CreatePointFont(240, _T("Arial"), &WorkCDC));
CFont* def_font = WorkCDC.SelectObject(&font);
font.DeleteObject();
//===== Set TEXT Color================
WorkCDC.SetTextColor(RGB(0, 0, 0));
//===== Draw TEXT ================
WorkCDC.DrawText("ICPDAS Text Example",
CRect(50, 300, 1200, 400), 0);
WorkCDC.SelectObject(def_font);
}
3.1 BMP CDC interface
3.1.1 Load a BMP file
bool Open_BMP(LPCTSTR lpszFileName);
This function loads the image of a bitmap file into memory.
Parameter
lpszFileName
Range
Pointer to an Unicode
character array.
Description
Bitmap file name
28
Return Value
0
Nonzero
Description
Execution was successful
Error: consult the error table at the appendix
Example:
//global variables:
CEzBMP m_BMP;
CDC WorkCDC;
void CCDC_DEMODlg::OnGetBMPCDC()
{
//== Select file and load file =============
CString strFilter (L"Bitmap Files (*.bmp)|*.bmp|All
Files (*.*) |*.*||");
CFileDialog dlg(TRUE, NULL, NULL, OFN_HIDEREADONLY|OFN_EXPLORER,
strFilter, NULL);
if (dlg.DoModal() == IDOK)
{
if (m_BMP.Open_BMP(dlg.GetPathName()))
{
BMP_OK=true;
Printer_OK=false;
Monitor_OK=false;
this->SetWindowText(dlg.GetPathName());
}
else
{
BMP_OK=false;
AfxMessageBox(_T("Unable to open bitmap file"));
}
}
//== GET the BMP CDC =============
WorkCDC.Attach(*m_BMP.Get_BMP_DC(this->GetDC()));
}
//Draw the image of the bitmap file to the screen =============
void CCDC_DEMODlg::OnBMPDraw()
{
if (WorkCDC)
{
Draw_Work();
}
}
29
void CCDC_DEMODlg::OnBMPSave()
{
//== Select a file ========================================
CString strFilter (L"Bitmap Files (*.bmp)|*.bmp|All Files (*.*)
|*.*||");
CFileDialog dlg(false, NULL, NULL,
OFN_HIDEREADONLY|OFN_EXPLORER, strFilter, NULL);
if (dlg.DoModal() == IDOK)
{
CString m_FileName= dlg.GetPathName();
if (!m_FileName.IsEmpty())
//== Save BMP to file =============================
m_BMP.Save_BMP(m_FileName);
}
}
void CCDC_DEMODlg::OnDrawBMP()
{
// TODO: Add your control notification handler code here
m_BMP.Draw_BMP(this->GetDC(), CPoint(0,0),0);
}
void CCDC_DEMODlg::OnDrawBMP()
{
// TODO: Add your control notification handler code here
m_BMP.Draw_BMP(this->GetDC(), CPoint(0,0),0);
}
void CCDC_DEMODlg::OnDrawBMPFit()
{
// TODO: Add your control notification handler code here
CRect rect(0, 0, 800, 550);
m_BMP.Draw_BMP_Fit(this->GetDC(), CPoint(0,0), rect.Size(),0);
}
30
3.1.2 Save BMP image
bool Save_BMP(LPCTSTR lpszFileName);
This function saves the bitmap image.
Parameter
lpszFileName
Return Value
0
Nonzero
Range
Pointer to a Unicode
character array.
Description
Bitmap file name
Description
Execution was successful
Error: consult the error table at the appendix
Example:
3.1.3 Height of BMP image
WORD Get_BMP_Height();
This function retrieves the height of the bitmap image in the memory.
Return Value
0 to 65,535
Description
Height in pixel
31
3.1.4 Width of BMP image
WORD Get_BMP_Width();
This function retrieves the width of the bitmap image in the memory.
Return Value
0 to 65,535
Description
Width in pixel
3.1.5 Width of BMP image
bool Get_BMP_OK();
This function checks whether the bitmap image was loaded successful from the
file into memory.
Return Value
true
false
Description
Loading operation was successful.
Loading operation failed.
32
3.1.6 Load BMP to CDC
bool Draw_BMP_Fit(CDC* pDC,
CPoint ptDest,
CSize size,
BOOL bForceBackground);
This function first sets the size and location of the bitmap destination rectangle on
the CDC and then copies the bitmap from the memory into the destination
rectangle. The bitmap will be stretched or compressed to fit the dimensions of the
destination rectangle.
Parameter
pDC
Range
Pointer to the target
CDC
ptDest
size
bForceBackground TRUE, FALSE
Return Value
0
Nonzero
Description
The device context on which the
bitmap should be drawn
The xy-coordinates, in logical units,
of the upper-left corner of the
destination rectangle
Destination rectangle
Show the bitmap in the foreground
or background.
Description
Execution was successful
Error: consult the error table at the appendix
33
3.1.7 BMP location on CDC
bool Draw_BMP(CDC* pDC,
CPoint ptDest,
BOOL bForceBackground);
This function copies the bitmap to the specified location on the CDC but will not
change the dimension of the bitmap.
Parameter
pDC
Range
Pointer to the target
CDC
ptDest
bForceBackground TRUE, FALSE
Return Value
0
Nonzero
Description
The device context on which the
bitmap should be drawn
The xy-coordinates, in logical units,
of the upper-left corner of the
bitmap rectangle
Show the bitmap in the foreground
or background.
Description
Execution was successful
Error: consult the error table at the appendix
34
3.1.8 Retrieve the CDC of the BMP
CDC* Get_BMP_DC(CDC* pDC);
This function retrieves a pointer to the bitmaps device context CDC, so that the
user can use the methods of the CDC to directly draw and write on the bitmaps
device context. CDC methods are provided for drawing text, working with fonts,
drawing lines and drawing simple shapes, ellipses, and polygons.
Parameter
pDC
Range
Description
Pointer to a CDC
Use:
this->GetDC()
Return Value
Description
Pointer to a CDC
35
3.2 Monitor CDC interface
3.2.1 Retrieve the monitor CDC
CDC* Get_Monitor_DC(CDC* pDC);
This function returns a pointer to a device context which manages the display
associated with the client area of a window.
Parameter
Range
pDC
Description
Pointer to a CDC.
Use:
this->GetDC()
Return Value
Description
Pointer to a window CDC
Example:
CEzBMP m_BMP;
CDC WorkCDC;
void CCDC_DEMODlg::OnGetMonitorCDC()
{
WorkCDC.Attach(*m_BMP.Get_Monitor_DC(this->GetDC()));
if (WorkCDC)
{
Monitor_OK=true;
BMP_OK=false;
Printer_OK=false;
MessageBox(_T("Get Monitor CDC OK !!"));
}
else
{
Monitor_OK=false;
MessageBox(_T("Get Monitor CDC Error!!"));
}
}
36
//Draw on the screen
void CCDC_DEMODlg::OnMonitorDraw()
{
// TODO: Add your control notification handler code here
if (WorkCDC && Monitor_OK)
Invalidate();//update the screen
}
// Updates the screen
void CCDC_DEMODlg::OnPaint()
{
CPaintDC dc(this); // device context for painting
// TODO: Add your message handler code here
if (WorkCDC && Monitor_OK)
{
Draw_Work();
}
// Do not call CDialog::OnPaint() for painting messages
}
37
4
Ethernet Connection
The chapter describes TCP/IP and FTP client functions which enable data exchange with
an ftp or a TCP/IP server.
4.1 FTP internet connection
File Transfer Protocol (FTP) is a standard network protocol used to exchange and
manipulate files over a TCP/IP based network, such as the Internet. The FTP is
commonly used for copying files to and from other computers. These computers may be
at the same site or at different sites thousands of miles apart.
The local computer (FTP client) refers to the computer which program calls the EzLib
FTP function. The remote computer (FTP server) listens for incoming connections from
clients. After a connection has been established with the server is responding to FTP
commands from the client.
4.1.1 Connect to FTP server
long FtpInitial(LPCTSTR FtpAddress,
long FtpPort,
LPCTSTR UserName,
LPCTSTR Password);
This function connects to the specified FTP server and attempts to automatically
log the user in to the FTP server
Parameter
FtpAddress
FtpPort
UserName
Password
Return Value
Range
0 ~ 65535
Description
FTP server IP address
FTP sever port
Specifies a user name with which to
log in to the remote computer.
Specifies the password for user-name.
Description
38
0
Nonzero
Execution was successful
Error: consult the error table at the appendix
Example:
CEzLIB EzLIB;
// =====================================================
void CEzLIB_TESTDlg::OnFTPTest()
{
BOOL rec;
rec= EzLIB.FtpInitial(_T("10.0.0.110"), 21,
_T("Anonymous"), _T("0"));
rec= EzLIB.FtpCwd(_T("\\Temp"));
rec= EzLIB.FtpCld(_T("\\Temp"));
rec= EzLIB.FtpPut(_T("test.BMP"), _T("test.BMP"));
rec= EzLIB.FtpGet(_T("test.BMP"), _T("test.BMP"));
EzLIB.FtpClose();
}
4.1.2 Close FTP server connection
void FtpClose();
This function closes the connection to the FTP server.
Example: see chapter 4.1.1.
39
4.1.3 Change remote directory
long FtpCwd(LPCTSTR Directory);
This function changes the directory on the remote computer.
Parameter
Range
Directory
Return Value
0
Nonzero
Description
Specifies the directory on the remote
computer to change to.
Description
Execution was successful
Error: consult the error table at the appendix
Example: see chapter 4.1.1.
4.1.4 Change local directory
long FtpCld(LPCTSTR Directory);
This function changes the working directory on the local computer.
Parameter
Range
Directory
Return Value
0
Nonzero
Description
Specifies the directory on the local
computer to change to.
Description
Execution was successful
Error: consult the error table at the appendix
Example: see chapter 4.1.1.
40
4.1.5 File transfer to FTP server
long FtpPut(LPCTSTR LocalFile, LPCTSTR RemoteFile);
This function copies one file from the local machine to the remote machine.
Parameter
LocalFile
RemoteFile
Return Value
0
Nonzero
Range
Pointer to a Unicode
character array
Pointer to a Unicode
character array
Description
Specifies the name of the local file to
copy.
Specifies the file name to use on the
remote computer (ftp server)
Description
Execution was successful
Error: consult the error table at the appendix
Example: see chapter 4.1.1.
41
4.1.6 File transfer to FTP client
long FtpGet(LPCTSTR RemoteFile, LPCTSTR LocalFile);
This function copies a remote file to the local computer (FTP client).
Parameter
RemoteFile
LocalFile
Return Value
0
Nonzero
Range
Pointer to a Unicode
character array
Pointer to a Unicode
character array
Description
Specifies the remote file to copy.
Specifies the name to use on the local
computer (FTP client).
Description
Execution was successful
Error: consult the error table at the appendix
Example: see chapter 4.1.1.
42
4.2 TCP/IP connection
4.2.1 Initializing a TCP/IP socket
long SocketInitial(short SocketNumber,
LPCTSTR IpAddress,
long IpPort);
This function creates a TCP/IP socket and connects to a remote TCP/IP server.
Parameter
SocketNumber
IpAddress
IpPort
Range
0 ~ 15
0 ~ 65535
Description
Socket number
TCP server IP address
TCP/IP server port number
Return Value
Description
0
Execution was successful
Nonzero
Error: consult the error table at the appendix
Example: see chapter 4.2.4.
4.2.2 Close a TCP/IP connection
long SocketClose(short SocketNumber);
This function closes an existing socket and thereby terminates a TCP/IP
connection.
Parameter
Range
Description
43
SocketNumber
Return Value
0
Nonzero
0 ~ 15
Socket number
Description
If no error occurs, this function returns zero
Error: consult the error table at the appendix
Example: see chapter 4.2.4.
4.2.3 Send data
long SocketSend(short SocketNumber, LPCTSTR String);
This function sends data to a remote TCP/IP server on a connected socket.
Parameter
SocketNumber
String
Return Value
0
Nonzero
Range
0 ~ 15
Pointer to a Unicode
character string
Description
Socket number
Buffer containing the data to be
transmitted
Description
If no error occurs, this function returns zero
Error: consult the error table at the appendix
Example: see chapter 4.2.4.
44
4.2.4 Receive data callback function
long SocketReceiveOn(short SocketNumber,
ptTSRFunc2 SRF);
This function triggers a call back function as soon as data is arriving.
Parameter
SocketNumber
SRF
Return Value
0
Nonzero
Range
0 ~ 15
Description
Socket number
Callback function
Description
If no error occurs, this function returns zero
Error: consult the error table at the appendix
Example:
CEzLIB EzLIB;
//User defined callback function
void SocketReceive0(CString AA,BYTE * Data,long Lenth)
{
BYTE Re[5000]={0};
memcpy( Re, Data,Lenth );
}
void OnEthernetTest()
{
BOOL rec;
rec= EzLIB.SocketInitial(0, _T("10.0.0.20"), 60000);
rec= EzLIB.SocketSend(0, _T("WinCon_IP_10.0.0.26"));
rec= EzLIB.SocketReceiveOn(0, &(ptTSRFunc2)SocketReceive0);
}
void OnEthernetClose()
{
BOOL rec;
rec= EzLIB.SocketReceiveOff(0);
rec= EzLIB.SocketClose(0);
}
45
4.2.5 Receive data callback function
long SocketReceiveOff(short SocketNumber);
This function disables the triggering of the callback function.
Parameter
SocketNumber
Return Value
0
Nonzero
Range
0 ~ 15
Description
Socket number
Description
If no error occurs, this function returns zero
Error: consult the error table at the appendix
Example: see chapter 4.2.4.
46
5
Trend View
The trend view is graphical user interface to visualize process values or calculated values
over time. The trend view is a line graph where time is measured on the horizontal axis
and the variable being observed is measured on the vertical axis. It records process values
for each time interval and joins these values by a line to visualize the change in data. It
can show multiple curves simultaneously to allow processes data comparison. The
TRENDA class does not support data recording and can only display a maximum of 1024
process values.
The class supports the following settings:
• Axis labels
• Gridlines: colors, width and style
• Trend line: colors, width, style and visibility
• Border line: colors, width and style
• Graph background colors
• Legend
5.1
Main configuration
The basic approach to creating a chart is as follows:
• Declare a CTRENDA object
• Determine the size and position of the graph frame
• Set the drawing area properties (background color, size, direction of the time axis)
• Assign the trend view graph a dialog window
• Set up labels, legends, grids,
• Set the line properties (style, width, color)
• Populate the chart object with your data
• Display data on the graph
47
5.1.1 Creating a trend view object
Create(LPCRECT pRect,
int iLeft,
int iRight,
int iTop,
int iBottom,
COLORREF RGB,
WORD RecordDataNo,
WORD XDir);
This function initializes the line chart object: sets its size, position and
background color.
Parameter
Range
Description
The position of the main frame on the dialog
window.
Top left:
•
•
pRect
LONG left;
LONG top;
Bottom right:
iLeft
iRight
iTop
iBottom
RGB
RecordDataNo
XDir
•
LONG right;
•
LONG bottom;
Left position of the graph area relative to the
left main frame position.
Right position of the graph area relative to
1 ~ 200
the right main frame position.
Top position of the graph area relative to the
1 ~ 200
top main frame position.
Bottom position of the graph area relative to
1 ~ 200
the bottom main frame position.
Background color
Sets the scale (resolution) of the visible
horizontal axis (time axis). It determines the
number of divisions of the visible timeline in
the graph.
10 ~ 1024
The RecordDataNo parameter basically
specifies the maximum number of data points
to be displayed on the visible time section.
XDir_Right_Lift =0 The direction of the horizontal axis.
1 ~ 200
48
XDir_Lift_Right =1 Chart plotting direction
• 0 – plotting of data points starts on the
right and each new point will be added to
the left of the previous point.
• 1 – plotting of data points starts on the
left and each new point will be added to
the right of the previous point.
49
5.1.2 Assign a parent window
void SET_CDC (CDC* pDC);
This function puts the trend view bitmap to a device context (CDC) of a dialog
window on which it will be displayed.
Parameter
Range
pDC
Description
Pointer to a device context of the
parent window.
Use the following expression to get the
pointer to the dialog window CDC:
this->GetDC()
Example:
CTRENDA MyTrend;
MyTrend.SET_CDC(this->GetDC());
5.1.3 Scaling, gridlines and labels
void Set_Rang(float fMin_X,
float fMin_Y,
float fMax_X,
float fMax_Y,
int iDevN_X,
int iDevN_Y);
This function sets the upper and lower limit of the vertical axis. In addition it sets
the number of vertical and horizontal gridlines for the visible section.
Data of the vertical axis is scaled according to the maximum and minimum axis
values. So, for example, if fMin_Y = 10 and fMax_Y = 60, then a value of 10
will be at the bottom of the chart and 60 will be at the top. Axis labels are
positioned according to the horizontal gridlines.
50
Parameter
Range
fMin_X
3.4E +/- 38
fMin_Y
3.4E +/- 38
fMax_X
3.4E +/- 38
fMax_Y
3.4E +/- 38
iDevN_X
iDevN_Y
–2,147,483,648 to
2,147,483,647
–2,147,483,648 to
2,147,483,647
Description
Of no significance for the trend view
object (use fMin_X = 0).
Set the minimum value of the vertical
axis.
Of no significance for the trend view
object (use fMax_X = 0).
Set the maximum value of the vertical
axis.
Set the number of vertical gridlines.
Set the number horizontal gridlines.
Example:
CTRENDA MyTrend;
MyTrend.Set_Range(0,-60, 0, 60, 5,10);
51
5.1.4 Legend setting
void SetLegend(bool ShowFlag, WORD XSpace);
This function enables the legend display and allows the user to set the distance of
legends from the right border of the graph area.
Parameter
ShowFlag
XSpace
Range
− true
− false
1~200
Description
− Display legends
− Hide legends
− Distance from the right border
5.2 Line properties
5.2.1 Frame and gridline property setting
void SetFrameP(BYTE Target,
int nPenStyle,
int nWidth,
COLORREF crColor);
This function sets the line style, width and color of the frame or the gridlines.
Parameter
Target
nPenStyle
Range
1 – graph frame
2 – vertical gridline
3 – horizontal gridline
PS_SOLID
PS_DASH
Description
Select a line.
Select a solid or dash line type
52
nWidth
crColor
1 ~ 10
Line width
Line color
Example:
CTRENDA MyTrend;
MyTrend.SetFrameP(1,PS_SOLID, 3,RGB(255,255,255)); //white
MyTrend.SetFrameP(2,PS_DASH, 1, RGB(255,0,0));// red
MyTrend.SetFrameP(3,PS_DASH, 1, RGB(0,255,0));// green
5.2.2 Trend line property setting
void SetCurveP(BYTE Cno,
int nPenStyle,
int nWidth,
COLORREF crColor,
bool IS_Used);
This function sets the line style, width and color of the selected trend line.
Parameter
Cno
Range
0~7
Description
Select a trend line. The CTRENDA class
supports multiple lines that means up
53
to eight trend lines (each representing
a variable) can be plotted on the graph.
nPenStyle
nWidth
PS_SOLID
PS_DASH
1~5
Select a solid or dash line type
Line width
Line color
Example:
crColor
RGB(255,255,255)//white
IS_Used
Indicate, whether the selected trend
line should be displayed or disabled:
true - display trend line
false - disable trend line
true,
false
Example:
CTRENDA MyTrend;
MyTrend.SetCurveP(0,PS_SOLID,1,RGB
MyTrend.SetCurveP(1,PS_SOLID,1,RGB
MyTrend.SetCurveP(2,PS_SOLID,1,RGB
MyTrend.SetCurveP(3,PS_SOLID,1,RGB
MyTrend.SetCurveP(4,PS_SOLID,1,RGB
MyTrend.SetCurveP(5,PS_SOLID,1,RGB
MyTrend.SetCurveP(6,PS_SOLID,1,RGB
MyTrend.SetCurveP(7,PS_SOLID,1,RGB
(
(
(
(
(
(
(
(
255
255
255
255
0 ,
127
0 ,
100
, 0 , 0 ),true);
//red
, 255 , 0 ),true); // yellow
, 0 , 255 ),true); // pink
, 255 ,111 ),true);// yellow
255 , 255 ),true); // blue
, 0 , 127 ),true); // purple
// green
255, 0 ),true);
, 44 , 44 ),true); // brown
54
5.3 Adding new data readings to the graph
5.3.1 Method 1
void AddRecord(double fData[8],
CString Dtime);
This function updates one or more trend lines to newest readings and
automatically adds a new time label to the grid. The y-axis (vertical axis) in the
line graph indicates a quantity (e.g., ampere, volt, liters) or percentage, while the
horizontal x-axis represents the time. For multi lines trends the data in the fData
array represents the y-values of different curves at a specific time (Dtime).
For example the new position of the trend line 0 is determined by the y-value
stored in the variable fData[0] and the time (x-axis) stored in the variable Dtime.
Parameter
fData[8]
Dtime
Range
3.4E +/- 38
Description
Vertical axis:
Each of the eight array elements stores
data for one of the eight trend lines at a
specific time.
Horizontal axis (time axis):
The time at which the reading took
place.
Example 1:
55
By calling the function SinusCurve() at fixed time interval a sinus curve will be
displayed.
CTRENDA MyTrend;
CEzLIB EzLIB;
void CTrendViewDlg::SinusCurve()
{
CString DataTime;
wchar_t tcDate[15];
wchar_t tcTime[15];
int i;
double fData[8];
static const float DtoGrade=3.1415926535/180;
static int Data_count=0;
// Update the array with new data of a sinus curve
for(i=0;i<8;i++)
{
fData[i]= 25 * sin(Data_count*DtoGrade*10)+25*i-150;
}
if (Data_count<360) Data_count++;
else Data_count=1;
// Read the current date and time:
EzLIB.Get_Date(tcDate);
EzLIB.Get_Time(tcTime);
// Copy the date and time to the time CString
DataTime.Format(L"%s\r\n%s", tcDate,tcTime);
// Update the graph with the new data
MyTrend.AddRecord(fData,DataTime);
// Redraw the graph
MyTrend.Paint();
}
56
5.3.2 Method 2
void AddRecord(double fData0,
double fData1,
double fData2,
double fData3,
double fData4,
double fData5,
double fData6,
double fData7 ,
CString Dtime);
This function has the same properties as the function discussed under method 1,
except that the values for the vertical axis are not stored in an array but in eight
float variables.
Parameter
Range
fData0 ~
fData7
3.4E +/- 38
Dtime
1~5
Description
Vertical axis:
Each of the eight data types stores data
for one of the eight trend lines at a
specific time.
Horizontal axis (time axis):
The time at which the reading took
place.
Example 2: Directly displaying analog input data.
This can be done by directly reading the analog input data from the analog
channel by using the IN_AI function. This function is described in the EzCore
manual.
CTRENDA MyTrend;
CEzLIB EzLIB;
void CTrendViewDlg::SinusCurve()
{
CString DataTime;
wchar_t tcDate[15];
wchar_t tcTime[15];
// Read the current date and time:
EzLIB.Get_Date(tcDate);
EzLIB.Get_Time(tcTime);
57
// Copy the date and time to the time CString
DataTime.Format(L"%s\r\n%s", tcDate,tcTime);
// EzProg-I IN_AI()
MyTrend.AddRecord(IN_AI(0), IN_AI(1), IN_AI(2), IN_AI(3),
IN_AI(4), IN_AI(5), IN_AI(6), IN_AI(7),
DataTime);
MyTrend.Paint();
}
5.3.3 Delete all trend lines
void ClearRecord();
This function removes all trend lines and time labels from the graph.
5.3.4 Redraw graph
void Paint();
This function redraws the graph. Any changes made to the graph property, the
line trend itself or other settings concerning the visual part of the graph requires a
Paint() function call to display the changes.
Example: see previous examples.
58
5.4 Change the display status and range
5.4.1 Display or hide a trend line
void SetVisible(BYTE Cno, bool Visible);
This function enables you to select a trend line and make it visible or invisible
during runtime.
Parameter
Range
Cno
0~7
Visible
true, false
Description
Select one trend line. The CTRENDA
class supports multiple lines that
means up to eight trend lines (each
representing a variable) can be plotted
on the graph.
Visible or invisible
Example:
CTRENDA MyTrend;
MyTrend.SetVisible(3,true); //display trend line no 3
MyTrend.SetVisible(4,false); // hide trend line no 4
MyTrend.SetVisible(5,true); //display trend line no 5
//Redraw the graph
MyTrend.Paint();
59
5.4.2 Modifying vertical axis range
void ChangeRangeY(double fMin_Y, double fMax_Y);
This function modifies the upper and lower limit of the vertical axis and therefore
also the scale of the axis. In addition it resets the number of horizontal gridlines
and the labels for the vertical axis.
Parameter
Range
fMin_Y
3.4E +/- 38
fMax_Y
3.4E +/- 38
Description
Set the minimum value forthe vertical
axis.
Set the maximum value for the vertical
axis.
5.4.3 Modifying horizontal axis range
void ChangeRangeX(int iDevN_X, WORD RecordDataNo);
This function modifies the number of vertical gridlines and the vertical gridline
labels. In addition it modifies the resolution of the visible horizontal axis.
Parameter
iDevN_X
3 ~ 20
Range
RecordDataNo
10 ~ 1024
Description
Set the number of vertical gridlines.
Set the number of divisions for the
horizontal axis. This variable sets the
resolution of the horizontal axis. The
higher the value the more data can be
displayed on the visible graph.
Example:
CTRENDA MyTrend;
CTRENDA MyTrend;
MyTrend.ChangeRangeX(3, 100);
MyTrend.ChangeRangeX(4, 500);
60
MyTrend.Paint();
//Redraw the graph
MyTrend.Paint();
MyTrend.Paint();
//Redraw the graph
MyTrend.Paint();
61
5.5 Example
The main purpose of this example is to demonstrate the sequence in which the
CTRENDA member functions have to be called in order to display the trend graph
correctly.
Example:
// STEP 1: Declare the following three global objects:
CTRENDA MyTrend;
CEzLIB EzLIB;
CDC WorkCDC;
void CTrendViewDlg::InitializeTrendView()
{
// STEP 2:
// Declare CRect object
// Initilize the object with the position and size of the graph window
CRect rect(0, 0, 400, 350);
// STEP 3:
// Set the general properties of the graph area like size and color
MyTrend.Creat(rect,50,50,50,50,RGB(0,0,0),100,XDir_Right_Lift);
// STEP 4:
//Attach the trend graph and the global device context to the dialog
// window
WorkCDC.Attach(*this->GetDC());
MyTrend.SET_CDC(this->GetDC());
// STEP 5:
//Set the line type, width and color of the frame and the grid lines
MyTrend.SetFrameP(1,PS_SOLID, 3,RGB(255,255,255)); //white
MyTrend.SetFrameP(2,PS_DASH, 1, RGB(255,0,0));// red
MyTrend.SetFrameP(3,PS_DASH, 1, RGB(0,255,0));// green
// STEP 6:
// Set the lower and upper limit of the vertical axis. Determine the
// number of gridlines for the veritcal and horizontal axis. A label
// is automatically attached to each gridline.
MyTrend.Set_Range(0.0,-60.0, 0.0, 60.0, 3,10);
// STEP 7:
//Set the line type, width and color
MyTrend.SetCurveP(0,PS_SOLID,2,RGB (
MyTrend.SetCurveP(1,PS_SOLID,2,RGB (
MyTrend.SetCurveP(2,PS_SOLID,2,RGB (
MyTrend.SetCurveP(3,PS_SOLID,1,RGB (
MyTrend.SetCurveP(4,PS_SOLID,1,RGB (
MyTrend.SetCurveP(5,PS_SOLID,1,RGB (
MyTrend.SetCurveP(6,PS_SOLID,1,RGB (
MyTrend.SetCurveP(7,PS_SOLID,1,RGB (
of the trend lines
255 , 0 , 0 ),true);
255 , 255 , 0 ),true);
255 , 0 , 255 ),true);
255 , 255 ,111 ),false);
0 , 255 , 255 ), false);
127 , 0 , 127 ), false);
0 , 255, 0 ), false);
100 , 44 , 44 ), false);
62
// STEP 8:
// Draw the frame
MyTrend.Paint();
}
void CTrendViewDlg::DrawTrendView()
{
CString DataTime;
wchar_t tcDate[15];
wchar_t tcTime[15];
int i;
static double x = 0;
double fData[8];
for(i=0; i<100; i++)
{
// STEP 8:
// Load the data for the y axis (vertical axis)
fData[0]= 5.0 * x - 60.0 ;
fData[1]= 2.5 * x - 60.0 ;
fData[2]= x - 60.0 ;
if (x <20.0) x++;
else x=0.0;
// STEP 9:
// Load data for the vertical gridline labels.
// Read the current date and time:
EzLIB.Get_Date(tcDate);
EzLIB.Get_Time(tcTime);
// Copy the date and time to the time CString
DataTime.Format(L"%s\r\n%s", tcDate,tcTime);
// STEP 10:
// Update the graph with the new data and labels
MyTrend.AddRecord(fData,DataTime);
}
// STEP 11:
// Draw the graph
MyTrend.Paint();
}
63
64
6
Appendix
6.1 Error Table
#define
#define
#define
#define
#define
#define
#define
_NO_ERROR
_EXEC_ERROR
_OPENFILE_ERROR
_SETUP_ERROR
_FRAM_INIT_ERROR
_REGISTER_ERROR
_NONE_MAOS_ERROR
0
-1
-2
-3
-4
-5
-6
#define _INCORECT_RUN_MODE
-7
#define _DIVIDE_ZERO_ERROR
-10
#define _SET_Interrupt_ERROR
-20
#define
#define
#define
#define
#define
#define
-31
-32
-33
-34
-35
-36
I8048_ERROR_NO_MODULE
I8048_ERROR_OPEN_DEVICE
I8048_ERROR_INVALID_PARAMETER
I8048_ERROR_INVALID_HANDLE
I8048_ERROR_CALL_IOCTL
I8048_ERROR_GET_IST_EVENT
#define _IN_USE_ERROR
#define _NO_USE_ERROR
#define _OUT_OF_RANGE_ERROR
-50
-51
-52
#define _AES_NOT_SETKEY_ERROR
#define _AES_CHECK_ERROR
-80
-81
#define _CREATE_THREAD_ERROR
-90
#define _INOUT_ERROR
-100
#define _STP_PARAMETER_ERROR
-150
#define _SYSTEM_VERSION_ERROR
#define _DEVICE_CHECK_ERROR
#define _DEVICE_NOT_INIT
-200
-201
-202
65
#define _DEVICE_NOT_WinCon
-203
#define _AES_REGCODE_LENTH_ERROR
#define _AES_REGMSG_NO_ERROR
-250
-251
#define _FILE_NOT_OPEN
// the file not open Please open first
#define _READ_FILE_ERROR
// Read from file error
#define _WRITE_FILE_ERROR
// Write to file error
-300
-310
-320
#define _ETHERNET_CONNECTION_ERROR
1
#define _ALREADY_RUN_WARNING
10
#define _BATTERY1_LEVEL_WARNING
21
#define _BATTERY2_LEVEL_WARNING
22
//for i8094H/A
#define _I8094H_TIMEOUT_ERROR
50
//for i8092/F i8094/F i8094H/A
#define _MOTION_NO_REG_ERROR
51
//for i8094/F
#define _MOTION_OPENCONFIG_ERROR
52
//for i8092/F i8094/F i8094H/A
#define _NON_MOTION_ERROR
#define _MOTION_INTP_ALREADY_RUN
53
54
#define _SYSTEM_NOT_READY
100
66