1
mw3 Classic Software
User Guide
Issue 2.05
27/03/2015
About this User Guide
This document applies to mw3 Classic Software Version 2.07 (or later).
The software was named 'Classic' since it has the option of displaying the meter dial in the
traditional (classic) rectangular style of an analog meters. Earlier software simply had the circular
dial.
The first section of this guide (Basics) gives a simple overview of the software which will enable
the user to get up and running quickly. The next section covers topics in more detail.
Needle Test
The most critical aspect of a computer based meter is the smoothness of the needle motion on the
screen.
The needle test is a quick guide to how well your computer will perform.
It can be turned on and off from the Connection menu.
The quality of motion depends mostly on the computer graphics performance.
Demo
To run the program as a demo, install the software then play the demonstration file, which by
default is located in the Program Files\mindwalker\samples folder. See the section Basics –
Playback for instructions on how to do this.
Installation
Follow the steps given in the separate document 'Software Installation Instructions'.
If you have purchased the mindwalker hardware (mw3A) then you will also need to verify that the
USB driver has been properly installed.
mw Classic User Guide
1
Basics
Basics - Starting the Program
The program will be listed on the Start menu under mindwalker>mw3 Classic. The first time the
program is run, it will enter Demo mode. If you have mindwalker hardware plugged into a USB
port then select Connection > Connect from the menu bar. The program should find the
mindwalker device and will automatically locate it the next time the program is run.
Basics - View menu
There are three main elements to the screen display.
•
•
•
Meter Panel – with either traditional (rectangular) or circular style dial – always visible.
Graph Panel - optional
Recording/Playback Panel - optional
These main elements of the display are controlled from the View menu.
mw Classic User Guide
2
The Graph display is made visible or hidden by selecting View > Graph.
The Recording/Playback panel is made visible or hidden by selecting View > Recording. It must be
visible to play the demo file.
Select View > Meter Style to open the meter panel display options.
mw Classic User Guide
3
Dial - four types of dial display are available:
Traditional (AutoSet) - a traditional analog dial is presented, and the needle behaves the same
way as modern automatic analog meters - when the needle goes off the dial it is automatically SET.
It can also be manually SET by the keyboard space bar.
Traditional (Continuous) - when the needle nears the edge of the dial, a second shadow needle
enters from the opposite side and then becomes the main needle.
Circular - this display provides a theoretically better presentation of the needle since it is
permanently visible with no discontinuity. It may however take some time to become accustomed to
this less familiar format. Choose 1 or 2 needles display.
mw Classic User Guide
4
There are also options to change the dial scale graduation and clock display.
The locations of the clock and Baseline display can be swapped by ticking the On Left box in the
clock section.
When the digital clock is displayed, the date can also be shown in either short or long format. These
formats are configured according to the settings in the Windows Control Panel Regional Settings.
Using the View menu enables the user to tailor the screen to display only those elements required,
and in a variety of formats. Remember that the meter window can be made full screen, which
produces a particularly clean and clear display on small screen laptop computers.
mw Classic User Guide
5
Basics - Meter Panel
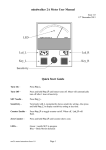
The meter panel comprises the following:
Baseline Position - top left, large digital readout.
Status - centre bottom (traditional) or centre left (circular), text describing the status or mode
currently active. Usually displays 'Demo Mode', 'Input OK', 'Recording' or 'Playback'.
Sensitivity Knob - bottom left, this control can be adjusted by dragging the knob with the mouse or
using the up & down arrow keys on the keyboard.
Clock - top right. Can be configured (View menu) as hidden, analog, digital 12hr or digital 24hr.
Baseline Drop (BD) Counter – bottom right, digital readout, appears faint until it is enabled by
clicking on it with the mouse, or the keyboard shortcut C. Repeating this action will toggle it
Off/On. Clicking on it and holding down the mouse button, or the keyboard shortcut Z, will zero
this counter.
The size of the panel on the screen can be adjusted by dragging the left or right window borders, or
full screen by the standard methods.
Basics - Alerts
The dial incorporates a simulated LED – a round indicator that flashes on and whose colour
indicates the status of the needle. For those familiar with automatic analog meters, they have such
an LED to indicate a needle SET, and on the traditional dial it is located in the same position. On
the circular dial it is located in the centre.
Following are the default colours for the LED and their meaning:
Green – a needle SET has occurred.
Blue – Body Motion has been detected.
Red – a Real Time delay (needle lag) has been detected.
Basics - Remembering Settings
There are many options which control the function and display of the the program. Colour settings
in particular dramatically affect the screen appearance. It is therefore important to understand how
these settings are remembered.
By default these settings are stored in the file mw3_Classic.ini located in the mindwalker directory.
Also by default you will be prompted to save any settings changes when exiting the program. This
behaviour can be changed from the Settings>Autosave menu item. Select On to always save
changes, select Off to always exit without saving changes, or leave it as Prompt.
mw Classic User Guide
6
If you wish to store several different 'styles' then use the File>Save Settings As and the File>Load
Settings menu items. The program always opens using the settings file in use when the last session
was closed.
Basics – Playback
To use the playback function the View>Recording menu option must be checked, so that the
Recording Panel is visible. Also ensure that the Recording>Audio>On menu item is checked.
Playback is accomplished by first loading a file using the OPEN button. Once loaded, the total time
of the recording will be shown at the left end of the panel. Press PLAY to start playback, and STOP
to terminate it. Recordings made with this version (or later) software will show the clock as it was
at the time of recording.
Once playback has started the Pause, Skip Forward, Skip Backwards and Repeat buttons are
enabled. Left mouse clicking anywhere on the Progress Bar will skip playback to that time.
It is also possible to select a section of a recording for playback. This is done by dragging the mouse
from left to right along the progress bar while holding down the left button. Right clicking on the
bar will return to full selection.
Overide Option – During playback, the settings from the time of recording, such as the Dial type
and Sensitivity, are duplicated. They can however be changed if the Overide option is checked.
mw Classic User Guide
7
Details
Recording Panel
To use the recording function the View>Recording menu option must be checked, so that the
Recording Panel is visible.
Audio can be turned on or off in the Recording>Audio menu. When making recordings with audio
enabled, the microphone setup and level are controlled by the standard Windows methods (eg
Windows Control Panel etc).
Meter data recordings are saved as *.mwd files, and the audio is saved separately as a *.wav file.
These files must have the same name and be located in the same folder to work together. If audio is
enabled when loading a recording but no sound file is located then an error message will appear.
Note - Playback will also work from a *.mp3 audio file, so once recorded in .wav format, free
software can be used to compress to .mp3 format.
The SETTINGS button (gear wheel) opens the Recording Setup panel.
mw Classic User Guide
8
•
Save to Folder – Location in which to store recordings, must be defined for Auto Name and
Auto Save modes
•
•
•
Save Mode – Manual. Complete control over name, location and when to save recording.
Save Mode – Auto Name. File is named according to 'File Name' settings, saving is manual.
Save Mode – Auto Save. File is always saved after STOP and named according to 'File
Name' settings.
Save Mode – Warn me... Unless you don't care about forgetting to save recordings, leave
this box ticked.
•
•
•
•
File Name – Filename prefix. This text is automatically inserted at the beginning of the
filename.
File Name – Numeric suffix. Files are named with incrementing number from 000 to 999.
File Name – Date/Time suffix. Files are named with date and start time in format
yy-mm-dd_hr.mm.ss
The numeric suffix system has been designed for ease of recording meter drills. Many recordings
can be made and easily viewed afterwards from a drop down box by right clicking the OPEN
button.
The drop-down box will show all numeric files in a folder with the same prefix name.
Warning! This system also makes it easy to delete all files by using the Reset button in the
Recording Setup.
Suppose there was one recording in the sequence you wanted to keep. Simply load it and right click
on the number text above the OPEN button. You can then save it as another name, and then use the
Reset button to delete all files in the sequence.
mw Classic User Guide
9
Recording Panel Keyboard Shortcuts:
R – RECORD
P – PLAY, PAUSE
S – STOP
Body Motion Detect
It is possible to detect needle responses caused by hand or finger motion on the electrode. Such
motion causes the LED to flash Blue. The sensitivity of the Body Motion Detect can be changed in
the Settings > Alerts > Body Motion Detector menu.
Needle Freeze
Detected Body Motion can optionally cause the needle to freeze and change colour. Once body
motion has ceased, there is a short delay before the needle returns to its normal colour and
unfreezes.
Needle Freeze on Body Motion can be turned off or on with keyboard shortcut F, or from the
Settings > Alerts > Body Motion Freeze menu.
This USER Guide is work in progress and is incomplete. Check the web site for updates.
mw Classic User Guide
10