1
User Guide
CUDAfy.NET
Table of Contents
1
2
3
4
5
INTRODUCTION .............................................................................................................................4
1.1
OVERVIEW .................................................................................................................................4
1.2
GENERAL CUDAFY PROCESS ....................................................................................................5
CONFIGURING THE SYSTEM.......................................................................................................6
2.1
KEY FEATURES ..........................................................................................................................6
2.2
ENVIRONMENT ...........................................................................................................................6
2.3
INSTALLATION ............................................................................................................................7
2.4
INSTALL DIRECTORY ................................................................................................................13
CUDAFY BY EXAMPLE................................................................................................................15
3.1
HELLO W ORLD.........................................................................................................................16
3.2
SIMPLE KERNEL .......................................................................................................................16
3.3
SIMPLE KERNEL PARAMS .........................................................................................................18
3.4
ENUM GPU .............................................................................................................................19
3.5
ADD LOOP CPU.......................................................................................................................19
3.6
ADD LOOP GPU ......................................................................................................................19
3.7
ADD LOOP GPU ALT ................................................................................................................20
3.8
ADD LOOP LONG......................................................................................................................20
3.9
JULIA CPU AND JULIA GPU .....................................................................................................21
3.10
ADD LOOPS BLOCKS AND ADD LOOP LONG BLOCKS ..................................................................21
3.11
DOT ........................................................................................................................................21
3.12
RIPPLE ....................................................................................................................................22
3.13
RAY TRACING ..........................................................................................................................23
3.14
HISTOGRAM SHARED MEMORY ATOMICS ..................................................................................25
3.15
HISTOGRAM SHARED MEMORY ATOMICS ..................................................................................25
3.16
COPY TIMED ............................................................................................................................26
CUDAFY EXAMPLES ...................................................................................................................28
4.1
ARRAY BASIC INDEXING ...........................................................................................................28
4.2
ARRAY MULTI-DIMENSIONS .......................................................................................................29
4.3
GLOBAL ARRAYS .....................................................................................................................29
4.4
COMPLEX NUMBERS ................................................................................................................29
4.5
DUMMY FUNCTIONS .................................................................................................................30
THE CUDAFY TRANSLATOR ......................................................................................................32
CUDAfy_User_Manual_1_22.doc
Page 2 of 45
6
7
5.1
CUDAFY TRANSLATOR ............................................................................................................32
5.2
CACHING MODULES TO IMPROVE PERFORMANCE ......................................................................33
5.3
CUDAFY COMMAND LINE TOOL ...............................................................................................34
CUDAFY MODULE VIEWER ........................................................................................................36
6.1
FUNCTIONS .............................................................................................................................37
6.2
TYPES .....................................................................................................................................37
6.3
CONSTANTS ............................................................................................................................39
6.4
GENERATED SOURCE CODE .....................................................................................................40
6.5
PTX ........................................................................................................................................41
MISCELLANEOUS FEATURES ...................................................................................................42
7.1
CONTEXTS AND MULTI-GPU SYSTEMS .....................................................................................42
7.2
STRONGLY TYPED LAUNCHES ..................................................................................................43
7.3
USING CUDAFY FROM A SERVICE ............................................................................................43
7.4
BUILDING CUDAFY FROM SOURCE CODE .................................................................................43
7.5
CODE INSERTION .....................................................................................................................44
7.6
USING NVIDIA NSIGHT FOR DEBUGGING ON GPU ....................................................................45
CUDAfy_User_Manual_1_22.doc
Page 3 of 45
1 Introduction
1.1 Overview
CUDAfy is a set of libraries and tools that permit from the Microsoft .NET framework general
purpose programming of NVIDIA CUDA Graphics Processing Units (GPUs) and devices
supporting OpenCL. Its aim is to be the leading set of tools for this task; combining flexibility,
performance and ease of use.
The CUDAfy SDK comprises one library (DLL) called Cudafy.NET.dll, the Cudafy command line
tool and a Cudafy Module Viewer GUI. From a high level it offers the following:
Cudafy .NET Library
o
Cudafy Translator (Convert .NET code to CUDA C)
o
Cudafy Library (CUDA support for .NET)
o
Cudafy Host (Host device wrapper)
o
Cudafy Math (FFT, BLAS, RAND, SPARSE)
Cudafy by Example demo project
Cudafy Module Viewer
Cudafy Command Line Tool
The Translator converts .NET code into CUDA or OpenCL code. It is based on ILSpy – a very
useful decompilation tool from SharpDevelop. Its use as part of your daily .NET development is
recommended. http://wiki.sharpdevelop.net/ilspy.ashx
Warning:
It is highly recommended that the user first learns the basics of CUDA. The NVIDIA
website is a good starting point as is the book CUDA by Example by Sanders and Kandrot.. Knowledge of OpenCL is less important since the CUDAfy preserves the CUDA
programming model these devices, too.
CUDAfy_User_Manual_1_22.doc
Page 4 of 45
1.2 General CUDAfy Process
There are two main components to the CUDAfy SDK:
Translation from .NET to CUDA C or OpenCL C and, if using CUDA, compiling using
NVIDIA compiler (this results in a Cudafy module xml file)
Loading CUDAfy modules and communicating with GPU from host
It is not necessary for the target machine to perform the first step above.
1. Add reference to Cudafy.NET.dll from your .NET project
2. Add the Cudafy, Cudafy.Host and Cudafy.Translator namespaces to source files (using in C#)
3. Add a parameter of GThread type to GPU functions and use it to access thread, block
and grid information as well as specialist synchronization and local shared memory features.
4. Place a Cudafy attribute on the functions.
5. In your host code before using the GPU functions call Cudafy.Translator.Cudafy( ).
This returns a Cudafy Module instance.
6. Load the module into a GPGPU instance. The GPGPU type allows you to interact seamlessly with the GPU from your .NET code.
CUDAfy_User_Manual_1_22.doc
Page 5 of 45
2 Configuring the System
There are two scenarios that we need consider:
Use of CUDAfy on developers machine
Use of CUDAfy on target end user machine
2.1 Key Features
CUDAfy attempts to provide an intuitive and clean interface to the world of massively parallel
programming. Recognizing that CUDA is a powerful programming tool it sticks closely to the
CUDA model but in a .NET manner. It also brings this model to the non-NVIDIA devices by
transparently supporting OpenCL devices such as GPUs from AMD or CPUs from Intel.
We minimize the introduction of new data formats and permit full support for .NET primitive
types, arrays and structures on the device – int, byte, short, double, etc. The code that will
execute on the device can be written in your .NET language.
The CUDA BLAS, FFT, RAND and SPARSE maths libraries are also supported and can be
seamlessly used alongside your own custom device code.
CUDAfy also features a powerful emulation mode to assist in debugging.
2.2 Environment
The single CUDAfy library targets Windows operating system with .NET 4.0. It is possible to use
CUDAfy with .NET 3.5 or Linux by building from source code and specifying the relevant
conditional symbols or configuration. Both 32-bit and 64-bit OS are supported.
Developer/Target Machine
Windows 32-bit or 64-bit (Linux possible)
.NET 4.0 (will need to build from sources if targeting other .NET versions)
NVIDIA GPUs:
o
NVIDIA GPU with compute capability 1.1 or higher (1.3 or higher recommended)
o
Up to date NVIDIA drivers
o
CURAND, CUSPARSE, CUFFT and CUBLAS dlls if using these math libraries
OpenCL Devices:
CUDAfy_User_Manual_1_22.doc
Page 6 of 45
o
AMD OpenCL SDK: http://developer.amd.com/tools/heterogeneouscomputing/amd-accelerated-parallel-processing-app-sdk/
o
Intel OpenCL SDK: http://software.intel.com/en-us/vcsource/tools/opencl-sdk
Precompiled CUDAfy modules. You generally would not cudafy your .NET code in a
deployment situation as this requires the full CUDA SDK and Visual Studio. CUDAfy
modules can be loose at *.cdfy files or embedded in your application assembly (*.exe or
*.dll) through use of the cudaycl command line tool.
Developer Machine
Visual Studio 2010 or higher, Visual Studio Express, SharpDevelop or MonoDevelop
NVIDIA GPUs
o
Visual Studio C++ required by NVIDIA nvcc compiler.
o
CUDA 5.0 SDK. You can obtain this from: http://developer.nvidia.com/cudadownloads
2.3 Installation
CUDAfy is available either as a custom installer from http://www.hybriddsp.com or can be built
from source code. The source code can be located at http://cudafy.codeplex.com. The installer
version contains a single merged library (DLL) that can be linked to from your application. If
building from sources you will have multiple libraries to contend with and you will need to link to
the relevant ones.
Getting CUDA itself installed correctly is typically the toughest step and NVIDIA have provided
detailed information on this: http://docs.nvidia.com/cuda/cuda-getting-started-guide-formicrosoft-windows/index.html.
CUDAfy_User_Manual_1_22.doc
Page 7 of 45
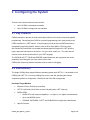
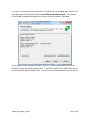
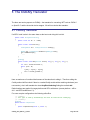
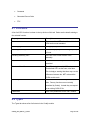
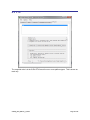
Click Next.
CUDAfy_User_Manual_1_22.doc
Page 8 of 45
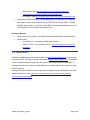
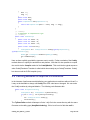
Read and accept the license agreement. Unless you have purchased a commercial license you
must adhere to the LGPL license. Basically you may only link to the dll and any changes made
to source code must be submitted. Click Next.
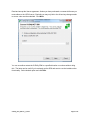
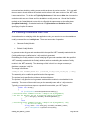
You can now either extract the CUDAfy SDK to a specified location or continue without doing
this. The latter can be useful if you’ve already got the SDK and want to use the installers other
functionality. Select desired option and click Next.
CUDAfy_User_Manual_1_22.doc
Page 9 of 45
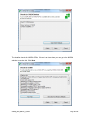
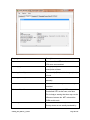
The installer checks for NVIDIA GPUs. If there is an issue here you can go to the NVIDIA
website to resolve this. Click Next.
CUDAfy_User_Manual_1_22.doc
Page 10 of 45
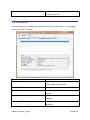
If you are on a developer machine and want to use CUDA you can click Run Test. If there is an
issue then check the log carefully and click Visit CUDA on Windows Website. This will take
you to NVIDIA’s webpage that details how to set-up CUDA on Windows. Click Next.
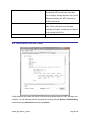
The next page tests your system for OpenCL devices. If CUDA is installed and you have an
NVIDIA GPU then this will also show up here. To use Intel or AMD CPUs or AMD GPUs you will
need to install the relevant OpenCL SDK. You can click on the relevant buttons to access these.
CUDAfy_User_Manual_1_22.doc
Page 11 of 45
The next page gives some more information on CUDAfy in general. If you find CUDAfy useful
then please consider a commercial license or donating to our chosen charity Harmony through
Education. They have already set-up a school in India for handicapped children. It is tough
being handicapped anywhere in the world but in the developing world it is especially so. Once
you are done you can check I’ve read and considered and then click Next.
Note: You can find out more about Harmony through Education at
http://www.hybriddsp.com/About/Charity.aspx.
CUDAfy_User_Manual_1_22.doc
Page 12 of 45
Okay you are done. If you check Get in touch then on hitting OK you will be taken to Hybrid
DSP’s support page.
2.4 Install Directory
The extracted directory contains the following:
CudafyByExample is a demonstration project that illustrates many of the features of CUDAfy. It
can be run on both CUDA and OpenCL devices.
The bin directory has:
CUDAfy_User_Manual_1_22.doc
Page 13 of 45
CUDAfy.NET.dll is the sole assembly that you need reference from your project. The other
applications are the command line tool cudafycl which is for standalone cudafying and for
embedding cudafy modules into the assembly.
The CudafyModuleViewer is a GUI tool for examing cudafy modules (*.cdfy files).
CUDAfy_User_Manual_1_22.doc
Page 14 of 45
3 CUDAfy By Example
The quickest way to get up and running with Cudafy is to take a look at the example project.
You may wish to make a copy of this before you begin building and modifying them – if so bear
in mind that if you open the copies then the reference to Cudafy.NET.dll may be broken if the
relative path is different. This dll is in the bin directory so re-add it if necessary.
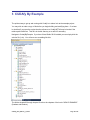
Navigate to CudafyByExample. If you have Visual Studio 2010 installed you can simply click the
solution file (*.sln). You will soon see something like this:
The folders chapter03 through chapter10 refer to the chapters of the book CUDA BY EXAMPLE
(Sanders and Kandrot).
CUDAfy_User_Manual_1_22.doc
Page 15 of 45
Open the file Program.cs. Since this is a Console application this is the code that will run when
you run it. The static CudafyModes class is a helper for storing our code generation and target
settings so all examples can access them. Basically we set the code generation to CUDA C or
OpenCL and the target to a CUDA GPU or OpenCL device. You can also set to Emulator but
it’s more fun at this stage not to since the more complex examples will be painfully slow. The
majority of the samples have an Execute method and our Main method simply calls each
sequentially.
Press F5 or the little green arrow to run the application.
The various examples are described below:
3.1 Hello World
This is only included to keep things in line with CUDA BY EXAMPLE. Hopefully no explanation
is needed!
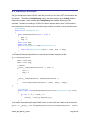
3.2 Simple Kernel
Now we are going to run a very simple function on the GPU or OpenCL device. Functions
running on a device are often referred to as kernels.
using System;
using System.Collections.Generic;
using System.Linq;
using System.Text;
using Cudafy;
using Cudafy.Host;
using Cudafy.Translator;
namespace CudafyByExample
{
public class simple_kernel
{
public static void Execute()
{
CudafyModule km = CudafyTranslator.Cudafy();
GPGPU gpu = CudafyHost.GetDevice(CudafyModes.Target, CudafyModes.Devi
ceId);
gpu.LoadModule(km);
gpu.Launch().thekernel(); // or gpu.Launch(1, 1, "kernel");
Console.WriteLine("Hello, World!");
}
[Cudafy]
public static void thekernel()
{
CUDAfy_User_Manual_1_22.doc
Page 16 of 45
}
}
}
You will see that we include three namespaces:
Cudafy
Cudafy.Host
Cudafy.Translator
Now follows some key points of using Cudafy. The function we wish to run on the device is
named thekernel. Don’t call it kernel because OpenCL will not like it. We put an attribute on
there named Cudafy. This tells the translator that we wish to cudafy this method. A device
method that is callable from a host application must return void. We will return to this later but
briefly when CudafyByExample is compiled an executable is produced named
CudafyByExample.exe. When we run this the call to CudafyTranslator.Cudafy creates a
Cudafy module. In this case we selected simple_kernel. This type contains only one item
marked for cudafying – the method thekernel. This method does nothing useful but importantly
it still does this nothing useful business on the GPU.
The output of the translation is a Cudafy module instance. When calling the empty overload of
Cudafy an xml file named simple_kernel.cdfy is also created (cached) and will be used next
time the exact same application is run (i.e. checksum stored in xml matches that of the declaring
assembly).
Okay, on with show. The CudafyHost class is static and contains a method called GetDevice.
We have stored the target type in our Main method in Program.cs. Hopefully it is set to Cuda
or OpenCL, but there is nothing wrong with choosing Emulator. Either way you will get back a
GPGPU object. This is your interface with the CUDA or OpenCL device in your computer. The
CudafyModule we deserialized in the first line is loaded and then we can Launch our function.
Launch is a dramatic sounding GPU term for starting a function on the device.
There are three ways of launching: Standard, Strongly Typed and Dynamic. The normal way is
commented out and is described next: We will go into details of what the first two arguments are
later but basically it means we are launching 1 x 1 = 1 thread. Later we’ll be launching rather
more threads in parallel. The third argument is the name of the function to run. Our module only
has one but it could have many so it is required that you provide this. The name is “thekernel” to
match the name of the thekernel method.
gpu.Launch().thekernel();
gpu.Launch(1,1, “thekernel”);
CUDAfy_User_Manual_1_22.doc
// Dynamic Launch OR
// Standard Launch OR
Page 17 of 45
gpu.Launch(1,1, Action(thekernel)); // Strongly Typed Launch
The dynamic way uses the Microsoft .NET 4.0 Dynamic Language Runtime to do the same way
but in a cleaner style. Since we want only one thread there are zero arguments to Launch
method. There are no arguments to kernel so that is also empty. The strongly typed launch has
the performance benefits of the standard launch plus the safety of strong typed parameters.
3.3 Simple Kernel Params
This is a slightly more useful example in that it actually does some processing on the device
though a CPU or even perhaps a calculator or doing the math in your head may be faster. Here
we pass some arguments into our device function:
[Cudafy]
public static void add(int a, int b, int[] c)
{
c[0] = a + b;
}
Since we cannot return any value from a device function our result is passed out via parameter
c. The out keyword is not supported so we use a vector instead. We need to actually allocate
memory on the device for this even though it will contain only one Int32 value.
int[] dev_c = gpu.Allocate<int>(); // cudaMalloc one Int32
If you take a look at the array dev_c in the debugger you’ll see that it has length zero. You
cannot and should not try to use variables that are on the device in your CPU side code. They
act merely as pointers.
We launch the function with:
gpu.Launch().add(2, 7, dev_c);
// or standard launch gpu.Launch(1, 1, "add", 2, 7, dev_c);
// or strongly typed gpu.Launch(1, 1, (Action<int,int,int[]>)(add),2,7,dev_c);
// Note that if the kernel method uses the GThread parameter then this must be
// added e.g. (Action<GThread,int,int,int[]>). However the argument does not
// need to be passed.
Put the arguments in the same order as the parameters of the add method. Finally we need to
copy the result back to the CPU:
int c;
gpu.CopyFromDevice(dev_c, out c);
With any luck you should end up with the correct answer.
CUDAfy_User_Manual_1_22.doc
Page 18 of 45
3.4 Enum GPU
Devices can list their properties and these can be useful for your application. Access the
properties for all CUDA GPUs via:
foreach (GPGPUProperties prop in CudafyHost.GetDeviceProperties(eGPUType.Cuda, true)))
The first parameter is the GPU type and the second is whether to get advanced properties or
not. Advanced properties require that the cudart DLL is available in addition to the standard
nvidia dll.
3.5 Add Loop CPU
This sample demonstrates how we might add two vectors of length N on the CPU.
3.6 Add Loop GPU
And now how to do the same on the device. We allocate three arrays on the CPU and the
device. As a short cut we can use an overloaded version of Allocate that takes a CPU array as
argument and then allocates the equivalent memory on the device. You could get the same
effect by passing the length in elements.
You will see that the Launch call passes the value N as first argument. We are going to launch
N threads, so that means we will add each element of the arrays in a separate thread.
How does each add thread know what element to operate on? This is done by adding a
GThread parameter to the device function. You do not need to specify an instance of this when
launching as this will occur automatically. Within GThread there are several properties. For
now we are interested in blockIdx and its x property.
[Cudafy]
public static void add(GThread thread, int[] a, int[] b, int[] c)
{
int tid = thread.blockIdx.x;
if (tid < N)
c[tid] = a[tid] + b[tid];
}
Variable tid will work out to be a number between 0 and N - 1 inclusive for our N threads. Now
each add knows who he is. The rest of the code should explain itself though the last three lines
are important, especially for .NET developers not used to cleaning up their garbage:
// free the memory allocated on the GPU
CUDAfy_User_Manual_1_22.doc
Page 19 of 45
gpu.Free(dev_a);
gpu.Free(dev_b);
gpu.Free(dev_c);
Here we explicitly release the memory we allocated on the device. The device host (GPGPU)
would also do this when it goes out of scope but since memory on a device is often limited in
comparison to that of the host and does not automatically cleanup it is good practice to do this.
Note that you can also access the thread id using the OpenCL notation. You can freely mix this
and the CUDA style while targeting both CUDA and OpenCL devices.
3.7 Add Loop GPU Alt
Basically the same as the previous sample but avoids the additional calls to Allocate by using
overloads of CopyToDevice:
// copy the arrays 'a' and 'b' to the GPU
int[] dev_a = gpu.CopyToDevice(a);
int[] dev_b = gpu.CopyToDevice(b);
Since we do not specify a destination for our CPU arrays a and b, Cudafy automatically creates
them and returns the pointers dev_a and dev_b.
3.8 Add Loop Long
Here we are adding two much longer vectors. Instead of adding each element in a separate
thread, each thread will be responsible for adding N / 128 elements. The first argument in
Launch is 128 which is the total number of threads.
In our GPU function we need an additional GThread property. We are now interested in
blockIdx and its x property and gridDim and its x property.
[Cudafy]
public static void add(GThread thread, int[] a, int[] b, int[] c)
{
int tid = thread.blockIdx.x;
while (tid < N)
{
c[tid] = a[tid] + b[tid];
tid += thread.gridDim.x;
}
}
CUDAfy_User_Manual_1_22.doc
Page 20 of 45
Variable tid is incremented by the number of blocks in the grid (128) which is given by
gridDim.x.
3.9 Julia CPU and Julia GPU
These are graphical demos for CPU and GPU. On the GPU it makes use of 2D blocks of
threads. Of note is the calling of a GPU function from another GPU function. Only GPU
functions that can be launched must return void, others may return values.
3.10 Add Loops Blocks and Add Loop Long Blocks
In CUDA you have grids, blocks and threads. Grids contain 1 or more blocks and blocks contain
one or more threads. The earlier examples for adding vectors made us of grids and blocks.
Now we use blocks and threads to obtain the same result. In more complex examples a
combination is used.
This usage remains identical when targeting OpenCL from CUDAfy.
3.11 Dot
This example introduces the concept of shared memory. This is memory shared between
threads of the same block. There are good performance reasons for this and you are referred to
the CUDA literature for background reading. To use shared memory from Cudafy you call the
AllocateShared method of GThread.
float[] cache = thread.AllocateShared<float>("cache", threadsPerBlock);
CUDAfy_User_Manual_1_22.doc
Page 21 of 45
The parameters are an id and the number of elements. We get back an array of the type
specified between the angle brackets. Another new concept is that of a barrier for the threads of
a single block. This is necessary for synchronizing all the threads at a certain point.
// synchronize threads in this block
thread.SyncThreads();
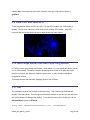
3.12 Ripple
This is another graphics demo that makes use of 2D blocks and a 2D grid. You will also see the
use of a GMath class. GMath is a Cudafy class that contains some specific versions of .NET
Math methods. The reason is that some Math methods such as Sqrt only provide overloads for
double and not float. When the translator translates to CUDA it would therefore add an
unnecessary cast if Math was used, hence the use of GMath.
GMath is also important when targeting OpenCL devices that do not support double floating
point.
Warning:
Unlike CUDA that transparently uses single floating point in early NVIDIA CUDA GPUs
that did not support double, OpenCL will simply not work if you try to load a module with
doubles on to a device that does not support them. You can query whether a device
supports double or not by checking the properties. With AMD GPUs only the more recent mid- to top range devices support double floating point.
CUDAfy_User_Manual_1_22.doc
Page 22 of 45
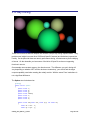
3.13 Ray Tracing
These are four almost identical samples that illustrate a simple ray tracing implementation. They
provide some insight into some other CUDA and OpenCL features (and limitations) exposed via
Cudafy. On the plus side these are namely performance timing, constant memory and cudafying
of structs. On the downside you learn some of the limits of OpenCL such as not supporting
functions in structs.
One example uses constant memory, the other does not. The difference you get in timing will
vary depending on whether .NET and the device are ‘warmed up’, your device and the target
compute capability used when creating the cudafy module. With the newer Fermi cards there is
not a significant difference.
The Sphere struct is declared as:
[Cudafy]
public struct Sphere
{
public float r;
public float b;
public float g;
public float radius;
public float x;
public float y;
public float z;
public float hit(float ox1, float oy1, ref float n1)
{
float dx = ox1 - x;
float dy = oy1 - y;
CUDAfy_User_Manual_1_22.doc
Page 23 of 45
if (dx * dx + dy * dy < radius * radius)
{
float dz = GMath.Sqrt(radius * radius - dx * dx - dy * dy);
n1 = dz / GMath.Sqrt(radius * radius);
return dz + z;
}
return -2e10f;
}
}
Placing the Cudafy attribute on classes does not work, only structs are supported. Operator
overloading is also not currently supported. Be aware that all types on the GPU whether in a
struct or copied between CPU and device or in a launch command, must be blittable. This
means that they have to be in a standard number format – e.g. byte, int, float, double.
Constant memory is a special kind of memory on the GPU that can be written only by the host
CPU and is read only for the device. It can in many circumstances be faster than the global
memory of the device, however its size is rather small (typically 64K). In the sample with
constant memory we have an array of Spheres here:
public const int SPHERES = 20;
[Cudafy]
public static Sphere[] s = new Sphere[SPHERES];
Warning:
Note you should not put a Cudafy attribute on SPHERES. .NET Constants (const) are
automatically placed into cudafied code.
We copy the Spheres we created on the host to the device’s constant memory with a special
method, where temp_s is an array of SPHERES Spheres:
Sphere[] temp_s = new Sphere[SPHERES];
...
...
gpu.CopyToConstantMemory(temp_s, s);
We should also look at the timer functionality. Timing device code is vital to ensure that the
effort that goes into fine tuning is paying off. We start and stop a timer with:
gpu.StartTimer();
...
...
float elapsedTime = gpu.StopTimer();
Finally let’s see what must be changed to get this to work under OpenCL. As hinted to earlier
the method hit has to be extracted from Sphere and made into a standard cudafied method of
the main class. This is not too much of a problem in a simple example like this but when this
limitation also rules out use of say a Complex number type then it becomes a royal pain.
Anyway this is one of the prices to pay to have CUDAfy code run on OpenCL devices.
CUDAfy_User_Manual_1_22.doc
Page 24 of 45
3.14 Histogram Shared Memory Atomics
This is an example of a simple algorithm that really shines on a GPU. It makes use of shared
memory and atomic operations. Atomic operations are an optimized way of performing some
basic commands such as addition in a thread safe manner. They are accessible from .NET by
using the Cudafy.Atomics namespace and will then appear as extension methods of GThread.
Warning:
Note that with NVIDIA GPUs, a GPU with compute capability of 1.2 or higher is needed.
The code works beautifully with CUDA and OpenCL targets.
[Cudafy]
public void histo_kernel(GThread thread, byte[] buffer, long size,
uint[] histo)
{
// clear out the accumulation buffer called temp
// since we are launched with 256 threads, it is easy
// to clear that memory with one write per thread
uint[] temp = thread.AllocateShared<uint>("temp", 256);
temp[thread.threadIdx.x] = 0;
thread.SyncThreads();
// calculate the starting index and the offset to the next
// block that each thread will be processing
int i = thread.threadIdx.x + thread.blockIdx.x * thread.blockDim.x;
int stride = thread.blockDim.x * thread.gridDim.x;
while (i < size)
{
thread.atomicAdd(ref temp[buffer[i]], 1 );
i += stride;
}
// sync the data from the above writes to shared memory
// then add the shared memory values to the values from
// the other thread blocks using global memory
// atomic adds
// same as before, since we have 256 threads, updating the
// global histogram is just one write per thread!
thread.SyncThreads();
thread.atomicAdd(ref(histo[thread.threadIdx.x]),temp[thread.threadIdx.x]);
}
3.15 Histogram Shared Memory Atomics
GPUs can perform multiple functions in parallel. To do this we use stream ids. Stream id zero is
the default and what has been implicitly used up until now. Commands with the same stream id
CUDAfy_User_Manual_1_22.doc
Page 25 of 45
are queued sequentially. Stream zero will synchronize any stream id so when doing parallel
operations we want to avoid its use. Of course to do all this we need to make sure our
commands are asynchronous. There are asynchronous versions of CopyToDevice, Launch
and CopyFromDevice. They get the postfix Async and take an additional parameter that is the
stream id. If you are using the dynamic launcher then a launch will be implicitly asynchronous if
a stream id is specified. To make sure all the asynchronous commands are completed we use
the SynchronizeStream method.
// now loop over full data, in bite-sized chunks
for (int i = 0; i < FULL_DATA_SIZE; i += N * 2)
{
gpu.CopyToDeviceAsync(host_aPtr, i, dev_a0, N, 1);
gpu.CopyToDeviceAsync(host_bPtr, i, dev_b0, N, 2);
gpu.CopyToDeviceAsync(host_aPtr, i + N, dev_a1, N, 1);
gpu.CopyToDeviceAsync(host_bPtr, i + N, dev_b1, N, 2);
//gpu.LaunchAsync(N / 256, 256, 1, "kernel", dev_a0, dev_b0, dev_c0);
//gpu.LaunchAsync(N / 256, 256, 2, "kernel", dev_a1, dev_b1, dev_c1);
// Or, dynamically
gpu.Launch(N / 256, 256, 1).kernel(dev_a0, dev_b0, dev_c0); //Async
gpu.Launch(N / 256, 256, 2).kernel(dev_a1, dev_b1, dev_c1); //Async
gpu.CopyFromDeviceAsync(dev_c0, host_cPtr, i, N, 1);
gpu.CopyFromDeviceAsync(dev_c1, host_cPtr, i + N, N, 2);
}
gpu.SynchronizeStream(1);
gpu.SynchronizeStream(2);
Another difference here is that the data on the host needs to be allocated as pinned memory.
This is a specially aligned data that offers higher performance and is a prerequisite for
asynchronous transfers. We can allocate this memory on the host with HostAllocate. Instead
of getting an array back we get an IntPtr. You can either copy host arrays to and from pinned
memory with GPGPU.CopyOnHost() or set values using the IntPtr extension method Set.
Remember to free the IntPtrs on the host and destroy the streams.
gpu.HostFree(host_aPtr);
gpu.HostFree(host_bPtr);
gpu.HostFree(host_cPtr);
gpu.DestroyStream(1);
gpu.DestroyStream(2);
3.16 Copy Timed
This sample compares the read and write performance of normal CPU to GPU transfers with
that of pinned memory to GPU transfers. Allocation of pinned memory was covered in the
previous example. You should see a significant difference when using non-TCC mode CUDA on
a Windows machine.
CUDAfy_User_Manual_1_22.doc
Page 26 of 45
Note: The Windows Device Driver Model (WDDM) imposes a fairly significant performance
penalty on transfers to and from non-pinned memory. Use of the Tesla Compute
Cluster (TCC) driver permits much better performance from non-pinned memory.
However the use of TCC is restricted to higher end Quadro and Tesla cards. Consult the NVIDIA documentation on how to configure TCC.
CUDAfy_User_Manual_1_22.doc
Page 27 of 45
4
CUDAfy Examples
From the CUDAfy codeplex site on http://cudafy.codeplex.com you can download the source
code to the CudafyExamples project. Only the first two examples are supported under both
CUDA and OpenCL. The remaining are currently CUDA only.
4.1 Array Basic Indexing
Only a sub-set of the standard .NET libraries is supported for device side code. With future
releases of CUDAfy and of NVIDIA’s CUDA Toolkit this will be expanded. In this example we
show how to use the Length, GetLength and Rank members of arrays. You can freely use these
in device code.
CUDAfy_User_Manual_1_22.doc
Page 28 of 45
4.2 Array Multi-dimensions
Typically we work with large arrays on devices. The reason for this is that small amounts of data
are not very efficient for processing and can be far better handled on the CPU. CUDAfy
supports one-, two- and three-dimensional arrays in global, constant and shared memory.
Jagged arrays are not supported. Use the notation [,] for 2D and [,,] for 3D arrays.
4.3 Global Arrays
This collection of samples shows how to work with 1D, 2D and 3D arrays of values (Int32) and
structs (ComplexFloat).
Warning:
This example and all subsequent examples are not currently supported under OpenCL..
4.4 Complex Numbers
Complex numbers are used very frequently in many disciplines. CUDA has a complex number
type built in (float and double varieties) and CUDAfy supports this via ComplexF and
ComplexD. These are in the Cudafy.Types namespace. The real part is called x and the
imaginary part y. A number of operations are provided:
Abs
Add
Conj
Divide
Multiply
Subtract
Bear in mind that due to the nature of floating point values the results you get with .NET and
those with the device will not be exactly the same.
CUDAfy_User_Manual_1_22.doc
Page 29 of 45
4.5 Dummy Functions
Say you already have some CUDA C code and you want to use it from .NET, then dummies are
the answer. The attribute CudafyDummy used in the same manner as the Cudafy attribute
makes this possible. Items marked with CudafyDummy are handled differently by the
translator. Instead of converting to CUDA C the add-in expects there to be a *.cu file with the
same name as the function or struct and that it also contains a function or struct with that name.
[CudafyDummy]
public struct DummyComplexFloat
{
public DummyComplexFloat(float r, float i)
{
Real = r;
Imag = i;
}
public float Real;
public float Imag;
public DummyComplexFloat Add(DummyComplexFloat c)
{
return new DummyComplexFloat(Real + c.Real, Imag + c.Imag);
}
}
A file named DummyComplexFloat.cu must exist and contain code such as this:
struct DummyComplexFloat
{
public: float Real;
public: float Imag;
// Methods
__device__ DummyComplexFloat(float
{
Real = r;
Imag = i;
}
r, float
i)
__device__ DummyComplexFloat Add(DummyComplexFloat c)
{
return DummyComplexFloat((Real + c.Real), (Imag + c.Imag));
}
};
[CudafyDummy]
public static void DummyDummyComplexFloatFunction(DummyComplexFloat[] result)
{
for (int i = 0; i < XSIZE; i++)
{
result[i] = result[i].Add(result[i]);
}
}
A file name DummyDummyComplexFloatFunction.cu must exist and contain code such as this:
extern "C" __global__ void
{
CUDAfy_User_Manual_1_22.doc
DummyDummyComplexFloatFunction(DummyComplexFloat
*result)
Page 30 of 45
int x = blockIdx.x;
result[x] = result[x].Add(result[x]);
}
Warning:
Dummy functions are not currently supported under OpenCL.
CUDAfy_User_Manual_1_22.doc
Page 31 of 45
5 The CUDAfy Translator
The there are two key aspects to CUDAfy – the translator for converting .NET code to CUDA C
or OpenCL C and the host side device wrapper. We will now look at the translator.
5.1 CUDAfy Translator
If all GPU code is also in the same class as the host code doing this is trivial:
public class ArrayBasicIndexing
{
public const int N = 1 * 1024;
public static void Execute()
{
CudafyModule km = CudafyTranslator.Cudafy();
GPGPU gpu = CudafyHost.GetDevice(eGPUType.Cuda);
gpu.LoadModule(km);
...
}
[Cudafy]
public static void add(GThread thread, int[] a, int[] b, int[] c)
{
int tid = thread.blockIdx.x;
while (tid < N)
{
c[tid] = a[tid] + b[tid];
tid += thread.gridDim.x;
}
}
Here we make use of a method that is aware of the class that is calling it. Therefore calling the
Cudafy method will first check if there is a cached Cudfy module with a matching checksum (see
next section), else it will translate the class ArrayBasicIndexing finding the method add.
Default settings are applied for target platform and GPU architecture (current platform – x86 or
x64 – and GPU architecture 1.3).
For more complex configurations the following will suffice:
/// <summary>
/// This type is used by GlobalArrays and must be selected for Cudafying.
/// </summary>
[Cudafy]
public struct ComplexFloat
{
public ComplexFloat(float r, float i)
CUDAfy_User_Manual_1_22.doc
Page 32 of 45
{
Real = r;
Imag = i;
}
public float Real;
public float Imag;
public ComplexFloat Add(ComplexFloat c)
{
return new ComplexFloat(Real + c.Real, Imag + c.Imag);
}
}
/// <summary>
/// Is dependent on ComplexFloat type.
/// </summary>
public class GlobalArrays
{
public const int XSIZE = 4;
public const int YSIZE = 8;
public const int ZSIZE = 16;
public static void Execute()
{
CudafyModule km = CudafyTranslator.Cudafy(typeof(ComplexFloat),
typeof(GlobalArrays));
GPGPU gpu = CudafyHost.GetDevice(eGPUType.Cuda);
gpu.LoadModule(km);
Here we have explicitly provided the types we want to cudafy. Further overloads of the Cudafy
method allow us to specify the architecture and platform. Note that it is also possible to compile
the module via the Compile method of the CudafyModule. This would be the typical sequence
when CudafyTranslator.Translate is called which does exactly as per CudafyTranslator .Cudafy
but does not call the CUDA compiler (nvcc).
5.2 Caching Modules to Improve Performance
In the interests of performance and distributing your applications to machines without Visual C++
it may not be desirable to always call Cudafy if the GPU code has not changed. We can cache
the Cudafy modules by using serialization. The following code illustrates this:
public class ArrayBasicIndexing
{
CudafyModule km = CudafyModule.TryDeserialize();
if (km == null || !km.TryVerifyChecksums())
{
km = CudafyTranslator.Cudafy();
km.Serialize();
}
The TryDeserialize method will attempt to find a *.cdfy file in the current directory with the same
file name as the calling type (ArrayBasicIndexing). If this is not found or fails then null is
CUDAfy_User_Manual_1_22.doc
Page 33 of 45
returned and we should try making a new module as shown in previous section. If it is not null
then we want to check whether the cached module refers to the same version of the .NET code
it was created from. To do this call TryVerifyChecksums. If this returns false then it means the
cached module was out of date and it is advisable to cudafy a new one. We call the Serialize
method on the CudafyModule to store this to a file with the same name as the calling class
(ArrayBasicIndexing). Overloaded methods of TryDeserialize and Serialize allow the
specifying of explict file names.
5.3 CUDAfy Command Line Tool
As an alternative to cudafying within the application code, you can elect to use the standalone
cudafy command line tool cudafycl.exe. There are two modes of operation:
Generate Cudafy Module
Embed Cudafy Module
In generate mode all types and members within the specified .NET assembly marked with the
Cudafy attribute are cudafied and a *.cdfy module is generated.
Embedding the Cudafy module involves cudafying all types and members within the specified
.NET assembly marked with the Cudafy attribute and then embedding the resultant Cudafy
module in the .NET assembly. The advantage of this is that it is no longer necessary to
distribute a separate *.cdfy file.
The usage is as follows:
cudafycl.exe assemblyname.dll [-arch=sm_11|sm_12|sm_13|sm_20] [-cdfy]
The assembly to be cudafied is specified as the first argument.
The optional -arch specifies the minimum device architecture.
The optional –cdfy puts the tool in generate mode and the module is not embedded in the
assembly. The name of the module is as per the assembly name with a *.cdfy extension.
Typically you would put these steps as a post-build event within your .NET project.
public void SetUp()
{
if (CudafyModule.HasCudafyModuleInAssembly())
// Post-build event command line was: cudafycl.exe $(TargetPath)
// Do this for Release. We use an extension method on Assembly.
_cm = GetType().Assembly.GetCudafyModule();
}
else
// Post-build event command line was: cudafycl.exe $(TargetPath) -cdfy
{
// Do this for Debug
string name = this.GetType().Assembly.GetName().Name;
_cm = CudafyModule.TryDeserialize(name);
CUDAfy_User_Manual_1_22.doc
Page 34 of 45
}
Assert.IsFalse(_cm == null);
Assert.IsTrue(_cm.TryVerifyChecksums());
_gpu = CudafyHost.GetDevice(CudafyModes.Target);
if(_cm != null)
_gpu.LoadModule(_cm);
}
CUDAfy_User_Manual_1_22.doc
Page 35 of 45
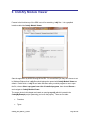
6 CUDAfy Module Viewer
Present in the bin directory of the SDK is a tool for examining *.cdfy files. It is a graphical
interface called the Cudafy Module Viewer.
Start the application by double clicking the exe file. For convenience you may also choose to set
in Windows Explorer that *.cdfy files should always be opened with Cudafy Module Viewer as
default. Double click a *.cdfy file and when Windows asks you which program to use to open
the file, choose Select a program from a list of installed programs, then choose Browse…
and navigate to Cudafy Module Viewer.
The screen shots in this chapter are based on opening ray.cdfy which is located in the
CudafyByExample project (assuming you’ve ran the project). There are five tabs:
Functions
Types
CUDAfy_User_Manual_1_22.doc
Page 36 of 45
Constants
Generated Source Code
PTX
6.1 Functions
A list of all GPU functions is shown in the top list box of this tab. Below are the details relating to
the selected function.
Property
Description
Name
The name of the .NET method from which the
GPU function was translated.
Declaring Type
The type (class) in which the method is found.
Declaring Assembly
The assembly (DLL) in which the type (class)
is found.
Declaring Assembly CRC
The CRC of the current version of the
assembly.
Deserialized CRC
The CRC of the assembly that was actually
translated.
Checksum Match?
True if Declaring Assembly CRC and
Deserialized CRC are the same, else false.
This is simply a warning that there may now be
differences between the .NET code and the
CUDA module code.
Is Dummy?
True if this function is a dummy function, else
false. Dummy functions are not actually
translated by Cudafy. Instead they correspond
to an existing CUDA C file.
Parameters
A list of the parameters for the .NET method.
6.2 Types
The Types tab shows a list of all structs in the Cudafy module.
CUDAfy_User_Manual_1_22.doc
Page 37 of 45
Property
Description
Name
The name of the .NET struct from which the
GPU struct was translated.
Declaring Type
The type (class) in which the struct is found (if
nested) else as Name.
Declaring Assembly
The assembly (DLL) in which the type (class)
is found.
Declaring Assembly CRC
The CRC of the current version of the
assembly.
Deserialized CRC
The CRC of the assembly that was actually
translated.
Checksum Match?
True if Declaring Assembly CRC and
Deserialized CRC are the same, else false.
This is simply a warning that there may now be
differences between the .NET code and the
CUDA module code.
Is Dummy?
True if this struct is a dummy struct, else false.
Dummy structs are not actually translated by
CUDAfy_User_Manual_1_22.doc
Page 38 of 45
Cudafy. Instead they correspond to an
existing CUDA C file.
6.3 Constants
This tab shows a list of variables that are allocated in GPU constant memory. Do not mistake
this for normal .NET constants.
Property
Description
Name
The name of the .NET constant from which the
GPU constant was translated.
Declaring Type
The type (class) in which the constant is found.
Declaring Assembly
The assembly (DLL) in which the type (class)
is found.
Declaring Assembly CRC
The CRC of the current version of the
assembly.
Deserialized CRC
The CRC of the assembly that was actually
translated.
CUDAfy_User_Manual_1_22.doc
Page 39 of 45
Checksum Match?
True if Declaring Assembly CRC and
Deserialized CRC are the same, else false.
This is simply a warning that there may now be
differences between the .NET code and the
CUDA module code.
Is Dummy?
True if this function is a dummy function, else
false. Dummy functions are not actually
translated by Cudafy. Instead they correspond
to an existing CUDA C file.
Declaration
Shows how the constant looks in CUDA C.
6.4 Generated Source Code
Cudafy Modules also contain the source code that was generated when the .NET assembly was
cudafied. You can optionally edit and recompile this code by going to Options : Enable Editing
and then selecting Architecture and pushing Compile.
CUDAfy_User_Manual_1_22.doc
Page 40 of 45
6.5 PTX
The compiled code is in the CUDA PTX format for one or more platform types. This is shown as
read only.
CUDAfy_User_Manual_1_22.doc
Page 41 of 45
7 Miscellaneous Features
7.1 Contexts and Multi-GPU Systems
Explicit control over context switching has been added as of version 1.10. The following
example demonstrates how to copy data between two devices. When two devices are used
from a single thread some steps must be taken to ensure the correct context is valid at the
correct time. Upon creating a GPGPU object through the use of GetDevice or CreateDevice, a
new context is created. From that point on in your code this remains the current context. If you
have two GPUs then the context from the second created becomes current. If you attempt an
operation in the same thread that addresses the first GPU you will receive an invalid context
exception. Instead you must call SetCurrentContext on the relevant GPU before using it. You
can check if the context is current for a given GPU by checking its IsCurrentContext property.
[Test]
public void Test_SingleThreadGPUtoGPU()
{
Random r = new Random();
for (int i = 0; i < _uintBufferIn0.Length; i++)
_uintBufferIn0[i] = (uint)r.Next(Int32.MaxValue);
_gpu0.SetCurrentContext();
_gpuuintBufferIn0 = _gpu0.CopyToDevice(_uintBufferIn0);
_gpu1.SetCurrentContext();
_gpuuintBufferIn1 = _gpu1.CopyToDevice(_uintBufferIn1);
_gpu0.SetCurrentContext();
long loops = 500;
Stopwatch sw = Stopwatch.StartNew();
for (int i = 0; i < loops; i++)
_gpu0.CopyDeviceToDevice(_gpuuintBufferIn0, 0, _gpu1, _gpuuintBufferIn1, 0
, _uintBufferIn0.Length);
sw.Stop();
float mbps = (float)((long)_uintBufferIn0.Length * sizeof(int) * loops) / (flo
at)(sw.ElapsedMilliseconds * 1000);
Console.WriteLine(mbps);
_gpu1.SetCurrentContext();
_gpu1.CopyFromDevice(_gpuuintBufferIn1, _uintBufferOut1);
Assert.IsTrue(Compare(_uintBufferIn0, _uintBufferOut1));
ClearOutputsAndGPU(0);
ClearOutputsAndGPU(1);
}
CUDAfy_User_Manual_1_22.doc
Page 42 of 45
7.2 Strongly Typed Launches
The safest way to launch kernels is by doing strongly typed launches. An example
demonstrates:
public void Test_add_strongly_typed()
{
int a = 1;
int b = 2;
int c;
int[] dev_c = _gpu.Allocate<int>();
_gpu.Launch(1, 1, (Action<GThread,int, int, int[]>)(add), a, b, dev_c);
_gpu.CopyFromDevice(dev_c, out c);
Assert.AreEqual(a + b, c);
_gpu.Free(dev_c);
}
[Cudafy]
public static void add(GThread thread, int a, int b, int[] c)
{
c[thread.blockIdx.x] = a + b;
}
7.3 Using CUDAfy from a Service
To use CUDAfy from a service it is necessary to place Cudafy.NET.dll in the global assembly
cache (GAC). See http://support.microsoft.com/kb/815808 for more information.
7.4 Building CUDAfy from Source Code
To build CUDAfy.NET from sources you of course first need to grab all the code from codeplex.
It is advised to do this via source control such as SVN (via Tortoise is easiest) so you can easily
remain up to date.
Once you've got the code go get the latest NUnit http://nunit.org. You'll need this for the unit test
projects. Taking a look at the CUDAfy unit tests is a great way to learn about some of the more
obscure features.
Okay, make sure the references to NUnit in the unit tests are valid; if not add them.
CUDAfy_User_Manual_1_22.doc
Page 43 of 45
It is important to realize that the sources will not build the exact same single DLL that is part of
the release. This is because that DLL is a merge of all the main DLLs. A commercial tool is used
for this. Instead you will need to link to the individual DLLs as per the unit tests for example.
7.5 Code Insertion
CUDAfy does not support all features of CUDA or OpenCL. In addition to dummy functions we
can also insert code into device methods. Use GThread.InsertCode(…).
public class TextInsertion
{
private static GPGPU _gpu;
public static void Execute()
{
_gpu = CudafyHost.GetDevice(eGPUType.Cuda);
CudafyModule km = CudafyTranslator.Cudafy(ePlatform.Auto, _gpu.GetArchitecture(), typeof(T
extInsertion));
Console.WriteLine(km.CompilerOutput);
_gpu.LoadModule(km);
int[] data = new int[64];
int[] data_d = _gpu.CopyToDevice(data);
int[] res_d = _gpu.Allocate(data);
int[] res = new int[64];
_gpu.Launch(1, 1, "AHybridMethod", data_d, res_d);
_gpu.CopyFromDevice(data_d, res);
for(int i = 0; i < 64; i++)
if (data[i] != res[i])
{
Console.WriteLine("Failed");
break;
}
}
[Cudafy]
private static void AHybridMethod(Cudafy.GThread thread, int[] data, int[] results)
{
GThread.InsertCode("#pragma unroll 5");
for (int h = 0; h < data.Length; h++)
GThread.InsertCode("{0}[{2}] = {1}[{2}];", results, data, h);
}
}
CUDAfy_User_Manual_1_22.doc
Page 44 of 45
7.6 Using NVIDIA NSight for Debugging on GPU
NVIDIA NSight is very powerful when the emulator won’t do due to too much data and too many
threads. You can step through the generated CUDA C file from within Visual Studio. Grab
NSight from NVIDIA’s website.
You will need to enable debug information on the NVIDIA compiler.
CudafyTranslator.GenerateDebug = true;
Once you've ran the code successfully one time a *.cdfy file will be in your working directory. Go
to Visual Studio 2010's solution explorer and at top click Show All Files. You'll see your bin
directory there. Go to the working directory and find the CUDAFYSOURCETEMP.cu file. This is
the generated file. Right click it and say Include in Project.
Now double click and open the cu file. Go ahead and add some break points.
Next up, open the NVIDIA Parallel NSight User Settings by clicking the green ball beside the
Show all Files button you just clicked. Set the Working Directory to match the directory where
the exe is running from.
Make sure Parallel NSight Monitor is running.
Make sure you are running the code on a different GPU than where your monitor(s) are
attached. Set the GPU device id if necessary in Cudafy by passing a device id to
CudafyHost.GetDevice method.
public void SetUp()
{
CudafyTranslator.GenerateDebug = true;
_cm = CudafyTranslator.Cudafy();
_gpu = CudafyHost.GetDevice(eGPUType.Cuda, 0);
_gpu.LoadModule(_cm);
}
CUDAfy_User_Manual_1_22.doc
Page 45 of 45