1
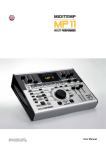
Questions/Problems?
Please contact your local dealer, or
MIDITEMP Service
Am Pfanderling 60
D-85778 Haimhausen - Germany
Email: [email protected]
www.miditemp.com
Vieware Pro-Controller
Distribution:
MIDITEMP GmbH
Am Pfanderling 60
D-85778 Haimhausen
Germany
FON +49 (0)8133-91 81 71
FAX +49 (0)8133-91 81 19
mail: [email protected]
www.miditemp.com
RoHS
compliant
2002/95/EC
Specification and Features may be changed without prior notice.
No liability for misprints or errors.
Version 1.3, 2010-12
© MIDITEMP GMBH
User Manual
Thank you for purchasing a Miditemp® - Product!
Our customers’ requests have always been the driving force behind our
cutting-edge MIDITEMP products – and you are now the owner of the
latest product in our range - the Viewarte Pro-Controller (VWPC)!
Connectors
With the VWPC, you can display notes, texts or lyrics on any connected screen.
The screen you use is up to you, depending on the application for which it’s to be used.
AC connector – 9 Volt DC/500mA and a
If you connect a midifile player, a karaoke player, etc., you can also display the file lyrics
via the VGA or Video inputs.
The next three connectors are all inputs for displaying lyrics that originate from
a midifile, karaoke file, keyboard, midifile player, etc.
Important
For this mode of operation (lyrics) there is one limitation, however – you can’t use just
ANY screen, if your host unit (Midifile-player/Keyboard or whatever) sends video-signals
(50Hz). Then it has to be a screen that supports video-signals (PAL) – 50Hz!! If you’re
not sure, just ask your specialist dealer! Using VGA: When your host unit can be set to
NTSC-Mode, you of course can use ANY screen. If not (the same as with the videoinputs here), then please use a screen that supports 50Hz signals (PAL)
Almost unlimited applications and usage options!
In principle, VWPC can be used in any possible configuration – and you can also use it
even if you DON’T use any midi-applications whatsoever!
Telepromter - just place a large screen at the front of the stage, perhaps mounted
inside a case like a monitor (wedge) – then all the performers (in the theatre, too) can
read their lines!
No midi? OK, then just connect 2 footswitches to the VWPC (up/down) – or use a
standard USB-numberpad to first select a patch, then use footswitches to move up and
down in the patch numbers bank... easy!
Dance bands - here’s an example - the keyboarder uses a monitor connected to his
keyboard for lyrics, but the sax player wants to have notes – no problem - VWPC can be
controlled by standard program changes / bank select commands from a midifile / midicontroller / keyboard!
Big bands - Here you can cascade several VWPC units. The first VWPC (“The BOSS”)
in the chain uses e.g. a USB number pad to select patches. These selections are sent
via midi-out, go to midi-in of the next VWPC unit. Here you connect the midi-thru to the
midi-in of the next unit and so on. The master (BOSS) now controls all the units and they
all work in parallel – and this enables the defining of sections. If you need more than one
screen per section, simply use a standard DVI split-box to distribute the signal of a
VWPC to several screens. Since each VWPC has its own SD card, data for each
instrument/group needs to be on the same number, but only at the start. If you leave
enough space between your songs, every VWPC, including the master unit, can be
controlled individually by footswitch, without affecting the other units. However, all units
must have the same midi channel.
Music schools: Increase the size of the notes - for classroom work –
also suitable for visually impaired musicians/speakers, etc., enlarge your notes and
use a large screen then.
On one side of the unit you have an
USB connector for connecting to a USB number pad. (! Not for a USB-Stick!)
VGA-In – Video-In (RCA-Cinch) – S-Video-connector
Output - connect your monitor to the DVI-I connector.
Your monitor only works with VGA? No problem! You can convert using a
standard DVI<>VGA cable or a DVI<>VGA adaptor, which are obtainable in any
multimedia-store.
On the other side you have a:
2x footswitch connectors - connect 2 switches here (momentary) for calling
up and moving patches up and down.
The second connector can also be used for dual switches. To use this option
you need a stereo 6.3-inch jack, or a Y-1x TRS 6.3” stereo male <> 2x TRS 6.3”
mono female.
MIDI-In - you can call up your data using midi program-changes. Here we use
standard bank select commands –
CC:0 / 0 – PG 1-128 (0-127) = 001-128 (000-127)
CC:0 / 1 – PG 1-128 (0-127) = 129- 256 (128-255) etc.
(There are different methods of counting – some systems start at 0, we use 1)
Of course you are able to use a different controller instead CC.0for bank-select.
MIDI-Out - here program-changes are sent out to the next VWPC. These are
generated by using the USB number pad or are forwarded from incoming
signals from the midi-in connector. In case you need both of these options, you
can change the global settings to “midi-soft thru” (explained later)
MIDI-Thru - incoming program change signals are forwarded without being
changed.
SD Card - insert a standard SD card here for file storage.(contacts facing
downward... and NO undue force please...☺ )
Starting up:
Operation
After unpacking the unit, proceed as follows:
OK, everything’s connected and the first SD card file (000) is displayed on
your screen as 001....let’s go! ☺
Connect your peripherals:
•
Screen (DVI connector)
•
possible - Keyboard/Midifileplayer (VGA/Video/S-Video)
•
possible - Footswitch
•
possible – USB numberpad
•
possible - Midi-connections
•
Insert your SD card (contacts facing downwards and gently, gently! ☺)
USB number pad - Enter your file number as sorted on your card, press
‘Enter’ and - hey presto! Following the order of midi program-changes/bankselect, files are recalled the same way here. One bank uses 128 patches
(songs)
You’re using more than 128 files? No problem, just select e.g. 431, and file no.
430 from your card will be displayed on your screen. When you have a second
unit conneted via midi-out (“The Boss”), then midi-programchange/bank-select
is transmitted automatically to the next unit, i.e. as CC0:3 / PG:47.
Now power on your screen and connect the AC adapter (9VDC)
The patch number and bank you select is also displayed in the left lower
corner of your screen. If you select a patch that’s not on your SD card, a white
screen will be displayed. For example – you have 25 files on your SD card,
and you recall No. 26. Just select an existing number, then that file will be
displayed.
Now you should have the first file from your SD card already on-screen (000)
– easy, eh?
Use the Forward Slash key ( / ) to change between SD card and Lyrics
operation modes.
If you can’t see anything on your screen Check the screen input selection - it might have several signal input options.
While beeing in the SD-card mode:
Press once: VGA
Press again: Video (RCA-Cinch)
Press again: S-Video
Press again: SD-Card operation is active again.
Check your SD card... is it inserted correctly? Does it contain data?
Is your data inside a folder named BANK0?
Check your cabling – all present and correct?
Keep-cool – changing operation mode needs a bit time – technical actualities.
!Important!
Please power on your units after cabling is finished and the SD card is
inserted – this will avoid potential SYNC problems and short circuits.
Delivery includes:
•
•
•
ViewarePro – Controller
Owner’s manual
AC-Adaptor, 9VDC / 500mA
+
.
-
More on Operation
Footswitch - You can use 2 single footswitches (momentary) at the two 6.3inch, TRS jack, mono connectors. One connector handles UP (forward) and
the other one DOWN (backward). You also can use a dual-switch at the
second connector. (see “Connectors”).
Footswitch functions are not sent to the midi-output port as default!
Lyrics - as we said earlier, you possibly can’t just use any screen on the
market here! Unfortunately not all existing TFT panels are able to handle the
video-signals (PAL / 50hz) incoming from the VGA, Video or S-Video
connectors. A multi-sync panel, a TV unit with a VGA connector or similar unit
is ideal here, when you use video-signals via the VGA/Video inputs.
Before buying a screen, please consult with your specialist dealer to avoid any
unpleasant surprises later. And also check, what signal is sent out by your
Keyboard/Midifileplayer or else you use!
When you’re using the VGA connector, please set the host unit
(keyboard/midifile player or similar) to NTSC operation. Now you can use ANY
screen you like ☺
You can use midi or a USB numberpad to change your VWPC’s operation
mode from picture mode to lyrics-mode!(Please see USB and MIDI).
Important Information
Copyright
Please be aware that you must observe copyrights when using notes or texts
that are copyright-protected. MIDITEMP will not accept liability for any
copyright infringement problems caused by your usage of song data!
Tips & Tricks
Using several VWPCs in cascade operation
You can work with several units on stage in cascade operation mode.
If you only want one master controller, the first unit is the “Boss”. When you use
a USB number pad or midi, all subsequent units are switched in parallel. All units
must have the same midi-channel.
Each user can operate his own controller independently by footswitch.
Here’s an example – your singer has to switch his text forwards to the next page
for verse II, then back again for the chorus on the first page. But your sax player,
on the other hand, has to switch through his pages four times to see all his notes
– so leave enough space between songs on the SD card to ensure that when the
next song is called up, all performers will have Page 1 of that song displayed.
We’ll explain soon how to get “empty” numbers in between the data... ☺
USB pad as the central controller (same song sorting on all SD-cards!)
Controller 1
Midi-In Controller 2
Midi-In Controller 3
Midi-ch. 1
Midi-ch.
1
Midi-ch. 1
Midi-Out
Midi-Thru
USB-Pad
MIDI as the central controller (same song sorting on all SD-cards!):
Midi-In Controller 1
MIDI-Unit
Midi-Out
Midi-ch. 1
Midi-Thru
Midi-ch. 1
Midi-In Controller 3
Midi-Thru
Midi-ch. 1
MIDI as the central controller (different song sorting on the SD-cards!):
Midi-In Controller 1
Updates
We will, if necessary, be releasing updates in the future. You can download
them from our website, www.miditemp.com. Then just copy the update file
onto an empty SD card, insert the card into your VWPC and power on - after
roughly 15 seconds, the update is finished!
Midi-In Controller 2
MIDI-Unit
Midi-Out
Midi-ch. 1
Midi-In Controller 2
Midi-Thru
Midi-ch. 2
Midi-In Controller 3
Midi-Thru
Midi-ch. 3
Here you send PG-changes to each unit using different midi channels when using a
midifile player, etc.
USB + Midi as central controllers (same song sorting on all SD-cards!):
Important!
NEVER turn the unit’s power supply while updating - the OS will be badly
damaged!
MIDI-Unit
Midi-Out
Midi-In Controller 1
Midi-ch. 1
USB-Pad
Midi-In Controller 2
Midi-Thru
Midi-ch. 1
More Tips & Tricks
The last example “USB + Midi as central controllers”, is a little more
complicated.
Midi data from the midi input is forwarded to midi thru, but your USB number
pad commands are sent to midi out – and the next unit only has one midi input
connector. But don’t worry - we have a solution for this too. ☺
On our website (www.miditemp.com) you find a downloadable flash tool that
changes the midi setting. After updating the VWPC with this flash-tool, you
now have an activated “Soft-Thru” function, so incoming midi data now goes to
midi thru and midi out.
Now you can use midi & USB to control the other units. And of course you can
also set the VWPC back to the standard-settings – just re-flash it with the
factory settings flash tool – and everything’s as it was.
Flashes
As already mentioned, you can easily update/reprogram (flash) the operation
of your VWPC for apps you need. You’ll find these ‘flash tools’ on our website.
Just copy the file you need to an SD card, insert the card into the slot of the
VWPC, turn on the power, wait for roughly 15 seconds and you’re ready to go!
Midi-Settings
You can of course choose your own midi channel and your own controller
number to change the operation mode – you don’t have to use our examples,
channel 1 and controller No. 50! Just create a TXT file on your computer and
save it as VWCFG.TXT. This file just contains one small entry
C12V35
This simply means:
Channel 12 Controller 35...........this also is the factory setting for the VWPC!
Now your VWPC works on midi channel 12 and the operation mode is
changed to use midi controller No. 35.... ☺
Still more Tips&Tricks
Sorting your data on an SD card: You simply create a folder called BANK0
and copy your files (PNG / JPG) into it. Sorting of the files in this folder on the
SD-Card starts with 000, in operation you start with 1 – don’t get confused
about that, please! Numbering on SD-Card and numbering in application is
shifted here!
Example:
Card No.
Card No.
Card No.
Card No.
Card No.
Card No.
Card No.
etc. etc.
000 DIRECTORY.PNG
001 LaLaLa_PT1.PNG
002 LaLaLa_PT2.PNG
003 Dobeedoo_PT1.PNG
004 Dobeedoo_PT2.PNG
005 Empty.JPG
006 LastTango.PNG
= Patch No.1
= Patch No.2
= Patch No.3
= Patch No.4
= Patch No.5
= Patch No.6
= Patch No.7
Normally you use one folder on your SD-Card, called BANK0
Alternated you also can work with 128 files per folder…the you name the
different forldes as: BANK1 / BANK2 / BANK3 etc……no BANK0 then, please!
Is makes sense, if you want to work with more than 999 files!
You can also create different folders on your card, e.g. for several
applications. Since each folder has its own name, but VWPC only recognises
ONE of these as valid... so, what to do? The answer’s easy:
Example:
Bank0
Bank_1
Bank_2
Bank_3
Sorting your data on an SD card
The files you use are created on a PC as PNG/JPG and then copied to the SD
card. The files must, however, be in a definite sequence – and they need to be
numbered. The sequence of numbers you use must always remain valid –
otherwise midi programme changes will recall the wrong data. So a song
always has to be at the same number – always! ☺
Remember the golden rule – CARE FOR THE NUMBER OF YOUR FILES!
The VWPC will only accept the folders without the underline as the valid
one...problem solved! You also may put all your files into one folder, of course!
Empty patches!
Your files are assorted numerically or alphabetically on your SD card – but
since “empty” numbers don’t exist on a computer-based system, we invented
another little trick to beat this too...
Create a file (JPG/PNG) with the content “Empty”. Make a copy of this file and
assign the number to the file where you want the empty file to be positioned
(see example 005 above). Integrate this file into your data-folder for the VWPC
– that’s it. You could use a picture of your mother in law here.....or the latest
invoice from your local inland revenue... it’s up to you! ☺
What? Even MORE Tips&Tricks!
AND… Even MORE Tips&Tricks!
Screens
Fit your scans / pictures
Just use a standard image editing software to re-size your files.
So, you know now that you can use any make or size of TFT screen (e.g. PC
monitor) at all when you use the VWPC with internal data (JPG/PNG)
…there are no limitations at all here.
However, if you want to use the Lyrics option as well, please care for the
limitations, described earlier.
Contents list
If you’re like me, you’ll sometimes forget the patch number of a song or file
(and I’m the author, for Pete’s sake – I should remember things like that!).
Don’t worry, friends – here’s yet another solution from my brilliant mind!
Just create a simple text file (or an XLS-file) on your PC and write your own
directory into it, and save it as PNG/JPG file.
It makes sense to place these files on top of your own files, so you can
reserve Nos.1-3 for your directories…for each bank of 128 files.
Then you can look at your directory lightning-fast – just press “1” – “Enter” and
look for your requested file number.
Please use maximum quality when scanning notes – especially notes that are
under “bad” condition. You later still can minimize the files as much you
need/like. To maximize small files will not really work fine, althouing you need
a professional software to do so in a good quality, what is not really needed
here! We, for example, tested “ULEAD Photo-Impact“ – worked fine so far.
The less dpi you use, the faster the map scroll will work – use the smallest
value you can use!
Factory settings:
VWPC is set on midi-channel 12, the controller to change the operation mode
is CC:35, using value 0/1/2/3 as default!
How to create my files?
Either you scan your notes, or you save your texfile you e.g. created in MSWord as PNG or JPG file.
Basically please use the size 1024x768, please!
Every connected screen, what size ever, will scale this file to it’s optimum size.
If you want the data endwise, you create your files in landscape-format and
use the screen on edge later!
In case you want to use coloured texts, then please use 4bit/16colours.
High colour mode will not be accepted by your VWPC.
You may scan your notes / texts as PDF file – then you simply use a batch
converter to convert these PDF-files into JPG / PNG!
How to create a picture out of a text-file:
There are several softwares on the market, you can use for that. We used
„Universal Document Creator“ – a nice and cheap software.
UDC is istalled as printer, so you „print“ your text-file as PNG, 1024x768.
Or you keep the original size first and later „cut“ it by using an image editing
software.
“Hats off” and our undying gratitude to
two gentlemanly geniuses who have created a great and eminently useable
product from the bare bones of our concept –
Mr. Marek Hybal and Mr. Denis Havrila! Thanks guys! Great job!