1
SSD Parvex SAS
8, avenue du Lac - B.P. 249
F-21007 Dijon Cedex
www.SSDdrives.com
SOFTWARE
PME - DIGIVEX Motion
Adjustment Manual
PVD 3516 GB – 04/2004
PRODUCT RANGE
1-
« BRUSHLESS » SERVODRIVES
•
•
•
2-
TORQUE OR POWER
RANGES
BRUSHLESS SERVOMOTORS, LOW INERTIA, WITH RESOLVER
Very high torque/inertia ratio (high dynamic performance machinery):
⇒ NX -HX - HXA
⇒ NX - LX
High rotor inertia for better inertia load matching:
⇒ HS - LS
Varied geometrical choice :
⇒ short motors range HS - LS
⇒ or small diameter motors : HD, LD
Voltages to suit different mains supplies :
⇒ 230V
three-phase for «série L - NX»
⇒ 400V, 460V three-phase for «série H - NX»
"DIGIVEX DRIVE" DIGITAL SERVOAMPLIFIERS
⇒ SINGLE-AXIS
DSD
⇒ COMPACT SINGLE-AXIS
DµD, DLD
⇒ POWER SINGLE-AXIS
DPD
⇒ MULTIPLE-AXIS
DMD
"PARVEX MOTION EXPLORER" ADJUSTING SOFTWARE
1 to 320 N.m
0,45 to 64 N.m
3,3 to 31 N.m
3,3 to 31 N.m
9 to 100 N.m
SPINDLE DRIVES
•
•
3-
SPINDLE SYNCHRONOUS MOTORS
⇒ "HV" COMPACT SERIES
⇒ "HW" ELECTROSPINDLE,frameless, water-cooled motor
From 5 to 110 kW
up to 60,000 rpm
"DIGIVEX" DIGITAL SERVOAMPLIFIERS
DC SERVODRIVES
•
•
•
4-
"AXEM", "RS" SERIES SERVOMOTORS
"RTS" SERVOAMPLIFIERS
"RTE" SERVOAMPLIFIERS for DC motors + resolver giving position
measurement
0.08 to 13 N.m
SPECIAL ADAPTATION SERVODRIVES
•
•
5-
"EX" SERVOMOTORS for explosive atmosphere
"AXL" COMPACT SERIES SERVOREDUCERS
POSITIONING SYSTEMS
•
•
•
•
Numerical Controls « CYBER 4000 » 1 to 4 axes
"CYBER 2000" NC 1 to 2 axes
DRIVE - POSITIONER
⇒ SINGLE-AXIS
DSM
⇒ POWER SINGLE-AXIS
DPM
⇒ MULTIPLE-AXIS
DMM
ADJUSTMENT AND PROGRAMMING SOFTWARE PARVEX MOTION EXPLORER
5 to 700 N.m
PARVEX Motion Explorer Software - DIGIVEX Motion Module
TABLE OF CONTENTS
1. OVERVIEW
1.1
1.2
6
Summary of other DIGIVEX Motion Manuals
PME DIGIVEX Motion Functions
2. INSTALLATION
2.1
2.2
2.3
7
Hardware and Software Set-up
User's licence
Installation - Operating Mode
3. PME IMPLEMENTATION
3.1
3.2
3.3
Preliminaries
Starting the application
Control Panel
3.3.1
3.3.2
3.3.3
File
Configuration
Programs
4.2
12
12
Creation of a New Structure
Adding an Item
Removing an Item
Saving the Structure
Opening a Structure
Searching for Structures
Print
Exit
CANopen PC Interface
Reset CRS232B/CIM03B
Options – Configuration
Example of CANopen structure
Changing the CANopen subscriber number
PROFIBUS PC Interface
About…
Comments
Available Tools
PC and DIGIVEX Motion memory zones
4.2.1
4.2.2
4.2.3
4.2.4
4.2.5
4.2.6
9
10
10
11
Network Structure
4.1.1
4.1.2
4.1.3
4.1.4
4.1.5
4.1.6
4.1.7
4.1.8
4.1.9
4.1.9.1
4.1.9.2
4.1.9.3
4.1.9.4
4.1.10
4.1.11
4.1.12
4.1.13
7
7
8
9
9
10
4. COMMUNICATION NETWORK MANAGEMENT
4.1
6
6
EEPROM_DM
RAM_DM
FLASH_DM
PROG_DM
FIRM_DM
RAM_PC
12
13
13
13
13
14
14
14
15
15
15
17
17
18
20
21
21
22
22
22
22
22
22
22
1
PVD 3516 GB 04/2004
PARVEX Motion Explorer Software - DIGIVEX Motion Module
4.2.7
Bulk Storage
22
5. SETTING DRIVE PARAMETERS
5.1
Presentation
5.1.1
5.1.2
5.1.3
5.1.4
5.1.5
5.1.6
5.2
5.3
Mimic Diagram
File
Connection / Disconnection
EEPROM
Options
About…
24
25
27
27
27
28
28
Configuration
Controlled axis
Position Feedback
Resolver
Modulo
Movement
Actions of OK and Cancel buttons depending on OFF LINE or ON LINE status
Options
Programmed motion direction
Program execution
Movement / torque authorization
Axis drive
Fault managements
Home Setting
Axis displacements during the home setting
Important Comments
Brake
Case No.1: No Brake
Case No.2: Brake present, but not managed by the drive
Case No.3: Brake present, and managed by the drive (usual case)
Case No.4: Brake present and managed by the drive (specific case)
CanOpen
SDO Server
PDO Rx
PDO Tx
Motor / Resolver
5.3.1
5.3.2
5.3.3
5.3.4
5.4
23
Operating Modes
5.2.1
5.2.1.1
5.2.1.2
5.2.1.3
5.2.1.4
5.2.1.5
5.2.1.6
5.2.2
5.2.2.1
5.2.2.2
5.2.2.3
5.2.2.4
5.2.2.5
5.2.3
5.2.3.1
5.2.3.2
5.2.4
5.2.4.1
5.2.4.2
5.2.4.3
5.2.4.4
5.2.5
5.2.5.1
5.2.5.2
5.2.5.3
23
28
28
29
29
29
30
31
32
32
33
33
34
35
36
38
38
39
40
40
40
41
42
42
44
45
46
Motor
Resolver
Brake
Setting the Resolver Clamp
46
49
50
50
Inputs / Outputs
51
5.4.1
Logic Inputs
5.4.2
Logic Outputs
5.4.3
Analog Input / Output
5.4.3.1
Input
51
52
53
54
2
PVD 3516 GB 04/2004
PARVEX Motion Explorer Software - DIGIVEX Motion Module
5.4.3.2
Output
5.4.4
Encoder Input/Output
5.4.4.1
Incremental encoder input
5.4.4.2
Incremental encoder emulation
5.4.4.3
SinCos encoder input
5.4.4.4
Oscilloscope variables
5.5
Servocontrol Settings
67
5.5.1
Servocontrols
5.5.1.1
Position
5.5.1.2
Speed
5.5.1.3
Feed Forward
5.5.1.4
Predictors
5.5.1.5
Inertias
5.5.1.6
Current
5.5.1.7
Comments
5.5.2
Setting Calculation
5.5.2.1
Operating Mode
5.5.2.2
Application of proposed settings
5.5.2.3
Assessment of results
5.5.2.4
Finding the optimal setting
5.5.2.5
Calculating Inertia
5.5.3
Hardware
6. TOOLS
6.1
6.2
Main System Variables
Stimuli Generator
74
75
6.4
6.5
75
75
76
76
76
77
77
78
Execution Control (Debug)
6.3.1
6.3.2
6.3.3
67
67
68
68
68
69
69
69
70
70
71
71
72
72
73
74
6.2.1
Stimuli Generator
6.2.1.1
Required Parameters
6.2.1.2
Available Keys
6.2.1.3
Comments
6.2.1.4
About…
6.2.2
JOG Instruction
6.2.2.1
Parameters to be set
6.2.2.2
Available Keys
6.3
54
55
56
58
58
66
79
Program execution control
Inputs / outputs control
Instructions
79
81
81
Variable Watcher
Oscilloscope Function
82
84
6.5.1
File
6.5.2
Connection/Disconnection
6.5.3
Options
6.5.3.1
Options/Cursors
6.5.3.2
Options/Cursor Calculation Choice
6.5.3.3
Options/Measurements
3
PVD 3516 GB 04/2004
84
85
86
86
87
87
PARVEX Motion Explorer Software - DIGIVEX Motion Module
6.5.3.4
6.5.3.5
6.5.3.6
6.5.3.7
6.5.3.8
6.5.4
6.5.5
6.5.6
6.5.7
6.5.8
6.5.9
6.6
Options/Comments
Options/Trigger
Options/Automatic connection
Options/List of reduced variables
Options/Background colour/Grid colour/Text colour
Depth of Plot
About…
Acquisition
%acquisition Bargraph
Time Base
Acquisition channels
Diagnostic Assistance Tool
93
6.6.1
Log of Events
6.6.1.1
List of Listed Events
6.6.1.2
Voltage Monitoring
6.6.1.3
Current Monitoring
6.6.1.4
Temperature Monitoring
6.6.1.5
Monitoring of Limit Stops
6.6.1.6
Connection Monitoring
6.6.1.7
Monitoring of movements in progress
6.6.1.8
Monitoring of the operational system of the positioner drive
6.6.1.9
Monitoring of the functional system of the positioner drive
6.6.1.10 Indicated operating malfunctions
6.6.1.11 Indicated Statuses
6.6.2
Loading Firmware
6.6.3
Licences
6.6.3.1
New license validation
6.6.3.2
Deletion of a licence
7. PROGRAM EDITOR
7.1
7.2
Presentation
Program Editor Functions
7.2.1
7.2.2
7.2.3
7.2.4
7.2.5
7.2.6
7.3
File
Edit
Connection / Disconnection
Compilation
Variable Name Editor
About…
8.2
101
102
104
105
106
108
109
Program execution
109
Operating principles
8.1.1
8.1.2
8.1.3
93
94
95
96
96
97
97
98
98
98
99
99
99
100
100
100
101
102
8. IMPLEMENTATION
8.1
88
88
89
89
89
89
90
91
91
91
92
110
110
Controlled position principle
Operating modes
User programs
110
111
111
Preliminary Operations
112
4
PVD 3516 GB 04/2004
PARVEX Motion Explorer Software - DIGIVEX Motion Module
8.2.1
8.2.2
8.3
8.4
8.5
8.6
8.7
8.8
8.9
8.10
Inputs/Outputs
Connections – Installing parameter setting software
Determining the Network Structure
Loading Parameters
Actual Commissioning
Loading a trial program
Loading user programs
Starting up the Machine
Shutting down the Machine
Re-setting the Machine
Characteristics and dimensions may change without prior notification.
YOUR LOCAL REPRESENTATIVE
SSD Parvex SAS
8 Avenue du Lac / B.P 249 / F-21007 Dijon Cedex
Tél. : +33 (0)3 80 42 41 40 / Fax : +33 (0)3 80 42 41 23
www.SSDdrives.com
5
PVD 3516 GB 04/2004
112
112
113
113
114
115
116
116
117
117
PARVEX Motion Explorer Software - DIGIVEX Motion Module
1. OVERVIEW
1.1 Summary of other DIGIVEX Motion Manuals
♦
♦
♦
♦
♦
♦
♦
♦
♦
♦
♦
♦
♦
♦
♦
DIGIVEX Single Motion (DSM) User Manual
DIGIVEX Power Motion (DPM) User Manual
DIGIVEX Multi Motion (DMM) User Manual
DIGIVEX Motion - CANopen
DIGIVEX Motion - Profibus
PME-DIGIVEX Motion Adjustment Manual
DIGIVEX Motion Directory of Variables
DIGIVEX Motion Programming
DIGIVEX Motion - Cam Function
PME Tool kit User and Commissioning Manual
CANopen - CAN Bus Access via CIM03
CANopen - Remote control using PDO messages
"Block Positioning" Application Software
"Fly shear linear cutting" software application
"Rotary blade cutting" software application
(DSM)
(DPM)
(DMM)
PVD3515
PVD3522
PVD3523
PVD3518
PVD3554
PVD3516
PVD3527
PVD3517
PVD3538
PVD3528
PVD3533
PVD3543
PVD3519
PVD3531
PVD3532
1.2 PME DIGIVEX Motion Functions
PME “Parvex Motion Explorer module DIGIVEX Motion” offers a complete software interface for
managing PARVEX digital products.
From a Windows® platform, PME DIGIVEX Motion allows the user to:
•
select a digital product:
- positioner drives,
- remote input/output modules [Function currently not available]
- keyboard – MicroVision display
- …
•
incorporate this product into a network structure:
- the various digital components then create an architecture and communicate in network
via a CAN or PROFIBUS bus,
- the entire architecture can then be supervised by a computer equipped either with CAN
interface that supports the CANopen protocol or with PROFIBUS-DP interface.
•
individually regulate and program each digital component:
- setting parameter editors,
- program editors.
•
manage the entire created system:
- access to all available functions,
- easy maintenance via observation tools and configuration back-up/downloading
commands.
A detailed description of each service is given in the following sections.
6
PVD 3516 GB 04/2004
PARVEX Motion Explorer Software - DIGIVEX Motion Module
2. INSTALLATION
2.1 Hardware and Software Set-up
• IBM™ PC office or industrial computer or compatible
• Intel Pentium® processor or equivalent
• Windows® version 98, Millennium, NT 4.0 (service pack 4 or above recommended),
2000 or XP
• VGA colour screen
• 1 parallel port
• 1 or more RS232 serial ports for using DIGIVEX Motion CANopen.
• 1 USB port for using DIGIVEX PROFIBUS with USBPRO interface
• 1 PCI slot for using DIGIVEX PROFIBUS with PCIPRO interface
• 1 PCMCIA slot for using DIGIVEX PROFIBUS with PCMCIAPRO interface
• Colour printer recommended
• Pointing device (mouse, trackball or equivalent)
• Software installation requires 20 to 40 MB hard disc space
Attention :
A printer driver must be installed to provide satisfactory PME.CYBER software operation. It is not
essential though to physically connect a printer.
An installation utility creates the directories required and implants the system files on your PC hard
disc. Required disc space is about 40 MB.
2.2 User's licence
Parvex Motion Explorer PME software is licensed.
The terms and conditions for using Parvex Motion Explorer software can be consulted during or
after installation by displaying the contents of the Licence.F text file in the pme directory.
PME software is available on CD-ROM.
Users are authorised to make a back-up copy (internal use only). This copy shall under no
circumstances by transferred, given away, rented, sold or installed at a third party's.
Enter the license number supplied with the original CD-ROM when installing the software. This
number must be quoted on any correspondence concerning the product.
7
PVD 3516 GB 04/2004
PARVEX Motion Explorer Software - DIGIVEX Motion Module
2.3 Installation - Operating Mode
The Parvex Motion Explorer installation program creates the necessary folders and recopies the
files on to your computer using an information carrier.
How to install the program from a CD-ROM:
• Start up your PC.
• Under Windows®, insert the CD-ROM in the CD-ROM player.
• An "auto run" program begins automatically after several seconds.
• Follow the instructions for installing the program.
If the "auto run" program does not start up:
• Click on "Start", then select "Settings" and "Control Panel".
• Double click on the "Add / Remove programs" icon.
• Select the "Install / Uninstall" tab.
• Click on "Install": Windows® automatically searches for the executable program, then
asks the user to start "setup.exe".
Uninstalling:
• Back-up any files that you wish to keep.
• Click on "Start", then select "Settings" and "Control Panel".
• Double click on the "Add / Remove programs" icon ".
• Select the "Install / Uninstall" tab, followed by "Parvex Motion Explorer".
• Click on "Add / Remove" in order to start up the deletion program.
Follow the instructions on the screen. All files from the Parvex Motion Explorer software
will be deleted. Only the user files located under the Parvex\Program Files\App_User\
directory and the database file that deals with specific motors will be preserved.
8
PVD 3516 GB 04/2004
PARVEX Motion Explorer Software - DIGIVEX Motion Module
3. PME IMPLEMENTATION
3.1 Preliminaries
Parvex Motion Explorer provides a complete software interface for DIGIVEX Motion positioner
drive implementation.
Certain functions are only accessible when the positioner drives are on and working.
System Start-Up:
•
Switch ON the system using the main switch.
•
Check that the auxiliary supply reaches the positioner drive. Do not apply power. In normal
operation [no events], the 7-segment display on the front panel shows a blinking 0
(steady 0 if a user program is open). The red POWER OFF LED is lit.
•
For DIGIVEX CANopen, check that the supply for the CRS232 interface module is present.
This module is supplied by the positioner drive(s). A green LED light (located next to the
CRS232 module 9-pin SUB-D socket) is used to check the status of the power supply to the
card.
•
For DIGIVEX PROFIBUS, it is the PC that supplies the USBPRO interface. Green and red LED
on the USB, side light up and flash as the interface is initialized at the beginning of a network
structure search; only the red LED then stays on.
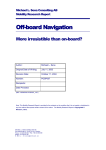
3.2 Starting the application
Double-click on the PARVEX PME icon located on the desktop in order to open the PARVEX
Motion Explorer control panel (or select: Start, Programs, Parvex, Parvex Motion Explorer).
PARVEX PME Icon:
9
PVD 3516 GB 04/2004
PARVEX Motion Explorer Software - DIGIVEX Motion Module
3.3 Control Panel
PARVEX Motion Explorer Control Panel:
The DIGIVEX Motion tab is associated with the positioner drive of the DIGIVEX Motion family.
3.3.1 File
File
Exit
Closes all open sessions.
3.3.2 Configuration
Select Language
Configuration
Language
Check b the desired language:
b
Français
English
Español
Deutsch
The selected language is applied to the Parvex Motion Explorer control panel and all open
modules.
10
PVD 3516 GB 04/2004
PARVEX Motion Explorer Software - DIGIVEX Motion Module
3.3.3 Programs
Programs
DIGIVEX Motion
This command is used to start the PME DIGIVEX Motion
module dedicated to applications using drive positioners.
Click on the DIGIVEX Motion button to open the following window:
This environment, called Network Management, is used to have access to PME DIGIVEX Motion
functions. A preview of the main functions proposed is given after.
11
PVD 3516 GB 04/2004
PARVEX Motion Explorer Software - DIGIVEX Motion Module
4. COMMUNICATION NETWORK
MANAGEMENT
4.1 Network Structure
In the PME DIGIVEX Motion context, a network structure includes several interconnected
elements, called items, that communicate via the communication bus (CAN or PROFIBUS).
4.1.1 Creation of a New Structure
This action is carried out by the following control sequence:
File
New Structure
It is useful to create a new structure when defining the network
structure. At this time, the user can free himself from the
material existence of the equipment to be controlled.
The screen is blank. The user creates the structure of his
application by adding various items.
12
PVD 3516 GB 04/2004
PARVEX Motion Explorer Software - DIGIVEX Motion Module
4.1.2 Adding an Item
Items are added by the following control sequence:
There are several different types of items that can be
added:
• DSM or DMM positioner drives,
• DPM positioner drive,
• MicroVision Terminal …
Items
Adding an Item
4.1.3 Removing an Item
Use the mouse, or any other pointing device, to click on the item to be removed.
The following control sequence is used to remove an item:
Items
Remove the selected Item
4.1.4 Saving the Structure
When a structure has just been created, it is advised to save its characteristics in a back-up file.
This operation is carried out using the following control sequence :
File
Save As
Choose the recording medium (floppy disk, hard drive, etc), the
archives directory and the back-up file name: name_structure.top.
When a structure has been previously saved using the File/Save As sequence, all new
modifications can be saved by the following control sequence:
File
Save
4.1.5 Opening a Structure
A structure that has been previously saved can be opened using the following control sequence:
File
Open a Structure
Select the recording medium, the directory and the filename
of the structure to be opened. The diagram corresponding
to the opened structure will be displayed on the screen.
13
PVD 3516 GB 04/2004
PARVEX Motion Explorer Software - DIGIVEX Motion Module
4.1.6 Searching for Structures
The software program automatically detects (by quantity and type) which items that make up the
network structure are present and switched ON. The mimic diagram of the existing structure is
displayed on the screen.
When items belonging to the opened structure are not detected, a red cross indicates that they are
not connected.
The " Searching for Structures’’ function is accessible by using the following control sequence:
File
Search for a Structure
Attention: The PC interface parameters must be set prior to a structure search (see sections
4.1.9 and 4.1.10)
Disconnecting an Item
An item present in the network can be
disconnected by clicking on this item, and then
clicking on the following button:
Connecting an Item
The connection for a "non connected" item is
located by clicking on this item, and then
clicking on the following button:
A red cross then indicates that this
subscriber is "not connected".
If the item is located on the network, the
red cross disappears and the subscriber
is recognized as being present.
If the item is not detected, the red cross
does not disappear.
4.1.7 Print
The default printer is defined in the Windows® environment. (Refer to Control Panel.)
Use the following control sequence to print the structure displayed on the screen:
File
Print
4.1.8 Exit
To exit the Network Management environment, select the following control sequence:
File
Exit
The Network Management window closes.
If the structure was modified, the user will be asked if he wishes to
save the modifications in a .top file before exiting.
Clicking on the
button has the same effect.
14
PVD 3516 GB 04/2004
PARVEX Motion Explorer Software - DIGIVEX Motion Module
4.1.9 CANopen PC Interface
4.1.9.1 Reset CRS232B/CIM03B
The Reset button is pressed to carry out a remote reinitialization of
CRS232B and CIM03B interface modules.
This functionality is not available for CRS232 and CIM03 interface
modules.
4.1.9.2 Options – Configuration
4.1.9.2.1 Configuration
Options
Configuration
15
PVD 3516 GB 04/2004
PARVEX Motion Explorer Software - DIGIVEX Motion Module
RS232 / CANopen interface Indicates which RS232 / CANopen interface module is used:
• CRS232 module
• CRS232B module
• CIM03 module
• CIM03B module
• RS232CAN module
Properties
Baud Rate Configuration
Serial Port
Baud Rate
(transfer rate)
From the drop-down menuu, select the identifier for the serial port used
by your PC.
Select the baud rate from the drop-down menuu.
(115,200 Bauds is recommended).
This drop down list is used to select the CAN baud rate for the CRS232 and CIM03 interface
modules (in PC mode).
The standard value used by appliances in the DIGIVEX Motion family is
Configuration
CAN baud rate 1Mbauds.
This value must not be modified without just cause!
Searching subscribers
The search, when searching for all present subscribers, is carried
out for all subscribers numbered from 1 to 63.
It is possible to limit the search to subscribers numbered from 1 to
31, the most frequent situation, thus, reducing the search time.
16
PVD 3516 GB 04/2004
PARVEX Motion Explorer Software - DIGIVEX Motion Module
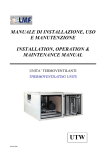
4.1.9.3 Example of CANopen structure
In the example opposite, the structure includes:
- a computer
- the CRS232 module (interface
between the RS232 serial link and
the CAN bus)
- a DSM positioner drive (subscriber
no.12)
- a DPM power positioner drive
(subscriber no.1)
- a µVision terminal (subscriber no.2)
• Actually, only subscriber no. 12 was detected as belonging to the network.
Subscribers no.1 and no.2 were not detected: a red cross indicates that they are "not
connected".
• By clicking on a subscriber (in this example, subscriber no.12), the tools that can be used for
this subscriber are displayed as buttons, in the lower strip of the Network Management window.
Only coloured buttons are accessible (buttons that cannot be used remain shaded).
• The characteristics pertaining to the selected item are given in the lower, left-hand corner of the
screen. Here, subscriber no.12 is a DSM 2/4 A 230 V –type positioner and is named Axis1.
4.1.9.4 Changing the CANopen subscriber number
The following window is opened by clicking on the subscriber number box located in the trunk
node of the item with the CAN bus:
Current Number
New Number
Apply
This cell displays the current subscriber number.
Enter the new subscriber number in this cell.
Check that the device physically connected to the network has itself also
been reset with the same number (miniature rotating switch, internal
configuration, etc.).
Click on this button to apply the new subscriber number to the CAN bus.
17
PVD 3516 GB 04/2004
PARVEX Motion Explorer Software - DIGIVEX Motion Module
4.1.10 PROFIBUS PC Interface
Options
Configuration
18
PVD 3516 GB 04/2004
PARVEX Motion Explorer Software - DIGIVEX Motion Module
PROFIBUS Interface
Check “Profibus” and indicate which PROFIBUS interface module is
used:
• USBPRO module (max baud rate 5Mbaud)
• CP5611module
• CP5511module
• USBPROx12 module (max baud rate 12Mbaud)
PROFIBUS interfaces are supplied by a third party, please refer to the manufacturer’s installation
procedures beforehand.
REFERENCE
DESIGNATION
USBPRO or USBPROx12
PCIPRO
PCMCIAPRO
USB-PROFIBUS Interface
PCI-PROFIBUS CP5611 Card
PCMCIA - PROFIBUS CP5511 Card
Properties
CP5611 and CP5511
The access point must be selected in accordance with the value selected using the SIEMENS “Set
PG-PC interface” parameter setting tool
Please refer to “PVD3554 – DIGIVEX Motion – Profibus” for more information
19
PVD 3516 GB 04/2004
PARVEX Motion Explorer Software - DIGIVEX Motion Module
USBPRO and USBPROx12
The Profibus transmission speed will possibly need to be changed so that it matches that imposed
by the "Master"
Click on "Properties" to select the serial number for the USB/Profibus interface device.
This number is detected automatically by clicking on “Search attached device”.
Validate the configuration by clicking on “OK”.
Please refer to “PVD3554 – DIGIVEX Motion – Profibus” for further information.
4.1.11 About…
This menu gives access to the:
• PME software guide in Acrobat Reader PDF format
• About… window and displays the version number of the current
software
20
PVD 3516 GB 04/2004
PARVEX Motion Explorer Software - DIGIVEX Motion Module
4.1.12 Comments
The Comments window is opened by clicking on the
"dialog box" button located above the 3 4 scroll
bars and to the right of the PARVEX logo:
This function is used to edit a text that
will
be
saved
with
the
name_structure.top file. It contains
comments
about
the
structure
(characteristics, data included, etc.).
The comments text is visible when
printed (File / Print control sequence or
corresponding button).
4.1.13 Available Tools
By clicking on a subscriber, the available tools for this subscriber are displayed as buttons in the
lower part of the Network Management window. The operating mode for each tool is described in
a specific section of this notice.
Parameter Setting Tool
Program Editor
Oscilloscope Tool
Variable Watcher Tool
Stimuli Generator Tool
Execution Control Unit Tool
Diagnostic Help Tool
The latter four tools are used for items having been detected as belonging to the network, during a
structure search. (Please refer to command File / Search for a Structure )
21
PVD 3516 GB 04/2004
PARVEX Motion Explorer Software - DIGIVEX Motion Module
4.2 PC and DIGIVEX Motion memory zones
The various information communicated to the positioner drive such as data, parameters or
programs, is stored in distinct memory zones.
The _DM extension refers to devices in the DIGIVEX Motion family (DSM, DMM, DPM).
The _PC extension concerns the PC connected to the CAN or PROFIBUS bus.
4.2.1 EEPROM_DM
A non-volatile storage zone, which is called EEPROM_DM, contains the machine parameters and
the user configuration file.
This memory is physically located on the personalization board of the positioner drive.
A part of the EEPROM_DM is integrated with the motherboard of the positioner drive. In particular,
it memorizes the operating time of the positioner and its serial number.
4.2.2 RAM_DM
When the positioner drive is powered up, or restored (control restore), the contents of the
EEPROM_DM are transferred to a RAM, which is called RAM_DM. This memory is used to
exchange data on-line (ON LINE) between the positioner and the PC.
4.2.3 FLASH_DM
User programs (assembler programs, source programs, cam tables) are located in a flash_eprom
– type storage zone, which is called FLASH_DM. This memory is located on the personalization
board and takes up 512Kb of space.
4.2.4 PROG_DM
The executable code contained in the FLASH_DM memory is transferred to a RAM called
PROG_DM (216Kb RAM) at power-up of the positioner drive, or during program application
("Apply programs" command).
User programs found in the PROG_DM memory are executed by the positioner drive.
4.2.5 FIRM_DM
The operating system software is called firmware.
It is located in a flash_eprom –type storage zone, which is called FIRM_DM.
4.2.6 RAM_PC
When the positioner drive is connected to the PC, an image of its RAM_DM is transmitted to the
RAM in the PC, which is called RAM_PC.
4.2.7 Bulk Storage
Diskettes and hard drives make up the bulk storage unit of the PC. This memory is used to save
user data.
22
PVD 3516 GB 04/2004
PARVEX Motion Explorer Software - DIGIVEX Motion Module
5. SETTING DRIVE PARAMETERS
5.1 Presentation
Select the drive to be set by clicking on its pictogram in the Network Management
environment, and then pressing the Set Parameters button:
The Set Drive Parameters main window opens:
Parameter setting is carried out drive by drive.
This is the subscriber number of the drive whose parameters are being set
ON LINE status indicates that the motion controller is connected to the PC (it is not connected in
OFF LINE status).
Data:
• PME = 7 indicates that the parameter editor used can manage the set of parameters 1 to 7
• Drive = 7 indicates that the onboard motion controller software can manage the set of
parameters 1 to 7
• File = 7
indicates that the parvex.pdm file contains a level 7 set of parameters
• EEPROM = 7
indicates that the motion controller EEPROM memory contains a level 7 set
of parameters
A set of parameters corresponds to the list of parameters recognized and managed by a
positioner drive. The level 7 set of parameters is the latest generation (new functionalities
available).
23
PVD 3516 GB 04/2004
PARVEX Motion Explorer Software - DIGIVEX Motion Module
5.1.1 Mimic Diagram
It shows the structure of the servocontrol loops integrated on the DIGIVEX Motion family products.
The Trajectory Generator receives the following input:
-
the stimulus
Stimulus
-
the position setpoint
posa (Setpoint)
-
the Master position setpoint
Master
•
and supplies the following output:
-
the position setpoint of the controlled movement,
-
the position setpoint of the Master movement,
-
the speed setpoint of the controlled movement,
-
the speed setpoint of the Master movement,
-
the acceleration setpoint of the controlled movement,
-
the acceleration setpoint of the Master movement.
The position servocontrol uses the return position data sent from the Resolver or from the external
encoder, called Encoder.
The feed forward is called kp.
Speed predictions are called kff_speed1 and kff_speed2.
The status of the switches shows how the Encoder return position data is used according to the
selected operating mode.
The speed servocontrol uses return speed data sent from the Resolver.
The fast forward is called PI: kv fi.
Acceleration predictions are called kff_accel1 and kff_accel2.
Static and gravity predictions are called static and gravity predictions.
The current reduction function is called i_red.
The lower part of the main window displays four control buttons:
Operating Modes
Motor / Resolver
Inputs/ Outputs
Servocontrol Settings
24
PVD 3516 GB 04/2004
PARVEX Motion Explorer Software - DIGIVEX Motion Module
Comments regarding all the windows managed by the Parvex Motion Explorer software
program:
File
Exit
Used to exit the current work session. If any modifications were made
during this session, the user will be asked if he wishes to save the
parameter modifications in a file before exiting the program. (Save
function).
Pressing the
button has the same effect.
5.1.2 File
The "File" menu opens
the following menu:
File
New
This control sequence initializes a new parameter setting session. It is
only available in OFF LINE mode.
The entire mimic diagram is at first displayed in red.
The various pictograms will turn to blue when the user will have
successively selected and validated the menus suggested at the bottom
of the Set Drive Parameters window using the following buttons:
Operating Modes, Motor / Resolver, Inputs / Outputs and Servocontrol
Settings.
File
Open
File
Save
This control sequence is used to open a parameter file previously saved
with a filename having a .pdm extension. This function is only available
in OFF LINE mode. The pictograms in the mimic diagram turn to blue.
This option is used to save a set of parameters stored in the RAM on the
PC onto a floppy disk or hard drive (current work session).
Comment:
When the status is ON LINE, the contents of the PC's RAM is the image
of the positioner's RAM (RAM_DM).
The saved parameter file has a .pdm extension.
25
PVD 3516 GB 04/2004
PARVEX Motion Explorer Software - DIGIVEX Motion Module
File
Save As
This sequence offers the same possibilities as the previous one, but is used to
specify the following information:
− the recording medium (floppy disk, hard drive, etc…),
− the archives directory,
− the .pdm filename.
The .pdm extension is suggested by default. Only files having a .pdm extension
are recognized by the Open command.
File
Comments
This function allows the user to record his own comments about the application:
operating point corresponding to the current settings,
personalization of the controlled axis,
etc…
Compares Files
File
Global Transfer
File
Print
File
Exit
The user can compare the open parameter file (when in OFF line mode) or the
motion controller parameters (when in ON line mode) with the contents of
another parameter file.
A window opens to allow file selection, and then a chart is displayed in which
the parameters are compared. A "red" index highlights the presence of different
values.
This control sequence is only accessible during ON LINE status.
It is used to download all the parameters of a .pdm file to the RAM of a
positioner drive (RAM_DM).
When the transfer is completed, a message is displayed on the screen asking
the user if he wishes to save the filename.pdm in non-volatile memory
(EEPROM_DM).
- The motor must be at zero torque or without power, for the Global Transfer
to be able to be carried out.
- The filename of the transferred .pdm file is displayed on the upper strip of
the Set Drive Parameters window.
Prints the contents of a previously opened parameter file in text format. The
default printer is defined in the Windows® environment. (Refer to Control Panel.)
Used to exit the current work session. If any modifications were made during
this session, the user will be asked if he wishes to save the parameter
modifications in a .pdm file before exiting the program. (Save function).
26
PVD 3516 GB 04/2004
PARVEX Motion Explorer Software - DIGIVEX Motion Module
5.1.3 Connection / Disconnection
The Connection control sequence is available only in OFF LINE status (drive not connected),
while the Disconnection control sequence is available only in ON LINE status (drive connected).
Connection
This control sequence sends the connection request from the PC to the drive. When the
connection is made, the status switches to ON LINE. The Connection control sequence loads the
parameter settings stored in the RAM of the positioner drive (RAM_DM) into the RAM of the PC.
• If a work session was previously opened, it will be replaced. A warning message suggests
that the user saves his data, using the Save As function, before executing the Connection
sequence.
Disconnection
This control sequence sends the disconnection request from the PC to the drive. When the
disconnection is made, the status switches to OFF LINE.
Comments
In OFF LINE status, the software program runs the PC memory: hard drive, diskettes, RAM_PC.
When a .pdm parameter file is opened using the Open sequence the color/colour of the
pictograms in the mimic diagram changes to blue.
In ON LINE status, the software program communicates with the RAM of the drive (RAM_DM).
This context is required to operate in real-time on the drive and its environment from the PC. The
pictograms in the mimic diagram are blue.
The ON LINE / OFF LINE status indicator is explicitly displayed in the lower, left-hand corner of
the of the Set Drive Parameters window.
The subscriber number for the drive is shown in the title bar.
5.1.4 EEPROM
This command displays the following alternatives:
SAVE
Save
in
EEPROM
RESTORE
Restore
Upgrade
EEPROM
The SAVE command saves the contents of the RAM_DM into the EEPROM_DM. All
data entry windows will be saved at the same time.
The SAVE command is not available in OFF LINE status.
The RESTORE command restores the contents of the EEPROM_DM and puts it into
the RAM_DM.
Comment: At power-up, a RESTORE operation is automatically carried out.
The RESTORE command is not available in OFF LINE status.
The Upgrade EEPROM instruction allows the version of the set of parameters in the
EEPROM_DM memory to be incremented (use of the positioner drive to the maximum
of its possibilities): EEPROM set of parameters = Drive set of parameters.
This instruction is only of interest, if, initially, EEPROM set of parameters < Drive set of
parameters.
5.1.5 Options
Check b the Automatic connection cell to request that the PC be
connected automatically to the drive, when the parameter setting editor
opens.
27
PVD 3516 GB 04/2004
PARVEX Motion Explorer Software - DIGIVEX Motion Module
5.1.6 About…
This menu gives access to the:
• PME software guide (Acrobat Reader PDF format)
• About… window and displays the version number of the current software
5.2 Operating Modes
Click on the Operating Modes button to display the following window:
5.2.1 Configuration
This environment is used to define the operating mode that will be applied to the axis.
5.2.1.1 Controlled axis
Axis Name
Units
Enter a suitable name in this field; its name may contain up to 15 characters.
[Corresponding Parameter: axis1]
Enter the name of the application unit in this field; its name may contain up to 15
characters, but in general, avoid exceeding 5 characters.
[Corresponding Parameter: unit1]
This data has absolutely no effect on the settings. It is only used to show the
type of unit used to measure or set the positions
28
PVD 3516 GB 04/2004
PARVEX Motion Explorer Software - DIGIVEX Motion Module
5.2.1.2 Position Feedback
By Motor Resolver
By External
Encoder
External Encoder
used as Master
Normal Filtering
High Filtering
By default, the control in position is carried out by the motor resolver. The By
Motor Resolver is then selected.
[Corresponding Parameter: option_card = 0 or 2]
By external encoder:
Check this cell when the control in position is carried out by an external
encoder, which is often attached to the mobile unit to be displaced. This
operating mode involves the use of an optional encoder input card.
[corresponding parameters: option_card = 1 or 3 and encoder_use = 0]
The return speed can be provided by the:
• resolver [corresponding parameter: fb_option = 1] only if option_card = 1
(this selection is not possible if option_card = 3: SinCos encoder)
• encoder [corresponding parameter: fb_option = 0] (default value)
When the external encoder is used as a master axis reader, the By Motor
Resolver and External Encoder used as Master will be validated. This
operating mode implies the use of an optional encoder input board.
[Corresponding Parameters: option_card = 1 and encoder_use = 1]
In function of the resolution of the external encoder, a filtering qualified as
normal or high is offered for reducing the noise on the current control unit of
the motor.
Used by default when the encoder frequency in lines/s at maximum speed is
greater than or equal to 50 kHz.
[Corresponding Parameter: filter_type = 0]
Used when the encoder frequency in lines/s at maximum speed is included
between 5 kHz and 50 kHz. When this frequency is less than 5 kHz, the
application is poorly sized.
[Corresponding Parameter: filter_type = 1]
5.2.1.3 Resolver
Enter the correspondence coefficient between the motor revolutions and
the displacement units.
[Corresponding Parameter: kunit_resolver]
Remark: Additional information is displayed if the position is servocontrolled by an external
encoder. It will show the correspondence factor, for the encoder, between encoder revolutions
and displacement units [Corresponding parameter: kunit_encoder, Inputs / Outputs window,
Encoder Input / Output tab].
Units /
Motor Revolutions
5.2.1.4 Modulo
Modulo operation consists in bringing the positional value of the controlled axis within a given
interval. This is typically used with rotary axes or axes with no physical limits, which move
indefinitely in the same direction.
When the user checks D the "Apply the specified modulo" box
the upper and lower limits stated.
29
PVD 3516 GB 04/2004
□, the system takes into account
PARVEX Motion Explorer Software - DIGIVEX Motion Module
Let's take as an example a 360° rotary plate. If the user selects a lower limit of -180° and an upper
limit of +180°, the axis position will always be between -180° and +180° whatever the cumulative
movements made by the axis. The position set-points and the measured positions will be taken to
be "modulo 360°". (The modulo corresponds to the difference upper limit - lower limit.) "Apply the
specified modulo" means the user does not need to control the equivalence relation between the
absolute positions -180° and +180°. Applying a modulo with an upper limit of +180° and a lower
limit of -180° to the value of 470° returns 110° (470° - n times the modulo, where n = 1); applying it
to a value of -200° returns +160° (-200° + n times the modulo, where n = 1). When a movement is
requested, motion is not controlled with the notion of the "shortest path". A request for movement
to the absolute position 900° will make the plate turn through 2 1/2 revolutions. When motion is
completed, the position counter will show +180° (900° - n times the modulo, where n = 2).
The modulo function also makes it possible to avoid reaching the maximum counting capacity of
the system. Unless otherwise specified by the user, the system will apply of its own accord and as
a safety measure a modulo with an upper limit of 10000000 unit1 (or 100000000 encoder
transitions) and for the lower limit a lower limit value of -10000000 unit1 (or -1000000000 encoder
transitions).
Tip: the modulo upper limit and modulo lower limit values must correspond to a complete number
of encoder increments or encoder emulation increments so as to avoid losing remainders from
division operations.
Apply
modulo
specified Check D this box to validate the modulo specified by the upper limit and
lower limit fields below.
[corresponding parameter: modul1_en]
If this box is not checked, the system modulo will be applied.
Modulo upper limit Enter the value of the upper threshold of the modulo in this field.
[corresponding parameter: modul1_up]
Modulo lower limit
Enter the value of the lower threshold of the modulo in this field.
[corresponding parameter: modul1_low]
5.2.1.5 Movement
In this field, enter the selected acceleration / deceleration level, expressed in
unit1/s2. See the Setting Calculation tab in the Servocontrol Settings window
for information on programming values.
[Corresponding Parameter: accel_max]
In this field, enter the stop window value desired in unit1. This value is used
Stop Window
to declare the end of a movement (axis stationary).
[Corresponding Parameter: target]
In this field, enter the maximum speed of the application expressed in unit1/s.
Max. Speed for
See the Setting Calculation tab in the Servocontrol Settings window for
Application
information on programming values.
[Corresponding Parameter: speed_max]
Maximum Tracking In this field, enter the maximum tracking error authorized, expressed in unit1.
[Corresponding Parameter: trackerror_max]
Error
Acceleration /
Deceleration
30
PVD 3516 GB 04/2004
PARVEX Motion Explorer Software - DIGIVEX Motion Module
5.2.1.6 Actions of OK and Cancel buttons depending on OFF LINE or ON LINE status
OFF LINE Status
• When a work session is opened (Open command), the contents of a parameter file, stored in
bulk memory (diskettes or hard drive), are recopied into the RAM_PC.
The data entry window displayed on the screen is a work memory.
When a user customizes his application, this work memory is modified.
OFF LINE Status
OK
Saves the contents of the work memory in the RAM_PC, and then
closes the current data entry window.
Cancel
Closes the current data entry window without modifying the RAM_PC.
(or
button)
ON LINE Status
• At power-up, the drive RAM (RAM_DM) is automatically loaded with the contents of its back-up
memory (EEPROM_DM).
• The Connection command recopies the entire drive RAM (RAM_DM) into the RAM_PC.
• The Global Transfer recopies the entire RAM_PC:
- into the drive RAM (RAM_DM) and
- into its back-up memory (EEPROM_DM), on request only.
• When a configuration window is opened, the information concerning this window are copied from
the RAM_ DM into the RAM_PC.
The data entry window displayed on the screen is a work memory.
When the operator changes the parameter settings for the window, the modifications affecting the
work memory are immediately recopied into RAM_DM. These are the only uses of the ON LINE
function.
ON LINE Status
OK
Saves the contents of the work memory in the RAM_PC, and then
closes the current data entry window.
Cancel
1] Closes the current data entry window.
(or
button)
2] Transfers the original parameters of the window contained in the
RAM_PC into the RAM_DM, if the work memory was modified (and
therefore cancels the modifications).
31
PVD 3516 GB 04/2004
PARVEX Motion Explorer Software - DIGIVEX Motion Module
5.2.2 Options
This environment defines operating options that will be applied to the axis.
5.2.2.1 Programmed motion direction
Reversal of
programmed
movements
Check b this cell to reverse the direction of programmed movements. This
function is very useful in the debugging phase because it does not require
the "physical" reversal of position, speed and displacement setpoint returns
in order to obtain the desired direction of displacement.
[Corresponding Parameter: dir_inv]
32
PVD 3516 GB 04/2004
PARVEX Motion Explorer Software - DIGIVEX Motion Module
5.2.2.2 Program execution
Please refer to the DIGIVEX Motion "PVD 3517 - Programming Manual" for further details.
Authorizes
program execution
at power-up
Wait for power to
be present to pass
through the
PROG0 #START
address
Check b this cell to authorize program execution when auxiliary power is
present.
In this event, when auxiliary power is present, the execution of the PROG0
program will start at the #INIT address and will be carried out in sequence.
[corresponding parameter: exec_en = 1]
The passing through of the #START address will depend on the setting
contained in the data field: "Wait for power to be present to pass through the
PROG0 #START address ".
⇒ Check b this cell to validate this choice.
The following actions depend on the detection of the "power":
- the passing through of the #START address by the operational pointer of
the main PROG0 program; and,
- the subsequent execution of user programs.
This option is useful because it can start up automatic control system
programs (or certain user programs) without "power". This is because only
the declarative zone of the program is explored by the operational pointer.
⇒ When this cell is not checked, there is no stop point at the #START
address; user programs are executed by PROG0 all at the same time (i.e.
with or without power).
[Corresponding Parameter: userprog_option]
5.2.2.3 Movement / torque authorization
Movement
authorized at
Power-up
Torque authorized
at Power-up
Check b this cell to authorize movement at power-up (obviously, power
must be present in order for this option to be effective).
This cell is checked by default.
[corresponding parameter: move_en = 1]
Check b this cell to authorize torque at power-up (obviously, power must be
present in order for this option to be effective).
This cell is checked by default.
[corresponding parameter: torque_cmd = 1]
33
PVD 3516 GB 04/2004
PARVEX Motion Explorer Software - DIGIVEX Motion Module
5.2.2.4 Axis drive
Position drive
Speed drive
Torque drive
CANopen Position
drive with
interpolation
CANopen Profile
Position Mode
Select this assignment from the drop-down menu to drive the position of the
drive (option selected by default).
[corresponding parameter: drive_mode = 0]
Where zero torque setting (torque_cmd = 0) or power absent (drive_ok = 0)
are concerned, the validated torque information is set to 0 (torque_on = 0).
The absolute position instruction (posa) is then forced to the actual position
value of the controlled axis (pos1) in order to prevent any inopportune surges
when power comes back on and when torque is validated (surges that might
occur if the axis position has been changed in between times). Counting of
the actual axis position stays validated as long as the auxiliary power supply
stays on.
Select this assignment from the drop-down to drive the speed of the drive
(speed instruction given by the speed_value variable)
The position remains measured and the tracking error is set at 0.
The acceleration/deceleration parameters remain acknowledged.
The trajectory generator remains active.
[corresponding parameter: drive_mode = 1]
Select this assignment from the drop-down menu to drive the torque of the
drive (torque instruction given by the torque_value variable)
The position remains measured and the tracking error is set at 0 (position
instruction = measured position → tracking error = 0). The position and
speed loops are no longer active.
[corresponding parameter: drive_mode = 2]
Select this assignment from the drop-down menu to drive the position of the
drive using interpolation and synchronization messages.
A supervisor card must be used for this operating mode. The card sends
cyclic, synchronized position instructions to one or more axes via PDO
CANopen messages (see PVD3543 "DIGIVEX Motion - Remote control
using PDO messages" Software Application Manual). This operating mode
would be used when a precise, synchronized movement must be carried out
on more than one axis at a time.
Use PDO Rx = 3 (Control Word + Target Position) or PDO Rx = 21 (Control
Word + Torque Max + Target Position).
[corresponding parameter: drive_mode = 3]
Select this assignment from the drop-down menu to drive the drive by remote
control in position drive mode.
A supervisor card must be used for this operating mode. The card sends
position instructions using PDO CANopen messages (see PVD3543
"DIGIVEX Motion - Remote control using PDO messages" Software
Application Manual). The position instructions, which do not have to be
cyclic, are acknowledged by the trajectory generator (posa or posr system
variables).
Use PDO Rx = 3 (Control Word + Target Position) or PDO Rx = 21 (Control
Word + Torque Max + Target Position).
[corresponding parameter: drive_mode = 4]
Remark: The drive_mode and speed_option parameters are not managed by PME software and
1st generation positioner drives.
34
PVD 3516 GB 04/2004
PARVEX Motion Explorer Software - DIGIVEX Motion Module
CANopen Profile
Velocity Mode
CANopen Profile
Torque Mode
CANopen Velocity
Mode
Axis stoppage
before changing
from speed drive
mode to position
drive mode
Select this assignment from the drop-down menu to drive the drive by remote
control in speed drive mode (speed expressed in unit1/s).
A supervisor card must be used for this operating mode. The card sends
speed instructions using PDO CANopen messages (see PVD3543 "DIGIVEX
Motion - Remote control using PDO messages" Software Application
Manual). The speed instructions, which do not have to be cyclic, are
acknowledged by the speed_value system variable.
Use PDO Rx = 4 (Control Word + Target Velocity).
[corresponding parameter: drive_mode = 5]
Select this assignment from the drop-down menu to drive the drive by remote
control in torque drive mode.
A supervisor card must be used for this operating mode. The card sends
torque instructions using PDO CANopen messages (see PVD3543 "DIGIVEX
Motion - Remote control using PDO messages" Software Application
Manual). The torque instructions, which do not have to be cyclic, are
acknowledged by the torque_value system variable.
Use PDO Rx = 5 (Control Word + Target Torque).
[corresponding parameter: drive_mode = 6]
Select this assignment from the drop-down menu to drive the drive by remote
control in speed drive mode (speed expressed in rpm).
A supervisor card must be used for this operating mode. The card sends
speed instructions using PDO CANopen messages (see PVD3543 "DIGIVEX
Motion - Remote control using PDO messages" Software Application
Manual). The speed instructions, which do not have to be cyclic, are
acknowledged by the speed_value system variable having been converted to
unit1/s.
Use PDO Rx = 6 (Control Word + VL Target Velocity).
[corresponding parameter: drive_mode = 7]
Check b this cell to cause the axis to stop automatically (zero speed
instruction) before effectively changing from speed drive mode to position
drive mode.
This cell is checked by default.
[corresponding parameter: speed_option = 0]
Remark: If this cell is not checked, the axis will go on to infinity without
changing its speed.
Remark: The drive_mode parameter is not managed by PME software and first-generation
positioner drives.
5.2.2.5 Fault managements
All faults become
major faults
Check b this cell so that all signalled faults (minor or major) are managed as
major faults (side-effect of the positioner drive OK relay).
This cell is not checked by default ⇔
[corresponding parameter: fault_option = 0]
Remark: The fault_option parameter is managed by PME software and positioner drives above 5th
generation.
35
PVD 3516 GB 04/2004
PARVEX Motion Explorer Software - DIGIVEX Motion Module
5.2.3 Home Setting
When the Operating Modes menu is opened and the tab called Home Setting is selected, the
following window is displayed:
The home setting corresponds to the search for the cam (switch0_input 24V logic input) and
encoder 0 timing signal (or resolver 0 timing signal) coincidence
36
PVD 3516 GB 04/2004
PARVEX Motion Explorer Software - DIGIVEX Motion Module
This environment is used to characterize the displacement procedure called for when referencing
measurements.
Hardware Limits Active
Check b this cell to effectively acknowledge the Hardware limits during
axis displacement.
[Corresponding Parameter: hardlimit_en]
Software Limits Active
Check b this cell to effectively acknowledge the software limits during
axis displacement.
[Corresponding Parameter: softlimit_en]
If the "Software Limits Active" cell is checked, enter the following information:
Limit +
Limit -
expressed in unit1
[Corresponding Parameter: softlimit_p]
expressed in unit1
[Corresponding Parameter: softlimit_m]
The software limits are generated by the system. They are used to stop movement before the
Hardware limits and the extremity limits are reached. They are only active when a home setting
has been configured.
The + Limit and − Limit values are acknowledged as soon as the home setting is configured (and
on condition that the "Software Limits Active" cell is checked).
N.B. The extremity limits are represented by dotted-line zones. (See data entry window.) They cut
the power of the drive via an appropriate remote control device. For the unit to be disengaged
before an Hardware limit is attained, a sufficiently long deceleration distance must be taken into
account so that the extremity limit is not reached.
Home Cam Acknowledgement
This cell is checked b by default.
[Corresponding Parameter: switch0_en]
If the home cam is not acknowledged, only the encoder 0 timing signal
(or resolver 0 timing signal), will be used to reference the measurement
start point. (The logical switch0_input input is then considered as being
permanently equal to 1).
Direction of Home Setting
Set button
to + or – according to the desired direction of
displacement.
[Corresponding Parameters:home_dir = 0 for + direction
home_dir = 1 for – direction]
Enter the desired home offset,
expressed in unit1.
[Corresponding Parameter: home_offset]
Enter the desired speed, expressed in unit1/s.
[Corresponding Parameter: home_speed]
Home Offset
Home Speed
37
PVD 3516 GB 04/2004
PARVEX Motion Explorer Software - DIGIVEX Motion Module
5.2.3.1 Axis displacements during the home setting
Depending on the initial position of the axis, one of the following cases applies:
•
The axis is not initially found on the home cam:
1st Case:
2nd Case:
•
The axis is found on the cam in its home position and the Home Cam Acknowledgement
option is validated:
3rd Case:
•
The axis moves in the specified direction [see Direction of Home Setting]; it meets the
rising edge of the cam, then the encoder 0 timing signal (or the resolver 0 timing
signal); at the cam and 0 timing signal coincidence, it decelerates and then stops.
The axis moves in the specified direction, but meets an electrical limit.
The displacement direction is automatically reversed until it meets the cam and then is
disengaged. The displacement direction is then re-established (it corresponds to the
Direction of Home Setting) and the axis continues moving as in the 1st case.
The axis is disengaged from the cam in the opposite direction of the Direction of Home
Setting. When the cam is disengaged, the displacement direction is then reversed (it
corresponds to the Direction of Home Setting) and the axis continues moving as in the
1st case.
The Home Cam Acknowledgement option is not validated:
The 1st case applies: The axis moves in the specified direction [see Direction of Home Setting];
when it meets the encoder 0 timing signal (or the resolver 0 timing signal), it decelerates and then
stops.
5.2.3.2 Important Comments
•
•
•
It is the first encoder 0 timing signal (or resolver 0 timing signal) met on the cam (when it has
been acknowledged), in the Direction of Home Setting, which defines the Home position.
Afterwards, this position will be considered as the reference in the absolute mark. It is a 0
reference if the Home Offset equals 0 [Corresponding Parameter: home_offset = 0]. The
Home position is repetitive.
The stop position is linked to the deceleration of the axis and resisting forces. The stop
position is not repetitive.
The Home Offset or axis displacements to a pre-determined position must be programmed
using a set of instructions that has been made available. (See Programming Manual.)
Recommended Procedure:
1] Set the parameters of a home setting with the Home Offset equal to 0 (default value).
2] When this home setting is configured, manually, or by programming, move the axis to the
desired Home position. Read the real position of the axis indicated by the pos1 variable; do
this using the Variable Watcher. Enter the position read in pos1 into the Home Offset field
(IMPORTANT, do not inverse the sign!).
3] Reset the home setting parameters.
4] For verification purposes, demand that the axis be displaced to the Home position (pos1 = 0).
The physical position of the axis when stopped must coincide with the desired Home position.
When all entries are correctly filled in, click on the OK button.
38
PVD 3516 GB 04/2004
PARVEX Motion Explorer Software - DIGIVEX Motion Module
5.2.4 Brake
Click on Operating Modes and select the Brake tab to open the following window:
This environment is used to manage the brake, if a brake was previously declared in Set Drive
Parameters, select Motor / Resolver, tab Motor.
Comments:
•
DSM and DPM –type drives:
A relay used to manage the brake is integrated into each one of these drives.
− "brake relay" open ⇔ brake closed (positive safety) ⇔ motor axis blocked,
− "brake relay" closed ⇔ brake open ⇔ motor axis free.
•
DMM –type drives:
These speed drives do not include a brake relay. Therefore, the brake must be managed
externally. Do not check the cell: □ Brake managed by drive.
Implementation:
The description below corresponds to a set-up using DSM or DPM –type drives.
39
PVD 3516 GB 04/2004
PARVEX Motion Explorer Software - DIGIVEX Motion Module
In addition to the parameter option, the user is able to use the following instructions for operating
the brake:
brake_emergency = 1 Emergency open command for the brake relay. This causes:
- a speed demand of zero,
- the immediate opening of the brake relay,
- a delayed torque disengagement (100 ms delay for dynamically braking
the axis).
Brake close command (therefore, the brake relay is opened).
brake_cmd = 1
Brake open command (therefore, the brake relay is closed).
brake_cmd = 0
5.2.4.1 Case No.1: No Brake
This declaration is a part of the following environment: Motor / Resolver, tab Motor, entry Motor
with brake, cell not checked [Corresponding Parameter: brake_en = 0 ].
In this context:
• the brake relay is permanently open (no brake management),
• the emergency open command for the brake relay is not managed,
• the brake open/closed command instructions are not managed,
• a serious fault causes the immediate de-validation of the torque.
5.2.4.2 Case No.2: Brake present, but not managed by the drive
[Corresponding Parameter: brake_management = 0]
In this context:
• the brake relay is permanently closed (no brake management),
• the emergency open command for the brake relay is not managed,
• the brake open/closed command instructions are not managed,
• a serious fault causes the immediate de-validation of the torque.
5.2.4.3 Case No.3: Brake present, and managed by the drive (usual case)
This selection is suggested by default. It is impossible to open the brake when the torque is
disengaged.
•
•
•
The brake is managed by the drive:
[Corresponding Parameter: brake_management = 1]
The brake is automatically opened when power is detected:
[Corresponding Parameter: brake_init = 1]
or not at all: (there is not an automatic brake command at power-up),
[Corresponding Parameter: brake_init = 0]
The brake cannot be opened if the torque is disengaged or if there is no power:
[Corresponding Parameter: brake_option = 1].
40
PVD 3516 GB 04/2004
PARVEX Motion Explorer Software - DIGIVEX Motion Module
In this context, the brake management mode is as follows:
•
•
•
•
•
•
•
•
The brake relay is opened at initialization ("brake relay" open = brake closed in positive safety).
A system protective device is implemented to prevent the brake from opening when the torque is
disengaged or when there is no power.
If a torque disengagement demand is requested by a user command, the brake relay is opened
prior to the torque disengagement.
The management of the emergency open command for the brake relay causes the following:
- a speed demand of zero,
- the immediate opening of the brake relay,
- a delayed torque disengagement (100 ms delay for dynamically braking the axis).
The management of the brake close command statement (by user command) causes the following:
- a speed demand of zero,
- waits for the speed to fall below 60 rpm before sending the open command to the brake relay,
- a delayed torque disengagement (delay depending on the time for the effective closing of the
brake: brake_ton).
The management of the brake open command statement (by user command) causes the following:
- brake relay closed only if there is power and the torque is validated.
When the brake supply is removed, the following occurs:
- a speed demand of zero,
- a delayed torque disengagement (delay depending on the time for the effective closing of the
brake: brake_ton).
When a serious fault is detected, the following occurs:
- the torque is immediately invalidated,
- the brake relay is immediately opened.
5.2.4.4 Case No.4: Brake present and managed by the drive (specific case)
The brake management mode is the same as in case no.3 except for one thing: there is no system
protective device to prevent the brake from opening when the torque is disengaged or when there is no
power.
•
•
•
The brake is managed by the drive:
[brake_management = 1]
The brake is automatically opened when power is detected: [brake_init = 1],
or when the auxiliary power is detected:
[brake_init = 2],
or not at all:
[brake_init = 0].
The brake can be opened when the torque is not applied or when there is no power:
[brake_option = 0]
When all entries are correctly filled in, click on the OK button.
41
PVD 3516 GB 04/2004
PARVEX Motion Explorer Software - DIGIVEX Motion Module
5.2.5 CanOpen
This tab only appears for a CANopen structure. The following window is opened by clicking on
Operating Modes and selecting the CanOpen tab:
5.2.5.1 SDO Server
SDO Server
Position
on 2 to have 2 SDO communication channels available
[corresponding parameter: SDO_server = 0, default value]. The
CANopen network is then limited to 63 subscribers.
Position
on 4 to have 4 SDO communication channels available
[corresponding parameter: SDO_server = 1]. The CANopen
network is then limited to 31 subscribers.
The 4 channel mode would be selected should more than 2
customers contact the same server at the same time (see
additional information).
Remark: The SDO_server parameter is not managed by PME software and the 1st, 2nd and 3rd
positioners generation which only accept one SDO channel.
42
PVD 3516 GB 04/2004
PARVEX Motion Explorer Software - DIGIVEX Motion Module
Additional information:
The Customer/Server operating mode allows SDO messages to be exchanged on a CANopen
network. Hence, requests coming from various customers can be answered by a positioner drive
(server) using the PC (via a CRS232 or CIM03 interface unit), of an appliance fitted with CANopen
interface or other positioner drives.
We recommend that each "Customer/Server Couple" has their own communication channel in
order to avoid communication problems between the server and the various customers. For this to
be achieved, the server’s appliance must have the ability to use several communication channels.
An appliance (subscriber) connected to the CANopen bus has a basic address that we call Node
Id. This address, in the case of a positioner drive, corresponds to the subscriber’s number defined
by the physical position of the rotary mini-switch available on the front panel.
The appliance connected to the CANopen bus has additional available addresses when several
communication channels have been declared, thus allowing it to establish various data flux. If 2
channels are available, the appliance has 2 addresses: a physical, Node Id, address and a virtual,
Node Id + 64, address. If 4 channels are available, the appliance has 4 addresses: a physical,
Node Id, address and 3 virtual, Node Id + 32, Node Id + 64 et Node Id + 96, addresses.
Channel 0 (Node Id addresses) should be used for communications passing via the CRS232 or
CIM03 interface module (PME software, remote control via a RS232 link, etc.). Other channels
(Node Id + 32, Node Id + 64 and Node Id + 96 addresses) would be used for direct interaction
between the bus’s various appliances.
Example: Either a 2 SDO channel operating mode and two DSM positioner drives with 5 and 6
physical addresses interacting between them. The PME software addresses the positioners with 5
and 6 addresses. The two positioner drives would exchange data using the 69 (5+64) and 70
(6+64) addresses.
43
PVD 3516 GB 04/2004
PARVEX Motion Explorer Software - DIGIVEX Motion Module
5.2.5.2 PDO Rx
In read mode, DIGIVEX Motion positioners are capable of managing up to 4 different PDO
messages (the receiving of instructions from a supervisor).
PDO Rx 1
This field defines the PDO Rx 1 message content
[corresponding parameter: PDO1_rx_cfg].
The selection is carried out using a drop-down list 0 : inactive (default value)
1 : Control Word
2 : Control Word + Mode Of Operation
3 : Control Word + Target Position
4 : Control Word + Target Velocity
5 : Control Word + Target Torque
6 : Control Word + VL Target Velocity
21 : Control Word + Torque Max (0.01 Nm) + Target Position
22 : Control Word + Torque Max (Nm) + Target Position
23 : Control Word + Current reduction (0,01A) + Target Position
PDO Rx 2
PDO Rx 3
PDO Rx 4
Remarks:
The PDO message content is defined in accordance with the
DS402 CANopen standard.
For further information concerning the use of PDO messages,
please refer to the PVD3543 "DIGIVEX Motion - Remote control
using PDO messages" Software Application Manual.
This field defines the PDO Rx 2 message content
[corresponding parameter: PDO2_rx_cfg].
The selection is carried out using a drop-down list This field defines the PDO Rx 3 message content
[corresponding parameter: PDO3_rx_cfg].
The selection is carried out using a drop-down list This field defines the PDO Rx 4 message content
[corresponding parameter: PDO4_rx_cfg].
The selection is carried out using a drop-down list Remark: The PDOn_rx_cfg parameters are not managed by PME software and the 1st, 2nd and 3rd
positioners generation.
44
PVD 3516 GB 04/2004
PARVEX Motion Explorer Software - DIGIVEX Motion Module
5.2.5.3 PDO Tx
In transmission, DIGIVEX Motion Drive positioners are capable of managing up to 4 different PDO
messages (the sending of condition returns to a supervisor).
PDO Tx 1
PDO Tx 2
PDO Tx 3
PDO Tx 4
This field defines the PDO Tx 1 message content
[corresponding parameter: PDO1_tx_cfg].
The selection is carried out using a drop-down list 0 : inactive (default value)
1 : Status Word
2 : Status Word + Mode Of Operation Display
3 : Status Word + Position Actual Value
4 : Status Word + Velocity Actual Value
6 : Status Word + VL Control Effort
21 : Status Word + Torque Actual Value (0,01 Nm) + Position
Actual Value
22 : Status Word + in_port + pos_memo (PDO message
transmitted after an event: following a change in status of any one
of the in0 to in15 on/off control inputs. Reception of a SYNC
message does not result in transmission of a PDO message).
23 : Master Actual Value (pos2)
24 : PxStatus Word + Torque Actual Value (0.01 Nm) + Position
Actual Value
25 : PxStatus Word + Torque Actual Value (Nm) + Position Actual
Value
26 : PxStatus Word + id_measure (0,01A) + Position Actual Value
Remarks:
The PDO message content is defined in accordance with the
DS402 CANopen standard.
For further information concerning the use of PDO messages,
please refer to the PVD3543 "DIGIVEX Motion - Remote control
using PDO messages" Software Application Manual.
This field defines the PDO Tx 2 message content
[corresponding parameter: PDO2_tx_cfg].
The selection is carried out using a drop-down list This field defines the PDO Tx 3 message content
[corresponding parameter: PDO3_tx_cfg].
The selection is carried out using a drop-down list This field defines the PDO Tx 4 message content
[corresponding parameter: PDO4_tx_cfg].
The selection is carried out using a drop-down list Remark: The PDOn_tx_cfg parameters are not managed by PME software and the 1st, 2nd and 3rd
positioners generation.
45
PVD 3516 GB 04/2004
PARVEX Motion Explorer Software - DIGIVEX Motion Module
5.3 Motor / Resolver
Click on the Motor / Resolver button to open the following window:
5.3.1 Motor
This environment is used to select the Motor / Drive association for the application.
Motor Family
Use the6 key to access the drop-down list.
Select the family of the motor being used.
Example of Motor families:
Axis Motors 230 V AC
Axis Motors 400 V AC
…
Spindle Motors 230 V AC
Spindle Motors 400 V AC
…
Axis Motors AXL 230 V AC
Axis Motors AXL 400 V AC
…
Explosion-proof Axis Motors 230 V
Explosion-proof Axis Motors 400 V
…
Specific Motors
46
PVD 3516 GB 04/2004
PARVEX Motion Explorer Software - DIGIVEX Motion Module
When "Specific Motors" is selected in the Motor Family data entry field, the Create, Modify, and
Remove function keys are made available.
Create
Modify
Remove
Motors / Drives
This key is used to create a set of parameters that characterize the
specific motor.
This key is used to modify the set of parameters of an existing specific
motor.
This key deletes the definition of the selected specific motor from the list
of existing specific motors.
Select the association for the motor with the current range for the drive
from the list.
The reference for the selected motor as well as the current range for the
associated drive appear separately in a display window.
Example:
HS610EF
DIGIVEX 4/8
The current range for the motor can be modified by clicking on 6 facing the display window.
However, this capability is controlled by the software program in order to eliminate incompatible
current ranges for the motor being used.
For information:
•
•
For a spindle motor, only an increase in the current range in relation to the initial association is
authorized; this is justified by the fact that the drive must be able to permanently deliver the
short-circuit current for the spindle motor, in "defluxed" mode.
For an explosion-proof motor, the current range cannot be modified. This is because it is the
association of the motor with its drive that meets the standards.
Data from base
Motor with Brake
Therm. Detector
Apply
Data relating to the motor database is displayed in the lower, right-hand
corner of the window. This data cannot be modified by the user.
Checkb this cell when the motor is equipped with a brake.
[Corresponding Parameter: brake_en = 1]
This option is validated by default for standard motors.
Comment: The motor database displays whether or not the motor is
equipped with a heat detection probe.
This key is only available during ON LINE status.
It is used to transfer data relating to the new choice of motor to the
RAM_DM when all data entry fields have been filled in.
It has the same function as the OK button, except that it does not close the
Motor/Resolver window.
When all the data for Motor, Resolver, Brake, Set Resolver Calibration tabs have been correctly
entered, exit the Motor / Resolver environment by clicking on the OK button.
47
PVD 3516 GB 04/2004
PARVEX Motion Explorer Software - DIGIVEX Motion Module
Click on the Details button to display the two definition pages of motor parameters. They are
displayed by clicking on tabs Page 1 and Page 2.
Motor Definition window, Page 1 tab:
Motor Definition window, Page 2 tab:
48
PVD 3516 GB 04/2004
PARVEX Motion Explorer Software - DIGIVEX Motion Module
5.3.2 Resolver
Click on Motor / Resolver and select to the Resolver tab to open the following window :
This environment is used to select the type, calibration and polarity of a specific resolver.
In most applications, the resolver is standard and the settings listed do not have to be modified.
Standard Resolver
This cell is checked by default.
The list indicates which type of resolver is used with the motor.
Selected Resolver
This window displays the selected resolver.
Resolver setting
Standard
Select
this button if the application is standard.
Special
Select this button to complete the degree zone corresponding to the
desired calibration angle.
[ Important! Do not select this option unless justified.]
Resolver Polarity
This window displays the number of pole pairs of the resolver.
49
PVD 3516 GB 04/2004
PARVEX Motion Explorer Software - DIGIVEX Motion Module
5.3.3 Brake
Click on Motor / Resolver and select the Brake tab to open the following window:
This environment displays the type of
brake associated to the motor.
Generally, the settings for this window
must not be modified. They only affect
motors that are specified having a
brake.
Standard Brake
Selected Brake
This cell is checked by default.
The list displays the type of brake used by the motor.
This window displays the selected brake.
The holding torque supplied by the brake is expressed in Nm.
5.3.4 Setting the Resolver Clamp
Click on Motor / Resolver and select the Set Resolver Clamp tab to open the following window:
This environment is used to start the
procedure for resolver clamping. This
procedure must only be carried out by
qualified personnel.
The resolver clamp is used with motors
delivered in kits (motor and resolver delivered
separately).
Comment:
The resolver clamping is
generally done at the factory; exceptionally,
the clamping procedure can be carried out in a
justified context. The purpose of the clamping
is to optimize the phasing of the self-driven,
synchronous motor in order to obtain its rated
performances. (The max. torque of the motor
must be obtained with its max. current in both
rotation directions).
Procedure:
Click on "Start".
The ON and OFF buttons are used to switch the current on and off.
Click on "ON".
The operator turns the resolver stator manually to make the blank zone between the two green bars as
small as possible. The position shown is then close to 0 degrees. The resolver stator must, then, be closed
and confirmed by "Done", then OK.
50
PVD 3516 GB 04/2004
PARVEX Motion Explorer Software - DIGIVEX Motion Module
5.4 Inputs / Outputs
Click on Inputs / Outputs to open the following window:
5.4.1 Logic Inputs
This environment is used to manage logic inputs.
For each logic input, the following data must be entered:
Connector
Force
Forcing Value
Interrupt Edge
The physical status (0 or 1) present on the connector is communicated to the logic input.
[Corresponding Parameters: m_in0 to m_in15 = 0]
This selection forces a logic status on the input, independent of the physical status
present on the connector.
[Corresponding Parameters: m_in0 to m_in15 = 1]
The following choices are possible:
• 0 for a low logic level (false status corresponds to 0 V in input),
• 1 for a high logic level (true status corresponds to +24 V in input).
[Corresponding Parameters: f_in0 to f_in15]
The forcing value is only acknowledged if the Force option of the corresponding input is
validated.
This function is used for inputs in0, in1, in2, and in3 when they are associated with a
priority sub-program. (See Programming Manual.)
The following choices are possible:
+ for a rising edge (transition from status 0 towards status1)
- for a falling edge (transition from status 1 towards status 0)
[Corresponding Parameters: level_in0 to level_in3
= 0 for a rising ↑ front, = 1 for a falling ↓ front.]
For input in0, the interrupt edge cannot be selected: the rising edge is forced. Since this
input is used for the exact "dating" of the interrupt event, the response time of the
sensor is acknowledged in the __ms data entry field.
[Corresponding Parameter: delay_in0 , expressed in s]
51
PVD 3516 GB 04/2004
PARVEX Motion Explorer Software - DIGIVEX Motion Module
Assignment
Logic inputs in11 to in15 can be assigned to system variables. By default, the
assignment of these logic inputs is: no system assignment.
[Corresponding Parameters: a_in11 to a_in15 ]
0 = not assigned; 1 = assigned to the associated function.
The following system variables can be assigned by logic inputs:
in11 = hardp_input
status of the + hardware limit input,
in12 = hardm_input
status of the - hardware limit input,
in13 = switch0_input
status of the home cam input,
in14 = move_en
feed authorization command,
in15 = exec_en
execution authorization for programs.
The assignments are selected from the drop-down list (6).
5.4.2 Logic Outputs
Click on Inputs / Outputs and select the Logic Outputs tab to open the following window:
This environment is used to manage logic outputs.
For each logic output, the following entries must be filled in:
Establishes the connection between the level programmed on the logic output and the
Progr.
physical connector.
[Corresponding Parameters: m_out0 to m_out7 = 0]
Forces the corresponding level of the logic output to the "Forcing Value" on the physical
Force
connector.
[Corresponding Parameters: m_out0 to m_out7 = 1]
Each logic output can be forced to 0 or to 1 by selecting the button for choice 0 or 1.
Forcing Value
[Corresponding Parameters: f_out0 to f_out7]
The forcing value is only taken into account if the Force option of the corresponding
output is validated.
52
PVD 3516 GB 04/2004
PARVEX Motion Explorer Software - DIGIVEX Motion Module
Initialization Value Each logic output can be initialized at 0 or 1 by selecting
takes effect when the auxiliary supply is detected.
[Corresponding Parameters: init_out0 to init_out7]
Logic outputs can be assigned to system variables.
Assignment
By default, they are no system assignment.
[Corresponding Parameters: a_out0 to a_out7]
0 or 1. This initialization
The following system variables can be assigned by logic outputs:
0 = not assigned
default situation
1 = home_made
"home-made" info
2 = moving
current movement info (theoretical)
3 = in_position
position reached info
4 = move_end
end of movement info (theoretical)
5 = exec_on
program being executed info
6 = drive_ok
positioner drive info ok (relay ok + power
present)
7 = brake_supplied
brake supplied info
8 = flag0
flag0 status
9 = flag1
flag1 status
10 = fatal_error
fatal error info
11 = fault
fault info
12 = cam_outx
cam logic variable (with x = number of the
corresponding output: out0 ↔ cam_out0,…)
5.4.3 Analog Input / Output
Click on Inputs / Outputs and select Analog Input / Output to open the following window:
This environment is used to manage analog input and output.
53
PVD 3516 GB 04/2004
PARVEX Motion Explorer Software - DIGIVEX Motion Module
5.4.3.1 Input
Enter the data for the following fields:
Units
Scale
Offset
Software Forcing
Value
Assignment
Edition field used to customize the analog input. The filling in of this field is optional.
[Corresponding Parameter: unit4]
Enter the desired scale coefficient, expressed in Units/Volt.
[Corresponding Parameter: scale_ina]
Enter any necessary offset settings, expressed in Volts.
[corresponding parameter: ina_offset]
By default, there is no software forcing: button set to No.
To validate software forcing, set button to Yes and fill in the Value data entry field.
[Corresponding Parameter: m_ina = 0 no forcing; = 1 forcing]
Enter the required forcing value for the analog input, expressed in Volt and in Units.
[Corresponding Parameter: f_ina]
The analog input can be assigned to the following system variables :
[Corresponding Parameter: a_ina]
0 = no assignment
default setting: the input can freely be used and configured using
Basic_DM program
1 = ki_red
current reduction coefficient applied to i_red
2 = speed_att
speed attenuation coefficient
3 = speed_value
speed instruction in speed drive mode
4 = torque_value
torque instruction in torque drive mode
5.4.3.2 Output
Enter the data for the following fields:
Units
Edition field used to customize the analog output. The filling in of this field is optional.
[Corresponding Parameter: unit3]
Enter the desired scale coefficient, expressed in Volt/Units.
[Corresponding Parameter: scale_outa]
Initialization Value Enter the value, expressed in Volt and in Units, that will be taken by the analog output at
initialization. This initialization takes effect when the auxiliary supply is detected.
[Corresponding Parameter: init_outa]
Software Forcing By default, there is no software forcing: button set to No.
To validate software forcing, set button to
Yes and fill in the Value data entry field,
expressed in Units.
[Corresponding Parameter: m_outa = 0 no forcing; = 1 forcing]
Enter the required forcing value for the analog output, expressed in Volt and in Units.
Value
[Corresponding Parameter: f_outa]
The analog output can be assigned to the following system variables :
Assignment
[Corresponding Parameter: a_outa]
0 = no assignment
default setting: the output can freely be used and configured
Scale
using Basic_DM program
1 = pos1
2 = pos2
3 = pos_th
4 = tracking_error
5 = speed1
6 = speed2
7 = speed_th
8 = synchro_error
9 = i_setpoint
10 = uf0
11 = uf1
12 = ui0
real position of controlled axis
position of measured axis
position setpoint
tracking error
real speed of controlled axis
speed of measured axis
speed setpoint
synchronized speed error
current setpoint
user variable
user variable
user variable
54
PVD 3516 GB 04/2004
PARVEX Motion Explorer Software - DIGIVEX Motion Module
13 = ui1
14 = ina
15 = cam_outa
user variable
analog input, post-mask status
cam analog variable
16 = torque_setpoint
17 = var0
18 = var1
19 = filter0
20= filter1
torque set-point
physical variable
physical variable
filtered variable
filtered variable
5.4.4 Encoder Input/Output
Pressing the Inputs / Outputs button and selecting the Encoder Input/Output tab leads to the following
window:
This environment is used to manage option cards.
55
PVD 3516 GB 04/2004
PARVEX Motion Explorer Software - DIGIVEX Motion Module
Depending on the option card placed in the drive, set the
button to:
No Option
Default setting for this button .
[Corresponding Parameter: option_card = 0]
Incremental
encoder input
Select this option when an SC6638 incremental encoder input card is installed
[corresponding parameter: option_card = 1]
Incremental
encoder
emulation
Select this option when an SC6639 incremental encoder emulation card is
installed
[corresponding parameter: option_card = 2]
SinCos encoder Select this option when an SC6645 SinCos encoder input card is installed
[corresponding parameter: option_card = 3]
input
5.4.4.1 Incremental encoder input
Inputs / Outputs button, Encoder Input/Output tab, position
for Incremental encoder Input:
56
PVD 3516 GB 04/2004
PARVEX Motion Explorer Software - DIGIVEX Motion Module
This environment validates the Incremental encoder input option. Set the parameters in the following data
fields:
Encoder
Resolution
Units
Units /
Encoder
Resolution
Inverse the
Pulse
Counting
Direction
Enter the number of pulses/Resolution for the encoder being used in this edition zone. The
value is expressed in whole units.
[Corresponding Parameter: res_encoder]
Specify the unit used for the application.
If the "position control by external encoder" function is selected (Operating Modes window,
Set-up tab), the unit declared under unit2 is the same as unit1. The box is then shaded.
[Corresponding Parameter: unit2]
Enter the correspondence coefficient between the encoder rotation and displacement units.
[Corresponding Parameter: kunit_encoder]
Check athis cell to inverse the direction of the pulse counting carried out by the calculator.
[Corresponding Parameter: encoder_inv]
This option is especially useful in the debugging phase: It avoids having to physically
inverse the return of encoder data.
Acknowledgement of a modulo
Modulo operation consists in bringing the positional value of the measured axis within a given interval. This
is typically used with rotary axes or axes with no physical limits, which move indefinitely in the same
direction.
When the user checks D the "Apply the specified modulo" box
and lower limits stated.
□ the system takes into account the upper
Let's take as an example a 360° rotary axis. If the user selects a lower limit of -180° and an upper limit of
+180°, the axis position will always be between -180° and +180° whatever the cumulative movements made
by the axis. The measured positions will be taken to be "modulo 360°". (The modulo corresponds to the
difference upper limit - lower limit.) The "Apply the specified modulo" option means the user does not need
to control the equivalence relation between the absolute positions -180° and +180°. Applying a modulo with
an upper limit of +180° and a lower limit of -180° to the value of 470° returns 110° (470° - n times the
modulo, where n = 1); applying it to a value of -200° returns +20° (-200° + n times the modulo, where n = 1).
The modulo function also makes it possible to avoid reaching the maximum counting capacity of the system.
Unless otherwise specified by the user, the system will apply of its own accord and as a safety measure a
modulo with an upper limit of 10000000 unit2 (or 100000000 encoder transitions) and for the lower limit a
lower limit value of -10000000 unit2 (or -1000000000 encoder transitions).
Tip: the modulo upper limit and modulo lower limit values must correspond to a complete number of encoder
increments or encoder emulation increments so as to avoid losing left-overs from division.
Apply specified
modulo
Modulo upper limit
Modulo lower limit
Check D this box to validate the modulo specified by the upper limit and lower limit
fields below.
[corresponding parameter: modul2_en]
If this box is not checked, the system modulo will be applied.
Enter the value of the upper threshold of the modulo in this field.
[corresponding parameter: modul2_up]
Enter the value of the lower threshold of the modulo in this field.
[corresponding parameter: modul2_low]
57
PVD 3516 GB 04/2004
PARVEX Motion Explorer Software - DIGIVEX Motion Module
5.4.4.2 Incremental encoder emulation
Inputs / Outputs button, Encoder Input/Output tab, position
for Incremental Encoder Emulation:
Th This environment validates the Incremental encoder emulation option. Set the parameters in the
following data fields:
In this edition field, enter the selected resolution for the "Encoder Emulation" function in
pulses / motor resolution, expressed in whole units selected from the range [1 …16384].
[Corresponding Parameter: Encoder_Resolution]
Acknowledgement First, set the kinematics to the desired position: future co-ordinate being 0 for the
absolute marker. The status must be ON LINE.
of top 0
Press the Top 0 button to validate the acknowledgement of the 0 timing signal on a
rotation of the resolver.
Comment: The 0 timing signal must be re-entered every time the resolution is changed.
Resolution
5.4.4.3 SinCos encoder input
5.4.4.3.1 Setting parameters for a drive fitted with a SinCos encoder:
All parameters are set using PME software via the Drive parameters Settings window.
58
PVD 3516 GB 04/2004
PARVEX Motion Explorer Software - DIGIVEX Motion Module
•
•
Global transfer of the parameters from an *.fdm file, if it has been created.
IF THIS IS NOT THE CASE
Upgrade the set of EEPROM parameters so that the SinCos option appears in
the Inputs / Outputs window.
The parameter setting procedure consists of the following 4 stages:
5.4.4.3.1.1 Validating the SinCos encoder input:
•
Pressing the Inputs / Outputs button and selecting the Encoder Input / Output
tab leads to the following window:
This environment is used to manage option cards.
59
PVD 3516 GB 04/2004
PARVEX Motion Explorer Software - DIGIVEX Motion Module
•
Validate the Sincos encoder input:
This environment validates the SinCos encoder input option. Set the parameters in
the Encoder resolution and Units / encoder revolution data fields. The Encoder
Resolution is expressed in sinusoids per revolution (sin/rev).
•
Click on OK to validate the SinCos input.
5.4.4.3.1.2 Validating the motor + SinCos encoder:
•
Clicking on the Motor / Resolver button opens the following window:
•
•
•
Select the Motor / Drive association from the motor database.
Apply.
Next, select the Resolver button.
This, then leads to the following window:
60
PVD 3516 GB 04/2004
PARVEX Motion Explorer Software - DIGIVEX Motion Module
•
•
Uncheck the Standard Resolver data field and select1002-SinCos Encoder as
shown above.
Click on OK.
5.4.4.3.1.3 Validating the automatic control option:
•
Clicking on the Operating modes button opens the following window:
•
Then, in the Position feedback section, check the:
By external encoder
Speed return by external encoder data fields.
•
•
Set the parameters in the other sections of the window.
Press OK.
61
PVD 3516 GB 04/2004
PARVEX Motion Explorer Software - DIGIVEX Motion Module
5.4.4.3.1.4 Saving the parameters:
•
•
Save the parameters in an *.fdm parameter file.
Click on the RAM ---> EEPROM button to save the drive configuration
.
RAM
•
EEPROM
Shutdown the drive to restart in SinCos mode.
5.4.4.3.2 Setting the SinCos balance parameters:
These parameters are to be set once when on-site energizing first takes place.
The SINCOS encoder unit (mechanical assembly) + cable + SINCOS SC6645 encoder input
card can generate:
• Sine and Cosine signal offsets.
• different amplitudes between the Sine and Cosine
signals.
and consequently a significant position error (speed ripple).
An automatic program is used to equalize the Sine and Cosine channel offsets and to correct the
Sine and Cosine channel amplitudes; the highest amplitude is set to the level of the lowest.
Amplitudes are corrected insofar as the Sine Amplitude / Cosine Amplitude ratio is between
0.9 and 1.1.
62
PVD 3516 GB 04/2004
PARVEX Motion Explorer Software - DIGIVEX Motion Module
5.4.4.3.2.1 Constraints:
This program can only operate with:
• Firmware greater than or equal to AP704V08.
• PME software greater than or equal to PME 4.06.
• The SinCos encoder unit (mechanical assembly) + cable + SINCOS SC6645
encoder input card form a combined unit once the parameters are set. Reset
the parameters if one of these elements changes.
5.4.4.3.2.2 Starting the program:
This program is to be found under the parameter editor:
• Click on Motor / Resolver.
• Select the SinCos adjustment parameters button.
•
Next, click on Start…
63
PVD 3516 GB 04/2004
PARVEX Motion Explorer Software - DIGIVEX Motion Module
•
Click on Start.
The parameter setting program then runs:
•
Click on Close when parameter setting is completed; Adjustment done then
appears in blue.
Parameter setting takes approximately 3 minutes.
64
PVD 3516 GB 04/2004
PARVEX Motion Explorer Software - DIGIVEX Motion Module
5.4.4.3.3 Home setting position:
It is necessary to calibrate the motor every time the drive is energized in order to guarantee the
control of said speed drive as the encoder is not absolute on a revolution.
Polarization of the motor is carried out via a Motor_ polarization.bdm user program
that is to be found under C:\Program File\Parvex\PME4.xx\App_parvex
\Example\Miscellaneous.
•
Start the Program editor tool:
•
Click on Connection.
•
Load the user program C:\Program File\Parvex\PME4.xx\App_parvex
\Example\Misc\Motor_polarization.bdm by clicking on File \ Open.
65
PVD 3516 GB 04/2004
PARVEX Motion Explorer Software - DIGIVEX Motion Module
•
Compile + Export + Apply as shown below:
•
•
•
Exit the window.
Turn the power on if it has not been done.
Start the user program by validating the exec_en = 1 variable and by putting in7
= 1. The calibration is completed when out7 = 1. The user program can then be
stopped by putting exec_en = 0.
5.4.4.4 Oscilloscope variables
Sine & Cosine encoder signals can be observed via the PME oscilloscope.
This involves using variables:
• Encoder_Sinus
Sine Signal.
• Encoder_Cosinus
Cosine Signal.
66
PVD 3516 GB 04/2004
PARVEX Motion Explorer Software - DIGIVEX Motion Module
5.5 Servocontrol Settings
5.5.1 Servocontrols
Click on Setting Servocontrols and select the Servocontrol tab to open the following window:
This environment gives individual* access to all servocontrol parameters.
(*) the procedure of assisted setting, as described in the following pages, sets all parameters
globally. This setting assistant should be used as a matter of priority.
The user is then able to separately modify each parameter when the application requires a
specific setting to obtain:
- a pre-determined performance level,
- an optimized filtering of resonances,
- etc.
Parameters are grouped by function family:
5.5.1.1 Position
Gain
This is proportional gain in position of the servocontrols, expressed in 1/s.
[Corresponding Parameter: kp]
67
PVD 3516 GB 04/2004
PARVEX Motion Explorer Software - DIGIVEX Motion Module
5.5.1.2 Speed
Gain
Integral Stop
Filter
This is proportional gain in speed of the servocontrols, expressed in 1/s.
[Corresponding Parameter: kv]
Corresponds to the stop frequency of the integral action, expressed in Hz, of the
speed servocontrol (Resonance frequency damping).
[Corresponding Parameter: fi]
This parameter determines the crossover frequency, expressed in Hz, of the
second order filtering.
[Corresponding Parameter: fc]
5.5.1.3 Feed Forward
This parameter family groups together the settings for anticipative actions.
Controlled
Acceleration
Master
Acceleration
Controlled
Speed
Master
Speed
Position
Delay
Speed Delay
Corresponds to the acceleration anticipation coefficient for the controlled
movement. When the settings are optimized, the coefficient equals 1 and
represents 100 % anticipation.
[Corresponding Parameter: kff_accel1 included between 0 and 1.5]
Corresponds to the acceleration anticipation coefficient for the master movement.
In a Master– Slave configuration, when the settings are optimized, the coefficient
equals 1 and represents 100 % anticipation.
[Corresponding Parameter: kff_accel2 included between 0 and 1.5]
Corresponds to the speed anticipation coefficient for the controlled movement.
When the settings are optimized, the coefficient equals 1 and represents 100 %
anticipation.
[Corresponding Parameter: kff_speed1 included between 0 and 1.5]
Corresponds to the speed anticipation coefficient for the master movement. In a
Master– Slave configuration, when the settings are optimized, the coefficient
equals 1 and represents 100 % anticipation.
[Corresponding Parameter: kff_speed2 included between 0 and 1.5]
This is a second order filtering whose crossover frequency (fp) is expressed in Hz.
Its role is to delay the position setpoint in order to optimize the speed prediction
action.
[Corresponding Parameter: fp]
This is a second order filtering whose crossover frequency (fv) is expressed in Hz.
Its role is to delay the speed setpoint in order to optimize the speed prediction
action.
[Corresponding Parameter: fv]
5.5.1.4 Predictors
Friction
Threshold
Gravity
Corresponds to the friction prediction value expressed in N.m.
[Corresponding Parameter: f_static]
Corresponds to the speed threshold above which the friction prediction is saturated
to the value of f_static.
The threshold is given as a percentage of the speed_max maximum speed.
[Corresponding Parameter: threshold]
This is the gravity force prediction value applied to the axis. It is expressed in N.m.
[Corresponding Parameter: gravity]
68
PVD 3516 GB 04/2004
PARVEX Motion Explorer Software - DIGIVEX Motion Module
5.5.1.5 Inertias
Load
Motor
Brake
Total
This parameter corresponds to the load inertia applied to the motor, expressed in
kg.m2.
[Corresponding Parameter: load_inertia]
Indication of the inertia of the motor, expressed in kg.m2.
[Corresponding Parameter: motor_inertia]
Indication of the inertia of the brake (when one is installed on the motor), expressed
in kg.m2.
[Corresponding Parameter: brake_inertia]
Indication of the total inertia of the movement applied to the motor, expressed in
kg.m2.
[Corresponding Parameter: inertia]
5.5.1.6 Current
Limitation
Corresponds to the motor current limitation parameter, expressed in A.
[Corresponding Parameter: i_red]
If excessive RMS or average current, then :
Stop and
pass to
Fault
Continue
with
Reduction
Current
Click on this button to trigger a fault of the drive, when a current overload is
detected.
[Corresponding Parameter: overload_management = 0]
Click on this button to limit the acceptable permanent current to 90% when a
current overload is detected.
[Corresponding Parameter: overload_management = 1]
5.5.1.7 Comments
•
•
When all values are correctly entered, click on OK .
It is strongly recommended that the user create an overall parameter file on diskette and/or
hard drive, when the following software environments:
- Operating Modes,
- Motor / Resolver,
- Inputs / Outputs,
- Servocontrol Settings,
belonging to the Drive Parameter Settings window will have been completely explored.
To do this, use function:
- File / Save or
- File / Save As.
•
A global transfer of all the parameters to the EEPROM (supplementary request required) and
the RAM of the drive can then be carried out using the function:
- Global Transfer.
69
PVD 3516 GB 04/2004
PARVEX Motion Explorer Software - DIGIVEX Motion Module
5.5.2 Setting Calculation
Click on Servocontrol Settings and select the Setting Calculation tab to open the following window:
This environment is used to:
• automatically calculate a set of parameter settings,
• apply the set of parameters suggested by the software program to the positioner drive.
To do this, the following data must be entered:
• Gain in position, [Corresponding Parameter: kp expressed as s-1]
• Load inertia (if possible).
The Maximum Achievable Acceleration and Maximum Achievable Speed boxes are for guidance
only. They show the maximum values of the accel_max and speed_max parameters (Operating
Mode window).
5.5.2.1 Operating Mode
1] When the window is opened, the gain in position kp is set at 62 s-1. It corresponds to a passing
band at a 10 Hz position. This setting, default, should be accepted by most applications.
The user can select the gain in position that he wishes to apply by clicking on + or – in the Gain in
position data entry window or by directly entering a value using the keyboard.
[Corresponding Parameter: kp expressed as s-1]
2] If possible, enter the values for Minimum Inertia and Maximum Inertia which correspond to the
probable load inertia, expressed in kg.m2.
70
PVD 3516 GB 04/2004
PARVEX Motion Explorer Software - DIGIVEX Motion Module
Comments:
• The considered load inertia is applied to the motor.
• The default values correspond to a Minimum Inertia of zero and a Maximum Inertia
equal to 4 times the inertia of the motor.
3] The user selects if he wishes to use the "acceleration and speed prediction" function. If yes,
checkb the Use Feed Forward cell and only enter the value for the Exact Inertia cell,
expressed in kg.m2. The value entered must be as exact as possible because the precision of
the prediction is based on this value.
4] When all the data is entered, the software program calculates the various servocontrol
parameters kv, fi, fc, fv, fp and displays them in the lower part of the window.
5.5.2.2 Application of proposed settings
The user can apply the set of suggested parameters by clicking on the Apply settings button.
Comment:
The settings cannot be applied if a value is displayed in red in one of the fields. Values are
displayed in red when the calculation is judged to exceed the limits set by the software program.
Certain combinations of gain in position and declared inertias are prohibited.
5.5.2.3 Assessment of results
The user is invited to use both the Stimuli Generator tool and the Oscilloscope function in order to
observe the development of variables while settings are being applied. (Refer to the use of various
tools expressed in section 4.)
Stimuli Generator tool
The programmed stimulus must be able to create a sufficient movement and requires a significant
current, without however, causing a saturation of current.
Important !
Before any movement commands: First make sure that the machine can operate without
endangering personnel and that no equipment will be damaged.
Oscilloscope Function
Screen display:
• speed setpoint
• speed measurement
• speed regulator PI output
[speed_setpoint]
[resol_speed or speed1]
[pi_out]
71
PVD 3516 GB 04/2004
PARVEX Motion Explorer Software - DIGIVEX Motion Module
5.5.2.4 Finding the optimal setting
General Case (without using Feed Forward )
For a given Gain in position (kp), the given range [Min. Inertia, Max. Inertia] is optimal when:
• the resol_speed speed measurement follows the speed_setpoint speed setpoint without any
transient or sustained oscillations.
• the delay of the speed measurement in relation to the speed setpoint remains acceptable.
The output of the pi_out speed regulator:
• is not saturated in acceleration and deceleration phases,
• does not oscillate at a high frequency at the end of movement.
A kp gain in position that is too high rapidly causes an instability of the servocontrol.
A kp value that is too weak makes the system too "soft" and causes a large tracking error
[Corresponding Parameter: tracking_error].
Using the Feed Forward prediction function
The output of the pi_out speed regulator is the image of an acceleration.
The feed forward prediction function is optimized when pi_out does not vary (or very little) during
acceleration and deceleration phases. This result is obtained when the entered Exact Inertia
converges towards the real value of the load inertia.
•
•
For a vertical axis that is subject to gravity acceleration, pi_out shows a value that is
approximately constant and not equal to zero.
For a horizontal axis, the pi_out output leans towards zero when the prediction is "perfect".
Increasing the kp gain in position
When the inertia range [Min. Inertia, Max. Inertia] or even the Exact Inertia, is correctly
determined, the kp gain can be increased in order to try to improve the dynamic performances.
5.5.2.5 Calculating Inertia
Cylinder : J =
1 2
mr
2
r
m=mass (inKg)
r= radius (in m)
72
PVD 3516 GB 04/2004
PARVEX Motion Explorer Software - DIGIVEX Motion Module
5.5.3 Hardware
This page is used for modifying the power bridge cutting frequency. This functionality is used as a
solution in cases of long length cables.
The 8kHz frequency selection, suggested by default, should not be modified without
just cause.
Keep the default selection for standard applications:
73
PVD 3516 GB 04/2004
Default value
PARVEX Motion Explorer Software - DIGIVEX Motion Module
6. TOOLS
6.1 Main System Variables
The table below lists the main system variables that are available when using the oscilloscope or
the variable watcher. These variables are displayed in the drop-down lists of the related tools and
are listed in alphabetical order.
The complete list of accessible variables can be found in the DIGIVEX Motion "PVD 3527 Directory of variables" Manual.
Name
Positions
Speed
posa
Absolute destination position (controlled by the program), in unit1
pos_setpoint
Current position setpoint (movement controlled by the program), in
unit1
pos1
Real position of axis 1 (controlled axis: motor resolver or external
encoder), in unit1
pos2
Real absolute position of axis 2 (master axis, external encoder), in
unit2
tracking_error
Current tracking error, in unit1
speed_setpoint
Current speed setpoint (controlled movement), in unit1/s
speed1
Real speed of axis 1 (motor), in unit1/s
speed2
Real speed of axis 2 (external encoder), in unit2/s
speed_error
Speed error, in unit1/s
pi_out
PI regulator output, in unit1/s²
Acceleration accel_setpoint
Torque
torque_setpoint
Current
Inputs
Outputs
User
Variables
Description
Acceleration setpoint, in unit1/s²
Torque setpoint, in N.m
i_setpoint
Current setpoint, in A
ina
Value of analog input
outa
Value of analog output
in0 to in15
Status of logic inputs
out0 to out7
Status of logic outputs
ub0 to ub127
User logic variables
ud0 to ud63
User floating variables (high precision, 40 bits)
uf0 to uf191
User floating variables (normal precision, 32 bits)
ui0 to ui127
User whole variables (32 bits)
thermic_drive_load
Thermal load of drive (100 % = permanent limit of the drive)
thermic_motor_load
Thermal load of the motor (100 % = limit of permanent motor speed)
Motor
heatsink_temp
Temperature of the radiator (heatsink) of the drive
Drive
bus_voltage
Voltage of the intermediate circuit (internal bus voltage)
Power
Power measured on the intermediate circuit (only available for DPM
drives)
74
PVD 3516 GB 04/2004
PARVEX Motion Explorer Software - DIGIVEX Motion Module
6.2 Stimuli Generator
From the Network Management environment and by clicking on a drive connected to
the network (ON LINE status), click on Stimuli Generator to open the following
window:
6.2.1 Stimuli Generator
The Stimuli Generator tool is used to generate a speed setpoint for the positioner drive. This is
especially useful in the debugging phase when trying to set the servocontrols and check
performances. It provides the means for simply moving the axis, without using positioning
statement included in a user program.
The title bar of the window displays the status of the stimuli generator:
Stimuli OFF (Stimuli inactive) or Stimuli ON (Stimuli active) and the subscriber number of the
positioner drive.
6.2.1.1 Required Parameters
stimulus_speed1
stimulus_speed2
stimulus_accel
stimulus_period
stimulus_repet
Enter the desired value in this field, expressed in unit1/s.
Comments:
- stimulus_speed1 can be lower than stimulus_speed2.
- Positive or negative values are authorized.
- unit1 is entered in the Drive Parameter Settings environment: Click on
Operating Modes, select Configuration.
Enter the desired value in this edition zone, expressed in unit1/s.
Positive or negative values are authorized.
Enter the desired acceleration or deceleration level [in unit1 /s2], during
speed transitions. Enter a positive value for this parameter.
Enter the time period of the stimulus, expressed in s.
Enter the number of cycles (repetitions) to be carried out by the Stimuli
Generator.
The entered value must be included between 1 and 1 000 000.
75
PVD 3516 GB 04/2004
PARVEX Motion Explorer Software - DIGIVEX Motion Module
6.2.1.2 Available Keys
Update
Predictions
START
Press this key to calculate and display the displacement predictions:
Min. Forecast Position and Max. Position, expressed in unit1.
This key runs the stimuli sequence.
IMPORTANT: Make sure that the controlled axis meets all safety requirements
before pressing this key!
The following conditions are required for starting the stimuli:
- power present,
- no fault present,
- no application programs are running,
- the 7-segment display on the front panel of the unit must have a blinking 1.
If these conditions are met:
- the status bar displays the status as ON.
- The Min. Forecast Position and Max. Position data, expressed in unit1, are
updated.
The STOP key becomes available.
This key interrupts the current stimuli sequence [abort_cmd = 1].
STOP
6.2.1.3 Comments
• On the figure illustrating a drive stimulus, t represents SPEED1 or SPEED2 a constant speed
operating range. Its value is determined by the following calculation:
t=
T − Σtγ
2
where: Σtγ represents the sum of the acceleration and deceleration times
and
T the stimulus recurrence frequency.
t must always be positive or zero: in the event that this is not true, an error message shows
Tmin making t equal to zero.
• Motion cannot start when inconsistent values have been entered in the different data fields. The
user is informed by an error message.
• When the software running limits are active, the software checks whether or not the anticipated
displacement will lead to the overrunning of these running limits. Motion cannot start if the
running limits are likely to be reached.
6.2.1.4 About…
This menu gives access to the:
• PME software guide (Acrobat Reader PDF format)
• About… window and displays the version number of the current software
76
PVD 3516 GB 04/2004
PARVEX Motion Explorer Software - DIGIVEX Motion Module
6.2.2 JOG Instruction
This tool generates a relative displacement. It is especially useful in the setting phase, where the user
applies himself to servocontrol setting and performance checking. It provides the means to displace the
axis simply, without using the positioning instructions making up a user program.
The "Position" window shows the real position of the axis [pos1]. This information is refreshed
cyclically.
6.2.2.1 Parameters to be set
Step
Speed
Accel
Enter the desired relative displacement value, expressed in unit1, in this
edition field
unit1 is set in the Setting drive parameters environment, select Operating
Modes, Configuration tab
Only positive values are authorised.
Enter the desired displacement speed value, expressed in unit1/s, in this
edition field
Only positive values are authorised.
In this field, enter the required acceleration / deceleration value, expressed in
unit1/s2
Only positive values are authorized.
77
PVD 3516 GB 04/2004
PARVEX Motion Explorer Software - DIGIVEX Motion Module
6.2.2.2 Available Keys
Jog +
This key starts displacement in the positive direction
Caution: make sure that the controlled axis meets all safety requirements before
pressing this key!
Jog -
The following conditions are required for starting the relative displacement:
• power supply present,
• no fault present,
• no application program execution in progress,
• the 7-segment display situated on the front of the unit must show a flashing 1.
This key starts displacement in the negative direction
Caution: make sure that the controlled axis meets all safety requirements before
pressing this key!
Abort
The following conditions are required for starting the relative displacement:
• power supply present,
• no fault present,
• no application program execution in progress,
• the 7-segment display situated on the front of the unit must show a flashing 1.
This key stops all displacement in progress [abort_cmd = 1].
78
PVD 3516 GB 04/2004
PARVEX Motion Explorer Software - DIGIVEX Motion Module
6.3 Execution Control (Debug)
From the Network Management environment and by clicking on a drive connected to the
network (ON LINE status), pressing the key Execution Control Tool opens the following
window:
The aim of this tool is to control the running of
the selected positioner drive user programs. It
would normally be used in design and test
phases to ensure user programs (programs
written in Basic_DM language: see DIGIVEX
Motion "PVD 3517 - Programming Manual") are
working correctly.
This menu gives access to the:
• PME software guide (Acrobat Reader
PDF format)
• About… window and displays the
version number of the current software
6.3.1 Program execution control
This display repeats the state of the 7-segment display of the positioner drive.
The various possible states are clarified in the section dealing with the diagnostic
assistance tool.
This key requests the emergency stoppage of all displacements in progress for the
positioner drive concerned [emergency_cmd = 1].
This key, via successive pressing, authorises or inhibits displacement [variable
management move_en]:
• "suspended" is shown if move_en = 0
• "enabled" is shown if move_en = 1
This button is used to clear a current fault (fault shown on the 7-segment display).
[reset_cmd = 1]
79
PVD 3516 GB 04/2004
PARVEX Motion Explorer Software - DIGIVEX Motion Module
Program control is carried out by 3 similar modules:
• The "MAIN" module concerns the execution of motion control programs (main PROG0 program and
subroutines).
• The "PLC1" module concerns the execution of the type 1 PLC program.
• The "PLC2" module concerns the execution of the type 2 PLC program.
"Line" and "Prog" zones show the position of the operation pointer for the module under consideration:
showing the program line and number.
The "State" zone shows whether or not the module is running:
Running
Stopped
Stepping
Hold
Continuous execution of the program
The program is stopped. Pressing on the "START" or "STEP” key will restart the
program at the first line of the PROG0 program for the "MAIN" module, at the first line of
the PLC program under consideration for "PLC1" and "PLC2" modules.
This is the step by step mode: a step of the program is being carried out
This is the step by step mode: a step of the program has just been carried out. The
"START" or "STEP" key must be pressed.
Execution control is carried out using the keys:
START
STEP
HOLD
STOP
This key starts the continuous execution of the program. The instructions are
sequenced automatically, one after another.
This key validates the execution of the program in step by step mode. Pressing this key
allows only one single, elementary instruction to be carried out at a time (execution of
the instructions one by one, with the need to repress the "STEP" key to validate the
execution of the following elementary instruction).
Comment: Numerous Basic_DM instructions break down into several elementary
instructions. Therefore, the "STEP" key often has to be pressed several times before the
"Line" information will move.
This key temporarily stops program execution. It changes to step by step mode. The
operation pointer stops moving. The following instruction will not be carried out until the
"START" or "STEP" key is pressed.
This key stops the execution of the program permanently. Pressing the "START" or
"STEP" key will restart the program at the first line of the PROG0 program for the
"MAIN" module, at the first line of the PLC program under consideration for "PLC1" and
"PLC2" modules.
80
PVD 3516 GB 04/2004
PARVEX Motion Explorer Software - DIGIVEX Motion Module
6.3.2 Inputs / outputs control
The purpose of this tool is to control the forcing of the
inputs and outputs of the selected positioner drive. It would
normally be used during commissioning to facilitate
electrical connection verification.
An all-or-nothing input or output can be forced by:
• Selecting for choice 0 or 1
• Checking D the F cell to validate the forcing
The analog input or output can be forced by:
• Entering the desired value (unit3 or unit4)
• Validating the value acknowledgment using the
button
• Checking D the F cell to validate the forcing
The
button is used to update the
display so that the displayed values agree with those
actually present in the positioner drive.
6.3.3 Instructions
The purpose of this tool is to facilitate instruction control:
• exec_en (program running authorization)
• torque_cmd (torque authorization)
• brake_cmd (brake management)
• move_en (movement authorization)
The display is updated cyclically in accordance with the
values present in the positioner drive.
Select
on choice 0 or 1 to change a value.
button is used to clear a current fault (fault
The
shown on the 7-segment display on the front panel of the
positioner drive): reset_cmd = 1 instruction.
81
PVD 3516 GB 04/2004
PARVEX Motion Explorer Software - DIGIVEX Motion Module
6.4 Variable Watcher
Click on Variable Watcher in the Network Management environment to open the following
window:
•
•
•
•
•
•
This tool is used to observe the values
taken for the various variables are
available to the user.
The values for the following variables
are refreshed in real-time:
•
•
•
•
•
•
•
Destination position (posa)
Measured position (pos1)
Tracking error (tracking_error)
Theoretical speed (speed_th)
•
Measured speed (speed1)
•
•
•
Logic inputs (in0 to in15)
Logic outputs (out0 to out7)
Analog input (ina)
•
•
•
•
Analog output (outa)
Program running data (exec_on)
Validated torque data (torque_on)
Movement authorization data
(move_on)
• Power on data (drive_ok)
A third tab allows the user to observe a desired variable in a list:
• either using a name
• or using a CANopen or PROFIBUS index
82
PVD 3516 GB 04/2004
PARVEX Motion Explorer Software - DIGIVEX Motion Module
The user can observe other variables by first
selecting the desired variable in the drop-down
list 6 and then clicking on READ (its value is
then explicitly displayed in the window).
The "detailed list" check b box is used to
display all observable variables. When this cell
is not checked, only the most frequently used
variables will be displayed in the drop-down
list.
The "Hexa" check b box is used to display the
data in hexadecimal format.
•
•
•
The user can observe other variables by first
indicating their index and subindex numbers,
and then clicking on READ. This window is,
therefore, reserved for experienced users.
The index and subindex numbers of the
variables which can be displayed are available
in the PVD3527 "Directory of variables".
For a value to be written in hexadecimal
format, it must be preceded by the $ symbol
(12 decimal → $0C hexa)
IMPORTANT! The value of the selected variable is not refreshed in real-time (press READ to
update the display).
If the user wants the desired variable to be observed cyclically, click on one of the two buttons
situated under the drop-down list (It is possible to deactivate cyclical observation by
clicking on the arrow which is then crossed through with a red cross).
To modify a variable, enter the value and press WRITE. Important, this operation must only be
carried out by authorized personnel having full knowledge of the system.
It is possible, when using a name to select a variable,
to enrich the selection list by adding variable names
contained in a .vdm file (user variable name file). The
"detailed list" check b box must be checked for this
function to be active.
This menu gives access to the:
• PME documentation and the directory of system variables (guides
in Acrobat Reader PDF format)
• About…window and displays the version number of the current
software.
83
PVD 3516 GB 04/2004
PARVEX Motion Explorer Software - DIGIVEX Motion Module
6.5 Oscilloscope Function
This tool is accessible through the Network Management environment.
Select the positioner drive related to the observed axis, then click on the button showing an
oscilloscope. The following window is then displayed on the screen:
← instruction zone
← visualization zone
← comment zone
The title bar shows the status [OFF LINE / ON LINE] of the connection between the positioner drive, the PC
and the subscriber number of the axis on the CAN or PROFIBUS bus.
6.5.1 File
This control opens the following window:
84
PVD 3516 GB 04/2004
PARVEX Motion Explorer Software - DIGIVEX Motion Module
File
Open
This control sequence is used to display an oscilloscope graph that was previously
saved on a diskette or the hard drive. The Open menu is only available in OFF LINE
mode.
File
This instruction displays a data entry window listing the most recently opened files.
The user displays the file of his choice on the screen by clicking on the filename.
The Re-open menu is only available in OFF LINE mode.
This control sequence saves an oscilloscope graph on a diskette or the hard drive.
The file relating to this copy will be saved with an .scp extension.
Re-open
File
Save
File
Save As
File
Print
File
Export
File
Exit
This sequence is the same as the previous one, but is used to specify the following
information:
- the recording medium (floppy disk or hard drive),
- the archives directory,
- the .scp filename.
The .scp extension is proposed by default. Only files with an .scp extension will be
recognized by the Open control sequence or Open again control sequence.
Used to print the oscilloscope graph currently displayed on the screen.
The default printer is defined in the Windows® environment. (Refer to Control
Panel.)
Curves, values and comments associated to the graph are printed in "landscape"
format.
This control sequence is used to generate a .csv format file which can be used with
an EXCEL® -type spreadsheet software program.
This sequence is used to exit the Oscilloscope environment.
Clicking on
, located in the upper, right-hand corner of the
Oscilloscope window has the same result
Comment: If the window does not close, make sure that the
acquisitions are previously stopped by pressing the following button:
6.5.2 Connection/Disconnection
Connection
Connection
This control sequence establishes the
connection between the PC and the
positioner drive.
The bargraph displays the progression of
the connection.
The Oscilloscope tool is then used to
acquire and observe the variables in realtime.
The ON LINE status is displayed in the
title bar.
85
PVD 3516 GB 04/2004
PARVEX Motion Explorer Software - DIGIVEX Motion Module
The Trigger
and Acquisition
buttons are available in connected mode.
The Open button is no longer available. It will become available when the PC is disconnected from
the positioner drive through the Disconnection control sequence.
Disconnection
The Disconnection control sequence is used to disconnect the link between the PC and the
positioner drive.
6.5.3 Options
This control sequence opens the following
window:
6.5.3.1 Options/Cursors
Options
Cursors
This sequence is used to activate and deactivate cursors.
The Cursors button is highlighted when cursors are active.
Cursors can be applied to each one of the acquisition channels and are controlled
by the mouse or any other type of pointing device.
Click on the box to the right of the Cursors button to select the current channel for
the cursors.
Channel numbers 1, 2, 3 and 4 are successively displayed in drop-down list
format.
86
PVD 3516 GB 04/2004
PARVEX Motion Explorer Software - DIGIVEX Motion Module
6.5.3.2 Options/Cursor Calculation Choice
Options
Cursor Calculation Choice
This control sequence opens the following window:
Click on OK to validate your choice.
Display Values Check b this cell to display the values associated to the cursors in the upper,
right-hand corner of the oscilloscope graph.
- The first cursor gives the amplitude of point no. 1 and acts as a measurement
reference for the second cursor.
- The second cursor supplies the amplitude of point no. 2 and the deviation
(difference in time and amplitude) in relation to the first cursor.
Select
Time:
Select this button to display the time delay between the two cursors.
Axis X
Measurements Frequency:
Select this button to convert the time delay into a frequency.
6.5.3.3 Options/Measurements
Options
Measurements
This sequence is used to validate the calculation options carried
out on the various plots of the oscilloscope graph.
Check b the cells of your choice to select the following:
Average values, peak-to-peak values, maximum values,
minimum values, RMS values.
Calculations are carried out:
• either on the entire acquisition
• or on the distance between two cursors
Click on OK to validate your choice.
The results of the calculations are displayed, for the selected channel, in an independent window
of your choice.
TIP: By clicking successively on the text Mean values, Peak to peak values, Maximum values,
Minimum values or RMS values, it is possible to b check or deselect cells 1 to 4 of the
corresponding line quickly.
87
PVD 3516 GB 04/2004
PARVEX Motion Explorer Software - DIGIVEX Motion Module
6.5.3.4 Options/Comments
Check b this option to authorize the display of the comment zone.
6.5.3.5 Options/Trigger
Options
Trigger
This control sequence opens the following window:
Select the trigger mode from the list by clicking on 6:
Immediate
Triggered
Acquisitions are triggered immediately.
Acquisitions are triggered in "triggered" mode on a specified channel.
Single
Check b this cell to obtain one single acquisition.
When this cell is not checked, acquisition sequences are routinely renewed.
From this list, click on 6, to select the channel that will be used as a
reference for triggering acquisitions in "triggered" mode.
Enter the triggering threshold for carrying out the acquisition in "triggered"
mode.
Used to display curves, over a pre-determined period of time, before
triggering acquisitions using the "trigger".
The Pre-Trig value is expressed in divisions. (One division corresponds to a
unit of time selected in the Time Base).
Enter the desired type of edge for the trigger.
Select this button for triggering acquisitions on a rising edge.
Select this button for triggering acquisitions on a falling edge.
Level
Threshold
Pre - Trig
Edge
Rising
Falling
Click OK to validate the information selected in the Trigger window and to start the acquisition.
Click Abort to restore the previous values of the Trigger window.
88
PVD 3516 GB 04/2004
PARVEX Motion Explorer Software - DIGIVEX Motion Module
6.5.3.6 Options/Automatic connection
Check b this option to request that the PC be connected automatically to the drive, when the
oscilloscope tool opens.
6.5.3.7 Options/List of reduced variables
Check b this option to display only the most frequently used variables in the drop-down list of
variables that can be observed using the oscilloscope.
Deselect this option to display all the variables that can be seen with the oscilloscope.
6.5.3.8 Options/Background colour/Grid colour/Text colour
Options
Background colour
Grid colour
Text colour
This sequence is used to select the background colour of the oscilloscope graph, the colour of the
grid and the colour of displayed text.
6.5.4 Depth of Plot
This sequence opens the following window:
Depth of Plot
b200 points
Depth of Plot
600 points to 2000 points
This choice is selected by default.
The acquisition of each curve is sampled using
200 points. All acquired points are displayed on
the screen.
Select the desired resolution according to the
nature of the recorded variables. A high resolution,
for example, is required for observing an isolated
perturbation, a high-frequency ripple or for
assessing a discontinuity.
- Regardless of the resolution selected, a
division of the time base always corresponds to
20 check points.
- All acquired points are thus divided into
consecutive screens of 200 points.
The curve display window can be moved
and the various other screens can be displayed by
using the translation bar 3 4, located at the
bottom of the oscilloscope graph.
89
PVD 3516 GB 04/2004
PARVEX Motion Explorer Software - DIGIVEX Motion Module
Carried out with a 200-point resolution:
Carried out with a 1000-point resolution:
With a Depth of Plot of 200 points, the entire acquisition can be displayed on a single screen.
With a Depth of Plot of 1000 points:
- Note the presence of a scroll bar at the bottom of the window: its cursor is used to explore the
contents of the acquisition.
- On the example above, the 1000 acquisition points are divided into 5 consecutive screens of
200 points each. (The second screen is displayed in the example given above.)
6.5.5 About…
This menu gives access to the:
• PME software guide (Acrobat Reader PDF
format)
• About… window and displays the version
number of the current software
90
PVD 3516 GB 04/2004
PARVEX Motion Explorer Software - DIGIVEX Motion Module
6.5.6 Acquisition
Start acquisition
Stop acquisition
immediately
Stop acquisition
at the end of the
sequence
Click Acquisition to arm a curve acquisition sequence based on the
selected triggering mode.
When an acquisition is interrupted, press Acquisition to:
- reset a new acquisition sequence,
- refresh the screen,
- empty the %acquisition bargraph (it becomes 0%).
Click Dead halt acquisition to immediately stop the current acquisition
sequence.
Click Stop Acquisition to stop the acquisition sequence when the
%Acquisition bargraph reaches 100%
6.5.7 %acquisition Bargraph
bargraph
The bargraph displayed in the upper, right-hand corner of the Oscilloscope
window represents the progress of the acquisitions.
0% is displayed and its colour is completely red:
- when the curve acquisition is empty,
- at the start of the acquisition period.
A percentage % is displayed and it is divided into two zones, red and blue:
- when an acquisition is in progress (the % value is evolutionary)
100% is displayed and its colour is completely blue:
- when the acquisition is finished (One-Time mode validated),
- at the end of the acquisition period.
Comment: The curves are displayed on the screen in time with the
progression of the acquisition.
6.5.8 Time Base
Enter the desired time base for the acquisition.
Press the
and
keys to facilitate this operation.
91
PVD 3516 GB 04/2004
PARVEX Motion Explorer Software - DIGIVEX Motion Module
6.5.9 Acquisition channels
The Oscilloscope tool has four acquisition channels, respectively called
Channel1, Channel2, Channel3 and Channel4.
Check b the cell corresponding to the desired acquisition channel to validate
its acknowledgement.
Channel colour
The menu for changing the colour of the curve displayed on the screen can be
accessed by clicking on the coloured line to the right of the word Channel.
DC / AC
Press this button to modify the current coupling.
The name on the button indicates the type of coupling selected,
AC:
for alternating,
DC:
for direct.
Select the variable to be saved in the drop-down list by pressing 6. Comment: Only
the first few letters of the variable have to be entered in the edition box, so that they
are properly indexed in the drop-down list.
Assignment 6
Examples of physical variables that can be observed:
id_measure
ud_voltage
id_setpoint
iq_setpoint
iu_measure
iw_measure
iq_measure
uq_voltage
bus_voltage
bus_current
filtered_bus_current
power
thermic_motor_load
thermic_drive_load
heatsink_temp
Encoder_Sinus
Encoder_Cosinus
[A]
[V]
[A]
[A]
[A]
[A]
[V]
[V]
[V]
[A]
[A]
[W]
[%]
[%]
[°C]
[V]
[V]
Measurement of active component current
Active component voltage control
Reactive component current control
Active component current control
Measurement of current in phase U
Measurement of current in phase W
Measurement of reactive component current
Reactive component voltage control
Measurement of bus voltage
Measurement of bus current
Measurement of the current filtered in the bus
Power measurement
Thermal load rate of the motor
Thermal load rate of the drive
Heatsink temperature
Sine Signal SinCos Encoder
Cosine Signal SinCos Encoder
Examples of system variables that can be observed:
Range
pos1
[unit1] Real position of axis1
speed1
[unit1/s] Real speed of axis1
tracking_error
[unit1] Value of tracking error
exec_en
[]
Authorization for program execution
…
Enter the desired display range.
Press the
and
keys to facilitate this operation.
Modification of the Range results in an "expansion" or "contraction" of the display
depending on the axis of the ordinates.
92
PVD 3516 GB 04/2004
PARVEX Motion Explorer Software - DIGIVEX Motion Module
6.6 Diagnostic Assistance Tool
This tool is available in the Network Management environment.
6.6.1 Log of Events
This environment is used to access the following
information:
-
log of events and their probable causes,
software version,
serial number of the positioner drive,
total operating time and under torque.
N.B. This information is not routinely updated. The
given values as well the Log of Events correspond
to those that exist when the window is opened. To
update these values, click Refresh.
Incident report
Possible causes
Displays the uncoded designation for the incident that has occurred.
Possible causes associated with an incident are obtained by clicking
on the text of the incident.
Discharges a fault in progress (fault visible on the 7 segment display
contained in the front panel of the drive)
Refreshes the information displayed on the screen.
Saves a record of the faults and all other information supplied on the
screen in a text file (.txt).
This menu gives access to the:
• PME software guide (Acrobat Reader PDF
format)
• About… window and displays the version
number of the current software
93
PVD 3516 GB 04/2004
PARVEX Motion Explorer Software - DIGIVEX Motion Module
6.6.1.1 List of Listed Events
The listed events and their identification codes on the 7-segment display located on the front panel of the
positioner drive are given below. The status_number variable is used to obtain the status of the drive.
Description
Display
Stand by without power
with execution of application program
Stand by without power
without execution of application program
Power present
with execution of application program
Power present
without execution of application program
Resolver failure
Encoder fault
Excessive ambient temperature
Excessive heatsink temperature
High heatsink temperature with reduced current
Excessive motor speed (in rpm)
Excessive application speed (in Units/s)
Excessive supply current
Excessive drive current
Excessive dI/dt
Excessive average current
Excessive RMS current
Excessive average current with reduced current
Excessive RMS current with reduced current
Bus overvoltage
Excessive motor temperature
Option card fault
Incompatible Axis/Spindle definition
CAN or PROFIBUS link fault
Synchronization message timeout
Motor not connected
User program memory fault
Emergency stop
Personalization board missing
Axis / personalization board incompatible
Internal parameter calculation fault
Licence missing
+ Electrical limit reached
- Electrical limit reached
+ Software limit reached
- Software limit reached
Program execution fault
Tracking error fault
C167 CPU Fault
DSP CPU Fault
0
status _
number
36
Information
blinking 0
1
Information
1
21
Information
blinking 1
2
Information
2
blinking 2
3
3
blinking 3
4
4
5
6
6
7
7
blinking 7
blinking 7
8
9
11
A
b
blinking b
C
d
E
F
F
F
blinking F
H
H
L
L
P
U
.
. blinking
3
37
4
5
6
7
35
8
9
10
11
13
12
14
15
16
29
17
18
41
19
20
38
22
23
24
42
25
26
33
34
27
28
31
32
Major Fault
Major Fault
Major Fault
Major Fault
Information
Major Fault
Major Fault
Major Fault
Major Fault
Major Fault
Major Fault
Major Fault
Information
Information
Major Fault
Major Fault
Major Fault
Major Fault
Major Fault
Minor Fault
Major Fault
Major Fault
Major Fault
Major Fault
Major Fault
Major Fault
Minor Fault
Minor Fault
Minor Fault
Minor Fault
Minor Fault
Minor Fault
Major Fault
Major Fault
Major Fault
94
PVD 3516 GB 04/2004
Status
PARVEX Motion Explorer Software - DIGIVEX Motion Module
Types of faults:
Major
Minor
A major fault causes the OK relay switch to open (and, therefore, the power would usually
cut out). The axis is no longer servo-controlled and the power bridge closes. The
torque_sys system request is forced to 0 (identical request to the torque_cmd = 0 user
request) and the target position (posa) instruction to the actual axis position. Therefore,
there is no tracking error and the axis will not move suddenly when the power is turned
back on.
If the brake is controlled by the motion controller (see the Operating modes window, tab
Brake), the “brake” relay switch opens and causes the brake to close.
Program running is not suspended and the OK relay switch remains open until fault
clearance is carried out (reset_cmd = 1).
A minor fault indicates an operating anomaly which, as a general rule, does not affect
movement nor program running.
Exceptions:
• software or electrical running limit fault reached: these faults cause all movement in
progress to stop, just as if the instruction ABORT had been programmed. The axis
slows down (accel_prog) then stops. The position obtained at the end of the
deceleration remains servo-controlled and the target position (posa) instruction
becomes the stopped position. Next, only movement to clear the running limit is
possible. These faults clear themselves as soon as the running limit is cleared. Program
running is not suspended.
• program running fault: program running is suspended.
When a fault occurs, a message identifies the source of the event. When the diagnostic is completed, the
user eliminates the problem using the appropriate process.
6.6.1.2 Voltage Monitoring
Bus
Overvoltage
A failure occurred during the recovery of braking energy.
• for energy return modules on resistance: excessive recovery cycle or braking
resistance out of order.
• for energy return modules on the network: the network was disconnected during a
recovery.
Diagnostic:
- energy recovery is excessive,
- recovery of braking energy is impossible,
- disconnection of the network,
- internal problem.
95
PVD 3516 GB 04/2004
PARVEX Motion Explorer Software - DIGIVEX Motion Module
6.6.1.3 Current Monitoring
This involves the input current for the drive. The fuse used to protect the supply is probably
Excessive
Supply Current destroyed.
Diagnostic:
- generally corresponds to an internal drive problem,
- damaged power transistors,
- malfunction of the gate control of the transistors.
This involves the output current for the drive, which has exceeded the pulsed current by
Excessive
Drive Current 30%. The load impedance is not adapted:
- check the connection between the motor and the drive (3-phase supply present),
- check the adequacy between the motor programmed in the association and the motor.
Diagnostic:
- short-circuit between motor phases,
- short-circuit between a phase and the ground,
- inadequacy between the motor and the drive.
Excessive dI/dt Check the status of the connection between the motor and the drive. Switch OFF the power
and measure the impedance between the three phases of the motor and the insulation
impedance between the phase and the ground.
Diagnostic:
- short-circuit between motor phases or between a phase and the ground,
- use of a long stretch of cable without an output filter,
- use of a long stretch of shielded cable with a high per unit length capacity,
- in both aforementioned cases, use recommended output filters for the drive.
To prevent the power semi-conductors from overheating, the average current, filtered by a
Excessive
2.4-second time constant [I = f(t)], is monitored.
Average
The fault is detected when the average current is equal to, or exceeds, the permanent
Current
current that is acceptable by the drive.
Depending on the adopted strategy (See Servocontrol Settings, 2nd tab Servocontrols), this
fault may:
- cause the main switch [POWER OFF] to open,
- reduce the current for the drive to 90% of the permanent current acceptable by the
drive.
This type of fault occurs when the requested acceleration requires a current greater than
the permanent current of the drive and for too long a time.
Diagnostic:
- generally a mechanical friction point,
- operating cycle too high,
- missing motor phase,
- sometimes, incompatibility of the resolver and motor connection.
To prevent the excessive overheating of the motor windings, the rms current, filtered by a
Excessive
time
constant sent by the motor database [I2 = f(t)], is monitored.
RMS Current
The fault is detected when the average current is equal to, or exceeds, the permanent
current that is acceptable by the motor with a low rpm.
Depending on the adopted strategy (See Servocontrol Settings, 2nd tab Servocontrols), this
fault may:
- cause the main switch [POWER OFF] to open,
- reduce the current for the drive to 90% of the permanent current acceptable by the
drive.
This type of fault occurs when motor when control cycle is too restrictive (high acceleration
and deceleration frequency, high resisting torque).
Diagnostic:
- generally a mechanical friction point,
- operating cycle too high,
- missing motor phase,
- sometimes, incompatibility of the resolver and motor connection.
6.6.1.4 Temperature Monitoring
96
PVD 3516 GB 04/2004
PARVEX Motion Explorer Software - DIGIVEX Motion Module
Excessive
Heatsink
Temperature
Excessive
Motor
Temperature
Excessive
Ambient
Temperature
There are no faults for temperatures less than 70°C.
If the heatsink temperature is between 70°C and 94°C, the pulsed current of the drive is
linearly reduced 2%/°C (i.e. a 50% reduction of the pulsed current at a temperature of
94°C). When the temperature reaches 95°C, the fault triggers a POWER OFF sequence.
Check cabinet ventilation and ensure fans are working.
The motor is equipped with a temperature probe incorporated with the windings. An
excessive temperature triggers a fault detection.
Diagnostic:
- Problem with the motor
- Incorrect motor parameters
A temperature probe located between the electronic boards detects excessive ambient
temperatures and triggers a POWER OFF sequence.
Check cabinet ventilation and ensure fans are working.
6.6.1.5 Monitoring of Limit Stops
+ Hardware Limit
Reached
- Hardware Limit
Reached
+ Software Limit
Reached
- Software Limit
Reached
The + Hardware limit is reached and the movement cannot continue in the + direction.
Disengage the axis by moving it in the opposite direction using the stimuli generator, the
manual operation tool, or a user program.
The – Hardware limit is reached and the movement cannot continue in the - direction.
Disengage the axis by moving it in the opposite direction using the stimuli generator, the
manual operation tool, or a user program.
The + software limit is reached and the movement cannot continue in the + direction.
Disengage the axis by moving it in the opposite direction using the stimuli generator, the
manual operation tool, or a user program.
The - software limit is reached and the movement cannot continue in the - direction.
Disengage the axis by moving it in the opposite direction using the stimuli generator, the
manual operation tool, or a user program.
6.6.1.6 Connection Monitoring
The resolver is missing or its wiring is defective.
Diagnostic:
- resolver excitation malfunction,
- one or more wires of the resolver is (are) broken,
- certain wires were inverted during wiring,
- poor contacts (check connections).
The encoder is missing or its wiring is defective.
Encoder
Diagnostic:
Malfunction
-. Encoder de-energized
- encoder malfunction,
- one or more wires of the encoder is (are) broken,
- certain wires were inverted during wiring,
- poor contacts (check connections).
Option Card Fault An option was validated and the related card is not found in the drive.
Diagnostic:
- problem with the option card,
- poor parameter definition.
[Monitoring level available at a later date]
Motor not
A missing connection between the motor and the drive was detected. Check the power
connected
connections at the level of the drive and the terminal box of the motor.
The personalization card is missing.
Missing
The memory storing the machine parameters (EEPROM) and the application programs
Personalization
(FLASH) is not occupied, therefore the system is inoperative.
Card
Diagnostic:
- Check to see if the personalization card is not unplugged.
Resolver
Malfunction
97
PVD 3516 GB 04/2004
PARVEX Motion Explorer Software - DIGIVEX Motion Module
6.6.1.7 Monitoring of movements in progress
Excessive Motor
Speed
(in rpm)
Excessive Application
Speed
(in Units/s)
Tracking Error Fault
Emergency Stop
The speed of the motor has exeeded its maximum value, assigned in the
database, by 15%. This fault indicates that a technological limit was exceeded.
Check resolver connection.
The speed of the motor has exceeded the speed_max value. [Refer to
Operating Modes, Configuration tab, Max. Application Speed entry.] This fault
implies an over-speed inherent to the application program.
The tracking error has exceeded the authorized trackerror_max value. This
fault can be generated by a problem of a mechanical nature (friction point,
abnormal restriction) or when the trackerror_max value is not adapted to the
performances of the position servocontrol.
Diagnostic:
- poor parameter settings,
- mechanical problem.
An emergency stop was requested.
[Corresponding system variable: emergency_stop = 1]
6.6.1.8 Monitoring of the operational system of the positioner drive
CPU Fault
Communication link
fault
Internal Parameter
Calculation Fault
The CPU detected a fault, but restarted.
An incident has occurred during exchanges between the drive positioner and the
PC or with the other subscribers on the CANopen or PROFIBUS communication
bus.
Diagnosis:
- wire disconnected
- unit turned off
The set of parameters supplied by the user resulted in an inconsistent
calculation or one that cannot be used by the positioner drive.
6.6.1.9 Monitoring of the functional system of the positioner drive
Incompatibility of Axis
/Spindle Definition
Incompatibility of Axis
/Personalization Card
Program Execution
Fault
User Program
Memory Fault
Synchronization
message timeout
Licence missing
Incompatibility of definition between the Axis-Spindle software bit and the
copper strip J0.
Incompatibility between the axis type or range memorized in the
personalization card and the real axis type or range.
A programming error was detected. Additional data concerning the nature of
the error is displayed.
Not currently available.
A problem has occurred during synchronization message transmission
(“Position drive with interpolation” mode).
An operating mode used requires authorization by entering a licence code
(see section “6.6.3 – Licences”).
98
PVD 3516 GB 04/2004
PARVEX Motion Explorer Software - DIGIVEX Motion Module
6.6.1.10 Indicated operating malfunctions
High heatsink temperature with reduced
current
Excessive average current with reduced
current
These events are not considered as faults.
They are just indications of operating
malfunctions.
Excessive RMS current with reduced current
6.6.1.11 Indicated Statuses
"Stand by" without power
and without execution of application program
Situation corresponding to POWER OFF.
[Corresponding Parameter: drive_ok = 0]
Power present
without execution of application program
Situation corresponding to POWER ON.
[Corresponding Parameter: drive_ok = 1]
Power present
with execution of application program
Execution of normal situation in progress
[Corresponding Parameter: drive_ok = 1]
"Stand by" without power
with execution of application program
Execution of normal situation in progress
[Corresponding Parameter: drive_ok = 0]
6.6.2 Loading Firmware
This window is for loading new Firmware
(operating system software) into the FIRM_DM
memory. This function saves the user from
having to change the memory hardware (located
on the motherboard of the positioner drive)
when updating the software version of his
system.
Click on the button below to delete and load
software via the communication bus:
⇒ This operation must be carried out only if
there is a valid reason! (Contact PARVEX first).
99
PVD 3516 GB 04/2004
PARVEX Motion Explorer Software - DIGIVEX Motion Module
6.6.3 Licences
This window allows to enter and to show the software licenses associated to the product.
6.6.3.1 New license validation
touch which is associated to it. A window
Choose an empty line and click the
appears. Select the function to be authorized thanks to the pop-up menu. Enter the corresponding
code of validation then rest on OK.
To validate a new license, select a new line and enter the given code. Validate with ENTER.
The following window if poster if the code is valid.
Remark: The licence code is memorized automatically. No
specific operation is necessary for it to be saved in EEPROM
memory.
This window is displayed if the code is not recognized.
Check that you have entered upper and lower case letters
correctly.
The required code is based on the serial number of the appliance
for which it was produced Therefore, a code that is valid for one
appliance will not be valid for another.
6.6.3.2 Deletion of a licence
Click the touch
of the license to be abolished. Leave space the field of seizure
corresponding to the code of validation then rest on OK.
100
PVD 3516 GB 04/2004
PARVEX Motion Explorer Software - DIGIVEX Motion Module
7. PROGRAM EDITOR
7.1 Presentation
The Program editor tool implements user programs written in Basic_DM language.
Please refer to the DIGIVEX Motion "PVD 3517 - Programming Manual" for instructions on how to
use this language and the training manual.
The Program Editor tool is accessed through the Network Management environment, and
then clicking the following button:
The following window is displayed on the screen:
button gives access to the cam editor. Please refer to the PVD3538 "DIGIVEX Motion –
The
Additional Cam Information" Manual for further information.
This operating mode requires the use of a licence during DIGIVEX Motion cam execution (see
section “6.6.3 – Licences”).
101
PVD 3516 GB 04/2004
PARVEX Motion Explorer Software - DIGIVEX Motion Module
7.2 Program Editor Functions
7.2.1 File
File
New
File
Open
File
Re-Open
This command opens a new edition session.
No filename is displayed in the upper strip of the data entry window. The
active tab is named Page1.
The edition page is blank; the user may start his edition. At this point, text
can be entered using Basic_DM language.
At the end of the edition, save the current session using the File / Save As
or File Save commands (see below).
This function opens a dialog window where the user selects the medium,
directory and filename that will be displayed on the screen. The active tab
will display the name of the open file (motion_block.bdm, for example).
N.B. Only files having a recognized extension will be listed in File / Open
command sequence.
This command displays a data entry window listing the most recently
opened files. The user displays the file of his choice on the screen by
clicking on the filename.
102
PVD 3516 GB 04/2004
PARVEX Motion Explorer Software - DIGIVEX Motion Module
File
Save
This sequence is used to save the session displayed on the screen and to specify the
following information:
- recording medium (floppy disk, hard drive, etc…),
- archives directory,
- filename,
- its extension.
The .bdm extension is used for files written in basic.
The .bdm extension is associated with a file using basic_DM language.
This sequence saves the current edition session. This session corresponds to the
active tab.
Save All
This command sequence saves all open edition sessions (represented by all active
tabs).
Save As
File
File
The following four commands are accessible when the PC is connected to the positioner drive; use the File
Connection command to achieve this (see description below).
File
Export binary file
File
Apply programs
File
Compile +
Export
+ Apply
This command exports to FLASH_DM memory:
• the object.odm file (a binary file executable by the positioner drive, result of the
compilation of the source.bdm file),
• the source.bdm file (a source file written in Basic_DM language), if the compilation
option "Include the source files" has been validated,
• the file that defines the variable names, if there is one (.vdm file).
This command sequence exports the binary program executable by FLASH_DM
memory to PROG_DM memory, at the end of execution.
N.B. User programs executed by the positioner drive are those found in PROG_DM
memory.
This sequence combines in one single operation the following three commands:
• Compile
• Export binary file
• Apply programs
File
This command sequence undertakes the function inverse to File Export binary file:
Import binary file • the object.odm file present in FLASH_DM memory arrives in the computer RAM,
RAM_PC, together with the file that defines the variable names (.vdm file), if there
was one,
• the associated source.bdm file is opened and displayed on the screen.
File
Close
File
Close All
File
Print
File
Cam editor
File
Variable names
This command closes the current edition session. The active tab disappears.
This command sequence closes all edition sessions in progress. All tabs (active and
inactive) disappear from the Program Editor environment.
Click on the Print button (or the File / Print command sequence) to print the text
relating to the edition session being processed.
The default printer is defined in the Windows® environment. (Refer to Control Panel.)
This function gives access to the cam editor. For further information, please refer to
the PVD3538 "DIGIVEX Motion - Cam function" Manual.
• This function gives access to the variable name editor.
See section 7.2.5 of this manual.
103
PVD 3516 GB 04/2004
PARVEX Motion Explorer Software - DIGIVEX Motion Module
Click on the Exit button (or the File Exit control sequence) to end the Program Editor
session.
If modifications were made during this session, the user will be asked if he wishes to
save these modifications in a file before exiting this environment (Save function).
Afterwards, the window closes.
File
Exit
7.2.2 Edit
The following five control sequences are available after one or more elements of text currently being
edited have been selected, using a mouse or any other pointing device.
Edit
Cut
Edit
Copy
Edit
Paste
This function deletes items selected, with the use of the mouse, from
text currently being edited.
The Program Editor stores the cut items in a "Clipboard" type memory.
These items may be re-used with the Edit / Paste function.
This control sequence places the text items selected with the mouse into
the "Clipboard" type memory. These items can then be re-used using the
Edit / Paste function.
This function pastes the text items, which are stored in the "Clipboard"
type memory, in the place indicated by the pointing device (mouse).
104
PVD 3516 GB 04/2004
PARVEX Motion Explorer Software - DIGIVEX Motion Module
Edit
This command sequence cancels the last keystroke.
Undo modifications
Edit
The role of this function is to clear (delete) the text item(s) selected by
the mouse.
Clear
Other commands available for making word processing easier:
Edit
Select All
Edit
Find
Edit
Replace
Edition
This function selects all the text currently being edited.
It is used for word processing (copy, paste, change fonts, etc…)
This control sequence opens a dialog box.
The user fills in the "Find" data entry field.
Click Continue to proceed with the search.
Click Cancel to close the dialog box.
The following Find options are also available:
bWhole string,
bCase-sensitive.
This function opens a dialog box.
The user fills in the "Find" and "Replace with" data entry fields.
Click Replace to replace the specified term.
Click Replace All to replace the specified term throughout the entire text
being edited.
Click Continue to continue with the Replace sequence.
Click Cancel to close the dialog box.
The following Replace options are also available:
bWhole string,
bCase-sensitive.
Fonts
This command sequence opens a dialogue window that gives the user a
choice of font, style and character size.
Home
This function is used to place the edit cursor at the beginning of the
specified line.
Edit
7.2.3 Connection / Disconnection
Click Connection to display Disconnection in the strip of available commands.
The Connection command is available when the status is OFF LINE (drive not connected), while
the Disconnection command is available when the status is ON LINE (drive connected).
Connection
Disconnection
This command sends the connection request from the PC to the
drive. When the connection is completed, the status is switched to
ON LINE.
N.B. The status must be in ON LINE mode in order to be able to
Export or Import an item.odm file.
This command sends the disconnection request from the PC to the
drive.
When the disconnection is completed, the status is switched to OFF
LINE.
105
PVD 3516 GB 04/2004
PARVEX Motion Explorer Software - DIGIVEX Motion Module
7.2.4 Compilation
The following button is associated with this function:
Compilation is a software operation that consists of translating a source program, written in a given
language (Basic_DM, assembler,…) into a binary language that is "understood" by the operating system of
the positioner drive (firmware).
This is the role of the compiler function. It generates a compiled file that has a binary file name and an .odm
extension.
It is important that the compilation result has no errors, or warnings of any type. An Export binary file
sequence for testing the user program can only be attempted if this condition is met.
Comment : Directions for use and the instructions for the Basic_DM language function are described in the
Programming Manual, reference PVD 3517 GB.
Example of display when no errors are detected during compilation:
Compilation options is accessed via the
Options menu:
106
PVD 3516 GB 04/2004
PARVEX Motion Explorer Software - DIGIVEX Motion Module
Keep intermediate files
Include source files
Compact source files
This option allows the user to keep system files that have been
generated during compilation. This option is of little interest for
ordinary usage.
This option, selected by default, authorizes source files (.bdm files) to
be loaded into the positioner drive. Its main interest lies in the fact
that the source program, once saved in the drive, cannot be lost: the
user can, therefore, easily modify the application if he needs to,
without having to call on an external back-up. Maintenance will
therefore be easier.
This option allows the user to compact source files before they are
loaded into the positioner drive; hence, a gain in memory space. This
option is of little interest for ordinary usage.
Example of display when an error is detected during compilation:
The error place and nature are clearly shown. In this example, there is a syntax error at line13, the
assignment indication = has been replaced by the indication +, the result, more than likely, of a
typing error. The cursor points to the error.
107
PVD 3516 GB 04/2004
PARVEX Motion Explorer Software - DIGIVEX Motion Module
7.2.5 Variable Name Editor
The following button is the one associated with this function:
In the Basic_DM programs, it is possible to replace the names of the user and system variables with names
that are more "graphic" in order to make programming more user-friendly.
For example, to increment a number of parts, we could program: nb_parts = nb_parts + 1 instead of ui1 =
ui1 + 1.
The variable names editor indicates the new names of the user and system variables to the compiler "in
uncoded language". These declarations are stored in a .vdm extension file.
The file menu gives access to all tools that open, save, print, etc. a .vdm file. It is also possible to enter a
comment concerning the whole file.
108
PVD 3516 GB 04/2004
PARVEX Motion Explorer Software - DIGIVEX Motion Module
To add a new variable name:
• click on the Add key,
• select the system variable from the drop-down list,
• enter the name "in uncoded language",
• then validate by clicking on the OK button.
It is also possible to change or remove a declaration by using the "Modify" and "Remove" keys.
the
button allows the user to sort names by alphabetical order.
7.2.6 About…
This menu gives access to:
• program editor documentation, the Basic_DM instruction guide and the
directory of system variables (guides in Acrobat Reader PDF format)
• the About…window and displays the current software version number
7.3 Program execution
See DIGIVEX Motion "PVD 3517 - Programming Manual".
109
PVD 3516 GB 04/2004
PARVEX Motion Explorer Software - DIGIVEX Motion Module
8. IMPLEMENTATION
The purpose of this section is to describe a simple way to implement an application that integrates
a positioner drive.
8.1 Operating principles
8.1.1 Controlled position principle
Basic_DM Program
Parameter
reading/writing
Absolute Position
Set point
posa
Speed
predictor
Tracking error
Position
iinstruction
pos_setpoint
tracking_error
+
Trajectory
generator
Gain
kp
-
Speed
Instruction
speed_setpoint
Read
Position
pos1
Te
Te
Position
meter
Resolver or Encoder
The positioner drive has an internal clock which regulates the system. The sampling period is
called the time frequency of this clock (250 µs).
For each sampling period (Te), the positioner drive reads the contents of the pulse meter giving
the position of the controlled axis (actual position pos1) and up-dates the trajectory generator’s
position instruction (position to be reached based on movement in progress pos_setpoint).
An algorithm is incorporated in the trajectory generator. This allows the trajectory to be worked out
whilst respecting specified speeds and accelerations (absolute position set point posa, speed
speed_prog, acceleration accel_prog).
Position control is carried out by comparing the immediate instruction and the measurement of the
actual position. The position difference existing between the measurement (pos1) and the
instruction (pos_setpoint) is known as the tracking error (tracking_error). This error is then
multiplied by a gain (kp) to generate the speed instruction (speed_setpoint).
The positioner drive has speed (kff_speed1) and acceleration (kff_accel1) predictors. They allow
tracking error to be considerably reduced:
Without predictor:
With predictors:
Tracking error = Speed / Gain
Tracking error → 0
110
PVD 3516 GB 04/2004
PARVEX Motion Explorer Software - DIGIVEX Motion Module
8.1.2 Operating modes
The positioner drive has three main operating modes:
•
•
•
Program execution: the positioner drive, gradually, carries out positioning (absolute or
relative movement, home setting, master/slave synchronization, etc.), calculations, tests
and output activation in accordance with the instructions of a program written in Basic_DM
language (this is the most usual operating mode).
Remote control using parameter access messages (CANopen SDO messages or
PROFIBUS PPO messages).
Remote control using process data access messages (cyclical CANopen PDO messages
or PROFIBUS Standard Telegram messages).
All three operating modes can be used simultaneously.
8.1.3 User programs
These program are compiled.
The Basic_DM programming language provides the means for structuring programs into distinct
tasks:
• main program and related subroutines (running process and movement control)
• priority subroutines (acknowledgement of a logic input on an interrupt signal edge)
• PLC function tasks (sequential PLC control using logic inputs and outputs)
• cyclical PLC function tasks (control of tasks that must be executed cyclically)
111
PVD 3516 GB 04/2004
PARVEX Motion Explorer Software - DIGIVEX Motion Module
8.2 Preliminary Operations
8.2.1 Inputs/Outputs
•
•
•
•
•
•
•
It is imperative that the default relay contact of the positioner drive (contact OK) be
wired into the safety chain of the electrical cabinet (so that the power automatically cuts
out if the positioner drive goes into major fault).
Machines with finite limits, must have maximum running limits that are wired into the
safety chain of the electrical cabinet. Any overrun of these maximum running limits will
then cause the power to cut out.
Machines with finite limits, must have hardware limits (placed in front of the maximum
running limits) that are connected to the positioner drive (in11 hardp_input and in12
hardm_input inputs). These running limits define the zone in which the positioner drive
is authorized to work. Any overrun of these running limits will not cause the power to
cut out so that a clearance is possible (the maximum running limit / hardware limit
distance should be sufficient for braking).
Axes with obligatory home setting (axes having finite limits) must have a home switch
(connection to the in13 switch0_input input of the positioner drive).
The in14 input (move_en) of the positioner drive can be used for authorizing movement
or not.
The in15 input (exec_en) of the positioner drive can be used for authorizing user
program execution or not.
Where a motor is fitted with a brake, the positioner drive (only DSM and DPM) controls
the brake with no need of external automatic regulation.
8.2.2 Connections – Installing parameter setting software
•
•
•
•
Connect all equipment as described in the installation manuals for the various devices
(motors, drives, control units and relays, limits, inputs/outputs, etc ... ).
Connecting a PC to the communication bus via a CRS232, CIM03, RS232CAN interface
module for CANopen or USBPRO, PCIPRO, PCMCIA, RS232PRO for PROFIBUS.
Install the PARVEX Motion Explorer software program on this computer.
Verify all connections.
112
PVD 3516 GB 04/2004
PARVEX Motion Explorer Software - DIGIVEX Motion Module
8.3 Determining the Network Structure
• Launch the PARVEX Motion Explorer application.
• Double click on the DIGIVEX Motion icon
• In the Network Management window, set the PC communication interface parameters,
and enter the network structure: create a new structure (use the Create a New Structure
and Adding an Item buttons) or use an existing network structure (use the Open an
Existing Structure button). Show all the appliances belonging to the application on the
diagram
• Check that the subscriber numbers entered match those set on the appliances that will
be physically present in the communication network.
• Save the network structure to file (Save Structure button).
• Energize all the positioner drives in the communication network via their auxiliary power
supply (Do not activate power)
• For DIGIVEX CANopen, check that the CRS232 or CIM03 interface module is
energized: 5V green LED on.
• In the Network Management window, find the network structure (use the Find Network
Structure button): check that all the objects present (and energized) have been found. A
cross on a link indicates an object is missing.
8.4 Loading Parameters
• Check that the auxiliary supply to all the positioner drives in the communication network
is energized (Do not activate power).
• For DIGIVEX CANopen, check that the CRS232 or CIM03 interface module is
energized: 5V green LED on
• Look in the Network Management environment corresponding to the application, for the
network structure (if it has not already been done), then click on the picture of the
positioner drive in which the parameters are to be loaded.
• Select the Servoamplifier Parameter Setting Tool.
• Complete the various pages.
• Save the data to file (.pdm file).
• Select the Connection menu.
• Check the On line message is displayed at the bottom left of the window.
• Select the File / Global Transfer menu.
• Indicate the name of the file to be transferred (.pdm file).
• Validate and wait until transfer is completed.
• When transfer is completed, answer yes to the prompt Save to EEPROM?
• Check that the parameter values displayed on screen match the parameters previously
saved in the .pdm file.
• Close the Servoamplifier Parameter Setting Tool.
• Repeat the procedure for the other servoamplifier positioners.
113
PVD 3516 GB 04/2004
PARVEX Motion Explorer Software - DIGIVEX Motion Module
8.5 Actual Commissioning
• Check that the auxiliary supply to all the positioner drives in the communication network
is energized (Do not activate power)
• For DIGIVEX CANopen, check that the CRS232 or CIM03 interface module is
energized: 5V green LED on
• Look in the Network Management environment corresponding to the application, for the
network structure (if it has not already been done), then click on the picture of the
positioner drive to be commissioned.
• Select the Variable Observation Tool and Servoamplifier Parameter Setting Tool (in this
tool select the Inputs/Outputs button).
• Use the forcing options available to check the logical and analog input/output
connections (force, forcing value).
• Check the safety devices and limit switches are operating.
• Turn on the power to the first resolver to be commissioned (only do this one).
• Authorize torque (torque_cmd = 1) and movement (move_en = 1); the motor must
remain stationary.
• If the motor has a brake, check the brake is operating correctly.
• If the motor vibrates or makes a lot of noise, work through the servocontrol settings
again: Servocontrol Settings button, Setting Calculation tab.
• Use the Stimuli Generator Tool and Oscilloscope Tool and then check the quality of the
motion requested (fine tune the servocontrol settings if necessary).
• Use the Diagnostic Assistance Tool in the event of a problem, to check the positioner
drive for a fault. If the axis does not move, check that torque is authorized
(torque_on = 1) and that the authorization to move is validated (move_on = 1).
• Once all adjustments have been carried out, save any possible changes in the .pdm file
(Setting Drive Parameters Tool, Save button) and in the positioner drive (SAVE button
or EEPROM / Save in EEPROM menu), then switch the power off.
• Close the Servoamplifier Parameter Setting Tool, Stimuli Generator Tool, Oscilloscope
Tool and Fault-Finding Tool.
• Repeat the procedure for the other servoamplifier positioners.
114
PVD 3516 GB 04/2004
PARVEX Motion Explorer Software - DIGIVEX Motion Module
8.6 Loading a trial program
• Check that the auxiliary supply to all the positioner drives in the communication network
is energized (Do not activate power)
• For DIGIVEX CANopen, check that the CRS232 or CIM03 interface module is
energized: 5V green LED on
• Look in the Network Management environment corresponding to the application, for the
network structure (if it has not already been done), then click on the picture of the
positioner drive in which a program is to be loaded.
• Select the Program Editor.
• Create a single program with the New button or open an existing program (.bdm file)
using the Open button.
• Compile the program (Compile file button): an object file is then created (.odm file).
• Select the Connection menu.
• Check the On line message is displayed at the bottom left of the window.
• Select the File / Transfer object file menu.
• Indicate the name of the file to be transferred (.odm file).
• Validate and wait until transfer is completed.
• For the program just loaded to be acknowledged, select the File / Apply programs
menu.
• Turn on the power to the resolver in which the program is loaded (only do this one so as
not to be hampered by other axes).
• Validate program execution (exec_en = 1).
• Check that the program is running correctly. Execution Management Tool (Debug)
follows the evolution.
• The loaded program should allow you, among other things, to:
• check the origin setting cycle works correctly,
• check motions executed match motions requested,
• check software limit switch operation.
• Close the Program Editor.
• De-activate power.
• Repeat the process for the other servoamplifier positioners.
115
PVD 3516 GB 04/2004
PARVEX Motion Explorer Software - DIGIVEX Motion Module
8.7 Loading user programs
•
•
•
•
•
•
•
•
•
•
•
•
•
•
Check that the auxiliary supply to all the positioner drives in the communication
network is energized (Do not activate power)
For DIGIVEX CANopen, check that the CRS232 or CIM03 interface module is
energized: 5V green LED on
Look in the Network Management environment corresponding to the application, for the
network structure (if it has not already been done), then click on the picture of the
positioner drive in which a program is to be loaded
Select Program Editor
Create a user program by using the New button or open the user program to be
transferred (.bdm file) by using the Open button
Compile this program (Compile file button): an object file is then created (.odm file)
Momentarily invalidate program execution (exec_en = 0)
Select the Connection menu
Check that the On line message is displayed in the bottom left-hand corner of the
window
Select the File / Transfer object file menu
Show the file name to be transferred (.odm file)
Validate and wait for the transfer to be completed
Select the File / Apply program menu in order that the program which has just been
loaded is properly acknowledged,
Revalidate program execution (exec_en = 1)
8.8 Starting up the Machine
Apply the start-up procedure defined by the machine manufacturer or integrator.
As a general rule, the order for starting up is as follows:
• energize the peripheral devices (plc, PC, etc.) and auxiliary items (input/output supplies,
communication bus supply, relays, brakes, etc.);
• energize the auxiliary supply to the servoamplifier positioners (low-level supply);
• energize the power devices (servoamplifier positioners).
When the servoamplifier positioner auxiliary supply is energized, the positioners display the figure
0 on the front panel (7-segment display: flashing 0 if no user program is running, steady 0 if user
program is running).
When the servoamplifier positioner power supply is activated, the positioners display the figure 1
on the front panel (7-segment display: flashing 1 if no user program is running, steady 1 is user
program is running). Any other display indicates a fault status (use the Fault-Finding Tool to
identify the fault).
116
PVD 3516 GB 04/2004
PARVEX Motion Explorer Software - DIGIVEX Motion Module
8.9 Shutting down the Machine
Apply the shut-down procedure defined by the machine manufacturer or integrator.
As a general rule, the order for shutting down is as follows:
•
•
•
•
stop motion and execution of user programs
de-energize the power devices (servoamplifier positioners)
de-energize the servoamplifier positioner auxiliary supply (low-level supply)
de-energize the peripheral devices (plc, PC, etc.) and auxiliary items (input/output
supplies, communication bus supply, relays, brakes, etc.).
When the servoamplifier positioner power supply is de-energized, the positioners display the
figure 0 on the front panel (7-segment display: flashing 0 if no user program is running, steady 0 if
user program is running).
8.10 Re-setting the Machine
When the servoamplifier positioner power supply is cut intentionally, there is no specific sequence
for restarting or clearing.
When the servoamplifier positioner power supply is cut unintentionally, apart from a mains failure,
check that this is not due to a fault with one of the servoamplifier positioners (check the
servoamplifier positioner front panel 7-segment display status or use the Fault-Finding Tool).
Determine the possible nature of the fault, correct it and carry out a clearance: reset_cmd = 1
(Variable Watcher Tool), Fault Clearance button (Diagnostic Assistance Tool) or press the RESET
button on the front panel of the positioner drive.
117
PVD 3516 GB 04/2004