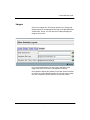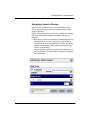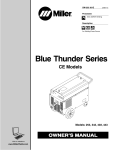
1
Miva Merchant 2.1
Storefront Development
& Management
System
User’s Guide
Revision 1.2
Miva Corporation
2629 Ariane Drive
San Diego, CA 92117
Telephone: 858-490-2570
Telefax: 858-490-0548
http://www.miva.com
[email protected]
This document and the software described by this document are
copyright 1999 by Miva Corporation. All rights reserved. Use of the
software described herein may only be done in accordance with the
License Agreement provided with the software. This document may not
be reproduced in full or partial form except for the purpose of using the
software described herein in accordance with the License Agreement
provided with the software. Information in this document is subject to
change without notice. Companies, names and data used in the examples
herein are fictitious unless otherwise noted.
Miva is s registered trademark of Miva Corporation. Miva Order, Miva
Merchant, Miva Mia, Miva Empresa, the Miva “blades” logo, and the Miva
Engine are trademarks of Miva Corporation. Windows is the registered
trademark of Microsoft Corporation. All other trademarks are the property
of their respective owners. This document was developed and produced
in San Diego, CA, USA.
MIVA CORPORATION WILL NOT BE LIABLE FOR (A) ANY BUG,
ERROR, OMISSION, DEFECT, DEFICIENCY, OR NONCONFORMITY IN
MERCHANT OR THIS DOCUMENTATION; (B) IMPLIED
MERCHANTIBILITY OF FITNESS FOR A PARTICULAR PURPOSE; (C)
IMPLIED WARRANTY RELATING TO COURSE OF DEALING, OR
USAGE OF TRADE OR ANY OTHER IMPLIED WARRANTY
WHATSOEVER; (D) CLAIM OF INFRINGEMENT; (E) CLAIM IN TORT,
WHETHER OR NOT ARISING IN WHOLE OR PART FROM MIVA
CORPORATION'S FAULT, NEGLIGENCE, STRICT LIABILITY, OR
PRODUCT LIABILITY, OR (F) CLAIM FOR ANY DIRECT, INDIRECT,
INCIDENTAL, SPECIAL, OR CONSEQUENTIAL DAMAGES, OR LOSS
OF DATA, REVENUE, LICENSEES GOODWILL, OR USE. IN NO CASE
SHALL MIVA CORPORATION'S LIABILITY EXCEED THE PRICE THAT
LICENSEE PAID FOR MERCHANT.
2
Table of Contents
1 - About This Guide
Introduction.........................................................................1
Requirements .....................................................................1
How This Manual Is Structured ..........................................2
Receive Support ...................................................................... 2
Documentation......................................................................... 2
2 - Getting Started
The Setup ...........................................................................3
The Administration Screen .................................................5
Create Store Wizard ................................................................ 7
Look & Feel Configuration Wizard ........................................... 9
Payment Configuration Wizard .............................................. 11
Add Category Wizard............................................................. 13
Shipping Configuration Wizard .............................................. 13
Add Product Wizard ............................................................... 17
Add Product Attribute Wizard ................................................ 17
3 - Domain Setting
Information........................................................................19
Registration ......................................................................20
Site Configuration .............................................................21
Timeouts ...........................................................................22
4 - Store Selection Layout
Layout...............................................................................25
Display..............................................................................26
The Color Selector ................................................................. 30
Fonts.................................................................................30
Images..............................................................................31
5 - Users
Add User...........................................................................33
Edit a User........................................................................34
Delete a User....................................................................34
Miva Merchant 2.1 Storefront Development and Management System User Manual
iii
Table of Contents
6 - Modules
Add Module ......................................................................35
Edit a Module....................................................................36
Information............................................................................. 36
Files ....................................................................................... 38
Delete a Module ...............................................................38
7 - Add a Store
License .............................................................................39
Identification .....................................................................40
Manager................................................................................. 40
Store Code............................................................................. 40
Store Name............................................................................ 40
Owner ...............................................................................40
Settings.............................................................................40
Basket Timeout (Minutes) ...................................................... 41
Price Group Overlap Resolutions .......................................... 41
First Order #........................................................................... 41
Sales Tax Calculation ............................................................ 41
Currency Formatting .............................................................. 42
Layout...............................................................................42
8 - Editing a Store
Delete Store......................................................................43
Identification .....................................................................44
Messages .........................................................................45
Headers and Footers........................................................45
Owner ...............................................................................45
Pagination.........................................................................46
Customer Accounts ..........................................................46
Settings.............................................................................48
Unit of Measurement (Weight) ............................................... 48
Basket Timeout (Minutes) ...................................................... 48
Price Group Overlap Resolution ............................................ 48
Sales Tax Calculation ............................................................ 49
Currency Formatting .............................................................. 52
Generic Currency Formatting ................................................ 52
Miva Merchant 2.1 Storefront Development and Management System User Manual
iv
Table of Contents
European Currency Formatting ............................................. 54
Colors ...............................................................................55
Layout...............................................................................56
Merchant Look & Feel............................................................ 56
KoolCat Look & Feel .............................................................. 58
Fonts.................................................................................58
Images..............................................................................59
9 - Adding Features to an
Existing Store
Groups..............................................................................63
Group Name .......................................................................... 65
View/Add/Modify/Delete......................................................... 65
Privileges ............................................................................... 65
Assigning Users to Groups .................................................... 67
States ...............................................................................68
Categories ........................................................................68
Add Categories ...................................................................... 69
Adding Products ...............................................................72
Product .................................................................................. 72
Product Editing ...................................................................... 73
Adding Products to Categories.........................................80
Upsale ..............................................................................83
Add Upsold Product ............................................................... 83
Edit Upsold Product ............................................................... 85
Shipping Configuration .....................................................87
UPS Online Shipping Calculation .......................................... 88
Quantity Based Shipping ....................................................... 89
Minimum or Weight Shipping ................................................. 89
Flat Rate Shipping ................................................................. 90
Base + Weight Shipping ........................................................ 90
Adding/Editing Shipping Methods ......................................... 90
Removing Shipping Methods ................................................. 90
Payment Configuration .....................................................90
Check Payment ..................................................................... 91
Credit Card Payment With Simple Validation ........................ 91
Payment Gateways................................................................ 91
Order Fulfillment Configuration.......................................101
Customer Order Confirmation Email.................................... 101
Miva Merchant 2.1 Storefront Development and Management System User Manual
v
Table of Contents
Email Merchant Notification ................................................. 102
Logging Configuration ....................................................104
System Extension Configuration ....................................104
Customers ......................................................................104
Customers ........................................................................... 105
Display ................................................................................. 106
Lost Password Email ........................................................... 106
Availability Groups ..........................................................107
Assigning Customers ........................................................... 107
Assigning Categories ........................................................... 107
Assigning Products .............................................................. 108
Price Groups...................................................................108
Order Processing............................................................109
Create Batch........................................................................ 112
Wizards........................................................................... 118
Utilities ............................................................................ 118
Import Products Using a Flat File ........................................ 118
Miva Merchant v1.x Store Import ......................................... 122
KoolCat v1.x Data Import..................................................... 124
Export Data .......................................................................... 125
Delete Expired Shopping Baskets ....................................... 126
Pack Data Files ..............................................................126
10 - Existing Site Integration
Store Integration .............................................................129
Category Integration .......................................................132
A - Miva Commerce Library Availability
Supported Platforms and Their Availability.....................133
Authorize.Net..................................................................133
CyberCash......................................................................133
ICSv2..............................................................................134
LinkPoint.........................................................................134
UPSOnline......................................................................134
Miva Merchant 2.1 Storefront Development and Management System User Manual
vi
Chapter 1
About This Guide
Introduction
Miva Merchant is a dynamic e-commerce product that enables a
web developer to create one or multiple online stores from
anywhere in the world where they have Internet access.
This brief introduction to Miva Merchant includes the following
topics:
• What You Can Do with Miva Merchant
• Requirements
• How This Manual Is Structured
Miva Merchant is used to create one or multiple online stores
(See information on licensing additional storefronts in the Miva
Merchant system at http://www.miva.com/purchase). Its database
architecture is built entirely using Miva Script and ships with
source code. Miva Merchant runs on any web server enabled
with the Miva Engine. Once installed, it creates its own data
setup and configures stores built upon information entered into
browser based setup and administration modules.
Requirements
In order to use a Web browser and put your storefront on the
Web, you must have access to an account with an Internet
Hosting Provider (IHP) or operate your own server with Miva
Empresa. Most IHPs provide you with browser software to access
the World Wide Web (WWW), and space on their server to put
your Web site and store. Since Miva Merchant fully resides on the
server in your Web site account, you can access the Miva
Merchant administration system from anywhere that you have
Internet access. This means you can perform all the operations of
maintaining your store from virtually anywhere in the world.
Miva Merchant 2.1 Storefront Development and Management System User Manual
1
1 - About This Guide
How This Manual Is Structured
This Manual covers the basic topics that you will need to be able
to create and manage your store with Miva Merchant.
Receive Support
Your Miva enabled hosting provider usually supplies initial
installation and configuration support. Ongoing developer and
merchant support for using your Miva Merchant system is
available from Miva Corporation at http://www.miva.com/support.
You may also send e-mail directly to [email protected] with
specific questions about support policies and procedures.
Documentation
Miva provides dynamic documentation of all Miva products to
include the latest updates. Miva provides its latest documentation
online at http://www.miva.com/docs. If you do not see your
specific problem addressed in the documentation, contact
[email protected] for corrections and updates.
Miva Merchant 2.1 Storefront Development and Management System User Manual
2
Chapter 2
Getting Started
This chapter discusses the basic information you need to get
started with Miva Merchant. It covers the setup and
administrative file locations and the file location for your storefront
configuration. The topics covered include:
• Τhe Setup
• The Administration System
• Viewing Your Storefront
The Setup
The Miva Merchant setup wizard installs and initializes the
systems data files in your account on the Miva enabled Web
server. These data files contain information unique to your store
and site location. They also contain your product information and
configuration options, such as shipping, customer payment
choices, and order processing.
Setup is initialized by accessing a URL in your browser similar to
one of the following (depending upon your specific configuration).
Contact your Internet hosting provider or system administrator if
you are unsure of which one to use.
http://www.yourdomain.com/Merchant2/setup.mv
This is the most common way to access Miva Merchants setup
program. This URL points to your setup file in a directory called /
Merchant2 in your top web documents directory (often called
document root).
http://www.yourdomain.com/cgi-bin/miva?Merchant2/
setup.mv
In some cases, Miva Merchant is accessed directly through your
servers cgi-bin with a URL similar to the one shown above.
http://127.0.0.1/Merchant2/setup.mv
To install Miva Merchant on a Windows® system using the
personal edition of the Miva Engine, Miva Mia, a URL like the one
Miva Merchant 2.1 Storefront Development and Management System User Manual
3
2 - Getting Started
above should be used. Where localhost is used, you may also
type the local host address 127.0.0.1. Miva Mia must be
installed and running.
The following screen starts the setup process.
The setup wizard leads you through each step of the process.
When you have finished, the setup wizard displays the following
screen.
Miva Merchant 2.1 Storefront Development and Management System User Manual
4
2 - Getting Started
The Administration Screen
When you access Miva Merchant administration (admin.mv), the
login screen displays as shown below.
Enter your user name and password and the Administration
screen is displayed.
Miva Merchant 2.1 Storefront Development and Management System User Manual
5
2 - Getting Started
Miva Merchant 2.1 Storefront Development and Management System User Manual
6
2 - Getting Started
There are three sections to the main administration screen:
• header menu bar
• dynamic hierarchical menu
• main data entry area.
The administration screen explains the menu on the left side and
how it relates to the Data Entry Area.
Before a store has been created the only wizard that is available
on the main administration screen is the Create Store Wizard. To
create a store, click on the wizard icon, or locate the wizards
menu on the navigation bar.
Create Store Wizard
The Miva Merchant wizards run in their own windows. The initial
Store Create Wizard window is shown below.
A Miva Merchant store can be created with the following
procedure.
1. Enter the name of your store.
2. Check the contact information you entered during setup. You
can change any of this information at this time.
3. Enter the first order number for your store. (Default is 1000)
4. Select the look and feel for your store.
Miva Merchant 2.1 Storefront Development and Management System User Manual
7
2 - Getting Started
A summary screen displays the information you have entered for
your store. If any of this needs to be changed, click on Previous
until you reach the screen you need, change the data and click on
Next until you return to the final screen. If you would like to start
fresh, click the Reset button.
After you have created the store, six wizards are displayed on the
main administration page.
Miva Merchant 2.1 Storefront Development and Management System User Manual
8
2 - Getting Started
Look & Feel Configuration Wizard
Allows you to further customize the look and feel of your store.
The wizard main screen is shown below.
Miva Merchant 2.1 Storefront Development and Management System User Manual
9
2 - Getting Started
Miva Merchant 2.1 Storefront Development and Management System User Manual
10
2 - Getting Started
Select the basic look of your store site. If you want to keep the
setting you have now, click Current Settings, otherwise select one
of the four looks. When you click on your selection, trhe following
screen displays.
This screen allows you to build an introductory message for the
store. Enter the following information:
1. Path to your logo image if you are going touse one.
2. Caption for the logo image.
3. Add any items you wish on your catalog screen.
The wizard displays everything you have entered for the catalog
screen.
Payment Configuration Wizard
Configures the payment modules that your customers can use to
pay for products.
Miva Merchant 2.1 Storefront Development and Management System User Manual
11
2 - Getting Started
The following eight payment gateways can be selected. You can
choose as many of these as you wish, but it is not recommended
to have more than one.
You can run the wizard to select a payment gateway module and
then run it again to select the Check Payment.
When you select a payment gateway, follow the directions on
each screen to configure the module.
Miva Merchant 2.1 Storefront Development and Management System User Manual
12
2 - Getting Started
Add Category Wizard
Adds categories in two steps.
• Add the category
• Place the new category in a parent category
Shipping Configuration Wizard
Configures the shipping module that you will use to calculate
shipping costs. There are five options available.
Miva Merchant 2.1 Storefront Development and Management System User Manual
13
2 - Getting Started
Miva Merchant 2.1 Storefront Development and Management System User Manual
14
2 - Getting Started
UPS Online
Shipping
Calculation
Accesses the UPS database and
calculates UPS shipping cost.
There are five pickup/drop off options:
• Customer Counter
• Letter Center
• On Call Air
• One Time Pickup
• Regular Daily Pickup
Select the UPS services to be offered.
Click all that you want to offer.
Miva Merchant 2.1 Storefront Development and Management System User Manual
15
2 - Getting Started
Quantity Based
Shipping
Enter the name of the shipping method.
You can have as many of this type
shipping module as you have ways of
shipping.
This option allows two methods of setting
up your shipping charges: Standard and
Progressive.
Standard
You can set up a standard fee that is to be
charged for the total number of items
ordered. For example, you can charge
$3.00 per item if the a minimum of three
items is order. You can set the charge at
$2.00 per item if the total order is up to 6
items, and $1.00 per item if the total order
is over six items. You could have the series
go as high as you wish.
Progressive
You can set up a series of quantity ranges
and charge shipping for the items that fall
within the quanity raqnge. For
example,you can set up five ranges as
follows: 1-3, 4-7, 8-15, 16+. This means
that you can charge shipping
progressively, the first 3 items are charged
at the rate you set for that range, Items 4
through 7 are charged at the rate for that
range, etc. This means that if you get a
break for quantity shipping you can pass it
on to your customers.
Minimum or
Weight Shipping
This shipping type allows you to establish
a minimum charge for shipping.
Flat Rate
Shipping
Defines a flat rate that is to be charged for
shipping.
Base + Weight
Shipping
Allows you to define a base charge, plus
an amount to be charge per weight unit to
the total weight of the order.
Miva Merchant 2.1 Storefront Development and Management System User Manual
16
2 - Getting Started
Add Product Wizard
Adds products to your store with five steps.
1. Enter the name of the product
2. Enter the price of the product the cost you pay for it and its
weight
3. Enter a description of the product
4. Define images that you want to display
5. Assign the product to a category
At this point you can click on Finish and complete the entry, or
you can Add an Attribute to the product.
Caution: When using Product and Category wizards you can add
duplicate product or category names because the wizard
generates a random, unique code for each name.
Add Product Attribute Wizard
Adds attributes to your products in seven steps.
1. Enter product code. You can find a list of products and codes
by pressing the lookup icon, select a product, click on the
Select icon.
2. Enter the Attribute Prompt that is displayed to customers.
3. Check box if this is a required attribute.
4. Define multiple attribute option definition method.
5. Enter the name for the option.
6. Enter the price and the cost for the option. This will be used
to determine the total price of the product.
7. Define whether this is the default option.
You have now created a Miva Merchant store.
Miva Merchant 2.1 Storefront Development and Management System User Manual
17
Chapter 3
Domain Setting
The Miva Merchant environment is categorized into two
functional areas:
Domain
The general area that makes up all of your Miva
Merchant environment.
Store(s)
As you add stores each will have its own
environment that you will be able to administer
separately.
After you have completed your domain settings in setup.mv,
you can update them whenever you like in admin.mv. Domain
Settings is the second item on the menu. Click on it to go to the
Domain Settings screen. There are four tabs for information that
can be changed.
•
•
•
•
Information
Registration
Site Configuration
Timeouts
Each screen has an Update button and a Reset button. Click on
Update to save changes that you have made Click on the Reset
button if you wish to return to the settings of the prior update.
Miva Merchant 2.1 Storefront Development and Management System User Manual
18
3 - Domain Setting
Information
The information screen allows you to change your domain name.
You will also find your license number located on this screen as
well as the version of Miva Merchant that you are currently
running.
Miva Merchant 2.1 Storefront Development and Management System User Manual
19
3 - Domain Setting
Registration
This information entered in setup.mv is the default for these
settings. You may go in and change the following settings:
• Owner
• Email Address
• Company
• Address
• City
• State/Province
• Zip/Postal Code
• Country
• Phone
• Fax
Miva Merchant 2.1 Storefront Development and Management System User Manual
20
3 - Domain Setting
Bold settings are required fields. Information in these may be
updated, but they may not be left blank.
Site Configuration
The site configuration contains the directories and URL paths for
your store site. This is also the screen that you should access if
you have changed your mail server or if you want to change
whether your e-mail addresses should use the angle brackets or
not. Directories in Bold are required. They may be changed but
their fields may not be left blank. Here are the directory
configurations that you may change on this screen:
•
•
•
•
•
•
•
•
•
Non-secure URL to Miva Merchant
Secure URL to Miva Merchant
Secure URL to Administration
Root Directory for Graphics
Base URL for Graphics
Secure Base URL for Graphics
Root Directory for Modules
Secure root Directory for Modules
Mail Server
Miva Merchant 2.1 Storefront Development and Management System User Manual
21
3 - Domain Setting
Timeouts
The timeout is the length of time an administrative user can be
inactive before the system logs that user off. This is screen allows
you change the timeout setting. The default value is 60 minutes.
Miva Merchant 2.1 Storefront Development and Management System User Manual
22
3 - Domain Setting
Miva Merchant 2.1 Storefront Development and Management System User Manual
23
3 - Domain Setting
Miva Merchant 2.1 Storefront Development and Management System User Manual
24
Chapter 4
Store Selection Layout
Store Selection Layout is the third item on the menu. The Store
Selection screen is displayed if you have more than one store. It
allows your customers to choose which of your stores they want
to enter. This screen is also called the mall screen. Design this
screen to show off each of your stores. You can configure the
following aspects:
•
•
•
•
•
Layout
Display
Colors
Fonts
Images
You will start selecting your store layout by choosing the Store
Selection Layout from the menu. The main Layout screen will
appear with additional links to:
•
•
•
•
Display
Colors
Fonts
Images
Layout
The Layout screen gives you a choice between the KoolCat v1.x
Look and Feel and the Miva Merchant Look and Feel. Make your
selection by clicking on the radio button below your preferred
Look and Feel.
Miva Merchant 2.1 Storefront Development and Management System User Manual
25
4 - Store Selection Layout
If you would like to see a preview of the stores, you may click on
the picture of either the KoolCat Look & Feel or the Merchant
Look & Feel. A screen that simulates what your store may look
like in the runtime is displayed.
Display
This is where you may change the Display header and the
number of stores that appear on a line for the Merchant Look &
Feel. As with other text boxes, you may enter any combination of
text and HTML for your Header.
Miva Merchant 2.1 Storefront Development and Management System User Manual
26
4 - Store Selection Layout
Colors
The Color Layout screen allows you to change the default colors
assigned to the following:
• Body Background
• Body Text
• Body Link
• Body Active Link
• Body Viewed Link
• Navigation Bar
Background
Miva Merchant 2.1 Storefront Development and Management System User Manual
27
4 - Store Selection Layout
You have two options for entering the color. You can enter the
color in the text box. This is entered using the hex code (i.e.
#0000ff) or as a literal (i.e. blue).
Miva Merchant 2.1 Storefront Development and Management System User Manual
28
4 - Store Selection Layout
Miva Merchant 2.1 Storefront Development and Management System User Manual
29
4 - Store Selection Layout
The Color Selector
Use the color selector if you chose to make your own custom
color by entering the RGB values and giving a name to the color.
If you want to know the hex code for an RGB value, enter the
RGB numbers and click on one of the other text boxes. The
equivalent value in hex code will appear in the Color box. You can
either save this code or enter a literal name for your color before
clicking the Save button. The Cancel button will close your Color
Selector
screen without making any changes.
You may also choose a color by clicking on the Color button. This
opens up a color selector. The color selector gives you the option
of choosing a color by entering the RGB number, hex code, or
simply clicking on the palette to choose a color.
Remember, nothing is final until you click the Update button.
Fonts
Enter your Body Text Face and Size on the Fonts screen. Enter
your preferred font face first followed by your next font choice (i.e.
Arial, Helvetica). A comma should delimit these styles.
Enter the relative size for your text by entering an integer
(i.e. 1, -1).
Miva Merchant 2.1 Storefront Development and Management System User Manual
30
4 - Store Selection Layout
Images
Click on the Images link. This screen allows you to change the
default images for the Navigation Bar Logo or the Navigation Bar
“Select Store” image. You may also enter a Body Background
image on this screen.
If you have stored images, you may type in the path to your
image in the text box or click on the Upload File button.
Click Upload to display the Upload File window. Select Overwrite
to replace an existing graphic with the file you select here. When
you click on Browse, you will open the Choose file window.
Miva Merchant 2.1 Storefront Development and Management System User Manual
31
4 - Store Selection Layout
From here, select your graphic from your directory and click
Open.
After you are happy with all of your selections, click on the
Update button at the bottom of your Store Selection Layout
screen.
Miva Merchant 2.1 Storefront Development and Management System User Manual
32
Chapter 5
Users
Miva Merchant allows you a great deal of flexibility in the manner
in which you administer your store(s). You can be the only
administrator, or you can assign individuals or groups of
individuals, to specific tasks which are defined by groups within
each store. Individual users are administered outside of a store,
within the Miva Merchant domain. The User function on the menu
allows you to do three functions:
• Add a user
• Edit user information
• Delete a user
Add User
This function allows you to add administrative users to the Miva
Merchant domain. After you add a user here, you can go to the
store and add a person in a group within that store.
Use the following procedure to create users and assign specific
privileges.
Click on the triangle next to Users. Click Add User. A page
appears that allows you to assign a new user.
Miva Merchant 2.1 Storefront Development and Management System User Manual
33
5 - Users
User Name
Login name used to access the
administration system.
Password/Verify
Password
Assign a password and then verify that the
password was typed correctly by reentering the password.
Administrator
Check this box if you would like to assign
administrator privileges to the new user. If
a user is designated an Administrator, he
or she has global access to all settings in
the Miva Merchant system, overriding any
other security settings.
User May Create
Additional Users
Checking this box allows the new user to
create additional users.
Caution – If you do not assign the new user as an Administrator,
then they will have no access to any of the Miva Merchant
administration utilities unless you assign them as a store
manager or to a group of privileges.
You can now add the user to a group within your store(s).
Edit a User
Editing a user is very similar to the Add User sequence. However,
instead of clicking on the Add User link, click on the link to the
user you want to edit. This will bring up the Edit User screen. This
screen has the same format as the Add User screen. Just make
your changes and click Update.
Delete a User
To delete a user, click on the user hyperlink and click on Delete
button.
Miva Merchant 2.1 Storefront Development and Management System User Manual
34
Chapter 6
Modules
Before a module can be added to a store it must be added to the
Miva Merchant domain. The Module tab on the menu allows you
to perform the following functions:
• Add a module
• Edit module information
• Delete a module
Add Module
Use the following procedure to add modules to your Miva
Merchant domain. Click on the triangle next to Modules. Click
Add
Module and the following screen displays.
Enter the module name and click on the Upload button and the
following screen is displayed.
Miva Merchant 2.1 Storefront Development and Management System User Manual
35
6 - Modules
Use the Browse... button to find the module on your system and
click on the Upload button. If you are uploading a module that is
already in your Miva Merchant domain, you will need to click in
the Overwrite check box if you want to replace the existing
module with a new version.
After you have added the module to your domain, you can access
it and add it to your store(s).
Edit a Module
When you want to bring a new version of an existing module to
your domain, click on the module hyperlink and the following
screen displays. There are two tabs for the Edit Module functions.
Information
The following screen is displayed for your review.
Miva Merchant 2.1 Storefront Development and Management System User Manual
36
6 - Modules
Type of Module
Enter valid Miva Merchant
module type.
Code
The code used to identify the
module within the Miva Merchant
environment.
Name
The name of the module that is
displayed to your customers.
Provider
The name of the person or
company that supplied this
module, and who supports the
module.
Miva Merchant 2.1 Storefront Development and Management System User Manual
37
6 - Modules
Version
The version of the module.
Usage Count (Number of
Stores)
Number of stores within your
domain that use the module.
Files
Enter the module name or click on the Upload button to find the
file on your system. If you are uploading a module that is already
in your domain, you will need to click in the Overwrite check box if
you want to replace the existing module with a new version.
Delete a Module
To delete the module, click on the module hyperlink and then on
the Delete button.
Miva Merchant 2.1 Storefront Development and Management System User Manual
38
Chapter 7
Add a Store
The Store link is the standard working area of Miva Merchant. It is
here that you can customize your store(s). When you click on the
Store link on the menu it opens to display the Add Store link and
the links to the stores you have created.
You can add a store with the Create Store Wizard, or you can
click on the Add Store tab under Stores on the menu. When you
choose the Add Store tab the following screen is displayed.
There are five tabs in this screen.
License
The License screen is displayed as the default. Enter the license
number for the store, and click on Identification.
Miva Merchant 2.1 Storefront Development and Management System User Manual
39
7 - Add a Store
Identification
Manager
A manager can be any user previously setup in Add User. By
clicking the Lookup button you are able to choose one of those
users by clicking on the user name or typing the user name in
manually.
Store managers have full access to store administration, but not
necessarily to the administration of the Miva Merchant system,
unless they were assigned Administrator when added as a user.
Store Code
An identifier for your store that will be used by Miva Merchant on
the command line as it constructs URLs to its different screens.
Store Name
Enter the name of the store that will be displayed to the
customers.
Owner
Change any of the information listed on the screen and click on
the Add button.
Settings
Units of Measurement (Weight)
This is the unit of weight measurement by which the products in
your store will be based. The default unit is pounds, however, you
may choose any unit of measure that suits your product line
better. This information is used for the shipping calculations.
Miva Merchant 2.1 Storefront Development and Management System User Manual
40
7 - Add a Store
Basket Timeout (Minutes)
The Timeout is the maximum amount of time, in minutes, that a
shopping basket will be allowed to remain open before being
deleted. By default, this is set to sixty minutes.
Price Group Overlap Resolutions
If there is a conflict between prices for a customer that may
belong to more than one price group, you may select whether the
customer gets the benefit of the lowest or the highest price. Make
your resolution selection from the drop-down menu.
First Order #
This is the number that will be assigned to the very first order
placed in your store. The order numbers will then follow
sequentially. By default, this is set to 1000. This order number is
restricted to numeric values only and after the store is created, it
can not be modified.
Sales Tax Calculation
There are three options for setting tax calculation.
Miva Merchant 2.1 Storefront Development and Management System User Manual
41
7 - Add a Store
VAT
This is value added tax that is used to
calculate federal excise taxes for U.S.
products. This VAT is not used for
European VAT tax calculation.
State Based
Sales Tax
Allows you to specify state tax
calculation.
Shopper Selected
Sales Tax
Allows the shopper to select a method for
tax calculation.
Currency Formatting
There are three options for formatting currency.
Formatting Type
Description
US
Formats U.S. currency
Generic
Can format any currency
European
Formats European currency
Layout
Choose the look and feel for the store and click on the Add
button.
Miva Merchant 2.1 Storefront Development and Management System User Manual
42
Chapter 8
Editing a Store
Existing a store can be modified at any time. There are two
places that you can work with the store. To edit an existing store,
click on the triangle next to Stores. Next, click on the store name
link (not the triangle beside it) in the menu.
This will open up the Edit Store screen for that particular store.
Here you can start to make the changes to make your storefront
look more unique.
Caution – Before you make any changes, be certain you can
restore your site to its Original State rapidly if your changes do
not work. Make a back up of your Data Files! If you are modifying
code, make sure you have a backup of the file you are going to
modify.
When you are finished editing the store you can click on Update
or Reset at the bottom of the screen.
When you click on Update, it will save any changes that you have
made. At the bottom of the screen, a message will appear that
confirms that your update is successful.
The Reset button will clear any changes that you have made that
have not been saved. It will take you back to the settings from the
ast update.
Delete Store
Clicking on Delete. Be sure that this is what you want to do and
make backups of the files that you want to keep.
A warning message appears to inform you that proceeding will
delete your product and order information and its associated data
files.
Miva Merchant 2.1 Storefront Development and Management System User Manual
43
8 - Editing a Store
Identification
This screen allows you to change the Manager of the store as
well as the Store Code and the Store Name.
To change the Manager, you may type in the name of the
Manager in the text box or click on the Lookup button on the right.
Clicking on the Lookup button will bring you the User Lookup
screen.
If you have a large number of users, you may do a search on a
particular user. Click on the Lookup button and enter the name in
the Search text box and click on the Search button next to that
user. You may set the pagination for your user screen in the text
box at the bottom and click on the Refresh button. If your user is
already displayed on the page, you may simply click on the
Select button. This will enter the user in the Manager text box.
The default value is 10 lines.
Click on the Close button to close this screen and return to the
Identification screen. Click on Reset to return the screen to the
default values.
Miva Merchant 2.1 Storefront Development and Management System User Manual
44
8 - Editing a Store
Messages
You may want to customize your welcoming message to your
customers or give additional information in your response to
those customers that have completed their order. You can put text
messages, HTML, or a combination of the two in these message
boxes. There is no character limit on the message entries.
Headers and Footers
There are several headers and footers that you have the ability
change as you like. The text boxes that are provided for your
entries can include text, HTML, or a combination of the two.
The headers and footers that are available:
•
•
•
•
•
•
•
•
•
•
•
•
•
•
•
•
Category Tree
Customer Login
Edit Customer Account
Create Customer Account
Missing Required Attribute(s)
Search
Product List
Basket Contents
Order: Customer Login
Order: Create Customer Account
Order: Customer Information
Order: Upsale
Order: Upsale Missing Required Attribute(s)
Order: Select Shipping/Payment
Order: Payment Information
Invoice
Owner
This is where you keep the owner's name and contact information
for the store. If your store has had a change of address or phone
number, you may make the necessary changes here.
Miva Merchant 2.1 Storefront Development and Management System User Manual
45
8 - Editing a Store
Pagination
For your product listing or for your search results, you can choose
whether you want to have pagination or not. To disable the
pagination, click on the radio button next to Do Not Paginate and
click Update. The default value for both the Product List and the
Search Results is set at 20 products per page. To change the
number of products viewed per page, enter your desired amount
in the text box and click on the Update button.
Customer Accounts
You can customize a greeting for your customer's at sign in.
Miva Merchant 2.1 Storefront Development and Management System User Manual
46
8 - Editing a Store
Display Links
Above Categories
Check box to display URL links above
the category names.
Customer Login
Once your customer completes the sign
in, you can designate the greeting to your
customer. Enter a welcome message in
the text box and select one of the radio
buttons that define what personalization
you wish. The choices are:
• None
• First Name
• First Name Last Name
This may be followed by a text message
that you can enter in the text box. For
example, if you chose the default values
you would have a greeting like:
“Welcome back, John Hancock.”
Or, you could add a ending message and
it could read, “Welcome back, John
Hancock – Check out this fishing
specials.”
Display Login
Before Order
Form
Check to have a login box displayed
before the order form is displayed. This
allows customers to login into their
accounts before the order form
displayed.
Miva Merchant 2.1 Storefront Development and Management System User Manual
47
8 - Editing a Store
Settings
Unit of Measurement (Weight)
Defines the basic unit for the weight of products. Default is
pounds.
Basket Timeout (Minutes)
Defines the time a basket can be left any action before it expires.
Default is 60 minutes.
Price Group Overlap Resolution
When you offer price groups there can be a conflict between
prices. If this happen you have to chose whether you want to
customer to have the highest of the two prices or the lowest.
Miva Merchant 2.1 Storefront Development and Management System User Manual
48
8 - Editing a Store
Sales Tax Calculation
You may make changes to your Tax Module. Use the drop-down
list to make your selection.
The three Tax Modules available in Miva Merchant are:
• VAT
• Shopper Selected Sales Tax
• State Based Sales Tax
After you have selected a Tax Module, the tax module selected
will show as a link on your Edit Store screen. To edit that module,
click on the link.
Value Added Tax
Value added tax is used to calculate federal excise taxes for U.S.
products. This VAT is not used for European VAT tax calculation.
You can place a VAT on any item in your store.Each product is
listed and you place the tax amount in the VAT Rate field.
Miva Merchant 2.1 Storefront Development and Management System User Manual
49
8 - Editing a Store
Shopper Selected Sales Tax
To add a rate, click on the New Rate button and enter your
prompt to create the drop-down list for your store.
Miva Merchant 2.1 Storefront Development and Management System User Manual
50
8 - Editing a Store
Enter the description in the text box, the rate in the % box and
click Update. You could have a list of all the tax rates for your
location.
State Based Sales Tax
To edit State Based Sales Tax, click on the State Based Sales
Tax
link. This will open the edit screen where you can
add states to your list.
To add a state, click on the Edit button and select your state from
the drop-down list. Enter the tax rate in the text box and click
Update.
To remove a state, select the Remove check box and click
Update.
To edit a states tax rate, select the Edit button next to the rate.
Miva Merchant 2.1 Storefront Development and Management System User Manual
51
8 - Editing a Store
Currency Formatting
There are three currency formatting modules that are available in
Miva Merchant. Select the appropriate module from the dropdown list. The modules available are:
• US Currency Formatting
• Generic Currency Formatting
• European Currency Formatting
Generic Currency Formatting
When you select this option a link displays at the top after
Identification. Click on the link to configure currency formatting.
There are eight options to complete.
Currency Symbol:
•
•
•
•
•
None
Dollar Symbol
Euro Symbol
Pound Symbol
Yen Symbol
User Defined:
Allows user to enter the symbol that is
used.
Note: You must click the radio button
for this option to be actived.
Positive Currency
Format:
Select a space before or after the
number.
Negative Currency
Format:
Select from the list to define the format
of a negative number.
Digit Grouping
Symbol:
Enter a numeric grouping symbol such
as the period ( . ) or the comma ( , ).
Number of Digits in
Group:
Select from the list to define the
number of numbers in a group.
Miva Merchant 2.1 Storefront Development and Management System User Manual
52
8 - Editing a Store
Decimal Symbol:
Enter a decimal point symbol such as
the period ( . ) or the comma ( , ).
Number of Digits
after Decimal:
Select from the list the number of
decimals to be placed behind the
decimal point.
Miva Merchant 2.1 Storefront Development and Management System User Manual
53
8 - Editing a Store
European Currency Formatting
When you select this option a link displays at the top after Identification. Click on the link to configure currency formatting. There
are eight options to complete.
Currency Symbol
Enter the currency symbol you want to
use for the conversion. Select a radio
button to choose between having the
currency symbol appear Before Amount
or After Amount.
Thousands
Separator
Enter the punctuation you wish to use as
the thousands separator. The comma is
the default.
Decimal
Separator
Enter the punctuation you wish to use as
the decimal separator. The period is the
default.
Conversion Rate
to Euros
Enter the conversion rate to use. This
rate was designed for an accuracy of six
decimal places for precise conversion.
This is a required field.
Euro Symbol
The default code that is entered is for the
Euro symbol. If you want to use another
symbol, enter the character code in the
text box.
Enclose Amounts
in Euros With
Select a radio button to choose between
the following:
• Parenthesis
• Angle Brackets
• Square Brackets
• Other
Miva Merchant 2.1 Storefront Development and Management System User Manual
54
8 - Editing a Store
Colors
There are many colors that you have the option of changing.
These colors include your background colors and your link colors.
To make these changes is quite easy.
As you can see, you have a text box beside each display. You
can enter nthe hex code or enter a literal color in any box and
click on the Update button.
If you are not sure of the hex code you want to use, or you have
an RGB
color you want to convert to hex code, you can use
Miva Merchant 2.1 Storefront Development and Management System User Manual
55
8 - Editing a Store
the color selector to make your color choice. Click on the Color
button beside the text box for the display you wish to change.
This will bring up the Color Selector page.
If you have a custom color and you know the RGB value for that
color, simply enter the values in the text boxes opposite the
respective Red, Green, and Blue titles. You will see a
representation of your color in a square to the left of these titles.
You may then enter a name for your color in the Color text box.
Click on the Save button to keep your custom color for future use.
This will enter that color in your display text box on the Color
screen.
You may also select a color by clicking on the desired color on the
palette
. Click Save to select this color for your display. Click
on Update to save this color for your display.
Layout
The Layout screen allows you to choose the user interface for
your store. This defines how your store looks and the manner in
which it responds to your customer. You have a choice between
the KoolCat v1.x and the Merchant Look and Feel. Make your
selection by clicking on the appropriate radio button.
You must decide which of the two looks you want for your store.
KoolCat is a much older user interface that the Merchant
interface. Some of the features that Merchant has are not
available in KoolCat.
Merchant Look & Feel
The Merchant look & feel for Hank’s Harware is shown below.
Miva Merchant 2.1 Storefront Development and Management System User Manual
56
8 - Editing a Store
Miva Merchant 2.1 Storefront Development and Management System User Manual
57
8 - Editing a Store
KoolCat Look & Feel
The KoolCat look & feel for Hank’s Hardware is shown below.
Fonts
To change the Font Face or the Font Size, simply enter the
respective attribute in the text box for the display you want to
change.
Miva Merchant 2.1 Storefront Development and Management System User Manual
58
8 - Editing a Store
For the Font Face, you may enter your primary font plus an
alternate Font Face separated by a comma (i.e. Arial, Helvetica).
Use an integer for the relative size (to the browser default settings) of the font that you want (i.e. 1, -1).
Images
Miva Merchant comes with images for your stores navigation bar.
To fit the design of the rest of your Web site, you may wish to
change these images. The Images screen gives you an easy
method of changing these images. You may either type in the
path of your image in the text box or click on the File Upload
button.
Miva Merchant 2.1 Storefront Development and Management System User Manual
59
8 - Editing a Store
When you click on Upload, the Upload File screen will appear.
This screen allows you to overwrite an existing file by selecting
the check box.
Miva Merchant 2.1 Storefront Development and Management System User Manual
60
8 - Editing a Store
Click on the Browse button to bring up the Choose file screen and
you may choose your image file. This will ensure that the correct
path for your image has been entered. Click Open and then click
Upload. Your image file has been loaded. Click Update to
complete.
Miva Merchant 2.1 Storefront Development and Management System User Manual
61
8 - Editing a Store
Miva Merchant 2.1 Storefront Development and Management System User Manual
62
Chapter 9
Adding Features to an
Existing Store
Click on the arrow to the left of the store link to expand the menu
list for a particular store.
This chapter describes the functions on this list.
Groups
An Administrator has global access to all functions of the Miva
Merchant system, and a Store Manager has access to all
functions of a particular stores administration. A user that has not
been assigned as an Administrator or Store Manager can be
assigned to a group of privileges within a specific store.
A group is a collection of managers privileges covering a number
of store administration functions. Groups are specific to a given
store, and multiple groups can be defined. Miva Merchant users,
which are globally defined (not defined within a store), can then
be assigned to a group (or groups) that gives them certain
Miva Merchant 2.1 Storefront Development and Management System User Manual
63
9 - Adding Features to an Existing Store
operating permissions for a given store. Therefore, a user can be
given clearly defined levels of access for each store
independently. If a user belongs to more than one group, he is
given all the privileges assigned by each group.
To assign a user to a group of privileges, you must first create
that group. To add a group, expand Groups and click Add Group
and
the Add Group form displays.
Miva Merchant 2.1 Storefront Development and Management System User Manual
64
9 - Adding Features to an Existing Store
Group Name
This is the name that you want to associate with the group of
privileges you are creating.
View/Add/Modify/Delete
For each privilege within a group, the user can be assigned the
following permissions: View, Add, Modify, and Delete. Select the
check box for each type of access you wish to grant to the group.
View
The View access allows the group to view the data
in the area that permission was granted. The group
cannot make any changes to the data without
additional permissions.
Add
The Add access allows the group the ability to view
and also add new records but not to modify or
delete existing records.
Modify
The Modify access allows the group the ability to
view and edit existing records.
Delete
The Delete access allows the group the ability to
delete existing records.
Privileges
The following privileges can be assigned to the group.
Availability
Groups
Maintains the availability groups for the
assigned store.
Categories
Maintains the categories for the store.
Currency
Configuration
Controls the maintenance of the currency
configuration.
Customers
Maintains the customers Personal
Information.
Logging
Configuration
Maintains the logging files.
Miva Merchant 2.1 Storefront Development and Management System User Manual
65
9 - Adding Features to an Existing Store
Order
Fulfillment
Configuration
Maintains the fulfillment modules.
Order
Processing
Maintains the orders that have been
created by customers in that store.
Payment
Configuration
Maintains and organizes the payment
modules.
Price Groups
Maintains the price groups for that users
store.
Products
Maintains products.
Sales Tax
Maintains tax modules.
Shipping
Configuration
Maintains shipping methods.
States
Maintains states and their associated tax
rates.
Store Settings
Controls the ability to view and modify the
settings ONLY for the settings for that given
store. Its viewable by clicking on the store
name in the left hierarchical menu bar and
only if that group has one or more
permission checked for store settings.
Otherwise the store name appears, but is
not a browse-able link.
Store Utilities
Maintains the store utility files. Its viewable
by expanding the store in the left
hierarchical menu bar.
System
Extension
Configuration
Maintains the system files.
Upsold
Products
Maintains upsold items.
Miva Merchant 2.1 Storefront Development and Management System User Manual
66
9 - Adding Features to an Existing Store
Assigning Users to Groups
When you click on Add, the form returns labeled Edit Group
(name) with a new form beneath it for assigning users to that
group of privileges.
Keep in mind that administrators and store managers will always
retain their full privileges regardless of what group they are
assigned.
• When training someone to administer your Miva Merchant system, assign them to a group that has view only privileges.
The trainee will become familiar with the system by viewing
aspects of administration without potentially causing problems for your storefront.
•
Assigning users to different groups can allow one person in
your organization to process orders and another to maintain
the product data.
Miva Merchant 2.1 Storefront Development and Management System User Manual
67
9 - Adding Features to an Existing Store
Note: The page number (shown as 1-1 above) is not displayed
on the Unassigned and Assigned options.
You may display All users on your page to select from or you may
display only those users that have not yet been assigned to a
group. You also have the option of displaying only those users
that have been assigned to the group.
If you have a large number of users displayed and paging
through the entries is too tedious, you may choose to search for a
particular user. Enter a string to search in the Search text box.
Click on the Search button to process.
To assign a user, simply select the check box next to the users
name and click Update.
States
The Edit State List is a very important part of the Ship To, Bill To,
and Tax portions of your store. From this list, you may remove a
state from the list. You do this by selecting the remove check box
next to the state and then clicking Update.
You may also edit the state code or name by clicking on the Edit
button. A new state may be added by clicking on the New State
button.
Caution - It should be noted that the Outside US listing contains
a null code. This is the default value used in the Bill To area of the
customer’s order form. If Outside US is removed from the list,
then a state code will be entered to the Bill To area. If the
customers Ship To state code does not match the Bill To code, it
will prompt the customer with the message that the "One or more
required fields were not filled out correctly," highlighting in red the
Bill To fields. Therefore, removing the Outside US is not
recommended.
Categories
To get your storefront moving, you will want to add products and
product categories. In some cases, you may also want to have
Miva Merchant 2.1 Storefront Development and Management System User Manual
68
9 - Adding Features to an Existing Store
sub-categories. It is best to have an outline of your products and
what categories and sub-categories you want to place them in
before starting. In this way, you can easily setup your categories
and place your products to their proper categories right from the
start.
To access Categories, click on the triangle next to Stores to
expand the Hierarchical Menu. When you have expanded your
store, click on Categories.
Add Categories
Expand Categories to display the Add Category link. Click on the
Add Category link to open up the first of four input pages.
Category Tab
Category
Code
Input your category code. This is an
alphanumeric field of up to 50 characters.
You may enter a combination of text and
HTML.
Category
Name
Input your name for the category. If you
choose, the name may be the same as the
Category Code. This is also an alphanumeric
field but you have a length of up to 100
characters. You may enter a combination of
text and HTML.
Miva Merchant 2.1 Storefront Development and Management System User Manual
69
9 - Adding Features to an Existing Store
Parent
Category
If you want to assign this category to a Parent
you can either type in the Parent category
code or click on the Lookup button. This will
open up the Category Lookup page. Here
you can find the category you wish to make
the parent of your new category. Simply click
on the Select button.
Category
Lookup
If you already have a large number of categories, you may not see the category you wish
to select on the first page. To find the category, you may enter a search variable in the
text box and click on the Search button. This
will bring up the list of all categories that
matches your search variable.
Pagination
If you only want a certain number of products to appear on your
category pages, you will want to set the pagination. The default is
set to Do not paginate products. To set the pagination, click on
the radio button next to Display and enter the number of products
to display on each page.
Headers and Footers
For each category you may enter a header and footer. This can
be any combination of text and HTML. Simply enter the text or
HTML you wish to display along with any images to highlight your
category.
Deselect the Display Category Title check box to allow room to
create a customized Category Title in the Header area.
Images
You may load images for the category menu (Tree Image) or for
the title (Title Image). Input the path for your graphic in the text
box provided or click on the File Upload button. The Tree Image
will appear in the menu area and the Title Image will appear in
the main data area of your page.
Click Upload to display the Upload File screen. If you are going to
overwrite an existing file, select the Overwrite Check Box. You
Miva Merchant 2.1 Storefront Development and Management System User Manual
70
9 - Adding Features to an Existing Store
may enter the path for your graphic in the text box provided or
click on Browse.
This will open a window for you to choose your graphic file from
your directory listing. Select your graphic file and click Open. This
returns you back to the Upload File screen. Click Upload. Your
file path for your graphic is now loaded into the text box for your
Tree or Title image.
Caution – It should be noted that if you use a graphic tree image,
it would replace the textual category name for that field.
Adding Sub-Categories
After you have created a category, you can add it to parent
category making it a sub-category. On the menu, click on the
triangle next to the category that you want to add the subcategory. Click on the Add Sub-Category link.
The pages for sub-category information are the same as the Add
Category
pages except that the Parent Category is filled in.
Click on the Select button to choose the Parent Category.
When you have added your categories you can sort them by
Name or Code. To do this click on the Categories link on the
menu and the following window opens.
Miva Merchant 2.1 Storefront Development and Management System User Manual
71
9 - Adding Features to an Existing Store
You can sort the categories in one of the following ways.
•
•
•
•
Name Ascending
Code Ascending
Name Descending
Code Descending
Click on one of the links and the category list will sort in that
manner.
There is a confirmation message that warns you that cannot be
undone.
Adding Products
To add a product to your store, click on the triangle next to
Products
and then click the Add Product link.
At the bottom of each page are Add and Reset buttons. Clicking
on Reset will clear all the pages of any changes that have been
made since the last update.
Clicking on the Add button will save the changes that have been
made to all the pages since the last update.
The Add product screen has three tabs.
Product
This opens the Product screen. Here you will enter the product
description.
Product
Code
Enter your product code. This is an
alphanumeric field of up to 50 characters. You
may enter a combination of text and HTML.
Product
Name
Input your name for the product. If you choose,
the name may be the same as the Product
Code. This is also an alphanumeric field but
you have a length of up to 100 characters. You
may enter a combination of text and HTML.
Miva Merchant 2.1 Storefront Development and Management System User Manual
72
9 - Adding Features to an Existing Store
Price
Enter the retail price for your product. This retail
price may be discounted by the assignment of
Price Groups.
Cost
Enter your cost for the product. This is the cost
that you will use for any markup percentage in
the assigning of Price Groups.
Weight
Assign the weight of your product. The default
value is pounds. This value may have been
changed in your store settings.
Description
This is a memo field. You may use text or HTML
or any combination of the two.
Taxable
The default value for added products is taxable.
If your product should not be taxed, deselect
the check box.
Image
Click on the Image link to select your product
images. Input the path for your image in the text
box provided or click on the Upload link.
Click on Upload to upload a file. If you are going to
overwrite an existing file, select the Overwrite Check Box. You
may enter the path for your graphic in the Text Box provided or
click on browse.
This will open a window for you to choose your graphic file from
your directory listing. Select your graphic file and click Open. This
returns you back to the Upload File screen. Click Upload. Your file
path for your image is now loaded into the Text Box for your
Thumbnail or Full-sized image.
Click the Add button to save the changes that have been made
since the last update, or the Reset button to return to the saved
options.
Product Editing
After you have created your product list, you may need to edit
features or graphic links for a particular product.
The Products page shows a list of your products and allows you
to go edit each product. If you have a large number of products, a
search feature is also included on this page.
Miva Merchant 2.1 Storefront Development and Management System User Manual
73
9 - Adding Features to an Existing Store
By default, the product list will display showing the Code and
Name of the product. You may also view the following product
features:
•
•
•
•
•
•
•
Price
Cost
Weight
Description
Taxable
Thumbnail Image
Full-sized Image
To view any of these product features, simply select the
corresponding check box next to the feature you wish to view.
Click the Reload button.
Edit
If you click on the Edit link on the product line, the Edit Product
page will display. The Product screen will display the fields that
you check off in the Display section of the screen.
Edit Here
If you click on the Edit Here link on the product line, the page will
display the product within text boxes. The information within
Miva Merchant 2.1 Storefront Development and Management System User Manual
74
9 - Adding Features to an Existing Store
these text boxes may be edited. Changing this product
information occurs when you click on the Update button.
Product
Code
Enter your product code. This is an
alphanumeric field of up to 50 characters. You
may enter a combination of text and HTML.
Product
Name
Input your name for the product. If you choose,
the name may be the same as the Product
Code. This is also an alphanumeric field but you
have a length of up to 100 characters. You may
enter a combination of text and HTML.
Price
Enter the retail price for your product. This retail
price may be discounted by the assignment of
Price Groups. (See Price Groups for additional
information.)
Cost
Enter your cost for the product. This is the cost
that you will use for any markup percentage in
the assigning of Price Groups. (See Price
Groups for additional information.)
Weight
Assign the weight of your product. The default
measurment is pounds.
Description
This is a memo field. You may use text or HTML
or any combination of the two.
Taxable
The default value for added products is taxable.
If your product should not be taxed, deselect the
check box.
Images
Click on the Image link to select your product
images. Input the path for your image in the text
box provided or click on the Upload File button.
Clicking on the Upload File button will bring up the Upload File
screen. If you are going to overwrite an existing file, select the
Overwrite check box. You may enter the path for your graphic
in the text box provided or click on Browse.
In addition, the Product screen also contains links to the products
Images and Attributes.
Miva Merchant 2.1 Storefront Development and Management System User Manual
75
9 - Adding Features to an Existing Store
Images
The Images screen provides you with the paths to your products
Thumbnail Image and its Full-sized Image. If you wish to add an
image or change the current image, you just add the path to the
text box. If you are unsure of the path or you want to make sure
that the path is entered correctly, you may click on the Upload link
to find your graphic image. Selecting your image in this manner
will ensure that your path is entered correctly.
Adding Attributes
Attributes are features of your products. If you are selling
computers, there are features such as RAM, disk memory,
monitor size, printer, etc. that must be defined. These can be
easily defined using product attributes.
To add an Attribute, click on the New Attribute button. Fill the text
boxes with the following information:
Attribute
Code
Enter a code that will represent the option. Use
any alpha or numeric characters dashes (-)or
underscores (_). For example enter “size” to
represent the size prompt. Make sure that the
code is unique within that product.
Prompt
Enter the prompt that will appear for the customer
in the shopping interface. For example for size
enter “Choose Your Size.” You may enter text
HTML or any other data that can be understood by
a browser.
Miva Merchant 2.1 Storefront Development and Management System User Manual
76
9 - Adding Features to an Existing Store
Type
Choose a device to use in displaying the options
under this prompt. For radio buttons and dropdown lists you will be able to create a list of
options in a secondary form from which your
shoppers will select their answer to the particular
prompt. With check boxes the prompt will ask for a
single answer to a single option – checked for
“yes” or unchecked for “no.” Text boxes prompt for
a single answer as well (text box size is default 40
characters).
Radio
Buttons
Allows the shopper to choose only
one attribute from the list at a time.
Radio buttons also allow the use of
HTML and images.
Text Entry
Field
Useful if the shopper needs to be
able to input text. For example – a
monogram on an embroidered shirt.
Check Box
Allows the shopper to select
multiple attributes from the list.
Drop-Down
Select List
Allows the shopper to choose only
one attribute from the list at a time
by displaying a drop-down list.
Useful if you have many attributes
to choose from.
Note – When using radio buttons or drop-down menus, a new
option line will automatically appear when you click Update. To
exit the New Option mode, simply click again on the New Option
button. You cannot create options with check boxes or text boxes.
Miva Merchant 2.1 Storefront Development and Management System User Manual
77
9 - Adding Features to an Existing Store
Price
(optional)
For check box entry prompts only, you may
choose to enter a decimal number for an extra
charge that will be added to the base price of
the product if the shopper selects the check
box. A negative integer will result in a
subtraction from the price.
Cost
Enter the cost of the attribute. This is the cost
that you can use for calculating discounts for
the attribute to specified customers.
Required
(R)
Click the check box under the R to designate
the attribute prompt as a required field. The
shopper will not be allowed to proceed until all
required fields are answered with a selection.
Left unchecked (by default), the shopper will
have the option of bypassing the field to
continue shopping or to go to the order form
and check out. Keep in mind that because
check boxes and text boxes are “their own
selection,” if an additional price has been
specified, making such a field required, this will
essentially be forcing the shopper to pay more
for the product.
Adding Options to Attributes
Options are a further definition of attributes. For example, if you
are selling computers and RAM is one of the attirbutes of the
computer, your customer needs to specify to amount of RAM they
want on their system. To do this you would define Type as Radio
Button, and add Options to the attribute. To do this, Click on the
Miva Merchant 2.1 Storefront Development and Management System User Manual
78
9 - Adding Features to an Existing Store
New Option button to enter the option information for the
specified attribute in the text boxes.
Option Code
Enter a unique code to represent the option
in the invoice and basket contents screen.
Prompt
Enter the text to display for the option here.
If you are creating radio button options you
may use HTML complete with image
references. However, if you are creating a
list of options for a drop-down menu only
minimal HTML will be allowed in the actual
display of the option text.
Additional Price
(optional)
Similar to adding attributes, where an
additional price could be configured for
check box prompts, you may create an extra
charge number that is specific to the single
option in a list. Enter a decimal number only
without entering the currency symbol.
Cost
Enter the cost of the option. This is the cost
that you can use for calculating discounts for
the option to specified customers.
Default (D)
When this box under the D is checked, the
option will display in the list pre-selected.
For radio buttons this means that the button
will appear selected, and for drop-downs it
will mean that the particular option will be
featured in the list – selected wherever it is
in sequential order. If the shopper does not
change the selection, the default selection
will be used to complete the order.
Once filled and updated, the Add Option text boxes reappear for
collecting information on another option. When you have added
all options needed for a given attribute, click the Edit button again
to exit edit mode. At any time after you have created these items,
clicking on the Edit button of any of them allows you to edit
information about the item.
Miva Merchant 2.1 Storefront Development and Management System User Manual
79
9 - Adding Features to an Existing Store
Note – Using the example product page Utility Knife previously in
this section, clicking Add to Basket would result in a shopping
cart contents as shown. Utility Knife is the product added to the
basket. Color, Gift Box, Leather Holder, and Monogram were
entered in the Attribute Code of the respective attributes. Yellow
and Extra Toothpick” were entered in Option Code. The shopper
entered the initials RJF in the Monogram text box attribute. Since
the customers order form is similar to the Basket Contents
display, the same information appears on the customers order
form.To remove an existing attribute, select the Remove check
box next to the attribute and click on Update.
When you have added your products you can sort them by Name
or Code. To do this click on the Categories link on the menu and
the following window opens.
Adding Products to Categories
Once that you have added Categories and Products to your
store, you will want to assign those products to a category. To add
a product to a category, click on the Categories link on the
heirarchical menu. This will open the Categories screen.
Miva Merchant 2.1 Storefront Development and Management System User Manual
80
9 - Adding Features to an Existing Store
From the Categories screen, click on the Edit button for the
category that you wish to assign a product. This will open the Edit
Category
page for that particular category.
In addition to the links you had when you added the category (i.e.,
Category, Pagination, Headers & Footers, and Images), you will
see a link to Products. Click on this Products link.
Miva Merchant 2.1 Storefront Development and Management System User Manual
81
9 - Adding Features to an Existing Store
The listing of your stores products will be displayed. To assign a
product to the category, select the Assigned checkbox. Once you
have selected all the products you wish to assign to the category,
click on the Update button.
All/Unassigned/Assigned
Beneath the category links are the All, Unassigned, and Assigned
buttons. The default is All. This lists all the products in your store.
You can assign or remove products from the category. If you wish
to view only the products that have not been assigned to this
category, click on the Unassigned button. You may then choose
to assign these products to your category.
Click on the Assigned button will show the list of only those
products that you have already assigned to this category.
Changing the Product Order in your Category
Beside each of the assigned products, you will find arrows. These
arrows allow you to move the products up or down in the category
list.
Miva Merchant 2.1 Storefront Development and Management System User Manual
82
9 - Adding Features to an Existing Store
After you have arranged the order of the products in your
category list, click the Update button.
Upsale
You can offer your customer an upsale item, from the list of your
products, free or at a reduced price.
Miva Merchant will select a single item from the upsale list based
on a special set of criteria ensuring that the item in question is in
the proper price range relative to the running total in the shoppers
basket. In addition, it will also check that the shopper has not
already purchased the item at the regular price, and that the item
is somehow related to the items in the shoppers basket.
Add Upsold Product
To add a product to the upsale list, expand the Upsale section of
the menu and click on Add Upsold Product.
Examine the different fields of the form.
Miva Merchant 2.1 Storefront Development and Management System User Manual
83
9 - Adding Features to an Existing Store
Product Code
By clicking on the Lookup button, you will be able to select an
item from the stores product list for addition into the upsale
product list as well. As soon as you have selected a product from
the Lookup screen, the form reappears with the product code
filling its field.
Threshold Percentage of Order Total
Specify the maximum percentage of the shoppers running total,
that this product may be priced, to be eligible as an upsale
product. For example, you set the upsale price of the item that
you are adding to be $85 and you set the threshold percentage to
be 85%. The shopper will then need to have a running total of at
least $100 in their basket for the item to be eligible as an upsale
offer.
Price
Choose Absolute Price and specify an exact upsale price for the
item, or choose Percentage of Original, and enter a decimal
number for a percentage of the items base price to be used as its
upsale price.
Miva Merchant 2.1 Storefront Development and Management System User Manual
84
9 - Adding Features to an Existing Store
Click on Add to include this item as part of your Upsale items. You
will see a message at the bottom of the form telling you that your
item has been added and the Edit Upsold Product screen
appears.
Edit Upsold Product
To edit an Upsold product, click on the product name under the
Upsold menu item in the store.
Products Related to Upsale Items
When the Edit Upsold Product screen appears, you can change
the fields for your upsale product or select the tab for the
Required Products.
Among other selective criteria, Miva Merchant’s process of
choosing an upsale item for a given shopping basket requires
that the item to be potentially offered is related to one, several, or
all of the items already in the shoppers basket at checkout. If
items that you have added to your stores upsale products list are
all related to all other items in your store, Miva Merchant will treat
each as an equally possible candidate for the resale offer of every
shopping basket that reaches checkout.
Miva Merchant 2.1 Storefront Development and Management System User Manual
85
9 - Adding Features to an Existing Store
Click on the Required Products link to get a list of products.
Select the products you want to include as required in order to get
the special upsale offer. If you select more than one required
product, the customer is eligible for the upsale by selecting any of
the required products. The customer is not required to select all
of the products.
Editing Your Required Products
If you decide you want to edit the required products for your
upsale product, simply click on the Required Products link from
the Edit Upsold Product page.
This will display your product list. Those items that you have
chosen to be required will have the Assigned check box
selected. There are three ways to view the list:
Miva Merchant 2.1 Storefront Development and Management System User Manual
86
9 - Adding Features to an Existing Store
All
This will display a list of all products on your
product list. Those assigned to your upsale
product as required will have the Assigned check
box selected.
Unassigned
This will display a list of those products on your
product list that you have not assigned as a
required product for your upsale item. To assign
a product to your required list, select the
Assigned check box next to the item and click
Update.
Assigned
This will display a list of those products on your
product list that you have assigned as a required
product for your upsale item. To remove a
product from your required list, deselect the
Assigned check box next to the item and click
Update.
Caution – Do not click Delete to remove an item from the
required item list (see above instructions for removing). Clicking
on the Delete button will remove the upsale product from the
Upsale list.
Shipping Configuration
Click on Shipping Configuration and following screen displays.
Miva Merchant 2.1 Storefront Development and Management System User Manual
87
9 - Adding Features to an Existing Store
Click on the check box next to the shipping method you wish to
add and click the Update button. In addition to a message at the
bottom of the screen confirming that the module has been
updated, a link will appear at the top of the screen for that particular module.
Click on the link for your module to get the configuration screen.
UPS Online Shipping Calculation
Accesses the UPS database and calculates UPS shipping cost.
For questions about how UPS handles e-commerce shipping log
on to: http://www.ec.ups.com/ecommerce/home.html
URL to UPS CPI Gateway
Enter the URL for the UPS shipping calculation program.
Rate Chart
There are five pickup/drop off options that determine your
shipping rates.
Miva Merchant 2.1 Storefront Development and Management System User Manual
88
9 - Adding Features to an Existing Store
1. Customer Counter
You deliver the packages to the UPS
office.
2. Letter Center
You drop the package(s) off at a UPS
letter box pickup point. These are
located in business districts near a US
mail box.
3. On Call Air
Rate for an air
4. One Time Pickup
Rate for a one-time pickup.
5. Regular Daily Pickup
The UPS truck stops at your business
daily and picks up your packages. You
have an established account with
UPS.
Select the UPS services to be offered. Click all that you want to
offer.
Quantity Based Shipping
Enter the name of the shipping method. You can have as many of
this type shipping module as you have ways of shipping.
This shipping method allows you to set up a set of quantity
ranges and charge shipping based on these ranges.
For example, if you set up five ranges as follows: 1-3, 4-7, 8-15,
16+.
This means that you can charge shipping progressively. The first
3 items are charged at the rate you set for that range, items 4
through 7 are charged at the rate for that range, etc. This means
that if you get a break for quantity shipping you can pass it on to
your customers.
Minimum or Weight Shipping
This shipping method type allows you to establish a minimum
charge for shipping.
Miva Merchant 2.1 Storefront Development and Management System User Manual
89
9 - Adding Features to an Existing Store
Flat Rate Shipping
Defines a flat rate that is to be charged for shipping.
Base + Weight Shipping
Allows you to define a base charge, plus an amount to be
charged per weight unit to the total weight of the order.
Adding/Editing Shipping Methods
To add another Shipping Method is the same regardless of the
shipping configuration you choose. Click on the New Shipping
Method
button. This will insert a row of text boxes to input
your new shipping method. Fill in the information and click
Update.
To edit a shipping method, click on the Edit button to the right of
the method you wish to change. This will place your shipping
method within text boxes for you to edit. When completed with
your editing, click Update or click the Edit button again to exit edit
mode.
Removing Shipping Methods
Once you have updated your Shipping Configuration, the
methods will appear next to Remove check boxes. To remove a
method, select the check box and click Update.
Payment Configuration
Expand your stores section of the menu, and then click the
Payment Configuration link. After you have selected a payment
module to install, and clicked Update, a link to a form appears for
you to use for configuring that module. Each payment module
has its own set of configuration options so, for each different one
that you choose to install, there will be a different configuration
screen to edit. The Check Payment module requires no
configuration screen.
Miva Merchant 2.1 Storefront Development and Management System User Manual
90
9 - Adding Features to an Existing Store
Keep in mind that all of the payment modules that use third party
commerce processing services (all except Check Payment and
Credit Card Payment With Simple Validation) modules need
more setup with the particular service vender than what is
required in Miva Merchants configuration screen for that
particular module. For your convenience, a hyperlink to the
vendors URL is provided in each configuration screen.
Check Payment
Needs no configuration. This simply adds a field to the order form
that prompts the user for a check number.
Credit Card Payment With Simple
Validation
By default this module comes loaded with American Express,
Discover, MasterCard, and Visa as accepted payment methods.
It is similar to the other Edit/Remove forms in the Miva Merchant
administrative interface. The Update button can be used to
submit edits, add, or remove cards in the accepted credit cards
list.
Note – The credit card number entered by the customer is
validated against a simple MOD10 algorithm. Real credit card
numbers should always pass, while numbers that are not
recognized as those that COULD be real credit card numbers are
usually rejected with an error message. For testing purposes, you
can use one of the following two that are known to pass:
4222 2222 2222
4111 1111 1111 1111
Payment Gateways
The payment gateways allow your store to process credit cards.
Getting Your Merchant Account
Getting your merchant account is relatively easy. All you need to
do is inform your financial institution that you want to open a
Miva Merchant 2.1 Storefront Development and Management System User Manual
91
9 - Adding Features to an Existing Store
merchant account that can accept credit card payments with your
payment gateway. Your financial institution will need to know
what you are selling, and how and when your products or service
are delivered.
After you have visited the payment gateway Web site for the
latest information and applied with them, you receive your
merchant account.
Payment gateway customers must have a merchant account for
processing their customers credit cards.
Going Live
Once your merchant account is setup, your financial institution
will communicate your merchant account information to your
payment gateway so that it can ensure the credit card service
payments are handled properly.
Anacom
To visit the Anacom website: http://www.anacom.com/
payment.htm
From the Payment Configuration screen, select the Anacom
Payment Services check box to assign Anacom as your payment
processor. Click on Update.
You will see two changes to your screen. The first change is a
message at the bottom of your screen informing you that the
payment configuration has been updated. Second, there will now
be a link to the Anacom configuration screen.
Click on the Anacom Payment Services link and the following
form will appear.
Username
Enter the user name for your Anacom
account.
URL for Payment Page
This is assigned by Anacom. It is display
only.
Secure Submittal
Message
Enter a message to inform your
customers of the secure transfer of
information.
Available Payment
Methods
Leave checked the credit card types you
will accept.
Miva Merchant 2.1 Storefront Development and Management System User Manual
92
9 - Adding Features to an Existing Store
Authorize.Net Payment Services
To visit the Autorize.Net website: http://authorizenet.com
Go to Miva Merchant administration (admin.mv). Expand Stores
and then expand your store. Click on Payment Configuration.
From the Payment Configuration screen, select the Authorize.Net
Payment Services check box to assign Authorize.Net as your
payment processor. Click on Update.
You will see two changes to your screen. The first change is a
message at the bottom of your screen informing you that the
payment configuration has been updated. Second, there will now
be a link to the Authorize.Net configuration screen.
Click on the Authorize.Net Payment Services v3.0 link and the
following form will appear.
Login ID
Enter the login ID for your Authorize.Net
account.
Password
Enter the password for your Authorize.Net
account.
Authorize.Net
URL
Enter the URL supplied to you by
Authorize.Net.
Charge Method
Select a radio button to Authorize and
Capture or Authorize Only, Capture Later.
Store Entire CC
Number
Check this option if you need the full credit
card information to display at order
processing in administration. This is useful
if you allow your customers the option of
having a standing order. For example –
“Please send me one pound of this coffee
once every two weeks.”
Test Mode
Select this check box when running in test
mode.
Available
Payment
Methods
Leave checked the credit card types you
will accept.
Miva Merchant 2.1 Storefront Development and Management System User Manual
93
9 - Adding Features to an Existing Store
Cardservice International Configuration
To visit the Cardservice International website: http://
www.cardservice.com
After you have visited the Cardservice Web site for the latest
information and applied with them, you receive your merchant
account
.
A MID
and a “TID number is generated by the LinkPoint
Secure Payment Gateway and a digital certificate or RSA key
(.pem file) is issued to you. These are your unique identifiers for
Cardservice International LinkPoint. They will have instructions to
read and continue installation.
Once you have obtained and parsed your digital certificate (.pem
file) go to Miva Merchant administration (admin.mv). Expand
Stores and then expand your store. Click on Payment
Configuration.
From the Payment Configuration screen, select the Cardservice
LinkPoint
Payment Gateway check box to assign Cardservice
as your payment processor. Click on Update.
You will see two changes to your screen. The first change is a
message at the bottom of your screen informing you that the
payment configuration has been updated. Second, there will now
be a link to the Cardservice configuration screen.Click on the
Cardservice/LinkPoint Payment Gateway link and the following
form will appear.
Store Name
Enter the reference configuration supplied
by Cardservice International LinkPoint
Secure Payment Gateway.
Server
Enter the server hostname:
secureweb.clearcommerce.com.
Port
Enter the server port supplied by
Cardservice International Linkpoint
Secure Payment Gateway.
Digital Certificate
Input the digital certificate file supplied by
Cardservice International LinkPoint
Secure Payment Gateway.
Miva Merchant 2.1 Storefront Development and Management System User Manual
94
9 - Adding Features to an Existing Store
Type of
Transaction
Select between the two options for the
type of transaction. Default is Preauthorization/Post-authorization (PreAuth/Post-Auth).
Store Entire Credit
Card Number
Check this option if you need the full
credit card information to display at order
processing in administration. This is a
requirement for Pre-Auth/Post-Auth. This
is optional for the Sale type of transaction.
This is useful if you allow your customers
the option of having a standing order. For
example – “Please send me one pound of
this coffee once every two weeks.”
Test Mode
Leave checked when running a test.
Remove the check mark when you are
ready to go live.
Available Payment
Methods
Leave checked the credit card types you
will accept.
Configuring Your Server
After you have obtained your Merchant ID and digital certificate
from Cardservice International, you are ready to configure your
server.
1. Copy the digital certificate file. Make a plain ASCII text file
that contains the digital certificate.
2. Save the file with a file name followed by a .pem extension.
So, if your file name were anything the file would be anything.pem.
3. Find your top data directory in your web account on the
server. This directory is most often called mivadata or htsdata, and usually resides either inside your home directory
or parallel to your document root (HTML) directory. Inside
your data directory is where Miva Merchant has installed all
of its data (i.e. mivadata/Merchant2/).
4. Create a directory in the top data directory called LinkPoint/ (i.e. mivadata/LinkPoint/), and place the
“parsed” certificate file received from Cardservice International in that directory.
Miva Merchant 2.1 Storefront Development and Management System User Manual
95
9 - Adding Features to an Existing Store
CyberCash
To visit the CyberCash website: http://www.cybercash.com
Once you have downloaded, installed, and configured the MCK
(Merchant Connection Kit), go to Miva Merchant administration
(admin.mv ). Expand Stores and then expand your store. Click
on Payment Configuration.
From the Payment Configuration screen, select the CyberCash
Payment Services check box to assign CyberCash as your
payment processor. Click on Update.
You will see two changes to your screen. The first change is a
message at the bottom of your screen informing you that the
payment configuration has been updated. Second, there will now
be a link to the CyberCash configuration screen.
Click on the CyberCash Payment Services link and the following
form will appear.
Merchant ID
Enter the Merchant ID supplied by
CyberCash.
URL to CyberCash
CashRegister
This will default to the CyberCash URL
at http://cr.cybercash.com.
Key
Enter the Key that CyberCash issued to
you.
Store Entire Credit
Card Number
Check this option if you need the full
credit card information to display at order
processing in administration. This is a
requirement for Pre-Auth/Post-Auth.
This is optional for the Sale type of
transaction. This is useful if you allow
your customers the option of having a
standing order. For example – “Please
send me one pound of this coffee once
every two weeks.”
Caution - For security reasons, you may not want to store the
entire credit card number if you do not have a need (as in the
above example).
Miva Merchant 2.1 Storefront Development and Management System User Manual
96
9 - Adding Features to an Existing Store
Type of Merchant
Select the radio button for Online
(Automatic Capture) or Offline or Auth/
Post-Auth. Default is Offline or Auth/
Post-Auth.
Available Payment
Methods
Leave checked the credit card types
you will accept. Click to deselect any
card types that you will not accept. The
default is all cards selected.
Click Update.
Configuring Your Server
After you have obtained your Merchant ID and merchant
keystring from CyberCash, you are ready to configure your
server.
1. Copy the merchant keystring file. Make a plain ASCII text file
that contains the merchant keystring and then a carriage return.
2. Save the file with a file name that is your Merchant ID followed by a .key extension. So, if your Merchant ID were
test-mck the file would be test-mck.key.
3. Find your top data directory in your web account on the
server. This directory is most often called mivadata or htsdata, and usually resides either inside your home directory
or parallel to your document root (HTML) directory. Inside
your data directory is where Miva Merchant has installed all
of its data (i.e. mivadata/Merchant2/).
4. Create a directory in the top data directory called CyberCash/ (i.e. mivadata/CyberCash/), and place the keystring file received from CyberCash in that directory.
CyberSource ICSv2 Payment Services
To visit the CyberSource website: http://www.cybersource.com
Once you have downloaded, installed, and configured the
ecert
, it will write three files to disk:
• merchant_id.crt (Certificate file)
• merchant_id.pvt (Private key file)
• merchant_id.pwd (Password file)
Miva Merchant 2.1 Storefront Development and Management System User Manual
97
9 - Adding Features to an Existing Store
These files should be moved into the ICS (Internet Commerce
System) client installation keys directory c:\opt\ics\keys or
the equivalent. These files may also be copied to any server
where the ICS client libraries have been installed.
Go to Miva Merchant administration (admin.mv). Expand Stores
and then expand your store. Click the Payment Configuration
link.
From the Payment Configuration screen, select the CyberSource
ICSv2
Payment Services check box to assign CyberSource
as your payment processor. Click on Update.
You will see two changes to your screen. The first change is a
message at the bottom of your screen informing you that the
payment configuration has been updated. Second, there will now
be a link to the CyberSource ICSv2 Payment Services
configuration screen.
Click on the CyberSource ICSv2 Payment Services link and a
form displays.
Merchant ID
URL to ICSv2
Gateway
Currency for
Transactions
Store Entire Credit
Card Number
Enter the Merchant ID assigned to you by
CyberSource.
This will default to the CyberSource test
URL at http://ics2test.ic3.com.
The currency default is set for USD
(United States Dollars).
Check this option if you need the full credit
card information to display at order
processing in administration. This is
useful if you allow your customers the
option of having a standing order. For
example – “Please send me one pound of
this coffee once every two weeks.”
Miva Merchant 2.1 Storefront Development and Management System User Manual
98
9 - Adding Features to an Existing Store
Caution – For security reasons, you may not want to store the
entire credit card number if you do n't have a need (as in the
above example).
Available Payment
Methods
Leave the credit card types you will
accept checked. Click to deselect any
card types that you will not accept. The
default is all cards selected.
Click Update.
Signio Payflow Pro (PaymentNet)
To visit the Signio Payflow Pro website: http://www.signio.com
To register wirh Signio for automated payment processing, you
need to go to https://secure.paymentnet.com/
registration.dll?pnireg&partner=pni-miva. This will link you into
the registration process. The registration process is two part.
First, the registration establishes an account in test mode. This
provides a means for you to simulate using Signios service in
advance of receiving your merchant account from the bank. Once
you have received your merchant account information from the
bank, you will need to complete the registration process as
defined below.
Going Live
When you receive your merchant account information, log into
https://manager.signio.com (using your vendor ID and password
that is specified in the first phase of registration). Next, click on
the GoLive button on the center of the Signio Manager page. This
will walk you through the final stage of registration collecting your
banking information, service selection (select Payflow Pro) and
payment.
Signio recommends that you do not log credit card information
such as account number. You are provided password-protected
access to a secure browser site where all transaction information
is logged for your account at https://manager.signio.com.
Once you have downloaded, installed, and configured the
Payflow Pro client (acquired from the downloads section of the
https://manager.signio.com site), go to Miva Merchant
Miva Merchant 2.1 Storefront Development and Management System User Manual
99
9 - Adding Features to an Existing Store
administration (admin.mv). Expand Stores and then expand
your store . Click on Payment Configuration.
From the Payment Configuration screen, select the Signio
Payflow Pro (PaymentNet) check box to assign Signio as your
payment processor. Click on Update.
You will see two changes to your screen. The first change is a
message at the bottom of your screen informing you that the
payment configuration has been updated. Second, there will now
be a link to the Signio configuration screen.
Click on the Signio Payflow Pro (PaymentNet) link and the
following form will appear.
User ID
Password
Host
Port
Proxy Address
Proxy Port
Proxy Logon
This unique user identification is
established at the point of registration
with Signio. The user ID is case sensitive
and is the Signio vendor ID you specified
during registration.
The password chosen during Signio
registration. The password is case
sensitive. Information is sent over the
network once a secure (SSL) connection
is established. Therefore, sending a
password is a secured transaction.
Signio host name. For live transactions
use connect.signio.com. For testing
purposes use test.signio.com.
The Signio host port number should be
set to 443.
The proxy server address field is
optional, used in combination with a
proxy server if necessary.
The proxy server port field is optional,
used in combination with a proxy server
if necessary.
The proxy server logon ID is optional,
used in combination with a proxy server
if necessary.
Miva Merchant 2.1 Storefront Development and Management System User Manual
100
9 - Adding Features to an Existing Store
Proxy Password
Store Entire Credit
Card Number
The proxy server logon password is
optional, used in combination with a
proxy server if necessary.
The parameters specific to proxy are
only used if a proxy server is
implemented.
Check this option if you need the full
credit card information to display at order
processing in administration. This is a
requirement for Pre Auth/Post Auth. This
is optional for the Sale type of
transaction. This is useful if you allow
your customers the option of having a
standing order. For example – “Please
send me one pound of this coffee once
every two weeks.”
Caution – For security reasons, you may not want to store the
entire credit card number if you do not have a need (as in the
above example).
Available Payment
Methods
Leave checked the credit card types
you will accept. Click to deselect any
card types that you will not accept.
The default is all cards selected.
Click Update.
Order Fulfillment Configuration
Customer Order Confirmation Email
The Customer Order Confirmation Email module gives Miva
Merchant the ability to e-mail a single address, or list of
addresses, with a custom e-mail message confirming that the
customers order has been successfully placed at the store.
Miva Merchant 2.1 Storefront Development and Management System User Manual
101
9 - Adding Features to an Existing Store
Select the Assigned check box for Customer Order Confirmation
Email
and click Update to configure your fulfillment
module.
From
The default is the owners e mail address
entered in the store setup.
CC (optional)
Enter a “courtesy copy” recipient
address. For multiple CCs, use a
comma separated list of e-mail
addresses.
Subject
Enter a text only subject for the
message here.
Header (Precedes
Order Information)
Enter preliminary text here to be
inserted above information about the
order in the message body. It is e-mailed
to the customer by the Fulfillment
module. The Header Text is optional.
Under your specified Header Text, the confirmation
message will contain all information from the order form except
for sensitive credit card information.
Email Merchant Notification
The Email Merchant Notification module gives Miva Merchant the
ability to e-mail a single address, or list of addresses, with a
custom e-mail message about each order that has been
successfully entered to the store. Except for its beginning
paragraph, the body of the message sent is “hard wired” into
source code.
Select the Assigned check box for Email Merchant Notification
and click Update to configure your fulfillment module.
Miva Merchant 2.1 Storefront Development and Management System User Manual
102
9 - Adding Features to an Existing Store
From
The default is to choose the e mail
address entered by the customer as the
sender of your notification messages.
Choose Other if you want your From
address to be different then the
customers billing e mail address. Enter a
specific e mail address from which to
send the messages.
To
Enter the message recipient e mail
address or comma separated list of e
mail addresses.
CC (optional)
Enter a “courtesy copy” recipient
address. For multiple addressees, use a
comma separated list of e mail
addresses.
Subject Enter a
text
only subject for the message here.
Header Text
(precedes Order
Information)
Enter preliminary text (no HTML) here to
be inserted above information about the
order in the message body. This text
appears just above the actual text of the
order generated by Miva Merchant. It is
then emailed to you by the Fulfillment
module. It will usually be something like:
“The following order was placed through
Miva Merchant:.” The Header Text is
optional.
Under your specified Header Text, the notification message will
contain all information from the order form except for sensitive
credit card information. To see additional information, go to the
section about Order Processing.
Miva Merchant 2.1 Storefront Development and Management System User Manual
103
9 - Adding Features to an Existing Store
Logging Configuration
Miva Merchant comes with two logging options. The e-Urchin Log
and the Miva Merchant Access Log. You may assign one or both
of these logging options.
These log files, elf.log and malf.log respectively, log the
type of platform and browser that your customer is using. They
also track the categories and products that the customer views
and what products they put in their basket.
The e-Urchin Log provides the ability to get a highly detailed
analysis of Web site traffic during the current month. A wide
variety of statistics are compiled and presented in an attractive,
easy to read format that is highly visual without the overhead of
large graphics. For more information on this log, visit
www.urchin.com.
System Extension Configuration
The System Extension Configuration allows you toadd a third
party modules that can extend the functionality of your Miva
Merchant store.
Customers
Miva Merchant allows you to build a customer list. With this list,
you can maintain customer shipping and billing data. You can
also use this list to assign customers to availability and price
groups.
To find the customer list, click on the Customers link under your
stores menu. There are two tabs to the Customers screen:
Customers and Lost Password Email.
There are two tabs on the Customers screen.
• Customers
• Lost Password Email
Miva Merchant 2.1 Storefront Development and Management System User Manual
104
9 - Adding Features to an Existing Store
Customers
This screen give a set of options that can be displayed for each
customer. Check the boxes for the option you wish to have
displayed on your customer list and click on Update. The checked
items are displayed on the customer list.
To add a customer, click on the New Customer button on the
page or click on the Add Customer link on the hierarchical menu.
Both options display the Add Customer screen.
Miva Merchant 2.1 Storefront Development and Management System User Manual
105
9 - Adding Features to an Existing Store
Display
The display default on the customer list contains the Login, Pass.
Recovery Email, Ship. First Name, and Ship. Last Name, and the
Ship. Email. To change the items to have additional fields
displayed, just select the check box for the data field you want to
see. Click Update to display.
Remove
To remove a customer from the list, select the check box in the
row of the customer and click Update.
Edit
The Edit option differs from the Edit Here option in that it will take
you to the display of the customer identification sheet. You can
edit any of the fields all on the Identification page or click on the
Shipping/Billing Information link to edit the data located there.
Lost Password Email
This is the screen to set up your message to any customer that
requests that his or her forgotten password be sent via e-mail.
From:
Enter the e-mail address that the
customer can reply to if they have
additional inquiries.
CC:
Enter any e-mail address that you wish
to receive a copy.
Subject:
Many will not open e-mail from a source
that is not recognized. Enter the subject
to alert the customer so that he or she
will realize that this is the response to
their request.
Header Text:
Enter any header text that you want to
appear at the beginning of your e-mail.
Click Update to continue.
Miva Merchant 2.1 Storefront Development and Management System User Manual
106
9 - Adding Features to an Existing Store
Availability Groups
Miva merchant can create specific groups that contain
Customers, Categories and Products. Therefore you can create a
group called Wholesale and place all of your wholesale
customers in it. You can then put Categories and Products in
these groups. By doing this you have created a special grouping
of customers, categories and products that can be treated in a
special manner.
To add an Availability Group
1. Click on the arrow next to Availability Groups in the menu.
2. Click on the Add Availability Group link.
3. This will display the Add Availability Group screen where you
will be able to enter the Availability Group Name.
4. Click Add.
After you have entered the Availability Group name, you can set
parameters for that availability group. You will find the Group
names listed on the menu under the Add Availability Group link.
Click on the name of the Availability Group you want and the Edit
Availability Group screen appears. This screen contains links for
Customers , Categories, and Products.
Assigning Customers
When you click on the Customers link, you will get the list of
customers. You can do a search for a customer or restrict your
screen display to unassigned or assigned customers by clicking
the respective buttons. To return your screen to the full list of
customers, click on the All button or click on the Reset button. To
assign a customer to an Availability Group, select the Assigned
check box next to a customer or customers to be assigned and
click Update.
Assigning Categories
To assign categories to an availability group, click on the
Categories link. This provides you the list of the categories that
you may choose to associate with the availability group. To
Miva Merchant 2.1 Storefront Development and Management System User Manual
107
9 - Adding Features to an Existing Store
assign a category to the availability group, select the Assigned
check box next to the category or categories and click Update.
Assigning Products
To assign products to the availability group, click on the Products
link. This provides you the list of the products that you may
choose to associate with the availability group. To assign a
product to the availability group, select the Assigned check box
next to the product and click Update.
Price Groups
Price Groups allow you to define Customers who will receive
special prices on products. First you create the Price Group, and
then you add the customers.
To add a price group, click on the arrow next to Price Group in the
menu. Then click on the Add Price Group link. This will display
the Add Price Group screen.
Enter the Price Group Name and select one of the four radio
button options for pricing.
Choose between:
Retail
Sells at retail price.
Cost
Sells at your cost.
Discount From Retail: %
Sells at the percent of discount from
Retail that you enter here.
Markup From Cost: %
Sells at the markup from Cost that you
enter here.
You may choose to have the price group see the normal retail
price or to see the products listed at cost.
For the retail discount, enter the percentage of discount you are
offering the price group. Enter the percent discount in the text box
provided. If you are offering a markup from cost percentage to the
price group , enter the percent markup in the appropriate text
box.
Miva Merchant 2.1 Storefront Development and Management System User Manual
108
9 - Adding Features to an Existing Store
When you have finished making your selection for your discount
amount on retail, click Add.
Once you have added the price group, you will see the price
group
added to the hierarchical menu underneath the Add
Price Group link.
Click on your new price group to finish the configuration of the
group. This will bring up the Edit Price Group screen. In addition
to the price group information you had previously on the Add
Price Group screen, this screen also contains links to add
customers and products to the price group.
Customer
Click on the Customer link to bring up a list of your customers. To
assign a customer, simply select the check box opposite their email address and click Update. The default view of this screen
shows all customers. You may choose to view only those
customers that are Unassigned or view those customers that
have already been Assigned to this price group.
You may also further limit the screen display by doing a search on
a variable string. Simply enter a search string and click the
search button.
Products
After you have selected which customers will be associated with
the price group, you will want to assign the products to the group.
Click on the Products link to bring up the list of products. You will
choose the products you wish to assign to the price group by
selecting the Assigned check box next to the product. Then click
Update.
Order Processing
Customer orders should be processed on a regular basic. You
can create batches of orders and download them for tracking and
accounting purposes. How often you will create a batch of orders
to be downloaded depends on the volume of your store. It could
be weekly for a small, low-volume store, or it may be daily for a
higher volume store. This decision should be made after careful
Miva Merchant 2.1 Storefront Development and Management System User Manual
109
9 - Adding Features to an Existing Store
consideration of your order volume and should be checked
regularly.
All orders go into the Un-batched Orders list. To create a batch of
orders, expand the Order Processing portion of your stores
menu, then expand the Un-batched Orders list that appears. To
view or edit information in an order, click on an order listing to
load the Edit Order screen for a particular order.
Miva Merchant 2.1 Storefront Development and Management System User Manual
110
9 - Adding Features to an Existing Store
Customer
Information
You will be able to view the customer
information and verify that the data entered
appears valid. You may edit the information
if needed.
Miva Merchant 2.1 Storefront Development and Management System User Manual
111
9 - Adding Features to an Existing Store
Order
Information
By clicking on the Order Information link,
you can view what products or services the
customer has ordered. You can also verify
that the tax and shipping information as well
as the total are correct.
Payment
Information
You can click on the payment information
link to view the credit card or check
information.
Create Batch
To make a batch of orders from the Un-batched list, click Create
Batch and give your order batch a name in the field provided.
Once you have named your new batch you will be able to run an
accounting report on the batch of orders and begin processing
them.
Miva Merchant 2.1 Storefront Development and Management System User Manual
112
9 - Adding Features to an Existing Store
As soon as you create the new batch of orders those orders will
be cleared out of the Un-batched Orders list, and a listing for the
newly created batch will appear in the menu under the Create
Batch list.
Expand a batch listing and view its subordinate items. To run
reports of each order in the batch for printing etc., click the Run
Report
option.
Miva Merchant 2.1 Storefront Development and Management System User Manual
113
9 - Adding Features to an Existing Store
Click Delete Batch to remove the batch with all of its orders
completely from the system. You can also view or edit orders in
the batch by clicking on any order listing in the Orders section of
the batch menu.
Click the Process Orders option and view the list of orders that
appears. Next to each of the order listings are Process and Mark
as Processed buttons. Depending on which payment module(s)
Miva Merchant 2.1 Storefront Development and Management System User Manual
114
9 - Adding Features to an Existing Store
your store is using, the system will do different things with the
information in each order that it processes for you. If your store
does not use any of the third party payment processing services
but you do use one or both of the Credit Card Payment With
Simple Validation or Check Payment modules, there is no
difference between what happens by clicking either button. The
system is only making a mark on the order and not actually billing
a credit card account.
The payment processing modules that interface with remote
processing servers do credit card validation at the point of entry
to the order form in the stores runtime (merchant.mv).
They do not actually bill the credit card until the order is
processed in the stores administration interface (admin.mv).
After processing (or marking as processed) a given order in a
batch, the order disappears from the Un-batched Orders list. The
Miva Merchant 2.1 Storefront Development and Management System User Manual
115
9 - Adding Features to an Existing Store
“Process” and “Mark as Processed” buttons will not appear on the
form once the order has been made part of the batch.
The only case where clicking the Process button results in any
transfer of funds is when the CyberSource Payment Services or
CyberCash module is in use.
Currently all of the other third-party payment processing modules
require that you use their proprietary system for processing
orders. Detailed information on each different service is available
from each vendor separately.
Export Orders
To Flat File
To export orders to a flat file, expand
Utilities within the store administration
menu and expand Export Data. Then click
Export Orders To Flat File.
Batch to Export
Select an order batch.
Export Orders
To File
This allows you to name or rename the
orders file.
If File Exists
Add to or replace the file.
Delimiter
Choose a delimiter.
Click Export.
The file is placed in the htsdata or mivadata folder for your
retrieval. Using an FTP client, transfer the orders.dat file onto
your local computer.
A Closer Look – The fields of the exported order batch are
shown below. The ORDER_ID is the order number. PROCESSED
is represented by a 0 or a 1 and denotes whether or not the order
has been processed as explained previously in this section. 1
equates to “yes.”
ORDER_ID
BILL_PHONE
PROCESSED
BILL_FAX
ORDER_DATE
BILL_ADDR
ORDER_TIME
BILL_CITY
SHIP_FNAME
BILL_STATE
Miva Merchant 2.1 Storefront Development and Management System User Manual
116
9 - Adding Features to an Existing Store
SHIP_LNAME
BILL_ZIP
SHIP_EMAIL
BILL_CNTRY
SHIP_COMP
PROD_CODE
SHIP_PHONE
PROD_NAME
SHIP_FAX
PROD_UPSLD
SHIP_ADDR
PROD_PRICE
SHIP_CITY
PROD_QUANT
SHIP_STATE
PROD_ATTR
SHIP_ZIP
PROD_OPT
SHIP_CNTRY
OPT_PRICE
BILL_FNAME
ORDER_TAX
BILL_LNAME
ORDER_SHIP
BILL_EMAIL
ORDER_TOTL
BILL_COMP
Below is an example of the order.dat opened in Microsoft
Excel. Each line represents a single product. If a single order has
more than one product and/or the quantity of two or more for a
given product, a new line of data will represent each one.
Please refer to your spreadsheet or data management software
instructions on how to handle and process “flat data files.” You
may also rename the extension of the orders.dat file to
Miva Merchant 2.1 Storefront Development and Management System User Manual
117
9 - Adding Features to an Existing Store
order.txt and view it using a plain text editor such as Microsoft
NotePad
.
Wizards
See Chapter 2, "Getting Started" for an explanation of the
Wizards.
Utilities
The Store Utility Configuration allows third party Utility modules
that can extend the functionality of your Miva Merchant store
utilities.
Import Products Using a Flat File
Importing your products from a flat text file, as opposed to
entering them one at a time can speed your editing of your
product list. Such a file may be created in any plain text,
spreadsheet, or database editor that has the ability of writing to a
regular text file. You can use any editor that creates a text only
file. The file must contain the following information in the order
show below.
Product
Product Code
Text (including spaces), numbers. No HTML is
to be used in the Product Code.
Product Name
Text (including spaces), numbers. No HTML is
to be used in the Product Name.
Price
This is the retail price of the product. Use
decimal numeric data only. Do not use
currency symbols or text.
Cost
This is the cost of the product. Use decimal
numeric data only. Do not use currency
symbols or text.
Miva Merchant 2.1 Storefront Development and Management System User Manual
118
9 - Adding Features to an Existing Store
Weight
Use decimal numeric data only. Do not use
text.
Taxable
“Yes,” “True,” (case insensitive) and positive
whole numbers will all mean that the item is
taxable. Any other text string, null (nothing),
zero, and any numbers other than positive
whole numbers will mean that the item is not
taxable.
Description
ou may use text, HTML (or any code
understood by a browser i.e. JavaScript, etc.).
Images
Thumbnail Image URL
Text, file path characters may be
used. No HTML and no quote (“ ”, )
characters may be used.
Full-sized Image URL
Text, file path characters may be
used. No HTML and no quote (“ ”, )
characters may be used.
The above fields are what each record in your import file can
contain for use in the Miva Merchant system. Additionally, you
may add a field containing the Category Code of an existing
category where you wish the product to be added. If the category
code in the product record exists, that product will be added to
the category as the record is imported. If the category specified
by its code in the product record does not exist at the time when
the file is imported, the product will be added to the store
uncategorized.
Click on the Import Products from Flat File option. Fill in the path
of your flat file or click on the Upload File button. Choose the
delimiter character, or string of characters, used to separate fields
in each record of the file.
Delimiter
By default, Miva Merchant will look for a tab character (ASCII 9)
as the delimiting character between fields in each record. If your
import file uses a different delimiter between fields select Other,
Miva Merchant 2.1 Storefront Development and Management System User Manual
119
9 - Adding Features to an Existing Store
and enter that character or string of characters in the text field
provided.
Click Next. A new form appears with the path to the data file.
Existing Products
In the case when you are importing product records that match
some which already exist in the store, the following options give
you the choice of how to handle any possible data collision. If you
are importing product information into your store for the first time
you may leave the default Keep The Existing Products option
selected here as there arent any existing products to worry about.
The Product Code is the only required field.
Previous
The Previous button takes you back to the previous screen.
Import
The Import button will process your request and import the file
requested.
Reset
The Reset button will take you to the previous screen and clear
the data File text box.
Note: If the file you just imported does not show all your fields,
the problem may be that you did not save your data file as a text
file. Bringing in a .doc or .xls file will not work. It will show only
Row as in the example above.
Keep The Existing Products
Select this option if you are importing a file that contains the same
product records that already exist in your store plus new records
that do not. Miva Merchant will add the new product records that
were not in the store previously – leaving the existing product
records in the store untouched.
Miva Merchant 2.1 Storefront Development and Management System User Manual
120
9 - Adding Features to an Existing Store
Caution – If product attribute information has been added to any
of your stores product records, DO NOT use this option to import
product information from a file. Since the import utility can only be
used to fill the basic information fields in the product record, any
additional information that has been added to the stores product
record via the administration interface will be wiped out when the
record is replaced by the import. Use the Update option that is
discussed next.
Replace The Existing Products
To simply replace product records in your store with new
information from the product records in the import file, select this
option. All product records in the store which contain product
codes that match those found in the records of the import file will
be overwritten with the information in each of the imported
product records. Null entries in any fields will overwrite fields in
the store that contains data.
Update The Existing Products
Updating is slightly different then replacement. Where selected
fields in selected product records need updating with new
information, and where all other information in the given record
needs to be left untouched and intact, use the update option.
For example, your store has 20 different product records, and the
price fields in records 1, 5, 12, and 17 need updating. In such a
case select the Update option, and in the form that follows youll
be able to choose from which of the fields in your import file you
want Miva Merchant to get its new data for price. All of the
records in the store that perfectly match those being imported (2
through 4, 6 through 11, 13 through 16, and 18 through 20) will be
left untouched.
All of the records in the store with information (in the specified
fields) that differs from information in matching imported records
will be overwritten with the new imported information. Only those
areas in the product record where the import utility knows to do its
work will be affected. So in the example scenario, any attribute
information that has been added to any product records in the
store will be left alone.
Miva Merchant 2.1 Storefront Development and Management System User Manual
121
9 - Adding Features to an Existing Store
The form also displays a table of the first 5 records in your import
file. A drop-down select list of the different Miva Merchant product
records fields allows you to assign your data to these fields.
As you can see, the sequential order of the fields has no bearing
on that of the product records in your store because you have the
power to tell Import Utility exactly “what” to grab “where,” as well
as “what to call it” and “where to put it.”
Be sure that when designating one or more fields in your import
file for writing to product records in your store, you first designate
the field that contains product code because that is what Miva
Merchant will use to find the correct records to update. All extra
fields in your import file that contain information not assigned will
be ignored. Only the information in the fields that you designate
will be imported. Fields that are left with the Skip option selected
above them will not have any effect on the stores product records
when updating with import. However, when replacing records with
import only fields in the stores product record that have been
designated as target fields for data in the import file will be filled
with data. All other information in the stores product record will be
wiped out with null values.
To maximize the convenience of using the flat file import utility,
you should designate as many store product records fields as
recipients of import data as possible when importing new product
records. Ideally, each of the Product Code, Product Name,
Thumbnail URL, Full-sized Image URL, Price, Weight, Taxable,
Description, and Category Code fields should be filled at once
with the flat file import. The only product information that cannot
be entered to the store via this method is attribute information
(i.e. color, size…). Configuring product attributes is discussed in
the Product Attributes Information section of this document.
Miva Merchant v1.x Store Import
When upgrading to v2.0, you can import your store from your v1.x
data. To accomplish this task, begin in v2.0 by adding a store.
Once you have created your store, expand your store menu.
Expand Utilities and then expand Import Data.
Click on Miva Merchant v1.x Store Import. The next store import
screen will appear.
Miva Merchant 2.1 Storefront Development and Management System User Manual
122
9 - Adding Features to an Existing Store
Path to Miva
Merchant Data
Files
Enter the path to your 1.x data files. Click
on Next. The next store import screen
will appear.
Store
Select from the drop-down list the name
of the store that you want to import the
data from.
Items/Page Load
Enter the Items/Page Load. The default
value is set to 100. The import will
proceed until the load limit is reached
and will then refresh. This is to avoid
timing out during the import process.
Miva Merchant 2.1 Storefront Development and Management System User Manual
123
9 - Adding Features to an Existing Store
Click on Import.
A list of the categories, products, modules, etc. that were
imported will be shown. At the end of the list, you should see the
statement: Import Complete.
The import of your 1.x store is now complete. To import another
store, just repeat the process.
KoolCat v1.x Data Import
If you have your store information from the KoolCat version of
the Miva Merchant you can import that data directly into your
Miva Merchant database.
Click on the KoolCat v1.x Data Import link to input your path to
your data.
Miva Merchant 2.1 Storefront Development and Management System User Manual
124
9 - Adding Features to an Existing Store
Path to koolcat.conf:
Enter the path to your KoolCat directory and Merchant will import
all the necessary data files.
You may also select the following options when importing your
data.
• Ιmport Store Look & Feel Settings
• Import Category Look & Feel Settings
• Create Top-Level Categories For Each Catalog
To reset the settings to the default values, click Reset. When you
are happy with the settings, click the Import button to complete
your data import.
You will get a confirmation display informing you of what was
imported.
Export Data
You can export your customer order information to a flat file for
external processing or storage. Once you have created a batch of
your order(s), the data can then be exported. To export, expand
the Export Data option on your menu. Then click on the Export
Orders
To Flat File link.
Export Orders To Flat File
Batch to Export
From the drop-down menu, select the
batch to export.
Export Orders to
File
Enter the name of the file to which you
want the data exported.
Delimiter
Choose one of the radio buttons you want
as your delimiter. To use a delimiter other
than a tab, select the Other radio button
and enter the delimiter you want used
(e.g. “|”)
Miva Merchant 2.1 Storefront Development and Management System User Manual
125
9 - Adding Features to an Existing Store
If File Exists
Select a radio button to choose between
appending to an existing file or to replace
the existing file. If you choose Replace
File, any data previously contained in your
data file will be overwritten by the new
data and will be lost.
Click on the Reset button if you want to return the settings to the
saved values.
Click on the Export button to complete the download of your data.
Delete Expired Shopping Baskets
If a customer enters your storefront and begins to place an order,
they are assigned an order number. If they decide not to
complete the order, the order number will not be used until it is
made available again.
When this happens, you may see your order numbers skipping
one or two numbers. To make the order numbers available again,
you need to delete the expired shopping baskets.
To delete the expired shopping baskets, simply click on the
Delete Expired Shopping Baskets link. This will make the unused
order numbers available for use again.
Pack Data Files
When you delete records (products, customers, etc.), you are not
deleting them entirely. You are “marking” the records for deletion.
If you have removed several records, your database may
become overburdened with these old records. To delete all the
records that have been “marked” for deletion, use the Pack Data
Files
utility.
To pack your data files, simply click on the Pack Data Files link
under your stores utilities. There is also a Pack Data Files utility
under the domain.
Packing data files writes the contents of the database to a
temporary file of those records that have not been marked for
deletion. It then erases the original database and renames the
temporary file to the original name. It then rebuilds the indexes to
Miva Merchant 2.1 Storefront Development and Management System User Manual
126
9 - Adding Features to an Existing Store
match the new database (with presumably fewer records). This
can take some time if there are several records.
Because of the time it may take to pack your database, you
should only pack your database when needed. You may also
want to perform this task during a non-peak time for your
storefront.
Miva Merchant 2.1 Storefront Development and Management System User Manual
127
9 - Adding Features to an Existing Store
Miva Merchant 2.1 Storefront Development and Management System User Manual
128
Chapter 10
Existing Site Integration
Miva Merchant can easily be integrated into an existing site. We
will take a look at:
• Store Integration
• Product Integration
• Category Integration
Store Integration
By integrating Miva Merchant into an existing site, you allow your
storefront to take full advantage of the system’s functionality.
Clicking on the Link button at the top of various edit screens will
open a new window. This reveals the relevant links that you can
Miva Merchant 2.1 Storefront Development and Management System User Manual
129
10 - Existing Site Integration
use in your static Web pages. When you find the link that you
want to integrate into your Web site, just copy the link and place it
into your static page.
As shown above, the main links pertaining to the storefront are
displayed. These links are:
•
•
•
•
•
Store Front
Search
Product List
Basket Contents
Order Form
Clicking on the hyperlinks will show you exactly what to point to.
Miva Merchant 2.1 Storefront Development and Management System User Manual
130
10 - Existing Site Integration
Other edit pages with relevant links include categories and
products. Below, the individual products links include the Product
Display, Add 1 To Basket, and Buy 1 Now.
Miva Merchant 2.1 Storefront Development and Management System User Manual
131
10 - Existing Site Integration
Category Integration
Clicking on the Category link takes you to the Category Display.
Miva Merchant 2.1 Storefront Development and Management System User Manual
132
Appendix A
Miva Commerce
Library Availability
Supported Platforms and Their Availability
Authorize.Net
Authorize.Net is supported by the following platforms:
• BSDi 2.x
• BSDi 3.x
• Cobalt
• DEC-UNIX
• FreeBSD2.x
• FreeBSD 3.x
• Linux-libc 5.3
• Linux-libc 5.4
• Linux-glibc2
• Sun Solaris
• SCO
•
Windows 98/NT
CyberCash
CyberCash is supported by the following platforms:
• BSDi 2.x
• BSDi 3.x
• FreeBSD 2.x
• FreeBSD 3.x
• IRIX
• IRIX62
• Linux-libc 5.3
• Linux-libc 5.4
• Linux-glibc2
• Sun Solaris
• SCO
• DEC-UNIX
• Windows 98/NT
Miva Merchant 2.1 Storefront Development and Management System User Manual
133
A - Miva Commerce Library Availability
ICSv2
ICSv2 from CyberSource is supported by the following platforms:
• FreeBSD 2.x
• IRIX
• IRIX62
• Linux-libc 5.3
• Linux-libc 5.4
• Linux-glibc 2
• Sun Solaris
• Windows 98/NT
•
LinkPoint
LinkPoint from Cardservice International is supported by the
following platforms:
• BSDi 3.x
• FreeBSD 2.x
• FreeBSD 3.x
• Linux-glibc 2.x
• SunSolaris
• Windows 98/NT
UPSOnline
UPSOnline is supported by the following platforms:
• BSDi 2
• BSDi 3.x
• Cobalt
• FreeBSD 2.x
• FreeBSD 3.x
• IRIX
• IRIX62
• Linux-libc 5.3
• Linux-libc 5.4
• Linux-glibc 2.x
• Sun Solaris
• SCO
• DEC-UNIX
• Windows 98/NT
Miva Merchant 2.1 Storefront Development and Management System User Manual
134