1
Section 23
CREATING A MODBUS CONFIGURATION
USING THE DF89
Introduction
This section will present how to configure a strategy using the DF89 as controller. The DF89
controller can operate in several Modbus scenarios. Therefore different application approaches will
be shown throughout the topics of this section.
•
NOTE
The characteristics of the DF89 described in this section are only available from the
firmware version 4 (V4.xx) with Device Description 4.xx.
•
The Modbus configuration characteristics of firmware versions prior to 4 are the same as
described in section “Adding Modbus” of this manual.
•
The DF89 only has RS-485 port from the serial number SN623.
•
Modules with serial number less than SN623 support firmware version 4 and features
described in this section only for RS-232 serial port.
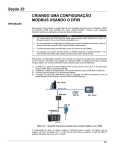
To illustrate the configuration, consider as example a process has two transmitters, one slave, one
IHM and one supervision station (HMI). The network architecture is shown on the figure below. The
scenarios used as examples are:
1)
2)
3)
4)
The DF89 stands for the RTU Modbus master of the slave PLC (PLC_ID1) and the slave
transmitter (TRM_ID2) on the RS-485 serial port.
The DF89 stands for the TCP Modbus master of the slave transmitter (TRM_ID3) on the
Ethernet.
The DF89 is the TCP Modbus slave for the IHM (IHM Master).
The supervision station (HMI Master) can read the DF89 data (concentrator) or the data directly
from the slaves on the DF89 serial port (Bypass).
Figure 23. 1 – Example of process using several Modbus scenarios with the DF89
The configuration for each one of these scenarios is explained step by step on the next topics. At
the beginning, the steps 1 to 4 are the same for all scenarios. Beyond step 5 there will be
differences according to the scenario.
23.1
DFI302 – User’s Manual – AUG/14 - J
SYSTEM302 enables to execute the control logic by two ways: ladder or function blocks. Steps 5 to
8 are necessary to configure the Modbus network. Step 9 shows how to map the Modbus network
points in available points for use in Ladder or Function Block logic. Step 10 shows how to make the
configuration using ladder logic and the step 10’ using function blocks. It also possible to combine
both configurations, i.e., part in ladder and part in function blocks.
IMPORTANT
Before configuring the Modbus network it is necessary to previously seek information on each
slave device configuration such as communication rate, data type, point address and functions
supported. This information is supplied by the respective Modbus device manufacturer
Creating a Basic Area
This topic will show how to create a basic DF89 area to be used on any of the above scenarios.
Step 1
To create a new area (on the SYSTEM302 language), right-click inside the Studio302 Areas
window and choose New Area as on the next figure.
Figure 23. 2 - Options to create a new area on the Studio302
Next, a window will be shown for the user to choose the type of configuration. As the DF89
controller is HSE device, you may choose HSE Area or Predefined by using a template.
The next window will show the types of existing templates. For every controller there are options
with the FFB1131 block or without it. Here, a DF89 template will be used with the FFB1131.
23.2
Creating a Modbus configuration using the DF89
Figure 23. 3 - Pre-defined configuration window
Choose the template and click OK.
Step 2
The user must enter the area name as shown on the figure below.
Figure 23. 4 – New area name
Type the name PROJ_DF89 in the Area Name field and click OK. Thus, the new area will be
created with the DF89 controller. See the following figure.
23.3
DFI302 – User’s Manual – AUG/14 - J
Figure 23. 5 – Syscon with the area and HSE channel windows
The figure above shows the Syscon window, with the HSE fieldbus network on the left (HSE
Network 1); below it, there is only one DF89 controller with default tag (ModbusController 1).
Below the DF89 controller, two channels were created supported by this device: the Modbus 1,
which corresponds to the serial channel, and the Modbus 2, which corresponds to the TCP
channel.
The second window on the right represents the expansion (or view) of the HSE channel, which has
only the ModbusController 1. The other HSE controllers can be added by simply clicking the
channel and ask for adding new devices.
Step 3
These default tags can be altered simply by right-clicking the corresponding tag on the main window
and choose Attributes. The figure below shows the DF89 tag altered to Area1_DF89.
Figure 23. 6 – Controller attribute window
23.4
Creating a Modbus configuration using the DF89
To alter the channel tag, on the main window, click the channel (for example, Modbus 1) and
command window expansion. A new window will open. At the window edge, right-click the channel
tag and choose Attributes. The figure below shows the configurations for the controller and the
channels with the new tags. The tags were changed as follows:
HSE– from HSE Network 1 to Area 1 Canal HSE
DF89 Modbus Serial – from Modbus 1 to DF89 Modbus RTU
DF89 Modbus TCP – from Modbus 2 to DF89 Modbus TCP
To ease the visualization, the Details button
on the toolbar shows the type of object between
brackets { }: channel, controller, and block. The figure below shows the new tags with the respective
types.
Figure 23. 7 – Syscon with the area windows (above left), for the HSE channel (below left)
and for the serial channel (above right).
IMPORTANT
Not all characters are valid when naming the elements.
The valid characters are:
A-Z a-z 0-9 # { } [ ] ( )+ The invalid characters are:
~`!@#$%^&*=|:;,.<>?/'"\
ATTENTION
The easier method to create a configuration was used here, based on template. In this case, the
configuration is created with all of the necessary channels. If the user does not want a specific
channel, it can be excluded.
There is another way of creating the configuration, when the controller and the channel are
created manually. In this case, in the step 1 in the figure 23.3, the type of area to be chosen
must be the HSE Area option, and only an empty HSE configuration will be created. Step 4
described below shows how to create a configurator starting from HSE window. For more details
refer to the Syscon manual.
The option to create from a template will only be available for new areas.
Step 4
This step will only serve to add a new controller or when the configuration is created only with the
HSE Host. In the example of this chapter is not even necessary step.
To add the DF89 controller, at the HSE channel window, right-click the Area1 Canal HSE, choose
New Controller and then D89, as shown on the next figure.
23.5
DFI302 – User’s Manual – AUG/14 - J
Figure 23. 8 – Creating the DF89 Controller manually
The new controller will be added. Then, still on the area window right-click and choose New
Network. The window shown on the figure below will appear. Fill out the channel type and tag. Click
OK and SmarNetCont will open automatically.
Figure 23. 9 – Creating the Modbus channel
DF89 configuration as Modbus Serial Master
This section will detail every step to make the following configuration:
- Add devices on the DF89 serial channel
- Add Modbus points on the devices
- Map the Modbus points for the SYSTEM302 logic
For the example of the process on figure 23.1 are used one PLC slave (PLC_ID1) and one
transmitter (TRM-ID2) connected to the RS-485 of the DF89 using Modbus RTU.
IMPORTANT
On the Modbus serial scenario the DF89 has two physical means, RS-232 and RS-485, although
only the DF89 has a serial port. In other words, it will work only with the configuration (baud rate,
stop, parity and timeout) for both means. The DF89 supports up to 32 devices on the serial
channel.
23.6
Creating a Modbus configuration using the DF89
Step 5
Modbus network configuration
SmarNetConf or Network Configurator is the Modbus network configuration tool. On it, the user
will define the network parameters, all slaves that compose them and all parameters necessary for
Modbus communication. The SmarNetConf has only the vision of the respective channel (Serial or
TCP), meaning that on the serial channel vision only the device corresponding to the chosen
channel will be shown.
Whenever the user needs to configure the DF89 channel as Modbus Master he should use
SmarNetConf. This will be possible on the following cases:
•
•
•
The DF89 is master of Modbus RTU slaves on the serial channel (RS-232/RS-485);
The DF89 is bypass of devices on the serial port;
The DF89 is master of Modbus RTU slaves on the TCP channel (ETH1);
More details will be provided on the respective scenario section. For other information on the
SmarNetConf consult the tool help.
To launch the SmarNetConf first expand the channel window, which in this example is DF89
Modbus RTU serial channel. Select and right-click it. Choose the Modify Configuration option.
See the next figure.
Figure 23. 10 – Launching SmarNetConf to configure a Modbus Serial device
The figure below shows the main SmarNetConf serial channel window.
Figure 23. 11 – Main window of the SmarNetConf Modbus configurator
23.7
DFI302 – User’s Manual – AUG/14 - J
The configurator has three main windows as shown on the previous figure: the Topology window,
at left, which shows a tree structure for the network device at a given channel, the Properties
window, at right, which shows all the properties of the item selected on the topology window and,
finally, the Output window (for events and error logs) at the bottom part of the window.
The properties channel window must have the channel parameters filled out: Baud rate, stop bit,
parity, timeout, etc. Each one of these parameters is detailed on the SmarNetConf parameterization
section.
NOTE
All devices must have the same media parameterization (Baud rate, Stop Bit and parity). The
DF89 always considers the data bits parameter equals to 8.
Step 6
Configuring Modbus devices
After creating the Modbus network, the device should be configured. To insert a slave device, click
on the Insert Device button located on the toolbar, or through the InsertDevice menu. The next
figure shows the window to insert the slave devices, where the user can add one of several devices
of the same type.
Figure 23. 12 – Adding device on the Modbus network
In this window, select the slave device to be inserted. For the present example, two serial channels
will be included. First, get the information for configuring the slave device (see its manual). Follow
the steps below to insert the slave device:
A. Fill out the device Model, Description and ID fields:
B. Select the quantity of device of a given type;
C. Click Add. A table will be shown with amount of selected device;
D. On the ID field, attribute an address for the device;
E. On the Tag field, the device tag is attributed. In case the user does not attribute a tag to the
device, a default tag will be attributed;
F. Click OK. The added devices will be included on the main window.
NOTE
The attributed device addresses and tags must be the only ones in the Modbus network and also
in the Sudio302 (Workspace) database. For more details refer to the Studio302 manual.
Both devices on the proposed example (PLC_ID1 e TRM_ID2), on the serial channel, will be shown
on SmarNetconf. See the next figure.
23.8
Creating a Modbus configuration using the DF89
Step 7
How to edit the devices properties
After adding the device, its properties can be changed. The main ones are tag, ID and if the device
is or is not enabled. Other properties can be changed in this window. An explanation for each
property is shown on the SmarNetConf parameters section.
For example, to edit the PLC_ID1 properties, right-click the corresponding Modbus device. At the
open pop up, choose the Edit Device Properties option to configure the slave device parameters.
Figure 23. 13 – Editing the device properties
Step 8
Adding commands to the device
The slave variables to be supervised or written are mapped by commands, which can be individual
or multiple ones. For example, if the analog points should be supervised on addresses 40001 and
40010. This supervision can be performed through the two individual commands (cmd1 for 40001
reading and cmd2 for 40010 reading) or a multiple command (cmd1 –reading beyond 40001 reading
with 10 registers). This last form is most common and most optimized.
The command configuration window is accessed right-clicking the corresponding Modbus device, for
example, the PLC_ID1. On the open pop up, choose the Insert Commands option to configure the
device Modbus commands. The following figure shows the example of a command addition window.
23.9
DFI302 – User’s Manual – AUG/14 - J
Figure 23. 14 – Configuring the Modbus device commands
The commands configuration window on the above figure shows a toolbar in which it is possible to
add, delete, check if the configuration is correct, save the configuration, import and export to a xls
format spreadsheet. More information about these features refers to the SmarNetConf help.
For each new command, it is created a table line up to the limit of 30 commands per device. On the
Modbus protocol the addressing takes into account the functions, the offset and number of registers.
Hence, for each command, the user should pay attention to the mapping of these three parameters.
The detailed command description is shown on the next SmarNetConf parameter section.
The DF89, when working as master, admits the Modbus functions shown on the table below. At the
“data type” column RW means that it supports reading and writing and RO supports only reading.
Modbus
Function
1
2
3
4
5
6
15
16
Description
Data Type
Read Coils (0x)
Discrete Input (RW)
Read Discrete Inputs (1x)
Discrete Input (RO)
Read Holding registers (4x)
Analog Input (RW)
Read Input registers (3x)
Analog Input (RO)
Write Single Coil (0x)
Discrete Output
Write Single Register (4x)
Analog Output
Write Multiple Coils (0x)
Discrete Output
Write Multiple Registers (4x)
Analog Output
Table 23. 1 – Modbus Functions Supported
After including the command check the configuration and save it. This saving indicates that every
device configuration command made on the SYSTEM302 database will be effective. In order for this
to happen there can be no inconsistencies on the commands mounted (like the inclusion of
repeated points on the commands or a command bigger than the limit. This is done by the Check
and Save
buttons in the SmarNetConf toolbar.
The Scan and Optimization fields are advanced parameters that can remain as Default. The Scan
field indicates the minimum time desired between the scan on the respective command. The
Optimization field indicates that the Modbus command is to be optimized or not. The latter, if the
user chooses not to optimize it, will be activated the same way it was configured.
Finally, the Start Address and End Address fields are ways to visualize the Modbus points. The
Start Address represents the beginning of the Modbus range addressed, while the End Address
represents the end of that command. This type of visualization can be of 5 digits (under the Modbus
Modcon specification) or 6 digits (under a Modbus 2.0 spec). The device Digits Address property
indicates if the visualization will be with 5 or 6 digits.
For example, on figure 23.13 a visualization of 5 digits was used. The first command was mapped
as follows: analog reading “03” function, offset equal to 10 and number of registers equal to 10. This
represents the addressing of the Modbus 40010 to 40019 registers. Should the chosen visualization
be that of 6 digits, so the corresponding Modbus StartAddress addresses would be 400010 and the
EndAddress would be 400019.
23.10
Creating a Modbus configuration using the DF89
Figure 23. 15 – Configuring the PLC_ID1 commands
When the previous steps are finished, the Modbus channel configuration can be saved and the
Smar Network Configurator can be closed. Automatically the Mapping Tool launches.
Do not forget to save the commands configuration before exiting the Smar Network
Configurator. This is the only point to be saved manually. The changes of the properties on the
channel or the device are saved automatically.
Step 09
Mapping the Modbus points for the SYSTEM302 logic
The Mapping tool is responsible for mapping the Modbus network points on points available for use
in Ladder Logic or Function Blocks logic. This tool also configures all the features of the Modbus
network points (user tags, data types, scales, etc.). Observe the next figure:
23.11
DFI302 – User’s Manual – AUG/14 - J
Figure 23. 16 – Mapping Tool window
As seen on the previous figure, the device was inserted on the Modbus network with their respective
commands. The Function Block Label shows the points that will be visualized on the Syscon and
on the IO Point Group View window are shown the points to be seen on the LogicView for FFB.
The purpose here is to configure each network point (or byte) at their respective data type.
A Mapping Tool maps automatically by default all registers created on the SmarNetConf with
discrete functions (Modbus 1, 2, 5, 15 functions) as Boolean type. The user can only alter the point
tags. The analog points that appear with the
symbol must be configured.
To configure the point, click the command to be configured; on the next figure, for example, the
command will be Tag2. Remember that on the SmarNetConf, Tag2 was mapped on the Modbus
from 49941 t9 49954 register range.
23.12
Creating a Modbus configuration using the DF89
Figure 23. 17 – Mapping the analog points on Mapping Tool
On the window upper part, the available bytes will be shown in white. Click the byte and a window to
configure the point will appear. For our example on Tag2 the first available byte was clicked.
According to the mapping window it corresponds to the 49951 address (Byte Offset 1).
Choose the data type (Data type) of the slave device variable. The available types depend on the
chosen device and must be obtained in the slave device manual. For our example of the data type
of the point 49951 is Unsigned16. For analog points can also be set for each scale point. More
information about Data type will be shown in the Advanced Topics section. The figure below shows
the configuration of the point scale.
Figure 23. 18 – Configuring the scale parameters
By right-clicking the point you can remove it with the Delete option, or define some attributes that
identify it better, with the Attributes option. The Mapping tool automatically creates the description
with the Modbus address. This is useful to identify the point through the Modbus address in the
ladder logic. Fill out the necessary fields and click OK.
23.13
DFI302 – User’s Manual – AUG/14 - J
Figure 23. 19 – Altering the attributes of the mapped points
It is still possible to choose between the data on the direct or swapped format for analog types with
4 bytes (float, uns32 and signed32). This device information tells if it uses data with the swapped
format or not. To configure the swapped format, right-click the device on Mapping tool and choose
Swapped, as shown on the figure below. The Advance Topics section explains in detail the type of
swapped data.
Figure 23. 20 – Example of configuration
After mapping and configuring all points, click OK to close the Mapping Tool.
Save the configuration after returning to the Syscon.
23.14
Creating a Modbus configuration using the DF89
DF89 Configuration as Modbus TCP Master
This section will detail all steps to make the following configuration:
a.
Add devices on the DF89 TCP channel
b.
Add Modbus points on the slaves
c.
Map all Modbus points for the SYSTEM302
As an example of the figure 23.1 process, the Modbus TCP Master configuration uses the PLC_ID3
slave transmitter.
To configure the Modbus TCP channel, the procedure is the same used on the serial channel from
step 5, where the Modbus TCP also is the SmarNetConf. To that effect, choose the Modbus TCP
as channel type on the figure 23.7 window and expand the TCP channel. From the area window
expand the TCP channel (DF89 Modbus TCP). Select the channel on the window top and right-click
it. Choose the Modify Configuration option.
The figure below shows the TCP channel main SmarNetConf window.
Figure 23. 21 – SmarNetConf Modbus Configurator main window
The CHECK SECOND. COMM. parameter has similar functionality of CHECK_COMM_STANDBY
paramater of MBCF block that is used by other DFI302 controllers. So the secondary DF89
(standby) will perform a communication test with the slave devices in the period configured in this
parameter.
Configuring the Modbus devices
To insert a slave device, click the Insert Device button located on the toolbar, or through the
InsertDevice menu, or still right-clicking the TCP channel as shown on the next figure. The
window shown on the next figure is the window for slave device insertion where the user can add
one or several devices of the same type.
23.15
DFI302 – User’s Manual – AUG/14 - J
Figure 23. 22 – Adding device on the Modbus network
Select on this window the slave device to be inserted. One device only will be included on the
proposed example. First, get the slave device Modbus configuration on its manual. Follow the steps
below to insert the slave device:
A. Fill out the Model, Description and ID of the device;
B. Fill out the device IP address on the 1st IP field. If the device is redundant, the 2nd IP will be
chosen as redundant path. For more details see the Redundancy section;
C. Select the device quantity of a determined type. In this case it will be only one.
D. Click ADD. A table will be shown with the quantity of selected device.
E. On the ID field, attribute an address for this device.
F. On the Tag field is attributed the device tag. If the user does not attribute a tag, a default tag is
attributed.
G. Click OK. The added device will be included on main window.
NOTE
The addresses attributed, as well as the device tags must be the only ones on the Modbus
network and also on the Studio302 Workspace database. Refer to the Studio302 manual.
Editing the devices properties and commands
After adding the device, its properties can be changed. To alter the device properties, add and
delete commands, follow the same procedures described for the serial channel. The device
properties and commands are described in detail on the SmarNetConf Parameters section.
For the TCP channel example there is a TRM_ID3 device. The following figure shows the
SmarNetConf screen with the TRM_ID3 device of the proposed example.
23.16
Creating a Modbus configuration using the DF89
Figure 23. 23 – Example of the TCP channel properties
Making logic with the Modbus I/O Points
This section will detail all steps to make the following configurations:
a.
Make a logic in blocks or ladder with the slave Modbus points
b.
Download the configuration.
Until now the Modbus TCP and Serial slaves were created and their points were mapped. The next
steps will show how to use the points mapped on the Network Configurator for the control logic. As
mentioned previously, there are two ways to map inputs and outputs on ladder logic or function
blocks. Each tool has its specific block library. It is possible to blend both logics through the FFB
1131 block.
Initially the steps will be shown to use only the Ladder logic. After that, it will be explained how to
mount the logic using function blocks. Which tool to use will be user´s choice.
Mapping the Modbus points to be used on Ladder
Step 10
As the points will be mapped to be used on ladder, by returning to the figure 23.17, it is not
necessary to use the Block Type option (None). A tag can be attributed to the group on the Group
Tag option or leave the default tag (Group Tag is important for use in blocks). Finally the User Tag
to be shown on the ladder logic will be chosen. In our example the 49951 point will be PLC_ID1_AI1
as seen on figure 23.25.
Sometimes, especially when the LogicView for FFB is already open, the points mapped on the
Mapping Tool do not appear on LogicView for FFB. If so, execute the Refresh Data command to
update the I/O points configured on the Mapping Tool on the ladder logic by right-clicking Network
I/O at the Hierarchy window of the LogicView for FFB. See the next figure.
23.17
DFI302 – User’s Manual – AUG/14 - J
Figure 23. 24 – Executing the Refresh Data
The NetIO points can be seen on the LogicView for FFB Hierarchy window. On the Object
Properties window is generated initially a description of the Modbus address variable. On the figure
below, Hierarchy is on the left side window with all the Modbus points mapped on the Mapping
tool. On the LogicView for FFB all points of both channels are shown. On the right side of the
figure is shown the Object properties window of the PLC_ID1_AI_1 selected point that was
configured on the Modbus 49951 address.
Figure 23. 25 – Network I/O on LogicView for FFB
After this procedure, the Modbus network I/O points are available to be used on the ladder logic,
23.18
Creating a Modbus configuration using the DF89
counting on a complete function library to be utilized by the user. For more details see the
LogicView for FFB manual.
The figure below shows two Modbus points used on ladder logic. The discrete PLC_ID1_D1_1 point
and the analog PLC_ID1_AI_1 point. All of the Modbus I/O points appear as the (MB) symbol on
ladder logic.
Figure 23. 26 – Editing the logic
The configuration of the serial channel using ladder logic only ends here. Save the LogicView for
FFB and return to the Syscon.
After configuring the ladder, the user can download the configuration on the device, or instead
choose to configure function blocks on the Syscon. Should the user wants to work also with
function blocks, it is necessary to follow the steps 9 to 12 for the function blocks edition.
To follow the same example, it is still necessary to configure also the TCP channel. To configure the
TCP channel without using function blocks go to the Configuring TCP Channel step. To download
only the configuration up to this point, go to the Configuration Download step.
Step 11
Mapping the Modbus points to be used in Function Blocks
Similarly to the configuration was done through the ladder, the configuration can be done using
function blocks. This section will show the mapping of the same Modbus I/O point of step 10, but
now using function blocks.
As stated previously, for the creation and insertion of network devices the steps are common up to
step 8. That is, we must follow the complete procedure for the area creation of Syscon and set the
controller, as done in steps 1-4 and the devices should also be inserted in the same way as done for
the ladder.
To map the I/O points in function blocks in the Mapping Tool window of as shown in the figure
23:17, it is necessary to fill the BlockType field. When is chosen None, as shown in step 10,
indicates that the point only is mapped in the ladder.
The user can only choose to map the I/O points in function blocks of type multiple inputs (analog or
discrete - MAI and MDI) or multiple outputs (analog or discrete - MDO and MAO).
At this point the user is ready to develop the control strategy. In this case the user may use other
function blocks to make the desired control strategy. To interconnect the blocks the user needs to
make links between them. To open a control strategy in Syscon is necessary to create a control
module, and then, the strategies. For details on these procedures, it is recommended to check the
Syscon manual.
23.19
DFI302 – User’s Manual – AUG/14 - J
An important parameter the must be configured in all function blocks is the MODE_BLK parameter
that determines the Out of Service (OOS), Manual (MAN) or Automatic (AUTO) block operations. All
blocks in this area must have the MODE_BLK.TARGET in AUTO. Each block has a specific
parameter configuration. For more information about each block see the Function Blocks manual.
NOTE
The Modbus I/O blocks do not need to configure the CHANNEL parameter. This parameter will
only work when using the I/O blocks to map the local I/O (IMB).
Commissioning and configuration download to the controller
After configuring the parameters, the user can begin communicating with the devices. It is
necessary to perform the device commissioning so that each device tags, IDs and addresses be
attributed adequately. If this procedure is not observed, the Syscon will detect the noncommissioned device and the download will be aborted. The commissioning consists in combining a
network DF89 controller and the configurator used on the configuration. The same configuration tag
will be attributed to the controller.
To commission, simply enable the online communication with the network equipment through the
ON button on the Syscon toolbar shown below.
Figure 23. 27 – Enabling Online mode
Then, click the controller or the channel and choose Commission. More information on how to
commission refer to the Syscon manual.
After finishing the devices commissioning, the download process may begin. Download can be done
in several Syscon points and depends on the purpose: on all controllers, on only one controller, etc.
However, the Syscon download is recommended for being the most complete, as it controls the
alterations performed on all tools.
The Syscon has two download procedures: conventional mode (non-incremental) and the
incremental download.
•
•
On conventional or non-incremental download the entire configuration is downloaded on
the device.
Incremental download includes a phase that compares the configuration stored on the
plant physical device with the Syscon configuration, stored on the Studio302 database.
Only the differences are downloaded to avoid that unnecessary information are sent to the
device. On this option, the download scope can be limited by the user.
The figure below shows the device download with the option for performing the incremental
download or not (which, in this case would be the total download).
Figure 23. 28 – Performing the download
23.20
Creating a Modbus configuration using the DF89
The download operation can affect a network of devices (when selecting a Fieldbus network, an
HSE network or a Linking Device channel) or a particular device, possibly a HSE device (Bridge,
Linking Device, Controller), or a H1 device. In the latter case, the operation is also called partial
download.
The download operation will be available only when the Syscon is on online mode, communicating
with the plant and with the device already commissioned.
NOTE
If the user has finished the commissioning, the Syscon suggests a download. Sometimes,
after the commissioning is performed, it is necessary to click on the Refresh button at the right
side of the online button on the Windows toolbar.
If the user chooses the incremental download, this option must be selected in the previous window.
A window will appear with the incremental download configuration options. If there are some of the
selected options, it means that Syscon will compare initially that option with the controller and will
only download if there are differences. Before downloading, the Syscon still will show the user a
window with the differences. Only when the user verifies the differences the new configuration will
be really downloaded.
Figure 23. 29 – Selecting download options
On the present example, only PROJ DF89 is to be downloaded. So, right-click the controller and
select the Download option. On the download window, select Start.
After performing the download, the user can check the logic parameters supervision on the device.
To supervise the parameters, both of ladder and blocks, the user must perform Export Tags. This
procedure indicates that the database will be updated with the desired supervision information.
Export tags is done on the area window by right-clicking its name.
Figure 23. 30 – Performing the Export Tags
23.21
DFI302 – User’s Manual – AUG/14 - J
After this operation the user can supervise the configuration parameters. New ladder logic or block
alterations may be applied. The Export Tags procedure must be repeated only if new ladder logic
or block alterations are included.
DF89 Configuration as Modbus Slave
DF89 can work as Modbus Serial slave or TCP. In this case, any Modbus Master equipment can
read the points on the DF89 controller, be them conventional I/O, Modbus I/O points of slaves
scanned by the DF89 or other DF89 internal points. On the figure 23.1 example, the DF89 is the
Modbus slave of an IHM Modbus TCP.
To configure the DF89 as Modbus slave, a block must be first created on Syscon - Modbus Slave
Configuration. To that effect, right-click the HSE_FB_VFB of DF89 controller, as shown on the
next figure.
Figure 23. 31 – Including a new block on the controller
Then, a Modbus Slave Configuration block must be created. This block represents the entire
DF89 configuration as Modbus slave (Serial or TCP).
After creating the block, the user may configure the parameters. As Modbus TCP slave the main
parameters are MODE_BLK and DEVICE_ADDRESS. On figure 23.1, the DF89 has the Modbus
address 25.
23.22
Creating a Modbus configuration using the DF89
Figure 23. 32 – Modbus Slave configuration parameters
The Modbus Serial slave configuration requires the following procedure:
1) No serial channel can be created on the Syscon, because the DF89 has only one serial
channel. The serial channel as master has priority over the slave function.
2) MODE_BLK and DEVICE_ADDRESS parameters must be configured on the MBSCF block.
3) Serial media parameters must be configured on the MBSCF block: Baud rate, Stop Bits and
Parity.
4) The serial can be checked if it is enabled as slave or master on the Modbus Transducer block
SERIAL_CHANNEL.
Only the points mapped on ladder logic can be mapped as Modbus slaves. Each Modbus point on
ladder has a respective Modbus address. To get information about the point, click it and check the
Object Properties window, as shown on the next figure.
Figure 23. 33 – Example of how to get the Ladder point Modbus address
On the example of the figure above, the V0004 contact has 1541 as Modbus MB address.
NOTES
1) All analog points are floating type.
2) Only Modbus multiple writing functions are admitted, namely, functions 15 and 16.
3) The DF89 is already produced as Modbus TCP and Serial slave on address 247 with baud
rate 9600/1/Even.
DF89 Configuration as Bypass Modbus only
Another DF89 feature is to work as Bypass Modbus, i.e. Modbus TCP master equipment can
access a slave Modbus serial equipment situated below the DF89.
23.23
DFI302 – User’s Manual – AUG/14 - J
The DF89 configuration as bypass is done by creating a serial channel. If the user wishes to work
only as bypass, simply create a serial channel on the SmarNetConf and configure the serial media.
On figure 23.1 example, the serial channel with devices has already been created, so it is already
supporting the bypass automatically. Take as example the IDM Master TCP accessing any point of
the TRM_ID2 or PCL_ID1 slaves simply by attributing the ID of the respective device (ID 1 or ID 2)
and the DF89 IP.
NOTES
•
To work as bypass, the Modbus slave address cannot be the same as the MBSCF block
DEVICE_ADDRESS.
The media configuration is done only on SmarNetConf. On the bypass case, the same
download can be used on the modification of any media parameter.
The bypass is supported by the two DF89 Ethernet ports: ETH1 and ETH2.
On the redundancy case, it is also possible to access the secondary port as bypass,
simply by configuring the parameter of the BYPASS_SECONDARY device on
SmarNetConf.
•
•
•
Advanced Modbus topics
There are two main Modbus specifications: an old one, created by Modcon company – the
predecessor of Modbus, which follows the Modcon PI-MBUS-300 1996 reference book. The current
Modbus version follows the Modbus Organization specification – Application Protocol Specification –
since 2002. Both specs are totally compatible, with only one difference of visualization and size on
the addressing band.
The Modbus register is a 2-byte number (Word) that indicates a given parameter on the slave
device. For example, address 1 indicates an I/O point, while address 2 indicates another I/O point.
This Modbus Modcon addressing has specific ranges depending on the function shown below,
taking into consideration that the Modbus protocol function indicates if it is desired working with
register reading or writing. The functions supported and the description for each function are on table
23.3.
•
•
•
•
Functions 1, 5, 15 – addressing range Modbus Modcon 0xxxx (0001 – 10000)
Functions 2 – addressing range Modbus Modcon 1xxxx (10001 – 20000)
Functions 3, 6, 16 – addressing range Modbus Modcon 4xxxx (40001 – 50000)
Function 4 – addressing range Modbus Modcon 3xxxx (30001 – 40000)
For the current version, also called extended Modbus, this range no longer exists, since the frame
format already ignore it. This kept the addressing range from being restricted to the 10000 range
registers.
A favorite format to use these ranges as reference is the quantity of bytes on the Modbus address,
i.e., if it uses 5 or 6 digits. The table below compares old and new addressing as address examples.
EXAMPLE OF
USER INPUT
Function
Start Address
1
2000
3
10
2
2500
4
1533
3
15200
VIEW
5 DIGITS
Start Address
2000
40010
12500
31533
Cannot be seen
VIEW
6 DIGITS
Start Address
2000
400010
102500
301533
115200
MODBUS
IN THE BUS
Function
Start Address
1
1999
3
9
2
2499
4
1532
3
15199
Table 23. 2 – Example of Modbus address on the old protocol (5 digits) or the current
protocol (6 digits) and how the protocol stays internally (Modbus online)
The table above shows examples of Modbus addressing using both specifications: Modcon (with 5
digits) and the current one (with 6 digits).
The user input columns show an example of a given Modbus function and register.
The Modbus column on the bus shows a would-be Modbus protocol. Usually, the user does not see
it, because it is inside the protocol for communication between devices. In this case, the initial bus
23.24
Creating a Modbus configuration using the DF89
address is always a relative address, i.e., they generate the same command on the bus. In this
case, the initial bus address is always a relative address discounted from the function base and it is
unique for both representations.
Table 23.2 shows that both protocol views do not have any difference for communication, i.e., they
generate the same bus command. The user then chooses which way he wants to work with, the old
or the current one. The only difference will be when the device will have a very large address range
(over 10000 registers) and so only the 6-digit format will be feasible.
NOTE
The DF89 supports the Modbus TCP and the Modbus RTU serial protocols. For both protocols
the standard is the same under the old or current specs, and they are totally supported by the
controller. The DF89 default is the 5-digit visualization, which is the most used.
There are other non-standard Modbus protocol extensions, like Enron and Daniel, which are
not supported by the DF89.
Types of data supported
On the Modbus, the points are mapped in registers. These registers differ, depending on the type of
variable. For discrete types (functions 1, 2, 5, or 15), each register occupies a 2-byte word. Besides
this information it is necessary to know which type of data corresponds to these registers. The
information on the data types supported by the DF89 Modbus are the following:
Modbus
Function
1, 2, 5 or 15
3, 4, 6 or 16
3, 4, 6 or 16
3, 4 ,6 or 16
3, 4, 6 or 16
3, 4, 6 or 16
3, 4, 6 or 16
3, 4, 6 or 16
Data types
Supported
Size in
Nr of Modbus Registers
Bytes
Necessary
BIT
1/8
1
UNSIGNED 8
1
1
UNSIGNED 16
2
1
UNSIGNED 32
4
2
FLOAT_SINGLE
4
2
SIGNED 8
1
1
SIGNED 16
2
1
SIGNED 32
4
2
Table 23. 3 – Data types supported
Besides these data types, the analog data of 4 bytes size can be swapped or not. In this case, the
type of swapped data has a little-endian data inversion relative to the big-endian non-swapped data
type. This information is selected in the device inside the Mapping Tool and it is valid for the whole
device.
For example, considering the number of 4 bytes 12345678 allocated on the Modbus 40001 and
40002 addresses:
Datatype
Unsigned32
Swapped Unsigned32
Register
40001
5678
1234
Register
40002
1234
5678
23.25
DFI302 – User’s Manual – AUG/14 - J
Supervision and Control using DF89
The Modbus variables in the slave device can be mapped in DF89 by user in the following usage
scenarios: supervision or control. As supervision, the variables are read cyclically via Modbus from
the slave device and stored in the memory of DF89 and can be written on demand. As control, the
variables are read cyclically (and do not allow writing) or written cyclically (and are never read).
Characteristic
Modbus command configuration
on SmarNetConf
Usage scenario: Supervision
Only Modbus commands for reading:
- Read Coil (command 1)
- Read Holding Register (command 3)
Type of Modbus variable in the
slave device and type of possible
Modbus command.
Coil (address 0x.xxx or 0xx.xxx) and
Holding Register (address 4x.xxx or 4xx.xxx) :
Modbus command for reading
Modbus variable on DF89 (cache)
Frequency of sending Modbus
command for reading
Frequency of sending Modbus
command for written
Application
Usage Scenario: Control
Modbus command to read or write:
- Read Discrete Input (command 2)
- Read Input Register (command 4)
- Read Coil (command 1)
- Read Holding Register (command 3)
- Write Single Coil (command 5)
- Write Single Register (command 6)
- Write Multiple Coil (command 15)
- Write Multiple Register (command 16)
Discrete Input (address 1x.xxx or 1xx.xxx) and
Input Register (address 3x.xxx or 3xx.xxx):
Modbus command for reading
Coil (address 0x.xxx or 0xx.xxx) and
Holding Register (address 4x.xxx or 4xx.xxx):
Modbus command for reading or written
If Modbus command for reading:
Discrete Input (address 1x.xxx or 1xx.xxx) or
Input Register (address 3x.xxx or 3xx.xxx) with
float data type.
Discrete Input (address 1x.xxx or 1xx.xxx) or
Input Register (address 3x.xxx or 3xx.xxx) with
float data type.
Cyclic
according
to
SmarNetConf
configuration.
User demand. When writing occurs via
Smar.DfiOleServer.
DF89 works as concentrator for an OPC
Server/Client (it scans the slave devices and
stores in the DF89 memory for host access).
If Modbus command for written:
Coil (address 0x.xxx or 0xx.xxx) or
Holding Register (address 4x.xxx or 4xx.xxx)
Cyclic
according
to
SmarNetConf
configuration.
Cyclic
according
to
SmarNetConf
configuration.
DF89 transfers cyclically a variable:
- from a Modbus device to another one
- from a Modbus device to a FF device
- from a FF device to a Modbus device
Despite the Modbus variable on DF89 is
Discrete Input or Input Register, the written via
Smar.DfiOleServer will be converted to written
Modbus command to the slave device.
Supervision
For example, in the HMI of example of figure 23.1 it is desired to map the point 40020 , which was a
PID set point, and a contact 2001 that would be an on/off of a pump. The point will be created in
SmarNetConf and Mapping tool as shown in steps 5 to 9 and would be as follows.
Modbus Function
(SmarNetConf)
Read Coils (01)
Read Holding Registers (03)
Start Address
(SmarNetConf)
2001
40020
Point Tag
(Mapping Tool)
PLC_ID1_DI_1
PLC_ID1_AI_1
Description
On/Off Pump
SP of PID
These points were used in the ladder in a particular control strategy, and could also be mapped in
supervisory via Smar.DfiOleServer. In supervisory, the value of points PLC_ID1_DI_1 and
PLC_ID1_AI_1 can be changed by the user where the change will be mapped into a Modbus
command of writing (function 5,6,15 or 16) and will be sent to the slave. The value of the next
reading will already be the value really affected on the slave. If the point continues with the previous
value means that the writing was not recognized by the slave.
23.26
Creating a Modbus configuration using the DF89
On ladder it is not possible to alter the set point value, as the online ladder alteration does not admit
writing on input parameters like this.
Peer-to-Peer of I/O point
A point mapped as peer-to-peer must be read on some slave device and written on other slave
device.
For example, if the user wants to read the PLC_ID1 set point value and write the TRM_ID2 set
point. In this case, the PLC_ID1 set point must be mapped with any reading function (n.1, 2, 3 or 4),
and the TRM_ID2 mapped with any writing function (n. 5, 6, 15 or 16). So, both ladder or function
block logic can be used so that the point mapped as PLC_ID1.PID1_SP be written on
TRM_ID2.PID2_SP.
Scan time between commands
The DF89 has the additional characteristic of choosing the scan time by command. By default, this
parameter is 500 ms and must suit most applications. This value can be adjusted from 0 to 65500
ms (65.5 s).
The Modbus scan time allows the user setting different times for each command as multiples of 100
ms. For variable requiring a smaller periodicity, as analog variables, the Modbus time can be slower,
for example, in relation to discrete points.
Scan time is also useful to prioritize the bypass. It refers only to the commands determined for the
D89 to execute as a Modbus master and does not influence the Modbus bypass at all. So, if using a
1000 ms scan time and there is only one command, the DF89 will execute the scan command at
each second. The rest of the time it can serve the bypass. That is, this makes bypass supervision
much faster, as the bypass range is bigger in this case.
This is time is the time the user. However, as the scan depends on other commands to be executed,
sometimes this time cannot be effected if the scan is much bigger than necessary. For example,
imagine if the user has 5 commands to execute a device data (5 commands, including the
optimization). And suppose that the user set the time of 100 ms for all commands. If the time for
each command is 100 ms, then the time to do all the scan would be 500 ms. As the user configured
200 ms (desired time) the time had never been able to be done because the scan occurs at least
every 500ms. If the user changes the time to 1000ms then will exist a gap between the scan of
500ms.
Optimization of commands
The DF89 has an additional command optimization feature. It consists on reducing the number of
commands sent online and optimizes the Modbus communication. Use only the non-selected option
when the Modbus slave really does not support the optimized commands.
Enabling and disabling a device in the configuration
Another interesting Network Configurator feature is the possibility of enabling and disabling a
slave device on the configuration without affecting the device properties window where the user
executes the device scan.
When the device is disabled, although the logic configuration and device mapping are not altered,
the controller does not perform any other operation with this device, not sending any command to
the slave.
The figure below shows a sample configuration with disabled devices. When the device is turned off
it appears with a red (x) in the device drawing. In the figure below only the devices 10, 18 and 30
are enabled. This option is very useful when there are devices for maintenance.
23.27
DFI302 – User’s Manual – AUG/14 - J
Figure 23. 34 – Example of configuration with enabled and disabled devices
This enabling change needs a download to the controller to recognize it. This download operation
can be performed from the Smar Network Configuration or from Syscon.
To enable again the device, return to device’s properties window and execute a new download.
Network Configurator online communication with the controller
Direct communication with the DF89 is possible through the SmarNetConf. It can facilitate some
functions like slave channel parameter download, among others. This communication is carried out
through the Ethernet network.
To enable Modbus communication through SmarNetConf, first enable communication with the OPC
server.
23.28
Creating a Modbus configuration using the DF89
SYSTEM302 Maintenance Procedure
This section presents a summary of download procedures recommended for cases of maintenance
of a SYSTEM302 configuration.
As the SYSTEM302 has several download modes, there must be a general way that meets most
cases. However, there are other procedures for the same alteration (consult the Syscon manual).
On the Download Recommended column the reference is the Syscon incremental download on
the plant or on the controller. These operations are explained in detail in the Syscon manual.
MAINTENANCE EVENT
ALTERATION TOOL
RECOMMENDED DOWNLOAD
Make a new SYSTEM302 configuration with the Modbus
controller and ladder logic. FFB block has no HSE links to
other controllers.
Include a new device or a new command on the Modbus
network
Alter the device configuration on the Modbus network
(device address, Modbus points addressing)
Change specific parameters on the Modbus channel (baud
rate, timeout or other parameter).
Enable or disable Modbus device keeping the entire
Modbus configuration
Add parameters on the FFB block and make HSE links or
only add FFB parameters to a FFB block that already has
HSE link.
Include or remove FFB link for internal blocks inside the
same controller.
Syscon, Network
Configurator, Mapping
Tool, LogicView for FFB
Network Configurator,
Mapping Tool
Network Configurator
On Syscon make an incremental plant
download with all selected options or a
download on the controller (*).
On Syscon make an incremental plant
download with all selected options.
Make an incremental plant download on the
controller on Syscon(*).
Download the Modbus network on the Network
Configurator (*)
Download the Modbus network on the Network
Configurator (*)
On Syscon make an incremental plant
download (*).
Change of mapping parameters I/O points (scale, point
tags, alteration of accessed or swapped bytes).
Mapping Tool
Change slave device configuration parameters (tag, model
or number of visualization digits) or enable/disable the
slave device.
Alteration only of ladder logic.
Network Configurator
Network Configurator
Network Configurator
Syscon
Syscon
LogicView for FFB
Make an incremental download on the
controller without the enabled NetIO options
(*).
On Syscon make an incremental download on
the controller with the NetIO Parameterization
enabled option (*).
Download the Modbus network on the Network
Configurator (*).
Download the logic on the LogicView for FFB.
Table 23.4 – Recommended download procedures
(*) These operations will stop the Modbus network channel
23.29
DFI302 – User’s Manual – AUG/14 - J
Smar Network Configurator Parameters
Serial Channel Parameters
Category
Parameter
Valid Range
Default
Unit
Description
RTS CTS Timeout
0-65535
0
ms
Time delay
0-65535
0
ms
Specifies the maximum waiting time for the CTS become
active after sending RTS on the serial ports.
Waiting time between Rx reception and the next Tx
transmission.
Baud rate
9600
E
Define the baud rate of serial ports.
Even
E
Defines the serial ports parity
Retry Count
0:110, 1:300,
2:600, 3:1200,
4:2400, 5:4800,
6:9600, 7:19200,
8:38400,
9:57600,
10:115200
0:Even, 1:Odd,
2:None.
0-5
Retry period
0-65536
10000
Stop bit
Timeout
0:1, 1:2
0-65536
1
1000
Advanced
Media
Parity
1
E
ms
Number of retransmissions in case the master does not
receive a response from the slave.
Time spent on a new live list check for the devices that
failed on the scan.
Defines the number of stop bits for the serial ports.
Waiting time for a slave response after sending a
command to the serial ports.
Misc
Port number
Tag
Type
1
Channel tag
Serial
Redundancy
CHECK SECOND
COMM
0 – Disable test
1 – 65535 Interval
between each test
True/False
SECONDARY
BYPASS
0
ms
False
Parameter configured for the secondary redundant port if
user wants the communication test between slave devices.
Parameter configured for the secondary redundant port if
wanting to use the path as bypass for a TCP master to
access the serial slave below the DF89.
TCP Channel Parameters
Category
Parameter
Valid Range
Default
Unit
RETRY COUNT
0-5
1
RETRY PERIOD
0-65536
0
ms
TIMEOUT
0-65536
1000
ms
Description
Media
Number of retransmissions if the master does not receive a
response from the slave.
Time of retransmission if the master does not get a response
from the slave.
Waiting time for a slave response after sending a command
for the TCP ports.
Misc
PORT NUMBER
TAG
TYPE
(read only)
(read only)
(read only)
2
Channel Tag
TCP
ms
Parameter configured for the secondary DF89. If the user
wants to perform the periodic communication test with the
slaves to check the communication.
Redundancy
CHECK
SECOND
COMM
Secondary
Bypass
23.30
0 – Disable test
1 – 65535 Interval
between each test
0 – False
1 – True
0
False
Creating a Modbus configuration using the DF89
Serial Device Parameters
Category
Parameter
Valid Range
Default
Digits address
5 or 6
5
Live List
1 – Use Modbus function 8.
2 – Use the First command
1
Enabled
0 – False
1 – True
1
Slave address
1-247
Unit
Description
Advanced
Indicates if the “Modbus Address” will show
the number with 5 or 6 digits, indicating if it is
the old Modbus Modicon standard or a new
one.
This parameter indicates which command will
be used by the master and check if the device
is alive. By default the loop back command
(function 8) is used, though the device may
not support this command. In this case, the
user may choose option 2 and the first
configured command will be sent.
Main
This Field defines if, and on what conditions,
the command must be executed.
If the parameter is configured as 0, the
command is disabled and won´t be executed
in the normal polling sequence.
If the parameter is configured as 1, the
command will be executed on each command
list scan.
This parameter specifies the node address, on
the network, of the Modbus slave that will be
considered. Values 1 to 247 are allowed.
Misc
Description
Model
Tag
Type
Vendor
Device tag
Serial
TCP Device Parameters
Category
Parameter
Valid Range
Default
Digits address
5 or 6
5
Live List
1 – Use Modbus function 8.
2 – Use the First command
1
Enabled
0 – False
1 – True
1
Slave address
1-247
Unit
Description
Advanced
Indicates if the “Modbus Address” will show the
number with 5 or 6 digits, indicating if it is the old
Modbus Modicon standard or a new one.
This parameter indicates which command will be used
by the master to check if the equipment is alive
(livelist). By default the loop back command (function
8) is used, though the equipment may not support this
command. In this case, the user may choose option 2
and the first configured command will be sent.
Main
IP
IP2
Spaces
Spaces
This field defines if the command must be executed
and under which conditions.
If the parameter is configured as 0, the command is
disabled and will not be executed on the normal polling
sequence.
If the parameter is configured as 1, the command is
executed at each command list scan.
This parameter specifies the node address, on the
network, of the slave device that will be considered.
Values 1 to 247are allowed.
Device main IP address
Redundant device IP address. See redundancy cases.
Misc
Description
Model
Tag
Type
Vendor
Device tag
TCP
23.31
DFI302 – User’s Manual – AUG/14 - J
Parameters of device commands (serial or TCP)
Parameter
TAG
FUNCTION
Valid Range
Default
The options are in
according to
Modbus supported
functions table
1
OFFSET
0 to 65535
0
REGISTERS
0 to 65535
0
SCAN
0 to 65500
(multiple of 100)
OPTIMIZATION
0 – False
1 – True
500
1
START ADDR
Unit
ms
Description
Device Tag
This parameter specifies the Modbus function that
will be executed by the command.
These function codes are defined by the Modbus
protocol. The next table defines the purpose of each
action supported by the module.
This parameter specifies the initial Modbus register
or the digital point address to be considered by
Modbus slave equipment command. Refer to each
slave device documentation on the network to
attribute their registers and digital point address.
This parameter specifies the number of registers and
digital points to be associated to the command.
Functions 5 and 6 ignore this field and their only
apply to a single data point.
For functions 1, 2 and 15, configure the number of
digital registers to be associated to the command.
For functions 3, 4 and 16 configure the number of
analog registers to be associated to the command.
Note: the register that may be associated to a point
depends on the data type. See more about
association of register and point in the item data type
supported described in this section.
This parameter specifies the minimum interval to
execute continuous commands periodically. This
parameter must be multiple of 100. So, if the scan
time is 500 the command will be executed at each
500 ms minimum.
When the parameter is true (checked on), indicates
that it will be used to optimize the Modbus command
where the algorithm tries to group multiple internal
points of the same type and the same device in the
same command.
This Field is a composition of function and Relative
Address, which will be the Modbus address in the
user language. It will depend also of the
Nr_digits_addr parameter. See the Modbus Address
mounting.
Modbus Functions Supported
The table below lists all Modbus functions supported by DF89 and their description. This function
code follows the current Modbus specification Modbus Organization – Application Protocol
Specification.
Modbus Function
1
2
3
4
5
6
15
16
MODBUS_FUNCTION Parameter
Class
Description
RW
Reading of Input/Output Discrete Points.
RO
Reading of Input Discrete Points
RW
Reading of Input/Output Analog Points
RO
Reading of Input Analog Points
W
Writing of Discrete Point (only 1 register)
W
Writing of Analog Point (only 1 register)
W
Writing of Discrete Points (1 or more registers)
W
Writing of Analog Points (1 or more registers)
RW - Read and Write, RO - Read Only, W - Write Only
Read Coils (0x)
Read Discrete Inputs (1x)
Read Holding registers (4x)
Read Input registers (3x)
Write Single Coil (0x)
Write Single Register (4x)
Write Multiple Coils (0x)
Write Multiple Registers (4x)
Besides these functions is also supported the function of checking the device function (8 - check).
This function is used when starting the device to know if is alive or not (LiveList). In the LiveList
parameter of the device the user may choose to use this function or the first function defined in the
command table.
23.32
Creating a Modbus configuration using the DF89
Specific blocks of DF89 controller
Modbus Communication Transducer
This block provides the following functionalities:
• Slave device live list;
• Slave device diagnostics;
• Parameter online configuration of slave configuration.
See in the table below the parameters description.
Parameter
Idx
Data
type
Valid Range
Default
Memory
Mode
Unit
1
ST_REV
Uns16
S
RO
2
TAG_DESC
Octet
S
RW
3
STRATEGY
Uns16
S
RW
4
ALERT_KEY
UNS8
S
RW
5
MODE_BLK
DS_69
S
RW
6
BLOCK_ERR
Bitstr
D
RO
7
SERIAL_CHANNEL
Uns8
0 : Slave
1 : Master
0
S
RO
8
BAUD_RATE
uns8
9600
S
RO
9
STOP_BITS
uns8
3:1200,
4:2400, 5:4800,
6:9600, 7:19200,
8:38400, 9:57600,
10:115200
0:1; 1:2
1
S
RO
10
PARITY
uns8
Even
S
RO
11
SERIAL_TIMEOUT
Uns16
0:Even
1:Odd
2:None
Positive
1000
S
RO
12
SERIAL_NR_RETRIES
Uns8
Positive
2
S
RO
13
SERIAL_RETRY_PERIOD
Uns16
Positive
5000
S
RO
ms
14
RTS_CTS_TIMEOUT
uns16
Positive
0
S
RO
ms
15
TIME_DELAY
uns16
Positive
S
RO
ms
16
SERIAL_CHK_COM_SEC
uns16
Positive
S
RO
sec
17
BYPASS_SECONDARY
uns8
0=False;
1=True
S
RO
18
SERIAL_ENABLE_DEVS
Uns8
D
RO
19
SERIAL_LIVE_LIST
Uns8
D
RO
Description
Shows if the serial port is
being used as Modbus
master or slave.
Shows the current baud rate
used on master or slave on
the serial port.
Shows the current stop bit
used on master or slave
serial port.
Shows the current parity used
on master or slave serial port.
ms
Waiting time for the slave
response using the serial
port.
Number of attempts of resending the failing serial port
command.
Time spent to re-send the
command to the slave that
does not respond.
Specifies the maximum
waiting time for the CTS to be
activated after the RTS is
configured on the serial ports.
Waiting time between Rx
reception and the next Tx
transmission.
Indicates to redundancy if the
information that the check will
be made on the secondary
path was configured.
Indicates to redundancy if the
user can use or not the
secondary path as bypass
List of devices enabled on the
serial network. The number
represents the slave
device_address.
List of devices connected to
the serial network. The
number represents the slave
device_address.
23.33
DFI302 – User’s Manual – AUG/14 - J
20
SERIAL_ERR_CNT
Uns32
0
D
RO
Serial errors number counter.
Use the RESET_COUNTERS
to restart the counter.
21
SERIAL_SCAN_TIME
Uns32
0
D
RO
Time spent by the serial port
to scan the Modbus variables.
22
TCP_TIMEOUT
uns16
Positive
S
RO
23
TCP_NR_RETRIES
uns8
Positive
S
RO
24
TCP_RETRY_PERIOD
uns16
Positive
S
RO
25
TCP_CHK_COM_SEC
uns16
Positive
S
RO
Waiting time for a slave
response after sending a
command on the TCP port.
Number of retransmissions if
no the slave response is
received.
Time to re-send the
command to slave that is not
responding.
Indicates to redundancy if the
check on the secondary path
will be configured
26
TCP_ENABLE_DEVS
Uns8
D
RO
27
TCP_LIVE_LIST
Uns8
D
RO
28
TCP_ERR_CNT
Uns32
0
D
RO
29
TCP_SCAN_TIME
Uns32
0
D
RO
30
RESET_COUNTERS
Uns8
D
RW
31
NUM_LINKS
Uns8
1
S
RO
32
LINK_SEL
Uns8
First
D
RW
33
LINK_ID
uns16
0
D
RW
34
LINK_ID_REV
Uns32
0
S
RO
35
NUM_DEV
Uns16
0
D
RO
36
SLAVE_SELECTOR
Uns8
0: First ; 1: Next ; 2:
Previous ; 3: Last
First
D
RW
37
SLAVE_ADDR
uns8
1 to 247
0
D
RW
38
UPDATE_EVT
DS-73
D
39
BLOCK_ALM
DS-72
D
23.34
0: First ; 1: Next ; 2:
Previous ; 3: Last
s
List of device enabled on the
TCP network. The number
represents the slave
device_address
List of device connected to
the TCP network.
TCP error number counter.
Use RESET_COUNTERS to
restart this counter.
Time spent by the TCP port
to scan the Modbus variables.
Restart the TCP and Serial
error counters.
Defines the number of buses
supported.
Selects which bus will show
its information. Internal
LiveList use.
Identifies the currently
selected bus. Internal LiveList
use.
Current bus LiveList revision.
Internal use.
Number of devices on current
bus for use on the LiveList.
Slave address selector to
read LiveList information.
Internal use.
Slave parameter address for
LiveList. Internal use.
Creating a Modbus configuration using the DF89
Modbus Slave Configuration
See in the table below the parameters description.
Idx
Parameter
Data type
Valid Range
Default
Memory
Mode
UNS16
0
S
RO
1
ST_REV
2
TAG_DESC
OCT(32)
Spaces
S
RW
3
STRATEGY
UNS16
0
S
RW
4
ALERT_KEY
UNS8
1 to 255
0
S
RW
5
MODE_BLK
DS_69
OOS , AUTO
OOS
6
BLOCK_ERR
Bitstr(2)
7
DEVICE_ADDRESS
S
RW
D
RO
uns8
1 to 247
1
S
RW
9600
S
RW
8
BAUD_RATE
uns8
0:110, 1:300,
2:600, 3:1200,
4:2400, 5:4800,
6:9600, 7:19200,
8:38400, 9:57600,
10:115200
9
STOP_BITS
uns8
0:1, 1:2
1
S
RW
10
PARITY
uns8
0:Even, 1:Odd,
2:None
Even
S
RW
11
RTS_CTS_TIMEOUT
uns16
0
S
RW
12
ENABLE_CHK_COM_
SEC
Uns8
0-False ;
1-True
S
RW
13
UPDATE_EVT
DS-73
D
14
BLOCK_ALM
DS-72
D
Unit
ms
Description
Defines the DFI302
Modbus address when
working as Modbus slave.
Defines the DFI302 serial
port baud rate when
working as Modbus slave.
Defines the DFI302
Modbus address when
working as Modbus slave.
Defines the DFI302 serial
port stop bit when working
as Modbus slave.
Defines the DFI302 serial
port parity when working as
Modbus slave.
When the value is other
than zero, it indicates that
the RTX_CTS function is
enabled and the value is
the connection timeout.
Used when the DFI302
works as Modbus slave.
When the DFI302 works as
Modbus slave, this flag
enables the redundancy,
checks the communication
on the secondary.
23.35
DFI302 – User’s Manual – AUG/14 - J
Redundancy and Modbus
The redundancy in Modbus communication may be mapped to many possible scenarios. Some of
them are supported by the controllers. The restrictions which should be considered are described
below:
1. The Modbus TCP in the DF89 will be established in both Ethernet ports (ETH1 and ETH2). It is
recommended to use both ports only in the scenarios where the DF89 is slave. When running as
Modbus Master, the DF89 should not be configured to use ETH2 to avoid duplication in the
bandwidth and it may damage the communication performance.
2. The both Ethernet ports (ETH1 and ETH2) are available to answer the Modbus requests when
the DF89 is slave.
3. Switch over conditions are related to bad conditions in the Primary controller (see description of
these bad conditions in another section of this manual “Adding Redundancy to DFI302 HSE
Controllers”). As slave Modbus, the controllers will not generate a switch over condition because of
communication failures. It is always the master who should switch over in such conditions. When
using TCP and all IPs are in the same subnet, the master should to decide when switch the request
to other slave Ethernet connection.
4. As Modbus Master, DF89 (either TCP or Serial RTU) only switch over if the Primary does not
have any answer from all slave modules.
Redundant DF89 as master and PLC, with two Ethernet ports, as slave, using Modbus TCP
There are two possible scenarios, in the first only one subnet is used and all IPs of equipment are
on the same subnet.
In the second scenario, two subnets are used, and each device has an Ethernet port connected to
one of them, see the following figure. The second scenario is the most recommended if the
availability of the Modbus communication is an important factor, because in this case if there is
some failure in one switch the another network/subnet will cover this failure.
Figure 23. 35 – Example of configuration with enabled and disabled devices
Network topologies for DF89 redundant master and slave PLC with two Ethernet ports
23.36
Creating a Modbus configuration using the DF89
The redundant PLC can either use two Ethernet cards or one card with two Ethernet ports.
Once the Primary DF89 executes the requests, it is assumed that any of the slave connections may
receive and process the request. If one connection is not running properly, the primary DF89 will
use another available connection (connection switching).
If the Primary DF89 did not receive response to any of the connections and the Secondary DF89
has response to at least one of the connections, the DF89 pair will switch over (scenario Bad
Condition/ controller switching).
Redundant DF89 as master and redundant PLC as slave, using Modbus RTU
In this scenario, the DF89 is redundant, using RS-485 serial port, and it is connected via multidrop
to redundant PLC (both ports). Once the active DF89 executes the requests (see R1 in the following
figure), it is assumed that only one slave will process the request. In case of any “bad condition” the
DF89 will switch over (see R2 in the following figure).
Figure 23. 36 – DF89 redundant master and PLC redundant slave, using Modbus RTU
Redundant DF89 as slave and redundant PLC as Master, using Modbus TCP
In this scenario, the Primary and the Secondary DF89 answer the reads requested by the Master
PLC. The writes will be executed only by the Primary DF89. If for any reason the Secondary DF89
receives writing, so this request will be forwarded via redundancy path from Secondary DF89 to
Primary DF89.
Redundant DF89 as slave and redundant PLC as Master, using Modbus RTU
In this scenario, only the Primary DF89 will answer the readings and writings requested by the
Master PLC.
23.37
DFI302 – User’s Manual – AUG/14 - J
23.38