1
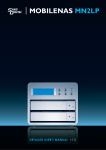
MobileNAS Detailed User’s Manual MN2L Contents Chapter 1 - Introduction to MN2L ................................................................................................................................3 1.1 Introduction .............................................................................................................................................. 3 1.2 What is RAID? ........................................................................................................................................... 3 1.3 Comparison between RAID 0 and RAID 1 .......................................................................................... 3 1.3.1 RAID 0: Striping (faster, no fault tolerance; requires at least 2 hard disks) ............................ 4 1.3.2 RAID 1: Mirroring (high security; requires at least 2 hard disks)................................................ 4 1.3.3 Comparison of RAID level in Table............................................................................................... 5 Chapter 2 - Installation ....................................................................................................................................................6 2.1 Accessories............................................................................................................................................... 6 2.2 Physic View............................................................................................................................................... 6 2.1.1 Front View ......................................................................................................................................... 6 2.1.2 Rear View ......................................................................................................................................... 7 2.3 Hardware Installation.............................................................................................................................. 7 2.4 Network Installation................................................................................................................................. 9 2.4.1 Setup IP Address ............................................................................................................................. 9 2.4.2 Installed Hard Drive Initialization ................................................................................................. 12 2.4.3 User and Share Setup ................................................................................................................... 21 Chapter 3 - Introduction to the User Interface ..............................................................................................................22 3.1 User Interface Structure........................................................................................................................ 22 3.2 Login ........................................................................................................................................................ 23 3.3 Basic......................................................................................................................................................... 24 3.3.1 Wizard.................................................................................................................................................. 25 3.3.2 Add User ............................................................................................................................................. 31 3.3.3 Add Group ......................................................................................................................................... 33 3.3.4 Add Share........................................................................................................................................... 35 3.4 Control Panel ......................................................................................................................................... 37 3.4.1 Users and Groups .............................................................................................................................. 38 3.4.2 File ........................................................................................................................................................ 43 3.4.3 System ................................................................................................................................................. 47 3.4.4 Network Service................................................................................................................................. 55 3.4.5 Maintenance ..................................................................................................................................... 60 3.4.6 Log File ................................................................................................................................................ 68 3.5 3.5.1 3.6 Personal Info ........................................................................................................................................... 71 Personal Information......................................................................................................................... 71 Logout ..................................................................................................................................................... 72 Appendix A - FAQ ...........................................................................................................................................................73 2 Chapter - Introduction to MN2L 1.1 Introduction The MobileNAS MN2L 2-Bay Network Storage Enclosure is a storage device that allows you to share documents, files, and digital media such as music, photos, and video with everyone on the home or office network. With the FTP support, you could access your files remotely through the Internet. The built-in account management allows you to keep data safe by giving read-only or full read/write permissions to specific users or groups. Utilizing the latest SATA II technology, the MN2L supports hot-swap with RAID 1 (mirroring) and RAID 0 (Stripping), allowing you to protect against Hard Drive failures or expands your useable drive space. The MN2L supports PC (Windows 2000, XP, 2003 and Vista), MAC, or Linux-based on your network, making it an ideal network storage sharing platform. Unique Features: • Share documents, files, and digital media such as music, photos, and video with everyone on the home or office network. • Convenient access to stored files remotely through the Internet. • Built-in account management allows safe data-keeping by giving read-only or full read/write permissions to specific users or groups. • Utilizing the latest SATA II technology, the MN2L supports hot-swap with RAID 1 (mirroring) and RAID 0 (Stripping), allowing the protection against Hard Drive failures or expands your useable drive space. • Supports PC (Windows 2000, XP, 2003 and Vista), MAC, or Linux-based on your network, making it an ideal network storage sharing platform. • Build-in iTunes Server support, providing music sharing from MN2L to your iTune in PC or MAC. • Build-in BitTorrent (BT) download station allow downloading BT files without your computer. 1.2 What is RAID? RAID (redundant array of independent disks or redundant array of inexpensive disks) RAID technology allows one or more disks to be combined into a logical volume which provides greater performance and/or protection than standard single disk drives. These volumes, also known as RAID Groups, appear like regular disk drives to the operating system and can be partitioned, formatted and used just like any other normal disk. The creation and necessaries calculation of the RAID is hidden from the operating system. There are several different methods of combining disks. Each method is referred to as a RAID “level” such as RAID Level 1, or RAID 1. The details of each level are summarized below and detailed in the following sections. MN2L support 2 RAID level, RAID 0 and RAID 1. It also supports JBOD, which stand for just a bunch of disk. JBOD will allow you use 2 hard drives individually. 1.3 Comparison between RAID 0 and RAID 1 MobileNAS MN2L provides RAID 0 and RAID 1 functionalities as below: 3 1.3.1 RAID 0: Striping (faster, no fault tolerance; requires at least 2 hard disks) Striping is a performance-oriented, non-redundant data mapping technique. While Striping is discussed as a RAID Group type, it is does not provide any fault tolerance. With modern SATA and ATA bus mastering technology, multiple I/O operations can be performed in parallel, enhancing data throughput. Striping arrays use multiple disks to form a larger virtual disk. The figure below illustrates a two-disk stripe set. Stripe one is written to disk one, stripe two to disk two, and so forth. RAID 0 sets can be comprised of two, three, or four drives. If the sizes of the disk segments are different, the smallest disk segment will limit the overall size of the RAID Group. 1.3.2 RAID 1: Mirroring (high security; requires at least 2 hard disks) Disk mirroring creates an identical twin for a selected disk by having the data simultaneously written to two disks. This redundancy provides instantaneous protection from a single disk failure. If a read failure occurs on one drive, the system reads the data from the other drive. RAID 1 sets are comprised of two drives. If the sizes of the disk segments are different, the smallest disk segment will limit the overall size of the RAID Group. 4 1.3.3 Comparison of RAID level in Table RAID Level Concept Available Capacity Reliability Transfer Speed Minimum Hard Disks 0 Stripping Total capacity of all disks Low Highest 2 1 Mirroring Half capacity of all disks High Slower 2 For more information on RAID arrays, please logon to our website www.sansdigital.com 5 Chapter 2 - Installation 2.1 Accessories After opening the packaging, the contents should include the following accessories: • MobileNAS MN2L Unit • AC Power Cable • User manual CD • Ethernet Cable • User Manual • Accessories Pack If any of the accessories be missing or the main unit is damaged prior to initial use, please contact Sans Digital, www.sansdigital.com or 1-800-980-1988. 2.2 Physic View 2.1.1 Note: 1. 2. Front View If the disk formatting or array set up has been completed, do avoid switching the original position of the disks. Before changing to or removing a disk, make sure to turn off the power first. Do not remove the hard disk during power on, otherwise, system failure will occur and any data stored may be lost. Indicator LEDs: Status LED Access LED Power On Flashing in Blue Color Flashing in Blue Color System Ready Blue Color Stay n/a 6 RAID Fail Blue Color Stay ON Flashing in Red Color Source: Flashing in Blue Color Rebuilding Flashing in Blue and Purple Color Target : Flashing in Blue and Purple Color Fan Fail Flashing in Blue and Purple Color n/a Over High Temperature Purple Color Stay ON n/a Access Blue Color Stay ON Flashing in Blue Color 2.1.2 Rear View Note: 1. When Gigabit LAN Port connects to the Network, the LED to the right will be flashing in amber color, indicating date is being transfer. When Gigabit network is connected, the LED to the left will be ON in green color. 2. 2.3 With the unit turned on, press the “Reset” button continuously for 5 seconds and the unit will reset back to its default settings. Hardware Installation Please follow the below procedures to complete the MobileNAS MN2L hardware installation: Step 1 Open the packaging and retrieve the main unit. (Please check whether the accessories and product itself is damaged or missing, and contact Sans Digital @ www.sansdigital.com or 1-800980-1988). 7 Step 2 Place the unit on a flat and stable surface. Make sure the fan is not blocked and there is sufficient cooling space around the unit. (Keep away from liquid or other that may damage the product.) Step 3 Remove the protector and install your hard disk onto the tray. Make sure the hard disk secure screws are fastened. Step 4 Re-insert the tray and make sure it is securely installed. 8 Step 5 Connect the Gigabit LAN port and plug in the power cable. Step 6 Hardware installation is complete. You can power on the unit and perform the MN2L IP Management utility and setup. 2.4 Network Installation Default Setting: IP Address: DHCP Username: admin Password: admin Before MobileNAS MN2L able to share data, it will need to setup the IP address, format installed hard drives and create user and share. 2.4.1 Setup IP Address To configure the MobileNAS MN2L IP address, you can use the MN2L Management Software Utility. You can run the “Management Software” included in the CD, or directly copy the “Setup.exe” to the desktop from the “\Management Software\Sans Digital NAS\” directory. Step 1 Run the “Setup.exe”, the IP management utility (located in the User Manual CD), and click on the “Setup” button in the windows. 9 Step 2 The setup software will automatically find the NAS unit and information is shown as the following screen. If there are multiple MobileNAS MN2L devices on the network, all detected MN2L will be shown on the left. The NAS unit’s IP address and other networking property will be display on the screen. First select the server name and then press OK. Note: The default setting is DHCP, which it will obtain the IP address automatically. Change to MANUAL/STATIC IP is highly recommended. Step 3 The administrator username and password will be required. Enter the default administrator as follow: Step 4 You can choose whether to use static IP address, or to automatically obtain an IP address from a DHCP server. Press Next to confirm the setting. 10 Note: The default setting is DHCP, which it will obtain the IP address automatically. Change to MANUAL/STATIC IP is highly recommended. Step 5 Date and Time information will be set in the following Windows. Change the desire time zone, date and time, and press Next to confirm. Step 6 The system confirmation screen will be display. Click on “Save” and the NAS unit will restart and the new setting will be active. 11 2.4.2 Installed Hard Drive Initialization Before the unit is ready to use, the installed hard drive will require initialize or format. • From a computer that is connect to the same network, open a Web Brower (Internet Explorer) and type in the NAS IP address. When prompt for the username and password, type in the administrator username and password. • If the inserted Hard Drives are not formatted, go to “Basic” -> “Maintenance” -> “Disk Utility” for single hard drive setup or Select “RAID Setting” for RAID configuration Setup. 2.4.2.1 Format a single hard disk To Format each individual Hard Drive, follow the below instructions: Note: When you format the hard disks separately, the MN2L system data will be saved in the first formatted hard drive. If the first formatted hard disk is damaged, the MN2L will not function. 12 Step 1 Enter “Maintenance” and select “Disk Utility”. 13 Step 2 The MobileNAS MN2L supports three kinds of file system, Fat32, Ext2 and Ext3. Select the hard disk to format and file system desired, press the “Format” button. Step 3 Press “Yes” to confirm to start format 14 Step 4 The format procedure will begin. The progress will show in the Status section of the table. Please wait unit the format is completed before the next step. Note: 1. When you format the hard disks separately, the MN2L system data will be saved in the first formatted hard drive. If the first formatted hard disk is damaged, the MN2L will not function. 2. 128-bit loop-AES encryption will only be avalaible using EXT2 format. 3. Fat32 format will not support RAID setting. Step 5 Upon hard drive format completion, the system will automatically reboot. Log into the system again with the IP address, and go to “Disk Utility” to verify the formatted hard drive and its file system. Repeat the preceding procedures to format the other hard disk. 15 Note: 1. When you format the hard disks separately, the MN2L system data will be saved in the first formatted hard drive. If the first formatted hard disk is damaged, the MN2L will not function. 2. The access privilege of the secondary formatted hard disk default as public. All users have the full access right to the secondary hard disk. 2.4.2.2 Format Two Hard Drive using RAID 1 or RAID 0 or Linear (Spanning) Alternatively, you can directly configure the RAID setting. Please follow the below steps: Note: The MN2L system data will be saved in the formatted hard drive. The system will return to its default settings if the hard drive is reformat. 16 Step 1 Go to “Maintenance” and select “RAID Setting”. Step 2 Select the “RAID Level” and “File System”. Press the “Create RAID System” button to begin hard disk formatting and RAID configuration. 17 Step 3 Press “Yes” to confirm to start create RAID system Step 4 The format procedure will begin. The progress will show in the Disk Status section. Please wait unit the format is completed before the next step 18 Step 5 Upon the formatting is complete, the system will reboot. Log into the system again with the IP address, and go to “RAID Setting” to verify the formatted hard drive, its RAID Level and file system. Note: 1. If the inserted Hard Drives has been format, the system will show the current information and “Disk Utility” and “RAID Setting” will be located in “Control Panel” -> “Maintenance” 19 20 2.4.3 User and Share Setup After the hard drive is initialized, you can use the “Add User Wizard” and “Add Share Wizard” for creating user account and network share. More Information can be found in Chapter 3.3.2 and 3.3.4. 21 Chapter 3 - Introduction to the User Interface 3.1 User Interface Structure The user interface is layout as below: Wizard Basic Add User Quick Setup Add Group Add Share User Management Users and Group Group Management File Server File Share Management LAN Settings Time Settings Turn Off Server System Information Disk Usage Error Notification DHCP Server Control panel Network Service Bonjour BTorrent Disk Utility RAID Settings Firmware Upgrade Maintenance Save Configuration Restore Configuration Factory Reset Samba Log FTP Log Log File DHCP Server Log System Log Administration Log Personal Info Personal Information 22 Account 3.2 Login MobileNAS MN2L supports the GUI interface as the user interface. Please first make sure that the network cable is connected and the IP address has been setup. Please refer to Chapter 2.3.1 for information on the configuration. The following will use IP address 192.168.0.146 as example. Please launch the web browser and enter at the address bar: http://192.168.0.146 Enter the username and password, default username and password as follow: Login account: admin Default password: admin 23 After logging in, you can start to configure the MN2L using the top and left menu. 3.3 Basic In the Basic configuration, there are four functions “Wizard”, “Add User”, “Add Group”, and “Add Share” under the “Quick Setup” feature group. Click “Quick Setup” to expand the function list. 24 3.3.1 Wizard The installation wizard can guide you through the MN2L system setup in six steps. Step 1 Select language MobileNAS MN2L can set the language preference to the system. You can manually select English, Simplified Chinese, or Traditional Chinese as the default language. Click “Next” to go to the next step or click “Cancel” to go back to the “System Information Page”. 25 Step 2 Configure new password (for admin) Configure a new password for the “admin” account. This is the password to allow administrator to change the setting of the MN2L unit. Click “Next” to go to the next step, Click “Back” to go back to previous step or click “Cancel” to go back to the “System Information Page”. It is very important to remember the password. To recover the password will require resetting the unit, which may causes data lost. Note: 1. The password may not exceed 16 characters and is limited to lower case characters and numbers. 2. It is recommended that you change the password to prevent unauthorized access through the default password. 26 Step 3 Hostname setting Configure the Host Name for MobileNAS MN2L on the network. This is the NETBIOS name of the MN2L. Click “Next” to go to the next step, Click “Back” to go back to previous step or click “Cancel” to go back to the “System Information Page”. Note: 1. Character is limited to 15 and only allows alphanumerical characters and hyphens (-). 2. Since the MobileNAS MN2L’s default Host Names are all identical, make sure to change the Host Name for each unit if two or more MobileNAS MN2L units are used within a network. This will avoid identification errors when configuring the IP. 27 Step 4 IP address Setting You can configure the network configurations in this screen. Select “Obtain IP Address Automatically” for DHCP setting or “Use following IP Address” for manual IP setting. Type the correct IP Address, Subnet Mask, Default Gateway as required. DNS server can be set as DHCP or manual setting as well. Click “Next” to go to the next step, Click “Back” to go back to previous step or click “Cancel” to go back to the “System Information Page”. Note: Using Manual IP address is highly recommended. 28 Step 5 Time Setting The system date, time, and time zone can be input in this screen. MN2L also support NTP (Network Time Protocol) server. NTP server is mainly used on the network that provides clients with network time. The MN2L provides Microsoft (time.windows.com) and USA NIST (time.nist.gov) NTP servers for you to choose from. You can also provide a NTP server address under “User Define Field”. 29 Step 6 Settings Confirmation This screen will show the summary of the setting. If the settings are correct, click the “Complete” button to confirm the configuration, or use “Back” button to return to the previous page to make the modifications. “Cancel” button will cancel all the change and go back to the “System Information” page. 30 3.3.2 Add User New users can be added using the “Add User” function in the following steps. Step 1 Configure the user account and password Click “Add User” and the MN2L will prompt to enter the new user’s username and password. You can also setup private folder and Quota options. Click “Next” to go to the next step or click “Back” to go back to previous step. Note: 1. The user name is limited to 20 characters. Only lower case characters, numbers, and hyphens (-), underscore (_), and dot (.) symbols are allowed. The first character must be a character. 2. The password is limited 16 characters. Only lower case letters are accepted. Step 2 User Management After the account/password is configured, the new user can be applied to a user group. To add the user to a group, select a group from the “Not Members” list and click “Add”. To remove from a group, select a group from the “Member of” list and click “Remove”. Click “Next” to proceed to next step or go on without any user group setup. (If this is the initial configuration, only the “guest-share” group will be available) 31 Step 3 Share Permission Configure the user sharing permissions. You can select from “Read Only” and “Writable”. After the configuration, the newly added user’s private folder can be found in the Network. Click “Complete” to finish the configuration. 32 3.3.3 Add Group Using Group can put Users together so that it can be better managed. Group can be added using “Add Group” Wizard. Step 1 Setup group name Type in the group name you want to create. 33 Step 2 Select group members Add the users from the right to the newly created group. Select a user from the “Not Members” list and click “Add”. To remove a user from the group, select a user from the “Members” list and click “Remove” Step 3 Setup share permission Configure the created group sharing permissions. “Writable”. 34 You can select from “Read Only” and 3.3.4 Add Share Share is the folder that allows users or groups to share data. Following the below step for creating share. Step 1 Setup shared folder name Enter the folder name and click to the blank space on the screen, the MN2L system will automatically fill-in the folder path for you. Note: The share name allows up to 20 characters. Only lower case characters, numbers, and hyphens (-), underscore (_), and dot (.) symbols are accepted. The first character must be a character. 35 Step 2 Windows, FTP Access To configure the folder access permission, select “Allow for all” option in the upper left to allow access to all users. Or select the users from the list to grant access permission individually. Step 3 NFS Access To configure NFS access permission, checkmark the “Allow for all” option to allow all access; or enter the IP address and Subnet of the device to grant permission for specific IP address. 36 3.4 Control Panel Control Panel is the centralized management page for administrator to manage the MN2L. Under Control panel, there are “User and Groups”, “File”, “System”, “Network Service”, “Maintenance” and “Log File”. We will describe in detail in the following sections. 37 3.4.1 Users and Groups You will be able to configure and manage users and groups from this option. You will find “User Management” and “Group Management” under these sections. 38 3.4.1.1 User Management In the User Management menu, all users on the system will be listed. You can use the “Save” and “Delete User” buttons to add or delete users. Press “Groups” to add the user to a specific group. • • Add new user Type-in the information, such as User Name, Password and Description and press “Save”. You can also setup private folder and Quota options. Add Users to Groups Select the users form “Existing Users” list, and click “Group”. The Group Management page for the user will show: 39 o • To add the user to a group, select a group from the “Not Members” list and click “Add”. To remove from a group, select a group from the “Member of” list and click “Remove”. Click “Save” to proceed to confirm or click “Cancel” to cancel the setting. Delete User Select the users form “Existing Users” list, and click “Delete User”. A confirmation is required. To confirm, click “OK” and the user will remove from the “Existing Users” list. Note: 1. The user name is limited to 20 characters. Only lower case characters, numbers, and hyphens (-), underscore (_), and dot (.) symbols are allowed. The first character must be a character. 2. The password is limited 16 characters. Only lower case letters are accepted. 40 3.4.1.2 Group Management In the Group Management menu, groups on the system will be listed. You can use the “Save” and “Delete Group” buttons to add or delete a group. To add or remove users from the group, first select the group and press “Members” to manage the users. • • Add a new Group Type the desired name in the “Group Name” and click “Save” Modify users to a specific group Select a group from “Existing Groups” lists and press “Members” to enter the group members’ page. To add a user, select a user from the “Not Members” list and click “Add”. To remove a user from the group, select a user from the “Members” list and click “Remove”. Click “Save” to confirm the change or click “Cancel” to cancel. 41 • Delete Group Select a group from “Existing Groups” lists and click “Delete Group”. A confirmation will require. To confirm, click “OK” and the user will remove from the “Existing Groups” list. 42 3.4.2 File The “File” section will allow you organize the file share setting and folder. This section includes “File Server” and “Share Management”. 43 3.4.2.1 File server “File Server” includes are the setting for the Microsoft Windows Network, FTP Server, NFS Server and Guest Access Service. • • Windows Settings To enable file sharing in Microsoft Windows Networking, check “Enable” to allow Microsoft Windows connection. Under “Workgroup” Field, type the “Workgroup” name in your network. You can also input the WINS Server IP address if you have a WINS Server in your network. FTP server setup To enable FTP server, check “Enable” to allow FTP server. The default TCP/IP port number is 21. You can change to other available if desire. Note: The FTP port can be changed but make sure that it does not conflict with port numbers used by other applications. For example, do not set the FTP port to 80 since it is reserve for HTTP Web Browser. • • NFS Server To enable NFS server sharing, check “Enable” to activate NFS server. Guest Access 44 Guest Access is an anonymous account that does not require password. To enable Guest Access, check “Enable” to activate Guest Access. You can also setup a Guest Quota to limit the storage usage. Check “Enable Quota” and input the amount in MB. After the setting is complete, click “Save” to confirm. 3.4.2.2 Share Management The “Share Management” section allows you to organize your shared folder. The Share Management screen will show all the shared names. The system default folder is “public”. • Create Sharing To create a share folder, enter the name of shared folder in the “Share Name” field, and the system will automatically fill-in the folder “Path”. Press “Save” to create a new share name. Note: The share name allows up to 20 characters. Only lower case characters, numbers, and hyphens (-), underscrore (_), and dot (.) symbols are accepted. The first character must be a character. • Folder Access Premission Setting Select and highlight the share folder name under “Existing Shares”. Click the “Windows, FTP Access” or “NFS Access” buttons to change the shared folders properties. o Windows and FTP Access 45 To configure the folder access permission, select “Allow for all” option in the upper left to allow access to all users. Or select the users from the list to grant access permission individually. o NFS Access To configure NFS access permission, checkmark the “Allow for all” option to allow all access; or enter the IP address and Subnet of the device to grant permission for specific IP address. 46 • Delete Share Select the folder name and click “Delete Share” to delete the shared name. The folder will be removed after the confirmation. Note: Delete Share cannot be reverse and all files under the deleted folder will be removed. 3.4.3 System The “System” Sections will allow you to control MN2L System setting. System Setting includes “LAN Setting”, “Time Setting”, “Turn Off Server”, “Information”, “Disk Usage” and “Error Notification”. 47 3.4.3.1 LAN Setting “LAN Setting” page allow you to change the IP address and Hostname. • Hostname setting Configure the Host Name for MobileNAS MN2L on the network. This is the NETBIOS name of the MN2L. Note: 1. Character is limited to 15 and only allow alphanumerical characters and hyphens (-). 2. Since the MobileNAS MN2L’s default Host Names are all identical, make sure to change the Host Name for each unit if two or more MobileNAS MN2L units are used within a network. This will avoid identification errors when configuring the IP. • IP address Setting Select “Obtain IP Address Automatically” for DHCP setting or “Use following IP Address” for manual IP setting. Type the correct IP Address, Subnet Mask, Default Gateway as required. DNS server can be set as DHCP or manual setting as well. Note: 1. Using Manual IP address is highly recommended. 3. For DHCP setting, the system will automatically obtain an IP address from the DHCP server. If a DHCP server is inaccessible, the MobileNAS MN2L will automatically enable its DHCP server function and become a DHCP server. Please confirm the IP address for MobileNAS MN2L (default is 192.168.1.1) and the PC has to be in the same network to be able to log into 48 MobileNAS MN2L. More information about DHCP server can be found in “Section 3.4.41, DHCP Server” • “MAC Address” The MAC address for MobileNAS MN2L is shown for your reference. After the setting is complete, click “Save” to confirm. 3.4.3.2 Time Setting The system date, time, and time zone can be input in this screen. NTP (Network Time Protocol) server can also be setup in this section. • Date • Time • • o The current date in Month (Mon), Day (Date) and Year The current Time in Hour, Minute (Min) in AM or PM Time Zone You can change the Time Zone of your location. The default setting is (GMT -08:00) Pacific Time (US & Canada), Tijuana. NTP (Network Time Protocol) server. NTP server is mainly used on the network that provides clients with network time. The MN2L provides Microsoft (time.windows.com) and USA NIST (time.nist.gov) NTP servers for you to choose from. You can also provide a NTP server address under “User Define Field”. Update Time “Update Time” will be available after select a NTP server. Once “Update Time” executive, the time will update automatically. 49 3.4.3.3 Turn Off Server You can restart or turn off the MN2L system in this section. • Restart To restart the system, click “Restart” and confirm by clicking OK. The system will restart and go to reboot screen. The login screen will display within 3 minutes. If the login pages does not display, click “Login” button to refresh. 50 Note: The unit status LED will be flashing blue when the system is rebooting. • Turn Off To turn off the system, click “Turn Off” and confirm by clicking OK. The system will start the shutdown process. You can close the web page when the system is turning off. 51 Note: 1. The unit status LED will be off when the system is turn off. 2. The system is turn off but the power is still on. You can turn off the power switch located on the back to power off. 3.4.3.4 Information This is the system information page. The following will be displayed: • Product Name • Firmware Version • Product Vendor • IP Address 3.4.3.5 Disk Usage The section will show the current disk usage status. It includes 2 sections: “Summary”, which shows the total disk usage, and “User”, which shows the users quota’s usage • Summary In “Summary” section, the summary of the disk usage will be display: o Disk Name: The name of the RAID volume/Physical Disk o Total: the Total Capacity of the RAID volume/physical disk o Used: The used space of the RAID volume/physical disk o Free: The free space left o Used Percentage: The percentage used. 52 • User In “User” section, the user’s quota usage will be display: o User Name: The username of the user o Quota: The disk space quota that you assigned o Used: The used disk space of the user o Free: The free space of the user o Used Percentage: The percentage used 53 The “Refresh” button will allow you to receive up to date information. 3.4.3.6 Error Notification Setting The “Error Notification Setting” will allow administration to monitor the system status. Monitoring Services Setting includes: • Disk Usage The system will notify the administrator when disk capacity reaches 90% full. Check the checkbox to enable this monitoring option. • Windows File Sharing Server The system will notify the administrator when Windows File Sharing Server (Samba server) is not working. Check the checkbox to enable this monitoring option. • FTP Server The system will notify the administrator when the FTP server is not working.. Check the checkbox to enable this monitoring option. • DHCP Server The system will notify the administrator when the DHCP server is not working. Check the checkbox to enable this monitoring option. • Check Interval The time between each service is check. Configure the interval to perform system check hourly or daily. • Email Notification Setting Select “Enable” to activate notification through Email. Error Handling Mail Server Enter the Mail server IP address for sending notification. o Error Handing Mail Addresses Enter the E-mail address to receive the notification. Note: 1. Only local e-mail server is supported. 2. The setting must be saved before testing. Click “Save” located on the bottom of the page before testing. 3. The setting can be tested by clicking “Send Test Email”. A testing e-mail will send to the address you specify • Pop-Up Notification Setting Select “Enable” to activate notification through Pop-up. o Error Handling Pop-Up Machines Specify the Host Name of the computer that will display the pop-up. 54 Note: 1. Only local computer with the same workgroup is supported. 2. The setting must be saved before testing. Click “Save” located on the bottom of the page before testing. 3. The setting can be tested by clicking “Send Test Pop-up”. A pop-up message will send to the computer you specify. 3.4.4 Network Service The “Network Service” sections allow you configure the advance network setting. The setting includes “DHCP server”, “Bonjour” network and “BTorrent” bit torrent download program. 3.4.4.1 DHCP Server DHCP function will allow MN2L act as DHCP server, which will assign IP address to the computer in the same network. • Enable DHCP Server To activate the DHCP server, select “Enable Server” and input the following: o Subnet Mask (optional) o Default Gateway (optional) o Primary DNS (optional) o Secondary DNS (optional) o Other DNS (optional) o DHCP IP address Start o DHCP IP address End o Maximum Lease Time 55 • DHCP Lease List DHCP lease list will provide a list of the DHCP client that assign by the MN2L DHCP server. The information includes: o HostName o IP Address o MAC Address o Lease Time The “Refresh” button will allow you to receive up to date information. • Static IP “Static IP” allow you to manual input IPs that will assign a specific IP address to a computer. You can manage the list in this section. o The “Existing Static IP” table will show the IP address that the administrator already created. To modify the setting, select the IP address, change the setting and click “Save” button. o To Create a Static IP Input the IP and MAC address to the “Static IP Address” and “MAC Address” field Click Save to setting. The IP address will save in the “Existing Static IP address” table. o To Delete a Static UP Select an IP address from the “Existing Static IP” table. Click “Delete Static IP” button 56 Note: For MN2L DHCP setting, the system will automatically obtain an IP address from the DHCP server. If a DHCP server is inaccessible, the MobileNAS MN2L will automatically enable its DHCP server function and become a DHCP server. Please confirm the IP address for MobileNAS MN2L (default is 192.168.1.1) and the PC has to be in the same network to be able to log into MobileNAS MN2L. 3.4.4.2 Bonjour MobileNAS MN2L supports the Apple Bonjour protocol and iTunes server. With Bonjour support, the MN2L can be easily setup in the Mac OS 10.4 network. iTunes server can allow MN2L act as a iTunes server to share music to the iTunes installed PC or MAC. • • To enable Bonjour Setting Click “Enable” Check box and click “Save” To enable iTunes Server Click “iTunes Enable” Check box and click “Save”. All music files is stored under the “\public\music” folder. The iTunes software will be automatically discover the MN2L and play back through iTunes software. 57 3.4.4.3 BTorrent MobileNAS MN2L supports BTorrent (BitTorrent) P2P downloading feature. You can provide the Bit Torrent file and MN2L will download the file for you. Five seeds can be downloaded simultaneously. 58 • • • • “Max bandwidth down(KB/s) - Set Max bandwidth download speed limit “Max bandwidth up(KB/s) - Set Max bandwidth upload speed limit “Save”- Save the Bit Torrent upload/download setting To Start a download: o Select the torrent file by go to “Open torrent file”, click browse o Click the “Add” button to add the torrent file to the queue. o Once the torrent file is added, a table of the downloading files will display. You will find: ID Name Size Percentage Download Upload Client Status Start/Stop/Delete Button Refresh To control the download service, click “Start” to start the download, “Stop” to stop the download and “Delete” to delete the download task. The “Refresh” button will allow you to receive up to date information. 59 3.4.5 Maintenance “Maintenance” section allows you to control the system setting s. The “Maintenance” menu includes “Disk Utility”, “RAID Setting”, “Firmware Upgrade”, “Save Configuration”, “Restore Configuration”, and “Factory Reset”. 3.4.5.1 Disk Utility Disk Utility display the physic status of the hard disk installed. It includes the vital information of the hard disk, such as hard disk name, file system type, capacity, used capacity, strip setting and all disk configurations. Once the Hard Drive is installed, a table of the Disk information will display: • Device Name – The physical name of the hard drive • Type – USB or SATA/IDE Drive • Mount Point – Linux Mount Location • Status – Showing the Formating Status as well as other Status • Encrypt: Password / Format Type MobileNAS MN2L can apply 128bits loop-AES encryption to the ext2 file system. To use this feature, you will be required to enter a 20-character password and reformat the hard disk. Click the “Format” button to format the hard disk. MobileNAS MN2L supports ext2, ext3, and FAT32 file systems. • Scan Disk Scandisk will check the bad section of the hard disk. • Umount Umount will remove the hard drive the software link from the system. • Health Health is the SMART information from the hard drive. If your hard disk supports S.M.A.R.T function, pressing this button can show the hard disk information. • Disk spin down time 60 This will allow the disk to spin down after period of no usage. Set the disk spin down time in minutes and click “Save”. MobileNAS MN2L supports USB drives data sharing thru the USB port located at the rear of the unit.. When a USB drive is plugged in, the drive will be shown as “\mut\usb1” in the “Disk Utility”, and the shared folder will be automatically named “usb1” in Workgroup Network. Note: 1. After the system detects the USB drive, you must first configure the access permission before reading from “usb1” folder. 2. To remove the USB drive, please first “Unmount” the drive before unplugging. 3.4.5.2 RAID Setting MobileNAS MN2L supports RAID 0 and RAID 1. If two hard disks are installed, “RAID Setting” page will show two options “RAID 0, RAID 1”. If only one hard disk installed, it will not allow to create any “RAID system”. • To Create a RAID system o Select the “RAID level” desired: RAID 0, RAID 1 or Linear (Spanning) o Select the “File system”: EXT2 or EXT3 o Click “Create RAID System” o Confirm creating the RAID system by clicking OK. Please note that all data will be removed once the process begins. Once the RAID system process begins, the Disk Status screen will display the percentage of the RAID system completion. Please wait until the process is finish. 61 3.4.5.3 Firmware Upgrade Firmware upgrade allows update your MN2L system OS to add more functionality. Please note that during the firmware upgrade, all network services will be interrupted. After the firmware is updated, the system will reboot automatically. The current firmware will also display in this page. 62 • To update the firmware o Click “Browse” to select the downloaded firmware update file. o Click “Start Upgrade” o Confirm the Firmware update by clicking “OK” button. o It will first upload to the MN2L and take about 15 minutes to complete the process. Do not interrupt the firmware upgrade procedure as it will damage the MN2L. o Once the firmware upgrade is done, the MN2L will restart and the new firmware will be installed. Note: Improper upgrade of the firmware may cause the system to become un-usable. For questions on upgrading your firmware, please first contact Sans Digital technical support, or e-mail us at: [email protected] 63 3.4.5.4 Save Configuration The current system configuration file can be downloaded and backup to your computer. This will restore the system configuration if the MN2L has been reset. The default file name is “config.tar”. • To Save the System Configuration o Click “Save” button o Click “Save” on the pop up Windows 64 o Select the location you want to store the backup configuration, and click “Save”. 3.4.5.5 Restore Configuration When the system configuration is damaged, lost, or modified, you can use “Restore Configuration” to restore the previously saved configuration file, described in the previous sections. • To Restore the Configuration o Click “Browse..” to locate the configuration files o Click “Restore” to start the restore configuration process. o The restore configuration process will take about 3 minutes. Once the restore configuration process is finished, the MN2L will go back to the login page. If the login pages does not display, click “Login” button to refresh. 65 3.4.5.6 Factory Reset The Factory Rest will restore the configuration back to default setting. Please note the all the user, group, and network setting will be remove. 66 • To perform Factory Reset o Click “Factory Reset” Button o Click “OK” to confirm to perform Factory Reset o The factory reset process will take about 3 minutes. Once the factory reset process is finished, the MN2L will go back to the login page. If the login pages does not display, click “Login” button to refresh. Note: After Factory Reset, the default Network Setting, Administration Username and Password will be restored: Default Setting: IP Address: DHCP Username: admin Password: admin 67 3.4.6 Log File Login Files provide administrator files to diagnose the problem of the MN2L. Log Files include: “Samba Log”, “FTP Log”, “DHCP Server Log”, “System Log” and “Administration Log”. 3.4.6.1 Samba Log Samba Log provides the information about the Samba Service (Microsoft Windows Networking). Click “Clean” to clear the log. 68 3.4.6.2 FTP Log FTP Log provides the log in information about the FTP Service. Click “Clean” to clear the log. 3.4.6.3 DHCP Server Log DHCP Server Log provides the DHCP lease information. Click “Refresh” to get updated information. 69 3.4.6.4 System Log System Log provides the information about the MN2L System information. Click “Clean” to clear the log. 3.4.6.5 Administration Log Administrator Log provides the administration information. Click “Clean” to clear the log. 70 3.5 Personal Info “Personal Info” section contains information about the information about the account that log in. It only contains “Account” under “Personal Information side menu. 3.5.1 Personal Information You can change password, select Language Preference or check on the Disk Quota information under the “Account” section. 3.5.1.1 Account “Account” is the lone option in this page. The password, Language preference and disk quota information will be display in this sections. • To Change the password: o Type the new password on the first password field o Confirm the password by typing the password again on the second password field o Click “Save” to update the password. • To Change the Language Preference o Select from the “Language Preference”: “Set From Browser Options”, “English”, “Traditional Chinese”, “Simplified Chinese” o Click “Save” to update. • To Change the Description o Description is the optional field to provide additional user information. Type in the desired information o Click “Save” to update. 71 • 3.6 The Disk Quota information will also display in the same page. Click “Refresh” to get updated status. Logout Click “Logout” to logout of the MN2L anytime. Click “OK” on the confirmation box. 72 Appendix A - FAQ 1. A: MobileNAS MN2L cannot be detected through the setup software? (1) Make sure that MobileNAS MN2L and PC is connected to a switch through the RJ-45 ports and the unit is powered. (2) It takes 2 minutes from turning on the MobileNAS MN2L to starting up the system. During this time, no MobileNAS MN2L will be detected. Once the MN2L is finish booting up, the status LED will stay on in BLUE. (3) Check for IP conflicts and change the IP addresses accordingly. (4) Press the “Reset” button at the back of MN2L unit to reboot the system. 2. A: I cannot access MobileNAS MN2L? (1) Check the network connections. (2) Restart the MobileNAS MN2L unit. 3. A: I cannot access the folder? (1) Make sure the account and password is correct. (2) Restart your computer if you have log in to two different folders. 4. A: Why the MobileNAS MN2L cannot be used after changing the hard disks? The system configuration file of the MobileNAS MN2L is stored on the hard disk. If remove the hard drive with the system in the MN2L, the MN2L will not be able to function correctly and the system information will be lost. To avoid above this situation, remove the hard drive only if in RAID 1 mode and you confirm after removing, the unit stay function as normal. Restart after the new hard drive is installed to confirm the functionality. 5. During the initial set up of the MobileNAS MN2L, how is the IP address known and then be configured correctly if under MAC or LINUX operating system environment. Under the MAC or LINUX operating systems environment, the [.exe] file will be work and the IP address cannot be automatically detected. To be able to configure MN2L, you can utilize the MN2L DHCP server function, which will activate when the MN2L cannot properly obtain an IP address: Step 1 Connect the MobileNAS MN2L and the Computer to the networking switch. Be sure they are on the same networking switch. If DHCP server is available in your network, temporary disable it. Step 2 Turn on the power of both system units. Step 2 Configure the IP address of the main system to 192.168.1.x, with the ‘x’ not being a 1. Step 3 Open the web browser and enter 192.168.1.1 to log in. A: 6. A: The Pop-Up Notification has been setup. But the administrator computer still do not show notifications when an error has occurred. Please check the following: (1) When setting up the Pop-up Notification function, make sure to enter the correct “Host Name” of the administrator computer. (2) Go to “Computer management” -> “services”. Enable the “Alerter” and “Messenger” service. 73