1
3
8. SETTING PARAMETERS
IMPORTANT
8.1
Settings Related to Inputs and Outputs
8.1.1
8.1.2
7.2
Connecting the Handy Terminal
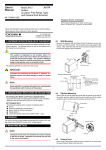
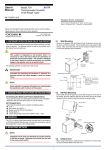
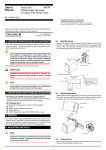
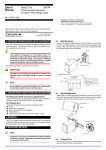
Connect the modular jack-to-connector adapter to the connection
cable (with 5-pin connector) of the Handy Terminal and then connect this adapter to the communications connector of the distributor.
Communications connector
(for connecting the
Handy Terminal)
Alarm-1 LED
(lights up if an alarm occurs)
ALM1
ALM2
Alarm-2 LED
(lights up if an alarm occurs)
Hysteresis
(Fixed to 0.2%)
8.1.3
Input signal (X)
Low-cut point
Direction of Output Action
Analog output signals can be reversed. To reverse the signal from output-1, set D38: OUT1 DR to REVERSE. For output-2, set D39 OUT2
DR to REVERSE. To return the output-1 signal to normal, set D38:
OUT1 DR to DIRECT. For output-2, set D39: OUT2 DR to DIRECT.
8.2
Settings Related to Communication
Function
Set the following parameters when output-2 is specified for communication function. For more information on the communication
function, see the Instruction Manual for VJ Series Communication
Function (IM 77J1J11-01E).
8.2.1
Communication Protocol
Set the communication protocol by selecting from among PCLINK, PC-LINK WITH SUM, MODBUS ASCII, MODBUS
RTU, and LADDER in F01: PROTOCOL.
8.2.2
* The LEDs are provided only when output-2
is specified for alarm output.
Y=X
0
Front Panel
The communications connector in the front panel is used for setting
up parameters through the Handy Terminal. The alarm-1 and alarm2 LEDs light up if an alarm occurs (those LEDs are provided only
when the output-2 is specified for alarm output).
Low-cut Function
Set this parameter when an input signal is square-root extracted for
use. Set it in D12: LOW CUT numerically.
● Setting range: A range of 0 to 100% of input range
● Setting resolution: 0.1%
7. DESCRIPTION OF FRONT PANEL
AND CONNECTION OF HANDY
TERMINAL
7.1
Square Root Extraction
Select SQR in D11: LINEARIZE.
Output signal (Y)
● If this instrument is used in a manner not sepecified in
this manual, the protection provided by this instrument
may be impaired.
● If the product is operated by a power supply exceeding
the specifications, the product may become extremely
hot and, as a result, damaged. To prevent this, ensure
the following before turning on the power.
(a) The voltage of the supplied power and the input
signal level meet the specifications of the product.
(b) External wires are connected to the correct terminals (refer to Chapter 5).
● Do not operate the product in the presence of flammable
or explosive gases or vapors. To do so is highly dangerous.
● The product is sensitive to static electricity; exercise
care in operating it. Before you operate the product,
touch a nearby metal part to discharge static electricity.
Set the parameters using the Handy Terminal. Refer to the list of parameters in this manual and the Instruction Manual for Handy Terminal (IM JF81-02E).
Communication Address
Set the address number of the distributor numerically in a range of
1 to 99 in F02: ADDRESS.
8.2.3
Baud Rate
Set the baud rate by selecting from among 1200, 2400, 4800, and
9600 bps in F03: BAUD RATE.
Fig. 7.1 Front Panel
Communications
connector
F9182EE
Connection cable (optional)
8.2.4
Parity
Select and set NONE, EVEN, or ODD in F04: PARITY.
8.2.5
Data Length
Select and set 7 bits or 8 bits in F05: DATA LEN.
8.2.6
Stop Bit
Select and set 1 bit or 2 bits in F06: STOP BIT.
VJ Series
E9786WH
Modular jack-to-connector
adapter (optional)
JHT200
Handy Terminal (optional)
Fig. 7.2 Connecting the Handy Terminal
All Rights Reserved. Copyright © 1999, Yokogawa M&C Corporation
8.3
Settings Related to Alarm Output
Set the following parameters when output-2 is specified for alarm
output.
8.3.1
Alarm Setpoints
Set the alarm setpoints of alarm-1 and alarm-2 in E03: SET
POINT1 and E04: SET POINT2 numerically.
● Setting range: A range of 0 to 100% of input range
● Setting resolution: 0.1%
IM 77J01A07-01E
3rd Edition Mar.31,1997-00