1
LCD Digital Camera
QV-4000
User’s Guide
Congratulations
upon your
selection of the
new CASIO
Digital Camera.
To get the most
out of your new
CASIO Digital
Camera, make
sure you read
this manual
carefully and
keep it on hand
for future
reference.
Downloaded from ManualsCamera.com Manuals
E
CONTENTS
CONTENTS
Monitor Screen
Indicators
....................................... E-22
Attaching
a Conversion
Lens,
REC mode
E-22
Close-up
Lens, or Filter ........................................ E-106
the Exposure Mode ............................... E-82
E-6Specifying
INTRODUCTION
Full Auto
E-82
Program AE
Quick
Reference .......................................................E-83
E-6
Aperture Priority AE
E-84
Getting Ready
E-6
Shutter Speed Priority AE
E-85
Recording an Image
E-7
Manual Exposure
E-87
Viewing (Playing Back) an Image
E-8
Using
the Continuous
Deleting
an Image Shutter Mode ....................... E-88
E-9
PLAY mode
Installing
a Conversion Lens or Close-up Lens
Changing
the Contents of the Monitor Screen
Using
a Filter
Indicator display ...................................................... E-24
Operation
Indicator Lamp ....................................... E-25
E-109
PLAYBACK
Operation/card access lamp
Using
the AEB
(Automatic Exposure Bracketing) Mode .. E-89
Features
..................................................................
E-11
To
configure
AEB Mode settings
Recording
Features
E-23
E-106
E-24
E-108
E-25
Flash
ChargeOperation
lamp
E-26
Basic
Playback
..................................... E-109
E-89
E-13
AF Assist Light/Self-timer Lamp
E-26
To record an image using AEB
E-90
Precautions
............................................................. E-14
Creating
a Panorama
General
Precautions.............................................. E-91
E-14
Playing a Movie ..................................................... E-110
Using the Bundled Accessories .............................. E-27
Playing
a Panorama
E-111
Attaching
the Neck..............................................
Strap
E-27
Operating
conditions
E-15
Recording
a Movie
.................................................. E-93
Adjusting
Length ofImage
the Neck
Strap
E-27
Enlarging
thethe
Playback
..............................
E-112
Condensation
E-15
RECLens
Mode
Camera Settings .................................. E-94
Precautions
E-16
Specifying
Image Size
and Quality
E-94
About the camera’s
backlight…
E-16
Enhancing Certain Colors
E-96
Using the Filter Function
E-97
E-17 GETTING
ACQUAINTED
Specifying Color
Saturation
E-97
Specifying Contrast
E-98
Specifying
Sharpness
E-98
General
GuideOutline
.........................................................
E-17
Turning
E-99
Front the On-screen Grid On and Off
E-17
Inserting
a Time Stamp into an Image
E-100
Back
E-18
Specifying
Power On Default Settings
E-101
Side
E-19
Resetting
E-102
Bottom the Camera
E-19
Loading Batteries
E-29
Using
Power
E-33
Using
theAC
Slide
Show Feature .............................. E-117
Turning the Camera On and Off
E-35
Resizing
Image
................................................ E-118
Poweran
Save
Settings
E-35
Memory Cards ......................................................... E-37
Inserting a Memory
Card into the Camera
E-119 DELETING
IMAGES
E-37
Removing a Memory Card from the Camera
E-38
Formatting
a Memory Image
Card ............................... E-119
E-39
Deleting
the Displayed
Memory Card Precautions
E-40
Deleting
Selected Precautions
Images ..................................... E-120
IBM Microdrive
E-41
E-104
E-104
Downloaded from ManualsCamera.com Manuals
E-28
Displaying
the Histogram
and
Battery Handling
Precautions
E-32
Other
Image Indicator
Information ................................... E-115
Low Battery
E-33
Using
the Remote
Shutter Release ...................... E-103
Mode Dials
..............................................................
E-20
an External
Flash ........................................
Using the
Control Button
.........................................E-104
E-21
External Flash Unit Requirements
Attaching an External Flash Unit
Using the Lens Cap
Displaying the 9-image View ................................ E-113
Power
Requirements
E-29
Selecting
a Specific ..............................................
Image in the 9-image View
E-114
Deleting
All Images
in Selected Folders ............... E-121
Menu Screens
.........................................................
E-42
Deleting All Unprotected Images .......................... E-122
E-2
E-124
MANAGING
CONTENTS
Using the
a Memory
Card to Transfer Image Data .... E-140
Flash .......................................................
E-55
Setting the Current Date and Time ......................... E-43
Setting the Date and Time
E-43
Selecting
the Date
Format
E-44
Folders
and Files
...................................................
E-123
E-45
Folders
Files
BASIC IMAGE RECORDING
Memory Card
Selecting
the Flash
Data Mode
FlashProtocol
DCF
Status Indicators
AdjustingCard
Memory
the Flash
File Structure
Intensity
Changing
Image
Files
theSupported
Sync Speed
by the Camera
Selecting a Flash
Precautions
when Sync
UsingSetting
a Memory Card
Precautions
on a Computer
when Using Flash
E-123
E-124
Protecting Images Against Deletion ..................... E-125
Protecting
Images
Using
the FullSelected
Auto Mode
........................................E-125
E-45
Selecting
Using
the the
HTML
Focus
Card
Mode
Browser
......................................
............................. E-145
E-61
Protecting
Unprotecting All Images
Recording and
Precautions
E-47
in Selected Folders
E-126
Focusing
E-47
Protecting
Unprotecting All Images
E-127
About Autoand
Focus
E-48
Image
Recording when the Batteries are Low
E-48
DPOF
.....................................................................
E-127
About
RECSettings
Mode Monitor
ScreenImages
E-49
Makingthe
DPOF
for Particular
E-128
Specifying
Using
Auto the
Focus
Card
(Multi-area
Browser Type
Auto Focus)
E-145
E-62
Using theCard
Viewing
SpotBrowser
Auto Focus
File Contents
Mode
E-147
E-63
Using the
Saving
Card
Manual
Browser
Focus
Files
Mode
E-149
E-64
Using the Infinity Mode
E-65
Using the Macro Mode
E-65
E-150 REFERENCE
Using Focus Lock
E-66
Expanding the Focus Area
E-67
Camera
Shake
Indicator
E-67
Camera
Menus
......................................................
E-150
REC mode
Selecting
the Metering Mode ..................................E-150
E-68
PLAY mode
E-151
Making
DPOF
Settings
for Particular Folders
E-129
Using
Optical
Zoom
................................................
E-49
Making DPOF Settings of All Images
Usingon
the
for Recording ........................E-129
E-51
theViewfinder
Memory Card
Using
Self-timer
................................................
E-52
PRINTthe
Image
Matching
......................................... E-130
Camera Orientation Detection ................................ E-53
Selecting White Balance ......................................... E-69
Mode
Settings ....................................................... E-152
Adjusting White Balance Manually
E-70
E-131 OTHER SETTINGS
E-54 OTHER RECORDING FUNCTIONS
Settings in Each Mode
E-152
Using
AEMode
Lock +.........................................................
E-71
Drive
Exposure Mode Combinations
E-153
Changing the Menu Language ............................. E-131
Installinga aSingle
Different
Language
Set .....................E-131
Recording
Image
(1-Image)
E-54
Previewing
the Last Image
Recorded
E-54
Turning
the Confirmation
Beep
On and Off .......... E-135
Exposure
Compensation
.........................................E-154
E-72
Full
Auto Mode
Settings ........................................
Menu
Using
theSettings
Histogram ...............................................E-154
E-74
Non-Menu Settings
Deleting the Last Image Recorded in the REC Mode E-55
Copying a Scene from the CD-ROM Best Shot Library E-77
Specifications
........................................................
E-160
Registering Your
Own Best Shot Scenes
E-80
Connecting to a Television .................................... E-136
Specifying the Location of Best Shot Mode Scenes
E-137
Connecting to a Computer .................................... E-138
Downloaded from ManualsCamera.com Manuals
E-154
Using Digital Zoom .................................................. E-75
Troubleshooting ..................................................... E-155
Instant
Setup Using the Best Shot Mode ...............E-158
E-76
Messages
E-136 CONNECTING TO EXTERNAL EQUIPMENT
Selecting the Video Output Signal Mode
E-141
E-55
E-141
E-56
E-142
E-57
E-143
E-57
E-58
E-144
E-60
E-3
E-81
CONTENTS
CONTENTS
Monitor Screen
Indicators
....................................... E-22
Attaching
a Conversion
Lens,
REC mode
E-22
Close-up
Lens, or Filter ........................................ E-106
the Exposure Mode ............................... E-82
E-6Specifying
INTRODUCTION
Full Auto
E-82
Program AE
Quick
Reference .......................................................E-83
E-6
Aperture Priority AE
E-84
Getting Ready
E-6
Shutter Speed Priority AE
E-85
Recording an Image
E-7
Manual Exposure
E-87
Viewing (Playing Back) an Image
E-8
Using
the Continuous
Deleting
an Image Shutter Mode ....................... E-88
E-9
PLAY mode
Installing
a Conversion Lens or Close-up Lens
Changing
the Contents of the Monitor Screen
Using
a Filter
Indicator display ...................................................... E-24
Operation
Indicator Lamp ....................................... E-25
E-109
PLAYBACK
Operation/card access lamp
Using
the AEB
(Automatic Exposure Bracketing) Mode .. E-89
Features
..................................................................
E-11
To
configure
AEB Mode settings
Recording
Features
E-23
E-106
E-24
E-108
E-25
Flash
ChargeOperation
lamp
E-26
Basic
Playback
..................................... E-109
E-89
E-13
AF Assist Light/Self-timer Lamp
E-26
To record an image using AEB
E-90
Precautions
............................................................. E-14
Creating
a Panorama
General
Precautions.............................................. E-91
E-14
Playing a Movie ..................................................... E-110
Using the Bundled Accessories .............................. E-27
Playing
a Panorama
E-111
Attaching
the Neck..............................................
Strap
E-27
Operating
conditions
E-15
Recording
a Movie
.................................................. E-93
Adjusting
Length ofImage
the Neck
Strap
E-27
Enlarging
thethe
Playback
..............................
E-112
Condensation
E-15
RECLens
Mode
Camera Settings .................................. E-94
Precautions
E-16
Specifying
Image SizebacklightÉ
and Quality
E-94
About the cameraÕs
E-16
Enhancing Certain Colors
E-96
Using the Filter Function
E-97
E-17 GETTING
ACQUAINTED
Specifying Color
Saturation
E-97
Specifying Contrast
E-98
Specifying
Sharpness
E-98
General
GuideOutline
.........................................................
E-17
Turning
E-99
Front the On-screen Grid On and Off
E-17
Inserting
a Time Stamp into an Image
E-100
Back
E-18
Specifying
Power On Default Settings
E-101
Side
E-19
Resetting
E-102
Bottom the Camera
E-19
Loading Batteries
E-29
Using
Power
E-33
Using
theAC
Slide
Show Feature .............................. E-117
Turning the Camera On and Off
E-35
Resizing
Image
................................................ E-118
Poweran
Save
Settings
E-35
Memory Cards ......................................................... E-37
Inserting a Memory
Card into the Camera
E-119 DELETING
IMAGES
E-37
Removing a Memory Card from the Camera
E-38
Formatting
a Memory Image
Card ............................... E-119
E-39
Deleting
the Displayed
Memory Card Precautions
E-40
Deleting
Selected Precautions
Images ..................................... E-120
IBM Microdrive
E-41
E-104
E-104
Downloaded from ManualsCamera.com Manuals
E-28
Displaying
the Histogram
and
Battery Handling
Precautions
E-32
Other
Image Indicator
Information ................................... E-115
Low Battery
E-33
Using
the Remote
Shutter Release ...................... E-103
Mode Dials
..............................................................
E-20
an External
Flash ........................................
Using the
Control Button
.........................................E-104
E-21
External Flash Unit Requirements
Attaching an External Flash Unit
Using the Lens Cap
Displaying the 9-image View ................................ E-113
Power
Requirements
E-29
Selecting
a Specific ..............................................
Image in the 9-image View
E-114
Deleting
All Images
in Selected Folders ............... E-121
Menu Screens
.........................................................
E-42
Deleting All Unprotected Images .......................... E-122
E-2
E-124
MANAGING
CONTENTS
Using the
a Memory
Card to Transfer Image Data .... E-140
Flash .......................................................
E-55
Setting the Current Date and Time ......................... E-43
Setting the Date and Time
E-43
Selecting
the Date
Format
E-44
Folders
and Files
...................................................
E-123
E-45
Folders
Files
BASIC IMAGE RECORDING
Memory Card
Selecting
the Flash
Data Mode
FlashProtocol
DCF
Status Indicators
AdjustingCard
Memory
the Flash
File Structure
Intensity
Changing
Image
Files
theSupported
Sync Speed
by the Camera
Selecting a Flash
Precautions
when Sync
UsingSetting
a Memory Card
Precautions
on a Computer
when Using Flash
E-123
E-124
Protecting Images Against Deletion ..................... E-125
Protecting
Images
Using
the FullSelected
Auto Mode
........................................E-125
E-45
Selecting
Using
the the
HTML
Focus
Card
Mode
Browser
......................................
............................. E-145
E-61
Protecting
Unprotecting All Images
Recording and
Precautions
E-47
in Selected Folders
E-126
Focusing
E-47
Protecting
Unprotecting All Images
E-127
About Autoand
Focus
E-48
Image
Recording when the Batteries are Low
E-48
DPOF
.....................................................................
E-127
About
RECSettings
Mode Monitor
ScreenImages
E-49
Makingthe
DPOF
for Particular
E-128
Specifying
Using
Auto the
Focus
Card
(Multi-area
Browser Type
Auto Focus)
E-145
E-62
Using theCard
Viewing
SpotBrowser
Auto Focus
File Contents
Mode
E-147
E-63
Using the
Saving
Card
Manual
Browser
Focus
Files
Mode
E-149
E-64
Using the Infinity Mode
E-65
Using the Macro Mode
E-65
E-150 REFERENCE
Using Focus Lock
E-66
Expanding the Focus Area
E-67
Camera
Shake
Indicator
E-67
Camera
Menus
......................................................
E-150
REC mode
Selecting
the Metering Mode ..................................E-150
E-68
PLAY mode
E-151
Making
DPOF
Settings
for Particular Folders
E-129
Using
Optical
Zoom
................................................
E-49
Making DPOF Settings of All Images
Usingon
the
for Recording ........................E-129
E-51
theViewfinder
Memory Card
Using
Self-timer
................................................
E-52
PRINTthe
Image
Matching
......................................... E-130
Camera Orientation Detection ................................ E-53
Selecting White Balance ......................................... E-69
Mode
Settings ....................................................... E-152
Adjusting White Balance Manually
E-70
E-131 OTHER SETTINGS
E-54 OTHER RECORDING FUNCTIONS
Settings in Each Mode
E-152
Using
AEMode
Lock +.........................................................
E-71
Drive
Exposure Mode Combinations
E-153
Changing the Menu Language ............................. E-131
Installinga aSingle
Different
Language
Set .....................E-131
Recording
Image
(1-Image)
E-54
Previewing
the Last Image
Recorded
E-54
Turning
the Confirmation
Beep
On and Off .......... E-135
Exposure
Compensation
.........................................E-154
E-72
Full
Auto Mode
Settings ........................................
Menu
Using
theSettings
Histogram ...............................................E-154
E-74
Non-Menu Settings
Deleting the Last Image Recorded in the REC Mode E-55
Copying a Scene from the CD-ROM Best Shot Library E-77
Specifications
........................................................
E-160
Registering Your
Own Best Shot Scenes
E-80
Connecting to a Television .................................... E-136
Specifying the Location of Best Shot Mode Scenes
E-137
Connecting to a Computer .................................... E-138
Downloaded from ManualsCamera.com Manuals
E-154
Using Digital Zoom .................................................. E-75
Troubleshooting ..................................................... E-155
Instant
Setup Using the Best Shot Mode ...............E-158
E-76
Messages
E-136 CONNECTING TO EXTERNAL EQUIPMENT
Selecting the Video Output Signal Mode
E-141
E-55
E-141
E-56
E-142
E-57
E-143
E-57
E-58
E-144
E-60
E-3
E-81
INTRODUCTION
INTRODUCTION
Quick Reference
Getting Ready
1
2
Load batteries.
1
Insert the memory card.
(page E-29)
2
1
3
(page E-37)
2
3
3
Set the current time and date.
Downloaded from ManualsCamera.com Manuals
(page E-43)
E-6
INTRODUCTION
Recording an Image (page E-45)
5
1
Point the camera at the subject,
compose the image on the monitor
screen, and press the shutter release button half way to focus the
image.
Remove the lens cap
from the lens.
2
Align the exposure
mode dial with
(Full Auto Mode).
4
Align the power/function switch with
.
3
6
Align the drive mode dial
with
(1-Image).
After confirming that the Auto
Focus operation is complete (the
operation lamp lights green),
press the shutter release button
all the way down to record the
image.
Use the Diopter Dial to adjust the view through
the viewfinder to suit your particular eyesight.
(page E-51)
Downloaded from ManualsCamera.com Manuals
E-7
INTRODUCTION
Viewing (Playing Back) an Image (page E-109)
1
Align the
power/function
switch with
.
2
Rock the control
button to the left or
right to scroll through
stored images on the
monitor screen.
Downloaded from ManualsCamera.com Manuals
E-8
INTRODUCTION
Deleting an Image (page E-119)
1
4
Double check to
make sure that you
really want to
delete the image
you selected.
Align the
power/function
switch with
.
• You can exit the image
delete operation by
pressing AE-L .
2
Rock the control
button to the left or
right to scroll through
stored images and
display the one you
want to delete.
5
3
Press AE-L
Rock the control
button down to
select “Yes” and
then click the
control button.
.
Downloaded from ManualsCamera.com Manuals
E-9
INTRODUCTION
• CASIO COMPUTER CO., LTD. assumes no responsibility
for any damage or loss resulting from the use of this
manual.
• CASIO COMPUTER CO., LTD. assumes no responsibility
for any loss or claims by third parties which may arise
through the use of the QV-4000.
• CASIO COMPUTER CO., LTD. assumes no responsibility
for any damage or loss caused by deletion of data as a
result of malfunction, repairs, or battery replacement. Be
sure to back up all important data on other media to protect
against its loss.
• Windows and Internet Explorer are registered trademarks
of Microsoft Corporation.
• Macintosh is a registered trademark of Apple Computer,
Inc.
• CompactFlashTM and the
logo are registered trademarks of SanDisk Corporation.
• The USB driver uses software by Phoenix Technologies
Ltd.
Compatibility Software Copyright C 1997
Phoenix Technologies Ltd., All Rights Reserved.
• IBM is a registered trademark of International Business
Machines Corporation.
• Other company, product and service names used herein
may also be trademarks or service marks of others.
Downloaded from ManualsCamera.com Manuals
E-10
Opera
INTRODUCTION
• Never open the battery compartment cover, disconnect the
Features
AC adaptor from the camera or unplug it from the wall
• socket
High-resolution
4.13-megapixel
CCD so will not only make
while recording
images. Doing
Record images
that capture
everything from
skin
storage
of the current
image impossible,
it candelicate
also corrupt
tone nuances
to all
the fine
detailinofcamera
naturalmemory.
scenery.
other
image data
already
stored
• Focus area expansion
Makes it easier achieve the focus you want.
• This camera is designed for use in temperatures ranging
• Image
from 0 preview
C to 40 C.
instant
preview
of an image
just recorded.
• Provides
Do not use
or keep
the camera
in the you
following
areas.
— In areas
to direct
• 1.8-inch
TFTsubject
low-glare
color sunlight
LCD (HAST) monitor screen
— In areas subject to high humidity or dust
• 9.6X
seamless
digital zoom
— Near
air conditioners,
heaters, or other areas subject to
3X temperature
digital zoom,extremes
3.2X digital zoom
— Insideflash
of a closed
vehicle, especially one parked in the
• External
connectability
sun
• Memory
card
imagetostorage
— In areas
subject
strong vibration
Supports CompactFlash cards (CF TYPE I/II) and the IBM
Microdrive.
• Canon F2.0 wide-aperture lens
Provides high contrast and captures the most delicate of
nuances.
• World’s first digital soft focus
Creates stunning effects for portraits and floral shots.
• Real-time histogram
Quickly and easily obtains exactly the exposure you want,
even under difficult lighting conditions.
•Condensation
Digital Print Order Format (DPOF)
can
be the
printed
easily
in theonsequence
want
• Images
When you
bring
camera
indoors
a cold dayyou
or otherusing
a DPOF
compatible
printer. DPOF
can also condenbe used
wise expose
it to
a sudden change
of temperature,
when
images
and quantities
for printing
by prosationspecifying
can form on
the exterior
of the camera
or on internal
fessional
printCondensation
services.
components.
can cause malfunction of the
camera,Image
so you
should avoid
exposing it to conditions that
• PRINT
Matching
support
might
cause
condensation.
Images include PRINT Image Matching data (mode setting
• and
To keep
condensation
from
forming, place
the camera
into
other
camera setup
information).
A printer
that supa plastic
bag Image
before Matching
moving it reads
into a this
location
much
ports
PRINT
data that
and isadjusts
warmer
or colder
your current
Leave
it in out
the
the
printed
imagethan
accordingly,
so location.
your images
come
plastic
the air inside
has athem.
chance to
just
the bag
way until
you intended
when the
you bag
recorded
reach the same temperature as the new location.
• Easy-to-understand control panel
Aperture, shutter speed, focus and other settings can be
seen at a glance, even when the monitor screen is turned
off.
• Dual dial operation
A pair of dials helps to make drive mode and exposure
mode settings quick and easy.
• AF assist light
Improves auto focus accuracy when shooting under dim
lighting.
• Multi-area AF
Helps to prevent out-of-focus areas in an image.
Downloaded from ManualsCamera.com Manuals
E-11
Abou
Precaution
General Pre
INTRODUCTION
• Should foreign matter or water ever get into the camera,
immediately turn power off, unplug the AC adaptor from the
• The
camera
equipped
a fluorescent
light source
to
power
outlet,isand
contactwith
your
dealer or nearest
CASIO
provide
the back Using
lightingthe
forcamera
its LCD.under these conditions
service provider.
• The
normal
service of
lifefire
of the
approximately six
creates
the danger
andbacklight
electricalisshock.
the camera
used or
for aabout
two odor
hourscoming
a day.
• years,
Shouldwhen
you ever
notice is
smoke
strange
• Should
thecamera,
LCD image
appear abnormally
dark,
the
out of the
immediately
turn power off
andtake
unplug
camera
to
your
dealer
or
an
authorized
CASIO
service
prothe AC adaptor from the power outlet. Using the camera
vider
haveconditions
the light source
Note
thatand
youelecwill
underto
these
createsreplaced.
the danger
of fire
be charged
this making
replacement.
trical
shock.for
After
sure there is no more smoke
• Under
theit backlight
may require
comingvery
fromcold
the conditions,
camera, take
to your nearest
CASIOmore
sertime
than normal
to light,Never
or reddish
bands
in
vice provider
for repair.
attempt
yourmay
ownappear
maintethe
displayed
image.
These
conditions
do
not
indicate
malnance.
and a
normal
operation
returnfrom
at higher
tem• function,
At least once
year, unplug
theshould
AC adaptor
the power
peratures.
outlet and clean the area around the prongs of the plug.
• DCF Data
Storage
Lens
Precautions
DCF (Design rule for Camera File system) data storage
• protocol
Fingerprints,
dust, or
any other
soiling of the lens
interprovides
image
inter-compatibility
withcan
printers
fere
with proper
recording. Never touch the lens with
and other
digitalimage
cameras.
your fingers. You can remove dust particles from the lens
sure OUT
to observe
the following important precautions
•Be
VIDEO
terminal
surface
by using
a lens blower to blow them off. Next, wipe
whenever
using theTV
QV-4000.
Connects
big-screen
viewing
the
surfacetoofyour
the lensforwith
a soft lens
cloth.of images.
references
in this
manual
to “thisfrom
camera”
and when
“the cam•AllThe
lens
of this
camera
extends
its body
you
USB
compatibility
era”
refer
toto
theyour
CASIO
QV-4000
Digital
Camera.
turn
on power
and
retracts
when
you turn
off
power.
Connects
computer
for quick
and
easy
imageTake
excare
the lensortouse
undue
force ordisplay
impact,while
and
• change.
Nevernot
trytotosubject
take pictures
the built-in
never set a
the
camera
faceordown
the lensDoing
is in contact
motor
vehicle
whilesowalking.
so cre• operating
Image
management
andsure
manipulation
with
athe
tabletop,
etc.
Be
to remove software
the lens cap before
ates
danger
of
serious
accident.
The
QV-4000
comes
bundled
with
a
CD-ROM
that’s
turning
onto
the
camera.
• packed
Never try
open
the
case ofPhoto
the camera
or
your
with the
useful
software:
Loader
forattempt
transferring
• own
If yourepairs.
align
power/function
switch
with
while
the
High-voltage
internal
components
create and
the
images
to
your
computer,
Photohands*
for
editing
lens
cap
is
on
the
lens,
the
message
“LENS
CAP”
appears
risk of electrical
shock
when exposed.
Always
leaveimages
mainprinting
images,
and
Panorama
Editor*
for
stitching
on
the display
and camera
power
turns off automatically.
If
tenance
and repair
work
up
to authorized
CASIO service
into
panoramas.
Other
bundled...
this
happens,
remove
the
lens cap and try again.
providers.
* Windows
version
•• Never
remove
the only.
camera’s
batteries
or unplug
its AC
Never fire
the flash
in
the direction
of a person
operating
a
adaptor
while
the
lenssoiscan
extended.
so driver’s
leaves the
motor vehicle. Doing
interfereDoing
with the
vilens
extended,
theaccident.
risk of lens damage.
sion and
createand
the creates
danger of
• Never fire the flash while it is too close to the subject’s
eyes. Intense light from the flash can cause eye damage if
it is fired too close to the eyes, especially with young children. When using the flash, the camera should be at least
one meter from the eyes of the subject.
• Keep the camera away from water and other liquids, and
never let it get wet. Moisture creates the danger of fire and
electrical shock. Never use the camera outdoors in the rain
or snow, at the seashore or beach, in the bathroom, etc.
Downloaded from ManualsCamera.com Manuals
Dust build up around the prongs can create the danger of
fire.
• If the camera’s case should ever become cracked due to
dropping it or otherwise subjecting it to rough treatment,
immediately turn power off, unplug the AC adaptor from the
power outlet, and contact your nearest CASIO service provider.
• Never use the camera inside of an aircraft or in any other
areas where its use is prohibited. Doing so can result in an
accident.
• Physical damage and malfunction of this camera can
cause the image data stored in its memory to be deleted.
Be sure to always keep backup copies of data by transferring them to personal computer memory.
E-12
INTRODUCTION
Recording Features
Movie Mode
Best Shot Mode
page E-76
page E-93
Auto Exposure Bracketing (AEB)
Automatically records multiple images at different exposure settings.
Five focus modes
Multi-area AF, Spot AF, Manual, Infinity, Macro
page E-62 to E-65
page E-89
Three metering modes
Multi-pattern, Center-weighted, Spot
page E-68
Panorama Mode
Stitches multiple images into a sweeping panorama.
Five exposure modes
Full auto, Program AE, aperture priority AE, shutter speed
priority AE, manual exposure
page E-82 to E-87
page E-91
Downloaded from ManualsCamera.com Manuals
E-13
Abou
Precaution
General Pre
INTRODUCTION
• Should foreign matter or water ever get into the camera,
immediately turn power off, unplug the AC adaptor from the
• The
camera
equipped
a fluorescent
light source
to
power
outlet,isand
contactwith
your
dealer or nearest
CASIO
provide
the back Using
lightingthe
forcamera
its LCD.under these conditions
service provider.
• The
normal
service of
lifefire
of the
approximately six
creates
the danger
andbacklight
electricalisshock.
the camera
used or
for aabout
two odor
hourscoming
a day.
• years,
Shouldwhen
you ever
notice is
smoke
strange
• Should
thecamera,
LCD image
appear abnormally
dark,
the
out of the
immediately
turn power off
andtake
unplug
camera
to
your
dealer
or
an
authorized
CASIO
service
prothe AC adaptor from the power outlet. Using the camera
vider
haveconditions
the light source
Note
thatand
youelecwill
underto
these
createsreplaced.
the danger
of fire
be charged
this making
replacement.
trical
shock.for
After
sure there is no more smoke
• Under
theit backlight
may require
comingvery
fromcold
the conditions,
camera, take
to your nearest
CASIOmore
sertime
than normal
to light,Never
or reddish
bands
in
vice provider
for repair.
attempt
yourmay
ownappear
maintethe
displayed
image.
These
conditions
do
not
indicate
malnance.
and a
normal
operation
returnfrom
at higher
tem• function,
At least once
year, unplug
theshould
AC adaptor
the power
peratures.
outlet and clean the area around the prongs of the plug.
• DCF Data
Storage
Lens
Precautions
DCF (Design rule for Camera File system) data storage
• protocol
Fingerprints,
dust, or
any other
soiling of the lens
interprovides
image
inter-compatibility
withcan
printers
fere
with proper
recording. Never touch the lens with
and other
digitalimage
cameras.
your fingers. You can remove dust particles from the lens
sure OUT
to observe
the following important precautions
•Be
VIDEO
terminal
surface
by using
a lens blower to blow them off. Next, wipe
whenever
using theTV
QV-4000.
Connects
big-screen
viewing
the
surfacetoofyour
the lensforwith
a soft lens
cloth.of images.
references
in this
manual
to “thisfrom
camera”
and when
“the cam•AllThe
lens
of this
camera
extends
its body
you
USB
compatibility
era”
refer
toto
theyour
CASIO
QV-4000
Digital
Camera.
turn
on power
and
retracts
when
you turn
off
power.
Connects
computer
for quick
and
easy
imageTake
excare
the lensortouse
undue
force ordisplay
impact,while
and
• change.
Nevernot
trytotosubject
take pictures
the built-in
never set a
the
camera
faceordown
the lensDoing
is in contact
motor
vehicle
whilesowalking.
so cre• operating
Image
management
andsure
manipulation
with
athe
tabletop,
etc.
Be
to remove software
the lens cap before
ates
danger
of
serious
accident.
The
QV-4000
comes
bundled
with
a
CD-ROM
that’s
turning
onto
the
camera.
• packed
Never try
open
the
case ofPhoto
the camera
or
your
with the
useful
software:
Loader
forattempt
transferring
• own
If yourepairs.
align
power/function
switch
with
while
the
High-voltage
internal
components
create and
the
images
to
your
computer,
Photohands*
for
editing
lens
cap
is
on
the
lens,
the
message
“LENS
CAP”
appears
risk of electrical
shock
when exposed.
Always
leaveimages
mainprinting
images,
and
Panorama
Editor*
for
stitching
on
the display
and camera
power
turns off automatically.
If
tenance
and repair
work
up
to authorized
CASIO service
into
panoramas.
Other
bundled...
this
happens,
remove
the
lens cap and try again.
providers.
* Windows
version
•• Never
remove
the only.
camera’s
batteries
or unplug
its AC
Never fire
the flash
in
the direction
of a person
operating
a
adaptor
while
the
lenssoiscan
extended.
so driver’s
leaves the
motor vehicle. Doing
interfereDoing
with the
vilens
extended,
theaccident.
risk of lens damage.
sion and
createand
the creates
danger of
• Never fire the flash while it is too close to the subject’s
eyes. Intense light from the flash can cause eye damage if
it is fired too close to the eyes, especially with young children. When using the flash, the camera should be at least
one meter from the eyes of the subject.
• Keep the camera away from water and other liquids, and
never let it get wet. Moisture creates the danger of fire and
electrical shock. Never use the camera outdoors in the rain
or snow, at the seashore or beach, in the bathroom, etc.
Downloaded from ManualsCamera.com Manuals
Dust build up around the prongs can create the danger of
fire.
• If the camera’s case should ever become cracked due to
dropping it or otherwise subjecting it to rough treatment,
immediately turn power off, unplug the AC adaptor from the
power outlet, and contact your nearest CASIO service provider.
• Never use the camera inside of an aircraft or in any other
areas where its use is prohibited. Doing so can result in an
accident.
• Physical damage and malfunction of this camera can
cause the image data stored in its memory to be deleted.
Be sure to always keep backup copies of data by transferring them to personal computer memory.
E-12
Opera
INTRODUCTION
• Never open the battery compartment cover, disconnect the
Features
AC adaptor from the camera or unplug it from the wall
• socket
High-resolution
4.13-megapixel
CCD so will not only make
while recording
images. Doing
Record images
that capture
everything from
skin
storage
of the current
image impossible,
it candelicate
also corrupt
tone nuances
to all
the fine
detailinofcamera
naturalmemory.
scenery.
other
image data
already
stored
• Focus area expansion
Makes it easier achieve the focus you want.
• This camera is designed for use in temperatures ranging
• Image
preview
from 0°C
to 40°C.
instant
preview
of an image
just recorded.
• Provides
Do not use
or keep
the camera
in the you
following
areas.
— In areas
to direct
• 1.8-inch
TFTsubject
low-glare
color sunlight
LCD (HAST) monitor screen
— In areas subject to high humidity or dust
• 9.6X
seamless
digital zoom
— Near
air conditioners,
heaters, or other areas subject to
3X temperature
digital zoom,extremes
3.2X digital zoom
— Insideflash
of a closed
vehicle, especially one parked in the
• External
connectability
sun
• Memory
card
imagetostorage
— In areas
subject
strong vibration
Supports CompactFlash cards (CF TYPE I/II) and the IBM
Microdrive.
• Canon F2.0 wide-aperture lens
Provides high contrast and captures the most delicate of
nuances.
• World’s first digital soft focus
Creates stunning effects for portraits and floral shots.
• Real-time histogram
Quickly and easily obtains exactly the exposure you want,
even under difficult lighting conditions.
•Condensation
Digital Print Order Format (DPOF)
can
be the
printed
easily
in theonsequence
want
• Images
When you
bring
camera
indoors
a cold dayyou
or otherusing
a DPOF
compatible
printer. DPOF
can also condenbe used
wise expose
it to
a sudden change
of temperature,
when
images
and quantities
for printing
by prosationspecifying
can form on
the exterior
of the camera
or on internal
fessional
printCondensation
services.
components.
can cause malfunction of the
camera,Image
so you
should avoid
exposing it to conditions that
• PRINT
Matching
support
might
cause
condensation.
Images include PRINT Image Matching data (mode setting
• and
To keep
condensation
from
forming, place
the camera
into
other
camera setup
information).
A printer
that supa plastic
bag Image
before Matching
moving it reads
into a this
location
much
ports
PRINT
data that
and isadjusts
warmer
or colder
your current
Leave
it in out
the
the
printed
imagethan
accordingly,
so location.
your images
come
plastic
the air inside
has athem.
chance to
just
the bag
way until
you intended
when the
you bag
recorded
reach the same temperature as the new location.
• Easy-to-understand control panel
Aperture, shutter speed, focus and other settings can be
seen at a glance, even when the monitor screen is turned
off.
• Dual dial operation
A pair of dials helps to make drive mode and exposure
mode settings quick and easy.
• AF assist light
Improves auto focus accuracy when shooting under dim
lighting.
• Multi-area AF
Helps to prevent out-of-focus areas in an image.
Downloaded from ManualsCamera.com Manuals
E-11
Abou
Precaution
General Pre
INTRODUCTION
• Should foreign matter or water ever get into the camera,
immediately turn power off, unplug the AC adaptor from the
• The
camera
equipped
a fluorescent
light source
to
power
outlet,isand
contactwith
your
dealer or nearest
CASIO
provide
the back Using
lightingthe
forcamera
its LCD.under these conditions
service provider.
• The
normal
service of
lifefire
of the
approximately six
creates
the danger
andbacklight
electricalisshock.
the camera
used or
for aabout
two odor
hourscoming
a day.
• years,
Shouldwhen
you ever
notice is
smoke
strange
• Should
thecamera,
LCD image
appear abnormally
dark,
the
out of the
immediately
turn power off
andtake
unplug
camera
to
your
dealer
or
an
authorized
CASIO
service
prothe AC adaptor from the power outlet. Using the camera
vider
haveconditions
the light source
Note
thatand
youelecwill
underto
these
createsreplaced.
the danger
of fire
be charged
this making
replacement.
trical
shock.for
After
sure there is no more smoke
• Under
theit backlight
may require
comingvery
fromcold
the conditions,
camera, take
to your nearest
CASIOmore
sertime
than normal
to light,Never
or reddish
bands
in
vice provider
for repair.
attempt
yourmay
ownappear
maintethe
displayed
image.
These
conditions
do
not
indicate
malnance.
and a
normal
operation
returnfrom
at higher
tem• function,
At least once
year, unplug
theshould
AC adaptor
the power
peratures.
outlet and clean the area around the prongs of the plug.
• DCF Data
Storage
Lens
Precautions
DCF (Design rule for Camera File system) data storage
• protocol
Fingerprints,
dust, or
any other
soiling of the lens
interprovides
image
inter-compatibility
withcan
printers
fere
with proper
recording. Never touch the lens with
and other
digitalimage
cameras.
your fingers. You can remove dust particles from the lens
sure OUT
to observe
the following important precautions
•Be
VIDEO
terminal
surface
by using
a lens blower to blow them off. Next, wipe
whenever
using theTV
QV-4000.
Connects
big-screen
viewing
the
surfacetoofyour
the lensforwith
a soft lens
cloth.of images.
references
in this
manual
to “thisfrom
camera”
and when
“the cam•AllThe
lens
of this
camera
extends
its body
you
USB
compatibility
era”
refer
toto
theyour
CASIO
QV-4000
Digital
Camera.
turn
on power
and
retracts
when
you turn
off
power.
Connects
computer
for quick
and
easy
imageTake
excare
the lensortouse
undue
force ordisplay
impact,while
and
• change.
Nevernot
trytotosubject
take pictures
the built-in
never set a
the
camera
faceordown
the lensDoing
is in contact
motor
vehicle
whilesowalking.
so cre• operating
Image
management
andsure
manipulation
with
athe
tabletop,
etc.
Be
to remove software
the lens cap before
ates
danger
of
serious
accident.
The
QV-4000
comes
bundled
with
a
CD-ROM
that’s
turning
onto
the
camera.
• packed
Never try
open
the
case ofPhoto
the camera
or
your
with the
useful
software:
Loader
forattempt
transferring
• own
If yourepairs.
align
power/function
switch
with
while
the
High-voltage
internal
components
create and
the
images
to
your
computer,
Photohands*
for
editing
lens
cap
is
on
the
lens,
the
message
“LENS
CAP”
appears
risk of electrical
shock
when exposed.
Always
leaveimages
mainprinting
images,
and
Panorama
Editor*
for
stitching
on
the display
and camera
power
turns off automatically.
If
tenance
and repair
work
up
to authorized
CASIO service
into
panoramas.
Other
bundled...
this
happens,
remove
the
lens cap and try again.
providers.
* Windows
version
•• Never
remove
the only.
camera’s
batteries
or unplug
its AC
Never fire
the flash
in
the direction
of a person
operating
a
adaptor
while
the
lenssoiscan
extended.
so driver’s
leaves the
motor vehicle. Doing
interfereDoing
with the
vilens
extended,
theaccident.
risk of lens damage.
sion and
createand
the creates
danger of
• Never fire the flash while it is too close to the subject’s
eyes. Intense light from the flash can cause eye damage if
it is fired too close to the eyes, especially with young children. When using the flash, the camera should be at least
one meter from the eyes of the subject.
• Keep the camera away from water and other liquids, and
never let it get wet. Moisture creates the danger of fire and
electrical shock. Never use the camera outdoors in the rain
or snow, at the seashore or beach, in the bathroom, etc.
Downloaded from ManualsCamera.com Manuals
Dust build up around the prongs can create the danger of
fire.
• If the camera’s case should ever become cracked due to
dropping it or otherwise subjecting it to rough treatment,
immediately turn power off, unplug the AC adaptor from the
power outlet, and contact your nearest CASIO service provider.
• Never use the camera inside of an aircraft or in any other
areas where its use is prohibited. Doing so can result in an
accident.
• Physical damage and malfunction of this camera can
cause the image data stored in its memory to be deleted.
Be sure to always keep backup copies of data by transferring them to personal computer memory.
E-12
Settin
Side
Setting
the
C
Tripod
Batt
Diopter
d
DIGITAL
te
1.
Align
or
.
t
screw
(pa
cov
(page
E-51)
(page
E-103)
2.
Press
M
VIDEO
OUT
3.
Select
(page
E-136)
to
the
r
4.
Select
USB
port
(page
E-138)
ton
to
5.
Select
Batter
DC
IN
6V
te
set
the
cover
(page
(page
E-33)
External
fla
sync
termin
Open
(page E-104)
Memory car
GETTING
ACQUAINTED
GETTING ACQUAINTED
This section contains important information you should know when trying to operate the camera.
Use the following procedures to set the current dateGeneral
and
Guide
time, and to select the date format.
The following
illustrations
show
the names
of the
each
component,
button, and switch on the camera.
When
you record
an image,
the time
and date
image
was
shot is registered in accordance with data from the cameraÕs
built-in
Frontclock. You can even use the time stamp function to
ÒstampÓ the date and time inside the image (page E-100).
Indicator display
Selector dial
(page E-24)
IMPORTANT!
Shutter
¥ The
time andrelease
date settings are cleared if the camera is
leftbutton
for about 24 hours without battery and AC power
(page
E-45) If this happens, restore power and
being
supplied.
make new time and date settings before using the
camera again.
¥ A flashing time display indicates that the time and date
Power/function
(clock)
settings have been cleared. Use the procedure
onswitch
this page to make the correct time and date set(pages E-35, 45)
tings.
¥ If you do not set the cameraÕs built-in clock to the current date and time, all images are recorded with the
default date and Flash
time, which probably is not your correct current date(page
and time.
Be sure to correctly set the
E-55)
clock before you use the camera.
Viewfinder
(page E-51)
AF assist light/
Self-timer lamp
cover
(pages
E-37,
3
Card
slot
lock
(pages E-3
(page E-26)
Terminal panel cover
Exposure sensor
Lens
(page E-60)
(page E-16)
Downloaded from ManualsCamera.com Manuals
E-17
(page E-19)
Mode
Dial
Drive mod
Exposure
GETTING ACQUAINTED
Battery Life Guidelines
Back
Drive mode dial
Monitor Screen Indicators
Flash charge lamp
MENU button
(page E-26)
(page E-42)
REC mode
AEB
(Self-Timer) button
(page E-52)
Tips for Prolonging(Flash)
Battery Life
button
(page E-55)
Operation/card
access lamp
(page E-25)
Exposure mode dial
M
(Metering Mode)
button (page E-68)
Zoom controller
(Enlarge/Nine Images)
(pages E-49, 75, 112, 113)
S
A
Alkaline Battery Life
P
WB (White balance)
button (page E-69)
Control button
FOCUS (Focus Mode)
button (page E-61)
AE-L
(AE Lock/Delete)
button (pages E-55, 71, 119)
PREVIEW button
(page E-54)
Monitor screen
DISP button
(page E-22)
(page E-24)
Downloaded from ManualsCamera.com Manuals
E-18
Settin
Side
Setting
the
C
Tripod
Batt
Diopter
d
DIGITAL
te
1.
Align
or
.
t
screw
(pa
cov
(page
E-51)
(page
E-103)
2.
Press
M
VIDEO
OUT
3.
Select
(page
E-136)
to
the
r
4.
Select
USB
port
(page
E-138)
ton
to
5.
Select
Batter
DC
IN
6V
te
set
the
cover
(page
(page
E-33)
External
fla
sync
termin
Open
(page E-104)
Memory car
GETTING
ACQUAINTED
GETTING ACQUAINTED
General Guide
Front
Indicator display
Selector dial
(page E-24)
IMPORTANT!
Shutter release
button
Viewfinder
(page E-45)
(page E-51)
Power/function
switch
AF assist light/
Self-timer lamp
(pages E-35, 45)
cover
(pages
E-37,
3
Card
slot
lock
(pages E-3
(page E-26)
Flash
(page E-55)
Terminal panel cover
Exposure sensor
Lens
(page E-60)
(page E-16)
Downloaded from ManualsCamera.com Manuals
E-17
(page E-19)
Mode
Dial
Drive mod
Exposure
GETTING ACQUAINTED
■
Battery Life Guidelines
■—
Drive
Recording
mode dial
one image per minute under the above conBack
Monitor Screen Indicators
The battery life guideline values given below indicate the
ditions reduces battery life to about one sixth of that
AEB
Auto
Exposure
Bracketing
(AEB)
page E-89
The following
describes
the different
indicators
on the
camera’s
monitor
screen.
amount
of time
at standard
temperature
(25 C)and
untilmarkings
power that appear
noted
above.
lamp failure. They MENU
button
automatically Flash
turns offcharge
due to battery
do not button
• Battery life Continuous
is(Self-Timer)
greatly affected
by
how
much
you
use Eflash,
Shutter recording
page
88
E-26)
(page E-42)
guarantee that(page
zoom and(page
other E-52)
functions, and how long you leave power
REC mode batteries will provide the amount of service
1-Image recording
page E-54
indicated. Low temperatures reduce battery life.
turned on.
10 SEC, 2 SEC
Multi-area Auto Focus
Movie recording
page E-93
Continuous
Continuous
■ Tips for Prolonging
(Flash)
Battery Life
button
Spot Auto Focus
Type of Operation/card
Operation
Panorama
recording
page E-91
Playback
Recording
Mode:
• Use to turn off the(page
flash when
E-55) you Mare
notManual
usingExposure
it (page
Manual Focus
access
lamp
1-Image
S Mode: Shutter Priority AE
AA-size Alkaline
90 minutes
E-55).
Infinity
170
minutes
(page E-25)
Batteries LR6
(540 shots)
CONTINUOUS
• You can also
use the power save settings
(page E-35)
to
A Mode: Aperture
Priority AE
Macro
■ Exposure mode dial
AA-size Lithium
180 minutes
protect against
AEB
wastingZoom
batterycontroller
power
when
you forget
to
P Mode:
Program
AE
320 minutes
Batteries FR6
(1,130 shots)
turnMoff theMOVIE
camera. (Enlarge/Nine
Images)
Modepage E- 87
M Mode (Manual
Exposure) Full Auto
AA-size(Metering
Ni-MH
100 minutes
• You can also
conserve (pages
battery power
by using
DISP to turn
Multi-pattern
Metering
PANORAMA
E-49, 75,
112, 113)
Mode)
180 minutes
BestAE)
Shot Mode
Batteries NP-H3
(600 shots)
S monitor
S Mode
(Shutter Speed Priority
page E-85
off the
screen.
Center-weighted Metering
button (page E-68)
A
A
Mode
(Aperture
Priority
AE)
page E-84
Spot
Metering
• The above values are approximations only.
■ Alkaline Battery Life
• The above guidelines are based on the following battery
P
P Mode (Program AE)
page E-83
2240 x 1680
pixels is affected by a variety of
The actual life of alkaline
batteries
WB (White balance)
types:
Control
button
2256
x
1504
pixels
Full
Auto
Mode
page
E-82of
factors, including the battery manufacturer, the amount
buttonMX1500
(page E-69)
Alkaline:
(AA) DURACELL ULTRA
1600 x 1200 pixels
time
the
batteries
spend
in
storage
before
you
use
them,
Best Shot
1280
Mode
x 960 pixels
page E76
Lithium: Energizer
640are
x 480
pixels
temperature while you
recording,
and photographic conBattery life varies with brand.
ditions. As a rule, we recommend the use of lithium batteries
An
out ofare
range
• •Values
based
on continuous
FOCUS
(Focus
Mode) recording under the folPREVIEW
button
aperture or shutter
or Ni-MH batteries, which
have
lives
than alkaline
batlowing
conditions.
FINE,longer
NORMAL,
ECONOMY,
TIFF
button
E-61)
speed
causes(page
the
(page E-54)
teries.
—corresponding
Flash turned
off
monitor
to turn
—screen
Onevalue
switch
between telephoto and wide-angle with the
• Movie Recording: recording time (seconds)
amber.
zoom
controller
per image
• Panorama: number of images (P1 to P10)
AE-L
(AE Lock/Delete)
• Focusing complete: Green
button (pages E-55, 71,
119)
• Focusing failed: Red
Monitor screen
(page E-22)
Downloaded from ManualsCamera.com Manuals
E-18
DISP button
(page E-24)
• Today’s date appears for
about two seconds.
2.
With
th
Formatting
PLAY
Using
Powe
Operation
Power
Req
I
arrow
slot
Operation/c
as it co
w
GETTING ACQUAINTED
AAbout
Microdrive
rechargeable
batteries
much
more
electrical
than a.
2.
1.
Load
Align
the
theconsumes
power/function
batteries
so
their
switch
withpower
or
PLAY
mode
Adjusting
the
Length
of
the
Neck
Strap
Flash
Mode
indicator
The following
examples
show
how
alkaline
Low
Turning
IBM
Microdrive
Battery
the
Camera
Indicator
Precautions
On
and
Off battery
Using
Using
the
Memory
the
Bundled
Control
Cards
Accessories
Button
life
None Auto
changes under different
shooting conditions.
The
Rotate
You
Compatibility
can
theformat
power/function
of
shows
the
a memory
camera
how
the
switch
card
battery
tothe
turn
delete
capacity
IBM
camera
Microdrive
allmemory
indicator
of power
the
has
on
Yourfollowing
This
camera
camera
supports
features
use
a two-way
of
awith
CompactFlash
power
supply
that
letsdata
card
you
Flash
On
the
and
stored
been
monitor
off.
confirmed
on1:
it.
screen
and
CASIO.
the
indicator
However,
display
youAC
should
changes
note
asNote
batthe
Attaching
the
Neck
Strap
use
(CF
either
TYPE
AA-size
I/II)
orbyIBM
batteries
Microdrive
image
storage.
current.
Example
Intermittent
use
ofhousehold
the for
camera
shortens
battery
Flash
Offor
tery power
following
is
important
used.
points
all card
four
whenever
batteries
using
as soon
the
as both
posIBM
that
all
mentions
ofReplace
memory
in this
manual
life.strap
The
Attach
operation/card
the
neck
access
Red-eye
to the strap
lamp
reduction
ring
as shown
inrefer
the illusBatteries
sible
Microdrive.
after they Flash
go dead.
If indicates
you
continue
to
use
the camera
to
a CompactFlash
memory
cardof
and
Microdrive,
unless
indicator
thatIBM
the flash
will fire button
shows
tration
below.
the
operational
status
Control
Four
alkaline
batteries:
LR6 power will automatiConditions
camera
while
theAA-size
battery
level
isflash
IMPORTANT!
(when
auto
is, selected).
specifically
noted
otherwise.
the
camera
ascarefully
described
below.
Be
sure
to
read
all ofFR6
the documentation that
Four
AA-size
lithium
batteries:
cally
turn
off.
Temperature:
25
C
Formatting
a memory before
card deletes
on the
comes
with the Microdrive
using
it.all images batterFour
AA-size
nickel-metal
hydride
rechargeable
card,
even
someoforbecomes
all of thehot
are
protected
IMPORTANT!
Repeat
ofMicrodrive
aifcycle
recording
ofimages
one
shot
per
minute
Note
that
the
during
normal
use.
ies:
NP-H3
Battery
(page
E-125).
Low off
High
for
10when
minutes,
followed
by
minute of
playback,
Take
care
removing
it from
the
Make
sure
that
the
power
of one
the camera.
camera
is turned
Capacity
The
control
button
is
used
to
select
menu
items
and
execute
Formatting
a memory
card deletes
all Best
Shot
Mode
and
minutes
of remove
power
off
(power
on,
full
lens
exHousehold
Current
Take
carenine
toyou
avoid
strong
pressure
on the
label
side
of
the
before
insert
or
a memory
card.
Monitor
function.
Thefiles
following
are
the
terms
usedthe
in Operation/card
this
manual
to
scene
you
have
imported
from
CD-ROM
and
tension,
half
lens
contraction,
full
lens
extension,
imAC
Adaptor:
AD-C620
(Option)
Microdrive
when
it
is
removed
from
the
camera.
Strong
:
Turns
on
power
and
enters
the
REC
mode.
When
inserting
a
memory
card
into
the
camera,
make
Screen control button operations.
access
lamp
describe
stored
ondamage
the card.
After
formatting
theand
card,
you have
age
recording,
power
off)
AC: sure
Adaptor/Charger:
BC-3HA
(Option)
pressure
can
internal
components
cause
malTurns
powerside
andisenters
mode.
itsoncorrect
facingthe
upPLAY
and that
you insert its
Indicator
REC
mode
Strap
ring the Best Shot scene files you
Strap
ringto the
to
import
want
function.
OFF
: terminal
Turns on
offend
power.
into the camera. Trying to force a card
Flash
Display
Term
memory
card
(page
E-77).
Meaning
Lamp
Never
turn
off
camera
power
or
subject
the
camera
to iminto the camera
the card
and the camera.
Approximate
Battery can
Life:damage
35 minutes
(32 shots)
Flashing
Color
Data
by thumb
a memory
card the
format
Useoperation/card
your
to access
move
control
button canup,
Loading
Batteries
pact
whiledeleted
the
lamp
isoperation
flashing.
DoRock
not
because
recovered!
sureoftothe
carefully
check and conIMPORTANT!
down,
left,
or Be
right.
ing so
can
malfunction
Microdrive.
One
of
the
following
operations
is
in
progress:
start
Make
sure
that
camera
power
is
turned
off
whenever
loading
Example
2:
Low
temperatures
shorten
battery
life.
Green
Inserting
a
Memory
Card
into
the
Camera
firm
that
longer
need
the
data
stored
in a
Press
control
button
straight
down
until
it clicks,
up, you
save
(multiple),
movie
recording
standby
Microdrive
isthe
ano
very
high
precision
device.
Dropping
while
Never
align
the
power/function
switch
with
orThe
replacing
batteries.
Click
memory
cardresult
it. of the Microdrive,
something
like
aformatting
computer
mouse.
the
camera
can
in
malfunction
the
lens
cap
isbefore
on
the
lens.
Conditions
The
camera
isthe
ready
to record
when
theinlamp
isbar
off. while
Zoom
White
balance
indicator
though
camera
is undamaged.
Take
extra
care
Never
align
the
power/function
switch
with
1.even
Slide
the
card
slot
cover
lock
the
direction
Temperature:
0 of
C
Lower half indicates
1.when
On
the
bottom
thewhile
camera,
handling
the
camera
the
Microdrive
iszoom.
installed.
the
lens
isby
facing
downwards
towards
the
Daylight
indicated
the
arrow
and
openoptical
theground.
memory
Repeat
of
acamera
cycle
ofpower
recording
ofit one
shot
minute
slide
the
battery
compartThe
Microdrive
has
very
large
storage
capacity.
Because
To
restore
after
has
beenper
turned
off
Upper
half
indicates
Shade
card
slot
cover.
Partial
press
of
the
shutter
button
forcertain
10
minutes,
followed
by release
one
minute
of
playback,
digital
zoom.
of ment
this,
operations
can
take
a
relatively
long
time
to
by
auto
power
off,
rotate
the
power/function
switch
cover
lock
in
the
Tungsten
and nine
minutes
of to
poweror
off (power
on, full lens exLamp
perform.
OFF
and
then
back
.
direction
indicated
by
the
On
Fluorescent
tension,
halfmay
lensnot
contraction,properly
full lensinextension,
imColor
The
Microdrive
areas where
arrow
and
theoperate
battery
Manualopen
age
recording,
power
off)
Auto
Focus
complete
Green
barometric
pressure
is low. Because of this, you should
compartment
cover.
Flash
avoid
usingon
it at high
Red
Auto
Focusaltitudes.
operation failed
Memory
Approximate Battery
Life: 8 minutes (8 shots) card slot
Card slot
cover lock
Use
CompactFlash
only the
nickel-metal
card.
Depending
hydride
batteries
on how(NP-H3)
a Microdrive
that are
is
plus
(+)described
and
minus
(let)to
ends
Lamp
Use
The
settings
theitadaptor
buckle
to
asadjust
shown
below
the
below
length
you
power
of
specify
the
neck
theProper
sleep
camera
strap.
and
from
auto
a
Flashing
specifically
used,
can
recommended
greatly
reduce
for
battery
this
camera.
life.
When
using
alkaline
camera
2.
Press
MENU.
Color
are
facing
as
shown
in
the
ilhousehold
power
off trigger
times
outlet.
that help
to other
conserve
operation
batteries,
ispower
certain
not guaranteed
operating
when
conditions
rechargeable
andvaluable
certain battery
battery
batterlustration.
One of the following operations is in progress:
power.
ies
are
used.
can Format
result in batteries
going
dead
right
afterbutyou
3.brands
Select
and
then
rock
the
control
Folder
number
delete, format,
battery
alert,
card
Green
If
the
eject
button
is: extended,
itbrowser
in before
sliding
install
AC Adaptor/Charger
new
ones.
Whenever
BC-3HA
using
apress
Microdrive,
we recomton
to
the
right
(page
E-42).
generation.
AUTO
POWER
OFF
the
memory
card
intobatteries
the slot.
mend
Nickel-metal
that
you
use
hydride
rechargeable
nickel
(4-battery
metal
hydride
set)/Quick
batImage
protection
indicator
File
Red
Memory
card
defective.power
Auto
Power
Off
turns
offisto
camera
if number
no operation is
Charger
or lithium
Set : batteries
BC-1HB4
power the camera.
Eject
button
4.teries
In
response
to
the
confirmation
message
that
performed
for five
minutes
in the
the amount
PLAY mode.
InNP-H3P4
the
REC
When
Nickel-metal
battery
power
hydride
isbatteries
low,
of
time
required
The
operation/card
access
lamp(4-battery
remains
litset)
(green)
while
appears,
rock
the
control
button
up
or: down
to
mode,
you
can
specify
an Auto
Power
Off
trigger
time
of
between
shots
may
become
longer.
This
longer
interval
is
Buckle
the
monitor
screen
turned off
the PLAY
mode.
Image
Side
marked
select
Yes
toisformat
orin No
to exit
and size
then
two
or
five
minutes.
designed
protect
thedown
Microdrive.
3.
Close to
and
press
on the
with
arrow
IMPORTANT!
click the
control
face the button.
batteryshould
compartment
cover
memory
card
SLEEP
Be
sure
to
keep
all four batteries
together as a set at
IMPORTANT!
Yes
: Formats
the
memory
card.
slot
cover.
asmonitor
you
slide
theenters
battery
DC IN
6V if no Quality
screen
a
sleep
state
operation
is
InThe
case
of
Microdrive
malfunction....
all
times,
for
both
charging
and
powering
the
Never
open
the
memory
card
cover
while
thecamera.
operaNo
: Does
format
the
memory
card.
Be
sure
tonot
keep
the
neck
strap
around
your
neck
when
(AC
power
terminal)
compartment
cover
lock
inofSide
File
name/
performed
for
a
specified
amount
time
in
the
REC
mode.
Mixing
batteries
from
different
sets
can
shorten
overall
marked
Contact
your
originallamp
Microdrive
retailer
or the contact
tion/card
access
is flashing.
using
thebutton
camera
to
protect
accidentally
File
number
the
direction
indicated
byagainst
the
Pressing
any
immediately
wakes
up
thecamera.
monitordropand
with arrow
lifethe
and
cause malfunction
of
the
pointbattery
noted
Microdrive
documentation.
ping
it. in
Date
and time
restores
normal
operation.
You
can
specify
30
seconds,
1
arrow
to lock
it. be charged
Batteries
cannot
while
they
are
loaded
in
Battery
CASIO
does
not
provide
any
servicing
or
maintenance
Theorsupplied
neck
strapthe
is sleep
intended
foris use
with this
AC
Adaptor:
AD-C620
(Option)
minute,
2
minutes
before
state
triggered,
or
3.
Close
the
memory
card
slot
cover.
capacity
the
camera.
support
for the
Microdrive.
camera
only.
Dosetting
not use
it for any other application.
you
can
off this
entirely.
AC Adaptor/Charger:
BC-3HA
(Option)
Note
thatturn
CASIO
assumes
noaround
responsibility
for any
data
Never
swing the
camera
by the neck
strap.
IMPORTANT!
The
BC-3HA
functions
both
as
an Microdrive.
AC adaptor
and neck
as a
loss you
may suffer
while
using
the
Allowing
the
camera
to
swing
freely
from
your
Never
use
manganese
batteries.
Use onlybatteries.
the battery
charger
unit
for
nickel
metal
It
This
camera
supports
use
a hydride
CompactFlash
card
can
result
inAA-size
damage
to of
theboth
camera
tos its
bumping
types
specifically
mentioned
in this due
User
Guide.
comes
complete
with
four
rechargeable
nickel
metal
hyand
the
Microdrive.
Note,
however,
that
ejecting
a
against other objects. It also creates the danger
of the
dride
batteries.
This
AC caught
adaptor/charger
unit
can
be used
Microdrive
from
the camera
is relatively
difficult
than
camera
becoming
in a doormore
or on
other
obwith jects,
anyahousehold
outlet
rated for 100V to 240V
ejecting
CompactFlash
card.
resulting inpower
personal
injury.
AC. Keep the camera out of the reach of small children,
especially when the neck strap is attached. The neck
strap can accidentally wind around the neck of a child
and create the risk of strangulation.
IMPOR
cover
Downloaded from ManualsCamera.com Manuals
E-21
Mode
Dial
Drive mod
Exposure
GETTING ACQUAINTED
Battery Life Guidelines
—
Drive
Recording
mode dial
one image per minute under the above conBack
Monitor Screen Indicators
The battery life guideline values given below indicate the
ditions reduces battery life to about one sixth of that
AEB
Auto
Exposure
Bracketing
(AEB)
page E-89
The following
describes
the different
indicators
on the
camera’s
monitor
screen.
amount
of time
at standard
temperature
(25 C)and
untilmarkings
power that appear
noted
above.
lamp failure. They MENU
button
automatically Flash
turns offcharge
due to battery
do not button
• Battery life Continuous
is(Self-Timer)
greatly affected
by
how
much
you
use Eflash,
Shutter recording
page
88
E-26) provide the amount of (page
guarantee that(page
serviceE-42)
zoom and(page
other E-52)
functions, and how long you leave power
REC mode batteries willFocus
1-Image
recording
page
E54
Mode
indicator
Self-timerturned on.
indicated. Low temperatures reduce
battery
life.
10 SEC, 2 SEC
Multi-area Auto Focus
Movie recording
page E-93
Continuous
Continuous
Exposure
Mode indicator
Tips for Prolonging
(Flash)
Battery
Life
button
Spot Auto Focus
Type of Operation/card
Operation
Panorama recording
page E-91
Playback
Recording
Mode:
DrivetoMode
• Use
turn indicator
off the(page
flash when
E-55) you Mare
notManual
usingExposure
it (page
Manual Focus
access
lamp
1-Image
S Mode: Shutter Priority AE
AA-size Alkaline
90 minutes
E-55).
Infinity
170
minutes
(page E-25)
Batteries LR6
(540 shots)
CONTINUOUS
• You can also
use the power save settings
(page E-35)
to
A Mode: Aperture
Priority AE
Macro
Exposure mode dial
AA-size Lithium
180 minutes
protect against
AEB
wastingZoom
batterycontroller
power
when
you forget
to
P Mode:
Program
AE
320 minutes
Batteries FR6
(1,130 shots)
turnMoff theMOVIE
camera. (Enlarge/Nine
Metering Mode indicator
Images)
Modepage E- 87
M Mode (Manual
Exposure) Full Auto
AA-size(Metering
Ni-MH
100 minutes
• You can also
conserve (pages
battery power
by using
DISP to turn
Multi-pattern
Metering
PANORAMA
E-49, 75,
112, 113)
Mode)
180 minutes
BestAE)
Shot Mode
Batteries NP-H3
(600 shots)
S monitor
S Mode
(Shutter Speed Priority
page E-85
off the
screen.
Center-weighted Metering
button (page E-68)
A
A
Mode
(Aperture
Priority
AE)
page E-84
Spot
Metering
Memory
capacity
• The above values are approximations only.
Alkaline Battery
Lifesize
(Remaining number
Image
• The above guidelines are based on the following battery
P
P Mode
(Program
AE)
page E-83
2240 x 1680
pixels is of
The actual life of alkaline
batteries
affected
byimages)
a variety of
storable
Camera shake indicator
WB (White balance)
types:
Control
button
2256
x
1504
pixels
Full
Auto
Mode
page
E-82of
factors, including the battery manufacturer, the amount
buttonMX1500
(page E-69)
Alkaline:
(AA) DURACELL ULTRA
1600 x 1200 pixels
time
the
batteries
spend
in
storage
before
you
use
them,
Aperture
Best Shot
1280
Mode
x 960 pixels
page E76
Lithium: value
Energizer
640are
x 480
pixels
temperature while you
recording,
and photographic conBatteryspeed
life varies
with brand.
Shutter
value
ditions. As a rule, we recommend the use of lithium batteries
An
out ofare
range
AE lock recording
indicator under the fol• •Values
based
on continuous
FOCUS
(Focus
Mode)
Quality button
PREVIEW
aperture or shutter
or Ni-MH batteries, which
have
lives
than alkaline
batlowing
conditions.
FINE,longer
NORMAL,
ECONOMY,
TIFF
button
E-61)
speed
causes(page
the
(page
E-54)
teries.
—corresponding
Flash turned
off
monitor
Batteryand
capacity
Image information
to turn
—screen
Onevalue
switch
between telephoto
wide-angle with the
• Movie Recording: recording time (seconds)
amber.
zoom
controller
per
image
• Panorama: number of images (P1 to P10)
AE-L
(AE Lock/Delete)
Focus frame
EV value
• Focusing complete: Green
button (pages E-55, 71,
119)
• Focusing failed: Red
Monitor screen
(page E-22)
No memory card alert
Downloaded from ManualsCamera.com Manuals
E-18
DISP button
Date and
time E-24)
(page
• Today’s date appears for
about two seconds.
2.
With
th
Formatting
PLAY
Using
Powe
Operation
Power
Req
I
arrow
slot
Operation/c
as it co
w
GETTING ACQUAINTED
• AAbout
Microdrive
rechargeable
batteries
much
more
electrical
than a.
2.
1.
Load
Align
the
theconsumes
power/function
batteries
so
their
switch
withpower
or
PLAY
mode
Adjusting
the
Length
of
the
Neck
Strap
Use
CompactFlash
only the
nickel-metal
card.
Depending
hydride
batteries
on how(NP-H3)
a Microdrive
that are
is
plus
(+)
and
minus
(
)
ends
Lamp
Use
The
settings
theitadaptor
buckle
described
to
asadjust
shown
below
the
below
length
let
to
you
power
of
specify
the
neck
theProper
sleep
camera
strap.
and
from
auto
a
Flashing
specifically
used,
can
recommended
greatly
reduce
for
battery
this
camera.
life.
When
using
alkaline
camera
2.
Press
MENU.
Color
are
facing
as
shown
in
the
ilhousehold
power
off trigger
times
outlet.
that help
to other
conserve
operation
batteries,
ispower
certain
not guaranteed
operating
when
conditions
rechargeable
andvaluable
certain battery
battery
batterlustration.
One of the following operations is in progress:
power.
ies
are
used.
can Format
result in batteries
going
dead
right
afterbutyou
3.brands
Select
and
then
rock
the
control
Folder
number
delete, format,
battery
alert,
card
Green
•
If
the
eject
button
is: extended,
itbrowser
in before
sliding
install
AC Adaptor/Charger
new
ones.
Whenever
BC-3HA
using
apress
Microdrive,
we recomton
to
the
right
(page
E-42).
generation.
AUTO
POWER
OFF
the
memory
card
intobatteries
the slot.
mend
Nickel-metal
that
you
use
hydride
rechargeable
nickel
(4-battery
metal
hydride
set)/Quick
batImage
protection
indicator
File
Red
Memory
card
defective.power
Auto
Power
Off
turns
offisto
camera
if number
no operation is
Charger
or lithium
Set : batteries
BC-1HB4
power the camera.
Eject
button
4.teries
In
response
to
the
confirmation
message
that
for five
minutes
in the
the amount
PLAY mode.
InNP-H3P4
the
REC
•• performed
When
Nickel-metal
battery
power
hydride
isbatteries
low,
of
time
required
The
operation/card
access
lamp(4-battery
remains
litset)
(green)
while
appears,
rock
the
control
button
up
or: down
to
mode,
you
can
specify
an Auto
Power
Off
trigger
time
of
between
shots
may
become
longer.
This
longer
interval
is
Buckle
the
monitor
screen
turned off
the PLAY
mode.
Image
Side
marked
select
Yes
toisformat
orin No
to exit
and size
then
two
or
five
minutes.
designed
protect
thedown
Microdrive.
3.
Close to
and
press
on the
with
arrow
IMPORTANT!
click the
control
face the button.
batteryshould
compartment
cover
memory
card
SLEEP
•
Be
sure
to
keep
all four batteries
together as a set at
IMPORTANT!
Yes
: Formats
the
memory
card.
slot
cover.
asmonitor
you
slide
theenters
battery
DC IN
6V if no Quality
screen
a
sleep
state
operation
is
InThe
case
of
Microdrive
malfunction....
all
times,
for
both
charging
and
powering
the
Never
open
the
memory
card
cover
while
thecamera.
operaNo
: Does
format
the
memory
card.
• Be
sure
tonot
keep
the
neck
strap
around
your
neck
when
(AC
power
terminal)
compartment
cover
lock
inofSide
File
name/
performed
for
a
specified
amount
time
in
the
REC
mode.
Mixing
batteries
from
different
sets
can
shorten
overall
marked
•File
Contact
your
originallamp
Microdrive
retailer
or the contact
tion/card
access
is flashing.
using
thebutton
camera
to
protect
accidentally
number
the
direction
indicated
byagainst
the
Pressing
any
immediately
wakes
up
thecamera.
monitordropand
with arrow
lifethe
and
cause malfunction
of
the
pointbattery
noted
Microdrive
documentation.
ping
it. in
Date
and time
restores
normal
operation.
You
can
specify
30
seconds,
1
arrow
to lock
it. be charged
•• Batteries
cannot
while
they
are
loaded
in
••Battery
CASIO
does
not
provide
any
servicing
or
maintenance
Theorsupplied
neck
strapthe
is sleep
intended
foris use
with this
AC
Adaptor:
AD-C620
(Option)
minute,
2
minutes
before
state
triggered,
or
3.
Close
the
memory
card
slot
cover.
capacity
the
camera.
support
for the
Microdrive.
camera
only.
Dosetting
not use
it for any other application.
you
can
off this
entirely.
AC •Adaptor/Charger:
BC-3HA
(Option)
•IMPORTANT!
Note
thatturn
CASIO
assumes
noaround
responsibility
for any
data
Never
swing the
camera
by the neck
strap.
The
BC-3HA
functions
both
as
an Microdrive.
AC adaptor
and neck
as a
loss• you
may suffer
while
using
the
Allowing
the
camera
to
swing
freely
from
your
• Never
use
manganese
batteries.
Use onlybatteries.
the battery
charger
unit
for
nickel
metal
It
• This
camera
supports
use
a hydride
CompactFlash
card
can
result
inAA-size
damage
to of
theboth
camera
to its
bumping
types
specifically
mentioned
in this due
User’s
Guide.
comes
complete
with
four
rechargeable
nickel
metal
hyand
the
Microdrive.
Note,
however,
that
ejecting
a
against other objects. It also creates the danger
of the
dride
batteries.
This
AC caught
adaptor/charger
unit
can
be used
Microdrive
from
the camera
is relatively
difficult
than
camera
becoming
in a doormore
or on
other
obwith jects,
anyahousehold
outlet
rated for 100V to 240V
ejecting
CompactFlash
card.
resulting inpower
personal
injury.
AC.• Keep the camera out of the reach of small children,
especially when the neck strap is attached. The neck
strap can accidentally wind around the neck of a child
and create the risk of strangulation.
Flash
Mode
indicator
The following
examples
show
how
alkaline
Low
Turning
IBM
Microdrive
Battery
the
Camera
Indicator
Precautions
On
and
Off battery
Using
Using
the
Memory
the
Bundled
Control
Cards
Accessories
Button
life
None Auto
changes under different
shooting conditions.
The
Rotate
You
Compatibility
can
theformat
power/function
of
shows
the
a memory
camera
how
the
switch
card
battery
tothe
turn
delete
capacity
IBM
camera
Microdrive
allmemory
indicator
of power
the
has
on
Yourfollowing
This
camera
camera
supports
features
use
a two-way
of
awith
CompactFlash
power
supply
that
letsdata
card
you
Flash
On
the
and
stored
been
monitor
off.
confirmed
on1:
it.
screen
and
CASIO.
the
indicator
However,
display
youAC
should
changes
note
asNote
batthe
Attaching
the
Neck
Strap
use
(CF
either
TYPE
AA-size
I/II)
orbyIBM
batteries
Microdrive
image
storage.
current.
Example
Intermittent
use
ofhousehold
the for
camera
shortens
battery
Flash
Offor
tery power
following
is
important
used.
points
all card
four
whenever
batteries
using
as soon
the
as both
posIBM
that
all
mentions
ofReplace
“memory”
in this
manual
life.strap
The
Attach
operation/card
the
neck
access
Red-eye
to the strap
lamp
reduction
ring
as shown
inrefer
the illusBatteries
sible
Microdrive.
after they• Flash
go dead.
If indicates
you
continue
to
use
the camera
to
a CompactFlash
memory
cardof
and
Microdrive,
unless
indicator
thatIBM
the flash
will fire button
shows
tration
below.
the
operational
status
Control
• Four
alkaline
batteries:
LR6 power will automatiConditions
camera
while
theAA-size
battery
level
isflash
IMPORTANT!
(when
auto
is, selected).
specifically
noted
otherwise.
camera
ascarefully
described
below.
•the
Be
sure
to
read
all ofFR6
the documentation that
• Four
AA-size
lithium
batteries:
cally
turn
off.
•
Temperature:
25
C
• Formatting
a memory before
card deletes
on the
comes
with the Microdrive
using
it.all images batter• Four
AA-size
nickel-metal
hydride
rechargeable
even
someoforbecomes
all of thehot
are
protected
IMPORTANT!
• card,
Repeat
ofMicrodrive
aifcycle
recording
ofimages
one
shot
per
minute
• Note
that
the
during
normal
use.
ies:
NP-H3
Battery
(page
E-125).
Low off
High
for
10when
minutes,
followed
by
minute of
playback,
Take
care
removing
it from
the
• Make
sure
that
the
power
of one
the camera.
camera
is turned
Capacity
The
control
button
is
used
to
select
menu
items
and
execute
• Formatting
a memory
card deletes
all Best
Shot
Mode
and
minutes
of remove
power
off
(power
on,
full
lens
exHousehold
Current
• Take
carenine
toyou
avoid
strong
pressure
on the
label
side
of
the
before
insert
or
a memory
card.
Monitor
function.
Thefiles
following
are
the
terms
usedthe
in Operation/card
this
manual
to
scene
you
have
imported
from
CD-ROM
and
tension,
half
lens
contraction,
full
lens
extension,
im•Screen
AC
Adaptor:
AD-C620
(Option)
Microdrive
when
it is
removed
from
the
camera.
Strong
:
Turns
on
power
and
enters
the
REC
mode.
•
When
inserting
a
memory
card
into
the
camera,
make
access
lamp
describe
control
button
operations.
stored
ondamage
the card.
After
formatting
theand
card,
you have
age
recording,
power
off)
• AC: sure
Adaptor/Charger:
BC-3HA
(Option)
pressure
can
internal
components
cause
malTurns
powerside
andisenters
mode.
itsoncorrect
facingthe
upPLAY
and that
you insert its
Indicator
REC
mode
Strap
ring the Best Shot scene files you
Strap
ringto the
to
import
want
function.
OFF
Turns on
offend
power.
into the camera. Trying to force a card
• : terminal
Flash
Display
Term
memory
card
(page
E-77).
Meaning
Lamp
• Never
turn
off
camera
power
or
subject
the
camera
to iminto the camera
the card
and the camera.
Approximate
Battery can
Life:damage
35 minutes
(32 shots)
Flashing
Color
• Data
by thumb
a memory
card the
format
Useoperation/card
your
to access
move
control
button canup,
Loading
Batteries
pact
whiledeleted
the
lamp
isoperation
flashing.
DoRock
not
because
recovered!
sureoftothe
carefully
check and conIMPORTANT!
down,
left,
or Be
right.
ing so
can
malfunction
Microdrive.
One
of
the
following
operations
is
in
progress:
start
Make
sure
that
camera
power
is
turned
off
whenever
loading
Example
2:
Low
temperatures
shorten
battery
life.
Green
Inserting
a
Memory
Card
into
the
Camera
firm
that
longer
need
the
data
stored
in a
Press
control
button
straight
down
until
it clicks,
up, you
save
(multiple),
movie
recording
standby
•orThe
Microdrive
isthe
ano
very
high
precision
device.
Dropping
while
• Never
align
the
power/function
switch
with
replacing
batteries.
Click
memory
cardresult
it. of the Microdrive,
something
like
aformatting
computer
mouse.
the
camera
can
in
malfunction
the
lens
cap
isbefore
on
the
lens.
Conditions
• even
The
camera
isthe
ready
to record
when
theinlamp
isbar
off. while
Zoom
White
balance
indicator
though
camera
is undamaged.
Take
extra
care
align
the
power/function
switch
with
1.
Slide
the
card
slot
cover
lock
the
direction
•• Never
Temperature:
0 of
C
• Lower half indicates
1.when
On
the
bottom
thewhile
camera,
handling
the
camera
the
Microdrive
iszoom.
installed.
the
lens
isby
facing
downwards
towards
the
Daylight
indicated
the
arrow
and
openoptical
theground.
memory
•• Microdrive
Repeat
of
acamera
cycle
ofpower
recording
ofit one
shot
minute
slide
the
battery
compart• The
has
very
large
storage
capacity.
Because
To
restore
after
has
beenper
turned
off
Upper
half
indicates
Shade
card
slot
cover.
Partial
press
of
the
shutter
button
forcertain
10
minutes,
followed
by release
one
minute
of
playback,
digital
zoom.
of ment
this,
operations
can
take
a
relatively
long
time
to
by
auto
power
off,
rotate
the
power/function
switch
cover
lock
in
the
Tungsten
and nine
minutes
of to
poweror
off (power
on, full lens exLamp
perform.
OFF
and
then
back
.
direction
indicated
by
the
On
Fluorescent
tension,
halfmay
lensnot
contraction,properly
full lensinextension,
imColor
• The
Microdrive
areas where
arrow
and
theoperate
battery
Manualopen
age
recording,
power
off)
Auto
Focus
complete
Green
barometric
pressure
is low. Because of this, you should
compartment
cover.
•Red
Flash
avoid
usingon
it at high
Auto
Focusaltitudes.
operation failed
Memory
Approximate Battery
Life: 8 minutes (8 shots) card slot
Card slot
cover lock
IMPOR
cover
Downloaded from ManualsCamera.com Manuals
E-21
5.
Close
t
To
configure
Memory
Flash
Using
Select
Charg
the
Ca
L
Menu
Scre
1.
Align
.
the
pow
2.
Press
MENU
3.
Rock the
con
IMPOR
GETTING ACQUAINTED
AC
Adaptor
If Handling
youawant
to Contents
do precautions
this: Card from
Do this:
Battery
Changing
Removing
the
Memory
Precautions
of the
the
Monitor
Camera
Rock
the
control
button
•
Never
use
an
electrical
outlet
whose
voltage
is
Screen
Flash
charge
Incorrect
The
•Always
Images
flash
keep
use
cannot
charge
or
handling
lens
lamp
be recorded
cap
also
of
on
batteries
lights
the
with
lens
can
this
whenever
cause
camera
them
you
unless
are
tolamp
leak
not
a
Move
the the
selection
boundary
Pressing
MENU
displays
the
menu
screen.
The
contents
of
to the
left
or AC
right.
outside
the
rating
marked
on
the
adaptor.
1.
Slide
the
card
slot
cover
lock
in
the
direction
or
and
using
memory
burst
flashes
the
and
card
camera.
during
create
is
installed
Always
the
a
record
danger
in
leave
it.
opof
the
serious
lens
cap
damage
on
the
to
your
lens
the
whether
you are
in the PLAY
Usemenu
DISP screen
to cycledepend
throughonmonitor
screen
information
set-
• Formatting
Remove
Be
• sure
In
the
to
turn
PLAY
is Light/Self-timer
recommended
offmode,
from
power
the
before
camera
Auto
forneck
any
connecting
Power
if strap
memory
you
do
Off
not
or
trigger
card
disconnectplan
that
time
toring.
you
use
is
Attach
the
lens
cap
holder
to
the
or
the
strap
Ifbatteries
you
want
to dothe
this:
Do
this:
AF
Assist
Lamp
Indicator
display
This
it forprotects
ing
suspect
the
fixed
more
adaptor.
contains
at
than
against
fivetwo
minutes.
corrupted
accidental
weeks. image
lossdata
of the
(due
lens
to a
cap.
RECORD
Rock
the
control
button
The
You
AF
can
assist
use
the
lightnon-rechargeable
following
operates
procedure
automatically
toof
select
tothe
assist
one
the
of
Auto
the
Select
a menu
item
display
located
on
the
top
camera
also
•The
Never
Always
ERROR,
recharge
turn
strange
image
power
off
before
malformed
type
disconnecting
images)
never
the
or
AC
for
alup
orbatteries,
down.
•indicator
Sleep
iscamera
disabled
in colors,
the
PLAY
mode.
Focus
three
different
operation
date
whenever
formats.
you
are
shooting
where
lighting
is
shows
various
camera
status
indicators
during
image
relow Display
adaptor,
newly
direct
purchased
even
connection
if
the
memory
camera
between
cards.
has
two
batteries
ends
of
installed.
a
battery,
If
and
you
Rock
the
control
button
details
of
the
selected
•
Performing
any
button
operation
while
the
monitor
is
IMPORTANT!
dim.
This
lamp
also
flashes
to indicate
thehandy
countdown
until
cording.
The
indicator
display
comes
in
especially
never
don’t,
the
try
to
camera
take
batteries
will
turn
apart.
off
automatically
when
you
dismenu
itemimmediately
toswitch
the
right.
•the
Before
starting
a format
operation,
to AC adaptor
asleep
wakes
itoff.
up
and
restores
normal
shutter
releases
during
aturned
self-timer
operation.
•not
Never
turn
on
camera
power
with
the
lensofcap
affixed
the
monitor
screen
isYou
•when
Do
connect
expose
the
AC
batteries
adaptor.
direct
also
heat
run
the
orwith
risk
dispose
damaging
of
them
1.
Align
the
switch
or
power
or
load
aselected
new
setitem
oftorecommended
batteries
into
the.
Execute
thepower/function
Click the
control button.
operation.
to the lens.
by
the
burning.
camera
whenever
Doing
so
can
you
create
disconnect
the
danger
the
AC
of
adaptor
explosion.
withcamera.
step
toPower
the
previous
screentypes.
Presspriority
MENU. if you have
• Back
The
Auto
setting
is given
• Never
outPress
first
mix
turning
batteries
power
ofOff
off.
different
2.
MENU.
“2batteries
min”
set may
for
Sleep
andtoto
Auto
Power
Off.
This
• Dead
The AC
adaptor
areboth
become
susceptible
warm
leakage,
touch
afterwhich
extended
can
Linedo
1 not perform
means
that
theand
camera
turns
off
if you
periods
serious
ofthe
use.
damage
This
is normal
to
your
and
camera.
is the
not
Remove
cause
for
batteries
alarm.
Rock
control
button
up
or
down
to
select
3.cause
Select
Date
then
rock
control
button
• Insert
only
memory
cards
into
theunplug
memory
card
slot.
any
operation
about
two
minutes
in the
REC
mode.
• from
After
the
using
camera
the item
camera,
asfor
soon
turn
aswant,
you
it off
notice
and
they
the
dead.
adaptor
Line
2are
the
menu
you
and
then
the
to
the
right.
Inserting
any
other
type
ofcamera
card
can
causerock
malfunc• The
from
batteries
the
AC
outlet.
that
power
the
normally
become
• Auto Power
Offtois the
automatically
disabled
control
button
right.
Line 3 under any
tion.
• warm
The
camera
as of
they
automatically
discharge.
switches
tothe
AC control
adaptor
one
the
following conditions.
4.
Select
Date
and
then over
rock
AF
assist
light/self-timer
lamp
• Should
water Style
or
any
other
foreign
matter
get
into the
powered
operation
whenever
the
AC adaptor
is plugged
—
While
a
slideshow
is
playing
button
to
the
right.
memory
card slot, immediately turn off power, unplug
into the
camera.
the
ACthe
adaptor,
contact
your
retailer
or
— use
When
you
areand
performing
operations
a com• Always
AC adaptor
to power
the original
cameraon
whenever
IMPORTANT!
Multi-area
AF Service
Metering
5.
Rock
theCASIO
control
button
up Multi-pattern
or down
to select
nearest
Provider.
puter
connected
to the
camera’s
USB port
it is connected
to
a
computer.
indicator
indicator
Auto
Focus
using
the AF
assist
light/
self-timer
lamp
is
the
setting
you
want
tocard
and
then
• Never
eject
the
while
the
card
slot
is the
fac—Spot
While
the
ACmemory
adaptor
isuse,
connected
to theclick
camera
AF
indicator
possible
when
the
distance
from
the
ing
downwards.
Doing
so
creates
the camera
danger to
of the
control button to apply it. Center-weighted
Metering indicator
lessindicator
than about
2.5
meters.
memory
card
falling,
which
can
corrupt data or damMF subject
Manual is
focus
Example:
October
23, light
2001operates while Multi-area AF
• age
When
the
AF
assist
Spot Metering
the
memory
card.
Infinity indicator
indicator
or
Spot remove
AF is specified
as the focus
mode,
the camera
camera
• Year/Month/Day:
Never
the
memory
card
from the
01/10/23
Macro mode indicator
automatically
assumes that
focus
area
the center
Battery
capacity
while
the operation/card
access
lamp
is is
flashing.
DoDay/Month/Year:
Flash
off
indicator
area
Spot
AF. 23/10/01
See
pages
and
E-63orfor
more
ing
sofor
can
cause
loss
ofLine
recorded
images
corrup2E-62
Aperture
value
• See the
“Camera
Menus”
on
page
E-150
for
more
informaMonth/Day/Year:
10/23/01
information.
tion
ofmenu
memory
card
data.
Flash
on
indicator
tion about
contents.
time settings
• Do
not
look
directly
at the AFSelf-timer
assist light/self-timer
Red eye reduction
6. Press
MENU
to
exit
the
setting
procedure.
lamp
or
point
it
directly
at
the
subject’s
eyes.
indicator
Exposure compensation
Increase
or
decrease
the
value
Doing
so
can
create
the
danger
of
fire
or eleccamera.
eration
when
the
Be
camera
described
sure
tois note
turned
below.
the
off
following
and
the
important
lens
retracted.
precautions
by
the
arrow
and
open
the
memory
Rock
theisCompactFlash
control
button
mode
oras
REC
mode.
The
following
procedure
shows
operaas
shown
below.
•tings
Beindicated
sure
to
use
only
CASIO
or
SanDisk
where
thetrical
selection
boundary
is
shock.
Use only
the
optional
AC adaptor
to
avoid
problems
with
batteries.
up
or
down.
card
cover.
tion
inlocated
the
REC
mode
as an example.
cards,
orslot
anspecified
IBM
Microdrive.
Proper
operation
is
not
guarfor this camera.
anteed with
other
memory
cards.
•• Use
Do
not
allow
the
AC
adaptor
power
cord
to
beonly LR6 (AM-3) type alkaline or FR6 type
come
cut
or
damaged,
do
not
place
heavy
ob•6.Static
electricity,
electrical
noise,
and
other
electrical
phe1.
Align
the
power/function
switch
with
.
Power
Save
and
then
rock
the
control
button
lithium
or
Ni-MH
(nickel-metal
hydride)
dry
cell
Click the control button
to display
applyon
your settings.
Histogram
jects
on it,
and
keep
it away
from
A damnomena
can
cause
corruption
or
even
totalheat.
loss
of
data
batteries
with
this
camera.
mix
old
batto
the
right.
REC
mode
(pages
E-74,
115)
• To
perform
a menu
operation
in
theNever
PLAY
mode,
align
aged
power
cord
creates
risk
ofshould
fire and
onpower/function
a teries
memory
card.
Because
of the
you
alwith
new
ones.
Doing
so
can
result
in
7.stored
Press
MENU
to
exit
the
setting
procedure.
the
switch
with
.this,
Lamp
Color
Flashing
DISP
electrical
shock.
ways
make
backup
copies
of
important
images
on
other
bursting
or
leaking
of
batteries,
creating
the
4. Rock the control button up or down to select
• danger
Never try
modify
theisAC
adaptor
Information
display
on power cord,
Amber
charging.
of to
fire
or Flash
personal
injury.
the
item
whose
settings
you
want
to change,
2.media.
Press
MENU.
(pages
E-22,
23)plustwisting,
or subject
it to
severe
bending,
or
pullCAUTION
•
Always
make
sure
that
the
and
minus
DISP
2.
Press
the
eject
button
so
it
• Memory
card rock
problems
can be corrected
by(+)
reformatting
and then
the
control
button
to
the
right.
ing.ends
Doing
so creates
the
risk
of fire
and elec(–)
of
the
batteries
are
facing
correctly,
as
DISP
extends
from
the
camera.
the
memory
card.
Reformatting
a
memory
card
deletes
all
CAUTION
• To press
make
auto
power
offmarkings
settings,
select
“Auto
Poweritself.
Off”.
trical
Partial
ofshock.
the
shutter
release
button
noted
by card,
the
on the
images stored
on the
but youdisplay
can
use
a computer
to
Information
offcamera
• Improper
Never
touch
the
AC
while
your
hands
• To
make
sleep
“Sleep”.
Cap
holder
loading
ofadaptor
batteries
can
result
in
Lamp
Color
On
copy
the
images
yousettings,
want
to select
keep
to
the computer’s
hard
DISP
are
wet.
Doing
so
creates
the
risk
of
electrical
Eject
button
bursting or leaking
of Ifbatteries,
creating
the
diskAmber
before reformatting
your card.
you
plan
to
be
recordReady
toor
fire.
shock.
5.ingOn
the where
screen
appears,
rock
the
Monitor
screen
off
danger
ofthat
personal
injury
soiling
ofcontrol
objects
images
you
do
not
have
access
to a
computer,
it
3. Press
the
eject
button
once
•
Do
not
overload
extension
cords
or loop
wall outnearby.
Large
button
up
down
the
setting
is a
good idea
toortake
alongtoanmake
extra memory
card oryou
two
again
to
eject
the
card.
lets.
Doing
so creates the danger of fire and
want,
and
then
click the
button
to apply
just
in case
you
experience
ancontrol
unexpected
memory
card
IMPORTANT!
electrical shock.
problem.
it.
IMPORTANT!
• When• batteries
gocord
low, ofthe
access
Should the
theoperation/card
AC adaptor become
power
off charge
settings:
“2 min”
min”
lamp
and
flash
lamp
flash“5
for about
damaged
internal
wiring),
request
a
• Auto
The histogram
is (exposed
not displayed
inamber
the
movie
RECone
or
second.
After(pages
that,
the
camera
powers
automatireplacement
from
an “1
authorized
CASIO
serPLAY
E-93,110).
Sleep mode
settings:
“Off”
“30
sec”
min” “2down
min”
cally. Ifvice
thisprovider.
happens, A
replace
batteries
as sooncord
as
damaged
AC adaptor
4. Remove
the
memory
card.
possible.
createstothe
danger
of fire or procedure.
electrical shock.
6. Press
MENU
exit
the setting
Line 1
Small loop
Downloaded from ManualsCamera.com Manuals
E-24
Remaining number of
images/File number
Line 3 Shutter speed value/EV
value
2.
With
th
Formatting
PLAY
Using
Powe
Operation
Power
Req
I
arrow
slot
Operation/c
as it co
w
GETTING ACQUAINTED
• AAbout
●
Microdrive
rechargeable
batteries
much
more
electrical
than a.
2.
1.
Load
Align
the
theconsumes
power/function
batteries
so
their
switch
withpower
or
PLAY
mode
Adjusting
the
Length
of
the
Neck
Strap
Use
CompactFlash
only the
nickel-metal
card.
Depending
hydride
batteries
on how(NP-H3)
a Microdrive
that are
is
plus
(+)
and
minus
(–)
ends
Lamp
Use
The
settings
theitadaptor
buckle
described
to
asadjust
shown
below
the
below
length
let
to
you
power
of
specify
the
neck
theProper
sleep
camera
strap.
and
from
auto
a
Flashing
specifically
used,
can
recommended
greatly
reduce
for
battery
this
camera.
life.
When
using
alkaline
camera
2.
Press
MENU.
Color
are
facing
as
shown
in
the
ilhousehold
power
off trigger
times
outlet.
that help
to other
conserve
operation
batteries,
ispower
certain
not guaranteed
operating
when
conditions
rechargeable
andvaluable
certain battery
battery
batterlustration.
One of the following operations is in progress:
power.
ies
are
used.
can“Format”
result in batteries
going
dead
right
afterbutyou
3.brands
Select
and
then
rock
the
control
delete, format,
battery
alert,
card
Green
•
If
the
eject
button
is: extended,
itbrowser
in before
sliding
install
AC Adaptor/Charger
new
ones.
Whenever
BC-3HA
using
apress
Microdrive,
we recomton
to
the
right
(page
E-42).
generation.
AUTO
POWER
the
memory
card
intobatteries
the slot.
mend
Nickel-metal
that
youOFF
use
hydride
rechargeable
nickel
(4-battery
metal hydride
set)/Quick
batRedPowerMemory
card
defective.power if no operation is
Auto
Off: batteries
turns
offisto
camera
Charger
or lithium
Set
BC-1HB4
power the camera.
4.teries
In
response
to
the
confirmation
message
that
for five
minutes
in the
the amount
PLAY mode.
InNP-H3P4
the
REC
•• performed
When
Nickel-metal
battery
power
hydride
isbatteries
low,
of
time
required
The
operation/card
access
lamp(4-battery
remains
litset)
(green)
while
appears,
rock
the
control
button
up
or: down
to
mode,
you
can
specify
an Auto
Power
Off
trigger
time
of
between
shots
may
become
longer.
This
longer
interval
is
the
monitor
screen
turned off
the PLAY
mode.
Side
marked
select
“Yes”
toisformat
orin“No”
to exit
and then
two
or
five
minutes.
designed
protect
thedown
Microdrive.
3.
Close to
and
press
on the
with
arrow
IMPORTANT!
click the
control
face the button.
batteryshould
compartment
cover
memory
card
SLEEP
•
Be
sure
to
keep
all four batteries
together as a set at
IMPORTANT!
Yes
: Formats
the
memory
card.
slot
cover.
asmonitor
you
slide
theenters
battery
screen
a
sleep
state
if no the
operation
is
InThe
case
of
Microdrive
malfunction....
all
times,
for
both
charging
and
powering
Never
open
the
memory
card
cover
while
thecamera.
operaNo
: Does
format
the
memory
card.
• Be
sure
tonot
keep
the
neck
strap
around
your
neck
when
compartment
cover
lock
inofsets
performed
for
a
specified
amount
time
in
the
REC
mode.
Mixing
batteries
from
different
can
shorten
overall
• Contact
your
originallamp
Microdrive
retailer
or the contact
tion/card
access
is flashing.
using
thebutton
camera
to
protect
accidentally
the
direction
indicated
byagainst
the of
Pressing
any
immediately
wakes
up
thecamera.
monitordropand
lifethe
and
cause malfunction
the
pointbattery
noted
Microdrive
documentation.
ping
it. in
restores
normal
operation.
You
can
specify
30
seconds,
1
arrow
to lock
it. be charged
•• Batteries
cannot
while
they
are
loaded
in
•• CASIO
does
not
provide
any
servicing
or
maintenance
Theorsupplied
neck
strapthe
is sleep
intended
foris use
with this
Adaptor:
AD-C620
(Option)
minute,
2
minutes
before
state
triggered,
or
3.AC
Close
the
memory
card
slot
cover.
the
camera.
support
for the
Microdrive.
camera
only.
Dosetting
not use
it for any other application.
you
can
off this
entirely.
AC •Adaptor/Charger:
BC-3HA
(Option)
•IMPORTANT!
Note
thatturn
CASIO
assumes
noaround
responsibility
for any
data
Never
swing the
camera
by the neck
strap.
The
BC-3HA
functions
both
as
an Microdrive.
AC adaptor
and neck
as a
loss• you
may suffer
while
using
the
Allowing
the
camera
to
swing
freely
from
your
• Never
use
manganese
batteries.
Use onlybatteries.
the battery
charger
unit
for
nickel
metal
It
• This
camera
supports
use
a hydride
CompactFlash
card
can
result
inAA-size
damage
to of
theboth
camera
to its
bumping
types
specifically
mentioned
in this due
User’s
Guide.
comes
complete
with
four
rechargeable
nickel
metal
hyand
the
Microdrive.
Note,
however,
that
ejecting
a
against other objects. It also creates the danger
of the
dride
batteries.
This
AC caught
adaptor/charger
unit
can
be used
Microdrive
from
the camera
is relatively
difficult
than
camera
becoming
in a doormore
or on
other
obwith jects,
anyahousehold
outlet
rated for 100V to 240V
ejecting
CompactFlash
card.
resulting inpower
personal
injury.
AC.• Keep the camera out of the reach of small children,
especially when the neck strap is attached. The neck
strap can accidentally wind around the neck of a child
and create the risk of strangulation.
The following
examples
show
how
alkaline
Low
Turning
IBM
Microdrive
Battery
the
Camera
Indicator
Precautions
On
and
Off battery
Using
Using
the
Memory
the
Bundled
Control
Cards
Accessories
Button
life
None Auto
changes under different
shooting conditions.
The
Rotate
You
Compatibility
can
theformat
power/function
of
shows
the
a memory
camera
how
the
switch
card
battery
tothe
turn
delete
capacity
IBM
camera
Microdrive
allmemory
indicator
of power
the
has
on
Yourfollowing
This
camera
camera
supports
features
use
a two-way
of
awith
CompactFlash
power
supply
that
letsdata
card
you
Flash
On
the
and
stored
been
monitor
off.
confirmed
on1:
it.
screen
and
CASIO.
the
indicator
However,
display
youAC
should
changes
note
asNote
batthe
Attaching
the
Neck
Strap
use
(CF
either
TYPE
AA-size
I/II)
orbyIBM
batteries
Microdrive
image
storage.
current.
Example
Intermittent
use
ofhousehold
the for
camera
shortens
battery
Flash
Offor
tery power
following
is
important
used.
points
all card
four
whenever
batteries
using
as soon
the
as both
posIBM
that
all
mentions
ofReplace
“memory”
in this
manual
life.strap
The
Attach
operation/card
the
neck
access
Red-eye
to the strap
lamp
reduction
ring
as shown
inrefer
the illus■ Batteries
sible
Microdrive.
after they• Flash
go dead.
If indicates
you
continue
to
use
the camera
to
a CompactFlash
memory
cardof
and
Microdrive,
unless
indicator
thatIBM
the flash
will fire
shows
tration
below.
the
operational
status
• Four
alkaline
batteries:
LR6 power will automatiConditions
camera
while
theAA-size
battery
level
isflash
IMPORTANT!
(when
auto
is, selected).
specifically
noted
otherwise.
camera
ascarefully
described
below.
•the
Be
sure
to
read
all ofFR6
the documentation that
• Four
AA-size
lithium
batteries:
cally
turn
off.
•
Temperature:
25
C
• Formatting
a memory before
card deletes
on the
comes
with the Microdrive
using
it.all images batter• Four
AA-size
nickel-metal
hydride
rechargeable
even
someoforbecomes
all of thehot
are
protected
IMPORTANT!
• card,
Repeat
ofMicrodrive
aifcycle
recording
ofimages
one
shot
per
minute
• Note
that
the
during
normal
use.
ies:
NP-H3
Battery
(page
E-125).
Low off
High
for
10when
minutes,
followed
by
minute of
playback,
Take
care
removing
it from
the
• Make
sure
that
the
power
of one
the camera.
camera
is turned
Capacity
The
control
button
is
used
to
select
menu
items
and
execute
• Formatting
a memory
card deletes
all Best
Shot
Mode
and
minutes
of remove
power
off
(power
on, full
lens
ex■
Household
Current
• Take
carenine
toyou
avoid
strong
pressure
on the
label
side
of
the
before
insert
or
a memory
Monitor
function.
Thefiles
following
are
the
terms
usedthe
in card.
this
manual
to
scene
you
have
imported
from
CD-ROM
and
tension,
half
lens
contraction,
full
lens
extension,
im•Screen
AC
Adaptor:
AD-C620
(Option)
Microdrive
when
it is
removed
from
the
camera.
Strong
:
Turns
on
power
and
enters
the
REC
mode.
•
When
inserting
a
memory
card
into
the
camera,
make
describe
control
button
operations.
stored
ondamage
the card.
After
formatting
theand
card,
you have
age
recording,
power
off)
• AC: sure
Adaptor/Charger:
BC-3HA
(Option)
pressure
can
internal
components
cause
malTurns
powerside
andisenters
mode.
itsoncorrect
facingthe
upPLAY
and that
you insert its
Indicator
REC
mode
to
import the Best Shot scene files you want to the
function.
OFF
Turns on
offend
power.
into the camera. Trying to force a card
• : terminal
Flash
Display
Term
memory
card
(page
E-77).
Meaning
Lamp
• Never
turn
camera
power
or
subject
camera
to iminto
theoff
camera
can
damage
the card
and
the camera.
Approximate
Battery
Life:
35 minutes
(32the
shots)
Flashing
Color
• Data
by thumb
a memory
card the
format
Useoperation/card
your
to access
move
control
button canup,
Loading
Batteries
pact
whiledeleted
the
lamp
isoperation
flashing.
DoRock
not
because
recovered!
sureoftothe
carefully
check and conIMPORTANT!
down,
left,
or Be
right.
ing so
can
malfunction
Microdrive.
One
of
the
following
operations
is
in
progress:
start
Make
sure
that
camera
power
is
turned
off
whenever
loading
Example
2:
Low
temperatures
shorten
battery
life.
Green
Inserting
a
Memory
Card
into
the
Camera
firm
that
longer
need
the
data
stored
in a
Press
control
button
straight
down
until
it clicks,
up, you
save
(multiple),
movie
recording
standby
•orThe
Microdrive
isthe
ano
very
high
precision
device.
Dropping
while
• Never
align
the
power/function
switch
with
replacing
batteries.
Click
memory
cardresult
it. of the Microdrive,
something
like
aformatting
computer
mouse.
the
camera
can
in
malfunction
the
lens
cap
isbefore
on
the
lens.
Conditions
• even
The
camera
isthe
ready
to record
when
theinlamp
isdirection
off. while
though
camera
is undamaged.
Take
extra
care
align
the
power/function
switch
with
1.
Slide
the
card
slot
cover
lock
the
•• Never
Temperature:
0 of
C
• Lower half indicates
1.when
On
the
bottom
thewhile
camera,
handling
the
camera
the
Microdrive
iszoom.
installed.
the
lens
isby
facing
downwards
towards
the
Daylight
indicated
the
arrow
and
openoptical
theground.
memory
•• Microdrive
Repeat
of
acamera
cycle
ofpower
recording
ofit one
shot
minute
slide
the
battery
compart• The
has
very
large
storage
capacity.
Because
To
restore
after
has
beenper
turned
off
Upper
half
indicates
Shade
card
slot
cover.
Partial
press
of
the
shutter
button
forcertain
10
minutes,
followed
by release
one
minute
of
playback,
digital
zoom.
of ment
this,
operations
can
take
a
relatively
long
time
to
by
auto
power
off,
rotate
the
power/function
switch
cover
lock
in
the
Tungsten
and nine
minutes
of to
poweror
off (power
on, full lens exLamp
perform.
OFF
and
then
back
.
direction
indicated
by
the
On
Fluorescent
tension,
halfmay
lensnot
contraction,properly
full lensinextension,
imColor
• The
Microdrive
areas where
arrow
and
theoperate
battery
Manualopen
age
recording,
power
off)
Auto
Focus
complete
Green
barometric
pressure
is low. Because of this, you should
compartment
cover.
•Red
Flash
avoid
usingon
it at high
Auto
Focusaltitudes.
operation failed
Approximate Battery Life: 8 minutes (8 shots)
Downloaded from ManualsCamera.com Manuals
IMPOR
E-21
Mode
Dial
Drive mod
Exposure
GETTING ACQUAINTED
●
Battery Life Guidelines
●—
Drive
Recording
mode dial
one image per minute under the above conBack
Monitor Screen Indicators
The battery life guideline values given below indicate the
ditions reduces battery life to about one sixth of that
AEB
Auto
Exposure
Bracketing
(AEB)
page E-89
The following
describes
the different
indicators
on the
camera’s
monitor
screen.
amount
of time
at standard
temperature
(25°C)and
untilmarkings
power that appear
noted
above.
lamp failure. They MENU
button
automatically Flash
turns offcharge
due to battery
do not button
• Battery life Continuous
is(Self-Timer)
greatly affected
by
how
much
you
use Eflash,
Shutter recording
page
88
E-26) provide the amount of (page
guarantee that(page
serviceE-42)
zoom and(page
other E-52)
functions, and how long you leave power
REC mode batteries willΦοχυσ
1-Image
recording
page
E54
Μοδε
ινδιχατορ
Σελφ−τιµερ
indicated. Low temperatures reduce
battery
life.
turned on.
10 SEC, 2 SEC
Multi-area Auto Focus
Movie recording
page E-93
Continuous
Continuous
Εξποσυρε
Μοδε ινδιχατορ
● Tips for Prolonging
(Flash)
Battery
Life
button
Spot Auto Focus
Type of Operation/card
Operation
Panorama recording
page E-91
Playback
Recording
Mode:
∆ριϖεtoΜοδε
• Use
turn ινδιχατορ
off the(page
flash when
E-55) you Mare
notManual
usingExposure
it (page
Manual Focus
access
lamp
1-Image
S Mode: Shutter Priority AE
AA-size Alkaline
90 minutes
E-55).
Infinity
170
minutes
(page E-25)
Batteries LR6
(540 shots)
CONTINUOUS
• You can also
use the power save settings
(page E-35)
to
A Mode: Aperture
Priority AE
Macro
● Exposure mode dial
AA-size Lithium
180 minutes
protect against
AEB
wastingZoom
batterycontroller
power
when
you forget
to
P Mode:
Program
AE
320 minutes
Batteries FR6
(1,130 shots)
turnMoff theMOVIE
camera. (Enlarge/Nine
Μετερινγ Μοδε ινδιχατορ
Images)
Modepage E- 87
M Mode (Manual
Exposure) Full Auto
AA-size(Metering
Ni-MH
100 minutes
• You can also
conserve (pages
battery power
by using
DISP to turn
Multi-pattern
Metering
PANORAMA
E-49, 75,
112, 113)
Mode)
180 minutes
BestAE)
Shot Mode
Batteries NP-H3
(600 shots)
S monitor
S Mode
(Shutter Speed Priority
page E-85
off the
screen.
Center-weighted Metering
button (page E-68)
A
A
Mode
(Aperture
Priority
AE)
page E-84
Spot
Metering
Μεµορψ
χαπαχιτψ
• The above values are approximations only.
● Alkaline Battery
Lifeσιζε
(Ρεµαινινγ νυµβερ
Ιµαγε
• The above guidelines are based on the following battery
P
P Mode
(Program
AE)
page E-83
2240 x 1680
pixels is οφ
The actual life of alkaline
batteries
affected
by aιµαγεσ)
variety of
στοραβλε
Χαµερα σηακε ινδιχατορ
WB (White balance)
types:
Control
button
2256
x
1504
pixels
Full
Auto
Mode
page
E-82of
factors, including the battery manufacturer, the amount
buttonMX1500
(page E-69)
Alkaline:
(AA) DURACELL ULTRA
1600 x 1200 pixels
time
the
batteries
spend
in
storage
before
you
use
them,
Απερτυρε
Best Shot
1280
Mode
x 960 pixels
page E76
Lithium: ϖαλυε
Energizer
640are
x 480
pixels
temperature while you
recording,
and photographic con* Battery σπεεδ
life varies
with brand.
Σηυττερ
ϖαλυε
ditions. As a rule, we recommend the use of lithium batteries
An
out ofare
range
ΑΕ λοχκrecording
ινδιχατορunder the fol• •Values
based
on continuous
FOCUS
(Focus
Mode)
Θυαλιτψbutton
PREVIEW
aperture or shutter
or Ni-MH batteries, which
have
lives
than alkaline
batlowing
conditions.
FINE,longer
NORMAL,
ECONOMY,
TIFF
button
E-61)
speed
causes(page
the
(page
E-54)
teries.
—corresponding
Flash turned
off
monitor
Βαττερψ
χαπαχιτψ
Ιµαγε ινφορµατιον
to turn
—screen
Onevalue
switch
between telephoto
and
wide-angle with the
• Movie Recording: recording time (seconds)
amber.
zoom
controller
per
image
• Panorama: number of images (P1 to P10)
AE-L
(AE Lock/Delete)
Φοχυσ φραµε
Ες ϖαλυε
• Focusing complete: Green
button (pages E-55, 71,
119)
• Focusing failed: Red
Monitor screen
(page E-22)
Νο µεµορψ χαρδ αλερτ
Downloaded from ManualsCamera.com Manuals
E-18
DISP button
∆ατε ανδ
τιµε E-24)
(page
• Today’s date appears for
about two seconds.
2.
With
th
Formatting
PLAY
Using
Powe
Operation
Power
Req
I
arrow
slot
Operation/c
as it co
w
GETTING ACQUAINTED
• AAbout
●
Microdrive
rechargeable
batteries
much
more
electrical
than a.
2.
1.
Load
Align
the
theconsumes
power/function
batteries
so
their
switch
withpower
or
PLAY
mode
Adjusting
the
Length
of
the
Neck
Strap
Use
CompactFlash
only the
nickel-metal
card.
Depending
hydride
batteries
on how(NP-H3)
a Microdrive
that are
is
plus
(+)
and
minus
(
)
ends
Lamp
Use
The
settings
theitadaptor
buckle
described
to
asadjust
shown
below
the
below
length
let
to
you
power
of
specify
the
neck
theProper
sleep
camera
strap.
and
from
auto
a
Flashing
specifically
used,
can
recommended
greatly
reduce
for
battery
this
camera.
life.
When
using
alkaline
camera
2.
Press
MENU.
Color
are
facing
as
shown
in
the
ilhousehold
power
off trigger
times
outlet.
that help
to other
conserve
operation
batteries,
ispower
certain
not guaranteed
operating
when
conditions
rechargeable
andvaluable
certain battery
battery
batterlustration.
One of the following operations is in progress:
power.
ies
are
used.
can Format
result in batteries
going
dead
right
afterbutyou
3.brands
Select
and
then
rock
the
control
delete, format,
battery
alert,
card
Green
•
If
the
eject
button
is: extended,
itbrowser
in before
sliding
install
AC Adaptor/Charger
new
ones.
Whenever
BC-3HA
using
apress
Microdrive,
we recomton
to
the
right
(page
E-42).
generation.
AUTO
POWER
the
memory
card
intobatteries
the slot.
mend
Nickel-metal
that
youOFF
use
hydride
rechargeable
nickel
(4-battery
metal hydride
set)/Quick
batRedPowerMemory
card
defective.power if no operation is
Auto
Off: batteries
turns
offisto
camera
Charger
or lithium
Set
BC-1HB4
power the camera.
4.teries
In
response
to
the
confirmation
message
that
for five
minutes
in the
the amount
PLAY mode.
InNP-H3P4
the
REC
•• performed
When
Nickel-metal
battery
power
hydride
isbatteries
low,
of
time
required
The
operation/card
access
lamp(4-battery
remains
litset)
(green)
while
appears,
rock
the
control
button
up
or: down
to
mode,
you
can
specify
an Auto
Power
Off
trigger
time
of
between
shots
may
become
longer.
This
longer
interval
is
the
monitor
screen
turned off
the PLAY
mode.
Side
marked
select
Yes
toisformat
orin No
to exit
and then
two
or
five
minutes.
designed
protect
thedown
Microdrive.
3.
Close to
and
press
on the
with
arrow
IMPORTANT!
click the
control
face the button.
batteryshould
compartment
cover
memory
card
SLEEP
•
Be
sure
to
keep
all four batteries
together as a set at
IMPORTANT!
Yes
: Formats
the
memory
card.
slot
cover.
asmonitor
you
slide
theenters
battery
screen
a
sleep
state
if no the
operation
is
InThe
case
of
Microdrive
malfunction....
all
times,
for
both
charging
and
powering
Never
open
the
memory
card
cover
while
thecamera.
operaNo
: Does
format
the
memory
card.
• Be
sure
tonot
keep
the
neck
strap
around
your
neck
when
compartment
cover
lock
inofsets
performed
for
a
specified
amount
time
in
the
REC
mode.
Mixing
batteries
from
different
can
shorten
overall
• Contact
your
originallamp
Microdrive
retailer
or the contact
tion/card
access
is flashing.
using
thebutton
camera
to
protect
accidentally
the
direction
indicated
byagainst
the of
Pressing
any
immediately
wakes
up
thecamera.
monitordropand
lifethe
and
cause malfunction
the
pointbattery
noted
Microdrive
documentation.
ping
it. in
restores
normal
operation.
You
can
specify
30
seconds,
1
arrow
to lock
it. be charged
•• Batteries
cannot
while
they
are
loaded
in
•• CASIO
does
not
provide
any
servicing
or
maintenance
Theorsupplied
neck
strapthe
is sleep
intended
foris use
with this
Adaptor:
AD-C620
(Option)
minute,
2
minutes
before
state
triggered,
or
3.AC
Close
the
memory
card
slot
cover.
the
camera.
support
for the
Microdrive.
camera
only.
Dosetting
not use
it for any other application.
you
can
off this
entirely.
AC •Adaptor/Charger:
BC-3HA
(Option)
•IMPORTANT!
Note
thatturn
CASIO
assumes
noaround
responsibility
for any
data
Never
swing the
camera
by the neck
strap.
The
BC-3HA
functions
both
as
an Microdrive.
AC adaptor
and neck
as a
loss• you
may suffer
while
using
the
Allowing
the
camera
to
swing
freely
from
your
• Never
use
manganese
batteries.
Use onlybatteries.
the battery
charger
unit
for
nickel
metal
It
• This
camera
supports
use
a hydride
CompactFlash
card
can
result
inAA-size
damage
to of
theboth
camera
to its
bumping
types
specifically
mentioned
in this due
User’s
Guide.
comes
complete
with
four
rechargeable
nickel
metal
hyand
the
Microdrive.
Note,
however,
that
ejecting
a
against other objects. It also creates the danger
of the
dride
batteries.
This
AC caught
adaptor/charger
unit
can
be used
Microdrive
from
the camera
is relatively
difficult
than
camera
becoming
in a doormore
or on
other
obwith jects,
anyahousehold
outlet
rated for 100V to 240V
ejecting
CompactFlash
card.
resulting inpower
personal
injury.
AC.• Keep the camera out of the reach of small children,
especially when the neck strap is attached. The neck
strap can accidentally wind around the neck of a child
and create the risk of strangulation.
The following
examples
show
how
alkaline
Low
Turning
IBM
Microdrive
Battery
the
Camera
Indicator
Precautions
On
and
Off battery
Using
Using
the
Memory
the
Bundled
Control
Cards
Accessories
Button
life
None Auto
changes under different
shooting conditions.
The
Rotate
You
Compatibility
can
theformat
power/function
of
shows
the
a memory
camera
how
the
switch
card
battery
tothe
turn
delete
capacity
IBM
camera
Microdrive
allmemory
indicator
of power
the
has
on
Yourfollowing
This
camera
camera
supports
features
use
a two-way
of
awith
CompactFlash
power
supply
that
letsdata
card
you
Flash
On
the
and
stored
been
monitor
off.
confirmed
on1:
it.
screen
and
CASIO.
the
indicator
However,
display
youAC
should
changes
note
asNote
batthe
Attaching
the
Neck
Strap
use
(CF
either
TYPE
AA-size
I/II)
orbyIBM
batteries
Microdrive
image
storage.
current.
Example
Intermittent
use
ofhousehold
the for
camera
shortens
battery
Flash
Offor
tery power
following
is
important
used.
points
all card
four
whenever
batteries
using
as soon
the
as both
posIBM
that
all
mentions
ofReplace
“memory”
in this
manual
life.strap
The
Attach
operation/card
the
neck
access
Red-eye
to the strap
lamp
reduction
ring
as shown
inrefer
the illus■ Batteries
sible
Microdrive.
after they• Flash
go dead.
If indicates
you
continue
to
use
the camera
to
a CompactFlash
memory
cardof
and
Microdrive,
unless
indicator
thatIBM
the flash
will fire
shows
tration
below.
the
operational
status
• Four
alkaline
batteries:
LR6 power will automatiConditions
camera
while
theAA-size
battery
level
isflash
IMPORTANT!
(when
auto
is, selected).
specifically
noted
otherwise.
camera
ascarefully
described
below.
•the
Be
sure
to
read
all ofFR6
the documentation that
• Four
AA-size
lithium
batteries:
cally
turn
off.
•
Temperature:
25°C
• Formatting
a memory before
card deletes
on the
comes
with the Microdrive
using
it.all images batter• Four
AA-size
nickel-metal
hydride
rechargeable
even
someoforbecomes
all of thehot
are
protected
IMPORTANT!
• card,
Repeat
ofMicrodrive
aifcycle
recording
ofimages
one
shot
per
minute
• Note
that
the
during
normal
use.
ies:
NP-H3
Battery
(page
E-125).
Low off
High
for
10when
minutes,
followed
by
minute of
playback,
Take
care
removing
it from
the
• Make
sure
that
the
power
of one
the camera.
camera
is turned
Capacity
The
control
button
is
used
to
select
menu
items
and
execute
• Formatting
a memory
card deletes
all Best
Shot
Mode
and
minutes
of remove
power
off
(power
on, full
lens
ex■
Household
Current
• Take
carenine
toyou
avoid
strong
pressure
on the
label
side
of
the
before
insert
or
a memory
Monitor
function.
Thefiles
following
are
the
terms
usedthe
in card.
this
manual
to
scene
you
have
imported
from
CD-ROM
and
tension,
half
lens
contraction,
full
lens
extension,
im•Screen
AC
Adaptor:
AD-C620
(Option)
Microdrive
when
it is
removed
from
the
camera.
Strong
:
Turns
on
power
and
enters
the
REC
mode.
•
When
inserting
a
memory
card
into
the
camera,
make
describe
control
button
operations.
stored
ondamage
the card.
After
formatting
theand
card,
you have
age
recording,
power
off)
• AC: sure
Adaptor/Charger:
BC-3HA
(Option)
pressure
can
internal
components
cause
malTurns
powerside
andisenters
mode.
itsoncorrect
facingthe
upPLAY
and that
you insert its
Indicator
REC
mode
to
import the Best Shot scene files you want to the
function.
OFF
Turns on
offend
power.
into the camera. Trying to force a card
• : terminal
Flash
Display
Term
memory
card
(page
E-77).
Meaning
Lamp
• Never
turn
camera
power
or
subject
camera
to iminto
theoff
camera
can
damage
the card
and
the camera.
Approximate
Battery
Life:
35 minutes
(32the
shots)
Flashing
Color
• Data
by thumb
a memory
card the
format
Useoperation/card
your
to access
move
control
button canup,
Loading
Batteries
pact
whiledeleted
the
lamp
isoperation
flashing.
DoRock
not
because
recovered!
sureoftothe
carefully
check and conIMPORTANT!
down,
left,
or Be
right.
ing so
can
malfunction
Microdrive.
One
of
the
following
operations
is
in
progress:
start
Make
sure
that
camera
power
is
turned
off
whenever
loading
Example
2:
Low
temperatures
shorten
battery
life.
Green
Inserting
a
Memory
Card
into
the
Camera
firm
that
longer
need
the
data
stored
in a
Press
control
button
straight
down
until
it clicks,
up, you
save
(multiple),
movie
recording
standby
•orThe
Microdrive
isthe
ano
very
high
precision
device.
Dropping
while
• Never
align
the
power/function
switch
with
replacing
batteries.
Click
memory
cardresult
it. of the Microdrive,
something
like
aformatting
computer
mouse.
the
camera
can
in
malfunction
the
lens
cap
isbefore
on
the
lens.
Conditions
• even
The
camera
isthe
ready
to record
when
theinlamp
isdirection
off. while
though
camera
is undamaged.
Take
extra
care
align
the
power/function
switch
with
1.
Slide
the
card
slot
cover
lock
the
•• Never
Temperature:
0°C
• Lower half indicates
1.when
On
the
bottom
ofdownwards
thewhile
camera,
handling
the
camera
the
Microdrive
iszoom.
installed.
the
lens
isby
facing
towards
the
Daylight
indicated
the
arrow
and
openoptical
theground.
memory
•• Microdrive
Repeat
of
acamera
cycle
ofpower
recording
ofit one
shot
minute
slide
the
battery
compart• The
has
very
large
storage
capacity.
Because
To
restore
after
has
beenper
turned
off
Upper
half
indicates
Shade
card
slot
cover.
Partial
press
of
the
shutter
button
forcertain
10
minutes,
followed
by release
one
minute
of
playback,
digital
zoom.
of ment
this,
operations
can
take
a
relatively
long
time
to
by
auto
power
off,
rotate
the
power/function
switch
cover
lock
in
the
Tungsten
and nine
minutes
of to
poweror
off (power
on, full lens exLamp
perform.
OFF
and
then
back
.
direction
indicated
by
the
On
Fluorescent
tension,
halfmay
lensnot
contraction,properly
full lensinextension,
imColor
• The
Microdrive
areas where
arrow
and
theoperate
battery
Manualopen
age
recording,
power
off)
Auto
Focus
complete
Green
barometric
pressure
is low. Because of this, you should
compartment
cover.
•Red
Flash
avoid
usingon
it at high
Auto
Focusaltitudes.
operation failed
Approximate Battery Life: 8 minutes (8 shots)
Downloaded from ManualsCamera.com Manuals
IMPOR
E-21
5.
Close
t
To
configure
Memory
Flash
Using
Select
Charg
the
Ca
L
Menu
Scre
1.
Align
.
the
pow
2.
Press
MENU
3.
Rock the
con
IMPOR
GETTING ACQUAINTED
AC
Adaptor
If Handling
youawant
to Contents
do precautions
this: Card from
Do this:
Battery
Changing
Removing
the
Memory
Precautions
of the
the
Monitor
Camera
Rock
the
control
button
•
Never
use
an
electrical
outlet
whose
voltage
is
Screen
Incorrect
The
•Always
Images
flash
keep
use
cannot
charge
or
handling
lens
lamp
be recorded
cap
also
of
on
batteries
lights
the
with
lens
can
this
whenever
cause
camera
them
you
unless
are
to leak
not
a
Move
the the
selection
boundary
Pressing
MENU
displays
the
menu
screen.
The
contents
of
to the
left
or AC
right.
outside
the
rating
marked
on
the
adaptor.
1.
Slide
the
card
slot
cover
lock
in
the
direction
or
and
using
memory
burst
flashes
the
and
card
camera.
during
create
is
installed
Always
the
a
record
danger
in
leave
it.
opof
the
serious
lens
cap
damage
on
the
to
your
lens
the
whether
you are
in the PLAY
Usemenu
DISP screen
to cycledepend
throughonmonitor
screen
information
set-
• Formatting
Remove
Be
• sure
In
the
to
turn
PLAY
is Light/Self-timer
recommended
offmode,
from
power
the
before
camera
Auto
forneck
any
connecting
Power
if strap
memory
you
do
Off
not
or
trigger
card
disconnectplan
that
time
toring.
you
use
is
Attach
the
lens
cap
holder
to
the
or
the
strap
Ifbatteries
you
want
to dothe
this:
Do
this:
AF
Assist
Lamp
Indicator
display
This
it forprotects
ing
suspect
the
fixed
more
adaptor.
contains
at
than
against
fivetwo
minutes.
corrupted
accidental
weeks. image
lossdata
of the
(due
lens
to a
cap.
RECORD
Rock
the
control
button
The
You
AF
can
assist
use
the
lightnon-rechargeable
following
operates
procedure
automatically
toof
select
tothe
assist
one
the
of
Auto
the
Select
a menu
item
display
located
on
the
top
camera
also
•The
Never
Always
ERROR,
recharge
turn
strange
image
power
off
before
malformed
type
disconnecting
images)
never
the
or
AC
for
alup
orbatteries,
down.
•indicator
Sleep
iscamera
disabled
in colors,
the
PLAY
mode.
Focus
three
different
operation
date
whenever
formats.
you
are
shooting
where
lighting
is
shows
various
camera
status
indicators
during
image
relow Display
adaptor,
newly
direct
purchased
even
connection
if
the
memory
camera
between
cards.
has
two
batteries
ends
of
installed.
a
battery,
If
and
you
Rock
the
control
button
details
of
the
selected
•
Performing
any
button
operation
while
the
monitor
is
IMPORTANT!
dim.
This
lamp
also
flashes
to indicate
thehandy
countdown
until
cording.
The
indicator
display
comes
in
especially
never
don’t,
the
try
to
camera
take
batteries
will
turn
apart.
off
automatically
when
you
dismenu
itemimmediately
toswitch
the
right.
•the
Before
starting
a format
operation,
to AC adaptor
asleep
wakes
itoff.
up
and
restores
normal
shutter
releases
during
aturned
self-timer
operation.
•not
Never
turn
on
camera
power
with
the
lensofcap
affixed
the
monitor
screen
isYou
•when
Do
connect
expose
the
AC
batteries
adaptor.
direct
also
heat
run
the
orwith
risk
dispose
damaging
of
them
1.
Align
the
switch
or
power
or
load
aselected
new
setitem
oftorecommended
batteries
into
the.
Execute
thepower/function
Click the
control button.
operation.
to the lens.
by
the
burning.
camera
whenever
Doing
so
can
you
create
disconnect
the
danger
the
AC
of
adaptor
explosion.
withcamera.
step
toPower
the
previous
screentypes.
Presspriority
MENU. if you have
• Back
The
Auto
setting
is given
• Never
outPress
first
mix
turning
batteries
power
ofOff
off.
different
2.
MENU.
“2batteries
min”
set may
for
Sleep
andtoto
Auto
Power
Off.
This
• Dead
The AC
adaptor
areboth
become
susceptible
warm
leakage,
touch
afterwhich
extended
can
means
that
theand
camera
turns
off
if you
do not
perform
periods
serious
ofthe
use.
damage
This
is normal
to
your
and
camera.
is the
not
Remove
cause
for
batteries
alarm.
Rock
control
button
up
or
down
to
select
3.cause
Select
Date
then
rock
control
button
• Insert
only
memory
cards
into
theunplug
memory
card
slot.
any
operation
about
two
minutes
in the
REC
mode.
• from
After
the
using
camera
the item
camera,
asfor
soon
turn
aswant,
you
it off
notice
and
they
are
the
dead.
adaptor
the
menu
you
and
then
the
to
the
right.
Inserting
any
other
type
ofcamera
card
can
causerock
malfunc• The
from
batteries
the
AC
outlet.
that
power
the
normally
become
• Auto Power
Offtois the
automatically
disabled under any
control
button
right.
tion.
• warm
The
camera
as of
they
automatically
discharge.
switches
tothe
AC control
adaptor
one
the
following conditions.
4.
Select
Date
and
then over
rock
• Should
water Style
orwhenever
any other
foreign
matter
get
into the
powered
operation
the
AC adaptor
is plugged
—
While
a
slideshow
is
playing
button
to
the
right.
memory
card slot, immediately turn off power, unplug
into the
camera.
the
ACthe
adaptor,
contact
your
retailer
or
— use
When
you
areand
performing
operations
a com• Always
AC adaptor
to power
the original
cameraon
whenever
IMPORTANT!
Multi-area
AF Service
Metering
5.
Rock
theCASIO
control
button
up Multi-pattern
or down
to select
nearest
Provider.
puter
connected
to the
camera’s
USB port
it is connected
to
a
computer.
indicator
indicator
Auto
Focus
using
the AF
assist
light/
self-timer
lamp
is
the
setting
you
want
tocard
and
then
• Never
eject
the
while
the
card
slot
is the
fac—Spot
While
the
ACmemory
adaptor
isuse,
connected
to theclick
camera
AF
indicator
possible
when
the
distance
from
the
ing
downwards.
Doing
so
creates
the camera
danger to
of the
control button to apply it. Center-weighted
Metering indicator
lessindicator
than about
2.5
meters.
memory
card
falling,
which
can
corrupt data or damMF subject
Manual is
focus
Example:
October
23, light
2001operates while Multi-area AF
• age
When
the
AF
assist
Spot Metering
the
memory
card.
Infinity indicator
indicator
or
Spot remove
AF is specified
as the focus
mode,
the camera
camera
• Year/Month/Day:
Never
the
memory
card
from the
01/10/23
Macro mode indicator
automatically
assumes that
focus
area
the center
Battery
capacity
while
the operation/card
access
lamp
is is
flashing.
DoDay/Month/Year:
Flash
off
indicator
area
Spot
AF. 23/10/01
See
pages
and
E-63orfor
more
ing
sofor
can
cause
loss
ofLine
recorded
images
corrup2E-62
Aperture
value
• See the
“Camera
Menus”
on
page
E-150
for
more
informaMonth/Day/Year:
10/23/01
information.
tion
ofmenu
memory
card
data.
Flash
on
indicator
tion about
contents.
time settings
• Do
not
look
directly
at the AFSelf-timer
assist light/self-timer
Red eye reduction
6. Press
MENU
to
exit
the
setting
procedure.
lamp
or
point
it
directly
at
the
subject’s
eyes.
indicator
Exposure compensation
Increase
or
decrease
the
value
Doing
so
can
create
the
danger
of
fire
or eleccamera.
eration
when
the
Be
camera
described
sure
tois note
turned
below.
the
off
following
and
the
important
lens
retracted.
precautions
by
the
arrow
and
open
the
memory
Rock
theisCompactFlash
control
button
mode
oras
REC
mode.
The
following
procedure
shows
operaas
shown
below.
•tings
Beindicated
sure
to
use
only
CASIO
or
SanDisk
where
thetrical
selection
boundary
is
shock.
Use only
the
optional
AC adaptor
to
avoid
problems
with
batteries.
up
or
down.
card
cover.
tion
inlocated
the
REC
mode
as an example.
cards,
orslot
anspecified
IBM
Microdrive.
Proper
operation
is
not
guarfor this camera.
anteed with
other
memory
cards.
•• Use
Do
not
allow
the
AC
adaptor
power
cord
to
beonly LR6 (AM-3) type alkaline or FR6 type
come
cut
or
damaged,
do
not
place
heavy
ob•6.Static
electricity,
electrical
noise,
and
other
electrical
phe1.
Align
the
power/function
switch
with
.
Power
Save
and
then
rock
the
control
button
lithium
or
Ni-MH
(nickel-metal
hydride)
dry
cell
Click the control button to apply your settings.
jects
on it,
andthis
keep
it away
from
A damnomena
can
cause
corruption
or
even
totalheat.
loss
of
data
batteries
with
camera.
mix
old
batto
the
right.
REC
mode
• To
perform
a menu
operation
in
theNever
PLAY
mode,
align
aged
power
cord
creates
risk
ofshould
fire and
onpower/function
a teries
memory
card.
Because
of the
you
alwith
new
ones.
Doing
so
can
result
in
7.stored
Press
MENU
to
exit
the
setting
procedure.
the
switch
with
.this,
Lamp
Color
Flashing
electrical
shock.
ways
make
backup
copies
of
important
images
on
other
bursting
or
leaking
of
batteries,
creating
the
4. Rock the control button up or down to select
• danger
Never try
modify
theisAC
adaptor power cord,
Amber
charging.
of to
fire
or Flash
personal
injury.
the
item
whose
settings
you
want to change,
2.media.
Press
MENU.
or subject
it to sure
severe
bending,
twisting,
or
pullCAUTION
•
Always
make
that
the
plus
and
minus
2.
Press
the
eject
button
so
it
• Memory
card rock
problems
can be corrected
by(+)
reformatting
and then
the
control
button
to
the
right.
ing.ends
Doing
so creates
the
risk
of fire
and elec(–)
of
the
batteries
are
facing
correctly,
as
extends
from
the
camera.
the
memory
card.
Reformatting
a
memory
card
deletes
all
CAUTION
• To press
make
auto
power
offmarkings
settings,
select
“Auto
Poweritself.
Off”.
trical
Partial
ofshock.
the
shutter
release
button
noted
by card,
the
on the
images stored
on the
but you can
use camera
a computer
to
• Improper
Never
touch
the AC
while
your
hands
• To
make
sleep
“Sleep”.
loading
ofadaptor
batteries
can
result
in
Lamp
Color
On
copy
the
images
yousettings,
want
to select
keep
to
the computer’s
hard
are
wet.
Doing
so
creates
the
risk
of
electrical
bursting or leaking
of Ifbatteries,
creating
the
diskAmber
before reformatting
your card.
you
plan
to
be
recordReady
toor
fire.
shock.
5.ingOn
the where
screen
appears,
rock
the
danger
ofthat
personal
injury
soiling
ofcontrol
objects
images
you
do
not
have
access
to a
computer,
it
3. Press
the
eject
button
once
•
Do
not
overload
extension
cords
or wall you
outnearby.
button
up
down
the
setting
is a
good idea
toortake
alongtoanmake
extra memory
card or two
again
to
eject
the
card.
lets.
Doing
so creates the danger of fire and
want,
and
then
click the
button
to apply
just
in case
you
experience
ancontrol
unexpected
memory
card
IMPORTANT!
electrical shock.
problem.
it.
IMPORTANT!
• When• batteries
gocord
low, ofthe
access
Should the
theoperation/card
AC adaptor become
power
off charge
settings:
“2 min”
min”
lamp
and
flash
lamp
flash“5
for about
damaged
internal
wiring),
request
a
• Auto
The histogram
is (exposed
not displayed
inamber
the
movie
RECone
or
second.
After(pages
that,
the
camera
powers
automatireplacement
from
an “1
authorized
CASIO
serPLAY
E-93,110).
Sleep mode
settings:
“Off”
“30
sec”
min” “2down
min”
cally. Ifvice
thisprovider.
happens, A
replace
batteries
as sooncord
as
damaged
AC adaptor
4. Remove
the
memory
card.
possible.
createstothe
danger
of fire or procedure.
electrical shock.
6. Press
MENU
exit
the setting
Line 1
Downloaded from ManualsCamera.com Manuals
E-24
Remaining number of
images/File number
Line 3 Shutter speed value/EV
value
2.
With
th
Formatting
PLAY
Using
Powe
Operation
Power
Req
I
arrow
slot
Operation/c
as it co
w
GETTING ACQUAINTED
• AAbout
Microdrive
rechargeable
batteries
much
more
electrical
than a.
2.
1.
Load
Align
the
theconsumes
power/function
batteries
so
their
switch
withpower
or
PLAY
mode
Adjusting
the
Length
of
the
Neck
Strap
Use
CompactFlash
only the
nickel-metal
card.
Depending
hydride
batteries
on how(NP-H3)
a Microdrive
that are
is
plus
(+)
and
minus
(
)
ends
Lamp
Use
The
settings
theitadaptor
buckle
described
to
asadjust
shown
below
the
below
length
let
to
you
power
of
specify
the
neck
theProper
sleep
camera
strap.
and
from
auto
a
Flashing
specifically
used,
can
recommended
greatly
reduce
for
battery
this
camera.
life.
When
using
alkaline
camera
2.
Press
MENU.
Color
are
facing
as
shown
in
the
ilhousehold
power
off trigger
times
outlet.
that help
to other
conserve
operation
batteries,
ispower
certain
not guaranteed
operating
when
conditions
rechargeable
andvaluable
certain battery
battery
batterlustration.
One of the following operations is in progress:
power.
ies
are
used.
can Format
result in batteries
going
dead
right
afterbutyou
3.brands
Select
and
then
rock
the
control
Folder
number
delete, format,
battery
alert,
card
Green
•
If
the
eject
button
is: extended,
itbrowser
in before
sliding
install
AC Adaptor/Charger
new
ones.
Whenever
BC-3HA
using
apress
Microdrive,
we recomton
to
the
right
(page
E-42).
generation.
AUTO
POWER
OFF
the
memory
card
intobatteries
the slot.
mend
Nickel-metal
that
you
use
hydride
rechargeable
nickel
(4-battery
metal
hydride
set)/Quick
batImage
protection
indicator
File
Red
Memory
card
defective.power
Auto
Power
Off
turns
offisto
camera
if number
no operation is
Charger
or lithium
Set : batteries
BC-1HB4
power the camera.
Eject
button
4.teries
In
response
to
the
confirmation
message
that
for five
minutes
in the
the amount
PLAY mode.
InNP-H3P4
the
REC
•• performed
When
Nickel-metal
battery
power
hydride
isbatteries
low,
of
time
required
The
operation/card
access
lamp(4-battery
remains
litset)
(green)
while
appears,
rock
the
control
button
up
or: down
to
mode,
you
can
specify
an Auto
Power
Off
trigger
time
of
between
shots
may
become
longer.
This
longer
interval
is
Buckle
the
monitor
screen
turned off
the PLAY
mode.
Image
Side
marked
select
Yes
toisformat
orin No
to exit
and size
then
two
or
five
minutes.
designed
protect
thedown
Microdrive.
3.
Close to
and
press
on the
with
arrow
IMPORTANT!
click the
control
face the button.
batteryshould
compartment
cover
memory
card
SLEEP
•
Be
sure
to
keep
all four batteries
together as a set at
IMPORTANT!
Yes
: Formats
the
memory
card.
slot
cover.
asmonitor
you
slide
theenters
battery
DC IN
6V if no Quality
screen
a
sleep
state
operation
is
InThe
case
of
Microdrive
malfunction....
all
times,
for
both
charging
and
powering
the
Never
open
the
memory
card
cover
while
thecamera.
operaNo
: Does
format
the
memory
card.
• Be
sure
tonot
keep
the
neck
strap
around
your
neck
when
(AC
power
terminal)
compartment
cover
lock
inofSide
File
name/
performed
for
a
specified
amount
time
in
the
REC
mode.
Mixing
batteries
from
different
sets
can
shorten
overall
marked
•File
Contact
your
originallamp
Microdrive
retailer
or the contact
tion/card
access
is flashing.
using
thebutton
camera
to
protect
accidentally
number
the
direction
indicated
byagainst
the
Pressing
any
immediately
wakes
up
thecamera.
monitordropand
with arrow
lifethe
and
cause malfunction
of
the
pointbattery
noted
Microdrive
documentation.
ping
it. in
Date
and time
restores
normal
operation.
You
can
specify
30
seconds,
1
arrow
to lock
it. be charged
•• Batteries
cannot
while
they
are
loaded
in
••Battery
CASIO
does
not
provide
any
servicing
or
maintenance
Theorsupplied
neck
strapthe
is sleep
intended
foris use
with this
AC
Adaptor:
AD-C620
(Option)
minute,
2
minutes
before
state
triggered,
or
3.
Close
the
memory
card
slot
cover.
capacity
the
camera.
support
for the
Microdrive.
camera
only.
Dosetting
not use
it for any other application.
you
can
off this
entirely.
AC •Adaptor/Charger:
BC-3HA
(Option)
•IMPORTANT!
Note
thatturn
CASIO
assumes
noaround
responsibility
for any
data
Never
swing the
camera
by the neck
strap.
The
BC-3HA
functions
both
as
an Microdrive.
AC adaptor
and neck
as a
loss• you
may suffer
while
using
the
Allowing
the
camera
to
swing
freely
from
your
• Never
use
manganese
batteries.
Use onlybatteries.
the battery
charger
unit
for
nickel
metal
It
• This
camera
supports
use
a hydride
CompactFlash
card
can
result
inAA-size
damage
to of
theboth
camera
to its
bumping
types
specifically
mentioned
in this due
User’s
Guide.
comes
complete
with
four
rechargeable
nickel
metal
hyand
the
Microdrive.
Note,
however,
that
ejecting
a
against other objects. It also creates the danger
of the
dride
batteries.
This
AC caught
adaptor/charger
unit
can
be used
Microdrive
from
the camera
is relatively
difficult
than
camera
becoming
in a doormore
or on
other
obwith jects,
anyahousehold
outlet
rated for 100V to 240V
ejecting
CompactFlash
card.
resulting inpower
personal
injury.
AC.• Keep the camera out of the reach of small children,
especially when the neck strap is attached. The neck
strap can accidentally wind around the neck of a child
and create the risk of strangulation.
Flash
Mode
indicator
The following
examples
show
how
alkaline
Low
Turning
IBM
Microdrive
Battery
the
Camera
Indicator
Precautions
On
and
Off battery
Using
Using
the
Memory
the
Bundled
Control
Cards
Accessories
Button
life
None Auto
changes under different
shooting conditions.
The
Rotate
You
Compatibility
can
theformat
power/function
of
shows
the
a memory
camera
how
the
switch
card
battery
tothe
turn
delete
capacity
IBM
camera
Microdrive
allmemory
indicator
of power
the
has
on
Yourfollowing
This
camera
camera
supports
features
use
a two-way
of
awith
CompactFlash
power
supply
that
letsdata
card
you
Flash
On
the
and
stored
been
monitor
off.
confirmed
on1:
it.
screen
and
CASIO.
the
indicator
However,
display
youAC
should
changes
note
asNote
batthe
Attaching
the
Neck
Strap
use
(CF
either
TYPE
AA-size
I/II)
orbyIBM
batteries
Microdrive
image
storage.
current.
Example
Intermittent
use
ofhousehold
the for
camera
shortens
battery
Flash
Offor
tery power
following
is
important
used.
points
all card
four
whenever
batteries
using
as soon
the
as both
posIBM
that
all
mentions
ofReplace
“memory”
in this
manual
life.strap
The
Attach
operation/card
the
neck
access
Red-eye
to the strap
lamp
reduction
ring
as shown
inrefer
the illusBatteries
sible
Microdrive.
after they• Flash
go dead.
If indicates
you
continue
to
use
the camera
to
a CompactFlash
memory
cardof
and
Microdrive,
unless
indicator
thatIBM
the flash
will fire button
shows
tration
below.
the
operational
status
Control
• Four
alkaline
batteries:
LR6 power will automatiConditions
camera
while
theAA-size
battery
level
isflash
IMPORTANT!
(when
auto
is, selected).
specifically
noted
otherwise.
camera
ascarefully
described
below.
•the
Be
sure
to
read
all ofFR6
the documentation that
• Four
AA-size
lithium
batteries:
cally
turn
off.
•
Temperature:
25
C
• Formatting
a memory before
card deletes
on the
comes
with the Microdrive
using
it.all images batter• Four
AA-size
nickel-metal
hydride
rechargeable
even
someoforbecomes
all of thehot
are
protected
IMPORTANT!
• card,
Repeat
ofMicrodrive
aifcycle
recording
ofimages
one
shot
per
minute
• Note
that
the
during
normal
use.
ies:
NP-H3
Battery
(page
E-125).
Low off
High
for
10when
minutes,
followed
by
minute of
playback,
Take
care
removing
it from
the
• Make
sure
that
the
power
of one
the camera.
camera
is turned
Capacity
The
control
button
is
used
to
select
menu
items
and
execute
• Formatting
a memory
card deletes
all Best
Shot
Mode
and
minutes
of remove
power
off
(power
on,
full
lens
exHousehold
Current
• Take
carenine
toyou
avoid
strong
pressure
on the
label
side
of
the
before
insert
or
a memory
card.
Monitor
function.
Thefiles
following
are
the
terms
usedthe
in Operation/card
this
manual
to
scene
you
have
imported
from
CD-ROM
and
tension,
half
lens
contraction,
full
lens
extension,
im•Screen
AC
Adaptor:
AD-C620
(Option)
Microdrive
when
it is
removed
from
the
camera.
Strong
:
Turns
on
power
and
enters
the
REC
mode.
•
When
inserting
a
memory
card
into
the
camera,
make
access
lamp
describe
control
button
operations.
stored
ondamage
the card.
After
formatting
theand
card,
you have
age
recording,
power
off)
• AC: sure
Adaptor/Charger:
BC-3HA
(Option)
pressure
can
internal
components
cause
malTurns
powerside
andisenters
mode.
itsoncorrect
facingthe
upPLAY
and that
you insert its
Indicator
REC
mode
Strap
ring the Best Shot scene files you
Strap
ringto the
to
import
want
function.
OFF
Turns on
offend
power.
into the camera. Trying to force a card
• : terminal
Flash
Display
Term
memory
card
(page
E-77).
Meaning
Lamp
• Never
turn
off
camera
power
or
subject
the
camera
to iminto the camera
the card
and the camera.
Approximate
Battery can
Life:damage
35 minutes
(32 shots)
Flashing
Color
• Data
by thumb
a memory
card the
format
Useoperation/card
your
to access
move
control
button canup,
Loading
Batteries
pact
whiledeleted
the
lamp
isoperation
flashing.
DoRock
not
because
recovered!
sureoftothe
carefully
check and conIMPORTANT!
down,
left,
or Be
right.
ing so
can
malfunction
Microdrive.
One
of
the
following
operations
is
in
progress:
start
Make
sure
that
camera
power
is
turned
off
whenever
loading
Example
2:
Low
temperatures
shorten
battery
life.
Green
Inserting
a
Memory
Card
into
the
Camera
firm
that
longer
need
the
data
stored
in a
Press
control
button
straight
down
until
it clicks,
up, you
save
(multiple),
movie
recording
standby
•orThe
Microdrive
isthe
ano
very
high
precision
device.
Dropping
while
• Never
align
the
power/function
switch
with
replacing
batteries.
Click
memory
cardresult
it. of the Microdrive,
something
like
aformatting
computer
mouse.
the
camera
can
in
malfunction
the
lens
cap
isbefore
on
the
lens.
Conditions
• even
The
camera
isthe
ready
to record
when
theinlamp
isbar
off. while
Zoom
White
balance
indicator
though
camera
is undamaged.
Take
extra
care
align
the
power/function
switch
with
1.
Slide
the
card
slot
cover
lock
the
direction
•• Never
Temperature:
0 of
C
• Lower half indicates
1.when
On
the
bottom
thewhile
camera,
handling
the
camera
the
Microdrive
iszoom.
installed.
the
lens
isby
facing
downwards
towards
the
Daylight
indicated
the
arrow
and
openoptical
theground.
memory
•• Microdrive
Repeat
of
acamera
cycle
ofpower
recording
ofit one
shot
minute
slide
the
battery
compart• The
has
very
large
storage
capacity.
Because
To
restore
after
has
beenper
turned
off
Upper
half
indicates
Shade
card
slot
cover.
Partial
press
of
the
shutter
button
forcertain
10
minutes,
followed
by release
one
minute
of
playback,
digital
zoom.
of ment
this,
operations
can
take
a
relatively
long
time
to
by
auto
power
off,
rotate
the
power/function
switch
cover
lock
in
the
Tungsten
and nine
minutes
of to
poweror
off (power
on, full lens exLamp
perform.
OFF
and
then
back
.
direction
indicated
by
the
On
Fluorescent
tension,
halfmay
lensnot
contraction,properly
full lensinextension,
imColor
• The
Microdrive
areas where
arrow
and
theoperate
battery
Manualopen
age
recording,
power
off)
Auto
Focus
complete
Green
barometric
pressure
is low. Because of this, you should
compartment
cover.
•Red
Flash
avoid
usingon
it at high
Auto
Focusaltitudes.
operation failed
Memory
Approximate Battery
Life: 8 minutes (8 shots) card slot
Card slot
cover lock
IMPOR
cover
Downloaded from ManualsCamera.com Manuals
E-21
5.
Close
t
To
configure
Memory
Flash
Using
Select
Charg
the
Ca
L
Menu
Scre
1.
Align
.
the
pow
2.
Press
MENU
3.
Rock the
con
IMPOR
GETTING ACQUAINTED
AC
Adaptor
If Handling
youawant
to Contents
do precautions
this: Card from
Do this:
Battery
Changing
Removing
the
Memory
Precautions
of the
the
Monitor
Camera
Rock
the
control
button
•
Never
use
an
electrical
outlet
whose
voltage
is
Screen
Incorrect
The
•Always
Images
flash
keep
use
cannot
charge
or
handling
lens
lamp
be recorded
cap
also
of
on
batteries
lights
the
with
lens
can
this
whenever
cause
camera
them
you
unless
are
to leak
not
a
Move
the the
selection
boundary
Pressing
MENU
displays
the
menu
screen.
The
contents
of
to the
left
or AC
right.
outside
the
rating
marked
on
the
adaptor.
1.
Slide
the
card
slot
cover
lock
in
the
direction
or
and
using
memory
burst
flashes
the
and
card
camera.
during
create
is
installed
Always
the
a
record
danger
in
leave
it.
opof
the
serious
lens
cap
damage
on
the
to
your
lens
the
whether
you are
in the PLAY
Usemenu
DISP screen
to cycledepend
throughonmonitor
screen
information
set-
• Formatting
Remove
Be
• sure
In
the
to
turn
PLAY
is Light/Self-timer
recommended
offmode,
from
power
the
before
camera
Auto
forneck
any
connecting
Power
if strap
memory
you
do
Off
not
or
trigger
card
disconnectplan
that
time
toring.
you
use
is
Attach
the
lens
cap
holder
to
the
or
the
strap
Ifbatteries
you
want
to dothe
this:
Do
this:
AF
Assist
Lamp
Indicator
display
This
it forprotects
ing
suspect
the
fixed
more
adaptor.
contains
at
than
against
fivetwo
minutes.
corrupted
accidental
weeks. image
lossdata
of the
(due
lens
to a
cap.
RECORD
Rock
the
control
button
The
You
AF
can
assist
use
the
lightnon-rechargeable
following
operates
procedure
automatically
toof
select
tothe
assist
one
the
of
Auto
the
Select
a menu
item
display
located
on
the
top
camera
also
•The
Never
Always
ERROR,
recharge
turn
strange
image
power
off
before
malformed
type
disconnecting
images)
never
the
or
AC
for
alup
orbatteries,
down.
•indicator
Sleep
iscamera
disabled
in colors,
the
PLAY
mode.
Focus
three
different
operation
date
whenever
formats.
you
are
shooting
where
lighting
is
shows
various
camera
status
indicators
during
image
relow Display
adaptor,
newly
direct
purchased
even
connection
if
the
memory
camera
between
cards.
has
two
batteries
ends
of
installed.
a
battery,
If
and
you
Rock
the
control
button
details
of
the
selected
•
Performing
any
button
operation
while
the
monitor
is
IMPORTANT!
dim.
This
lamp
also
flashes
to indicate
thehandy
countdown
until
cording.
The
indicator
display
comes
in
especially
never
don’t,
the
try
to
camera
take
batteries
will
turn
apart.
off
automatically
when
you
dismenu
itemimmediately
toswitch
the
right.
•the
Before
starting
a format
operation,
to AC adaptor
asleep
wakes
itoff.
up
and
restores
normal
shutter
releases
during
aturned
self-timer
operation.
•not
Never
turn
on
camera
power
with
the
lensofcap
affixed
the
monitor
screen
isYou
•when
Do
connect
expose
the
AC
batteries
adaptor.
direct
also
heat
run
the
orwith
risk
dispose
damaging
of
them
1.
Align
the
switch
or
power
or
load
aselected
new
setitem
oftorecommended
batteries
into
the.
Execute
thepower/function
Click the
control button.
operation.
to the lens.
by
the
burning.
camera
whenever
Doing
so
can
you
create
disconnect
the
danger
the
AC
of
adaptor
explosion.
withcamera.
step
toPower
the
previous
screentypes.
Presspriority
MENU. if you have
• Back
The
Auto
setting
is given
• Never
outPress
first
mix
turning
batteries
power
ofOff
off.
different
2.
MENU.
“2batteries
min”
set may
for
Sleep
andtoto
Auto
Power
Off.
This
• Dead
The AC
adaptor
areboth
become
susceptible
warm
leakage,
touch
afterwhich
extended
can
means
that
theand
camera
turns
off
if you
do not
perform
periods
serious
ofthe
use.
damage
This
is normal
to
your
and
camera.
is the
not
Remove
cause
for
batteries
alarm.
Rock
control
button
up
or
down
to
select
3.cause
Select
Date
then
rock
control
button
• Insert
only
memory
cards
into
theunplug
memory
card
slot.
any
operation
about
two
minutes
in the
REC
mode.
• from
After
the
using
camera
the item
camera,
asfor
soon
turn
aswant,
you
it off
notice
and
they
are
the
dead.
adaptor
the
menu
you
and
then
the
to
the
right.
Inserting
any
other
type
ofcamera
card
can
causerock
malfunc• The
from
batteries
the
AC
outlet.
that
power
the
normally
become
• Auto Power
Offtois the
automatically
disabled under any
control
button
right.
tion.
• warm
The
camera
as of
they
automatically
discharge.
switches
tothe
AC control
adaptor
one
the
following conditions.
4.
Select
Date
and
then over
rock
• Should
water Style
orwhenever
any other
foreign
matter
get
into the
powered
operation
the
AC adaptor
is plugged
—
While
a
slideshow
is
playing
button
to
the
right.
memory
card slot, immediately turn off power, unplug
into the
camera.
the
ACthe
adaptor,
contact
your
retailer
or
— use
When
you
areand
performing
operations
a com• Always
AC adaptor
to power
the original
cameraon
whenever
IMPORTANT!
Multi-area
AF Service
Metering
5.
Rock
theCASIO
control
button
up Multi-pattern
or down
to select
nearest
Provider.
puter
connected
to the
camera’s
USB port
it is connected
to
a
computer.
indicator
indicator
Auto
Focus
using
the AF
assist
light/
self-timer
lamp
is
the
setting
you
want
tocard
and
then
• Never
eject
the
while
the
card
slot
is the
fac—Spot
While
the
ACmemory
adaptor
isuse,
connected
to theclick
camera
AF
indicator
possible
when
the
distance
from
the
ing
downwards.
Doing
so
creates
the camera
danger to
of the
control button to apply it. Center-weighted
Metering indicator
lessindicator
than about
2.5
meters.
memory
card
falling,
which
can
corrupt data or damMF subject
Manual is
focus
Example:
October
23, light
2001operates while Multi-area AF
• age
When
the
AF
assist
Spot Metering
the
memory
card.
Infinity indicator
indicator
or
Spot remove
AF is specified
as the focus
mode,
the camera
camera
• Year/Month/Day:
Never
the
memory
card
from the
01/10/23
Macro mode indicator
automatically
assumes that
focus
area
the center
Battery
capacity
while
the operation/card
access
lamp
is is
flashing.
DoDay/Month/Year:
Flash
off
indicator
area
Spot
AF. 23/10/01
See
pages
and
E-63orfor
more
ing
sofor
can
cause
loss
ofLine
recorded
images
corrup2E-62
Aperture
value
• See the
“Camera
Menus”
on
page
E-150
for
more
informaMonth/Day/Year:
10/23/01
information.
tion
ofmenu
memory
card
data.
Flash
on
indicator
tion about
contents.
time settings
• Do
not
look
directly
at the AFSelf-timer
assist light/self-timer
Red eye reduction
6. Press
MENU
to
exit
the
setting
procedure.
lamp
or
point
it
directly
at
the
subject’s
eyes.
indicator
Exposure compensation
Increase
or
decrease
the
value
Doing
so
can
create
the
danger
of
fire
or eleccamera.
eration
when
the
Be
camera
described
sure
tois note
turned
below.
the
off
following
and
the
important
lens
retracted.
precautions
by
the
arrow
and
open
the
memory
Rock
theisCompactFlash
control
button
mode
oras
REC
mode.
The
following
procedure
shows
operaas
shown
below.
•tings
Beindicated
sure
to
use
only
CASIO
or
SanDisk
where
thetrical
selection
boundary
is
shock.
Use only
the
optional
AC adaptor
to
avoid
problems
with
batteries.
up
or
down.
card
cover.
tion
inlocated
the
REC
mode
as an example.
cards,
orslot
anspecified
IBM
Microdrive.
Proper
operation
is
not
guarfor this camera.
anteed with
other
memory
cards.
•• Use
Do
not
allow
the
AC
adaptor
power
cord
to
beonly LR6 (AM-3) type alkaline or FR6 type
come
cut
or
damaged,
do
not
place
heavy
ob•6.Static
electricity,
electrical
noise,
and
other
electrical
phe1.
Align
the
power/function
switch
with
.
Power
Save
and
then
rock
the
control
button
lithium
or
Ni-MH
(nickel-metal
hydride)
dry
cell
Click the control button to apply your settings.
jects
on it,
andthis
keep
it away
from
A damnomena
can
cause
corruption
or
even
totalheat.
loss
of
data
batteries
with
camera.
mix
old
batto
the
right.
REC
mode
• To
perform
a menu
operation
in
theNever
PLAY
mode,
align
aged
power
cord
creates
risk
ofshould
fire and
onpower/function
a teries
memory
card.
Because
of the
you
alwith
new
ones.
Doing
so
can
result
in
7.stored
Press
MENU
to
exit
the
setting
procedure.
the
switch
with
.this,
Lamp
Color
Flashing
electrical
shock.
ways
make
backup
copies
of
important
images
on
other
bursting
or
leaking
of
batteries,
creating
the
4. Rock the control button up or down to select
• danger
Never try
modify
theisAC
adaptor power cord,
Amber
charging.
of to
fire
or Flash
personal
injury.
the
item
whose
settings
you
want to change,
2.media.
Press
MENU.
or subject
it to sure
severe
bending,
twisting,
or
pullCAUTION
•
Always
make
that
the
plus
and
minus
2.
Press
the
eject
button
so
it
• Memory
card rock
problems
can be corrected
by(+)
reformatting
and then
the
control
button
to
the
right.
ing.ends
Doing
so creates
the
risk
of fire
and elec(–)
of
the
batteries
are
facing
correctly,
as
extends
from
the
camera.
the
memory
card.
Reformatting
a
memory
card
deletes
all
CAUTION
• To press
make
auto
power
offmarkings
settings,
select
“Auto
Poweritself.
Off”.
trical
Partial
ofshock.
the
shutter
release
button
noted
by card,
the
on the
images stored
on the
but you can
use camera
a computer
to
• Improper
Never
touch
the AC
while
your
hands
• To
make
sleep
“Sleep”.
loading
ofadaptor
batteries
can
result
in
Lamp
Color
On
copy
the
images
yousettings,
want
to select
keep
to
the computer’s
hard
are
wet.
Doing
so
creates
the
risk
of
electrical
bursting or leaking
of Ifbatteries,
creating
the
diskAmber
before reformatting
your card.
you
plan
to
be
recordReady
toor
fire.
shock.
5.ingOn
the where
screen
appears,
rock
the
danger
ofthat
personal
injury
soiling
ofcontrol
objects
images
you
do
not
have
access
to a
computer,
it
3. Press
the
eject
button
once
•
Do
not
overload
extension
cords
or wall you
outnearby.
button
up
down
the
setting
is a
good idea
toortake
alongtoanmake
extra memory
card or two
again
to
eject
the
card.
lets.
Doing
so creates the danger of fire and
want,
and
then
click the
button
to apply
just
in case
you
experience
ancontrol
unexpected
memory
card
IMPORTANT!
electrical shock.
problem.
it.
IMPORTANT!
• When• batteries
gocord
low, ofthe
access
Should the
theoperation/card
AC adaptor become
power
off charge
settings:
“2 min”
min”
lamp
and
flash
lamp
flash“5
for about
damaged
internal
wiring),
request
a
• Auto
The histogram
is (exposed
not displayed
inamber
the
movie
RECone
or
second.
After(pages
that,
the
camera
powers
automatireplacement
from
an “1
authorized
CASIO
serPLAY
E-93,110).
Sleep mode
settings:
“Off”
“30
sec”
min” “2down
min”
cally. Ifvice
thisprovider.
happens, A
replace
batteries
as sooncord
as
damaged
AC adaptor
4. Remove
the
memory
card.
possible.
createstothe
danger
of fire or procedure.
electrical shock.
6. Press
MENU
exit
the setting
Line 1
Downloaded from ManualsCamera.com Manuals
E-24
Remaining number of
images/File number
Line 3 Shutter speed value/EV
value
2.
With
th
Formatting
PLAY
Using
Powe
Operation
Power
Req
I
arrow
slot
Operation/c
as it co
w
GETTING ACQUAINTED
• AAbout
Microdrive
rechargeable
batteries
much
more
electrical
than a.
2.
1.
Load
Align
the
theconsumes
power/function
batteries
so
their
switch
withpower
or
PLAY
mode
Adjusting
the
Length
of
the
Neck
Strap
Use
CompactFlash
only the
nickel-metal
card.
Depending
hydride
batteries
on how(NP-H3)
a Microdrive
that are
is
plus
(+)
and
minus
(
)
ends
Lamp
Use
The
settings
theitadaptor
buckle
described
to
asadjust
shown
below
the
below
length
let
to
you
power
of
specify
the
neck
theProper
sleep
camera
strap.
and
from
auto
a
Flashing
specifically
used,
can
recommended
greatly
reduce
for
battery
this
camera.
life.
When
using
alkaline
camera
2.
Press
MENU.
Color
are
facing
as
shown
in
the
ilhousehold
power
off trigger
times
outlet.
that help
to other
conserve
operation
batteries,
ispower
certain
not guaranteed
operating
when
conditions
rechargeable
andvaluable
certain battery
battery
batterlustration.
One of the following operations is in progress:
power.
ies
are
used.
can Format
result in batteries
going
dead
right
afterbutyou
3.brands
Select
and
then
rock
the
control
delete, format,
battery
alert,
card
Green
•
If
the
eject
button
is: extended,
itbrowser
in before
sliding
install
AC Adaptor/Charger
new
ones.
Whenever
BC-3HA
using
apress
Microdrive,
we recomton
to
the
right
(page
E-42).
generation.
AUTO
POWER
the
memory
card
intobatteries
the slot.
mend
Nickel-metal
that
youOFF
use
hydride
rechargeable
nickel
(4-battery
metal hydride
set)/Quick
batRedPowerMemory
card
defective.power if no operation is
Auto
Off: batteries
turns
offisto
camera
Charger
or lithium
Set
BC-1HB4
power the camera.
4.teries
In
response
to
the
confirmation
message
that
for five
minutes
in the
the amount
PLAY mode.
InNP-H3P4
the
REC
•• performed
When
Nickel-metal
battery
power
hydride
isbatteries
low,
of
time
required
The
operation/card
access
lamp(4-battery
remains
litset)
(green)
while
appears,
rock
the
control
button
up
or: down
to
mode,
you
can
specify
an Auto
Power
Off
trigger
time
of
between
shots
may
become
longer.
This
longer
interval
is
the
monitor
screen
turned off
the PLAY
mode.
Side
marked
select
Yes
toisformat
orin No
to exit
and then
two
or
five
minutes.
designed
protect
thedown
Microdrive.
3.
Close to
and
press
on the
with
arrow
IMPORTANT!
click the
control
face the button.
batteryshould
compartment
cover
memory
card
SLEEP
•
Be
sure
to
keep
all four batteries
together as a set at
IMPORTANT!
Yes
: Formats
the
memory
card.
slot
cover.
asmonitor
you
slide
theenters
battery
screen
a
sleep
state
if no the
operation
is
InThe
case
of
Microdrive
malfunction....
all
times,
for
both
charging
and
powering
Never
open
the
memory
card
cover
while
thecamera.
operaNo
: Does
format
the
memory
card.
• Be
sure
tonot
keep
the
neck
strap
around
your
neck
when
compartment
cover
lock
inofsets
performed
for
a
specified
amount
time
in
the
REC
mode.
Mixing
batteries
from
different
can
shorten
overall
• Contact
your
originallamp
Microdrive
retailer
or the contact
tion/card
access
is flashing.
using
thebutton
camera
to
protect
accidentally
the
direction
indicated
byagainst
the of
Pressing
any
immediately
wakes
up
thecamera.
monitordropand
lifethe
and
cause malfunction
the
pointbattery
noted
Microdrive
documentation.
ping
it. in
restores
normal
operation.
You
can
specify
30
seconds,
1
arrow
to lock
it. be charged
•• Batteries
cannot
while
they
are
loaded
in
•• CASIO
does
not
provide
any
servicing
or
maintenance
Theorsupplied
neck
strapthe
is sleep
intended
foris use
with this
Adaptor:
AD-C620
(Option)
minute,
2
minutes
before
state
triggered,
or
3.AC
Close
the
memory
card
slot
cover.
the
camera.
support
for the
Microdrive.
camera
only.
Dosetting
not use
it for any other application.
you
can
off this
entirely.
AC •Adaptor/Charger:
BC-3HA
(Option)
•IMPORTANT!
Note
thatturn
CASIO
assumes
noaround
responsibility
for any
data
Never
swing the
camera
by the neck
strap.
The
BC-3HA
functions
both
as
an Microdrive.
AC adaptor
and neck
as a
loss• you
may suffer
while
using
the
Allowing
the
camera
to
swing
freely
from
your
• Never
use
manganese
batteries.
Use onlybatteries.
the battery
charger
unit
for
nickel
metal
It
• This
camera
supports
use
a hydride
CompactFlash
card
can
result
inAA-size
damage
to of
theboth
camera
to its
bumping
types
specifically
mentioned
in this due
User’s
Guide.
comes
complete
with
four
rechargeable
nickel
metal
hyand
the
Microdrive.
Note,
however,
that
ejecting
a
against other objects. It also creates the danger
of the
dride
batteries.
This
AC caught
adaptor/charger
unit
can
be used
Microdrive
from
the camera
is relatively
difficult
than
camera
becoming
in a doormore
or on
other
obwith jects,
anyahousehold
outlet
rated for 100V to 240V
ejecting
CompactFlash
card.
resulting inpower
personal
injury.
AC.• Keep the camera out of the reach of small children,
especially when the neck strap is attached. The neck
strap can accidentally wind around the neck of a child
and create the risk of strangulation.
The following
examples
show
how
alkaline
Low
Turning
IBM
Microdrive
Battery
the
Camera
Indicator
Precautions
On
and
Off battery
Using
Using
the
Memory
the
Bundled
Control
Cards
Accessories
Button
life
None Auto
changes under different
shooting conditions.
The
Rotate
You
Compatibility
can
theformat
power/function
of
shows
the
a memory
camera
how
the
switch
card
battery
tothe
turn
delete
capacity
IBM
camera
Microdrive
allmemory
indicator
of power
the
has
on
Yourfollowing
This
camera
camera
supports
features
use
a two-way
of
awith
CompactFlash
power
supply
that
letsdata
card
you
Flash
On
the
and
stored
been
monitor
off.
confirmed
on1:
it.
screen
and
CASIO.
the
indicator
However,
display
youAC
should
changes
note
asNote
batthe
Attaching
the
Neck
Strap
use
(CF
either
TYPE
AA-size
I/II)
orbyIBM
batteries
Microdrive
image
storage.
current.
Example
Intermittent
use
ofhousehold
the for
camera
shortens
battery
Flash
Offor
tery power
following
is
important
used.
points
all card
four
whenever
batteries
using
as soon
the
as both
posIBM
that
all
mentions
ofReplace
“memory”
in this
manual
life.strap
The
Attach
operation/card
the
neck
access
Red-eye
to the strap
lamp
reduction
ring
as shown
inrefer
the illusBatteries
sible
Microdrive.
after they• Flash
go dead.
If indicates
you
continue
to
use
the camera
to
a CompactFlash
memory
cardof
and
Microdrive,
unless
indicator
thatIBM
the flash
will fire
shows
tration
below.
the
operational
status
• Four
alkaline
batteries:
LR6 power will automatiConditions
camera
while
theAA-size
battery
level
isflash
IMPORTANT!
(when
auto
is, selected).
specifically
noted
otherwise.
camera
ascarefully
described
below.
•the
Be
sure
to
read
all ofFR6
the documentation that
• Four
AA-size
lithium
batteries:
cally
turn
off.
•
Temperature:
25
C
• Formatting
a memory before
card deletes
on the
comes
with the Microdrive
using
it.all images batter• Four
AA-size
nickel-metal
hydride
rechargeable
even
someoforbecomes
all of thehot
are
protected
IMPORTANT!
• card,
Repeat
ofMicrodrive
aifcycle
recording
ofimages
one
shot
per
minute
• Note
that
the
during
normal
use.
ies:
NP-H3
Battery
(page
E-125).
Low off
High
for
10when
minutes,
followed
by
minute of
playback,
Take
care
removing
it from
the
• Make
sure
that
the
power
of one
the camera.
camera
is turned
Capacity
The
control
button
is
used
to
select
menu
items
and
execute
• Formatting
a memory
card deletes
all Best
Shot
Mode
and
minutes
of remove
power
off
(power
on, full
lens
exHousehold
Current
• Take
carenine
toyou
avoid
strong
pressure
on the
label
side
of
the
before
insert
or
a memory
Monitor
function.
Thefiles
following
are
the
terms
usedthe
in card.
this
manual
to
scene
you
have
imported
from
CD-ROM
and
tension,
half
lens
contraction,
full
lens
extension,
im•Screen
AC
Adaptor:
AD-C620
(Option)
Microdrive
when
it is
removed
from
the
camera.
Strong
:
Turns
on
power
and
enters
the
REC
mode.
•
When
inserting
a
memory
card
into
the
camera,
make
describe
control
button
operations.
stored
ondamage
the card.
After
formatting
theand
card,
you have
age
recording,
power
off)
• AC: sure
Adaptor/Charger:
BC-3HA
(Option)
pressure
can
internal
components
cause
malTurns
powerside
andisenters
mode.
itsoncorrect
facingthe
upPLAY
and that
you insert its
Indicator
REC
mode
to
import the Best Shot scene files you want to the
function.
OFF
Turns on
offend
power.
into the camera. Trying to force a card
• : terminal
Flash
Display
Term
memory
card
(page
E-77).
Meaning
Lamp
• Never
turn
camera
power
or
subject
camera
to iminto
theoff
camera
can
damage
the card
and
the camera.
Approximate
Battery
Life:
35 minutes
(32the
shots)
Flashing
Color
• Data
by thumb
a memory
card the
format
Useoperation/card
your
to access
move
control
button canup,
Loading
Batteries
pact
whiledeleted
the
lamp
isoperation
flashing.
DoRock
not
because
recovered!
sureoftothe
carefully
check and conIMPORTANT!
down,
left,
or Be
right.
ing so
can
malfunction
Microdrive.
One
of
the
following
operations
is
in
progress:
start
Make
sure
that
camera
power
is
turned
off
whenever
loading
Example
2:
Low
temperatures
shorten
battery
life.
Green
Inserting
a
Memory
Card
into
the
Camera
firm
that
longer
need
the
data
stored
in a
Press
control
button
straight
down
until
it clicks,
up, you
save
(multiple),
movie
recording
standby
•orThe
Microdrive
isthe
ano
very
high
precision
device.
Dropping
while
• Never
align
the
power/function
switch
with
replacing
batteries.
Click
memory
cardresult
it. of the Microdrive,
something
like
aformatting
computer
mouse.
the
camera
can
in
malfunction
the
lens
cap
isbefore
on
the
lens.
Conditions
• even
The
camera
isthe
ready
to record
when
theinlamp
isdirection
off. while
though
camera
is undamaged.
Take
extra
care
align
the
power/function
switch
with
1.
Slide
the
card
slot
cover
lock
the
•• Never
Temperature:
0 of
C
• Lower half indicates
1.when
On
the
bottom
thewhile
camera,
handling
the
camera
the
Microdrive
iszoom.
installed.
the
lens
isby
facing
downwards
towards
the
Daylight
indicated
the
arrow
and
openoptical
theground.
memory
•• Microdrive
Repeat
of
acamera
cycle
ofpower
recording
ofit one
shot
minute
slide
the
battery
compart• The
has
very
large
storage
capacity.
Because
To
restore
after
has
beenper
turned
off
Upper
half
indicates
Shade
card
slot
cover.
Partial
press
of
the
shutter
button
forcertain
10
minutes,
followed
by release
one
minute
of
playback,
digital
zoom.
of ment
this,
operations
can
take
a
relatively
long
time
to
by
auto
power
off,
rotate
the
power/function
switch
cover
lock
in
the
Tungsten
and nine
minutes
of to
poweror
off (power
on, full lens exLamp
perform.
OFF
and
then
back
.
direction
indicated
by
the
On
Fluorescent
tension,
halfmay
lensnot
contraction,properly
full lensinextension,
imColor
• The
Microdrive
areas where
arrow
and
theoperate
battery
Manualopen
age
recording,
power
off)
Auto
Focus
complete
Green
barometric
pressure
is low. Because of this, you should
compartment
cover.
•Red
Flash
avoid
usingon
it at high
Auto
Focusaltitudes.
operation failed
Approximate Battery Life: 8 minutes (8 shots)
Downloaded from ManualsCamera.com Manuals
IMPOR
E-21
5.
Close
t
To
configure
Memory
Flash
Using
Select
Charg
the
Ca
L
Menu
Scre
1.
Align
.
the
pow
2.
Press
MENU
3.
Rock the
con
IMPOR
GETTING ACQUAINTED
AC
Adaptor
If Handling
youawant
to Contents
do precautions
this: Card from
Do this:
Battery
Changing
Removing
the
Memory
Precautions
of the
the
Monitor
Camera
Rock
the
control
button
•
Never
use
an
electrical
outlet
whose
voltage
is
Screen
Incorrect
The
•Always
Images
flash
keep
use
cannot
charge
or
handling
lens
lamp
be recorded
cap
also
of
on
batteries
lights
the
with
lens
can
this
whenever
cause
camera
them
you
unless
are
to leak
not
a
Move
the the
selection
boundary
Pressing
MENU
displays
the
menu
screen.
The
contents
of
to the
left
or AC
right.
outside
the
rating
marked
on
the
adaptor.
1.
Slide
the
card
slot
cover
lock
in
the
direction
or
and
using
memory
burst
flashes
the
and
card
camera.
during
create
is
installed
Always
the
a
record
danger
in
leave
it.
opof
the
serious
lens
cap
damage
on
the
to
your
lens
the
whether
you are
in the PLAY
Usemenu
DISP screen
to cycledepend
throughonmonitor
screen
information
set-
• Formatting
Remove
Be
• sure
In
the
to
turn
PLAY
is Light/Self-timer
recommended
offmode,
from
power
the
before
camera
Auto
forneck
any
connecting
Power
if strap
memory
you
do
Off
not
or
trigger
card
disconnectplan
that
time
toring.
you
use
is
Attach
the
lens
cap
holder
to
the
or
the
strap
Ifbatteries
you
want
to dothe
this:
Do
this:
AF
Assist
Lamp
Indicator
display
This
it forprotects
ing
suspect
the
fixed
more
adaptor.
contains
at
than
against
fivetwo
minutes.
corrupted
accidental
weeks. image
lossdata
of the
(due
lens
to a
cap.
RECORD
Rock
the
control
button
The
You
AF
can
assist
use
the
lightnon-rechargeable
following
operates
procedure
automatically
toof
select
tothe
assist
one
the
of
Auto
the
Select
a menu
item
display
located
on
the
top
camera
also
•The
Never
Always
ERROR,
recharge
turn
strange
image
power
off
before
malformed
type
disconnecting
images)
never
the
or
AC
for
alup
orbatteries,
down.
•indicator
Sleep
iscamera
disabled
in colors,
the
PLAY
mode.
Focus
three
different
operation
date
whenever
formats.
you
are
shooting
where
lighting
is
shows
various
camera
status
indicators
during
image
relow Display
adaptor,
newly
direct
purchased
even
connection
if
the
memory
camera
between
cards.
has
two
batteries
ends
of
installed.
a
battery,
If
and
you
Rock
the
control
button
details
of
the
selected
•
Performing
any
button
operation
while
the
monitor
is
IMPORTANT!
dim.
This
lamp
also
flashes
to indicate
thehandy
countdown
until
cording.
The
indicator
display
comes
in
especially
never
don’t,
the
try
to
camera
take
batteries
will
turn
apart.
off
automatically
when
you
dismenu
itemimmediately
toswitch
the
right.
•the
Before
starting
a format
operation,
to AC adaptor
asleep
wakes
itoff.
up
and
restores
normal
shutter
releases
during
aturned
self-timer
operation.
•not
Never
turn
on
camera
power
with
the
lensofcap
affixed
the
monitor
screen
isYou
•when
Do
connect
expose
the
AC
batteries
adaptor.
direct
also
heat
run
the
orwith
risk
dispose
damaging
of
them
1.
Align
the
switch
or
power
or
load
aselected
new
setitem
oftorecommended
batteries
into
the.
Execute
thepower/function
Click the
control button.
operation.
to the lens.
by
the
burning.
camera
whenever
Doing
so
can
you
create
disconnect
the
danger
the
AC
of
adaptor
explosion.
withcamera.
step
toPower
the
previous
screentypes.
Presspriority
MENU. if you have
• Back
The
Auto
setting
is given
• Never
outPress
first
mix
turning
batteries
power
ofOff
off.
different
2.
MENU.
“2batteries
min”
set may
for
Sleep
andtoto
Auto
Power
Off.
This
• Dead
The AC
adaptor
areboth
become
susceptible
warm
leakage,
touch
afterwhich
extended
can
means
that
theand
camera
turns
off
if you
do not
perform
periods
serious
ofthe
use.
damage
This
is normal
to
your
and
camera.
is the
not
Remove
cause
for
batteries
alarm.
Rock
control
button
up
or
down
to
select
3.cause
Select
“Date”
then
rock
control
button
• Insert
only
memory
cards
into
theunplug
memory
card
slot.
any
operation
about
two
minutes
in the
REC
mode.
• from
After
the
using
camera
the item
camera,
asfor
soon
turn
aswant,
you
it off
notice
and
they
are
the
dead.
adaptor
the
menu
you
and
then
the
to
the
right.
Inserting
any
other
type
ofcamera
card
can
causerock
malfunc• The
from
batteries
the
AC
outlet.
that
power
the
normally
become
• Auto Power
Offtois the
automatically
disabled under any
control
button
right.
tion.
• warm
The
camera
as of
they
automatically
discharge.
switches
tothe
AC control
adaptor
one
the
following conditions.
4.
Select
“Date
and
then over
rock
• Should
water Style”
orwhenever
any other
foreign
matter
get
into the
powered
operation
the
AC adaptor
is plugged
—
While
a
slideshow
is
playing
button
to
the
right.
memory
card slot, immediately turn off power, unplug
into the
camera.
the
ACthe
adaptor,
contact
your
retailer
or
— use
When
you
areand
performing
operations
a com• Always
AC adaptor
to power
the original
cameraon
whenever
IMPORTANT!
Multi-area
AF Service
Metering
5.
Rock
theCASIO
control
button
up Multi-pattern
or down
to select
nearest
Provider.
puter
connected
to the
camera’s
USB port
it is connected
to
a
computer.
indicator
indicator
Auto
Focus
using
the AF
assist
light/
self-timer
lamp
is
the
setting
you
want
tocard
and
then
• Never
eject
the
while
the
card
slot
is the
fac—Spot
While
the
ACmemory
adaptor
isuse,
connected
to theclick
camera
AF
indicator
possible
when
the
distance
from
the
ing
downwards.
Doing
so
creates
the camera
danger to
of the
control button to apply it. Center-weighted
Metering indicator
lessindicator
than about
2.5
meters.
memory
card
falling,
which
can
corrupt data or damMF subject
Manual is
focus
Example:
October
23, light
2001operates while Multi-area AF
• age
When
the
AF
assist
Spot Metering
the
memory
card.
Infinity indicator
indicator
or
Spot remove
AF is specified
as the focus
mode,
the camera
camera
• Year/Month/Day:
Never
the
memory
card
from the
01/10/23
Macro mode indicator
automatically
assumes that
focus
area
the center
Battery
capacity
while
the operation/card
access
lamp
is is
flashing.
DoDay/Month/Year:
Flash
off
indicator
area
Spot
AF. 23/10/01
See
pages
and
E-63orfor
more
ing
sofor
can
cause
loss
ofLine
recorded
images
corrup2E-62
Aperture
value
• See the
“Camera
Menus”
on
page
E-150
for
more
informaMonth/Day/Year:
10/23/01
information.
tion
ofmenu
memory
card
data.
Flash
on
indicator
tion about
contents.
time settings
• Do
not
look
directly
at the AFSelf-timer
assist light/self-timer
Red eye reduction
6. Press
MENU
to
exit
the
setting
procedure.
lamp
or
point
it
directly
at
the
subject’s
eyes.
indicator
Exposure compensation
Increase
or
decrease
the
value
Doing
so
can
create
the
danger
of
fire
or eleccamera.
eration
when
the
Be
camera
described
sure
tois note
turned
below.
the
off
following
and
the
important
lens
retracted.
precautions
by
the
arrow
and
open
the
memory
Rock
theisCompactFlash
control
button
mode
oras
REC
mode.
The
following
procedure
shows
operaas
shown
below.
•tings
Beindicated
sure
to
use
only
CASIO
or
SanDisk
where
thetrical
selection
boundary
is
shock.
Use only
the
optional
AC adaptor
to
avoid
problems
with
batteries.
up
or
down.
card
cover.
tion
inlocated
the
REC
mode
as an example.
cards,
orslot
anspecified
IBM
Microdrive.
Proper
operation
is
not
guarfor this camera.
anteed with
other
memory
cards.
•• Use
Do
not
allow
the
AC
adaptor
power
cord
to
beonly LR6 (AM-3) type alkaline or FR6 type
come
cut
or
damaged,
do
not
place
heavy
ob•6.Static
electricity,
electrical
noise,
and
other
electrical
phe1.
Align
the
power/function
switch
with
.
“Power
Save”
and
then
rock
the
control
button
lithium
or
Ni-MH
(nickel-metal
hydride)
dry
cell
Click the control button to apply your settings.
jects
on it,
andthis
keep
it away
from
A damnomena
can
cause
corruption
or
even
totalheat.
loss
of
data
batteries
with
camera.
mix
old
batto
the
right.
REC
mode
• To
perform
a menu
operation
in
theNever
PLAY
mode,
align
aged
power
cord
creates
risk
ofshould
fire and
onpower/function
a teries
memory
card.
Because
of the
you
alwith
new
ones.
Doing
so
can
result
in
7.stored
Press
MENU
to
exit
the
setting
procedure.
the
switch
with
.this,
Lamp
Color
Flashing
electrical
shock.
ways
make
backup
copies
of
important
images
on
other
bursting
or
leaking
of
batteries,
creating
the
4. Rock the control button up or down to select
• danger
Never try
modify
theisAC
adaptor power cord,
Amber
charging.
of to
fire
or Flash
personal
injury.
the
item
whose
settings
you
want to change,
2.media.
Press
MENU.
or subject
it to sure
severe
bending,
twisting,
or
pullCAUTION
•
Always
make
that
the
plus
and
minus
2.
Press
the
eject
button
so
it
• Memory
card rock
problems
can be corrected
by(+)
reformatting
and then
the
control
button
to
the
right.
ing.ends
Doing
so creates
the
risk
of fire
and elec(–)
of
the
batteries
are
facing
correctly,
as
extends
from
the
camera.
the
memory
card.
Reformatting
a
memory
card
deletes
all
CAUTION
• To press
make
auto
power
offmarkings
settings,
select
“Auto
Poweritself.
Off”.
trical
Partial
ofshock.
the
shutter
release
button
noted
by card,
the
on the
images stored
on the
but you can
use camera
a computer
to
• Improper
Never
touch
the AC
while
your
hands
• To
make
sleep
“Sleep”.
loading
ofadaptor
batteries
can
result
in
Lamp
Color
On
copy
the
images
yousettings,
want
to select
keep
to
the computer’s
hard
are
wet.
Doing
so
creates
the
risk
of
electrical
bursting or leaking
of Ifbatteries,
creating
the
diskAmber
before reformatting
your card.
you
plan
to
be
recordReady
toor
fire.
shock.
5.ingOn
the where
screen
appears,
rock
the
danger
ofthat
personal
injury
soiling
ofcontrol
objects
images
you
do
not
have
access
to a
computer,
it
3. Press
the
eject
button
once
•
Do
not
overload
extension
cords
or wall you
outnearby.
button
up
down
the
setting
is a
good idea
toortake
alongtoanmake
extra memory
card or two
again
to
eject
the
card.
lets.
Doing
so creates the danger of fire and
want,
and
then
click the
button
to apply
just
in case
you
experience
ancontrol
unexpected
memory
card
IMPORTANT!
electrical shock.
problem.
it.
IMPORTANT!
• When• batteries
gocord
low, ofthe
access
Should the
theoperation/card
AC adaptor become
power
off charge
settings:
“2 min”
min”
lamp
and
flash
lamp
flash“5
for about
damaged
internal
wiring),
request
a
• Auto
The histogram
is (exposed
not displayed
inamber
the
movie
RECone
or
second.
After(pages
that,
the
camera
powers
automatireplacement
from
an “1
authorized
CASIO
serPLAY
E-93,110).
Sleep mode
settings:
“Off”
“30
sec”
min” “2down
min”
cally. Ifvice
thisprovider.
happens, A
replace
batteries
as sooncord
as
damaged
AC adaptor
4. Remove
the
memory
card.
possible.
createstothe
danger
of fire or procedure.
electrical shock.
6. Press
MENU
exit
the setting
Line 1
Downloaded from ManualsCamera.com Manuals
E-24
Remaining number of
images/File number
Line 3 Shutter speed value/EV
value
2.
With
th
Formatting
PLAY
Using
Powe
Operation
Power
Req
I
arrow
slot
Operation/c
as it co
w
GETTING ACQUAINTED
• AAbout
Microdrive
rechargeable
batteries
much
more
electrical
than a.
2.
1.
Load
Align
the
theconsumes
power/function
batteries
so
their
switch
withpower
or
PLAY
mode
Adjusting
the
Length
of
the
Neck
Strap
Use
CompactFlash
only the
nickel-metal
card.
Depending
hydride
batteries
on how(NP-H3)
a Microdrive
that are
is
plus
(+)
and
minus
(
)
ends
Lamp
Use
The
settings
theitadaptor
buckle
described
to
asadjust
shown
below
the
below
length
let
to
you
power
of
specify
the
neck
theProper
sleep
camera
strap.
and
from
auto
a
Flashing
specifically
used,
can
recommended
greatly
reduce
for
battery
this
camera.
life.
When
using
alkaline
camera
2.
Press
MENU.
Color
are
facing
as
shown
in
the
ilhousehold
power
off trigger
times
outlet.
that help
to other
conserve
operation
batteries,
ispower
certain
not guaranteed
operating
when
conditions
rechargeable
andvaluable
certain battery
battery
batterlustration.
One of the following operations is in progress:
power.
ies
are
used.
can Format
result in batteries
going
dead
right
afterbutyou
3.brands
Select
and
then
rock
the
control
Folder
number
delete, format,
battery
alert,
card
Green
•
If
the
eject
button
is: extended,
itbrowser
in before
sliding
install
AC Adaptor/Charger
new
ones.
Whenever
BC-3HA
using
apress
Microdrive,
we recomton
to
the
right
(page
E-42).
generation.
AUTO
POWER
OFF
the
memory
card
intobatteries
the slot.
mend
Nickel-metal
that
you
use
hydride
rechargeable
nickel
(4-battery
metal
hydride
set)/Quick
batImage
protection
indicator
File
Red
Memory
card
defective.power
Auto
Power
Off
turns
offisto
camera
if number
no operation is
Charger
or lithium
Set : batteries
BC-1HB4
power the camera.
Eject
button
4.teries
In
response
to
the
confirmation
message
that
for five
minutes
in the
the amount
PLAY mode.
InNP-H3P4
the
REC
•• performed
When
Nickel-metal
battery
power
hydride
isbatteries
low,
of
time
required
The
operation/card
access
lamp(4-battery
remains
litset)
(green)
while
appears,
rock
the
control
button
up
or: down
to
mode,
you
can
specify
an Auto
Power
Off
trigger
time
of
between
shots
may
become
longer.
This
longer
interval
is
Buckle
the
monitor
screen
turned off
the PLAY
mode.
Image
Side
marked
select
Yes
toisformat
orin No
to exit
and size
then
two
or
five
minutes.
designed
protect
thedown
Microdrive.
3.
Close to
and
press
on the
with
arrow
IMPORTANT!
click the
control
face the button.
batteryshould
compartment
cover
memory
card
SLEEP
•
Be
sure
to
keep
all four batteries
together as a set at
IMPORTANT!
Yes
: Formats
the
memory
card.
slot
cover.
asmonitor
you
slide
theenters
battery
DC IN
6V if no Quality
screen
a
sleep
state
operation
is
InThe
case
of
Microdrive
malfunction....
all
times,
for
both
charging
and
powering
the
Never
open
the
memory
card
cover
while
thecamera.
operaNo
: Does
format
the
memory
card.
• Be
sure
tonot
keep
the
neck
strap
around
your
neck
when
(AC
power
terminal)
compartment
cover
lock
inofSide
File
name/
performed
for
a
specified
amount
time
in
the
REC
mode.
Mixing
batteries
from
different
sets
can
shorten
overall
marked
•File
Contact
your
originallamp
Microdrive
retailer
or the contact
tion/card
access
is flashing.
using
thebutton
camera
to
protect
accidentally
number
the
direction
indicated
byagainst
the
Pressing
any
immediately
wakes
up
thecamera.
monitordropand
with arrow
lifethe
and
cause malfunction
of
the
pointbattery
noted
Microdrive
documentation.
ping
it. in
Date
and time
restores
normal
operation.
You
can
specify
30
seconds,
1
arrow
to lock
it. be charged
•• Batteries
cannot
while
they
are
loaded
in
••Battery
CASIO
does
not
provide
any
servicing
or
maintenance
Theorsupplied
neck
strapthe
is sleep
intended
foris use
with this
AC
Adaptor:
AD-C620
(Option)
minute,
2
minutes
before
state
triggered,
or
3.
Close
the
memory
card
slot
cover.
capacity
the
camera.
support
for the
Microdrive.
camera
only.
Dosetting
not use
it for any other application.
you
can
off this
entirely.
AC •Adaptor/Charger:
BC-3HA
(Option)
•IMPORTANT!
Note
thatturn
CASIO
assumes
noaround
responsibility
for any
data
Never
swing the
camera
by the neck
strap.
The
BC-3HA
functions
both
as
an Microdrive.
AC adaptor
and neck
as a
loss• you
may suffer
while
using
the
Allowing
the
camera
to
swing
freely
from
your
• Never
use
manganese
batteries.
Use onlybatteries.
the battery
charger
unit
for
nickel
metal
It
• This
camera
supports
use
a hydride
CompactFlash
card
can
result
inAA-size
damage
to of
theboth
camera
to its
bumping
types
specifically
mentioned
in this due
User’s
Guide.
comes
complete
with
four
rechargeable
nickel
metal
hyand
the
Microdrive.
Note,
however,
that
ejecting
a
against other objects. It also creates the danger
of the
dride
batteries.
This
AC caught
adaptor/charger
unit
can
be used
Microdrive
from
the camera
is relatively
difficult
than
camera
becoming
in a doormore
or on
other
obwith jects,
anyahousehold
outlet
rated for 100V to 240V
ejecting
CompactFlash
card.
resulting inpower
personal
injury.
AC.• Keep the camera out of the reach of small children,
especially when the neck strap is attached. The neck
strap can accidentally wind around the neck of a child
and create the risk of strangulation.
Flash
Mode
indicator
The following
examples
show
how
alkaline
Low
Turning
IBM
Microdrive
Battery
the
Camera
Indicator
Precautions
On
and
Off battery
Using
Using
the
Memory
the
Bundled
Control
Cards
Accessories
Button
life
None Auto
changes under different
shooting conditions.
The
Rotate
You
Compatibility
can
theformat
power/function
of
shows
the
a memory
camera
how
the
switch
card
battery
tothe
turn
delete
capacity
IBM
camera
Microdrive
allmemory
indicator
of power
the
has
on
Yourfollowing
This
camera
camera
supports
features
use
a two-way
of
awith
CompactFlash
power
supply
that
letsdata
card
you
Flash
On
the
and
stored
been
monitor
off.
confirmed
on1:
it.
screen
and
CASIO.
the
indicator
However,
display
youAC
should
changes
note
asNote
batthe
Attaching
the
Neck
Strap
use
(CF
either
TYPE
AA-size
I/II)
orbyIBM
batteries
Microdrive
image
storage.
current.
Example
Intermittent
use
ofhousehold
the for
camera
shortens
battery
Flash
Offor
tery power
following
is
important
used.
points
all card
four
whenever
batteries
using
as soon
the
as both
posIBM
that
all
mentions
ofReplace
“memory”
in this
manual
life.strap
The
Attach
operation/card
the
neck
access
Red-eye
to the strap
lamp
reduction
ring
as shown
inrefer
the illusBatteries
sible
Microdrive.
after they• Flash
go dead.
If indicates
you
continue
to
use
the camera
to
a CompactFlash
memory
cardof
and
Microdrive,
unless
indicator
thatIBM
the flash
will fire button
shows
tration
below.
the
operational
status
Control
• Four
alkaline
batteries:
LR6 power will automatiConditions
camera
while
theAA-size
battery
level
isflash
IMPORTANT!
(when
auto
is, selected).
specifically
noted
otherwise.
camera
ascarefully
described
below.
•the
Be
sure
to
read
all ofFR6
the documentation that
• Four
AA-size
lithium
batteries:
cally
turn
off.
•
Temperature:
25
C
• Formatting
a memory before
card deletes
on the
comes
with the Microdrive
using
it.all images batter• Four
AA-size
nickel-metal
hydride
rechargeable
even
someoforbecomes
all of thehot
are
protected
IMPORTANT!
• card,
Repeat
ofMicrodrive
aifcycle
recording
ofimages
one
shot
per
minute
• Note
that
the
during
normal
use.
ies:
NP-H3
Battery
(page
E-125).
Low off
High
for
10when
minutes,
followed
by
minute of
playback,
Take
care
removing
it from
the
• Make
sure
that
the
power
of one
the camera.
camera
is turned
Capacity
The
control
button
is
used
to
select
menu
items
and
execute
• Formatting
a memory
card deletes
all Best
Shot
Mode
and
minutes
of remove
power
off
(power
on,
full
lens
exHousehold
Current
• Take
carenine
toyou
avoid
strong
pressure
on the
label
side
of
the
before
insert
or
a memory
card.
Monitor
function.
Thefiles
following
are
the
terms
usedthe
in Operation/card
this
manual
to
scene
you
have
imported
from
CD-ROM
and
tension,
half
lens
contraction,
full
lens
extension,
im•Screen
AC
Adaptor:
AD-C620
(Option)
Microdrive
when
it is
removed
from
the
camera.
Strong
:
Turns
on
power
and
enters
the
REC
mode.
•
When
inserting
a
memory
card
into
the
camera,
make
access
lamp
describe
control
button
operations.
stored
ondamage
the card.
After
formatting
theand
card,
you have
age
recording,
power
off)
• AC: sure
Adaptor/Charger:
BC-3HA
(Option)
pressure
can
internal
components
cause
malTurns
powerside
andisenters
mode.
itsoncorrect
facingthe
upPLAY
and that
you insert its
Indicator
REC
mode
Strap
ring the Best Shot scene files you
Strap
ringto the
to
import
want
function.
OFF
Turns on
offend
power.
into the camera. Trying to force a card
• : terminal
Flash
Display
Term
memory
card
(page
E-77).
Meaning
Lamp
• Never
turn
off
camera
power
or
subject
the
camera
to iminto the camera
the card
and the camera.
Approximate
Battery can
Life:damage
35 minutes
(32 shots)
Flashing
Color
• Data
by thumb
a memory
card the
format
Useoperation/card
your
to access
move
control
button canup,
Loading
Batteries
pact
whiledeleted
the
lamp
isoperation
flashing.
DoRock
not
because
recovered!
sureoftothe
carefully
check and conIMPORTANT!
down,
left,
or Be
right.
ing so
can
malfunction
Microdrive.
One
of
the
following
operations
is
in
progress:
start
Make
sure
that
camera
power
is
turned
off
whenever
loading
Example
2:
Low
temperatures
shorten
battery
life.
Green
Inserting
a
Memory
Card
into
the
Camera
firm
that
longer
need
the
data
stored
in a
Press
control
button
straight
down
until
it clicks,
up, you
save
(multiple),
movie
recording
standby
•orThe
Microdrive
isthe
ano
very
high
precision
device.
Dropping
while
• Never
align
the
power/function
switch
with
replacing
batteries.
Click
memory
cardresult
it. of the Microdrive,
something
like
aformatting
computer
mouse.
the
camera
can
in
malfunction
the
lens
cap
isbefore
on
the
lens.
Conditions
• even
The
camera
isthe
ready
to record
when
theinlamp
isbar
off. while
Zoom
White
balance
indicator
though
camera
is undamaged.
Take
extra
care
align
the
power/function
switch
with
1.
Slide
the
card
slot
cover
lock
the
direction
•• Never
Temperature:
0 of
C
• Lower half indicates
1.when
On
the
bottom
thewhile
camera,
handling
the
camera
the
Microdrive
iszoom.
installed.
the
lens
isby
facing
downwards
towards
the
Daylight
indicated
the
arrow
and
openoptical
theground.
memory
•• Microdrive
Repeat
of
acamera
cycle
ofpower
recording
ofit one
shot
minute
slide
the
battery
compart• The
has
very
large
storage
capacity.
Because
To
restore
after
has
beenper
turned
off
Upper
half
indicates
Shade
card
slot
cover.
Partial
press
of
the
shutter
button
forcertain
10
minutes,
followed
by release
one
minute
of
playback,
digital
zoom.
of ment
this,
operations
can
take
a
relatively
long
time
to
by
auto
power
off,
rotate
the
power/function
switch
cover
lock
in
the
Tungsten
and nine
minutes
of to
poweror
off (power
on, full lens exLamp
perform.
OFF
and
then
back
.
direction
indicated
by
the
On
Fluorescent
tension,
halfmay
lensnot
contraction,properly
full lensinextension,
imColor
• The
Microdrive
areas where
arrow
and
theoperate
battery
Manualopen
age
recording,
power
off)
Auto
Focus
complete
Green
barometric
pressure
is low. Because of this, you should
compartment
cover.
•Red
Flash
avoid
usingon
it at high
Auto
Focusaltitudes.
operation failed
Memory
Approximate Battery
Life: 8 minutes (8 shots) card slot
Card slot
cover lock
IMPOR
cover
Downloaded from ManualsCamera.com Manuals
E-21
5.
Close
t
To
configure
Memory
Flash
Using
Select
Charg
the
Ca
L
Menu
Scre
1.
Align
.
the
pow
2.
Press
MENU
3.
Rock the
con
IMPOR
GETTING ACQUAINTED
AC
Adaptor
If Handling
youawant
to Contents
do precautions
this: Card from
Do this:
Battery
Changing
Removing
the
Memory
Precautions
of the
the
Monitor
Camera
Rock
the
control
button
•
Never
use
an
electrical
outlet
whose
voltage
is
Screen
Flash
charge
Incorrect
The
•Always
Images
flash
keep
use
cannot
charge
or
handling
lens
lamp
be recorded
cap
also
of
on
batteries
lights
the
with
lens
can
this
whenever
cause
camera
them
you
unless
are
tolamp
leak
not
a
Move
the the
selection
boundary
Pressing
MENU
displays
the
menu
screen.
The
contents
of
to the
left
or AC
right.
outside
the
rating
marked
on
the
adaptor.
1.
Slide
the
card
slot
cover
lock
in
the
direction
or
and
using
memory
burst
flashes
the
and
card
camera.
during
create
is
installed
Always
the
a
record
danger
in
leave
it.
opof
the
serious
lens
cap
damage
on
the
to
your
lens
the
whether
you are
in the PLAY
Usemenu
DISP screen
to cycledepend
throughonmonitor
screen
information
set-
• Formatting
Remove
Be
• sure
In
the
to
turn
PLAY
is Light/Self-timer
recommended
offmode,
from
power
the
before
camera
Auto
forneck
any
connecting
Power
if strap
memory
you
do
Off
not
or
trigger
card
disconnectplan
that
time
toring.
you
use
is
Attach
the
lens
cap
holder
to
the
or
the
strap
Ifbatteries
you
want
to dothe
this:
Do
this:
AF
Assist
Lamp
Indicator
display
This
it forprotects
ing
suspect
the
fixed
more
adaptor.
contains
at
than
against
fivetwo
minutes.
corrupted
accidental
weeks. image
lossdata
of the
(due
lens
to a
cap.
RECORD
Rock
the
control
button
The
You
AF
can
assist
use
the
lightnon-rechargeable
following
operates
procedure
automatically
toof
select
tothe
assist
one
the
of
Auto
the
Select
a menu
item
display
located
on
the
top
camera
also
•The
Never
Always
ERROR,
recharge
turn
strange
image
power
off
before
malformed
type
disconnecting
images)
never
the
or
AC
for
alup
orbatteries,
down.
•indicator
Sleep
iscamera
disabled
in colors,
the
PLAY
mode.
Focus
three
different
operation
date
whenever
formats.
you
are
shooting
where
lighting
is
shows
various
camera
status
indicators
during
image
relow Display
adaptor,
newly
direct
purchased
even
connection
if
the
memory
camera
between
cards.
has
two
batteries
ends
of
installed.
a
battery,
If
and
you
Rock
the
control
button
details
of
the
selected
•
Performing
any
button
operation
while
the
monitor
is
IMPORTANT!
dim.
This
lamp
also
flashes
to indicate
thehandy
countdown
until
cording.
The
indicator
display
comes
in
especially
never
don’t,
the
try
to
camera
take
batteries
will
turn
apart.
off
automatically
when
you
dismenu
itemimmediately
toswitch
the
right.
•the
Before
starting
a format
operation,
to AC adaptor
asleep
wakes
itoff.
up
and
restores
normal
shutter
releases
during
aturned
self-timer
operation.
•not
Never
turn
on
camera
power
with
the
lensofcap
affixed
the
monitor
screen
isYou
•when
Do
connect
expose
the
AC
batteries
adaptor.
direct
also
heat
run
the
orwith
risk
dispose
damaging
of
them
1.
Align
the
switch
or
power
or
load
aselected
new
setitem
oftorecommended
batteries
into
the.
Execute
thepower/function
Click the
control button.
operation.
to the lens.
by
the
burning.
camera
whenever
Doing
so
can
you
create
disconnect
the
danger
the
AC
of
adaptor
explosion.
withcamera.
step
toPower
the
previous
screentypes.
Presspriority
MENU. if you have
• Back
The
Auto
setting
is given
• Never
outPress
first
mix
turning
batteries
power
ofOff
off.
different
2.
MENU.
“2batteries
min”
set may
for
Sleep
andtoto
Auto
Power
Off.
This
• Dead
The AC
adaptor
areboth
become
susceptible
warm
leakage,
touch
afterwhich
extended
can
Linedo
1 not perform
means
that
theand
camera
turns
off
if you
periods
serious
ofthe
use.
damage
This
is normal
to
your
and
camera.
is the
not
Remove
cause
for
batteries
alarm.
Rock
control
button
up
or
down
to
select
3.cause
Select
Date
then
rock
control
button
• Insert
only
memory
cards
into
theunplug
memory
card
slot.
any
operation
about
two
minutes
in the
REC
mode.
• from
After
the
using
camera
the item
camera,
asfor
soon
turn
aswant,
you
it off
notice
and
they
the
dead.
adaptor
Line
2are
the
menu
you
and
then
the
to
the
right.
Inserting
any
other
type
ofcamera
card
can
causerock
malfunc• The
from
batteries
the
AC
outlet.
that
power
the
normally
become
• Auto Power
Offtois the
automatically
disabled
control
button
right.
Line 3 under any
tion.
• warm
The
camera
as of
they
automatically
discharge.
switches
tothe
AC control
adaptor
one
the
following conditions.
4.
Select
Date
and
then over
rock
AF
assist
light/self-timer
lamp
• Should
water Style
or
any
other
foreign
matter
get
into the
powered
operation
whenever
the
AC adaptor
is plugged
—
While
a
slideshow
is
playing
button
to
the
right.
memory
card slot, immediately turn off power, unplug
into the
camera.
the
ACthe
adaptor,
contact
your
retailer
or
— use
When
you
areand
performing
operations
a com• Always
AC adaptor
to power
the original
cameraon
whenever
IMPORTANT!
Multi-area
AF Service
Metering
5.
Rock
theCASIO
control
button
up Multi-pattern
or down
to select
nearest
Provider.
puter
connected
to the
camera’s
USB port
it is connected
to
a
computer.
indicator
indicator
Auto
Focus
using
the AF
assist
light/
self-timer
lamp
is
the
setting
you
want
tocard
and
then
• Never
eject
the
while
the
card
slot
is the
fac—Spot
While
the
ACmemory
adaptor
isuse,
connected
to theclick
camera
AF
indicator
possible
when
the
distance
from
the
ing
downwards.
Doing
so
creates
the camera
danger to
of the
control button to apply it. Center-weighted
Metering indicator
lessindicator
than about
2.5
meters.
memory
card
falling,
which
can
corrupt data or damMF subject
Manual is
focus
Example:
October
23, light
2001operates while Multi-area AF
• age
When
the
AF
assist
Spot Metering
the
memory
card.
Infinity indicator
indicator
or
Spot remove
AF is specified
as the focus
mode,
the camera
camera
• Year/Month/Day:
Never
the
memory
card
from the
01/10/23
Macro mode indicator
automatically
assumes that
focus
area
the center
Battery
capacity
while
the operation/card
access
lamp
is is
flashing.
DoDay/Month/Year:
Flash
off
indicator
area
Spot
AF. 23/10/01
See
pages
and
E-63orfor
more
ing
sofor
can
cause
loss
ofLine
recorded
images
corrup2E-62
Aperture
value
• See the
“Camera
Menus”
on
page
E-150
for
more
informaMonth/Day/Year:
10/23/01
information.
tion
ofmenu
memory
card
data.
Flash
on
indicator
tion about
contents.
time settings
• Do
not
look
directly
at the AFSelf-timer
assist light/self-timer
Red eye reduction
6. Press
MENU
to
exit
the
setting
procedure.
lamp
or
point
it
directly
at
the
subject’s
eyes.
indicator
Exposure compensation
Increase
or
decrease
the
value
Doing
so
can
create
the
danger
of
fire
or eleccamera.
eration
when
the
Be
camera
described
sure
tois note
turned
below.
the
off
following
and
the
important
lens
retracted.
precautions
by
the
arrow
and
open
the
memory
Rock
theisCompactFlash
control
button
mode
oras
REC
mode.
The
following
procedure
shows
operaas
shown
below.
•tings
Beindicated
sure
to
use
only
CASIO
or
SanDisk
where
thetrical
selection
boundary
is
shock.
Use only
the
optional
AC adaptor
to
avoid
problems
with
batteries.
up
or
down.
card
cover.
tion
inlocated
the
REC
mode
as an example.
cards,
orslot
anspecified
IBM
Microdrive.
Proper
operation
is
not
guarfor this camera.
anteed with
other
memory
cards.
•• Use
Do
not
allow
the
AC
adaptor
power
cord
to
beonly LR6 (AM-3) type alkaline or FR6 type
come
cut
or
damaged,
do
not
place
heavy
ob•6.Static
electricity,
electrical
noise,
and
other
electrical
phe1.
Align
the
power/function
switch
with
.
Power
Save
and
then
rock
the
control
button
lithium
or
Ni-MH
(nickel-metal
hydride)
dry
cell
Click the control button
to display
applyon
your settings.
Histogram
jects
on it,
and
keep
it away
from
A damnomena
can
cause
corruption
or
even
totalheat.
loss
of
data
batteries
with
this
camera.
mix
old
batto
the
right.
REC
mode
(pages
E-74,
115)
• To
perform
a menu
operation
in
theNever
PLAY
mode,
align
aged
power
cord
creates
risk
ofshould
fire and
onpower/function
a teries
memory
card.
Because
of the
you
alwith
new
ones.
Doing
so
can
result
in
7.stored
Press
MENU
to
exit
the
setting
procedure.
the
switch
with
.this,
Lamp
Color
Flashing
DISP
electrical
shock.
ways
make
backup
copies
of
important
images
on
other
bursting
or
leaking
of
batteries,
creating
the
4. Rock the control button up or down to select
• danger
Never try
modify
theisAC
adaptor
Information
display
on power cord,
Amber
charging.
of to
fire
or Flash
personal
injury.
the
item
whose
settings
you
want
to change,
2.media.
Press
MENU.
(pages
E-22,
23)plustwisting,
or subject
it to
severe
bending,
or
pullCAUTION
•
Always
make
sure
that
the
and
minus
DISP
2.
Press
the
eject
button
so
it
• Memory
card rock
problems
can be corrected
by(+)
reformatting
and then
the
control
button
to
the
right.
ing.ends
Doing
so creates
the
risk
of fire
and elec(–)
of
the
batteries
are
facing
correctly,
as
DISP
extends
from
the
camera.
the
memory
card.
Reformatting
a
memory
card
deletes
all
CAUTION
• To press
make
auto
power
offmarkings
settings,
select
“Auto
Poweritself.
Off”.
trical
Partial
ofshock.
the
shutter
release
button
noted
by card,
the
on the
images stored
on the
but youdisplay
can
use
a computer
to
Information
offcamera
• Improper
Never
touch
the
AC
while
your
hands
• To
make
sleep
“Sleep”.
Cap
holder
loading
ofadaptor
batteries
can
result
in
Lamp
Color
On
copy
the
images
yousettings,
want
to select
keep
to
the computer’s
hard
DISP
are
wet.
Doing
so
creates
the
risk
of
electrical
Eject
button
bursting or leaking
of Ifbatteries,
creating
the
diskAmber
before reformatting
your card.
you
plan
to
be
recordReady
toor
fire.
shock.
5.ingOn
the where
screen
appears,
rock
the
Monitor
screen
off
danger
ofthat
personal
injury
soiling
ofcontrol
objects
images
you
do
not
have
access
to a
computer,
it
3. Press
the
eject
button
once
•
Do
not
overload
extension
cords
or loop
wall outnearby.
Large
button
up
down
the
setting
is a
good idea
toortake
alongtoanmake
extra memory
card oryou
two
again
to
eject
the
card.
lets.
Doing
so creates the danger of fire and
want,
and
then
click the
button
to apply
just
in case
you
experience
ancontrol
unexpected
memory
card
IMPORTANT!
electrical shock.
problem.
it.
IMPORTANT!
• When• batteries
gocord
low, ofthe
access
Should the
theoperation/card
AC adaptor become
power
off charge
settings:
“2 min”
min”
lamp
and
flash
lamp
flash“5
for about
damaged
internal
wiring),
request
a
• Auto
The histogram
is (exposed
not displayed
inamber
the
movie
RECone
or
second.
After(pages
that,
the
camera
powers
automatireplacement
from
an “1
authorized
CASIO
serPLAY
E-93,110).
Sleep mode
settings:
“Off”
“30
sec”
min” “2down
min”
cally. Ifvice
thisprovider.
happens, A
replace
batteries
as sooncord
as
damaged
AC adaptor
4. Remove
the
memory
card.
possible.
createstothe
danger
of fire or procedure.
electrical shock.
6. Press
MENU
exit
the setting
Line 1
Small loop
Downloaded from ManualsCamera.com Manuals
E-24
Remaining number of
images/File number
Line 3 Shutter speed value/EV
value
2.
With
th
Formatting
PLAY
Using
Powe
Operation
Power
Req
I
arrow
slot
Operation/c
as it co
w
GETTING ACQUAINTED
• AAbout
Microdrive
rechargeable
batteries
much
more
electrical
than a.
2.
1.
Load
Align
the
theconsumes
power/function
batteries
so
their
switch
withpower
or
PLAY
mode
Adjusting
the
Length
of
the
Neck
Strap
Use
CompactFlash
only the
nickel-metal
card.
Depending
hydride
batteries
on how(NP-H3)
a Microdrive
that are
is
plus
(+)
and
minus
(–)
ends
Lamp
Use
The
settings
theitadaptor
buckle
described
to
asadjust
shown
below
the
below
length
let
to
you
power
of
specify
the
neck
theProper
sleep
camera
strap.
and
from
auto
a
Flashing
specifically
used,
can
recommended
greatly
reduce
for
battery
this
camera.
life.
When
using
alkaline
camera
2.
Press
MENU.
Color
are
facing
as
shown
in
the
ilhousehold
power
off trigger
times
outlet.
that help
to other
conserve
operation
batteries,
ispower
certain
not guaranteed
operating
when
conditions
rechargeable
andvaluable
certain battery
battery
batterlustration.
One of the following operations is in progress:
power.
ies
are
used.
can“Format”
result in batteries
going
dead
right
afterbutyou
3.brands
Select
and
then
rock
the
control
delete, format,
battery
alert,
card
Green
•
If
the
eject
button
is: extended,
itbrowser
in before
sliding
install
AC Adaptor/Charger
new
ones.
Whenever
BC-3HA
using
apress
Microdrive,
we recomton
to
the
right
(page
E-42).
generation.
AUTO
POWER
the
memory
card
intobatteries
the slot.
mend
Nickel-metal
that
youOFF
use
hydride
rechargeable
nickel
(4-battery
metal hydride
set)/Quick
batRedPowerMemory
card
defective.power if no operation is
Auto
Off: batteries
turns
offisto
camera
Charger
or lithium
Set
BC-1HB4
power the camera.
4.teries
In
response
to
the
confirmation
message
that
for five
minutes
in the
the amount
PLAY mode.
InNP-H3P4
the
REC
•• performed
When
Nickel-metal
battery
power
hydride
isbatteries
low,
of
time
required
The
operation/card
access
lamp(4-battery
remains
litset)
(green)
while
appears,
rock
the
control
button
up
or: down
to
mode,
you
can
specify
an Auto
Power
Off
trigger
time
of
between
shots
may
become
longer.
This
longer
interval
is
the
monitor
screen
turned off
the PLAY
mode.
Side
marked
select
“Yes”
toisformat
orin“No”
to exit
and then
two
or
five
minutes.
designed
protect
thedown
Microdrive.
3.
Close to
and
press
on the
with
arrow
IMPORTANT!
click the
control
face the button.
batteryshould
compartment
cover
memory
card
SLEEP
•
Be
sure
to
keep
all four batteries
together as a set at
IMPORTANT!
Yes
: Formats
the
memory
card.
slot
cover.
asmonitor
you
slide
theenters
battery
screen
a
sleep
state
if no the
operation
is
InThe
case
of
Microdrive
malfunction....
all
times,
for
both
charging
and
powering
Never
open
the
memory
card
cover
while
thecamera.
operaNo
: Does
format
the
memory
card.
• Be
sure
tonot
keep
the
neck
strap
around
your
neck
when
compartment
cover
lock
inofsets
performed
for
a
specified
amount
time
in
the
REC
mode.
Mixing
batteries
from
different
can
shorten
overall
• Contact
your
originallamp
Microdrive
retailer
or the contact
tion/card
access
is flashing.
using
thebutton
camera
to
protect
accidentally
the
direction
indicated
byagainst
the of
Pressing
any
immediately
wakes
up
thecamera.
monitordropand
lifethe
and
cause malfunction
the
pointbattery
noted
Microdrive
documentation.
ping
it. in
restores
normal
operation.
You
can
specify
30
seconds,
1
arrow
to lock
it. be charged
•• Batteries
cannot
while
they
are
loaded
in
•• CASIO
does
not
provide
any
servicing
or
maintenance
Theorsupplied
neck
strapthe
is sleep
intended
foris use
with this
Adaptor:
AD-C620
(Option)
minute,
2
minutes
before
state
triggered,
or
3.AC
Close
the
memory
card
slot
cover.
the
camera.
support
for the
Microdrive.
camera
only.
Dosetting
not use
it for any other application.
you
can
off this
entirely.
AC •Adaptor/Charger:
BC-3HA
(Option)
•IMPORTANT!
Note
thatturn
CASIO
assumes
noaround
responsibility
for any
data
Never
swing the
camera
by the neck
strap.
The
BC-3HA
functions
both
as
an Microdrive.
AC adaptor
and neck
as a
loss• you
may suffer
while
using
the
Allowing
the
camera
to
swing
freely
from
your
• Never
use
manganese
batteries.
Use onlybatteries.
the battery
charger
unit
for
nickel
metal
It
• This
camera
supports
use
a hydride
CompactFlash
card
can
result
inAA-size
damage
to of
theboth
camera
to its
bumping
types
specifically
mentioned
in this due
User’s
Guide.
comes
complete
with
four
rechargeable
nickel
metal
hyand
the
Microdrive.
Note,
however,
that
ejecting
a
against other objects. It also creates the danger
of the
dride
batteries.
This
AC caught
adaptor/charger
unit
can
be used
Microdrive
from
the camera
is relatively
difficult
than
camera
becoming
in a doormore
or on
other
obwith jects,
anyahousehold
outlet
rated for 100V to 240V
ejecting
CompactFlash
card.
resulting inpower
personal
injury.
AC.• Keep the camera out of the reach of small children,
especially when the neck strap is attached. The neck
strap can accidentally wind around the neck of a child
and create the risk of strangulation.
The following
examples
show
how
alkaline
Low
Turning
IBM
Microdrive
Battery
the
Camera
Indicator
Precautions
On
and
Off battery
Using
Using
the
Memory
the
Bundled
Control
Cards
Accessories
Button
life
None Auto
changes under different
shooting conditions.
The
Rotate
You
Compatibility
can
theformat
power/function
of
shows
the
a memory
camera
how
the
switch
card
battery
tothe
turn
delete
capacity
IBM
camera
Microdrive
allmemory
indicator
of power
the
has
on
Yourfollowing
This
camera
camera
supports
features
use
a two-way
of
awith
CompactFlash
power
supply
that
letsdata
card
you
Flash
On
the
and
stored
been
monitor
off.
confirmed
on1:
it.
screen
and
CASIO.
the
indicator
However,
display
youAC
should
changes
note
asNote
batthe
Attaching
the
Neck
Strap
use
(CF
either
TYPE
AA-size
I/II)
orbyIBM
batteries
Microdrive
image
storage.
current.
Example
Intermittent
use
ofhousehold
the for
camera
shortens
battery
Flash
Offor
tery power
following
is
important
used.
points
all card
four
whenever
batteries
using
as soon
the
as both
posIBM
that
all
mentions
ofReplace
“memory”
in this
manual
life.strap
The
Attach
operation/card
the
neck
access
Red-eye
to the strap
lamp
reduction
ring
as shown
inrefer
the illusBatteries
sible
Microdrive.
after they• Flash
go dead.
If indicates
you
continue
to
use
the camera
to
a CompactFlash
memory
cardof
and
Microdrive,
unless
indicator
thatIBM
the flash
will fire
shows
tration
below.
the
operational
status
• Four
alkaline
batteries:
LR6 power will automatiConditions
camera
while
theAA-size
battery
level
isflash
IMPORTANT!
(when
auto
is, selected).
specifically
noted
otherwise.
camera
ascarefully
described
below.
•the
Be
sure
to
read
all ofFR6
the documentation that
• Four
AA-size
lithium
batteries:
cally
turn
off.
•
Temperature:
25
C
• Formatting
a memory before
card deletes
on the
comes
with the Microdrive
using
it.all images batter• Four
AA-size
nickel-metal
hydride
rechargeable
even
someoforbecomes
all of thehot
are
protected
IMPORTANT!
• card,
Repeat
ofMicrodrive
aifcycle
recording
ofimages
one
shot
per
minute
• Note
that
the
during
normal
use.
ies:
NP-H3
Battery
(page
E-125).
Low off
High
for
10when
minutes,
followed
by
minute of
playback,
Take
care
removing
it from
the
• Make
sure
that
the
power
of one
the camera.
camera
is turned
Capacity
The
control
button
is
used
to
select
menu
items
and
execute
• Formatting
a memory
card deletes
all Best
Shot
Mode
and
minutes
of remove
power
off
(power
on, full
lens
exHousehold
Current
• Take
carenine
toyou
avoid
strong
pressure
on the
label
side
of
the
before
insert
or
a memory
Monitor
function.
Thefiles
following
are
the
terms
usedthe
in card.
this
manual
to
scene
you
have
imported
from
CD-ROM
and
tension,
half
lens
contraction,
full
lens
extension,
im•Screen
AC
Adaptor:
AD-C620
(Option)
Microdrive
when
it is
removed
from
the
camera.
Strong
:
Turns
on
power
and
enters
the
REC
mode.
•
When
inserting
a
memory
card
into
the
camera,
make
describe
control
button
operations.
stored
ondamage
the card.
After
formatting
theand
card,
you have
age
recording,
power
off)
• AC: sure
Adaptor/Charger:
BC-3HA
(Option)
pressure
can
internal
components
cause
malTurns
powerside
andisenters
mode.
itsoncorrect
facingthe
upPLAY
and that
you insert its
Indicator
REC
mode
to
import the Best Shot scene files you want to the
function.
OFF
Turns on
offend
power.
into the camera. Trying to force a card
• : terminal
Flash
Display
Term
memory
card
(page
E-77).
Meaning
Lamp
• Never
turn
camera
power
or
subject
camera
to iminto
theoff
camera
can
damage
the card
and
the camera.
Approximate
Battery
Life:
35 minutes
(32the
shots)
Flashing
Color
• Data
by thumb
a memory
card the
format
Useoperation/card
your
to access
move
control
button canup,
Loading
Batteries
pact
whiledeleted
the
lamp
isoperation
flashing.
DoRock
not
because
recovered!
sureoftothe
carefully
check and conIMPORTANT!
down,
left,
or Be
right.
ing so
can
malfunction
Microdrive.
One
of
the
following
operations
is
in
progress:
start
Make
sure
that
camera
power
is
turned
off
whenever
loading
Example
2:
Low
temperatures
shorten
battery
life.
Green
Inserting
a
Memory
Card
into
the
Camera
firm
that
longer
need
the
data
stored
in a
Press
control
button
straight
down
until
it clicks,
up, you
save
(multiple),
movie
recording
standby
•orThe
Microdrive
isthe
ano
very
high
precision
device.
Dropping
while
• Never
align
the
power/function
switch
with
replacing
batteries.
Click
memory
cardresult
it. of the Microdrive,
something
like
aformatting
computer
mouse.
the
camera
can
in
malfunction
the
lens
cap
isbefore
on
the
lens.
Conditions
• even
The
camera
isthe
ready
to record
when
theinlamp
isdirection
off. while
though
camera
is undamaged.
Take
extra
care
align
the
power/function
switch
with
1.
Slide
the
card
slot
cover
lock
the
•• Never
Temperature:
0 of
C
• Lower half indicates
1.when
On
the
bottom
thewhile
camera,
handling
the
camera
the
Microdrive
iszoom.
installed.
the
lens
isby
facing
downwards
towards
the
Daylight
indicated
the
arrow
and
openoptical
theground.
memory
•• Microdrive
Repeat
of
acamera
cycle
ofpower
recording
ofit one
shot
minute
slide
the
battery
compart• The
has
very
large
storage
capacity.
Because
To
restore
after
has
beenper
turned
off
Upper
half
indicates
Shade
card
slot
cover.
Partial
press
of
the
shutter
button
forcertain
10
minutes,
followed
by release
one
minute
of
playback,
digital
zoom.
of ment
this,
operations
can
take
a
relatively
long
time
to
by
auto
power
off,
rotate
the
power/function
switch
cover
lock
in
the
Tungsten
and nine
minutes
of to
poweror
off (power
on, full lens exLamp
perform.
OFF
and
then
back
.
direction
indicated
by
the
On
Fluorescent
tension,
halfmay
lensnot
contraction,properly
full lensinextension,
imColor
• The
Microdrive
areas where
arrow
and
theoperate
battery
Manualopen
age
recording,
power
off)
Auto
Focus
complete
Green
barometric
pressure
is low. Because of this, you should
compartment
cover.
•Red
Flash
avoid
usingon
it at high
Auto
Focusaltitudes.
operation failed
Approximate Battery Life: 8 minutes (8 shots)
Downloaded from ManualsCamera.com Manuals
IMPOR
E-21
5.
Close
t
To
configure
Memory
Flash
Using
Select
Charg
the
Ca
L
Menu
Scre
1.
Align
.
the
pow
2.
Press
MENU
3.
Rock the
con
IMPOR
GETTING ACQUAINTED
AC
Adaptor
If Handling
youawant
to Contents
do precautions
this: Card from
Do this:
Battery
Changing
Removing
the
Memory
Precautions
of the
the
Monitor
Camera
Rock
the
control
button
•
Never
use
an
electrical
outlet
whose
voltage
is
Screen
Incorrect
The
•Always
Images
flash
keep
use
cannot
charge
or
handling
lens
lamp
be recorded
cap
also
of
on
batteries
lights
the
with
lens
can
this
whenever
cause
camera
them
you
unless
are
to leak
not
a
Move
the the
selection
boundary
Pressing
MENU
displays
the
menu
screen.
The
contents
of
to the
left
or AC
right.
outside
the
rating
marked
on
the
adaptor.
1.
Slide
the
card
slot
cover
lock
in
the
direction
or
and
using
memory
burst
flashes
the
and
card
camera.
during
create
is
installed
Always
the
a
record
danger
in
leave
it.
opof
the
serious
lens
cap
damage
on
the
to
your
lens
the
whether
you are
in the PLAY
Usemenu
DISP screen
to cycledepend
throughonmonitor
screen
information
set-
• Formatting
Remove
Be
• sure
In
the
to
turn
PLAY
is Light/Self-timer
recommended
offmode,
from
power
the
before
camera
Auto
forneck
any
connecting
Power
if strap
memory
you
do
Off
not
or
trigger
card
disconnectplan
that
time
toring.
you
use
is
Attach
the
lens
cap
holder
to
the
or
the
strap
Ifbatteries
you
want
to dothe
this:
Do
this:
AF
Assist
Lamp
Indicator
display
This
it forprotects
ing
suspect
the
fixed
more
adaptor.
contains
at
than
against
fivetwo
minutes.
corrupted
accidental
weeks. image
lossdata
of the
(due
lens
to a
cap.
RECORD
Rock
the
control
button
The
You
AF
can
assist
use
the
lightnon-rechargeable
following
operates
procedure
automatically
toof
select
tothe
assist
one
the
of
Auto
the
Select
a menu
item
display
located
on
the
top
camera
also
•The
Never
Always
ERROR,
recharge
turn
strange
image
power
off
before
malformed
type
disconnecting
images)
never
the
or
AC
for
alup
orbatteries,
down.
•indicator
Sleep
iscamera
disabled
in colors,
the
PLAY
mode.
Focus
three
different
operation
date
whenever
formats.
you
are
shooting
where
lighting
is
shows
various
camera
status
indicators
during
image
relow Display
adaptor,
newly
direct
purchased
even
connection
if
the
memory
camera
between
cards.
has
two
batteries
ends
of
installed.
a
battery,
If
and
you
Rock
the
control
button
details
of
the
selected
•
Performing
any
button
operation
while
the
monitor
is
IMPORTANT!
dim.
This
lamp
also
flashes
to indicate
thehandy
countdown
until
cording.
The
indicator
display
comes
in
especially
never
don’t,
the
try
to
camera
take
batteries
will
turn
apart.
off
automatically
when
you
dismenu
itemimmediately
toswitch
the
right.
•the
Before
starting
a format
operation,
to AC adaptor
asleep
wakes
itoff.
up
and
restores
normal
shutter
releases
during
aturned
self-timer
operation.
•not
Never
turn
on
camera
power
with
the
lensofcap
affixed
the
monitor
screen
isYou
•when
Do
connect
expose
the
AC
batteries
adaptor.
direct
also
heat
run
the
orwith
risk
dispose
damaging
of
them
1.
Align
the
switch
or
power
or
load
aselected
new
setitem
oftorecommended
batteries
into
the.
Execute
thepower/function
Click the
control button.
operation.
to the lens.
by
the
burning.
camera
whenever
Doing
so
can
you
create
disconnect
the
danger
the
AC
of
adaptor
explosion.
withcamera.
step
toPower
the
previous
screentypes.
Presspriority
MENU. if you have
• Back
The
Auto
setting
is given
• Never
outPress
first
mix
turning
batteries
power
ofOff
off.
different
2.
MENU.
“2batteries
min”
set may
for
Sleep
andtoto
Auto
Power
Off.
This
• Dead
The AC
adaptor
areboth
become
susceptible
warm
leakage,
touch
afterwhich
extended
can
means
that
theand
camera
turns
off
if you
do not
perform
periods
serious
ofthe
use.
damage
This
is normal
to
your
and
camera.
is the
not
Remove
cause
for
batteries
alarm.
Rock
control
button
up
or
down
to
select
3.cause
Select
Date
then
rock
control
button
• Insert
only
memory
cards
into
theunplug
memory
card
slot.
any
operation
about
two
minutes
in the
REC
mode.
• from
After
the
using
camera
the item
camera,
asfor
soon
turn
aswant,
you
it off
notice
and
they
are
the
dead.
adaptor
the
menu
you
and
then
the
to
the
right.
Inserting
any
other
type
ofcamera
card
can
causerock
malfunc• The
from
batteries
the
AC
outlet.
that
power
the
normally
become
• Auto Power
Offtois the
automatically
disabled under any
control
button
right.
tion.
• warm
The
camera
as of
they
automatically
discharge.
switches
tothe
AC control
adaptor
one
the
following conditions.
4.
Select
Date
and
then over
rock
• Should
water Style
orwhenever
any other
foreign
matter
get
into the
powered
operation
the
AC adaptor
is plugged
—
While
a
slideshow
is
playing
button
to
the
right.
memory
card slot, immediately turn off power, unplug
into the
camera.
the
ACthe
adaptor,
contact
your
retailer
or
— use
When
you
areand
performing
operations
a com• Always
AC adaptor
to power
the original
cameraon
whenever
IMPORTANT!
Multi-area
AF Service
Metering
5.
Rock
theCASIO
control
button
up Multi-pattern
or down
to select
nearest
Provider.
puter
connected
to the
camera’s
USB port
it is connected
to
a
computer.
indicator
indicator
Auto
Focus
using
the AF
assist
light/
self-timer
lamp
is
the
setting
you
want
tocard
and
then
• Never
eject
the
while
the
card
slot
is the
fac—Spot
While
the
ACmemory
adaptor
isuse,
connected
to theclick
camera
AF
indicator
possible
when
the
distance
from
the
ing
downwards.
Doing
so
creates
the camera
danger to
of the
control button to apply it. Center-weighted
Metering indicator
lessindicator
than about
2.5
meters.
memory
card
falling,
which
can
corrupt data or damMF subject
Manual is
focus
Example:
October
23, light
2001operates while Multi-area AF
• age
When
the
AF
assist
Spot Metering
the
memory
card.
Infinity indicator
indicator
or
Spot remove
AF is specified
as the focus
mode,
the camera
camera
• Year/Month/Day:
Never
the
memory
card
from the
01/10/23
Macro mode indicator
automatically
assumes that
focus
area
the center
Battery
capacity
while
the operation/card
access
lamp
is is
flashing.
DoDay/Month/Year:
Flash
off
indicator
area
Spot
AF. 23/10/01
See
pages
and
E-63orfor
more
ing
sofor
can
cause
loss
ofLine
recorded
images
corrup2E-62
Aperture
value
• See the
“Camera
Menus”
on
page
E-150
for
more
informaMonth/Day/Year:
10/23/01
information.
tion
ofmenu
memory
card
data.
Flash
on
indicator
tion about
contents.
time settings
• Do
not
look
directly
at the AFSelf-timer
assist light/self-timer
Red eye reduction
6. Press
MENU
to
exit
the
setting
procedure.
lamp
or
point
it
directly
at
the
subject’s
eyes.
indicator
Exposure compensation
Increase
or
decrease
the
value
Doing
so
can
create
the
danger
of
fire
or eleccamera.
eration
when
the
Be
camera
described
sure
tois note
turned
below.
the
off
following
and
the
important
lens
retracted.
precautions
by
the
arrow
and
open
the
memory
Rock
theisCompactFlash
control
button
mode
oras
REC
mode.
The
following
procedure
shows
operaas
shown
below.
•tings
Beindicated
sure
to
use
only
CASIO
or
SanDisk
where
thetrical
selection
boundary
is
shock.
Use only
the
optional
AC adaptor
to
avoid
problems
with
batteries.
up
or
down.
card
cover.
tion
inlocated
the
REC
mode
as an example.
cards,
orslot
anspecified
IBM
Microdrive.
Proper
operation
is
not
guarfor this camera.
anteed with
other
memory
cards.
•• Use
Do
not
allow
the
AC
adaptor
power
cord
to
beonly LR6 (AM-3) type alkaline or FR6 type
come
cut
or
damaged,
do
not
place
heavy
ob•6.Static
electricity,
electrical
noise,
and
other
electrical
phe1.
Align
the
power/function
switch
with
.
Power
Save
and
then
rock
the
control
button
lithium
or
Ni-MH
(nickel-metal
hydride)
dry
cell
Click the control button to apply your settings.
jects
on it,
andthis
keep
it away
from
A damnomena
can
cause
corruption
or
even
totalheat.
loss
of
data
batteries
with
camera.
mix
old
batto
the
right.
REC
mode
• To
perform
a menu
operation
in
theNever
PLAY
mode,
align
aged
power
cord
creates
risk
ofshould
fire and
onpower/function
a teries
memory
card.
Because
of the
you
alwith
new
ones.
Doing
so
can
result
in
7.stored
Press
MENU
to
exit
the
setting
procedure.
the
switch
with
.this,
Lamp
Color
Flashing
electrical
shock.
ways
make
backup
copies
of
important
images
on
other
bursting
or
leaking
of
batteries,
creating
the
4. Rock the control button up or down to select
• danger
Never try
modify
theisAC
adaptor power cord,
Amber
charging.
of to
fire
or Flash
personal
injury.
the
item
whose
settings
you
want to change,
2.media.
Press
MENU.
or subject
it to sure
severe
bending,
twisting,
or
pullCAUTION
•
Always
make
that
the
plus
and
minus
2.
Press
the
eject
button
so
it
• Memory
card rock
problems
can be corrected
by(+)
reformatting
and then
the
control
button
to
the
right.
ing.ends
Doing
so creates
the
risk
of fire
and elec(–)
of
the
batteries
are
facing
correctly,
as
extends
from
the
camera.
the
memory
card.
Reformatting
a
memory
card
deletes
all
CAUTION
• To press
make
auto
power
offmarkings
settings,
select
“Auto
Poweritself.
Off”.
trical
Partial
ofshock.
the
shutter
release
button
noted
by card,
the
on the
images stored
on the
but you can
use camera
a computer
to
• Improper
Never
touch
the AC
while
your
hands
• To
make
sleep
“Sleep”.
loading
ofadaptor
batteries
can
result
in
Lamp
Color
On
copy
the
images
yousettings,
want
to select
keep
to
the computer’s
hard
are
wet.
Doing
so
creates
the
risk
of
electrical
bursting or leaking
of Ifbatteries,
creating
the
diskAmber
before reformatting
your card.
you
plan
to
be
recordReady
toor
fire.
shock.
5.ingOn
the where
screen
appears,
rock
the
danger
ofthat
personal
injury
soiling
ofcontrol
objects
images
you
do
not
have
access
to a
computer,
it
3. Press
the
eject
button
once
•
Do
not
overload
extension
cords
or wall you
outnearby.
button
up
down
the
setting
is a
good idea
toortake
alongtoanmake
extra memory
card or two
again
to
eject
the
card.
lets.
Doing
so creates the danger of fire and
want,
and
then
click the
button
to apply
just
in case
you
experience
ancontrol
unexpected
memory
card
IMPORTANT!
electrical shock.
problem.
it.
IMPORTANT!
• When• batteries
gocord
low, ofthe
access
Should the
theoperation/card
AC adaptor become
power
off charge
settings:
“2 min”
min”
lamp
and
flash
lamp
flash“5
for about
damaged
internal
wiring),
request
a
• Auto
The histogram
is (exposed
not displayed
inamber
the
movie
RECone
or
second.
After(pages
that,
the
camera
powers
automatireplacement
from
an “1
authorized
CASIO
serPLAY
E-93,110).
Sleep mode
settings:
“Off”
“30
sec”
min” “2down
min”
cally. Ifvice
thisprovider.
happens, A
replace
batteries
as sooncord
as
damaged
AC adaptor
4. Remove
the
memory
card.
possible.
createstothe
danger
of fire or procedure.
electrical shock.
6. Press
MENU
exit
the setting
Line 1
Downloaded from ManualsCamera.com Manuals
E-24
Remaining number of
images/File number
Line 3 Shutter speed value/EV
value
2.
With
th
Formatting
PLAY
Using
Powe
Operation
Power
Req
I
arrow
slot
Operation/c
as it co
w
GETTING ACQUAINTED
• AAbout
Microdrive
rechargeable
batteries
much
more
electrical
than a.
2.
1.
Load
Align
the
theconsumes
power/function
batteries
so
their
switch
withpower
or
PLAY
mode
Adjusting
the
Length
of
the
Neck
Strap
Use
CompactFlash
only the
nickel-metal
card.
Depending
hydride
batteries
on how(NP-H3)
a Microdrive
that are
is
plus
(+)
and
minus
(
)
ends
Lamp
Use
The
settings
theitadaptor
buckle
described
to
asadjust
shown
below
the
below
length
let
to
you
power
of
specify
the
neck
theProper
sleep
camera
strap.
and
from
auto
a
Flashing
specifically
used,
can
recommended
greatly
reduce
for
battery
this
camera.
life.
When
using
alkaline
camera
2.
Press
MENU.
Color
are
facing
as
shown
in
the
ilhousehold
power
off trigger
times
outlet.
that help
to other
conserve
operation
batteries,
ispower
certain
not guaranteed
operating
when
conditions
rechargeable
andvaluable
certain battery
battery
batterlustration.
One of the following operations is in progress:
power.
ies
are
used.
can Format
result in batteries
going
dead
right
afterbutyou
3.brands
Select
and
then
rock
the
control
delete, format,
battery
alert,
card
Green
•
If
the
eject
button
is: extended,
itbrowser
in before
sliding
install
AC Adaptor/Charger
new
ones.
Whenever
BC-3HA
using
apress
Microdrive,
we recomton
to
the
right
(page
E-42).
generation.
AUTO
POWER
the
memory
card
intobatteries
the slot.
mend
Nickel-metal
that
youOFF
use
hydride
rechargeable
nickel
(4-battery
metal hydride
set)/Quick
batRedPowerMemory
card
defective.power if no operation is
Auto
Off: batteries
turns
offisto
camera
Charger
or lithium
Set
BC-1HB4
power the camera.
4.teries
In
response
to
the
confirmation
message
that
for five
minutes
in the
the amount
PLAY mode.
InNP-H3P4
the
REC
•• performed
When
Nickel-metal
battery
power
hydride
isbatteries
low,
of
time
required
The
operation/card
access
lamp(4-battery
remains
litset)
(green)
while
appears,
rock
the
control
button
up
or: down
to
mode,
you
can
specify
an Auto
Power
Off
trigger
time
of
between
shots
may
become
longer.
This
longer
interval
is
the
monitor
screen
turned off
the PLAY
mode.
Side
marked
select
Yes
toisformat
orin No
to exit
and then
two
or
five
minutes.
designed
protect
thedown
Microdrive.
3.
Close to
and
press
on the
with
arrow
IMPORTANT!
click the
control
face the button.
batteryshould
compartment
cover
memory
card
SLEEP
•
Be
sure
to
keep
all four batteries
together as a set at
IMPORTANT!
Yes
: Formats
the
memory
card.
slot
cover.
asmonitor
you
slide
theenters
battery
screen
a
sleep
state
if no the
operation
is
InThe
case
of
Microdrive
malfunction....
all
times,
for
both
charging
and
powering
Never
open
the
memory
card
cover
while
thecamera.
operaNo
: Does
format
the
memory
card.
• Be
sure
tonot
keep
the
neck
strap
around
your
neck
when
compartment
cover
lock
inofsets
performed
for
a
specified
amount
time
in
the
REC
mode.
Mixing
batteries
from
different
can
shorten
overall
• Contact
your
originallamp
Microdrive
retailer
or the contact
tion/card
access
is flashing.
using
thebutton
camera
to
protect
accidentally
the
direction
indicated
byagainst
the of
Pressing
any
immediately
wakes
up
thecamera.
monitordropand
lifethe
and
cause malfunction
the
pointbattery
noted
Microdrive
documentation.
ping
it. in
restores
normal
operation.
You
can
specify
30
seconds,
1
arrow
to lock
it. be charged
•• Batteries
cannot
while
they
are
loaded
in
•• CASIO
does
not
provide
any
servicing
or
maintenance
Theorsupplied
neck
strapthe
is sleep
intended
foris use
with this
Adaptor:
AD-C620
(Option)
minute,
2
minutes
before
state
triggered,
or
3.AC
Close
the
memory
card
slot
cover.
the
camera.
support
for the
Microdrive.
camera
only.
Dosetting
not use
it for any other application.
you
can
off this
entirely.
AC •Adaptor/Charger:
BC-3HA
(Option)
•IMPORTANT!
Note
thatturn
CASIO
assumes
noaround
responsibility
for any
data
Never
swing the
camera
by the neck
strap.
The
BC-3HA
functions
both
as
an Microdrive.
AC adaptor
and neck
as a
loss• you
may suffer
while
using
the
Allowing
the
camera
to
swing
freely
from
your
• Never
use
manganese
batteries.
Use onlybatteries.
the battery
charger
unit
for
nickel
metal
It
• This
camera
supports
use
a hydride
CompactFlash
card
can
result
inAA-size
damage
to of
theboth
camera
to its
bumping
types
specifically
mentioned
in this due
User’s
Guide.
comes
complete
with
four
rechargeable
nickel
metal
hyand
the
Microdrive.
Note,
however,
that
ejecting
a
against other objects. It also creates the danger
of the
dride
batteries.
This
AC caught
adaptor/charger
unit
can
be used
Microdrive
from
the camera
is relatively
difficult
than
camera
becoming
in a doormore
or on
other
obwith jects,
anyahousehold
outlet
rated for 100V to 240V
ejecting
CompactFlash
card.
resulting inpower
personal
injury.
AC.• Keep the camera out of the reach of small children,
especially when the neck strap is attached. The neck
strap can accidentally wind around the neck of a child
and create the risk of strangulation.
The following
examples
show
how
alkaline
Low
Turning
IBM
Microdrive
Battery
the
Camera
Indicator
Precautions
On
and
Off battery
Using
Using
the
Memory
the
Bundled
Control
Cards
Accessories
Button
life
None Auto
changes under different
shooting conditions.
The
Rotate
You
Compatibility
can
theformat
power/function
of
shows
the
a memory
camera
how
the
switch
card
battery
tothe
turn
delete
capacity
IBM
camera
Microdrive
allmemory
indicator
of power
the
has
on
Yourfollowing
This
camera
camera
supports
features
use
a two-way
of
awith
CompactFlash
power
supply
that
letsdata
card
you
Flash
On
the
and
stored
been
monitor
off.
confirmed
on1:
it.
screen
and
CASIO.
the
indicator
However,
display
youAC
should
changes
note
asNote
batthe
Attaching
the
Neck
Strap
use
(CF
either
TYPE
AA-size
I/II)
orbyIBM
batteries
Microdrive
image
storage.
current.
Example
Intermittent
use
ofhousehold
the for
camera
shortens
battery
Flash
Offor
tery power
following
is
important
used.
points
all card
four
whenever
batteries
using
as soon
the
as both
posIBM
that
all
mentions
ofReplace
“memory”
in this
manual
life.strap
The
Attach
operation/card
the
neck
access
Red-eye
to the strap
lamp
reduction
ring
as shown
inrefer
the illusBatteries
sible
Microdrive.
after they• Flash
go dead.
If indicates
you
continue
to
use
the camera
to
a CompactFlash
memory
cardof
and
Microdrive,
unless
indicator
thatIBM
the flash
will fire
shows
tration
below.
the
operational
status
• Four
alkaline
batteries:
LR6 power will automatiConditions
camera
while
theAA-size
battery
level
isflash
IMPORTANT!
(when
auto
is, selected).
specifically
noted
otherwise.
camera
ascarefully
described
below.
•the
Be
sure
to
read
all ofFR6
the documentation that
• Four
AA-size
lithium
batteries:
cally
turn
off.
•
Temperature:
25
C
• Formatting
a memory before
card deletes
on the
comes
with the Microdrive
using
it.all images batter• Four
AA-size
nickel-metal
hydride
rechargeable
even
someoforbecomes
all of thehot
are
protected
IMPORTANT!
• card,
Repeat
ofMicrodrive
aifcycle
recording
ofimages
one
shot
per
minute
• Note
that
the
during
normal
use.
ies:
NP-H3
Battery
(page
E-125).
Low off
High
for
10when
minutes,
followed
by
minute of
playback,
Take
care
removing
it from
the
• Make
sure
that
the
power
of one
the camera.
camera
is turned
Capacity
The
control
button
is
used
to
select
menu
items
and
execute
• Formatting
a memory
card deletes
all Best
Shot
Mode
and
minutes
of remove
power
off
(power
on, full
lens
exHousehold
Current
• Take
carenine
toyou
avoid
strong
pressure
on the
label
side
of
the
before
insert
or
a memory
Monitor
function.
Thefiles
following
are
the
terms
usedthe
in card.
this
manual
to
scene
you
have
imported
from
CD-ROM
and
tension,
half
lens
contraction,
full
lens
extension,
im•Screen
AC
Adaptor:
AD-C620
(Option)
Microdrive
when
it is
removed
from
the
camera.
Strong
:
Turns
on
power
and
enters
the
REC
mode.
•
When
inserting
a
memory
card
into
the
camera,
make
describe
control
button
operations.
stored
ondamage
the card.
After
formatting
theand
card,
you have
age
recording,
power
off)
• AC: sure
Adaptor/Charger:
BC-3HA
(Option)
pressure
can
internal
components
cause
malTurns
powerside
andisenters
mode.
itsoncorrect
facingthe
upPLAY
and that
you insert its
Indicator
REC
mode
to
import the Best Shot scene files you want to the
function.
OFF
Turns on
offend
power.
into the camera. Trying to force a card
• : terminal
Flash
Display
Term
memory
card
(page
E-77).
Meaning
Lamp
• Never
turn
camera
power
or
subject
camera
to iminto
theoff
camera
can
damage
the card
and
the camera.
Approximate
Battery
Life:
35 minutes
(32the
shots)
Flashing
Color
• Data
by thumb
a memory
card the
format
Useoperation/card
your
to access
move
control
button canup,
Loading
Batteries
pact
whiledeleted
the
lamp
isoperation
flashing.
DoRock
not
because
recovered!
sureoftothe
carefully
check and conIMPORTANT!
down,
left,
or Be
right.
ing so
can
malfunction
Microdrive.
One
of
the
following
operations
is
in
progress:
start
Make
sure
that
camera
power
is
turned
off
whenever
loading
Example
2:
Low
temperatures
shorten
battery
life.
Green
Inserting
a
Memory
Card
into
the
Camera
firm
that
longer
need
the
data
stored
in a
Press
control
button
straight
down
until
it clicks,
up, you
save
(multiple),
movie
recording
standby
•orThe
Microdrive
isthe
ano
very
high
precision
device.
Dropping
while
• Never
align
the
power/function
switch
with
replacing
batteries.
Click
memory
cardresult
it. of the Microdrive,
something
like
aformatting
computer
mouse.
the
camera
can
in
malfunction
the
lens
cap
isbefore
on
the
lens.
Conditions
• even
The
camera
isthe
ready
to record
when
theinlamp
isdirection
off. while
though
camera
is undamaged.
Take
extra
care
align
the
power/function
switch
with
1.
Slide
the
card
slot
cover
lock
the
•• Never
Temperature:
0 of
C
• Lower half indicates
1.when
On
the
bottom
thewhile
camera,
handling
the
camera
the
Microdrive
iszoom.
installed.
the
lens
isby
facing
downwards
towards
the
Daylight
indicated
the
arrow
and
openoptical
theground.
memory
•• Microdrive
Repeat
of
acamera
cycle
ofpower
recording
ofit one
shot
minute
slide
the
battery
compart• The
has
very
large
storage
capacity.
Because
To
restore
after
has
beenper
turned
off
Upper
half
indicates
Shade
card
slot
cover.
Partial
press
of
the
shutter
button
forcertain
10
minutes,
followed
by release
one
minute
of
playback,
digital
zoom.
of ment
this,
operations
can
take
a
relatively
long
time
to
by
auto
power
off,
rotate
the
power/function
switch
cover
lock
in
the
Tungsten
and nine
minutes
of to
poweror
off (power
on, full lens exLamp
perform.
OFF
and
then
back
.
direction
indicated
by
the
On
Fluorescent
tension,
halfmay
lensnot
contraction,properly
full lensinextension,
imColor
• The
Microdrive
areas where
arrow
and
theoperate
battery
Manualopen
age
recording,
power
off)
Auto
Focus
complete
Green
barometric
pressure
is low. Because of this, you should
compartment
cover.
•Red
Flash
avoid
usingon
it at high
Auto
Focusaltitudes.
operation failed
Approximate Battery Life: 8 minutes (8 shots)
Downloaded from ManualsCamera.com Manuals
IMPOR
E-21
5.
Close
t
To
configure
Memory
Flash
Using
Select
Charg
the
Ca
L
Menu
Scre
1.
Align
.
the
pow
2.
Press
MENU
3.
Rock the
con
IMPOR
GETTING ACQUAINTED
AC
Adaptor
If Handling
youawant
to Contents
do precautions
this: Card from
Do this:
Battery
Changing
Removing
the
Memory
Precautions
of the
the
Monitor
Camera
Rock
the
control
button
•
Never
use
an
electrical
outlet
whose
voltage
is
Screen
Incorrect
The
•Always
Images
flash
keep
use
cannot
charge
or
handling
lens
lamp
be recorded
cap
also
of
on
batteries
lights
the
with
lens
can
this
whenever
cause
camera
them
you
unless
are
to leak
not
a
Move
the the
selection
boundary
Pressing
MENU
displays
the
menu
screen.
The
contents
of
to the
left
or AC
right.
outside
the
rating
marked
on
the
adaptor.
1.
Slide
the
card
slot
cover
lock
in
the
direction
or
and
using
memory
burst
flashes
the
and
card
camera.
during
create
is
installed
Always
the
a
record
danger
in
leave
it.
opof
the
serious
lens
cap
damage
on
the
to
your
lens
the
whether
you are
in the PLAY
Usemenu
DISP screen
to cycledepend
throughonmonitor
screen
information
set-
• Formatting
Remove
Be
• sure
In
the
to
turn
PLAY
is Light/Self-timer
recommended
offmode,
from
power
the
before
camera
Auto
forneck
any
connecting
Power
if strap
memory
you
do
Off
not
or
trigger
card
disconnectplan
that
time
toring.
you
use
is
Attach
the
lens
cap
holder
to
the
or
the
strap
Ifbatteries
you
want
to dothe
this:
Do
this:
AF
Assist
Lamp
Indicator
display
This
it forprotects
ing
suspect
the
fixed
more
adaptor.
contains
at
than
against
fivetwo
minutes.
corrupted
accidental
weeks. image
lossdata
of the
(due
lens
to a
cap.
RECORD
Rock
the
control
button
The
You
AF
can
assist
use
the
lightnon-rechargeable
following
operates
procedure
automatically
toof
select
tothe
assist
one
the
of
Auto
the
Select
a menu
item
display
located
on
the
top
camera
also
•The
Never
Always
ERROR,
recharge
turn
strange
image
power
off
before
malformed
type
disconnecting
images)
never
the
or
AC
for
alup
orbatteries,
down.
•indicator
Sleep
iscamera
disabled
in colors,
the
PLAY
mode.
Focus
three
different
operation
date
whenever
formats.
you
are
shooting
where
lighting
is
shows
various
camera
status
indicators
during
image
relow Display
adaptor,
newly
direct
purchased
even
connection
if
the
memory
camera
between
cards.
has
two
batteries
ends
of
installed.
a
battery,
If
and
you
Rock
the
control
button
details
of
the
selected
•
Performing
any
button
operation
while
the
monitor
is
IMPORTANT!
dim.
This
lamp
also
flashes
to indicate
thehandy
countdown
until
cording.
The
indicator
display
comes
in
especially
never
don’t,
the
try
to
camera
take
batteries
will
turn
apart.
off
automatically
when
you
dismenu
itemimmediately
toswitch
the
right.
•the
Before
starting
a format
operation,
to AC adaptor
asleep
wakes
itoff.
up
and
restores
normal
shutter
releases
during
aturned
self-timer
operation.
•not
Never
turn
on
camera
power
with
the
lensofcap
affixed
the
monitor
screen
isYou
•when
Do
connect
expose
the
AC
batteries
adaptor.
direct
also
heat
run
the
orwith
risk
dispose
damaging
of
them
1.
Align
the
switch
or
power
or
load
aselected
new
setitem
oftorecommended
batteries
into
the.
Execute
thepower/function
Click the
control button.
operation.
to the lens.
by
the
burning.
camera
whenever
Doing
so
can
you
create
disconnect
the
danger
the
AC
of
adaptor
explosion.
withcamera.
step
toPower
the
previous
screentypes.
Presspriority
MENU. if you have
• Back
The
Auto
setting
is given
• Never
outPress
first
mix
turning
batteries
power
ofOff
off.
different
2.
MENU.
“2batteries
min”
set may
for
Sleep
andtoto
Auto
Power
Off.
This
• Dead
The AC
adaptor
areboth
become
susceptible
warm
leakage,
touch
afterwhich
extended
can
means
that
theand
camera
turns
off
if you
do not
perform
periods
serious
ofthe
use.
damage
This
is normal
to
your
and
camera.
is the
not
Remove
cause
for
batteries
alarm.
Rock
control
button
up
or
down
to
select
3.cause
Select
Date
then
rock
control
button
• Insert
only
memory
cards
into
theunplug
memory
card
slot.
any
operation
about
two
minutes
in the
REC
mode.
• from
After
the
using
camera
the item
camera,
asfor
soon
turn
aswant,
you
it off
notice
and
they
are
the
dead.
adaptor
the
menu
you
and
then
the
to
the
right.
Inserting
any
other
type
ofcamera
card
can
causerock
malfunc• The
from
batteries
the
AC
outlet.
that
power
the
normally
become
• Auto Power
Offtois the
automatically
disabled under any
control
button
right.
tion.
• warm
The
camera
as of
they
automatically
discharge.
switches
tothe
AC control
adaptor
one
the
following conditions.
4.
Select
Date
and
then over
rock
• Should
water Style
orwhenever
any other
foreign
matter
get
into the
powered
operation
the
AC adaptor
is plugged
—
While
a
slideshow
is
playing
button
to
the
right.
memory
card slot, immediately turn off power, unplug
into the
camera.
the
ACthe
adaptor,
contact
your
retailer
or
— use
When
you
areand
performing
operations
a com• Always
AC adaptor
to power
the original
cameraon
whenever
IMPORTANT!
Multi-area
AF Service
Metering
5.
Rock
theCASIO
control
button
up Multi-pattern
or down
to select
nearest
Provider.
puter
connected
to the
camera’s
USB port
it is connected
to
a
computer.
indicator
indicator
Auto
Focus
using
the AF
assist
light/
self-timer
lamp
is
the
setting
you
want
tocard
and
then
• Never
eject
the
while
the
card
slot
is the
fac—Spot
While
the
ACmemory
adaptor
isuse,
connected
to theclick
camera
AF
indicator
possible
when
the
distance
from
the
ing
downwards.
Doing
so
creates
the camera
danger to
of the
control button to apply it. Center-weighted
Metering indicator
lessindicator
than about
2.5
meters.
memory
card
falling,
which
can
corrupt data or damMF subject
Manual is
focus
Example:
October
23, light
2001operates while Multi-area AF
• age
When
the
AF
assist
Spot Metering
the
memory
card.
Infinity indicator
indicator
or
Spot remove
AF is specified
as the focus
mode,
the camera
camera
• Year/Month/Day:
Never
the
memory
card
from the
01/10/23
Macro mode indicator
automatically
assumes that
focus
area
the center
Battery
capacity
while
the operation/card
access
lamp
is is
flashing.
DoDay/Month/Year:
Flash
off
indicator
area
Spot
AF. 23/10/01
See
pages
and
E-63orfor
more
ing
sofor
can
cause
loss
ofLine
recorded
images
corrup2E-62
Aperture
value
• See the
“Camera
Menus”
on
page
E-150
for
more
informaMonth/Day/Year:
10/23/01
information.
tion
ofmenu
memory
card
data.
Flash
on
indicator
tion about
contents.
time settings
• Do
not
look
directly
at the AFSelf-timer
assist light/self-timer
Red eye reduction
6. Press
MENU
to
exit
the
setting
procedure.
lamp
or
point
it
directly
at
the
subject’s
eyes.
indicator
Exposure compensation
Increase
or
decrease
the
value
Doing
so
can
create
the
danger
of
fire
or eleccamera.
eration
when
the
Be
camera
described
sure
tois note
turned
below.
the
off
following
and
the
important
lens
retracted.
precautions
by
the
arrow
and
open
the
memory
Rock
theisCompactFlash
control
button
mode
oras
REC
mode.
The
following
procedure
shows
operaas
shown
below.
•tings
Beindicated
sure
to
use
only
CASIO
or
SanDisk
where
thetrical
selection
boundary
is
shock.
Use only
the
optional
AC adaptor
to
avoid
problems
with
batteries.
up
or
down.
card
cover.
tion
inlocated
the
REC
mode
as an example.
cards,
orslot
anspecified
IBM
Microdrive.
Proper
operation
is
not
guarfor this camera.
anteed with
other
memory
cards.
•• Use
Do
not
allow
the
AC
adaptor
power
cord
to
beonly LR6 (AM-3) type alkaline or FR6 type
come
cut
or
damaged,
do
not
place
heavy
ob•6.Static
electricity,
electrical
noise,
and
other
electrical
phe1.
Align
the
power/function
switch
with
.
Power
Save
and
then
rock
the
control
button
lithium
or
Ni-MH
(nickel-metal
hydride)
dry
cell
Click the control button to apply your settings.
jects
on it,
andthis
keep
it away
from
A damnomena
can
cause
corruption
or
even
totalheat.
loss
of
data
batteries
with
camera.
mix
old
batto
the
right.
REC
mode
• To
perform
a menu
operation
in
theNever
PLAY
mode,
align
aged
power
cord
creates
risk
ofshould
fire and
onpower/function
a teries
memory
card.
Because
of the
you
alwith
new
ones.
Doing
so
can
result
in
7.stored
Press
MENU
to
exit
the
setting
procedure.
the
switch
with
.this,
Lamp
Color
Flashing
electrical
shock.
ways
make
backup
copies
of
important
images
on
other
bursting
or
leaking
of
batteries,
creating
the
4. Rock the control button up or down to select
• danger
Never try
modify
theisAC
adaptor power cord,
Amber
charging.
of to
fire
or Flash
personal
injury.
the
item
whose
settings
you
want to change,
2.media.
Press
MENU.
or subject
it to sure
severe
bending,
twisting,
or
pullCAUTION
•
Always
make
that
the
plus
and
minus
2.
Press
the
eject
button
so
it
• Memory
card rock
problems
can be corrected
by(+)
reformatting
and then
the
control
button
to
the
right.
ing.ends
Doing
so creates
the
risk
of fire
and elec(–)
of
the
batteries
are
facing
correctly,
as
extends
from
the
camera.
the
memory
card.
Reformatting
a
memory
card
deletes
all
CAUTION
• To press
make
auto
power
offmarkings
settings,
select
“Auto
Poweritself.
Off”.
trical
Partial
ofshock.
the
shutter
release
button
noted
by card,
the
on the
images stored
on the
but you can
use camera
a computer
to
• Improper
Never
touch
the AC
while
your
hands
• To
make
sleep
“Sleep”.
loading
ofadaptor
batteries
can
result
in
Lamp
Color
On
copy
the
images
yousettings,
want
to select
keep
to
the computer’s
hard
are
wet.
Doing
so
creates
the
risk
of
electrical
bursting or leaking
of Ifbatteries,
creating
the
diskAmber
before reformatting
your card.
you
plan
to
be
recordReady
toor
fire.
shock.
5.ingOn
the where
screen
appears,
rock
the
danger
ofthat
personal
injury
soiling
ofcontrol
objects
images
you
do
not
have
access
to a
computer,
it
3. Press
the
eject
button
once
•
Do
not
overload
extension
cords
or wall you
outnearby.
button
up
down
the
setting
is a
good idea
toortake
alongtoanmake
extra memory
card or two
again
to
eject
the
card.
lets.
Doing
so creates the danger of fire and
want,
and
then
click the
button
to apply
just
in case
you
experience
ancontrol
unexpected
memory
card
IMPORTANT!
electrical shock.
problem.
it.
IMPORTANT!
• When• batteries
gocord
low, ofthe
access
Should the
theoperation/card
AC adaptor become
power
off charge
settings:
“2 min”
min”
lamp
and
flash
lamp
flash“5
for about
damaged
internal
wiring),
request
a
• Auto
The histogram
is (exposed
not displayed
inamber
the
movie
RECone
or
second.
After(pages
that,
the
camera
powers
automatireplacement
from
an “1
authorized
CASIO
serPLAY
E-93,110).
Sleep mode
settings:
“Off”
“30
sec”
min” “2down
min”
cally. Ifvice
thisprovider.
happens, A
replace
batteries
as sooncord
as
damaged
AC adaptor
4. Remove
the
memory
card.
possible.
createstothe
danger
of fire or procedure.
electrical shock.
6. Press
MENU
exit
the setting
Line 1
Downloaded from ManualsCamera.com Manuals
E-24
Remaining number of
images/File number
Line 3 Shutter speed value/EV
value
Settin
Side
Setting
the
C
Tripod
Batt
Diopter
d
DIGITAL
te
1.
Align
or
.
t
screw
(pa
cov
(page
E-51)
(page
E-103)
2.
Press
M
VIDEO
OUT
3.
Select
(page
E-136)
to
the
r
4.
Select
USB
port
(page
E-138)
ton
to
5.
Select
Batter
DC
IN
6V
te
set
the
cover
(page
(page
E-33)
External
fla
sync
termin
Open
(page E-104)
Memory car
GETTING
ACQUAINTED
GETTING ACQUAINTED
This section contains important information you should know when trying to operate the camera.
Use the following procedures to set the current dateGeneral
and
Guide
time, and to select the date format.
The following
illustrations
show
the names
of the
each
component,
button, and switch on the camera.
When
you record
an image,
the time
and date
image
was
shot is registered in accordance with data from the camera’s
built-in
Frontclock. You can even use the time stamp function to
“stamp” the date and time inside the image (page E-100).
Indicator display
Selector dial
(page E-24)
IMPORTANT!
Shutter
• The
time andrelease
date settings are cleared if the camera is
leftbutton
for about 24 hours without battery and AC power
(page
E-45) If this happens, restore power and
being
supplied.
make new time and date settings before using the
camera again.
• A flashing time display indicates that the time and date
Power/function
(clock)
settings have been cleared. Use the procedure
onswitch
this page to make the correct time and date set(pages E-35, 45)
tings.
• If you do not set the camera’s built-in clock to the current date and time, all images are recorded with the
default date and Flash
time, which probably is not your correct current date(page
and time.
Be sure to correctly set the
E-55)
clock before you use the camera.
Viewfinder
(page E-51)
AF assist light/
Self-timer lamp
cover
(pages
E-37,
3
Card
slot
lock
(pages E-3
Purple
selection
boundary
(page E-26)
Terminal panel cover
Exposure sensor
Lens
(page E-60)
(page E-16)
Downloaded from ManualsCamera.com Manuals
E-17
(page E-19)
5.
Close
t
To
configure
Memory
Flash
Using
Select
Charg
the
Ca
L
Menu
Scre
1.
Align
.
the
pow
2.
Press
MENU
3.
Rock the
con
IMPOR
GETTING ACQUAINTED
AC
Adaptor
If Handling
youawant
to Contents
do precautions
this: Card from
Do this:
Battery
Changing
Removing
the
Memory
Precautions
of the
the
Monitor
Camera
Rock
the
control
button
Never
use
an
electrical
outlet
whose
voltage
is
Screen
Incorrect
The
Always
Images
flash
keep
use
cannot
charge
or
handling
lens
lamp
be recorded
cap
also
of
on
batteries
lights
the
with
lens
can
this
whenever
cause
camera
them
you
unless
are
to leak
not
a
Move
the the
selection
boundary
Pressing
MENU
displays
the
menu
screen.
The
contents
of
to the
left
or AC
right.
outside
the
rating
marked
on
the
adaptor.
1.
Slide
the
card
slot
cover
lock
in
the
direction
or
and
using
memory
burst
flashes
the
and
card
camera.
during
create
is
installed
Always
the
a
record
danger
in
leave
it.
opof
the
serious
lens
cap
damage
on
the
to
your
lens
the
whether
you are
in the PLAY
Usemenu
DISP screen
to cycledepend
throughonmonitor
screen
information
set-
Remove
Be
Formatting
sure
In
the
to
turn
PLAY
is Light/Self-timer
recommended
offmode,
from
power
the
before
camera
Auto
forneck
any
connecting
Power
if strap
memory
you
do
Off
not
or
trigger
card
disconnectplan
that
time
toring.
you
use
is
Attach
the
lens
cap
holder
to
the
or
the
strap
Ifbatteries
you
want
to dothe
this:
Do
this:
AF
Assist
Lamp
Indicator
display
This
it forprotects
ing
suspect
the
fixed
more
adaptor.
contains
at
than
against
fivetwo
minutes.
corrupted
accidental
weeks. image
lossdata
of the
(due
lens
to a
cap.
RECORD
Rock
the
control
button
The
You
AF
can
assist
use
the
lightnon-rechargeable
following
operates
procedure
automatically
toof
select
tothe
assist
one
the
of
Auto
the
Select
a menu
item
The
indicator
display
located
on
the
top
camera
also
Never
Always
ERROR,
recharge
turn
strange
image
power
off
before
malformed
type
disconnecting
images)
never
the
or
AC
for
alup
orbatteries,
down.
Sleep
iscamera
disabled
in colors,
the
PLAY
mode.
Focus
three
different
operation
date
whenever
formats.
you
are
shooting
where
lighting
is
shows
various
camera
status
indicators
during
image
relow Display
adaptor,
newly
direct
purchased
even
connection
if
the
memory
camera
between
cards.
has
two
batteries
ends
of
installed.
a
battery,
If
and
you
Rock
the
control
button
details
of
the
selected
Performing
any
button
operation
while
the
monitor
is
IMPORTANT!
dim.
This
lamp
also
flashes
to indicate
thehandy
countdown
until
cording.
The
indicator
display
comes
in
especially
never
don
t,
the
try
to
camera
take
batteries
will
turn
apart.
off
automatically
when
you
dismenu
itemimmediately
toswitch
the
right.
Before
starting
a format
operation,
to AC adaptor
asleep
wakes
itoff.
up
and
restores
normal
the
shutter
releases
during
aturned
self-timer
operation.
Never
turn
on
camera
power
with
the
lensofcap
affixed
when
the
monitor
screen
isYou
Do
connect
not
expose
the
AC
batteries
adaptor.
direct
also
heat
run
the
orwith
risk
dispose
damaging
of
them
1.
Align
the
switch
or
power
or
load
aselected
new
setitem
oftorecommended
batteries
into
the.
Execute
thepower/function
Click the
control button.
operation.
to the lens.
by
the
burning.
camera
whenever
Doing
so
can
you
create
disconnect
the
danger
the
AC
of
adaptor
explosion.
withcamera.
Back
step
toPower
the
previous
screentypes.
Presspriority
MENU. if you have
The
Auto
setting
is given
outPress
first
mix
turning
batteries
power
ofOff
off.
different
2.Never
MENU.
2batteries
min
set may
for
Sleep
andtoto
Auto
Power
Off.
This
Dead
The AC
adaptor
areboth
become
susceptible
warm
leakage,
touch
afterwhich
extended
can
means
that
theand
camera
turns
off
if you
do not
perform
periods
serious
ofthe
use.
damage
This
is normal
to
your
and
camera.
is the
not
Remove
cause
for
batteries
alarm.
Rock
control
button
up
or
down
to
select
3.cause
Select
“Date”
then
rock
control
button
Insert
only
memory
cards
into
theunplug
memory
card
slot.
any
operation
about
two
minutes
in the
REC
mode.
from
After
using
camera
the item
camera,
asfor
soon
turn
aswant,
you
it off
notice
and
they
are
the
dead.
adaptor
thethe
menu
you
and
then
the
to
the
right.
any
other
type
ofcamera
card
can
causerock
malfuncThe
from Inserting
batteries
the
AC
outlet.
that
power
the
normally
become
Auto Power
Offtois the
automatically
disabled under any
control
button
right.
tion.
The
camera
as of
they
automatically
discharge.
switches
tothe
AC control
adaptor
one
the
following conditions.
4.warm
Select
“Date
and
then over
rock
Should
water Style”
orwhenever
any other
foreign
matter
get
into the
powered
operation
the
AC adaptor
is plugged
While
a
slideshow
is
playing
button
to
the
right.
memory
card slot, immediately turn off power, unplug
into the
camera.
theuse
ACthe
adaptor,
contact
your
retailer
or
When
you
areand
performing
operations
a comAC adaptor
to power
the original
cameraon
whenever
IMPORTANT!
Multi-area
AF Service
Metering
5.Always
Rock
theCASIO
control
button
up Multi-pattern
orsdown
to select
nearest
Provider.
puter
connected
to the
camera
USB port
it is connected
to
a
computer.
indicator
indicator
Auto
Focus
using
the AF
assist
light/
self-timer
lamp
is
the
setting
you
want
tocard
and
then
Never
eject
the
while
the
card
slot
is the
facWhile
the
ACmemory
adaptor
isuse,
connected
to theclick
camera
Spot
AF
indicator
possible
when
the
distance
from
the
ing
downwards.
Doing
so
creates
the camera
danger to
of the
control button to apply it. Center-weighted
Metering indicator
lessindicator
than about
2.5
meters.
memory
card
falling,
which
can
corrupt data or damMF subject
Manual is
focus
Example:
October
23, light
2001operates while Multi-area AF
When
the
AF
assist
Spot Metering
age
the
memory
card.
Infinity indicator
indicator
or
Spot remove
AF is specified
as the focus
mode,
the camera
camera
Never
the
memory
card
from the
Year/Month/Day:
01/10/23
Macro mode indicator
automatically
assumes that
focus
area
the center
Battery
capacity
while
the operation/card
access
lamp
is is
flashing.
DoDay/Month/Year:
Flash
off
indicator
area
for
Spot
AF. 23/10/01
See
pages
and
E-63orfor
more
ing
so
can
cause
loss
ofLine
recorded
images
corrup2E-62
Aperture
value
See the
Camera
Menus
on
page
E-150
for
more
informaMonth/Day/Year:
10/23/01
information.
tion
ofmenu
memory
card
data.
Flash
on
indicator
tion about
contents.
time settings
Do
not
look
directly
at the AFSelf-timer
assist light/self-timer
Red eye reduction
6. Press
MENU
to
exit
the
setting
procedure.
lamp
or
point
it
directly
at
the
subject
s
eyes.
indicator
Exposure compensation
Increase
or
decrease
the
value
Doing
so
can
create
the
danger
of
fire
or eleccamera.
eration
when
the
Be
camera
described
sure
tois note
turned
below.
the
off
following
and
the
important
lens
retracted.
precautions
by
the
arrow
and
open
the
memory
Rock
theisCompactFlash
control
button
mode
oras
REC
mode.
The
following
procedure
shows
operatings
as
shown
below.
Beindicated
sure
to
use
only
CASIO
or
SanDisk
where
thetrical
selection
boundary
is
shock.
Use only
the
optional
AC adaptor
to
avoid
problems
with
batteries.
up
or
down.
card
cover.
tion
inlocated
the
REC
mode
as an example.
cards,
orslot
anspecified
IBM
Microdrive.
Proper
operation
is
not
guarfor this camera.
anteed with Do
other
memory
cards.
not
allow
the
AC
adaptor
power
cord
to
beUse only LR6 (AM-3) type alkaline or FR6 type
come
cut
or
damaged,
do
not
place
heavy
obStatic
electricity,
electrical
noise,
and
other
electrical
phe1.
Align
the
power/function
switch
with
.
“Power
Save”
and
then
rock
the
control
button
lithium
or
Ni-MH
(nickel-metal
hydride)
dry
cell
6. Click the control button to apply your settings.
jects
on it,
andthis
keep
it away
from
A damnomena
can
cause
corruption
or
even
totalheat.
loss
of
data
batteries
with
camera.
mix
old
battoTo
the
right.
REC
mode
perform
a menu
operation
in
theNever
PLAY
mode,
align
aged
power
cord
creates
risk
ofshould
fire and
onpower/function
a teries
memory
card.
Because
of the
you
alwith
new
ones.
Doing
so
can
result
in
7.stored
Press
MENU
to
exit
the
setting
procedure.
the
switch
with
.this,
Lamp
Color
Flashing
electrical
shock.
ways
make
backup
copies
of
important
images
on
other
bursting
or
leaking
of
batteries,
creating
the
4. Rock the control button up or down to select
Never try
modify
theisAC
adaptor power cord,
Amber
charging.
danger
of to
fire
or Flash
personal
injury.
the
item
whose
settings
you
want to change,
2.media.
Press
MENU.
or subject
it to sure
severe
bending,
twisting,
or
pullCAUTION
Always
make
that
the
plus
and
minus
2.Memory
Press
the
eject
button
so
it
card rock
problems
can be corrected
by(+)
reformatting
and then
the
control
button
to
the
right.
ing.
Doing
so creates
the
risk
of fire
and elec(
)
ends
of
the
batteries
are
facing
correctly,
as
extends
from
the
camera.
the
memory
card.
Reformatting
a
memory
card
deletes
CAUTION
To press
make
auto
power
offmarkings
settings,
select
Auto
Poweritself.
Offall.
trical
Partial
ofshock.
the
shutter
release
button
noted
by card,
the
on the
images stored
on the
but you can
use camera
a computer
to
Never
touch
the AC
while
your
hands
To
make
sleep
. can
Improper
loading
ofadaptor
batteries
result
in
Lamp
Color
On
copy
the
images
yousettings,
want
to select
keep
toSleep
the computer
s hard
are
wet.
Doing
so
creates
the
risk
of
electrical
bursting or leaking
of Ifbatteries,
creating
the
diskAmber
before reformatting
your card.
you
plan
to
be
recordReady
toor
fire.
shock.
5.ingOn
the where
screen
appears,
rock
the
danger
ofthat
personal
injury
soiling
ofcontrol
objects
images
you
do
not
have
access
to a
computer,
it
3. Press
the
eject
button
once
Do
not
overload
extension
cords
or wall you
outnearby.
button
up
down
the
setting
is a
good idea
toortake
alongtoanmake
extra memory
card or two
again
to
eject
the
card.
lets.
Doing
so creates the danger of fire and
want,
and
then
click the
button
to apply
just
in case
you
experience
ancontrol
unexpected
memory
card
IMPORTANT!
electrical shock.
problem.
it.
IMPORTANT!
When batteries
gocord
low, ofthe
access
Should the
theoperation/card
AC adaptor become
Auto
power
off charge
settings:
2 min
5amber
min
lamp
and
flash
lamp
flashin
for about
damaged
internal
wiring),
request
a
The histogram
is (exposed
not displayed
the
movie
RECone
or
second.
After(pages
that,
camera
powers
automatireplacement
from
an authorized
CASIO
serPLAY
E-93,110).
Sleep mode
settings:
Offthe
30
sec
1
min 2down
min
cally. Ifvice
thisprovider.
happens, A
replace
batteries
as sooncord
as
damaged
AC adaptor
4. Remove
the
memory
card.
possible.
createstothe
danger
of fire or procedure.
electrical shock.
6. Press
MENU
exit
the setting
Line 1
Downloaded from ManualsCamera.com Manuals
E-24
Remaining number of
images/File number
Line 3 Shutter speed value/EV
value
About the R
BASIC IMAGE
RECORDING
BASIC IMAGE RECORDING
When recording
portrait
5. —Compose
the
image
as orientation
youZoom
view itimages,
on theposition
moniUsing
Optical
This section describes the basic procedure for recording an
Camera Orientation Detection
image using the Full Auto Mode. It also explains about basic
•The
The
actual
image is recorded and saved in accordance
camera
automatically
camera
settings.
with the
imageit quality
setting currently selected on your
detects
whether
is
camera.
The image
recorded on the memory card has
oriented
vertically
or
much better
resolution
and detail than the REC mode
horizontally
when
you the Full
Using
Auto Mode
monitor
record
an screen
image, image.
and
•The
Certain
levels
of
subject
brightness
can
cause novices
the reFull
Auto
Mode
makes
it
easy
even for
complete
stores the orientation
RECdata.
mode
to slow
tosponse
record
good-looking
digitalmonitor
images screen
every time.
Thedown,
camalong
withof
thethe
image
which
causes
some
staticspeed,
noise
in camera’s
the monitor
screen
imera
makes
focus,
shutter
aperture,
flash
and other
When
you
display
the
images
on the
monitor
age. they
settings
automatically
in accordance
with
subjectas
brightness.
screen,
are automatically
oriented
correctly
you
recorded them. You can also configure the bundled Photo
Loader application (page E-138) so it automatically positions
1.
Before turning on the camera, remove its lens
each image using the orientation data stored with it.
camera so it is standing up as straight as possible,
torthe
screen.
Opticalaszoom
enlarges
the imagebelow.
by changing
the
disshown
in the illustration
Holding
thefocal
camera
tance of
zoom
an image
by aAszoom
factor
at the
an lens.
angleYou
cancan
cause
sensor
errors.
a general
ranging
from
(normal
size)
to 3 (three
size).
rule,
do1not
allow the
camera
to betimes
more normal
than about
20
degrees off of vertical.
1. Align the power/function switch with
2. Push the zoom controller
upwards towards
• If you prefer to use the optical viewfinder to compose
(telephoto)
to zoom in
the image, press DISP to turn off the monitor screen.
on the subject, or downwards the
towards
(wide6. Press
shutter release
Zoom controller
to
zoom
out.
angle)
button about half way and
hold
it there
to perform
—
Tilting
the camera
too far upwards or downwards can
auto
alsofocus.
cause sensor errors. As a general rule, do not
cap.
IMPORTANT!
2. Align the exposure mode dial with
(Full
Auto
• Note
thatMode).
all images are displayed on the camera’s monitor
screen using standard horizontal orientation during fast
3.scrolling
Align of
the
drive on
mode
dial with
images,
the 9-image
screen,(1-Image).
and on all image selection menu screens.
Align
power/function
•4.Note
the the
following
precautions to ensure that the sensor
built
into the
camera. can correctly detect the orientation of
switch
with
the camera.
: Turns on power and
allow the camera to point more than about 60 degrees
Shutter release button
up or down.
• Pressing the shutter release button causes the focus
frame to appear on the monitor screen (page E-62).
(telephoto)
(wide-angle)
• Multi-area Auto Focus (page E-62) automatically focuses the image and displays shutter speed and aperture values.
— Make
sure the
youREC
are holding
enters
mode. the camera still when recording
images.
Camera
: Turns
on power
and movement can cause sensor
errors.
enters the PLAY mode.
OFF : Turns off power.
Downloaded from ManualsCamera.com Manuals
.
— The camera orientation sensor does not work with
movie images.
E-45
NOTESImage
BASIC IMAGE RECORDING
Self-timer
Time Settings:
7. After
confirming
that
• YouAuto
can find
out the status of
About
Focus
Using
the Self-timer
the
Auto Focus
operation
by
•Focus
Changing
the
optical
zoom
alsotypes
affects
the lens
Auto
not
to work
wellfactor
with
of subjects
You can
set tends
thevalue.
self-timer
either
one the
of two
starting
times.
checking
the
color
oftothe
aperture
listed below.
frame
and the
status
of
• focus
The lens
aperture
value
indicated
on the camera is the
the
operation/card
access
•1.Solid
aperture
color
walls
when
or objects
optical
zoom
with little
is
1X.
contrast
Using
a higher
Align
the
power/function
switch
with
. optilamp.
cal zoom
• Strongly
backlitsetting
objectsresults in a higher aperture value
Operation/card
(smaller
aperture).
•2.Polished
metal
or
other the
brightly
reflective objects
Press
to
select
selfaccess
lamp to
• Use time
of
a tripod
is
recommended
for telephoto
shots
• Venetian
blinds
or other
horizontally repeating
patterns
timer
you
want.
avoid
blurring
of
the
image
due
to
camera
movement.
• Multiple
images
that
are
varying
distances
from
the
If you see this:
It means this:camera
• Subjects in poorly lit areas
Focus frame: Green
• Moving subjects
Operation/card access lamp:
the
image
is unexpected
in focus,
Each
press
of
cyclesloss
through
the data,
available
To protect
against
of image
eachselfimsettings
described
the
shutter
age press
is timer
recorded
directly
to the below.
memory card (without going
button
all the
into release
the buffer)
whenever
battery level is indicated as
or
Toto
dorecord
this:
Select save”
this setting:
way
down
the
lower.
The
message
“
Press to cancel
appears
Turn
the self-timer
No display
on the
monitor
screenoff
during the save operation
under this
image.
condition.
As
long
as
you
do
not
press
DISP,
the
save
Record
10
seconds
after
the
• Recorded images are temporarily stored in a operabuffer
10SEC
tion continues
andthey
takes
a few
seconds
complete.
shutter
release
button
is
pressed
from which
are
stored
to thetomemory
card. You
Pressing
“ the
Press to images
cancel save”
is on
Record
two while
seconds
after
canDISP
continue
tothe
shoot
consecutive
as long
as
2SEC
the monitor
screen
cancels
theinimage
save operation.
shutter
button
is pressed
there release
is space
available
the buffer.
The image is in focus.
• If you
have
a Microdrive
loaded
thestore
camera,
thecamera
above
• The
number
of images
you incan
in the
appears
the battery
isstart
indicated
3.message
Press
depends
theonshutter
thewhenever
storage
release
medium
button
and level
theto
image
quality
the
asself-timer
or lower.
setting
(page
E-94) you are using.
countdown.
• The message
“
Press to cancel
save”
also appears
To avoid
hand
movement,
press
shutter
release
• The
AF assist
light/self-timer
lamp the
flashes
as the
secmomentarily
during save operations in the Panorama
button
gently.
onds are counted down. If you have the monitor
Mode, Movie Mode, and when you are using certain Best
screen turned on, the seconds are counted down on
Shot scene setups. In this case, this message does not inthe screen.
dicate that battery power is low.
• message
To stop a countdown
part way
through,
press while
the shut• The
described above
does
not appear
the
ter release
button.
monitor
screen is
turned off.
Auto Green
Focus also may not work properly when the camera is
Self
timer
unsteady
orframe:
shaking.
Focus
Red
Operation/card
access lamp:
Time
Fixed
Red Focusing Distances
The image is not in focus.
• Depending on actual conditions, a green operation/card
access
lamp
and
focus
• Take
care
that
youframe
do notdo not necessarily guarantee
that the
image
is in or
focus.
block
the lens
the
sensors with your fingers
as you hold the camera.
NOTES
• The hand-shake limiter is enabled when you use a
slow shutter speed and the two-second self-timer at
the same time.
• You cannot use the self-timer in combination with the
Continuous Shutter Mode.
Downloaded from ManualsCamera.com Manuals
E-46
BASIC IMAGE RECORDING
IMPORTANT!
•Recording
You can use Precautions
the Diopter Dial to adjust the image in
viewfinder screen to your eyesight.
• Never remove the camera’s batteries, disconnect the AC
adaptor, or remove the memory card from the camera
while it is saving images to its memory card. Doing so not
only causes a loss of the image being saved, it can also
corrupt images already stored on the memory card.
• Fluorescent lighting actually flickers at a frequency that
cannot be detected by the human eye. When using the
camera indoors under such lighting, you may experience
some brightness or color problems with recorded images.
Using the Viewfinder for Recording
• In any of the following cases, the message “One moThe illustrations
below appears
show what
whenafter
you look
ment please...”
onyou
thesee
display
you
through
the viewfinder
to compose
an image
recording.
record
each image
as it is saved
to the for
memory
card.
— When you are recording TIFF (uncompressed) imΦοχυσ Φραµε
ages (page E-95)
— When you are recording a movie or panorama
(pages E-91, 93)
— When you are recording using certain Best Shot
scene setups (page E-76)
— When the
low battery indicator is on the disΦοχυσ Ρανγε
play while you are using a CompactFlash card
Φραµε
(page E-33)
— When the
low battery indicator is on the display while you are using an IBM Microdrive (page
E-33).Σηορτ διστανχε το συβϕεχτ
• Recording images in the Full Auto Mode causes a
Note that
the focus
range settings
frame is to
valid
subjects
that are
number
of camera
be for
made
automatically
about three
meters away.
A different
focus range
used
for
in accordance
with shooting
conditions.
Seeis“Full
Auto
subjects
thatSettings”
are closeronorpage
farther
away.
of this, you
Mode
E-154
forBecause
more information.
should change to the Manual Focus Mode (MF) or Macro
Mode ( ) whenever the distance between the camera and
the subject is 30cm or less (pages E-64, 65).
• The monitor screen turns on automatically whenever the
camera is in the Manual Focus Mode or Macro Mode. Use
the monitor screen to compose images in the Manual Focus Mode or Macro Mode.
Downloaded from ManualsCamera.com Manuals
∆ιοπτερ ∆ιαλ
Focusing
IMPORTANT!
The Full Auto Mode uses Multi-area AF, which measures
Focusing ofand
theautomatically
viewfinder image
is disabled
the
three• distances
focuses
on thewhile
subject
camera
turned off
or that
in thethe
PLAY
mode.range is apnearest
to the iscamera.
Note
focusing
proximately 30 cm to ∞.
IMPORTANT!
• You cannot select a different focusing method when
using the Full Auto Mode (Page E-61).
E-47
NOTESImage
BASIC IMAGE RECORDING
Self-timer
Time Settings:
7. After
confirming
that
• YouAuto
can find
out the status of
About
Focus
Using
the Self-timer
the
Auto Focus
operation
by
•Focus
Changing
the
optical
zoom
alsotypes
affects
the lens
Auto
not
to work
wellfactor
with
of subjects
You can
set tends
thevalue.
self-timer
either
one the
of two
starting
times.
checking
the
color
oftothe
aperture
listed below.
frame
and the
status
of
• focus
The lens
aperture
value
indicated
on the camera is the
the
operation/card
access
•1.Solid
aperture
color
walls
when
or objects
optical
zoom
with little
is
1X.
contrast
Using
a higher
Align
the
power/function
switch
with
. optilamp.
cal zoom
• Strongly
backlitsetting
objectsresults in a higher aperture value
the
image
is unexpected
in focus,
Each
press
of
cyclesloss
through
the data,
available
To protect
against
of image
eachselfimsettings
described
the
shutter
age press
is timer
recorded
directly
to the below.
memory card (without going
button
all the
into release
the buffer)
whenever
battery level is indicated as
or
Toto
dorecord
this:
Select save”
this setting:
way
down
the
lower.
The
message
“
Press to cancel
appears
Turn
the self-timer
No display
on the
monitor
screenoff
during the save operation
under this
image.
condition.
As
long
as
you
do
not
press
DISP,
the
save
Record
10
seconds
after
the
• Recorded images are temporarily stored in a operabuffer
10SEC
tion continues
andthey
takes
a few
seconds
complete.
shutter
release
button
is
pressed
from which
are
stored
to thetomemory
card. You
Pressing
“ the
Press to images
cancel save”
is on
Record
two while
seconds
after
canDISP
continue
tothe
shoot
consecutive
as long
as
2SEC
the monitor
screen
cancels
theinimage
save operation.
shutter
button
is pressed
there release
is space
available
the buffer.
(smaller
aperture).
•2.Polished
metal
or
other the
brightly
reflective objects
Press
to
select
self• Use time
of
a tripod
is
recommended
for telephoto
shots to
• Venetian
blinds
or other
horizontally repeating
patterns
timer
you
want.
avoid
blurring
of
the
image
due
to
camera
movement.
• Multiple
images
that
are
varying
distances
from
the
If you see this:
It means this:camera
• Subjects in poorly lit areas
Focus frame: Green
• Moving subjects
Operation/card access lamp:
The image is in focus.
• If you
have
a Microdrive
loaded
thestore
camera,
thecamera
above
• The
number
of images
you incan
in the
appears
the battery
isstart
indicated
3.message
Press
depends
theonshutter
thewhenever
storage
release
medium
button
and level
theto
image
quality
the
asself-timer
or lower.
setting
(page
E-94) you are using.
countdown.
• The message
“
Press to cancel
save”
also appears
To avoid
hand
movement,
press
shutter
release
• The
AF assist
light/self-timer
lamp the
flashes
as the
secmomentarily
during save operations in the Panorama
button
gently.
onds are counted down. If you have the monitor
Mode, Movie Mode, and when you are using certain Best
screen turned on, the seconds are counted down on
Shot scene setups. In this case, this message does not inthe screen.
dicate that battery power is low.
• message
To stop a countdown
part way
through,
press while
the shut• The
described above
does
not appear
the
ter release
button.
monitor
screen is
turned off.
Auto Green
Focus also may not work properly when the camera is
unsteady
shaking.
Focusorframe:
Red
Operation/card access lamp:
■ Fixed
Red Focusing Distances
The image is not in focus.
• Depending on actual conditions, a green operation/card
access
lamp
and
focus
• Take
care
that
youframe
do notdo not necessarily guarantee
that the
image
is in or
focus.
block
the lens
the
sensors with your fingers
as you hold the camera.
NOTES
• The hand-shake limiter is enabled when you use a
slow shutter speed and the two-second self-timer at
the same time.
• You cannot use the self-timer in combination with the
Continuous Shutter Mode.
Downloaded from ManualsCamera.com Manuals
E-46
About the R
BASIC IMAGE
RECORDING
BASIC IMAGE RECORDING
When recording
portrait
5. —Compose
the
image
as orientation
youZoom
view itimages,
on theposition
moniUsing
Optical
This section describes the basic procedure for recording an
Camera Orientation Detection
image using the Full Auto Mode. It also explains about basic
•The
The
actual
image is recorded and saved in accordance
camera
automatically
camera
settings.
with the
imageit quality
setting currently selected on your
detects
whether
is
camera.
The image
recorded on the memory card has
oriented
vertically
or
much better
resolution
and detail than the REC mode
horizontally
when
you the Full
Using
Auto Mode
monitor
record
an screen
image, image.
and
•The
Certain
levels
of
subject
brightness
can
cause novices
the reFull
Auto
Mode
makes
it
easy
even for
complete
stores the orientation
RECdata.
mode
to slow
tosponse
record
good-looking
digitalmonitor
images screen
every time.
Thedown,
camalong
withof
thethe
image
which
causes
some
staticspeed,
noise
in camera’s
the monitor
screen
imera
makes
focus,
shutter
aperture,
flash
and other
When
you
display
the
images
on the
monitor
age. they
settings
automatically
in accordance
with
subjectas
brightness.
screen,
are automatically
oriented
correctly
you
recorded them. You can also configure the bundled Photo
Loader application (page E-138) so it automatically positions
1.
Before turning on the camera, remove its lens
each image using the orientation data stored with it.
camera so it is standing up as straight as possible,
torthe
screen.
Opticalaszoom
enlarges
the imagebelow.
by changing
the
disshown
in the illustration
Holding
thefocal
camera
tance of
zoom
an image
by aAszoom
factor
at the
an lens.
angleYou
cancan
cause
sensor
errors.
a general
ranging
from
(normal
size)
to 3 (three
size).
rule,
do1not
allow the
camera
to betimes
more normal
than about
20
degrees off of vertical.
1. Align the power/function switch with
2. Push the zoom controller
upwards towards
• If you prefer to use the optical viewfinder to compose
(telephoto)
to zoom in
the image, press DISP to turn off the monitor screen.
on the subject, or downwards the
towards
(wide6. Press
shutter release
Zoom controller
to
zoom
out.
angle)
button about half way and
hold
it there
to perform
—
Tilting
the camera
too far upwards or downwards can
auto
alsofocus.
cause sensor errors. As a general rule, do not
cap.
IMPORTANT!
2. Align the exposure mode dial with
(Full
Auto
• Note
thatMode).
all images are displayed on the camera’s monitor
screen using standard horizontal orientation during fast
3.scrolling
Align of
the
drive on
mode
dial with
images,
the 9-image
screen,(1-Image).
and on all image selection menu screens.
Align
power/function
•4.Note
the the
following
precautions to ensure that the sensor
built
into the
camera. can correctly detect the orientation of
switch
with
the camera.
: Turns on power and
allow the camera to point more than about 60 degrees
Shutter release button
up or down.
• Pressing the shutter release button causes the focus
frame to appear on the monitor screen (page E-62).
(telephoto)
(wide-angle)
• Multi-area Auto Focus (page E-62) automatically focuses the image and displays shutter speed and aperture values.
— Make
sure the
youREC
are holding
enters
mode. the camera still when recording
images.
Camera
: Turns
on power
and movement can cause sensor
errors.
enters the PLAY mode.
OFF : Turns off power.
Downloaded from ManualsCamera.com Manuals
.
— The camera orientation sensor does not work with
movie images.
E-45
NOTESImage
BASIC IMAGE RECORDING
Self-timer
Time Settings:
7. After
confirming
that
• YouAuto
can find
out the status of
About
Focus
Using
the Self-timer
the
Auto Focus
operation
by
•Focus
Changing
the
optical
zoom
alsotypes
affects
the lens
Auto
not
to work
wellfactor
with
of subjects
You can
set tends
thevalue.
self-timer
either
one the
of two
starting
times.
checking
the
color
oftothe
aperture
listed below.
frame
and the
status
of
• focus
The lens
aperture
value
indicated
on the camera is the
the
operation/card
access
•1.Solid
aperture
color
walls
when
or objects
optical
zoom
with little
is
1X.
contrast
Using
a higher
Align
the
power/function
switch
with
. optilamp.
cal zoom
• Strongly
backlitsetting
objectsresults in a higher aperture value
the
image
is unexpected
in focus,
Each
press
of
cyclesloss
through
the data,
available
To protect
against
of image
eachselfimsettings
described
the
shutter
age press
is timer
recorded
directly
to the below.
memory card (without going
button
all the
into release
the buffer)
whenever
battery level is indicated as
or
Toto
dorecord
this:
Select save”
this setting:
way
down
the
lower.
The
message
“
Press to cancel
appears
Turn
the self-timer
No display
on the
monitor
screenoff
during the save operation
under this
image.
condition.
As
long
as
you
do
not
press
DISP,
the
save
Record
10
seconds
after
the
• Recorded images are temporarily stored in a operabuffer
10SEC
tion continues
andthey
takes
a few
seconds
complete.
shutter
release
button
is
pressed
from which
are
stored
to thetomemory
card. You
Pressing
“ the
Press to images
cancel save”
is on
Record
two while
seconds
after
canDISP
continue
tothe
shoot
consecutive
as long
as
2SEC
the monitor
screen
cancels
theinimage
save operation.
shutter
button
is pressed
there release
is space
available
the buffer.
(smaller
aperture).
•2.Polished
metal
or
other the
brightly
reflective objects
Press
to
select
self• Use time
of
a tripod
is
recommended
for telephoto
shots to
• Venetian
blinds
or other
horizontally repeating
patterns
timer
you
want.
avoid
blurring
of
the
image
due
to
camera
movement.
• Multiple
images
that
are
varying
distances
from
the
If you see this:
It means this:camera
• Subjects in poorly lit areas
Focus frame: Green
• Moving subjects
Operation/card access lamp:
The image is in focus.
• If you
have
a Microdrive
loaded
thestore
camera,
thecamera
above
• The
number
of images
you incan
in the
appears
the battery
isstart
indicated
3.message
Press
depends
theonshutter
thewhenever
storage
release
medium
button
and level
theto
image
quality
the
asself-timer
or lower.
setting
(page
E-94) you are using.
countdown.
• The message
“
Press to cancel
save”
also appears
To avoid
hand
movement,
press
shutter
release
• The
AF assist
light/self-timer
lamp the
flashes
as the
secmomentarily
during save operations in the Panorama
button
gently.
onds are counted down. If you have the monitor
Mode, Movie Mode, and when you are using certain Best
screen turned on, the seconds are counted down on
Shot scene setups. In this case, this message does not inthe screen.
dicate that battery power is low.
• message
To stop a countdown
part way
through,
press while
the shut• The
described above
does
not appear
the
ter release
button.
monitor
screen is
turned off.
Auto Green
Focus also may not work properly when the camera is
unsteady
shaking.
Focusorframe:
Red
Operation/card access lamp:
Fixed
Red Focusing Distances
The image is not in focus.
• Depending on actual conditions, a green operation/card
access
lamp
and
focus
• Take
care
that
youframe
do notdo not necessarily guarantee
that the
image
is in or
focus.
block
the lens
the
sensors with your fingers
as you hold the camera.
NOTES
• The hand-shake limiter is enabled when you use a
slow shutter speed and the two-second self-timer at
the same time.
• You cannot use the self-timer in combination with the
Continuous Shutter Mode.
Downloaded from ManualsCamera.com Manuals
E-46
BASIC IMAGE RECORDING
IMPORTANT!
•Recording
You can use Precautions
the Diopter Dial to adjust the image in
viewfinder screen to your eyesight.
• Never remove the camera’s batteries, disconnect the AC
adaptor, or remove the memory card from the camera
while it is saving images to its memory card. Doing so not
only causes a loss of the image being saved, it can also
corrupt images already stored on the memory card.
• Fluorescent lighting actually flickers at a frequency that
cannot be detected by the human eye. When using the
camera indoors under such lighting, you may experience
some brightness or color problems with recorded images.
Using the Viewfinder for Recording
• In any of the following cases, the message “One moThe illustrations
below appears
show what
whenafter
you look
ment please...”
onyou
thesee
display
you
through
the viewfinder
to compose
an image
recording.
record
each image
as it is saved
to the for
memory
card.
— When you are recording TIFF (uncompressed) imFocus Frame
ages (page E-95)
— When you are recording a movie or panorama
(pages E-91, 93)
— When you are recording using certain Best Shot
scene setups (page E-76)
— When the
low battery indicator is on the disFocus Range
play while you are using a CompactFlash card
Frame
(page E-33)
— When the
low battery indicator is on the display while you are using an IBM Microdrive (page
E-33).Short distance to subject
• Recording images in the Full Auto Mode causes a
Note that
the focus
range settings
frame is to
valid
subjects
that are
number
of camera
be for
made
automatically
about three
meters away.
A different
focus range
used
for
in accordance
with shooting
conditions.
Seeis“Full
Auto
subjects
thatSettings”
are closeronorpage
farther
away.
of this, you
Mode
E-154
forBecause
more information.
should change to the Manual Focus Mode (MF) or Macro
Mode ( ) whenever the distance between the camera and
the subject is 30cm or less (pages E-64, 65).
• The monitor screen turns on automatically whenever the
camera is in the Manual Focus Mode or Macro Mode. Use
the monitor screen to compose images in the Manual Focus Mode or Macro Mode.
Downloaded from ManualsCamera.com Manuals
Diopter Dial
Focusing
IMPORTANT!
The Full Auto Mode uses Multi-area AF, which measures
Focusing ofand
theautomatically
viewfinder image
is disabled
the
three• distances
focuses
on thewhile
subject
camera
turned off
or that
in thethe
PLAY
mode.range is apnearest
to the iscamera.
Note
focusing
proximately 30 cm to .
IMPORTANT!
• You cannot select a different focusing method when
using the Full Auto Mode (Page E-61).
E-47
NOTESImage
BASIC IMAGE RECORDING
Self-timer
Time Settings:
7. After
confirming
that
• YouAuto
can find
out the status of
About
Focus
Using
the Self-timer
the
Auto Focus
operation
by
•Focus
Changing
the
optical
zoom
alsotypes
affects
the lens
Auto
not
to work
wellfactor
with
of subjects
You can
set tends
thevalue.
self-timer
either
one the
of two
starting
times.
checking
the
color
oftothe
aperture
listed below.
frame
and the
status
of
• focus
The lens
aperture
value
indicated
on the camera is the
the
operation/card
access
•1.Solid
aperture
color
walls
when
or objects
optical
zoom
with little
is
1X.
contrast
Using
a higher
Align
the
power/function
switch
with
. optilamp.
cal zoom
• Strongly
backlitsetting
objectsresults in a higher aperture value
Operation/card
(smaller
aperture).
•2.Polished
metal
or
other the
brightly
reflective objects
Press
to
select
selfaccess
lamp to
• Use time
of
a tripod
is
recommended
for telephoto
shots
• Venetian
blinds
or other
horizontally repeating
patterns
timer
you
want.
avoid
blurring
of
the
image
due
to
camera
movement.
• Multiple
images
that
are
varying
distances
from
the
If you see this:
It means this:camera
• Subjects in poorly lit areas
Focus frame: Green
• Moving subjects
Operation/card access lamp:
the
image
is unexpected
in focus,
Each
press
of
cyclesloss
through
the data,
available
To protect
against
of image
eachselfimsettings
described
the
shutter
age press
is timer
recorded
directly
to the below.
memory card (without going
button
all the
into release
the buffer)
whenever
battery level is indicated as
or
Toto
dorecord
this:
Select save”
this setting:
way
down
the
lower.
The
message
“
Press to cancel
appears
Turn
the self-timer
No display
on the
monitor
screenoff
during the save operation
under this
image.
condition.
As
long
as
you
do
not
press
DISP,
the
save
Record
10
seconds
after
the
• Recorded images are temporarily stored in a operabuffer
10SEC
tion continues
andthey
takes
a few
seconds
complete.
shutter
release
button
is
pressed
from which
are
stored
to thetomemory
card. You
Pressing
“ the
Press to images
cancel save”
is on
Record
two while
seconds
after
canDISP
continue
tothe
shoot
consecutive
as long
as
2SEC
the monitor
screen
cancels
theinimage
save operation.
shutter
button
is pressed
there release
is space
available
the buffer.
The image is in focus.
• If you
have
a Microdrive
loaded
thestore
camera,
thecamera
above
• The
number
of images
you incan
in the
appears
the battery
isstart
indicated
3.message
Press
depends
theonshutter
thewhenever
storage
release
medium
button
and level
theto
image
quality
the
asself-timer
or lower.
setting
(page
E-94) you are using.
countdown.
• The message
“
Press to cancel
save”
also appears
To avoid
hand
movement,
press
shutter
release
• The
AF assist
light/self-timer
lamp the
flashes
as the
secmomentarily
during save operations in the Panorama
button
gently.
onds are counted down. If you have the monitor
Mode, Movie Mode, and when you are using certain Best
screen turned on, the seconds are counted down on
Shot scene setups. In this case, this message does not inthe screen.
dicate that battery power is low.
• message
To stop a countdown
part way
through,
press while
the shut• The
described above
does
not appear
the
ter release
button.
monitor
screen is
turned off.
Auto Green
Focus also may not work properly when the camera is
Self
timer
unsteady
orframe:
shaking.
Focus
Red
Operation/card
access lamp:
Time
Fixed
Red Focusing Distances
The image is not in focus.
• Depending on actual conditions, a green operation/card
access
lamp
and
focus
• Take
care
that
youframe
do notdo not necessarily guarantee
that the
image
is in or
focus.
block
the lens
the
sensors with your fingers
as you hold the camera.
NOTES
• The hand-shake limiter is enabled when you use a
slow shutter speed and the two-second self-timer at
the same time.
• You cannot use the self-timer in combination with the
Continuous Shutter Mode.
Downloaded from ManualsCamera.com Manuals
E-46
About the R
BASIC IMAGE
RECORDING
BASIC IMAGE RECORDING
When recording
portrait
5. —Compose
the
image
as orientation
youZoom
view itimages,
on theposition
moniUsing
Optical
This section describes the basic procedure for recording an
Camera Orientation Detection
image using the Full Auto Mode. It also explains about basic
•The
The
actual
image is recorded and saved in accordance
camera
automatically
camera
settings.
with the
imageit quality
setting currently selected on your
detects
whether
is
camera.
The image
recorded on the memory card has
oriented
vertically
or
much better
resolution
and detail than the REC mode
horizontally
when
you the Full
Using
Auto Mode
monitor
record
an screen
image, image.
and
•The
Certain
levels
of
subject
brightness
can
cause novices
the reFull
Auto
Mode
makes
it
easy
even for
complete
stores the orientation
RECdata.
mode
to slow
tosponse
record
good-looking
digitalmonitor
images screen
every time.
Thedown,
camalong
withof
thethe
image
which
causes
some
staticspeed,
noise
in camera’s
the monitor
screen
imera
makes
focus,
shutter
aperture,
flash
and other
When
you
display
the
images
on the
monitor
age. they
settings
automatically
in accordance
with
subjectas
brightness.
screen,
are automatically
oriented
correctly
you
recorded them. You can also configure the bundled Photo
Loader application (page E-138) so it automatically positions
1.
Before turning on the camera, remove its lens
each image using the orientation data stored with it.
camera so it is standing up as straight as possible,
torthe
screen.
Opticalaszoom
enlarges
the imagebelow.
by changing
the
disshown
in the illustration
Holding
thefocal
camera
tance of
zoom
an image
by aAszoom
factor
at the
an lens.
angleYou
cancan
cause
sensor
errors.
a general
ranging
from
(normal
size)
to 3 (three
size).
rule,
do1not
allow the
camera
to betimes
more normal
than about
20
degrees off of vertical.
1. Align the power/function switch with
2. Push the zoom controller
upwards towards
• If you prefer to use the optical viewfinder to compose
(telephoto)
to zoom in
the image, press DISP to turn off the monitor screen.
on the subject, or downwards the
towards
(wide6. Press
shutter release
to
zoom
out.
angle)
button about half way and
hold
it there
to perform
—
Tilting
the camera
too far upwards or downwards can
auto
alsofocus.
cause sensor errors. As a general rule, do not
cap.
IMPORTANT!
2. Align the exposure mode dial with
(Full
Auto
• Note
thatMode).
all images are displayed on the camera’s monitor
screen using standard horizontal orientation during fast
3.scrolling
Align of
the
drive on
mode
dial with
images,
the 9-image
screen,(1-Image).
and on all image selection menu screens.
Align
power/function
•4.Note
the the
following
precautions to ensure that the sensor
built
into the
camera. can correctly detect the orientation of
switch
with
the camera.
: Turns on power and
allow the camera to point more than about 60 degrees
up or down.
• Pressing the shutter release button causes the focus
frame to appear on the monitor screen (page E-62).
• Multi-area Auto Focus (page E-62) automatically focuses the image and displays shutter speed and aperture values.
— Make
sure the
youREC
are holding
enters
mode. the camera still when recording
images.
Camera
: Turns
on power
and movement can cause sensor
errors.
enters the PLAY mode.
OFF : Turns off power.
Downloaded from ManualsCamera.com Manuals
.
— The camera orientation sensor does not work with
movie images.
E-45


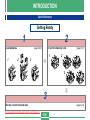


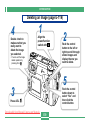


![[Federal Register: April 12, 1999 (Volume 64, Number 69)]](http://vs1.manualzilla.com/store/data/005742852_1-e5ad3fd67c2402334828f9fc4efc3f1c-150x150.png)