1
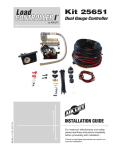
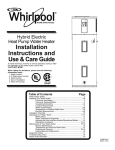
Air Lift
Performance
3H /3P
™
MN-946 • 021506 • ERN 7687
P
A
™
T
E
N
T
E
D
INSTALLATION GUIDE
For maximum effectiveness and safety,
please read these instructions completely
before proceeding with installation.
Failure to read these instructions can result in an
incorrect installation.
Download the App for the Best #lifeonair
The Air Lift Performance 3 mobile app allows for full integration of your new 3H/3P control
system on compatible mobile devices. Simply download the FREE app to not only take
full control of your system, but to always have the latest system firmware with updates
directly from the app.
Visit air-lift.co/3app to download.
See 3H/3P User Guide for instructions on pairing your device.
TABLE OF CONTENTS
Component List. . . . . . . . . . . . . . . . . . . . . . . . . . . . . . . . . 2
Introduction. . . . . . . . . . . . . . . . . . . . . . . . . . . . . . . . . . . . 3
Notation Explanation . . . . . . . . . . . . . . . . . . . . . . . . . . . . . . . . . . . . . . . . . . . . . . . 3
Installing the Air Lift Performance 3H/3P Kit. . . . . . . . . 4
Layout Overview. . . . . . . . . . . . . . . . . . . . . . . . . . . . . . . . . . . . . . . . . . . . . . . . . . . 4
Tank (Optional). . . . . . . . . . . . . . . . . . . . . . . . . . . . . . . . . . . . . . . . . . . . . . . . . . . . . 5
Filter. . . . . . . . . . . . . . . . . . . . . . . . . . . . . . . . . . . . . . . . . . . . . . . . . . . . . . . . . . . . . 6
Installing Harness . . . . . . . . . . . . . . . . . . . . . . . . . . . . . . . . . . . . . . . . . . . . . . . . . . 7
Installing Air Lines. . . . . . . . . . . . . . . . . . . . . . . . . . . . . . . . . . . . . . . . . . . . . . . . . . 9
Manifold. . . . . . . . . . . . . . . . . . . . . . . . . . . . . . . . . . . . . . . . . . . . . . . . . . . . . . . . . . 10
Compressor (Optional) . . . . . . . . . . . . . . . . . . . . . . . . . . . . . . . . . . . . . . . . . . . . . . 11
Height Sensors. . . . . . . . . . . . . . . . . . . . . . . . . . . . . . . . . . . . . . . . . . . . . . . . . . . . 12
Installation Diagram . . . . . . . . . . . . . . . . . . . . . . . . . . . . 16
Troubleshooting Guide. . . . . . . . . . . . . . . . . . . . . . . . . . 20
Leak Testing and Detection. . . . . . . . . . . . . . . . . . . . . . 20
Permissible Modifications . . . . . . . . . . . . . . . . . . . . . . . 21
Display Mounting Template . . . . . . . . . . . . . . . . . . . . . . 23
Height Sensor Install Tool. . . . . . . . . . . . . . . . . . . . . . . . 25
Manifold Mounting Template. . . . . . . . . . . . . . . . . . . . . 27
16444 Compressor Mounting Template . . . . . . . . . . . . 29
Limited Warranty and Returns Policy . . . . . . . . . . . . . . 31
Replacement Information. . . . . . . . . . . . . . . . . . . . . . . . 33
Contact Information . . . . . . . . . . . . . . . . . . . . . . . . . . . . 33
Installation Manual
Component List
Refer to Installation diagram on pages 16-17 for item illustrations.
Some kits include parts in addition to or different from what is listed here. Those kits
include an Installation Manual insert with a parts list for that kit.
NOTE
HARDWARE CONTENT
Item Part #
A
B
C
D
E
F
G
H
I
J
K
26498-009
26498-006
27050
24503
24501
24502
24661
24752
24748
24524
24594
Description
Qty
Harn – USB Display Cable..................1
Harn – Main Harness...........................1
3H/3P Display....................................... 1
Fuse ATM 3A.......................................1
Fuse Holder ATM.................................1
Fuse Holder ATO/ATC.........................1
Heat Shrinkable Butt Splice 14-16GA.... 1
Heat Shrinkable Butt Splice 10-12GA.... 3
Ring Terminal 3/8” 10-12GA................. 2
Ins. Female .187” Term. 14-16GA......... 1
Ins. Female .250” Term. 14-16GA......... 1
MANIFOLD CONTENT
3/8” Manifold (27685, 27695)
Item Part #
Description.............................. Qty
AE 72614
Manifold ECU 3/8”............................. 1
AF 20947
Air line 3/8”.....................................60 ft.
1/4” Manifold (27680, 27690)
Item Part #
Description.............................. Qty
AE 72615
Manifold ECU 1/4”............................. 1
AF 20946
Air Line 1/4”...................................60 ft.
COMPRESSOR (OPTIONAL)
Item Part #
AG 16444
Description.............................. Qty
Compressor.........................................1
Item
L
M
N
O
P
Q
R
S
T
U
V
Part #
24561
24542
10466
17103
18542
17263
17494
10530
24504
24505 24547
Description.............................. Qty
ATM Fuse Tap Adapter......................... 1
ATO/ATC Fuse Tap Adapter.................. 1
Zip Tie 8” Black................................... 20
Screw 5/16”-18 x 1” Zinc....................... 2
Flat Washer 5/16” Stainless.................. 2
Screw 1/4”-14 x 1” Self-Tapping Zinc... 1
Screw 1/4”-14 x 2” Self-Tapping Zinc... 2
Hose Cutter Kit...................................... 1
Fuse Low Profile Mini 3A...................... 1
Low Profile Mini Fuse Tap..................... 1
Fuse ATO/ATC 30A..............................1
FILTER CONTENT
Item Part #
AI
AJ
AK
AL
AM
AN
11217
11517
17173
20937
22677
21048
Description.............................. Qty
Clamp P, 1.5” Cushion.........................1
Miniature Filter.....................................1
Screw #14-1/4 x 3/4” self-tapping........1
Hose 1/4” Dia Poly...........................5 ft.
Tee Fitting, 1/4”....................................1
Pressure-Relief Valve..........................1
TANK (OPTIONAL)
Item Part #
AH Varies
Description.............................. Qty
Tank.....................................................1
HEIGHT CONTENT (OPTIONAL INCLUDED IN 3H SYSTEMS ONLY)
Item Part #
W
X
Y
Z
34977
26894
26953-012
26953-013
STOP!
Description.............................. Qty
HPACK- Height Sensor Linkage..........4
Height Sensor Assembly.....................4
Harn-12FT RL Height Sensor*.............1
Harn-12FT RR Height Sensor*............1
Part #
26953-020
26953-021
10466
17497
Description.............................. Qty
Harn-20FT FL Height Sensor*.............1
Harn-20FT FR Height Sensor*.............1
Zip Tie 8” Black..................................20
Screw 10-16 x 1 3/4” Self Tapping Zinc.... 8
Missing or damaged parts? Call Air Lift customer service at (800) 248-0892 for replacement parts.
* FL = Front left corner
FR = Front right corner
2
Item
AA
AB
AC
AD
RL = Rear left corner
RR = Rear right corner
MN-946
Installation Manual
WARNING
WARNING
CAUTION
IF THE PRESSURE-BASED SYSTEM IS ALREADY INSTALLED BEFORE HEIGHT
SENSOR INSTALLATION, MAKE SURE TO TURN OFF RISE ON START TO AVOID
UNINTENDED AIRING UP. FAILURE TO FOLLOW THIS WARNING COULD RESULT IN
EQUIPMENT DAMAGE, BODILY HARM OR DEATH (SEE USER GUIDE).
FLOOR JACKS CAN BE DANGEROUS. WHENEVER USING A FLOOR JACK, MAKE
SURE IT IS RATED FOR THE LOAD IT IS LIFTING. CHECK THE VEHICLE OWNER’S
MANUAL FOR INFORMATION ABOUT WHERE TO PLACE THE JACK. BEFORE RAISING
THE VEHICLE, PLACE WHEEL CHOCKS IN FRONT AND BEHIND THE WHEELS TO
PREVENT THE VEHICLE FROM ROLLING. ALWAYS USE JACK STANDS TO SUPPORT
THE VEHICLE. NEVER GET UNDER OR PLACE ANY BODY PARTS UNDER A VEHICLE
THAT IS SOLELY SUPPORTED BY THE JACK.
REMOVE ALL FUSES WHEN JUMP-STARTING OR WELDING ON THE VEHICLE. FAILURE
TO DO SO COULD DAMAGE THE MANIFOLD.
Introduction
The purpose of this publication is to assist with the installation, maintenance and
troubleshooting of Air Lift Performance 3H/3P.
Read and understand the entire installation guide before beginning installation or performing
any maintenance, service or repair. The information includes step-by-step installation
information, installation templates and a troubleshooting guide.
Air Lift Company reserves the right to make changes and improvements to its Air Lift
Performance products and publications at any time. For the latest version of this manual,
contact Air Lift Company at (800) 248-0892 or visit airliftperformance.com.
NOTATION EXPLANATION
Hazard notations appear in various locations in this publication. Information which is
highlighted by one of these notations must be observed to help minimize risk of personal
injury or possible improper installation which may render the vehicle unsafe. Notes are used
to help emphasize areas of procedural importance and provide helpful suggestions. The
following definitions explain the use of these notations as they appear throughout this guide.
DANGER
INDICATES IMMEDIATE HAZARDS WHICH WILL RESULT IN SEVERE PERSONAL INJURY
OR DEATH.
WARNING
INDICATES HAZARDS OR UNSAFE PRACTICES WHICH COULD RESULT IN SEVERE
PERSONAL INJURY OR DEATH.
CAUTION
INDICATES HAZARDS OR UNSAFE PRACTICES WHICH COULD RESULT IN DAMAGE TO
THE MACHINE OR MINOR PERSONAL INJURY.
NOTE
MN-946
Indicates a procedure, practice or hint which is important to highlight.
3
Installation Manual
Installing Air Lift Performance 3H/3P Kit
LAYOUT OVERVIEW
NOTE
For a complete installation diagram, see Pages 16-17. See Page 2 for a complete parts list.
Layout
1. Plan component location first. Ideally, the manifold should be located at a level above
the compressor and tank to avoid compressor ingested water from gathering in the
manifold (fig. 1). This is most important for vehicles operated in below-freezing climates.
2. Prior to mounting components, check to make sure:
• the electrical harness connections will reach the manifold and compressor.
• the compressor leader hose will reach the tank.
• the air lines will route cleanly through the vehicle without kinking or bending.
NOTE
Be sure to install all components as far as possible from any heat sources (figs. 2 and 3).
Plan and prepare harness and air line routing thru the vehicle. Eliminate all sharp edges that
could chafe. Use rubber grommets when passing through compartment walls.
MANIFOLD
fig. 1
COMPRESSOR
AIR TANK
fig. 2
4
fig. 3
MN-946
Installation Manual
TANK (OPTIONAL)
Tank pre-assembly
1. Determine tank location and orientation prior to installing fittings.
2. Before installing fittings, apply liquid pipe sealant or Teflon tape (not supplied) around
the male threads, leaving the first two threads uncovered.
CAUTION
NEVER BACK OFF AN INSTALLED PIPE FITTING TO ACHIEVE PROPER ALIGNMENT.
LOOSENING INSTALLED PIPE FITTINGS WILL CORRUPT THE SEAL AND CONTRIBUTE
TO LEAKAGE AND FAILURE.
3. Install the drain/fill PTC fitting in the tank’s lowermost threaded port.
4. Choose a middle tank threaded port for manifold/filter air line.
Tank install
1. Using the tank’s feet as a template, drill holes for hardware assembly.
2. Secure the tank using the supplied hardware.
3. Route the drain/fill air line with the Schrader valve (included in the tank hardware pack)
preferably outside the vehicle (fig. 4).
4. Install tee fitting and pressure-relief valve in-line to the drain fill line. Locate the pressurerelief valve inside the vehicle, if possible.
Drain/
fill valve
routed
to vehicle
exterior
fig. 4
The pressure-relief valve should be
mounted at an angle above horizontal.
Ideally, it would be mounted with the
valve pointed straight up, but any angle
above horizontal is acceptable. This will
stop water from collecting in the valve.
Pressure-relief
valve
CAUTION
INSTALLATION OF THE PRESSURE-RELIEF VALVE IS IMPORTANT TO ENSURE THE
SYSTEM IS NOT OVER-PRESSURIZED AS A RESULT OF A COMPRESSOR OR RELAY
FAILURE.
Table 1
Torque Specifications
MN-946
Fitting Size
Turns Past
Finger Tight
Torque
ft./lbs.
1/8” NPT
1.5 - 3.0
12
1/4” NPT
1.5 - 3.0
25
3/8” NPT
1.5 - 3.0
40
1/2” NPT
1.5 - 3.0
54
5
Installation Manual
FILTER
CAUTION
AIR COMPRESSORS TAKE IN MOISTURE (HUMIDITY) FROM THE OUTSIDE AIR
SOURCE, AND WILL DEPOSIT THAT MOISTURE IN THE AIR TANK. THE AIR LIFT
PERFORMANCE 3H/3P SYSTEM INCLUDES A FILTER THAT WILL GREATLY REDUCE
THE POTENTIAL FOR MOISTURE TO ENTER THE MANIFOLD. HOWEVER, TANKS MUST
BE REGULARLY PURGED TO ELIMINATE THE POSSIBILITY OF WATER ENTERING
THE MANIFOLD. BE SURE TO PROVIDE EASY ACCESS TO DRAIN/FILL VALVE
(PREFERABLY OUTSIDE THE VEHICLE). IF USING AN ENGINE-DRIVEN COMPRESSOR,
AN ADDITIONAL COALESCING FILTER MUST BE USED. OTHERWISE THE LIFE OF
THE PROVIDED FILTER MAY BE REDUCED DUE TO THE INCREASED POTENTIAL
FOR OIL BEING INTRODUCED INTO THE SYSTEM.
1. Mount the filter to the tank using the appropriate fittings (fig. 5).
fig. 5
2. Ensure the filter is mounted in a vertical position. Do not install filter inverted or angled.
(fig. 6).
fig. 6
3. The arrow on the filter indicates flow direction and must point toward the manifold. (fig. 7)
Arrow on top of filter
pointing toward
manifold
fig. 7
4. If choosing not to mount the filter to the tank, run necessary hose from tank to the filter
and filter to the manifold using the appropriate fittings.
5. Run hose from bottom of filter to location where water will drain (fig. 8).
Drain hose running
from filter to exterior
of vehicle
fig. 8
6
MN-946
Installation Manual
INSTALL HARNESS
The harness can be routed inside or underneath the vehicle. In either case, ensure all parts
of the harness are protected from abrasive edges and heat sources.
CAUTION
CAUTION
DISCONNECT THE BATTERY GROUND BEFORE INSTALLING THE SYSTEM.
REMOVE ALL FUSES WHEN JUMP-STARTING OR WELDING ON THE VEHICLE. FAILURE
TO DO SO COULD DAMAGE THE MANIFOLD.
1. Manifold/relay/compressor connections
• Attach the manifold connector; it will “click” into place once fully seated.
• Mount the compressor relay using supplied hardware.
• Cut off the spade and eyelet from the compressor power (red) and ground (black)
wires.
• Attach the compressor (red) wire to the main harness compressor power (red/white)
wire using supplied heat shrinkable butt splice.
• Attach the compressor (black) wire to the main harness compressor ground (black)
wire using supplied heat shrinkable butt splice.
2. Battery/ignition connections
• Route battery power (red) and ground (black) wires of the main harness to the
battery.
• Attach the battery power (red) wire to the red wire of the fuse holder using supplied
heat shrinkable butt splice.
• Attach supplied ring terminal to the other end of the fuse holder and fasten to the
positive battery (+) terminal or stud.
• Install a 30A fuse into this fuse holder and close the cap.
• Attach the other ring terminal to the ground (black) wire and fasten to the negative
battery (-) terminal or stud.
• Route the ignition (pink) wire to a key-switched ignition source that remains on
during cranking. Examples include: ECU, fuel pump.
NOTE
Do not select an accessory source. With the system fully installed, if the display shuts off
while starting the vehicle, this is not a true ignition source.
•
•
•
NOTE
MN-946
Attach the pink ignition wire to the black wire of the fuse holder.
Attach a faston terminal to the other end of the fuse holder and attach to a selected
ignition source using a supplied fuse tap.
Install a 3A fuse into this fuse holder and close the cap.
The supplied harness is only capable of powering a single compressor. If installing
dual compressors, a second dedicated power wire is required. Contact an AIR LIFT
PERFORMANCE retailer to purchase the optional second compressor harness kit (part
number: 27703).
7
Installation Manual
3. Display
• Route the main harness display cable as desired to the preferred operating location.
• Attach the 4’ display cable to the main harness cable, and to the back of the display.
4. Height sensor harness (optional)
• Route and attach each height sensor harness to the height sensor locations based
on the heat shrink labels for the appropriate corners of the vehicle (FL, FR, RL, RR)*.
• Connect the main harness height sensor drops to the appropriate height sensor
harness feeding the corresponding corners of the vehicle (match FL, FR, RL, RR)*.
5. Reconnect the battery once the system is completely installed.
NOTE
Keep proper drip loops and use proper bend radius for wire bundles (fig. 9).
Route for potential
water intrusion
fig. 9
* FL = Front left corner
FR = Front right corner
RL = Rear left corner
RR = Rear right corner
8
MN-946
Installation Manual
INSTALLING AIR LINES
1. Route and attach the air lines from the manifold to the air springs and from the manifold
to the filter, as well as from the filter to the tank, if not mounting filter directly to tank.
• Route air lines free from abrasive edges and heat sources.
2. Attach air lines to the appropriate manifold ports for the air springs, filter/tank and
exhaust.
NOTE
Air lines should be pushed in firmly, with a slight back-and-forth rotational twist – check the
connection by pulling on each line to verify a robust connection.
3. Exhaust port can be left open, or routed to preferred exhaust location. Routing exhaust
outside of vehicle will eliminate any possibility of moisture being discharged from the
port to surrounding area.
NOTE
Use the included hose cutter (Part number: 10530). Cut all hose ends as squarely and as
smooth as possible (fig. 10).
GOOD CUT
NOTE
POOR CUT
fig. 10
To release the air line from the connection (fig. 11), first release all air from the system.
Push on the line (step 1), depressing the ring towards the fitting (step 2), and then pull the
hose out of the fitting (step 3).
fig. 11
STEP 1
STEP 2
STEP 3
HELPFUL AIR LINE TIPS
4. Minimum hose bend radius
• 3/8” hose = 1.5” hose bend radius.
• 1/4” hose = 1” hose bend radius.
5. Hose to fitting
• No side loading on fitting from hose.
• Hose straight for 1” before bending.
6. Hose cutting
• Cut hose perpendicular to hose length.
• Inspect hose for scratches that run lengthwise on hose prior to insertion.
• Use the included hose cutter.
MN-946
9
Installation Manual
MANIFOLD
CAUTION
NOTE
BEST PRACTICE IS TO LOCATE THE MANIFOLD UNIT INSIDE THE VEHICLE. IF
EXTERNAL MOUNTING IS DESIRED, THE MANIFOLD SHOULD BE LOCATED IN AN
AREA SHIELDED FROM DIRECT WATER SPRAY FROM TIRES OR CAR WASHES.
1. Position the manifold in a desired location. Make sure the manifold mounting surface
is flat.
When mounting the manifold , do so either horizontally or vertically, with ports and connector
facing toward the ground. Do not mount the manifold upside down. Proper manifold mounting
will help prevent water from settling in areas sensitive to freezing (fig. 12).
UP
IDEAL
ACCEPTABLE
MANIFOLD
ROTATION/
ORIENTATION
UNACCEPTABLE
fig. 12
DOWN
2. Fasten the manifold using the supplied hardware. If the mounting surface is not flat,
add washers or a spacer to lift the manifold up over surface irregularities (fig. 13). In
addition to the provided self-tapping screws, the manifold mounting holes are threaded
and can be secured with 5/16-18 bolts (also supplied).
fig. 13
3. A manifold mounting template can be found on page 27.
10
MN-946
Installation Manual
COMPRESSOR (OPTIONAL)
1. Prepare the compressor intake. If it is mounted inside the vehicle, attach the filter to
port on end of compressor (fig. 14). If the compressor is located outside the vehicle,
snorkel the inlet filter to dry location inside vehicle using components supplied with
compressor (fig. 15).
2. Center-punch and drill four holes using the compressor or the template on page 29.
3. Secure the compressor using the supplied hardware (see installation diagram).
Filter attached
to compressor
Mounting bolt
Flat washer
Compressor foot
COMPRESSOR
MOUNTING
HARDWARE
Rubber bushing
Mounting surface
Flat washer
Locking washer
Nut
NOTE
fig. 14
NOTE: If using an Air-Zenith compressor see figure 33 on Page 21.
Filter snorkeled
inside of vehicle
to reduce
moisture drawn
into the tank.
fig. 15
Compressor
mounted under
vehicle
MN-946
11
Installation Manual
WARNING
IF THE PRESSURE-BASED SYSTEM IS ALREADY INSTALLED BEFORE HEIGHT
SENSOR INSTALLATION, MAKE SURE TO TURN OFF RISE ON START TO AVOID
UNINTENDED AIRING UP. (SEE USER GUIDE.)
HEIGHT SENSORS
Installation of height sensors is a trial-and-error process and requires patience. The goal is to
use as much of the sensor range as possible which will maximize height adjustment accuracy.
Determininig Height Sensor Mounting Point
1. Solid mounting point on the body or frame that will not deflect. Anything that moves
is not a good mounting point.
Extruded
point
2. The sensor can be mounted in any direction and will still work as long as the sensor
arm base’s extruded point is pointing toward the connector when the sensor arm is
at its mid-position. The height sensor assembly is supplied in position A. Remove
the arm to reposition it to B or C but keep the extruded point in the direction of the
connector. The orientation of the connector must be either facing down or parallel to
the ground to avoid water accumulating on the connector and making its way into the
sensor. Also mount the sensor where the arm will be mounted opposite or 90 degrees
from the connector wiring if possible. If not possible, ensure the wiring harness is
secured away from arm travel so it will not get caught up when the arm cycles (fig. 16).
Preferred orientations (A., B.)
Acceptable orientation (C.)
A.
As supplied
Extruded point
on sensor base
must point
toward the
connector as
arm is mounted
in mid position.
NOTE
B.
C.
sensor arm
range
fig. 16
Do NOT position sensor with connector up, or with point on sensor base pointed anywhere
but at the sensor connector when arm is in its mid position.
3. Find a point where the sensor will be directly above the lower linkage mounting surface.
It may be necessary in some applications to fabricate a bracket to locate sensor in
appropriate position.
4. Make sure that the sensor and sensor arm clear the vehicles suspension, wheels, and
any other moving parts. This includes steering the wheels all the way to the lock position
left and right to ensure proper clearance. Provide enough clearance to compensate for
heavy load/movement that can’t be seen from manual/physical articulations.
5. Keep the sensor and wires away from heat sources and moving parts that will create
wear and may damage these components.
6. Understand whether the suspension or wheel assembly is the limiting factor when
the vehicle is aired out. This will ensure proper accommodation of sensor arm travel.
7. If using self-tapping screws into the frame, make sure there are no wires or brake/air/
fuel lines on the other side before installing screw.
12
MN-946
Installation Manual
WARNING
FLOOR JACKS CAN BE DANGEROUS. WHENEVER USING A FLOOR JACK, MAKE
SURE IT IS RATED FOR THE LOAD IT IS LIFTING. CHECK THE VEHICLE OWNER’S
MANUAL FOR INFORMATION ABOUT WHERE TO PLACE THE JACK. BEFORE RAISING
THE VEHICLE, PLACE WHEEL CHOCKS IN FRONT AND BEHIND THE WHEELS TO
PREVENT THE VEHICLE FROM ROLLING. ALWAYS USE JACK STANDS TO SUPPORT
THE VEHICLE. NEVER GET UNDER OR PLACE ANY BODY PARTS UNDER A VEHICLE
THAT IS SOLELY SUPPORTED BY THE JACK.
SELECTING SENSOR LOCATION
1. Mark on the vehicle the intended sensor mount location to maintain consistency in
measuring methods in the next several steps. After finding a potential sensor location,
measure the suspension travel, which will determine the proper arm hole. Exhaust the
air springs, disconnect the air lines and jack up the suspension to its lower limit position.
Take the measurement between the selected sensor arm hole with the arm at its midpoint
and directly below the intended lower linkage location (fig. 17).
Measure the
dimension between
the selected arm hole
and the intended
lower linkage
mounting location.
Intended
lower linkage
mounting
location
fig. 17
2. Reinstall air lines and cycle the suspension to get to the upper limit position again,
measuring between the sensor arm’s middle position and directly below the sensor arm
hole mounting to the lower linkage ball joint (fig. 18). The difference between these two
values will be the full suspension travel range.
fig. 18
Measure this
dimension
Intended
lower linkage
mounting
location
MN-946
13
Installation Manual
SELECTING SENSOR ARM HOLE
Max angle of travel for this sensor is 120 degrees, which can be correlated to the necessary
suspension travel as seen in the table below (table 2). Any significant over-extension or
over-compression may damage and possibly destroy the sensor or sensor linkage.
First hole
Second hole Third hole
fig. 19
Hole
Maximum Suspension Range
Minimum Suspension Range
First
2 3/4"
1 13/16"
Second
4 3/16"
2 7/8"
Third
5 5/8"
4 3/16"
Table 2
The sensor should be mounted so the measured travel falls near one of the maximum
suspension range dimensions. Move the sensor closer or farther from the suspension pivot
point to achieve this measurement. (fig. 20).
fig. 20
MODIFYING LINKAGE ANGLE
After selecting the location of the sensor and the arm hole to be used, determine the lower mounting
point. Ensure the angle between the mounting point and the sensor arm is less than 15 degrees.
Any more angle than that, will put unwanted stress on the components. Use the supplied spacer
on the lower mounting point to get the angle closer to vertical with respect to the sensor arm
(fig. 21).
Flat Washer
Bolt
fig. 21
Nut
Arm
Spacer
Mounting
Location
Bolt
Flat Washer
14
Nut
Flat Washer
Max angle 15 degrees
MN-946
Installation Manual
LINKAGE ASSEMBLY/MODIFICATION
1. Locate the linkage and ensure the rod is threaded all the way on (fig. 22).
Thread both ends all the way down
fig. 22
2. Next put the suspension in the mid-position with respect to full suspension travel (fig. 23).
Mid-position
Min.
Max.
fig. 23
3. Fasten by finger tightening the linkage to the sensor arm and ensure the sensor arm
is at mid-position with respect to the sensor (fig. 24).
fig. 24
4. Loosen if needed in order to extend to reach the lower mounting point. If loosening the
linkage to extend it is required, make sure to have at least 5 threads of engagement
on both ends (fig. 25).
Minimum 5 threads
engaged
fig. 25
5. If shortening the rod linkage is necessary, mark the rod cover where the mounting
location intersects with the intended mounting location (fig. 26).
Mark here
fig. 26
CONTINUED ON PAGE 18
MN-946
15
Installation Manual
Y
RL Bag
(not included)
RL
RL Sensor (optional)
or
Filter
(See
page 6)
AJ
AL
AE
or
Exhaust
(See page 9)
AF
R
O AND P
AM
Drain/Fill Valve
(See page 5)
AG
Attach filter
Drains to outside vehicle
REAR
OF VEHICLE
Heat-shrinkable
butt splice
AN
AD
X
H
RR Bag
(not included)
Refer to component
list on Page 2 for
complete part
descriptions.
AH
RR
RR Sensor (optional)
MN-946
16
Installation Manual
FL
FL Sensor (optional)
FL Bag
(not included)
AA
FL
FL
RL
RL
A
3H/3P Display
(See User Guide)
FR
RR
FR
Heatshrink
RR
2nd compressor
signal wire
(optional)
C
CAUTION
U
H
F
V
Existing fuse
J OR K
Fuse
To Battery
(See page 7)
L OR M
FRONT
OF VEHICLE
T
AB
FR Bag
(not included)
FR Sensor (optional)
I
IF THE PRESSURE-BASED SYSTEM
WARNING IS ALREADY INSTALLED BEFORE
HEIGHT SENSOR INSTALLATION, MAKE SURE TO
TURN OFF RISE ON START TO AVOID UNINTENDED
SUSPENSION CYCLING. (SEE USER GUIDE.)
Heat-shrinkable
butt splice
Add-acircuit
fuse
Q
Z
or
To Ignition Source
(See page 7)
REMOVE ALL FUSES
WHEN JUMPSTARTING OR WELDING ON THE VEHICLE.
FAILURE TO DO SO
COULD RESULT IN
DAMAGE TO THE
MANIFOLD.
B
G
In-line
Fuse
D
E
Relay
17
MN-946
Heat-shrinkable
butt splice
Installation Manual
HEIGHT SENSORS, CONT. FROM PAGE 15
6. Remove the rod linkage from the sensor arm and measure 1/2” back from the mark.
This will show where to cut the rod (fig. 27).
Mark
Rod cover
fig. 27
Cut here
7. Before cutting the rod, thread the jam nut back on the rod. Use the nut to debur the rod
end. (fig. 28).
fig. 28
Cut here
Jam nut
Cover
8. Cut the rod cover 5/8” shorter than the rod length with the rod assembled on one end
after cutting (fig. 29).
Cut here
fig. 29
5/8”
1/2”
9. Assemble linkage back together, and fasten it to the sensor arm and lower mounting
location with supplied hardware (fig. 30). Temporarily secure the sensor in its intended
location including using the height sensor spacer that is provided.
fig. 30
18
MN-946
Installation Manual
VERIFYING SUSPENSION RANGE
Use the paper height sensor tool on page 25 or electronic sensor tool in the display to make
sure the range is sufficient to provide accurate measurements (fig. 31). (See User’s Guide).
Next, air the vehicle up and down to see if there is any issue with the travel of the sensor
using the height sensor install tool.
After confirming that the range is correct and adequate, permanently secure the position of
the sensor using the supplied hardware.
Complete this for all four sensors. Once the system is completely installed and system
calibration is done, if any of the height sensors are out of range, there will be a warning
message and the affected corner’s visual indicators will not move with pressure adjustments.
See User’s Guide for more information.
Angles measured
from arm centerline
Maximum range
of sensor: 120
degrees
fig. 31
MODIFYING SENSOR ARM
Follow the arcs around the appropriate holes to make the arms shorter. Keep the smooth,
rounded contour of the end of the arm (fig. 32).
Arc for trimming
MN-946
fig. 32
19
Installation Manual
Troubleshooting Guide
For technical assistance please contact our customer service department by calling
(800) 248-0892, Monday through Friday. For calls from outside the USA or Canada, call
(517) 322-2144 or email [email protected].
PROBLEM
Compressor doesn’t run.
CAUSE
SOLUTION
Check for a blown fuse, bad relay, poor ground, or
poor electrical connections or the motor overheated.
Replace the 30A or 3A fuse if blown. Check ground
wire connection at battery and compressor. Let
compressor cool off for about 30 minutes to allow
thermal overload switch to reset.
Compressor runs all the time.
The compressor relay is defective or there is a leak.
Replace the relay or locate the leak and repair.
Air spring or tank leak.
Fitting seal or air line is compromised.
Check to make sure air lines are seated in connectors.
Inspect fittings with soapy water. Trim hose or re-seal
fitting. Ensure lines are cut straight.
Nothing happens when the vehicle is key on,
ignition active.
Check for a blown fuse or a poor connection.
Replace the fuses and check the electrical
connections.
Compressors runs all the time but doesn’t fill the tank.
Compressor in-line check valve fitting has been
overtorqued.
Loosen fitting and check again. Replace if needed.
Display does not work.
Check for a blown fuse, compromised cable/harness.
Replace the 3A fuse if blown. Replace the extension
cable.
Leak Testing and Detection
1. A leak can be defined as a loss of pressure of more than 5 PSI over an 8-hour period.
Be aware that ambient temperature change has an effect on pressure that may seem
like a leak. For example: a change of 10 degrees F up or down from your baseline will
have an approximate gain or loss of indicated pressure of 2 PSI. If a leak is suspected
after including any temperature change, proceed to step 2.
2. Spray soapy water (1/5 Dawn brand dish soap to 4/5 water) on suspect fittings and
hose connections and look for any bubbling caused by air leakage.
3. Fix leaking connection (review page 9 for help on NPT fittings and air line connections).
4. Wipe down sprayed connections with rag to remove any residual soapy water.
NOTE
20
Dawn brand dish soap will not corrode the metals (aluminum, brass, steel) with which it
comes into contact.
®
MN-946
Installation Manual
Permissible Modifications
1. If extending the height sensor harness is necessary because of the size of the
vehicle, order one of two kits:
a. 27700 Kit-Height Sensor 4’ Ext (2 extension harnesses)
b. 27701 Kit-Height Sensor 8’ Ext (2 extension harnesses)
2. If it is necessary to extend the display cable beyond the 4-foot cable that is supplied,
purchase a USB A/M adapter extension of up to 8 feet. Use an off-the-shelf USB 3.0
cable if possible.
3. If using an Air-Zenith OB2 compressor, follow the wiring diagram below (fig. 33). The 70A
fuse, relay, etc. are supplied with compressor. Wiring requirements for the compressor
should follow manufacturer’s recommendation.
35/50A
relay
To rest of
3H/3P Main
Harness
MN-946
Yellow
16AWG
80A
relay
Compressor
power
RD/WE-10GA
Ground
10GA
Minimum
6AWG
Vehicle
battery
70A
AMG
Butt
splice
10-12GA
fig. 33
Air-Zenith OB2
ground
21
Installation Manual
Permissible Modifications, Cont.
4. The keypad on the 3H/3P display can be rotated for horizontal applications but it must
not be rotated so that the keypad is above the screen (fig. 34). It will not power up in
this position.
a. Rotate the keypad after removing the two screws on the back of the 3H/3P display
unit (fig. 35). Once they are removed, the keypad can be pulled out and rotated.
b. Using light and even pressure, push the keypad into the display until it is flush.
c. After rotating the keypad, re-fasten the screws to the torque of 14-16 in.-oz. Do not
overtighten.
d. See the User Guide for additional information about display options.
Acceptable
Unacceptable
fig. 34
Keypad
Normal
Acceptable
See Page 23
for a scale
template
for the 3H/3P
display
N
Bu
To
Not mounting holes
Button pad fastener holes
Torque (14-16 oz.-in.)
Acceptable
4-40 screw
.20” deep
Keypad
Right
Keypad
Left
fig. 35
5. Extending the compressor power and ground wires is not recommended. It is permissible
to remove a portion of the battery power and ground wires to extend the compressor
wiring if necessary, keeping the same overall harness length. This will keep the voltage
drop be within industry standards. Failing to do so could decrease the life of the
compressor.
22
MN-946
Installation Manual
Display Mounting Template
CAUTION
IMPORTANT: PRINT THIS MANUAL AT 100% SCALE. THIS MANUAL CONTAINS DRILLING
TEMPLATES, WHICH WOULD BE RENDERED INCORRECT IN DIMENSION IF PRINTED
WITH ANY SCALING. USING AN INCORRECT TEMPLATE TO DRILL HOLES MAY CAUSE
DAMAGE TO YOUR VEHICLE.
REFER TO THE ONE-INCH SCALE (FIG. 36) AND USE A MEASURING TOOL TO CONFIRM
THAT THE PRINTED SCALE MEASURES ONE INCH TO VERIFY PROPER SCALE. IF
THIS IS PRINTED AT ANY SCALE OTHER THAN 100%, THE INSTALLER COULD END
UP DRILLING IN THE WRONG LOCATIONS ON THE VEHICLE.
Display Template
0
INCH
1
fig. 36
2 5/16”
2”
Not mounting holes
Button pad fastener holes
Torque (14-16 oz.-in.)
4 1/16”
4 3/8”
(4X) 4-40, .20” deep
MN-946
23
Installation Manual
Height Sensor Install Tool
MN-946
60˚
120˚
120˚
100˚
100˚
80˚
80˚
60˚
60˚
Cut out the height sensor tools and
position each one as shown at right
depending on the height sensor
orientation. It would be a good
idea to make copies of this page in
case the tools are damaged during
installation. Make sure to copy at
100% so the tools are the correct
size. The drawing to the right is
not to scale.
✃
✃
60˚
60˚
80˚
✃
80˚
80˚
1
100˚
100˚
INCH
100˚
120˚
0
120˚
✃
120˚
25
Installation Manual
Manifold Template/Top Plate Dimension
Manifold Mounting Template
MN-946
3 1/2”
5/16-18 thread pitch
(1/4-14 through-bolts
included with kit)
6 15/16”
1 3/4”
6 3/8”
27
16444 Compressor Mounting Template
Installation Manual
HOLE PATTERN FOR
16444 COMPRESSOR
8 1/2”
3 5/16”
MN-946
29
Installation Manual
Limited Warranty and Returns Policy
WHAT THIS WARRANTY COVERS
Air Lift Company provides a Limited Lifetime Warranty to the original purchaser of its Air Lift Performance 3H ™ and
3P™ Control/Air Management Systems, that the Air Lift Performance products will be free from defects in workmanship
and materials for the normal expected life of the part when used on cars and trucks as specified by Air Lift Company
and under normal operating conditions, subject to the requirements and exclusions set forth below.
For all other Air Lift Performance products, Air Lift Company warrants to the original purchaser for a period of one year
from the date of original purchase, that the Air Lift Performance products will be free from defects in workmanship
and materials when used on cars and trucks as specified by Air Lift Company and under normal operating conditions,
subject to the requirements and exclusions set forth below.
WHAT THIS WARRANTY DOES NOT COVER
The warranty does not apply to products that have been improperly applied, improperly installed, or which have not
been maintained in accordance with installation instructions furnished with all products. This warranty does not apply
and is void if damage or failure is caused by: accident, abuse, misuse (including but not limited to racing or off-road
activities or commercial use), abnormal use, faulty installation, liquid contact, fire, earthquake or other external cause;
operating the product outside Air Lift Company’s instructions, specifications or guidelines; or service, alteration,
maintenance or repairs performed by anyone other than Air Lift Company to the product from its purchased condition.
This warranty also does not apply to: Universal Air (Fabricator Kits), consumable parts, such as batteries; cosmetic
damage, including but not limited to scratches or dents; defects caused by normal wear and tear or otherwise due
to the normal aging of the product, or if any serial or identification number has been removed or defaced from the
product. Air Lift Company reserves the right to change the design of any product without assuming any obligation
to modify any product previously manufactured.
LIMITATION OF LIABILITY
TO THE EXTENT PERMITTED BY LAW, THIS WARRANTY AND THE REMEDIES SET FORTH HEREIN ARE
EXCLUSIVE AND IN LIEU OF ALL OTHER WARRANTIES, REMEDIES AND CONDITIONS, WHETHER ORAL,
WRITTEN, STATUTORY, EXPRESS OR IMPLIED. AIR LIFT COMPANY DISCLAIMS ALL STATUTORY AND IMPLIED
WARRANTIES, INCLUDING WITHOUT LIMITATION, WARRANTIES OF MERCHANTABILITY AND FITNESS FOR
A PARTICULAR PURPOSE AND WARRANTIES AGAINST HIDDEN OR LATENT DEFECTS TO THE EXTENT
PERMITTED BY LAW. TO THE EXTENT SUCH WARRANTIES CANNOT BE DISCLAIMED, SUCH IMPLIED
WARRANTIES SHALL APPLY ONLY FOR THE WARRANTY PERIOD SPECIFIED ABOVE. PLEASE NOTE THAT
SOME STATES DO NOT ALLOW LIMITATION ON HOW LONG AN IMPLIED WARRANTY (OR CONDITION) LASTS.
SO THE ABOVE LIMITATION MAY NOT APPLY TO YOU.
EXCEPT AS PROVIDED IN THIS WARRANTY AND TO THE EXTENT PERMITTED BY LAW, AIR LIFT COMPANY
SHALL NOT BE LIABLE FOR ANY DIRECT, SPECIAL, INCIDENTAL OR CONSEQUENTIAL DAMAGES RESULTING
FROM ANY BREACH OF WARRANTY OR CONDITION, OR ARISING IN CONNECTION WITH THE SALE, USE
OR REPAIR OF AIR LIFT PERFORMANCE PRODUCTS, OR UNDER ANY OTHER LEGAL THEORY, INCLUDING
BUT NOT LIMITED TO LOSS OF USE, LOSS OF REVENUE, LOSS OF ACTUAL OR ANTICIPATED PROFITS,
LOSS OF THE USE OF MONEY, LOSS OF BUSINESS, LOSS OF OPPORTUNITY, LOSS OF GOODWILL, AND
LOSS OF REPUTATION. AIR LIFT COMPANY’S MAXIMUM LIABILITY SHALL NOT IN ANY CASE EXCEED THE
PURCHASE PRICE PAID BY YOU FOR THE AIR LIFT PERFORMANCE PRODUCT. PLEASE NOTE THAT SOME
STATES DO NOT ALLOW THE EXCLUSION OR LIMITATION OF INCIDENTAL OR CONSEQUENTIAL DAMAGES,
SO THE ABOVE LIMITATION OR EXCLUSION MAY NOT APPLY TO YOU.
MN-946
31
Installation Manual
Limited Warranty and Returns Policy, Cont.
HOW TO GET SERVICE
If a defect in workmanship or materials causes your Air Lift Performance product to become inoperable within the
warranty period, before returning any defective product, call Air Lift Company at (800) 248-0892 in the U.S. and
Canada (elsewhere, (517) 322-2144) to obtain a Returned Materials Authorization (RMA) number. The consumer
shall be responsible for removing (labor charges) the defective product from the vehicle and returning it, shipping
costs prepaid, to Air Lift Company for verification. Returns to Air Lift Company must be postage prepaid and sent to:
Air Lift Company • 2727 Snow Road • Lansing, MI • 48917. You must prove to the satisfaction of Air Lift Company
the date of original purchase of your Air Lift Performance product. You must also enclose the RMA number and a
return address. A minimum $10 shipping and handling charge will apply to all warranty claims. You must also pack
the product to minimize the risk of it being damaged in transit. If we receive a product in damaged condition as the
result of shipping, we will notify you and you must seek a claim with the shipper.
WHAT AIR LIFT COMPANY WILL DO
If you submit a valid claim to Air Lift Company during the warranty period, Air Lift Company will, at its option, repair
your Air Lift Performance product or furnish you with a new or rebuilt product. Air Lift Company will not reimburse
you for repairs or replacement parts provided by other parties. Your repaired or replacement Air Lift Performance
product will be returned to you (subject to payment of the required warranty claim shipping and handling charge)
and it will be covered under the warranty for the balance of the warranty period, if any. When a product or part is
replaced, any replacement item becomes your property and the replaced item becomes property of Air Lift Company.
You are responsible for installation/reinstallation (labor charges) of the product.
HOW THE LAW RELATES TO THIS WARRANTY
THIS WARRANTY GIVES YOU SPECIFIC LEGAL RIGHTS AND YOU MAY ALSO HAVE OTHER RIGHTS WHICH
VARY FROM STATE TO STATE. BY THIS WARRANTY, AIR LIFT COMPANY DOES NOT LIMIT OR EXCLUDE
YOUR RIGHTS EXCEPT AS ALLOWED BY LAW. TO FULLY UNDERSTAND YOUR RIGHTS, YOU SHOULD
CONSULT THE LAWS OF YOUR STATE.
32
MN-946
Installation Manual
Replacement Information
If replacement parts are needed, contact the local dealer or call Air Lift Company customer service at (800) 248-0892.
Most parts are immediately available and can be shipped the same day.
Contact Air Lift Company customer service at (800) 248-0892 or (517) 322-2144 first if:
• Parts are missing from the kit.
• Technical assistance on installation or operation is
needed.
• Broken or defective parts in the kit.
• Wrong parts in the kit.
• Have a warranty claim or question.
Contact the retailer where the kit was purchased:
• If it is necessary to return or exchange the kit for any reason.
• If there is a problem with shipping if shipped from the retailer.
• If there is a problem with the price.
Contact Information
Contact Air Lift Company’s customer service department by calling (800) 248-0892, Monday through Friday with
questions, comments or for technical assistance. For calls from outside the USA or Canada, call (517) 322-2144.
Contact customer service anytime at [email protected].
For inquiries by mail, our address is P.O. Box 80167, Lansing, MI 48908-0167. The shipping address for returns is
2727 Snow Road, Lansing, MI 48917.
Contact the Air Lift Performance sales team anytime at [email protected] or visit www.airliftperformance.
com.
MN-946
33
Need Help?
Contact Air Lift customer service department at
(800) 248-0892, Monday through Friday. For calls
from outside the USA or Canada, call (517) 322-2144.
Thank you for purchasing Air Lift Performance products!
Air Lift Company • 2727 Snow Road • Lansing, MI 48917 or P.O. Box 80167 • Lansing, MI 48908-0167
Toll Free (800) 248-0892 • Local (517) 322-2144 • Fax (517) 322-0240 • airliftperformance.com
Printed in
the USA
Air Lift
Performance
3H /3P
™
™
Control System
MN-948 • (011510) • ERN 7687
P
A
T
E
N
T
E
D
USER GUIDE
For maximum effectiveness and safety,
please read these instructions completely
before proceeding with installation.
Failure to read these instructions can result in an
incorrect installation.
Download the App for
the Best #lifeonair
The Air Lift Performance 3 mobile app allows
for full integration of your new 3H/3P control
system on compatible mobile devices. Simply
download the FREE app to not only take full
control of your system, but to always have the
latest system firmware with updates directly
from the app.
Visit air-lift.co/3app to download.
See page 9 for instructions on pairing your
device.
TABLE OF CONTENTS
Introduction. . . . . . . . . . . . . . . . . . . . . . . . . . . . . . . . . . . . . 4
Important Safety Notices. . . . . . . . . . . . . . . . . . . . . . . . . . . . . . . . . . . . . . 4
Main Controls. . . . . . . . . . . . . . . . . . . . . . . . . . . . . . . . . . . . 5
Quick Reference Guide. . . . . . . . . . . . . . . . . . . . . . . . . . . . 6
Getting Started. . . . . . . . . . . . . . . . . . . . . . . . . . . . . . . . . . . 7
Display Menu. . . . . . . . . . . . . . . . . . . . . . . . . . . . . . . . . . . . 8
Operation. . . . . . . . . . . . . . . . . . . . . . . . . . . . . . . . . . . . . . . 9
Setup Menu . . . . . . . . . . . . . . . . . . . . . . . . . . . . . . . . . . . . 10
Calibration Menu. . . . . . . . . . . . . . . . . . . . . . . . . . . . . . . . 12
Calibration Detail Explained. . . . . . . . . . . . . . . . . . . . . . . 14
Firmware Updates. . . . . . . . . . . . . . . . . . . . . . . . . . . . . . . 16
Additional Information . . . . . . . . . . . . . . . . . . . . . . . . . . . 18
About Menu . . . . . . . . . . . . . . . . . . . . . . . . . . . . . . . . . . . . 19
System Messages. . . . . . . . . . . . . . . . . . . . . . . . . . . . . . . 20
VIAIR Duty Cycle/Working Pressure. . . . . . . . . . . . . . . . 22
3H/3P User Guide
Introduction
The purpose of this publication is to assist with the calibration, maintenance,
and troubleshooting of the Air Lift Performance 3P or 3H control systems.
Read the entire user guide before beginning calibration or performing any
maintenance, service or repair. The information includes a step-by-step
calibration set-up, display options and functions, and diagnostic troubleshooting.
Air Lift Company reserves the right to make changes and improvements
to its Air Lift Performance products and publications at any time. For the
latest version of this manual, contact Air Lift Company at (800) 248-0892
or visit www.airliftperformance.com.
IMPORTANT SAFETY NOTICES
Before servicing the vehicle, make sure to turn
off “rise on start” and “preset maintain.” This will
eliminate any unintended suspension cycling if you
need to turn the key on in the vehicle for any reason.
WARNING
Only use the Air Lift Performance 3 App on a mobile
device when the vehicle is in a clear line of sight. To
avoid the risk of serious injury or harm, verify that
no person or thing is near or in the way of the vehicle’s path of travel while
cycling the suspension.
WARNING
For user safety and to prevent vehicle damage, the
system has a 25% or 25 PSI minimum drive height
as the default. Due to extreme risk of danger to the
user or vehicle, Air Lift Company strongly recommends not to change this
value. If for some reason the minimum drive height is set below the default
value, Air Lift Company suggests this setting only be used while the vehicle
is stationary. It is possible to set the vehicle at a height that is below this
threshold, then start driving. This is a universal system and settings will be
different for every user and vehicle. The installer is responsible to determine
how low the suspenion can be set without causing damage. It is the sole
responsibility of the user, and Air Lift Company will not be held liable for,
anything that may happen to the operator or the vehicle as a result of the
user’s choice to alter these default values below recommended minimums.
WARNING
Floor jacks can be dangerous. Whenever using a
floor jack, make sure it is rated for the load it is lifting.
Check the vehicle owner’s manual for information
about where to place the jack. Before raising the vehicle, place wheel
chocks in front and behind the wheels to prevent them from rolling. Always
use jack stands to support the vehicle. Never get under or place any body
parts under a vehicle that is solely supported by the jack.
WARNING
4
MN-948
3H/3P User Guide
Main Controls
Mode Indicator
Tank pressure
Front Left Bag
Pressure
Front Right Bag
Pressure
Rear Left Bag
Pressure
Rear Right Bag
Pressure
System Messages
Fault Indicator
Manually increase
and decrease front
left bag pressure.
User-defined
Button
(See Page 7
All-Up Button)
Preset Ride
(Middle Button)
Preset High
(Up Button)
Manually increase
and decrease rear
left bag pressure.
Preset Low
(Down Button)
User-defined
Button
(See Page 7
All-Down Button)
MN-948
Manually increase
and decrease front
right bag pressure.
Manually increase
and decrease rear
right bag pressure.
5
3H/3P User Guide
Quick Reference Guide
Main Menu
Screen
Sub-Menu
Data
Default
Brightness
Brightness Sleeping
Sleep Time
Level 1-10
Level 1-10
5-60 Sec
All-Up
Front-Down
Preset
All-Down
Front-Up
Preset
Air-Out
PSI
BAR
Off
On
Off
On
0-100 PSI (Pressure)
0-100% (Height)
Height
Pressure
Off
Level 7
Level 4
10 Sec
All-Up Button
Display
All-Down Button
Units
Rise-on-Start
Pre-Set Maintain
Minimum Drive Height
Operation
Pressure/Height Mode
Anti Cross-Load (Height)
Axle Equalization (Pressure)
Show Mode
Bluetooth Pairing
Sensor Tool
Compressor
Setup
Min. Battery (Voltage
to allow compressor to
still run)
Factory Reset
On/Off
Enable/Disable
Compressor
Dual/Single
Max Pressure
Duty Cycle
Calibration
6
Wizard
On
Off
On
Off
On
See Page 10
See Compressor Main
Menu
10-15 Volts
Cancel
Reset All
Off
On
Enabled
Disabled
Single
Dual
150-200 PSI
33%
50%
66%
75%
100%
See Page 12
All-Up
Air-Out
PSI
Off
Off
25 PSI / 25%
Pressure
On
Off
Off
—
—
11 Volts
Cancel
Off
Enabled
Single
150 PSI
50%
—
MN-948
3H/3P User Guide
Getting Started
This User Guide is designed to demonstrate
all the different menu options and default
settings that will help make using this system
easy and enjoyable.
1. To get to the main menu screen,
push the middle (preset ride) button
simultaneously with either the up (preset
high) button or down (preset low) button.
2. All other settings
and parameters will
be detailed in the
following pages to
ensure the system is
set up accurately.
3. Use the preset low
and preset high
buttons to scroll.
User-defined button
Preset high (up)
Preset ride (middle)
Preset low (down)
User-defined button
4. Green text indicates the last saved
value.
MN-948
7
3H/3P User Guide
Display
BRIGHTNESS
Set the brightness for the display while in use.
1. Level 1-10
2. Use the up and down buttons to increase
or decrease luminosity in 10% increments.
3. Level 7 (default)
BRIGHTNESS SLEEPING
Set the brightness for the display after it goes
into sleep mode.
1. Level 0-10
2. Use the up and down buttons to increase
or decrease luminosity in 10% increments.
3. Level 4 (default)
SLEEP TIME
Set the amount of time it takes to revert back
to the main screen and for the display to go to
sleep.
1. 5-60 seconds.
2. Use the up and down buttons to increase or
decrease time in 1-second increments.
3. 10 seconds (default)
ALL-UP BUTTON
Set function for the all-up button.
1. All-up (default)
2. Front-up
3. Preset
ALL-DOWN BUTTON
Set function for the all-down button.
1. All-down
2. Front-down
3. Preset
4. Air-out (default)
UNITS
Set units of measure to PSI or BAR.
1. PSI (default)
2. BAR
8
MN-948
3H/3P User Guide
Operation
RISE-ON-START
This setting brings the vehicle to ride height
at key-on if below ride height.
1. Off (default)
2. On
PRESET MAINTAIN
When enabled, the Preset Maintain will maintain
the selected preset, whether pressure or height.
1. Off (default)
2. On
MINIMUM DRIVING HEIGHT
Set the minimum vehicle ride height. The system
will not deflate below this level while driving.
1. 0-100 PSI (pressure mode) or 0-100%
(height mode)
2. Hold down the up or down button to
cycle quickly to 0 or 100 PSI or press the
buttons individually to go up or down 1 PSI at a time.
3. 25 PSI (pressure mode) or 25% (height mode) (default)
PRESSURE/HEIGHT MODE
Set system to operate in height or pressure mode.
1. Height
2. Pressure (default)
ANTI CROSS-LOAD/AXLE EQUALIZATION
Set system to equalize the axle to prevent cross-loading.
1. Off
2. On (default)
SHOW MODE
This provides operation with ignition off for one ignition cycle.
(Running compressor will drain the battery.)
1. Off (default)
2. On
BLUETOOTH PAIRING
Set to “on,” to enable Bluetooth pairing with a compatible mobile device
for one ignition cycle. If no display is present, pairing mode can be entered
by: turning the ignition on 3 seconds, ignition off 3 seconds, ignition on.
MN-948
9
3H/3P User Guide
Setup
SENSOR TOOL (HEIGHT MODE
MUST BE ENABLED)
This tool is used to ensure that the range of
the height sensors as installed are sufficient
to provide optimal accuracy for the system.
(Each time that this tool is used it will reset and
initially show low range until the suspension is
cycled to tell the system its range.)
1. At any time press the “Preset Ride” button
to exit the tool.
2. By cycling the suspension up and down,
the tool will determine the following:
• Range low – Not enough range in the
sensor to portray accurate data.
• OK – The range of the sensor is
adequate for accurate data.
• Limit – The range of the sensor is at or
beyond the bounds of acceptable data.
COMPRESSOR* (SETUP)
ON/OFF
Control the compressor manually. In the
default setting of “Off” the compressor will
operate normally. Selecting “On” will activate
the compressor for troubleshooting.
1. Off (default)
2. On
ENABLE/DISABLE
Enable or disable the compressor until the next
ignition cycle.
1. Enabled (default)
2. Disabled
* The 3H/3P system can be installed with one or two compressors.
10
MN-948
3H/3P User Guide
Setup, Cont.
COMPRESSOR (SETUP, CONT.)
DUAL/SINGLE
Set based on whether a dual or single
compressor setup is installed. If using a
second compressor and harness, dual must be
selected for proper operation.
1. Single (default)
2. Dual
MAX PRESSURE
Set the maximum tank pressure. The
compressor will turn on at 15 PSI below max
tank pressure.
1. 150-200 PSI or 10342-13789 mBAR
2. Holding the up or down button quickly
cycles between 150 PSI/10342 mBAR
and 200/13789. A single press changes
pressure one increment at a time.
3. 150 PSI (default)
DUTY CYCLE
This is for the user to set the compressor duty cycle.
WARNING
Setting the duty cycle higher than the manufacturer’s
recommended value may cause compressor damage.
See Page 22 for compressor duty cycle and working pressure.
1. 33%
4. 75%
2. 50% (default)
5. 100%
3. 66%
MINIMUM BATTERY VOLTAGE
Set minimum battery voltage required to allow compressor to turn on.
1. 10-14 volts
2. 11 volts (default)
FACTORY RESET
Resets all settings and calibration back to factory default.
1. Cancel (default)
2. Reset all
Cycle ignition to complete the factory reset.
MN-948
11
3H/3P User Guide
Calibration
WIZARD
Run this program to complete calibration. At any
time, cancel calibration by pressing “stop.”
1. Make sure the vehicle is on a level surface
and select “Yes.”
2. Verify that the front wheels are straight to
prevent damage to fenders, then select
“Yes.”
3. Verify nothing is under the vehicle that
could cause undercarriage damage, then
select “Yes.”
4. Verify that the manifold is securely
mounted, then select “Yes.”
NOTE
An unmounted manifold will not allow
Preset Maintain to function properly.
5. Determine how many compressors are in
use. If using a single compressor, select
one. If using two compressors with the
second compressor harness (part number: 27703) select
two.
6. If height sensors are installed, select “Yes.” If running as a
pressure only system, select “No.” If only running pressure,
system will now skip to step 8.
7. If height sensors are installed, select whether to calibrate
them automatically or manually. Most vehicles can be
calibrated automatically. The manual option can be used
when there is a custom setup where there may be concern
about component interference at either high or low limits.
8. After selecting “Yes” the system will begin calibration.
Selecting “No” will exit the calibration wizard.
9. System checks to make sure manifold is mounted in a
proper orientation.
10. System is calibrating the accelerometer.
11. System is now calibrating the front axle for Pressure mode.
12. System is now calibrating the rear axle for Pressure mode.
If using the system for Pressure only, calibration will
complete after this step.
12
MN-948
3H/3P User Guide
Calibration, Cont.
WIZARD
13. Height Sensor Calibration (Upper)
a. If Auto Sensor Calibration was
selected, the system will cycle the
suspension to calibrate its upper limit
position.
b. If Manual Calibration was selected,
the system will now ask for the user
to set the “Upper Limits.” Do this by
using the manual buttons to raise
the suspension to its highest setting
on all four corners. Press the middle
button when complete.
14. Height Sensor Calibration (Lower)
a. If Auto Sensor Calibration was
selected, the system will now cycle
the suspension to calibrate its lower
limit position.
b. If Manual Calibration was selected,
the system will now ask for the user
to set the “Lower Limits.” Do this by using the manual
buttons to lower the suspension to its lowest setting
on all four corners. Press the middle button when
complete.
15. System will now check Height Sensor vehicle wiring (Only
completes this if user selected Auto Sensor).
16. The system will now perform a movement calibration for
height mode.
17. Once it has run through the calibration wizard successfully, it
will say “Calibration Successful” and the system will then be
ready for use.
MN-948
13
3H/3P User Guide
Calibration Detail Explained
AUTO SENSOR LIMITS
When the program is completing the auto sensor calibration, make
sure the wheels are straight and all people stand clear as the
vehicle will move up and down during calibration. The user doesn’t
have to do anything during this portion of the calibration.
MANUAL SENSOR LIMITS
Below is what is being completed during the wizard’s manual
sensor calibration. Use this option when making a custom setup
where there may be concern about component interference at
either high or low limits. (e.g. Wheel to fender interference – if the
system is aired out and the wheel and fender make contact before
the suspension can reach its limit.)
1. Set upper limit
●● Use the manual buttons to set the upper height sensor
limit.
●● Press the ride preset button to continue.
2. Set lower limit
●● Use the manual buttons to set the lower height sensor
limit.
●● Press the middle button to continue.
3. Calibration is complete.
PRESSURE
Below is what the wizard is doing during the pressure calibration.
1. Front calibration – The system actuates the suspension
through its range of travel to calibrate pressure mode on the
front axle.
2. Rear calibration – The system actuates the suspension
through its range of travel to calibrate pressure mode on the
rear axle.
3. At any time, cancel calibration by selecting “stop.”
14
MN-948
3H/3P User Guide
Calibration Detail Explained, Cont.
HEIGHT
Below is what the wizard is doing during height calibration.
The system will actuate suspension through it’s entire height range
to calibrate height mode.
1. Movement calibration
●● A message will indicate completion of the movement
calibration.
●● Press the middle button to continue.
2. At any time, cancel calibration by pressing “stop.”
MANIFOLD
Below is what the wizard is doing during manifold calibration.
1. If the manifold is mounted correctly, it will indicate “Complete –
calibration successful.”
2. If the manifold is mounted incorrectly, it will indicate “Fault –
calibration failed.”
3. If mounted incorrectly, follow the Installation Guide for proper
mounting of the manifold and run calibration again.
MN-948
15
3H/3P User Guide
Firmware Updates
MOBILE DEVICE APP
The app, which is free and requires no additional
hardware, is available in the Apple App Store.
The app will be available soon for Android
devices in Google Play. Search for Air Lift
Performance.
• Operation of the mobile app is similar
to operation of the 3H/3P controller.
The main difference are:
●● To access the menu screens, tap
the gear in the upper right corner.
●● The sensor tool is only available
on the controller.
• App users will get notifications that
there is a firmware update, app update
or other system update.
• Firmware updates can only be made
through the mobile app.
After installing the system, all users should
download the app and check for firmware
updates.
Find direct links to the apps at air-lift.co/3app.
Check www.airliftperformance.com/firmware
periodically for firmware updates.
16
MN-948
3H/3P User Guide
Firmware Updates, Cont.
SWITCHING TO LANDSCAPE MODE
Users have the option of changing the orientation
of the 3H/3P controller to landscape mode.
•
To change modes, update the firmware
and choose “Keypad Normal,” “Keypad
Right” or “Keypad Left.”
•
While the controller can be used with the
display to the right or left of the keypad,
it cannot be oriented so that the keypad
is above the display.
•
To rotate the keypad, remove the two
screws on the back of the controller.
Remove the keypad, rotate it to the
preferred position and re-secure the
screws to 14-16 oz.-in.
3H/3P DISPLAY
ORIENTATION
OPTIONS
Acceptable
Keypad
Normal
Acceptable
Keypad
Right
MN-948
Unacceptable
Acceptable
Keypad
Left
17
3H/3P User Guide
Additional Information
PRESET MODES
There are three standard preset modes used in
this system. If the user chooses, the all-up and
all-down buttons can be set as two additional
presets which will follow the same requirement
for operation below (see page 9).
Presets are viewed, used and changed/saved
with the following procedures:
User-defined preset
1. Press the appropriate
Preset high
preset key once to display
Preset ride
current preset values.
2. Double press the preset key
Preset low
to obtain the preset value
User-defined preset
that is currently saved.
3. Press and hold the preset
key to change the preset value.
CHANGING PRESETS
1. Press and hold the preset key you want to
change. The display will allow you to manually
change those values using the corner keys.
(Values will be shown as PSI for pressure and
percentage for height).
2. Press and hold the preset key again to save
your selected values.
3. To exit without saving the current preset, press
any other preset button at any time.
DEFAULT SETTINGS
1. Preset low – 25 PSI (pressure)/ 25% (height)
2. Preset ride – 50 PSI (pressure)/ 50% (height)
3. Preset high – 75 PSI (pressure)/ 75% (height)
It is possible to set the vehicle
at a height that is below
the minimum drive height
threshold, then start driving. The 3H/3P system is
a universal system and settings will be different for
every user and vehicle.
WARNING
18
MN-948
3H/3P User Guide
About
Select this option to see what version of
software is running on the system, product
serial number and Bluetooth identification
address.
Users may need to provide this information
when calling Air Lift Company customer
service.
The manifold or display software can be
updated using the mobile app.
Check www.airliftperformance.com/firmware
periodically for firmware updates.
MN-948
19
3H/3P User Guide
System Messages
Label
Fault
Problem
NOTICE
Calibration not completed Customer attempts to use presets prior to calibration.
NOTICE
Manifold upside down,
please re-mount
The manifold has been mounted in an unacceptable
orientation.
CAUTION
Leak detected on corner
(FL, FR, RL, RR*)
A leak has been detected between manifold and the air
spring that is causing a drop in air pressure.
CAUTION
Check height wiring and
plumbing (FL, FR, RL,
RR*)
The system has detected that the either the wiring is
incorrect or not responding or lines are plumbed incorrectly
for the given corner.
CAUTION
Waiting for tank to fill
Detected that tank pressure dropped 15 PSI below user
defined max tank pressure value.
DANGER
Height sensor failure
(FL, FR, RL, RR*)
Detected that sensor signal has gone invalid or out of range
for the given corner.
CAUTION
Range fault
Height sensor range is too low to provide accurate data to
the user and will need to be adjusted to provide adequate
sensor travel.
CAUTION
Limit reached
Height sensor travel is out of acceptable range of 10-90%
of full sensor travel. Re-adjust sensor to be in range of
acceptable wheel travel.
CAUTION
Min drive height reached
The system has detected vehicle is moving and therefore
prevented vehicle from going below minimum drive height.
CAUTION
Low battery voltage
Vehicle has reached the user defined set value for minimum
battery voltage used for disabling the compressor.
CAUTION
High battery voltage
Vehicle has detected battery voltage above 16V.
DANGER
Pressure sensor failure
(FL, FR, RL, RR*)
Detected a pressure sensor failure at the manifold block for
the corner sensor.
CAUTION
Pressure preset mode
disabled
System has detected a failure in the pressure sensor and
disabled pressure preset. Can still operate height preset if
installed.
DANGER
Corner height sensor
failure (FL, FR, RL, RR*)
Corner height sensor voltage is out of range.
* FL = Front left corner
FR = Front right corner
RL = Rear left corner
RR = Rear right corner
20
MN-948
3H/3P User Guide
System Messages
Label
Fault
Problem
CAUTION
Corner height sensor
near limit (FL, FR, RL,
RR*)
Height sensor range is near limit of operation at the given
corner.
CAUTION
Compressor freeze
The system has detected no increase in tank pressure
when compressor commanded on and compressor may
be blocked.
CAUTION
Compressor overheat
The compressor duty cycle has been reached and
excessive usage has been detected which could overheat
the compressor.
CAUTION
Tank pressure
sensor failure
The system detected a pressure sensor failure at the
manifold block for the tank sensor.
System will disable the compressor when a tank pressure
sensor failure has been detected to eliminate the
opportunity of overfilling the tank.
CAUTION
Tank pressure too low
Tank pressure has fallen below 85 PSI. Will reset when
pressure reaches 85 PSI.
Adjusting minimum ride
height below 25% may
result…..
Setting the minimum driving height below the 25% default
may result in vehicle damage and personal injury. Agreeing
to and understanding this safety concern will allow the
system to be set below 25%.
DANGER
MN-948
21
3H/3P User Guide
VIAIR Compressor Duty Cycle/
Working Pressure
COMPRESSOR RATINGS (STANDARD: 16444)
Max working pressure: 200 PSI
Duty cycle at rated pressure: 50% @ 200 PSI, 100% @ 100 PSI
Users have the option of installing several other compressors. Below are
examples with their duty cycles and working pressures.
Air Lift P/N
VIAIR Compressor
Max Working
Pressure
Duty Cycle @ Rated Pressure
16130 (100C)
130 PSI
15% @ 100 PSI and 130 PSI
16190 (325C)
150 PSI
33% @ 100 PSI and 150 PSI
16380 (380C)
200 PSI
55% @ 200 PSI and 100% @ 100 PSI
16400 (400C)
150 PSI
33% @100 PSI and 150 PSI
16444 (444C)
200 PSI
50% @ 200 PSI and 100% @ 100 PSI
16450 (450C)
150 PSI
100% @ 100 PSI and 150 PSI
16480 (480C)
200 PSI
50% @ 200PSI and 100% @ 100 PSI
22
MN-948
3H/3P User Guide
Notes
MN-948
23
Need Help?
Contact our customer service department by calling
(800) 248-0892. For calls from outside the USA or
Canada, call (517) 322-2144.
Thank you for purchasing
Air Lift Performance products!
Air Lift Performance • 2727 Snow Road • Lansing, MI 48917 or
PO Box 80167 • Lansing, MI 48908-0167
Toll Free (800) 248-0892 • Overseas (517) 322-2144
Fax (517) 322-0240 • www.airliftperformance.com
Printed in
the USA