1
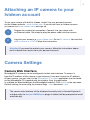
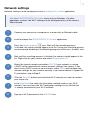
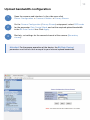
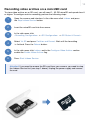
4
Attaching an IP camera to your
Ivideon account
To use your camera with built-in Ivideon, attach it to your personal account
on the Ivideon website - www.ivideon.com. If you do not have an Ivideon account
yet, please visit www.ivideon.com and sign up.
1
Prepare the camera for connection. Connect it to your router with
an Ethernet cable. Get ready to plug the power cable into the camera.
2
Log into your account at www.ivideon.com. Go to My cameras tab and click
Add a camera or a DVR. Follow the instructions.
Attention! If you need to reattach your camera, follow the instructions above,
but first delete the camera from your personal account.
Camera Settings
Camera Web Interface
Microdigital IP-cameras can be configured via their web-interface. To access it,
type the IP-address of the camera in your browser. If you don't know the IP-address
of your camera, you can see it in the Microdigital IP installer application (can be found
on the Microdigital CD supplied with the camera. Also, the application
is available for downloading on the Microdigital website). Click Admin in the top menu.
Default settings for accessing the camera: login - root, password - root.
The camera web-interface will be displayed correctly only in Internet Explorer 8
or higher with the Active X MDiViewer plugin installed (will be prompted to install
automatically).