1
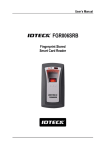
Quick Installation Guide Fingerprint Identification Proximity Reader ※ FGR006 QUICK INSTALLATION GUIDE 1. WHAT’S INCLUDED Please unpack and check the contents of the box. If any of these parts are missing, please contact a nearby distributor or IDTECK. FGR006 (1ea) User Manual (1ea) Master Card (1ea) RS232C Stereo Jack (Optional) 3.0*30 Screw (2ea) 3.0*12 Screw (2ea) 2 6.0*30 Anchor Bolt (2ea) ※ FGR006 QUICK INSTALLATION GUIDE 2. PARTS CODE AND DESCRIPTION 2.1. Panel Description 2.2. Connection and Color Code Table Signal Color Main Power (+12V) Power Ground (GND) Wiegand Data 0 Out / ABA Track II Data Out Red Black Green Wiegand Data 1 Out / ABA Track II Clock Out White Error Signal Out / ABA Track II CP Out Orange OK Signal Out Orange with Black stripe Tamper Switch Out Purple Wiegand Data 0 In Pink Wiegand Data 1 In Cyan LED Control In Blue with White stripe Buzzer Control In White with Red stripe RS422 (TX+) Gray RS422 (TX-) Yellow RS422 (RX+) Brown RS422 (RX-) Blue *RS485 communication, you should combine Gray (TX+) wire and Brown (RX+) wire, Yellow (TX-) wire and Blue (R X-) wire and then connect the two combined wires to a converter. We recommend you to use an INC300 converter. 3 ※ FGR006 QUICK INSTALLATION GUIDE 3. NETWORK CONFIGURATION (Figure: Network Configuration) 4. INSTALLATION 1. Drill two Ø 0.12"(3mm) holes, 4.45"(113mm) apart vertically and drill one Ø 0.5"(12.7mm) hole in the center of the two holes for the reader cable. 2. Connect wires between the controller and the FGR006, and then put the reader cable into the center hole and install the main unit by using two 3.0*30 screws. 3. Put the bezel into the main unit and until you hear the locking sound. 4 ※ FGR006 QUICK INSTALLATION GUIDE 5. CONNECTION 5.1. Power Connections (Figure: Power Connection) Caution * Even in case of using external power, you MUST connect GND(-). 5.2. Input Connections (Figure: Input Connection) 5 ※ FGR006 QUICK INSTALLATION GUIDE 5.3. Output Connection Connection for 26Bit/34Bit Wiegand output - Connect +12V (Red) of FGR006 to +12V of a Reader port of ACU. - Connect +GND (Black) of FGR006 to GND of a Reader port of ACU. - Connect WIEGAND DATA0 OUT (Green) of FGR006 to D0 of a Reader port of ACU. - Connect WIEGAND DATA1 OUT (White) of FGR006 to D1 of a Reader port of ACU. - Connect OK SIGNAL OUT (Orange with Black Stripe) of FGR006 to an Input port of ACU. - Connect ERROR SIGNAL OUT (Orange) of FGR006 to an Input port of ACU. (26bit/34bit Wiegand Output) 5.4. External Reader Connection - Connect +12V of an external reader to +12V (Red) of a FGR006. - Connect GND of an external reader to GND (Black) of a FGR006. - Connect WIEGAND DATA0 OUT of an external reader to WIEGAND DATA0 IN (Pink) of a FGR006. - Connect WIEGAND DATA1 OUT of an external reader to WIEGAND DATA1 IN (Cyan) of a FGR006. - Connect FGR006 and ACU for WIEGAND output. (Figure: External Reader Connection) 6 ※ FGR006 QUICK INSTALLATION GUIDE 6. Communication 6.1. Board ID Setting for RS485 / RS422 Communication Board ID is the unique address of the device to communicate with PC and it is set by 8 DIP switches. Each DIP switch has assigned address values. Board ID is decided depending on positions of switch set to ‘ON’ or ‘OFF’ position. From ‘000’ to ‘254’, total 255ea of Board ID can be set and Board ID 255 is used for system initialization, thus; you cannot use it as Board ID. The method of setting Board ID differs depending on the version of product. Therefore, you should check the version and then set Board ID. For 8.0.0 and higher version of FGR006 / 8.1.0 and higher version of IP-FGR006 / 4.0.0 and higher version of FGR006SR Each of 8 DIP switches has assigned address values as figure below. Board ID is sum values of each switch that are set to ‘ON’ position. Refer to the examples below and set Board ID. Example 1 Example 2 Example 3 Example 4 (Initialization) 1+4=5 (Board ID =5) 4+8+64=76 (Board ID =76) 1+4+16+128=149 (Board ID =149) Board ID =255 (Initialization) For lower version of 8.0.0 FGR006 / lower version of 8.1.0 IP-FGR006 / lower version of 4.0.0 FGR006SR Each of 8 DIP switches has assigned address values. Board ID is sum values of each switch that are set to ‘OFF’ position. Refer to the examples below and set Board ID. Example 1 Example 2 Example 3 Example 4 1+4=5 (Board ID =5) 4+8+64=76 (Board ID =76) 1+4+16+128=149 (Board ID =149) Board ID =255 (Initialization) Caution Each Board ID on the same communication loop must not be duplicated. If there are duplicated Board ID in the same communication roof, the communication error may occur. 7 ※ FGR006 QUICK INSTALLATION GUIDE 6.2. RS232 Communication Connection For RS232 communication, you should use an external RS232C stereo jack. - Connect the RS232C stereo jack between the stereo jack plug on the bottom of the FGR006 and the COM1 or COM2 port of the Host Computer - Install and run the application software. For more information, refer to 10.5 External RS232C stereo jack (OPTION) of the main manual of FGR006. 6.3. RS485 Communication Connection You need RS485/RS232 *Converter to connect FGR006 to HOST PC using RS485 communication. *We recommend you to use INC300 converter. 8 ※ FGR006 QUICK INSTALLATION GUIDE 6.4. RS422 Communication Connection You need RS485/RS232 *Converter to connect FGR006 to HOST PC using RS422 communication. *We recommend you to use INC400 converter. 9 ※ FGR006 QUICK INSTALLATION GUIDE 6.5. TCP/IP Communication Connection TCP/IP Communication Connection using RS422 Set this communication switch to RS422 (Figure: TCP/IP Communication Connection using RS422) TCP/IP Communication Connection using RS485 Set this communication switch to RS485 ILAN485 (Figure: TCP/IP Communication Connection using RS485) 10 ※ FGR006 QUICK INSTALLATION GUIDE 7. Operation 7.1. Master Card Registration mode 7.1.1. Master Card Registration A card presented to the FGR006 for the first time after initialization becomes the master card. For more information on the system indication during the master card registration process, refer to the 11.Operating Status of FGR006 of FGR006 User’s Manual. ※ NOTE: Master Card does not use fingerprint data. 7.1.2. Master Card Change You can change the Master Card again after system initialization. Alternatively, you can change the Master Card using the application software. Using the application software keeps the user data unchanged. Refer to the software manual for more details. Caution If the device is initialized, all data stored in the device will be cleared and the default setting values (factory setting values) will be reloaded. Therefore, the Initialization should be performed by authorized person only. 7.1.3. Master Card Function. The Master Card is used to toggle the FGR006 between the Reader mode and the Registration mode. ※ For example, If you present the master card in the Reader mode, the FGR006 shifts to the Registration mode. If you present the master card in the Registration mode, the FGR006 shifts to the Reader mode. 7.2. Registration mode You can go into Registration mode by presenting a Master Card. In the Registration mode, you can register new user cards or delete existing user cards. 7.2.1. User Card Registration. When registering a new card, you can select whether to register a fingerprint. To register a new card, follow steps below. 1) In normal mode, present a Master card to go into Registration mode. In Registration mode, LENS LED blinks at an interval of 1 sec. 2) Present a card to register to the FGR006. 11 ※ FGR006 QUICK INSTALLATION GUIDE 3) To register a fingerprint: When the light is turned on from the fingerprint scanner, place the fingerprint on it. When the light is turned off, remove the fingerprint. When the light is turned on again from the fingerprint scanner, place the fingerprint on it one more time. (Refer to the figure below ’Correct placement of fingerprint’) Not to register a fingerprint: When the light is turned on from the fingerprint scanner, do not wait until the light is turned off. 4) When the registration succeeded, FGR006 beeps 3 times. Otherwise, FGR006 beeps twice. 5) To register more cards, repeat the steps from 2) – 4) above. 6) To go back into Normal mode after registration, present a Master card to FGR006. ※ You can use application software to register users. (Figure: Correct placement of fingerprint) 7.2.2. User Card Deletion To delete registered user cards, follow the steps below; 1) In normal mode, present a Master card to go into Registration mode. In Registration mode, LENS LED blinks at an interval of 1 sec. 2) Present a card to delete to FGR006. 3) When the deletion succeeded FGR006 beeps 4 times. Otherwise, FGR006 beeps twice. 4) To register more cards, repeat the steps from 2) – 3) above. 5) To go back into Normal mode after deletion, present a Master card to FGR006. ※NOTE: You can delete user cards by using the application software. 7.3. Reader mode 7.3.1. Reader mode Function. In the Reader mode, when a card is presented, access of registered users is accepted and access of unregistered users is denied. - If a user is authorized, the FGR006 transmits the card number to the controller. In case of ‘Card + Fingerprint’ or ‘Fingerprint’ authentication, FGR006 also transmits OK Signal. - If a user fails to be authorized, the FGR006 transmits the error Signal to the controller. In case that ‘Extention’ mode is enabled, FGR006 also transmits card ID. 12 ※ FGR006 QUICK INSTALLATION GUIDE -For more details about OK Signal and Error Signal, refer to 6.1. FGR006 Functions of FGR006 User’s Manual. For information on the system indication in the Reader mode, refer to 11.Operating Status of the FGR006 of FGR006 User’s Manual. 7.3.2. Authentication RF + FINGER MODE: 1) Present a registered card to the FGR006. 2) When FGR006 read the card and the light is turned on from the scanner, place a registered fingerprint on the scanner. 3) When the fingerprint is successfully authenticated, the green LED is turned on for 1 sec. and FGR006 beeps for 1 sec. And the FGR006 transmits the ID information and OK Signal to the controller. 4) If the authentication fails, LENS LED blinks twice, and FGR006 beeps twice shortly and transmits Error Signal. And. In case that you have enabled ‘Extension mode’, FGR006 also transmits user ID information. RF-ONLY MODE: Present a registered card to the FGR006. In RF-Only mode, you don’t need to place your fingerprint on the fingerprint scanner. When authentication succeeded, the green LED is turned on and FGR006 beeps for 1 sec. And FGR006 transmits the ID information to the controller. 4) When the card is not a registered card, LENS LED blinks twice, and FGR006 beeps twice shortly and transmits Error Signal. And. In case that you have enabled ‘Extension mode’, FGR006 also transmits user ID information. 1) 2) 3) 7.4. Identification mode You can use Identification mode in Reader mode. When Identification mode is enabled, users can gain access by simply placing their fingerprint on the fingerprint scanner (without having to present the proximity card). The fingerprint scanner will be automatically activated when the user places the finger onto the fingerprint scanner. IDENTIFICATION MODE: 1) Place your finger onto the fingerprint scanner. 2) Light is automatically turned on from the fingerprint scanner. Keep the fingerprint still on the scanner until the light is turned off. 3) When authentication succeeded, the green LED is turned on and FGR006 beeps for 1 second. FGR006 transmits user ID information and OK Signal. 4) When authentication fails, the FGR006 beeps twice and transmits Error Signal. 13 ※ FGR006 QUICK INSTALLATION GUIDE 8. Operating Status of FGR006 Applicable to FGR006: V 3.0.0 or above LED OFF LED ON 8.1. LED Indicators Status LED LED BLINKING STATUS FUNCTION Power has supplied and the system is booting. After the system initialization is completed, the first card presented to the FGR006 becomes the Master Card. Booting Register Master Card Registration mode You can register or delete user cards. Reader mode Users can access the door in this mode. Initialization proceeding. is If system initialization is performed, all registered users are deleted. Initialization Completion System initialization is completed. 8.2. Beeper Sound Status BEEP NUMBER OF BEEPS STATUS 1 beep (1 sec.) Access Granted 2 beeps Error (Fingerprint or operation error) 3 beeps User Card is Registered 4 beeps User Card is Deleted 14




![13.56MHz [MIFARE] Contactless Smart Card](http://vs1.manualzilla.com/store/data/005689074_1-1b5ba2b7f854420e24ee51932ec4423a-150x150.png)