1
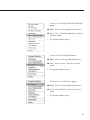
User Manual Sartorius ProControl@Inline Ethernet Software Program 98646-002-56 Contents Intended Use�������������������������������������� 4 Features���������������������������������������������� 4 Common Keyboard Shortcuts�������������� 4 Legal Notices�������������������������������������� 4 Launching the Application������������������ 5 Starting the Application���������������������� 5 Logging-In������������������������������������������ 5 The Main Window ������������������������������ 6 Setting the Password �������������������������� 8 Logging Out���������������������������������������� 8 Opening the Help Window ������������������ 9 Customizing Settings��������������������������10 System Settings ����������������������������������10 Alarm Configuration����������������������������13 Editing Alarm Settings ������������������������14 Deleting Alarm Settings ����������������������15 Printing the Alarm Settings������������������15 Defining Statistics��������������������������������16 Setting Statistics Times������������������������17 Setting the Language��������������������������18 Registering Devices����������������������������19 Adding Devices������������������������������������19 Editing Devices������������������������������������21 Deleting Devices����������������������������������22 Retrieving Device Data������������������������23 Pinging Devices ����������������������������������24 Managing Product Types (Checkweigher)����������������������������������25 Adding Product Types��������������������������25 Setting-up Parameters for each Weigh line������������������������������27 Editing Product Types�������������������������28 Copying Product Types������������������������29 Removing Product Types ��������������������31 Changing Tare and Density Values . . . . 32 Creating Batch Plans����������������������������33 Removing Batch Plans ������������������������34 Managing Product Types (Metal Detector). . . . . . . . . . . . . . . . . 35 Adding Product Types. . . . . . . . . . . . . . 35 Editing Product Types. . . . . . . . . . . . . 36 Copying Product Types. . . . . . . . . . . . . 37 Removing Product Types . . . . . . . . . . . 37 Monitoring Production Batches����������38 The Monitoring Window����������������������38 Setting Limits��������������������������������������39 Setting Button Sizes����������������������������39 Viewing Graphs ����������������������������������40 Using Graphs��������������������������������������42 Viewing Violations������������������������������43 Viewing Statistics��������������������������������45 Viewing the Device Status��������������������45 Checkweigher Remoting����������������������45 The Message Pane ������������������������������46 Running Offline Batches����������������������47 Monitoring Events������������������������������49 Opening the Alarm List Window����������49 Using the Alarm List Window ��������������51 The Statistics Window������������������������53 Using the Statistics Selection Window��53 Using the Statistics Window����������������55 2 Evaluating Statistics ��������������������������58 Automatic Statistics����������������������������58 Manual Printout����������������������������������61 Graphic Evaluation������������������������������62 Device Downtime Report����������������������64 Monitoring Data Communications������65 Using the Communication Logs Window��������������������������������������65 Backup and Archiving������������������������67 Archiving Samples ������������������������������67 Exporting Archived Data����������������������70 The Report Viewer������������������������������72 Using the Report Viewer����������������������72 Symbols The following symbols are used in these instructions: § indicates required steps $ indicates steps required under certain conditions > describes what happens after you have performed a particular step – indicates an item in a list ! indicates a hazard Using SPC@Inline Services ����������������76 Socket Listener Service������������������������76 Automatic Archiving����������������������������79 Automatic Statistics Printout ��������������80 Email Notification ������������������������������83 Licensing Procedures��������������������������85 Ordering Product Licenses��������������������85 Activating the Product������������������������87 Activating the Device License ��������������89 3 Intended Use Sartorius ProControl@Inline is designed for monitoring Sartorius checkweighers and metal detectors on production lines. SPCInline is a user-friendly program that makes it easy to check the connection of devices to the system server, monitor data transfer activity and manage the statistical data generated for every production batch. These instructions describe the use of the SPCInline software. Features SPCInline communicates with checkweighers and metal detectors over TCP/ IP. The software is installed on an application server and implements bidirectional communication with the networked checkweighers and metal detectors. Common Keyboard Shortcuts Keyboard shortcuts are provided for fast access to controls in the user interface, such as menu items and buttons. Press ALT to view the shortcut character. Press the underlined letter (or other character) while holding down the ALT key to activate the corresponding control. The following common Windows shortcuts are available: – [Esc]: Closes the active window – [Enter] ( ↵ ): Activates the default control (if any) in the active window – [F1]: Opens the Help window. 4 Legal Notices Copyright This documentation may not be duplicated or transmitted for any purpose whatsoever, whether in whole or in part, without the express written permission of Sartorius. This documentation is intended for use by the purchaser only. Transfer to third parties, whether free of charge or in return for payment, is not permitted. The software on the enclosed CD-ROM is the property of Sartorius. The software may not be copied, modified, reverse engineered or modified through assimilation. The purchaser may operate the software for his/her own purposes only, and may not permit use of the software by third parties, neither free of charge nor in return for payment. If you have any problems with the enclosed software, please inform the software vendor. Sartorius reserves the right to supply updated software with this product. No liability is accepted for software installed prior to purchase of this product. The purchaser bears liability for misuse of the product. Launching the Application Starting the Application § Double-clicktheSPCInlineshortcuton thedesktop, or § ClicktheWindows[Start]buttonand select[Sartorius],[SPCInline],[SPCInline] fromtheStartmenu� Ifyouhavenotlicensedthefullversion, thedemonotificationdialogopens� § Click[Continue]toproceed� > Thesplashscreenopens� > Afteramoment,thesplashscreencloses andtheOperatorLogindialogopens� Logging-In § Enterthepassword� § Click[Ok]� Note: Youareonlypermittedthreelogin attempts�Thethirdtimeaninvalidpasswordisentered,theapplicationshuts downautomatically�Theinitialpassword fortheapplicationis“admin�” Youcanchangethispasswordifdesired� 5 The Main Window Onceyouhaveenteredyourpassword, themainwindowopens�Thiswindow includesamenubarandtheSPCInline toolbar� Youcanusekeyboardshortcutstoaccess menucommandsbyholdingdownthe ALTkeyandpressingtheletterthatis underlinedinthemenunameormenu item� 6 [File] Menu – [ProductType]�OpenstheProductList window� – [BackupProcessData]�OpenstheBackup window� – [ExportAchiveData]�OpenstheExport ArchiveDatawindow� – [OfflineBatch]�OpenstheOfflineBatch dialog� – [SetPassword]�OpensthePassword Settingwindow� – [LogOff]�Lockstheapplication� – [UpdateLicense���]�Opensthelicense activationdialog� – [Exit]�Shutsdowntheapplication� [View] Menu – [Monitoring]�OpenstheProduction Monitoringwindow� – [Statistics]�OpenstheStatisticsSelection window – [AllViolations]�OpenstheAlarmList windowshowingbothtimeandtolerance violations� – [ToleranceViolations]�OpenstheAlarm Listwindowshowingtoleranceviolations only� – [TimeViolations]�OpenstheAlarmList windowshowingtimeviolationsonly� – [CommunicationLogs]�Opensthe CommunicationLogswindow� [Evaluation] Menu – [AutomaticStatistics]�OpenstheAutomaticStatisticswindow� – [ManualPrintout]�OpenstheManual Printoutwindow� – [GraphicEvaluation]�OpenstheGraphic Evaluationwindow� – [DowntimeReport]�OpenstheDowntime Reportwindow� [Configuration] Menu – [NetworkConfiguration]�Opensthe NetworkConfigurationwindow� – [Alarm]�OpenstheAlarmSettingswindow� – [StatisticsDefinition]�OpenstheStatistics Definitionwindow� – [StatisticsTimes]�OpenstheStatistics Timeswindow� – [SystemSettings]�OpenstheSystem Settingswindow� – [Language]�OpenstheSetLanguage window� [Window] Menu – [Cascade]�Arrangeswindowssothey overlap� – [Tile]�Arrangeswindowsastiles� – [CloseAll]�Closesallopenwindows� [Help] Menu – [Contents]�OpenstheHelpwindow� – [ContextSensitiveHelpF1]�Opensthe Helpwindowshowingtherelevanttopic� – [About���]�OpenstheAboutwindow� SPCInline Toolbar 7 Setting the Password Onceyouhaveloggedintothe SPCInlineprogram,youcanchangethe passwordatanytime� § OpentheFilemenuinthemainwindow andselect“SetPassword�” > TheSetPassworddialogopens� § Enterthecurrentpasswordinthe“Old Password”field� § Enterthenewpasswordinthe“NewPassword”field,andagaininthe“ConfirmNew Password”field� § Click[Ok]tosavethenewpassword� Ifyouentertheoldpasswordincorrectly, orifyourentryinthe“NewPassword”field didnotmatchyourentryunder“Confirm NewPassword,”thenewpasswordisnot saved,andanerrormessageisshown� $ Click[Cancel]toretaintheoldpassword� Logging Out Ifyoulogoutwhilebatchprocessing isinprogress,theapplicationislockedto preventunauthorizeduseandprocessing continuesinthebackground�Otherusers canaccesstheprogramonlybyenteringa validpassword� § OpentheFilemenuinthemainwindow andselect“LogOff�” > Amessageboxopenspromptingyoufor confirmation� § Click[Yes]� 8 Opening the Help Window § OpentheHelpmenuinthemainwindow andselect“Contents�” > TheHelpwindowopensandshowsthe tableofcontents� § Select“ContextSensitiveHelp”fromthe HelpmenuorpressF1� > TheHelpwindowopenswithadefault topicrelatedtotheactivewindow� 9 Customizing Settings System Settings Applicationpropertiesthatdonotrequire frequentreconfigurationcanbemodified intheSystemSettingswindow�Werecommendconfiguringthesesettingsimmediatelyfollowinginstallationoftheprogram� § OpentheConfigurationmenuinthemain windowandselect“SystemSettings�” § Onthe[Customize]pageofthe[Company] dialogpage,enteryourcompany’sname under“Companynameonprintout�” Thisnameisincludedintheheaderof reportprintouts� § OntheMonitorpageofthe[Customize] dialogpage,youcandefinethesizeofthe productionmonitorbuttonbyselectinga sizefromthedrop-down“Buttonsize”list� § Todefinethedisplayoflimits,selectan itemfromthe“Graphlimits”drop-down list� – Select“-T1to+T1”(or“TU1-TO1”)ifyou wishtohaveonlythelowerandupper warninglimitsshown� – Select“-T2to+T2”(or“TU2-TO2”)ifyou wishtohavetheloweranduppertolerance limitsshownaswell� § Openthe[Logs]pageofthe[Customize]dialogpagetodefinethedirectoryin whichlogfilesaresaved;clickthe[Browse] buttontobrowsetothedesireddirectory� 10 > TheBrowseForFolderwindowopens� § Selectafolderfromthelist� – Clickthe[MakeNewFolder]buttonifyou wishtocreateafolder� § Click[OK]toproceed� § Ifdesired,youcanchangethesizelimit forlogfilesunder“Purgecommunication logfileifthisfilesizehasbeenreached�” Onthe[Archiving]dialogpage,youcan changethevaluesforeachstatisticstype, aslongasthenewvalueiswithinthepermittedrange�Ifyouenteravalueoutside thisrange,thefieldreturnstothedefault value�Thesevaluesdefinethequantity ofstatisticstoberetainedforeachbatch duringarchiving� Thenumberofdaysforretroactive evaluationdefinestheenddateofthe defaultarchivingperiod�Forexample, ifthenumberofdaysforretroactiveevaluationis30(A)andthedateofthelatest recordedsampleisFebruary3,2006(B), thentheenddateisJanuary4,2006� Theprogramcountsbackwardfromsample dateBbyAnumberofdays� 11 Toconfirmchanges: § Click[OK]� > Thesettingsaresavedandthewindow closes� IfyouclickCancelwithouthavingfirst clickedApply,youarepromptedtoconfirm thatthewindowwillbeclosedwithout savingchanges� Toclosewithoutsavingchanges: § Click[Yes]� Tocanceltheoperationandleavethe windowopen: § Click[No]� > Thewindowremainsopen� Note: Somechangesmightnotbetakeeffect untiltheapplicationisrestarted� 12 Alarm Configuration § OpentheConfigurationmenuinthemain windowandselect“Alarms�” > TheAlarmsConfigurationwindowopens� Tocreateanewsettingforacertain article/checkweighercombination: § Clickthe[New]button� > Thedrop-downlistsforselectingarticleand weighernumberappears� § Selectaniteminthe“ArticleDescription” field� § SelectaniteminWeigherNo�field� Note: Anasterisk(*)inthe“ArticleDescription” or“WeigherNo�”fieldmeans“applyto allarticles”or“applyallcheckweighers,” respectively� 13 Youcanchangethesettingsforviolations aswell� § Todothis,selectthedesiredseveritylevel –Inactive,Warning,orAlarm–foreach violationonboththe[GoodProduction] pageandthe[TotalProduction]page� Torestorethedefaultsettingsforall violationsatonce: § Clickthe[Default]button� Therearetwowaystosavesettings: § Click[OK]tosavechangesandclosethis window, or § Clickthe[Save]buttontosavechanges andkeepthewindowopen� Editing Alarm Settings Tomodifyanexistingalarmsetting: § SelectanitemfromtheAlarmSettingslist� > Thisloadsthesettingsstoredforthe selecteditemontheGoodProductionand TotalProductionpagestotheleftofthe list� § Modifythesettingsasdesired� § Click[OK]or[Save]tosaveyourchanges� 14 Deleting Alarm Settings § SelectanitemfromtheAlarmSettingslist� § Clickthe[Delete]button� > Youarepromptedtoconfirm� § Click[Yes]toproceed� Repeatthesestepsforeachitemthatyou wishtodelete� Printing the Alarm Settings § SelectanitemfromtheAlarmSettingslist� § Clickthe[Print]button� > TheReportVieweropens� § Clickthe[Print]buttononthetoolbarin theReportViewertosendthereporttothe printer� 15 Defining Statistics § OpentheConfigurationmenuinthemain windowandselect“DefineStatistics�” > TheDefineStatisticswindowopens� § Clickthecheckboxnexttoeachdesired statisticstypetoactivatethattype� § Removecheckmarksfromstatistictypes thatyoudonotwishtocollectduring batchprocessing� § Click[Ok]tosaveyourchanges� > Youarepromptedtoconfirm� § Click[Yes]tosave� Ifyouclickthe[Cancel]buttonafter havingmadechanges,youarepromptedto confirmbeforethewindowisclosed� § Click[Yes]toclosetheDefineStatistics windowwithoutsavingchanges� 16 Setting Statistics Times § OpentheConfigurationmenuinthemain windowandselect“StatisticsTimes�” > TheStatisticsTimeswindowopens� § Youcansetthestarttimesforthethree shiftsasdesired;stoptimesaresetautomatically�ThestoptimeofShift1isone minutebeforethestarttimeofShift2,the stoptimeofShift2isoneminutebefore thestarttimeoftheShift3,andthestop timeofShift3isoneminutebeforethe starttimeoftheShift1� § Changethevalueinthe“Firstdayofweek” field,ifdesired� § Setthestartdatesformonths1through 13� ThestartdateofMonth1should bebeforethestartdateofMonth2,the startdateofMonth2shouldbebeforethe startdateofMonth3,andsoon� § Click[OK]tosaveyourchanges� > Youarepromptedtoconfirm� § Click[Yes]tosave� 17 Setting the Language § OpentheConfigurationmenuinthemain windowandselect“Language�” > The“SetLanguage”dialogopens� § Selectthedesiredlanguagetobeused� § Clickthe[OK]button� > Youarepromptedtoconfirm� § Click[Yes]tocommitchanges� > Youareaskedtorestarttheprogrambefore thechangetakeseffect� 18 Registering Devices ToopentheNetworkConfiguration window: § OpentheConfigurationmenuinthemain windowandselect“Network,” or § Clickthe[NetworkConfiguration]button ontheSPCInlinetoolbar� > TheNetworkConfigurationwindowopens� Adding Devices – Ifnodeviceshavebeenregisteredyet,for example,ifyourareusingtheprogramfor thefirsttime: § Right-clickontheSPCInlineServericon� > Ashortcutmenuopens� § Select“AddNewDevice�” 19 – Ifoneormoredeviceshavealreadybeen registered: § Left-clickonanydevicenode� > TheCheckweigherSettingsboxopenson theright-handside� § Clickthe[AddNew]buttoninthiswindow� Orafterselectingadevicenode: § Right-clickonthedevicenode� > Ashortcutmenuopens� § Select“AddNew�” Asaresultoftheaboveactions: > The“DeviceEntry”windowopens� § Entertherequireddeviceinformation� § Selectanappropriate“DeviceType�” 20 IftheMDPdevicetypeisselected,an additonaloptionisdisplayed� $ Select“MetalDetector->Checkweigher (Standard)”ifproductswillpassthrough themetaldetectorbeforepassingthrough thecheckweigher�Otherwise,select “Checkweigher->MetalDetector�” Note: Ifnocheckweigherisinstalledintheproductionline,selectthe“Standard”position� § Click[OK]tosavethedata� Note: IPaddressesmustbeenteredinthe correctformat;otherwise,anerrormessage isshownafteryouclick[OK]andtheinformationisnotsaved� Editing Devices § Right-clickonadevicenodeintheNetwork Nodestree� § Select“Edit”fromtheshortcutmenu� > ThisopenstheDeviceEntrywindowand loadsthedataontheselectedcheckweigherintheinputfields� $ Editthefieldsasdesired� § Click[OK]tosave� 21 ThereisanotherwaytoopentheDevice Entrywindow: § SelectadevicenodefromtheNetwork Nodestree� > TheCheckweigherSettingsboxopenswith thedatafromtheselectedcheckweigher� § Clickthe[Edit]buttontoopenthewindow foreditingdata� > TheDeviceEntrywindowopens� Deleting Devices § Right-clickonadevicenodeinthe NetworkNodestree� § Select“Remove”fromtheshortcutmenu� > Youarepromptedtoconfirm� § Click[Yes]todeletethedeviceinformation� YoucandothesameintheCheckweigher Settingsbox: § Selectadevicenode� > TheCheckweigherSettingsboxopenswith thedatafromtheselectedcheckweigher� § Clickthe[Remove]button� > Youarepromptedtoconfirm� § Click[Yes]todelete� 22 Note: Adevicethatiscurrentlyprocessing aproductionbatchcannotbedeleted� Retrieving Device Data Toconfirmthatanetworknodeisacheckweigher,youcanrequestanXMLtest messagecontainingthedeviceinformation directlyfromthecheckweigherinquestion� § Right-clickonadevicenodeinthe NetworkNodestree� § Select“AskTestMsg”fromtheshortcut menu� § Therequesttakesamomenttoprocess� TorequestaTestMsg�xmlfileinthe CheckweigherSettingsbox: § Selectadevicenode� > TheCheckweigherSettingsboxopenswith thedatafromtheselectedcheckweigher� § Clickthe[AskTestMsg]button� Thecommunicationbetweentheserver andthedeviceisshowninthe“Reply”box� 23 Pinging Devices Totestdevicenetworkconnections,you cansendapingrequesttoeachdevice� § Right-clickonadevicenodeinthe NetworkNodestree� § Select“Ping”fromtheshortcutmenu� > Ifthedeviceisnotconnectedorcouldnot bereached,aredcirclewithanexclamationpointisshownnexttothecheckweighericonintheNetworkNodestree� Ifthepingrequestissuccessful,thered circlewilldisappear� Note: Resultsofthepingrequestaredisplayed intheReplyboxintheNetworkConfigurationwindow� YoucanalsopingadeviceintheCheckweigherSettingsbox� § Selectadevicenode� > TheCheckweigherSettingsboxopenswith thedatafromtheselectedcheckweigher� § Clickthe[Ping]button� Topingalldevicesatonetime: § Right-clickontheSPCInlineServernode� § Select“Pingall”fromtheshortcutmenu� 24 Managing Product Types (Checkweigher) Thelistofproducttypesisshowninthe ProductListwindow�Toopenthewindow: § OpentheFilemenuinthemainwindow andselect“ProductType,”“Checkweigher�” > TheProductListwindowopens� § Selectacheckweigherfromthedropdown list� > Theproducttypes,relatedtotheselected checkweigher,ifany,aredisplayed� Adding Product Types § FromtheProductListwindow,clickthe [AddNew]button� > TheProductTypewindowopens� Note: Theentryfieldsmayvarydependingon thereleaseoptionsthatareactivatedinthe checkweigher� IftheCheckForCompletenessoptionis activated,theCompletenesstabwillappear inthedialog� § Entertherequiredproducttypeinformation� $ Clickthe[Operat�Mode]buttontochange thesettingsoftheOperationmode� 25 > TheOperationModewindowopens� $ Modifythesettingsifdesired� $ Clickthe[OK]button� > TheOperationModewindowcloses� Dependingonthesettings,someofthe fieldsintheProductTypewindowmaybe altered� $ Clickthe[Advanced]buttontochange thesettingsoftheProductionMonitoring option� > TheAdvancedwindowopens� $ Modifythesettingsifdesired� $ Clickthe[OK]button� > TheAdvancedwindowcloses� Note: The[Advanced]buttonwillonlybeenabled iftheProductionMonitoringoptionis activatedforthecheckweigher� § FromtheProductTypewindow,clickthe [Store]buttontosavetheproducttype� > Youarepromptedtocreateanewproduct type� 26 Ifyouclick[Yes],followthesameproceduresasabove�Otherwise, > TheProductTypewindowcloses� > TheProductListwindowrefreshesthelist showingthenewproducttype� Setting-up Parameters for each Weigh line Theparametersforthetrendcontroller areappliedtoeachoftheweighlinesof thecheckweigher�Tosetupweighline parameters: § Selectaweighlinenumberfromthe “Weighlineno�”dropdownlist(onmultilinesystems)� § Entervaluesinthefields� § Selectanotherweighlinenumberfromthe list� > Theprevioussettingsaresavedtothe previouslyselectedweighline� > Thefieldvaluesaresettodefault� $ Repeatuntiltheparametersofallweigh linesareentered� 27 Note: TheTrendControllertabwillappearinthe ProductTypewindowifoneofthethree trendcontrollersinthecheckweigheris activated� Thesameproceduresarefollowedinthe Advancedwindow� Editing Product Types § FromtheProductListwindow,selecta producttypeandclickthe[Edit]button� Or, § Double-clickonaproducttype� > TheProductTypewindowopens,containingthestoredparametervaluesofthe selectedproduct� § Modifythefieldsasneeded� § Clickthe[Store]buttontosavethe changes� > Youarepromptedwhethertosendthefile tothecheckweigherornot� § Click[Yes]tosend,otherwise,click[No]� > Youarepromptedtocreateanewproduct type� 28 Ifyouclick[Yes],followtheprocedures foraddinganewproducttype�Otherwise, > TheProductTypewindowcloses� Copying Product Types Aproducttypecanbecopiedfrom onecheckweighertooneormorecheckweighers� § Selectoneormoreproducttypesfromthe list� § Right-clickontheselectedproducttypes� § Select“Copytoweigher…”fromthe contextmenu� > TheCopytoWeigherdialogopens� § Checkoneormoreweighernumbersfrom thelisttowhichtheproducttypesareto becopied� § Clickthe[OK]button� > Thedialogcloses� > Theselectedproducttypesarecopiedto theselectedweighernumbers� Aproducttypecanbecopiedtooneor morenewproducts� § Selectaproducttypefromthelist� Thiswillserveasthesourcecopy� 29 § Right-clickontheselectedproducttype� § Select“Copytonewproducts���”fromthe contextmenu� > The“Copytonewproducts”dialogopens� Toaddanewproduct, § EntertheArticleNumberandtheArticle Description� § Clickthe[AddNew]button� > Thenewproductisaddedtothelist� Note: Ifthetextsturntored,thismeansthatthe ArticleNumberortheArticle Descriptionisthesameasthatofthe sourcearticle� Toaddtheproducttooneormorecheckweighers, § Selectthenewlyaddedproductfromthe list� § Onthecheckweigherlistontherightside, checkthecheckweigherswheretheproduct shouldbeadded� $ Repeatasrequiredtoaddadditional products� 30 To remove a product from the list, § Select a product from the list. § Click the [Remove] button. To save the list of new products, § Click the [Save] button. > The products are saved to the database. Each product will have the same details as that of the source product. Note: Only valid products will be saved. A notification message is shown if the products can not be saved to the database, especially if the product is not compatible to the weigh cell range of the checkweigher. Removing Product Types To delete one or more product types: § Select the product types from the list. § Click the [Remove] button. > You are prompted to confirm. § Click [Yes] to proceed. 31 Changing Tare and Density Values Tochangethetarevalueofoneormore products, § Selectoneormoreproducttypesfromthe ProductListwindow� § Right-clickontheselectedproducttypes� § Select“ChangeTare���”fromthecontext menu� $ Select“ChangeDensity���”tochangethe densityvalueinstead� > The“ChangeTare”dialogopens� § Enterthenewvalue� § Click[OK]tosavethenewvalue� Note: Usethe[Ctrl]+[Z]keysto“Undo”thelatest changesmadetotheproductlist� 32 Creating Batch Plans Tocreateabatchplan, § SelectaproducttypefromtheProductList window� § Clickthe[ShowPlans���]button� > ThePlanListwindowopens� § Clickthe[AddNew]button� > TheBatchPlanwindowopens� § EnteravalueintheBatchNumberfield� $ Click“Decentral”ifyouwanttocreate adecentralizedbatchnumber� § Clickthe[OK]buttontosavethebatchplan� > TheBatchPlanwindowcloses� > ThePlanListwindowrefreshesthebatch planlist� Youcanalsocreateabatchplanwithout displayingthePlanListwindow� § SelectaproducttypefromtheProductList window� 33 § Click the “Plan a batch...” button. > The Batch Plan window opens. § Follow the procedures listed above. Removing Batch Plans § From the Plan List window, select one or more batch plans. § Click the [Remove] button. > You are prompted to confirm. § Click [Yes] to proceed. 34 Managing Product Types (Metal Detector) Thelistofproducttypesisshowninthe ProductListwindow�Toopenthewindow: § OpentheFilemenuinthemainwindow andselect“ProductType,”“Metal Detector�” > TheProductListwindowopens� § Selectametaldetectornumberfromthe dropdownlist� > Theproducttypes,relatedtotheselected metaldetector,ifany,aredisplayed� Adding Product Types § FromtheProductListwindow,clickthe [AddNew]button� > TheProductTypewindowopens� § Selectalinenumber� > Thefieldsareenabled� § Entertherequiredproducttype information� Note: The[Option]tabwillonlybeavailable ifoneofthesetesttypesareselected: “Extended,”“Standard,”“Single” 35 § From the Product Type window, click the [Store] button to save the product type. > You are prompted to create a new product type. If you click [Yes], follow the same procedures as above. Otherwise, > The Product Type window closes. > The Product List window refreshes the list showing the new product type. Editing Product Types § From the Product List window, select a product type and click the [Edit] button. Or, § Double-click on a product type. > The Product Type window opens, containing the saved parameter values of the selected product. § Modify the fields as needed. § Click the [Store] button to save the changes. > The Product Type window closes. 36 Copying Product Types Aproducttypecanbecopiedfromone metaldetectortooneormoremetal detectors� § Selectoneormoreproducttypesfromthe list� § Right-clickontheselectedproducttypes� § Select“Copyto���”fromthecontextmenu� > The“Copyto���”dialogopens� § Checkoneormoremetaldetectornumbers fromthelistwheretheproducttypeswill becopied� § Clickthe[OK]button� > Thedialogcloses� > Theselectedproducttypesarecopiedto theselectedmetaldetectorlinenumbers� Removing Product Types Todeleteoneormoreproducttypes, § SelecttheproducttypesfromtheProduct Listwindow� § Clickthe[Remove]button� > Youarepromptedtoconfirm� § Click[Yes]toproceed� 37 Monitoring Production Batches The Monitoring Window Eachproductionbatchisrepresentedin theMonitoringwindowasalargebutton� Eachofthesebuttonsshowstheactivityof thebatch,alarmiconsforviolationsthat occurredandthetotalproductiongraph� Toopenthiswindow: § OpentheViewmenuinthemainwindow andselect“Monitoring,” or § Clickthe[Monitoring]buttononthe SPCInlinetoolbar� > TheMonitoringwindowopens� Eachon-goingbatchisrepresentedbyan activeproductionbuttonasseeninthe figure� Bydefault,thetotalproductiongraphis displayedbytheactivebutton�Youcan togglethroughdifferentgraphs�Todoso, § Right-clickanactiveproductionbutton� § Selectthe“SetDefaultGraph”fromthe shortcutmenu� § Selectagraphtypefromthesub-menu� 38 Note: Ifabatchisstartedbyastand-alonemetal detector,theonlyavailablemenuitemis “Close�”Ifclicked,thiswillclosethe productionbutton� Setting Limits Tosetthelimitsofthemeanvaluegraph: § Right-clickanactiveproductionbutton� § Selectthe“SetLimits”fromtheshortcut menu� § Selectalimitfromthesub-menu� Note: The“SetLimits”menuisavailableifthe defaultgraphisaGoodProductionor TotalProduction� Setting Button Sizes Tosetthesizeoftheproductionbutton: § Right-clickanactiveproductionbutton� § Selectthe“SetButtonSize”fromthe shortcutmenu� § Selectthedesiredsizefromthesub-menu� 39 Viewing Graphs Clickinganactiveproductionbuttonwill displaytheenlargedversionofthedefault graphinaseparatewindow�Youmay selectanddisplayaspecificgraphusing theshortcutmenu� Toviewthe“AverageofProduction”graph ofarunningbatch: § Right-clickanactiveproductionbutton� § Select“AverageofProduction”fromthe shortcutmenu� > Thegraphwindowopens� Toviewthe“AverageofTotalProduction” graph: § Right-clickanactiveproductionbutton� § Select“Ave�ofTotalProduction”fromthe shortcutmenu� 40 Toviewthe“AverageofGoodProduction” graph: § Right-clickanactiveproductionbutton� § Select“Ave�ofGoodProduction”fromthe shortcutmenu� > Thegraphwindowopens� ToviewtheGaussiandistribution: § Right-clickanactiveproductionbutton� § Select“GaussCurve”fromtheshortcut menu� > Thegraphwindowopens� Toviewthe“Classification”graph: § Right-clickanactiveproductionbutton� § Select“Classification”fromtheshortcut menu� > Thegraphwindowopens� 41 Using Graphs Whenright-clicked,therearethreemenu commandsavailabledirectlyinthecontext menuofthegraphs:“Print,”“Refresh,”and “Close�” Toprintagraph: § Clickthe“Print”menuitem� > Theprintpreviewwindowopens� § Clickthe[Print]buttonintheupperlefthandcornerofthiswindow� > Theimageissenttotheprinter� Note: Pleasekeepinmind,particularlyifthe productionbatchisstillrunning,thatthe graphvaluesontheprintoutarejusta snapshotofthevaluesthatwerecurrentat thetimethegraphwindowwasopened� Tocapturethelatestgraphvalues: § Clickthe“Refresh”menuitem� Toclosethegraphwindow: § Clickthe“Close”menuitem� 42 Viewing Violations Whenpresettimeortolerancelimitsare exceeded,awarningsymbolisdisplayedon thebatchbuttonintheMonitoringwindow� Thefollowingwarningsandalarmsmay beshown: – Tolerancealarm – Tolerancewarning – Timealarm – Timewarning MetalDetection: – Metalcontamination – Performancevalidationrequest – Sign-of-lifesignalnotreceived – Performancevalidationsuccessful Completeness: – Good – Incomplete,overfilled 43 Toviewthelistoftoleranceviolations: § Right-clicktheactiveproductionbutton� § Select“ToleranceViolations”fromthe shortcutmenu� > ThisopenstheAlarmListwindowwith thetoleranceviolationlogsforaspecific productionbatch� Toviewthelistoftimeviolations: § Right-clicktheactiveproductionbutton� § Select“TimeViolations”fromtheshortcut menu� > ThisopenstheAlarmListwindowwiththe timeviolationlogsforaspecificproductionbatch� Toviewthelistofbothtoleranceandtime violations: § Right-clicktheactiveproductionbutton� § Select“AllViolations”fromtheshortcut menu� > ThisopenstheAlarmListwindowwith boththetoleranceandtimeviolationlogs foraspecificproductionbatch� 44 Viewing Statistics SelectoneormoreitemsintheAlarmList andclicktheStatisticsbuttontoview details,includingthetimeswhen violationsoccurred�See“Monitoring Events”formoreinformation� Viewing the Device Status Whenanerroroccursinthecheckweigher, anotificationissenttotheserver� Toviewthelatesterror: § Right-clicktheactiveproductionbutton� § Select“DeviceStatus”fromtheshortcut menu� > Awindowopensdisplayingadescriptionof theerror� The“DeviceStatus”shortcutmenuitem isdisablediftherearenoerrormessages fromthecheckweigher�Awarningsymbol inthelowerleft-handcornerofabatch buttonindicatesthatadeviceerrorhas occurredinthatbatch� Checkweigher Remoting TolaunchtheSPC@Remoteapplication, § Right-clicktheactiveproductionbutton� § Select“Remote”fromtheshortcutmenu� > TheSPC@Remoteprogramopens� 45 YoucanlaunchSPC@Remoteapplication fromtheNetworkConfigurationwindow also�Todothis, § OpentheNetworkConfigurationwindow� § Right-clickonadevicenodeinthe NetworkNodestree� § Select“Remote”fromtheshortcutmenu� > TheSPC@Remoteprogramopens� Note: SPC@Remoteisanoptionalfeature whichcanbelaunchedonlyifthelicense ispurchased� The Message Pane Messagesthataregeneratedtoinform theuseraboutcertaineventsaredisplayed inthemessagepaneoftheMonitoring window�Messagesareclassifiedintothree types:information,warning,oralarm� Thepanemaycontain300messages� Whenthisnumberisreached,theoldest messageisdeleted� Tomanuallydeleteoneormore messages, § Selectoneormoreitemsfromthelist� § Right-clickontheselecteditems� > Ashortcutmenuopens� § Selectthe“Delete”menuitem� > Theselecteditemsareremoved� 46 Running Offline Batches Torunanofflinebatch, § Connectthedisk(stick)toaUSBport� Note: Thedisk(stick)mustcontaintheXMLfiles fromacheckweigher�SPC@Inlinerequires thecorrectdirectorystructureonthedisk (stick)�Anychangestothestructuremay causeerrorswhenreadingthefiles�When loadingthefilesfromthecheckweigher, theappropriatestructureiscreatedonthe disk(stick)bydefault� § OpentheFilemenuandselect“Offline Batch�” > TheOfflineBatchProcessingwindow opens� § Selectthesourcedrive� > Thelistofproductsisdisplayed�Theseare theproductsthatwereusedduringoffline batchprocessing� Note: Theitemsinthelistthataredisplayed inredfontareeithererroneousormay alreadyexistinthedatabase�Youmay checkthe“Remarks”fieldforadetailed description� § Selectoneormoreproductstobesavedto thedatabase� $ Select“CheckAllProducts”toselectall listedproducts� 47 § Clickthe[Start]buttontoprocessthe batch� > Thebatchisprocessed�Waituntilitis finished� § Whendone,clickthe[Close]buttonto closethewindow� Note: Theofflinecheckweighermustbe registeredandactivatedwithalicense viatheNetworkConifigurationwindow� YoumayenteratemporaryIPaddress, butthemachinenumber,weigher number,andserialcodeshouldmatchthe actualvaluesfoundinthecheckweigher� 48 Monitoring Events Opening the Alarm List Window AsdescribedinChapter5,youcanopen theAlarmListbyright-clickingona batchbuttonintheMonitoringwindow� Withthismethod,however,thelist containsonlytheviolationsthatoccurred inaspecificproductionbatch� Alternatively,youcanclickthecorrespondingtoolbarbuttonoruseamenu commandinthemainwindow�Withthis method,theAlarmListwindowshowsall violationsfromallprocessedbatches� Toviewthelistoftoleranceviolations: § OpentheViewmenuandselect “ToleranceViolations,” or § Clickthe[ToleranceViolations]buttonon theSPCInlinetoolbar� > TheAlarmListwindowopens� 49 Toviewthelistoftimeviolations: § OpentheViewmenuandselect“Time Violations,” or § Clickthe[TimeViolations]buttononthe SPCInlinetoolbar� > TheAlarmListwindowopens� Toviewalistofbothtoleranceandtime violations: § OpentheViewmenuandselect“All Violations,” or § Clickthe[AllViolations]buttononthe SPCInlinetoolbar� > TheAlarmListwindowopens� 50 Using the Alarm List Window Toviewdetailsonaviolation: § SelectthedesireditemfromtheAlarm Settingslist� § Double-clickontheselecteditem� or § Clickthe[Statistics]buttonatthebottom oftheAlarmListwindow� > TheStatisticswindowopens�See“The StatisticsWindow”formoreinformation� Youcan“cleanup”thealarmlistby removingdatafromtheviolationlogs� $ Toselectmorethanoneitem,holddown theControlkey(Ctrl)whileclickingthe desireditems� § Selecttheitem(s)tobedeletedfromthe list� § Clickthe[Delete]buttoninthebottom right-handcorneroftheAlarmList window� > Youarepromptedtoconfirm� § Click[Yes]todelete� 51 Toprintthealarmlist: § Clickthe[Print]buttoninthebottom right-handcorneroftheAlarmListwindow� > TheReportVieweropens� § Clickthe[PrintReport]buttononthe toolbarintheReportViewertosendthe reporttotheprinter� ToclosetheAlarmListwindow: § Clickthe[OK]buttoninthebottom right-handcornerofthewindow� > Thewindowcloses� 52 The Statistics Window Using the Statistics Selection Window TheStatisticsSelectionwindowissimilar totheAlarmListwindow,butshowsthe listoftheproductionbatchdatawithout anyinformationonviolations� ToopentheStatisticsSelectionwindow, § OpentheViewmenuinthemainwindow andselect“Statistics,” or § Clickthe[Statistics]buttonontheSPC@ Inlinetoolbar� > TheStatisticsSelectionwindowopens� Toviewstatisticsonaparticularbatch: § Selectanitemfromthelist� § Clickthe[Statistics]buttonatthebottom ofthewindow, or § Double-clickontheselecteditem� 53 > TheStatisticswindowopens� Toprintthelist, § Clickthe[Print]buttoninthebottom right-handcorneroftheStatistics Selectionwindow� > TheReportVieweropens� § Clickthe[PrintReport]buttononthe toolbarintheReportViewertosendthe reporttotheprinter� ToclosetheStatisticsSelectionwindow: § Clickthe[OK]buttoninthebottom right-handcornerofthewindow� > Thewindowcloses� 54 Using the Statistics Window Themainstatisticalinformationinthe StatisticsWindowisdividedintofivepages asfollows:TheTotalProductionpage showsstatisticsonoverallproduction; theGoodProductionpageshowsdetails ongoodproduction;theAcceptedpage containsinformationonthedistributionof goodproduction;theRejectedpageshows detailsonrejectedpieces;theMiscellaneouspageshowsmiscellaneousinformation, suchasevaluationrangeandignored pieces;theMetalDetectspageshows informationaboutmetalcontamination andthestatusofthemetaldetectorduring thebatchperiod;andtheCompleteness pageshowspackagecompletenessinformation� TheIntermediateandAccumulatedpages areshownforeachofthefivepages describedabove�TheIntermediatepage showsdataonthelatestsamplebydefault, andtheAccumulatedpageshowsthe cumulativestatisticsonaparticularproductionbatch,fromthefirsttothelatest sample� ThedataontheIntermediatetabcanbe switchedtodifferentsamplesorintervals� UsetheIntervalBrowsertonavigateto eachsampleofthebatch� Toprintstatisticalinformation: § Clickononeofthesixmaintabs� § ClickontheIntermediateorAccumulated tab� § Clickthe[Print]button� > TheReportVieweropens� § Clickthe[PrintReport]buttononthetoolbarintheReportViewertosendthereport totheprinter� 55 Eachsamplehasanumberofindividual weightvalues�Toviewthesevalues: § ClickontheTotalProductionorGood Productiontab� § ClickontheIntermediatetab� § Clickthe[Ind�Values]button� > TheIndividualValueswindowopens� ToprinttheIndividualValuesreport: § Clickthe[Print]button� > TheReportVieweropens� § Clickthe[PrintReport]buttononthetoolbarintheReportViewertosendthereport totheprinter� Note: Thenumberofindividualvaluesislimited to200� ToviewtheGaussiandistributionofthe productionbatch: § Clickthe[GaussCurve]buttonfromthe bottomleftpartoftheStatisticswindow� > AgraphoftheGaussiandistributionis shown� 56 Toviewtheaverageproductiongraphfor theparticularbatch: § Clickthe[Ave�ofProduction]buttoninthe bottomleft-handcorneroftheStatistics window� > Agraphoftheproductionaverageopens� See“MonitoringProductionBatches”for moreinformationaboutusingthegraph window� ToclosetheStatisticswindow: § Clickthe[Close]buttoninthebottom right-handcornerofthewindow� 57 Evaluating Statistics Automatic Statistics ‘Automaticstatistics’isthetermappliedto datacollectedautomaticallyduringbatch processing�Thisdataisclassifiedasbatch, shift,hourly,daily,weekly,monthly,or yearlystatistics� ToopentheAutomaticStatisticswindow: § OpentheEvaluationmenuinthemain windowandselect“AutomaticStatistics�” > TheAutomaticStatisticswindowopens� Beforedatacanbeprinted,youneedto definewhichdatathereportwillcontain� § Selectatypeofstatisticsfromthedropdownlistinthe“StatisticsType”field� > The“Period”fieldisenabled� § Selectanitemfromthedrop-downlistin the“Period”field� 58 Ifnovalueisavailableforthisfield, amessageboxinformsyouofthefact� Ifyouhaveselectedhourlystatistics: $ Selectavalueinthe“Time”fieldafter selectingaperiod� § Entervaluesinallthreeofthesubsequent fields: – “ArticleNumber” – “MachineNumber” – “BatchNumber” Note: Wildcardsarepermittedinthesefields� Anasterisk(*)canbeusedasaplaceholder foranynumberofcharacters;aquestion mark(?)standsforasinglecharacter� Youcanselectfromamongexistingvalues intheItemSelectiondialog� Toopenthisdialog: § Clickthe[Search]buttonnexttotheArticle Numberfield� > TheItemSelectiondialogopens� Itemslistedinthisdialogaredesignated inthefollowingformat:<articlenumber> –<articledescription>�WhentheItem Selectionwindowisopenedtoselecta machineorbatch,thelistshows<machine number>or<batchnumber>ratherthan articledata� 59 § Selectanitemfromthelist� § Click[Ok]� > TheselecteditemisenteredintheArticle Numberfield� Followthisproceduretoentermachine numberandbatchnumberaswell� > Selectoneormorecharacteristicstobe includedinthereport� $ Under“Reportsortedby���”youcanspecify whetherdatainthereportissortedby articleormachine� § Clickthe[Print]button� > TheReportVieweropens� § Clickthe[PrintReport]buttononthe toolbarintheReportViewertosendthe reporttotheprinter� Toevaluatedatainarchivedrecords: § Activatethe“Evaluatefromarchive”option intheupperright-handcornerofthis window� > Thedropdownlistisenabled� § Selectadatabasenamefromthelist� § Proceedasdescribedabovetoprintthe report� 60 Toclosethewindow, § Click[Cancel]� Manual Printout ToopentheManualPrintoutwindow: § OpentheEvaluationmenuinthemain windowandselect“ManualPrintout�” > TheManualPrintoutwindowopens� § Selectasortingoptionfromthedropdownlistinthe“Sortby”field� > Thesubsequentfieldsareenabled� Bydefault,the“PeriodFrom”and“Period To”fieldsshowthetimeanddateofthe firstsampleandthecurrenttimeanddate, respectively� $ Youcaneditthesevaluesasdesired� § Fordetailsonenteringthedesiredarticle, machineandbatchnumbers,see“AutomaticStatistics�” § Selectoneormorecharacteristicstobe displayed� 61 $ Select“ShowIndividualWeights”todisplay theweightvaluesofeachinterval� $ Select“IgnoreEmptyIntervals”tosuppress emptyintervalsfromthereport� § Clickthe[Print]button� > TheReportVieweropens� § Clickthe[PrintReport]buttononthetoolbarintheReportViewertosendthereport totheprinter� Toevaluatedatainarchivedrecords: § Activatethe“Evaluatefromarchive”option intheupperright-handcornerofthis window� > Thedropdownlistisenabled� § Selectadatabasenamefromthelist� § Proceedasdescribedabovetoprintthe report� Toclosethewindow: § Click[Cancel]� Graphic Evaluation ToopentheGraphicEvaluationwindow: § OpentheEvaluationmenuinthemain windowandselect“GraphicEvaluation�” 62 > TheGraphicEvaluationwindowopens� § Selectatypeofgraphfromthedrop-down listinthe“GraphType”field� > Thesubsequentfieldsareenabled� Bydefault,the“PeriodFrom”and“Period To”fieldsshowthedateandtimeofthe firstsample,andthecurrentdateandtime, respectively� $ Youcaneditthesevaluesasdesired� § Fordetailsonenteringthedesiredarticle, machineandbatchnumbers,see“AutomaticStatistics�” Note: Wildcardsarenotpermittedwhendefining agraphicevaluation� § Clickthe[Print]button� > TheGraphwindowopens�See“Monitoring ProductionBatches”formoreinformation aboutusingthegraphwindow� Toevaluatedatainarchivedrecords: § Activatethe“Evaluatefromarchive”option intheupperright-handcornerofthiswindow� > Thedropdownlistisenabled� 63 § Selectadatabasenamefromthelist� § Proceedasdescribedabovetoprintthe report� Toclosethewindow: § Click[Cancel]� Device Downtime Report Downtimehappenswhenthenumberof productsrunningthroughthedevicedrops tozerowhilethebatchisstillon-going� Toviewthedowntimereport: § OpentheEvaluationmenuinthemain windowandselect“DowntimeReport�” > TheDowntimeReportwindowopens� Bydefault,thedowntimeperiodissetto onedaystartingfromthepreviousday specifiedin“PeriodFrom”field� $ Youcaneditthesevaluesasdesired� § Entervaluesinalltwoofthesubsequent fields: – “MachineNumber” – “WeigherNumber” § Clickthe[Print]button� > TheReportVieweropens� Toclosethewindow: § Click[Cancel]� 64 Monitoring Data Communications Using the Communication Logs Window Toopenthewindow: § OpentheViewmenuandselect“CommunicationLogs�” > TheCommunicationLogswindowopens� Loggeddataisshowninthe“CommunicationTrail”box�Youcanchoosebetween twologgingmodesfromthe“Logging Option”box: – Select“Trailinformationonly”toview one-lineentriescontainingonlyabrief descriptionofthecommunication activityandatimestamp – Select“ShowAllContents”toviewthe contentsofthedatabeingtransferred toandfromthecheckweighers� Bydefault,alldatafromallcheckweighers connectedtotheserverisdisplayedinthis window�Ifyouprefertomonitoronlya specificdevice: 65 § Selectanitemotherthan‘*ALL’fromthe drop-downlistinthe“Checkweighers” field� > Onlythedatapertainingtotheselected item(checkweigher)isdisplayed� Ifyoudonotneedthecommunicationlog file: $ Deselectthe“EnableCommunicationLogs” optioninthetopleft-handcornerofthis window� Theprogramautomaticallydeletesthedata inthelogfilewhenacertainnumberof lineshasbeenreached�Youcandeletethis datamanuallyatanytime� Todothis: § Clickthe[Clear]buttonatthebottomof theCommunicationLogswindow� > Youarepromptedtoconfirmbeforethe dataisdeleted� § Click[Yes]toproceed� Toclosethewindow: § Clickthe[Close]button� 66 Backup and Archiving Archiving Samples ToopentheBackupwindow: § OpentheFilemenuinthemainwindow andselect“BackupProcessData�” > TheBackupwindowopens� Tobackupsaveddata, § Clickthe[Search]button(magnifying glass)nexttothe“ArticleNumber”input field� > TheItemSelectionwindowopens� § Selectanarticlefromthelist� Note: Wildcardsarepermittedinthesefields� Anasterisk(*)canbeusedasaplaceholder foranynumberofcharacters;aquestion mark(?)standsforasinglecharacter� Torepresentallpossiblevalues,enteronly anasterisk(withoutanyothercharacters)� § Followthesameproceduresforthe “MachineNumber”and“BatchNumber” fields� § Enterthestartingandstoptimesanddates forthedesiredperiodinthe“Period”fields� 67 Thedatatobebackedupisfiltered accordingtothedatesprovided�Datathat wasnotcollectedduringthedefinedperiodisnotbackedup�Thedefaultstartdate istheearliestsampledate,andthedefault enddateisxdayspriortothelatestsample date,wherexisthenumberofdaysset forretroactiveevaluationontheArchiving dialogpageofthesystemsettings� $ Setthe“deletesourcedata”optionas desired� Specifywhetherornotsamplesaredeleted afterbackup: – Selectthe“Deletesourcedata(Archiving)” optionbeforestartingthebackupprocess tohavetheoriginalsampledatadeleted oncethebackupcopyhasbeencreated� Thisisequivalenttothearchivingprocess, assampledataisnolongeravailablefor thecurrentevaluations,whilethecurrent automaticstatisticsarenotdeleted� – Deactivatethe“Deletesourcedata (Archiving)”optiontoretainthesamples afterbackup�Thesesamplesareinternally markedasbackedup,andwillnotbe processedthenexttimeyourunabackup operation� § Click“Startbackup”tobeginthebackup operation� > TheProgressIndicatordialogisdisplayed duringbackup� 68 ToopentheHelpprogramforbackup functions: § Clickthe[Help]buttonorpressF1key� > TheHelpwindowopens� Toviewdetailsonthebackupprocess: § Clickthe[Info]button� > TheInfowindowopens� Thewindowshowsthefollowing information: – Currentdata:Showsthedatesofthe earliestandlatestsamplesstoredinthe maindatabase� – Numberofsamples:Thecurrent numberofsamplesstoredinthemain database� – Dataoncurrentbackuppath:Showsthe datesoftheearliestandlatest samplesstoredinthearchivedatabase� § Click[OK]toclosethiswindow� Toclosethebackupwindow: § Click[Cancel]inthelowerright-handcornerofthewindow� > TheBackupwindowcloses� 69 Exporting Archived Data Deletedatafromthearchivedatabaseat regularintervalstokeeptheuseofstorage spaceatreasonablelevels�Youcanpurge thedatabasewithoutdatalossbyexportingdatatoadifferentfile� ToopentheExportArchiveDatawindow: § OpentheFilemenuinthemainwindow andselect“ExportArchiveData�” > TheExportArchiveDatawindowopens� The“DatabaseFileDirectory”fieldshowsa defaultdirectoryforthenewdatabasefile� Tospecifyadifferentdirectory: § Clickthe[Browse]button(representedby anopenfolder)� > TheBrowseForFolderdialogopens� § Selectafolderfromthelist� 70 $ Clickthe[MakeNewFolder]buttonifyou wishtocreateafolder� § Click[OK]toproceed� Note: IftheSQLServeraccountisnotpermittedtocreateadatabasefileinthedefault databasefiledirectory,anerrormessageis shown�Inmostcases,youneedtobrowse tothefollowingdirectory:“\ProgramFiles\ MicrosoftSQLServer\MSSQL�x\ MSSQL\Data\,”wherexisanynumber (e�g�,\ProgramFiles\MicrosoftSQL Server\MSSQL�1\MSSQL\Data\)� The“DatabaseName”fieldalsoshows adefaultvalue�Youcaneditthename asdesired�Ifthenameyouenterisalready inuse,anerrormessageisshown� Tobeginexportingdata: § Clickthe[Export]button� > Youarepromptedtoconfirm� § Click[Yes]toproceed� > Aprogressindicatorisdisplayed� Oncethedatahasbeensuccessfully exported,thedatabasenameisshown inthe“ArchivedDatabases”list�Thislist showsinformationaboutthedatabasesin whicharchiveddatahasbeenexported� Toclosethewindow: § Clickthe[Close]button� 71 The Report Viewer Using the Report Viewer ReportsareopenedintheReportViewer beforebeingsenttotheprinter�Thislets youcheckthelayout,pagecount,and contentbeforeahardcopyisproduced� Youcancanceltheprintjobbeforeprinting,ifdesired� Usethefollowingbuttonstonavigatethe pagesofareport: – Firstpage:Jumpdirectlytothefirstpage ofthereport� – Lastpage:Jumpdirectlytothelastpageof thereport� – Nextpage:Clickrepeatedlytoscroll throughthereportonepageatatimefrom lowertohigherpagenumbers� – Previouspage:Clickrepeatedlytoscroll throughthereportonepageatatimefrom highertolowerpagenumbers� Togodirectlytoaspecificpage: § Typethedesiredpagenumberfromthe CurrentPagefield� § Pressthe[Enter]key� > ThepageisopenedintheReportViewer� 72 Youcanexportthereporttootherformats, suchasPDF(portabledocumentformat), andMSExcel� § Clickthe[Export]button� > Thedropdownmenuopens� § Selectthedesiredformatfromthemenu� > TheProgressdialogopens�Waitwhilethe reportisbeingexported� > The“SaveAs”dialogopens� § Enterthefilename� § Clickthe[Save]button� > Thefileissavedtothespecifieddirectory� 73 Toadjustthesizeofthereportpageinthe ReportViewer: § Clickthe[Zoom]drop-downbutton� Therearethreeoptionsforre-sizingthe report� Tochangethesizeofthereportasdisplayed: – Select“PageWidth”toadjustthewidthof thereporttothewindow� – Select“WholePage”toshowtheentire pageinthewindow� – Selectaspecificzoomfactor:500%,200%, 150%,100%,75%,50%,or25%� § Selectthedesiredzoomfactor� > Thepageviewisresizedaccordingly� Tosearchforspecifictextswithinthe report: § Enterthewordorphraseyouwishtofind inthe[SearchText]field� § Click[Find]toproceed� > Ifthetextexists,thefirstmatchfoundis highlighted� $ Click[Next]tosearchforthenextmatch, goingonuntiltheendofthereportis reached,ifdesired� 74 Toprintthereportdocument: § Clickthe[Print]button� > ThePrintdialogopens� § Specifyyourprintingpreferences,suchas numberofcopies,paperlayout,pagesto beprinted,etc� § Click[Print]toprintthereport� 75 Using SPC@Inline Services Therearefourservicesthatareinstalled alongwithSPC@Inline� Socket Listener Service TheSPC@InlineListenerServiceisresponsibleforgatheringdatafromthedevices� Duringbatchprocessing,itisnecessarythattheserviceisrunning�Dataare processedbytheserviceevenifthemain applicationisclosed�Bydefault,theservice isopenedduringcomputerstartup�For manualconfiguration,theListenerService Managerisused� ToopentheListenerServiceManager, § ClicktheWindows[Start]buttonandselect [Sartorius],[SPCInline],[Services],[Listener]� > Theiconshowsupinthetaskbar� § Right-clickontheicon� > Theshortcutmenuappears� – [StartListening]�Startstheserversocket� – [StopListening]�Stopstheserversocket� – [Settings]�OpenstheListenersettings dialog� – [InstallationList]�OpenstheInstallation Listdialog� – [Exit]�ClosestheListenerServiceManager application� 76 Toopenandusethesettingsdialog, $ Fromtheshortcutmenu,select“Stop Listening�”Thisisnecessaryiftheserver socketiscurrentlyopenorrunning� § Right-clickontheicon� § Selectthe“Settings”menuitem� > TheListenerdialogappears� § Modifythefieldsasneeded� The“IPAddress”fieldreferstotheIP addressassignedtotheserverhostingthe SPC@Inlineapplication� ThevalueoftheIPaddressshouldappear inthecheckweigher’s“ServerIP”parameter intheTCP/IPConfigurationdialog(614|1)� Theparameter“XMLClient–TCPPort number”shouldhaveavaluesimilartothe valueofthefield“ListeningtoPort�” Theparameter“XMLServer–TCPPort number”shouldhaveavaluesimilarto thevalueofthefield“SendingDatafrom Port�”Inthesamedialog,“Selection criteriaforpartlyemptyintervals”refersto thepercentageofthenumberofindividual weightsthataremissingfromtheexpected number�Ifthegivenpercentageisreached duringbatchprocessing,thiswillbe consideredasdowntime� Important note: Thedetectionofdowntimesonlyworks iftheintervalinthecheckweigherissetto timeandnottopieces! § Click[OK]tosavethechanges� > Thesettingsdialogcloses� 77 $ Fromtheshortcutmenu,select“Start Listening�”Thenewsettingisapplied� ToopenandusetheInstallationListdialog: § Right-clickontheicon� § Select“InstallationList”menuitem� > TheInstallationListdialogappears� ThelistcontainstheIPaddressesofthe SPC@Inlinecompactinstallations (AdditionalMasterPC)withinthenetwork, includingtheIPaddressoftheserver wherethelistenerserviceisinstalled� ToaddanIPaddresstothelist: § Clickthe[Add]button� > TheAdddialogdisplays� § TypeIPAddress� § Clickthe[Save]buttontoadditemtothe list� ToeditanIPaddresstothelist: § Selectanitemfromthelist� § Clickthe[Edit]button� > TheEditdialogdisplays� § ModifytheIPAddress� 78 § Clickthe[Save]buttontosavechanges� Toremoveanitemfromthelist: § Selectanitemfromthelist� § Clickthe[Remove]button� > TheRemoveconfirmationappears� § Clickthe[Yes]buttontoremovetheitem fromthelist� Automatic Archiving TheAuto-Archiverautomaticallycreatesa backupofstatisticalrecordsataspecified interval�Recordsaretransferredfromthe maindatastoragetothearchivedata storagearea� ToopentheAuto-Archiverservice: § ClicktheWindows[Start]buttonandselect [Sartorius],[SPCInline],[Services],[AutoArchiver]� > Theiconoftheserviceappearsinthe systemtray� > TheServiceSettingsdialogopensautomaticallywhenlaunchedforthefirsttime� ToopentheAuto-ArchiverServiceSettings dialog: § Right-clickontheicon� § Select“Settings”menuitem� 79 > TheServiceSettingsdialogappears� § Selectthe“Enableauto-archiving”option toactivatetheservice� § Selectthedesireddayordayswhenthe serviceshouldarchivetherecords� § Specifythetimeintervalbyselectingone oftheoptions: – “Interval�”Selecttheintervalinhours(3,6, 8,12hours)� – “Fixedtime�”Specifythetimesin24-hour notationseparatedbycommas:e�g�8:00, 13:30,21:00 Thearchivedatabaseisautomatically namedandcreated�Thedatabasewillbe usedforarchivingforatimeperiodof 1,2,3,6,or12months�Bydefault,the databaseisusedforonemonthonly,after whichanewoneiscreated�Youmayselect thedesireddurationfrom“Usethesame archivedatabase”field� § Click[Save]whendone� § Click[Close]toclosethedialog� Automatic Statistics Printout Thestatisticsreportprintoutsstatisticsare createdautomaticallybytheAuto-Printing serviceduringaspecifiedinterval� ToopentheAuto-Printingservice: § ClicktheWindows[Start]buttonandselect [Sartorius],[SPCInline],[Services],[AutoPrinting]� 80 > Theserviceiconappearsinthesystemtray� > TheServiceSettingsdialogopensautomaticallywhenlaunchedforthefirsttime� ToopentheAuto-PrintingSettingsdialog: § Right-clickontheicon� § Select“Settings”menuitem� > TheServiceSettingsdialogappears� § Selectthe“Enableautomaticstatistics” optiontoactivatetheservice� > Theinputfieldsareenabled� § Selecttheoutputpreference� – “Sendtoprinter�”Sendsthereportfile directlytotheprinter� – “Saveas�pdffile�”Savesthereportfile tothespecifieddirectoryasaportable documentfile� 81 If“Sendtoprinter”isselected,specifythe nameoftheconnectedprinterhardware� Todoso: § Clickthe[SelectPrinter]button� > TheSelectPrinterdialogappears� § Selectthenameofthedesiredprinterfrom thelist� § Clickthe[OK]button� If“Saveto�pdffile”isselected,specify thedirectorywherethefileswillbestored� Todoso: § Clickthe[Browse]button� > TheBrowseforFolderwindowopens� § Selectafolderfromthelist� – Clickthe[MakeNewFolder]buttonifyou wishtocreateafolder� § Click[OK]toproceed� § Selectthestatisticstypestobeprinted regularly� $ Forthehourlystatistics,youmaywantto specifytheintervalinhours�Thedefaultis 1hourmeaningthathourlystatisticswill beprocessedattheendofeveryhour� § Clickthe[Save]buttontosavethesettings� 82 > Thenextprintoutprocessingschedulesare displayedinthe“Nextprinttime”column� § Clickthe[Close]buttontoclosethedialog� Email Notification Violationscommittedduringbatch processingcanbesentviaemail�Thisis doneusingtheEmailNotificationservice� ToopentheEmailNotificationService manager: § ClicktheWindows[Start]buttonandselect [Sartorius],[SPCInline],[Services],[Email Notification]� > Theiconoftheserviceappearsinthe systemtray� > Theservicesettingsdialogopensautomaticallywhenlaunchedforthefirsttime� ToopentheEmailNotificationService dialog: § Right-clickontheicon� § Select“Settings”menuitem� 83 > Theservicesettingsdialogappears� § Selectthe“ActivateEmailNotification” optiontoactivatetheservice� > Theinputfieldsareenabled� § SelectanSMTPServer� If“Local(IIS)”isselectedastheSMTP Server,MicrosoftInternetInformation Servicesmustbeinstalled� If“Remote”isselectedastheSMTPServer: § Fromthe“Sender’sEmailAddress,” enterthevalidemailaddressofthesender, whichistheSPC@Inlineapplication� Toaddoneormoremailrecipients: § EntertheFullName� § EnterthevalidEmailAddress� § Clickthe[Add]button� > Therecipientinformationisaddedtothe list� $ Toaddmorerecipients,repeatthe procedureasrequired� Toremovearecipient: § Selectarecipientfromthelist� § Clickthe[Remove]button� > Therecipientinformationisremovedfrom thelist� § Clickthe[Save]buttontosavechanges� 84 Licensing Procedures Ordering Product Licenses Thesoftwareisshippedwitha30-day licensefortrialanddemonstration purposes�Thisincludesonelicenseforthe SPC@Inlineserverapplicationandone licenseforasinglecheckweigher� Amessagewindowopenseverytimethe programislaunchedindicatingthatthe softwareisademoversion� Afterthe30-daydemolicenseexpires, theprogramcannotbeusedagainuntil youobtaina“fullversion”licensefile� Toorderafullversionlicense: § Contactthesoftwaremanufacturer (viaphoneore-mail)� § Providethemwithyourcompanyname, contactdetails,productID,ordercodes, andinstallationcode� § Specifytheordercode(s)andthenumber oflicensesforeachcode� Validordercodesare: – 62899XS:LicenseperconnectedEWKor – – – – – SYNUScheckweigher(specifynumberof licenses) 62899XCombi:LicenseperconnectedEWK CombiorCoSYNUScheckweigher(specify numberoflicenses) 62899XMDP:LicenseperconnectedMetal DetectorPremium(specifynumberof licenses) 62899XM:LicensefortheSPC@Inlinefull installation(only1percustomer) 62899XM-L:License(s)foradditional SPC@Inline“CompactInstallation”versions (specifynumberofinstallations,upto255) 62899XV:LicenseperconnectedVistus metaldetector(specifynumberoflicenses, upto255) 85 Toobtaintheinstallationcode: § Clickthe“ShowLicenseViewer”linkinthe demoversionnotificationdialog,orclick theWindows[Start]buttonandselect [Sartorius],[SPCInline],[LicenseViewer] fromtheStartmenu� > TheLicenseViewerwindowopens� Thelistofinstallationcodesislocated intheupperright-handcornerofthe window�Fourinstallationcodesarelisted; selecteitherCode2orCode3� Note: Whensubmittingtheinstallationcode, besuretoindicatewhichcodeitis;for example,“Code2:DF740095�”Sending onlythe8-charactercode(inthiscase, DF740095)isnotsufficient� 86 Activating the Product Afteryousubmittherequiredinformation asdescribedabove,anewlicensefilewill besenttoyou�Toactivatethefullversion ofthesoftware,replacetheoldlicensefile withthenewoneasfollows: § RuntheSPC@Inlineprogram� > TheDemoVersionNotificationdialog opens� § Clickthe[Browse]button� > TheOpendialogopens� § Selectthenewlicensefile� § Clickthe[Open]button� > TheOpendialogcloses� > Thecompletefilenameofthelicensefileis displayedinthe“Locatevalid‘spcinline�lic’ file”field� § Clickthe[Activate]button� 87 Alternatively,youcanreplacetheold licensefileusingtheUpdateLicense��� dialog� § OpentheFilemenuinthemainwindow andselect“UpdateLicense����” > Youarepromptedtoconfirm� § Click[Yes]toproceed� Note: Ifanyproductionbatchesarerunning, thedialogwillnotopenandyoucannot update thelicenseatthattime� > TheUpdateLicense���dialogopens� Note: Ifthelicensefileisinvalid,anerrormay occurafterwhichyouwillnotbeable tousetheprogram�Pleasecontactyour administratororthesoftwaremanufacturer shouldthisoccur� 88 Activating the Device License Afteryouobtaintherequireddevice licenses(seeOrderingProductLicenses), youneedtoactivateeachdevicelicense individually�Checkweighersormetaldetectorsthatdonothaveactivelicensesare representedbygraycheckweigherormetal detectoriconsintheNetworkConfigurationwindow� Toactivateadevicelicense: § OpentheNetworkConfigurationwindow� (See“RegisteringtheDevices”formore information�) § Right-clickonadevicenodeintheNetworkNodestree� > Ashortcutmenuopens� § Selectthe“Activate”menuitem� > Theiconoftheactivatedcheckweigher changes� Makesureyouordersufficientlicenses withyour62899XS,62899XCombi,and/or 62899XMDPordercodes�Thenumberof availablelicensesisshownatthebottom oftheNetworkNodestreepane� 89 Devicelicensesarefullytransferable;in otherwords,youcandeactivateagiven licenseforonedeviceandactivateitfor another�Thisisonlypossiblethoughfor devicesofthesametype,e�g�EWKtoEWK, CoSYNUStoCoSYNUS,etc� Todothis: § Right-clickonadevicenodeinthe NetworkNodestree� > Ashortcutmenuopens� § Selectthe“Deactivate”menuitem� > Theiconoftheactivateddevicechanges� Youcannowactivatethislicensefor anotherdevice� Note: Youcannotdeactivateadevicelicense whilethedeviceitisassignedtoisprocessingabatch� 90 Sartorius Weighing Technology GmbH Weender Landstrasse 94–108 37075 Goettingen, Germany Phone +49.551.308.0 Fax +49.551.308.32 89 www.sartorius.com Copyright by Sartorius Weighing Technology GmbH, Goettingen, Germany. All rights reserved. No part of this publication may be reprinted or translated in any form or by any means without the prior written permission of Sartorius. The status of the information, specifications and illustrations in this manual is indicated by the date given below. Sartorius reserves the right to make changes to the technology, features, specifications and design of the equipment without notice. Status: Januar 2012, Sartorius Weighing Technology GmbH, Goettingen, Germany Printed in Germany on paper that has been bleached without any use of chlorine W_ ProControl Inline 3_0· KT Publication No.: W626025-e12012