1
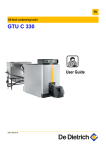
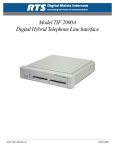
SECTION I: USER
I.6.8
ALARM SIGNALS
If the al arm is a type A alarm, it will be automatic ally res et. If the alar m
is a type M al arm, you will need to press the ALARM key for 3 sec onds
to reset it. If the alarm is a type A3M alar m, it will be automaticall y reset
3 times and will then need to be manuall y res et.
IMPORTANT !
Malfunctions and alarm s displayed b y the machine
should NEVER b e ignored. The problem should b e
checked and resolved as soon as po ssible. If the
alarm re-occurs, call technical assistance.
If the unit's elec tronic boar d detec ts any malfunctions, the AL ARM key
will light up on the control panel and the alar m code in ques tion will
appear on the displ ay, with r eference to the following table.
ALARM
!
Prg
ALARM
No alarms
detected
MODE
ON
OFF
ALARM
!
High pressure
Prg
ALARM
MODE
AL: 012
ON
OFF
Alarm
AL: 002
Alarm description
Antifreeze loc kout alar m
AL: 005
Differential pressur e s witch alarm
AL: 010
AL: 012
AL: 020
AL: 021
AL:022
Low press ure alarm
High pressure Al arm
Fan thermal al arm
Alarm pump 1
Alarm pump 2
AL: 030
ST1 probe malfunction alar m (B1)
AL:033
ST4 probe malfunction alar m (B4)
AL:034
ST2 probe malfunction alar m (B5)
AL:035
Faulty pr essure trans ducer alarm
AL: 037
ST8 probe malfunction alar m (B8)
AL: 040
Maintenanc e pump 1
AL: 041
Maintenanc e compressor 1
AL: 042
Maintenanc e compressor 2
AL:046
Maintenanc e pump 2
AL: 055
Clock c ard al arm
AL: 056
Phas e sequenc e al arm
AL: 057
Min/max voltage alarm
AL:060
High temperature al arm IN r ec/des
Reset
Indicates that probe ST2 has detected a lower temperatur e than the set antifreeze
Set-point.
Indicates that the differential pressure switc h between the s ystem i nput and output
water has been ac tivated.
Indicates that the low pressur e s witch has been acti vated.
Indicates that the high press ure s witch has been acti vated.
Indicates that the ther mal protec tion i nside the fan's elec tric motor has been acti vated.
Indicates that following the AL: 005 alarm the pump may be faulty.
Indicates that following the AL: 005 alarm the pump may be faulty.
Indicates that either the probe is faulty or has detac hed from c onnector B1. Chec k
whether it's worki ng and repl ace if nec essar y.
Indicates that either the probe is faulty or has detac hed from c onnector B4. Chec k
whether it's worki ng and repl ace if nec essar y.
Indicates that either the probe is faulty or has detac hed from c onnector B5. Chec k
whether it's worki ng and repl ace if nec essar y.
Indicates that either the pressur e transduc er is faulty or has detac hed from connector
B6. Chec k whether it's worki ng and repl ace if necessar y.
Indicates that either the probe is faulty or has detac hed from c onnector B8. Chec k
whether it's worki ng and repl ace if nec essar y.
This alarm does not i ndicate a malfunction but onl y signals that the number of worki ng
hours of the pump has exc eeded the s et val ue. The unit continues to oper ate as
normal.
This alarm does not i ndicate a malfunction but onl y signals that the number of worki ng
hours of the c ompress or has exc eeded the set value. T he unit c ontinues to operate as
normal.
This alarm does not i ndicate a malfunction but onl y signals that the number of worki ng
hours of the c ompress or has exc eeded the set value. T he unit c ontinues to operate as
normal.
This alarm does not i ndicate a malfunction but onl y signals that the number of worki ng
hours of the pump has exc eeded the s et val ue. The unit continues to oper ate as
normal.
Indicates that the cloc k card ( accessor y) is faulty: cut off and res ume the unit's power.
If the al arm persists, c ontact an authorised ser vice centre and the cloc k c ard will be
replaced.
Indicates that the L1-L2-L3 phase s equence to the mains s witch is incorrect. Cut the
unit off, adj ust the s equence and resume power.
M
A3M
A3M
M
M
A3M
A3M
A
A
A
A
A
A
A
A
A
A
M
A
Indicates that the rec over y outlet water temperature has exceeded the s afety
threshold.
A Automatic reset
M Manual r eset
A3M Automatic 3 times, then manual
50
A3M
SECTION II: INST ALL ATION AND MAINTEN ANCE
II.8.1
CONFIGURATION
Safet y component calibration settings
Pressure switch
high pressure
low pressure
water differential
Safety val ve
Cut-in
40.2 bar
2 bar
80 mbar
41.7 bar
Reset
28.1 bar - Manual
3.3 bar – Automatic
105 mbar - Automatic
-
DANGER !
The safet y valve is calibr ated to 41.7 bar. It could
cut in if the calibr ation valve is reached during the
refrigerant charging operations, cau sing a burst
that could cau se scalding.
Configuration parameter s
Standard setting
Summer worki ng temper ature set poi nt
7°C
Winter working temperature s et poi nt (THAEY)
45°C
Wor king temperature differential
2°C
Antifreeze temper ature set poi nt
1,5°C
Antifreeze temper ature differential
2°C
Water differenti al press ure s witch time upon start-up
120"
Water differential pressure s witch exclusion time upon start-up
15"
Circulation pump s witch off time delay
15"
Minimum time between two c onsec uti ve compress or start-ups 360"
The units are tested in the fac tor y, where they are also c alibrated and
the default par ameter s ettings are put in. These guarantee that the
appliances r un c orrectly in rated wor king conditions . The machi ne
configuration is carried out in the factor y and should never be altered.
IMPORTANT !
If a unit is used for the production of chilled water,
check the adjustment of the thermostatic valve.
II.8.2
UNIT S TART-UP AND S TARTUP AFTER
PROLONGED SHUTDOWN
DANGER !
Always use the switch to isolate the unit from the
mains b efore carr ying out an y mainten ance work,
even if it is for inspection purposes only. Make sur e
that no one accidentally supplies po wer to the
machine, lock the m ains switch in the OFF position.
Befor e starti ng the unit, perfor m the following chec ks :
The el ectricity power suppl y must c ompl y with the specifications on
the data plate and/or the wiring diagram and it must fall within the
followi ng limits:
• Variation of the power suppl y frequenc y: ±2 Hz.
• variation of the power suppl y voltage: ±10% of the nominal voltage;
• imbal ance between the suppl y phas es: <2% .
the electrical power s uppl y s ys tem must be able to suppl y adequate
current and be suitabl y sized to handle the load;
open the electric panel and make s ure the terminals of the power
suppl y and of the c ontactors are tight (they may have c ome loose
during trans port, which c ould lead to malfunctions);
Electrical connec tions must be made in compliance with the l ocal
installation standards i n force in the plac e where the unit is i nstalled,
and with the i nstructions in the wiring diagram provided with the unit.
58
SECTION I: USER
II.8.3
START-UP PROCEDURE
IMPORTANT !
The unit must be started up for the fir st time b y
skilled technicians only, qualified to wor k on
conditioning and refrig erant units.
II.8.3.1
Once the unit installation and c onnecti on operations have been
completed, it can be started up for the first time.
For a correct first start-up of the unit c arefully follow the diagrams
provided in the following paragraphs.
General unit conditions
START
Have the technical clearanc e distanc es indicated in the manual been
respected?
" YES
Are the finned coils fr ee fr om obs tructions?
!
NO
!
Restore the indicated tec hnic al spaces.
!
NO
!
Clean the finned c oils.
!
NO
!
Remove the obstr uctions .
!
YES
!
Danger ! D o not start the unit! Restore
the unit!
" YES
Are the fan grilles free from obstructions?
" YES
Is the unit damaged due to transport/installation?
" NO
The gener al conditions of the unit ar e compliant !
II.8.3.2
Checking the compressor oil level
START
Is the oil level sufficient?
!
NO
!
Top up as necess ary
" YES
Was pre-heating ac tivated at least 24
hours before start-up?
" YES
!
NO
!
Activate pre-heati ng and wait 24 hours.
The compressor is r ead y for startup !
II.8.3.3
Checking the water connections
START
Have the water connections been made to a professional standard?
!
NO
!
Bring the c onnections up to standard.
!
NO
!
Correct the input/output directi on.
!
NO
!
Fill the circuits and/or bleed the air.
!
NO
!
Correct the water flow.
!
NO
!
Correct the rotation direction.
!
NO
!
Repair or replace the component.
!
NO
!
Repair or replace the component.
" YES
Is the water input/output direction c orrect?
" YES
Are the circuits full of water and have the pipes been bled of any air residue?
" YES
Does the water flow c onform to what is stated in the user manual?
" YES
Do the pumps turn in the right direction?
" YES
Are the flow meters (if installed) acti ve and correctl y c onnected?
" YES
Are the water filters placed upstream from the heat exc hanger and rec over y unit
in good worki ng order and correctl y ins talled?
" YES
The water connections ar e compliant !
59
SECTION I: USER
II.8.3.4
Checking the electrical connections
START
Does the unit power s uppl y matc h the values
indicated on the plaque?
" YES
Is the phas e sequenc e correct?
!
NO
!
Restore the correct power s upply.
!
NO
!
Restore the correct phase s equence.
!
NO
!
Danger ! R estore the earth c onnec tion!
!
NO
!
Danger ! R eplac e the wires
immediatel y!
!
NO
!
Danger ! R eplac e the c omponent
immediatel y!
" YES
Does the earth confor m with c urrent r egulations?
" YES
Are the power circuit electric conductors of the siz e
indicated in the manual?
" YES
Is the circuit breaker positioned upstream from the
unit of the right size?
" YES
The electric connection is compliant !
II.8.3.5
First start-up (Standard Unit)
START
Ask all unauthorised personnel to leave the area.
De-activate the magnetother mal s witches on the c ompress or
power suppl y.
Simul ate an empty start i n order to ensure that the power
contactors have been inserted c orrectl y.
Are the power contactors ins erted correctl y?
!
NO
!
Chec k and r eplac e the c omponent if
necess ary.
" YES
Disconnec t the power from the auxiliary s upply again.
De-activate the magnetother mal s witches on the c ompress or
power suppl y.
Power the auxiliar y circuit.
Start up the machine usi ng the control panel
(ON/OFF key).
All ON/OFF operations must be carried out
EXCLUSIVEL Y using the ON/OFF key on the
control panel.
!
Choos e the oper ating modes
(MODE key).
Chec k the c orrect rotation of the pumps and fans, the flows and
the operation of the heat exc hangers sens ors.
!
Start-up procedure completed !
60
NO
!
Chec k and r eplac e the c omponent if
necess ary.
SECTION II: INST ALL ATION AND MAINTEN ANCE
II.8.3.6
First start-up (Unit w ith recovery)
START
Ask all unauthorised personnel to leave the area.
De-activate the magnetother mal s witches on the c ompress or power
suppl y.
Simul ate an empty start i n order to ensure that the power c ontactors
have been inserted c orrectl y.
Are the power contactors ins erted correctl y?
" YES
!
NO
!
Chec k and r eplac e the c omponent if nec essar y.
Disconnec t the power from the auxiliary s upply again.
De-activate the magnetother mal s witches on the c ompress or power
suppl y.
Power the auxiliar y circuit.
Start up the machine usi ng the control panel (ON/OFF key), also
starting up the recover y circuit pumps and disabling the heat
recover y units through the control panel or excluding the heat
recover y differential pr essure s witc h consent.
Chec k that the pumps rotate correctl y, c hec k the flows and the
operation of the heat recovery sens ors.
All ON/OFF operations must be carried out
EXCLUSIVEL Y using the ON/OFF key on the
control panel.
!
!
NO
!
Chec k and r eplac e the c omponent if nec essar y.
Put the unit in the right mode (summer or wi nter), then ac tivate the
recover y unit consent.
Start-up procedure completed !
II.8.3.7
Checks to be made w hile the machine is running
START
Cut-in test:
use the water intercept valves to reduce
the flow to the evaporator.
Ask all unauthorised personnel
to leave the area.
" YES
Is the water differenti al
!
pressure s witc h acti vated
correctly?
" YES
Is the wor king press ure
reading correct?
" YES
If you take the pressur e on the
high pressure side to approx. 8
bar, ar e there gas l eaks of > 3
grams/year?
" NO
Does the unit display feature
any alarms ?
" NO
Start-up procedure completed !
61
!
NO
!
Chec k and/or repl ace the component.
!
NO
!
Stop the unit and chec k the c aus e of
this anomal y.
!
YES
!
Stop the unit and chec k the c aus e of
the l eak (EN 378-2).
!
YES
!
Chec k the c aus e of the alarm.
See table of al arms.
SECTION II: INST ALL ATION AND MAINTEN ANCE
II.8.4
TABLE OF ALARMS
The dis play on the control panel displ ays the alarms, with referenc e to
the following table. Alarms are r eset by pressing the ALARM key on the
control panel once the cause has been identified and eliminated.
Typ e of alarm
AL:002 Antifreez e alarm
AL:005 Alar m for water differential
pressur e switch on condenser/evaporator
Possible cause
Chec k set-point and res et
Insufficient water fl ow
Chec k and adj ust if nec essar y
Insufficient water fl ow
Restore the correct water flow
Presenc e of air in the water s ystem
Bleed
Intercept val ves clos ed
The circulati ng pump (if present) does not run
Water circuit filter obstructed
Open val ves
See Troubl eshooting s ection
Chec k and cl ean if necess ar y
Indicates that the low pressur e s witch has been
activated: the alar m is res et manually from the
keyboard.
Note: the alar m will be automatic ally res et 3 ti mes
in the region of an hour and will then need to be
reset manuall y. When this alarm is triggered the
AL:021 and AL:022 signals are acti vated
simultaneousl y. If the alarm persists refer to
Troubles hooting section.
Indicates that the high press ure s witch has been
activated: r eset the press ure s witch manuall y by
firmly pressing the button on the pressure s witc h
itself. Then res et the alar m manuall y fr om the
keyboard. If the alarm persists refer to
Troubles hooting section.
Short-circuited fan
Chec k and r eplac e the fan if necess ary
AL:010 Lo w pr essur e alarm
AL:012 High pressur e switch alarm
AL:020 Fan ther mal protection activation
alarm
AL:21 Alarm pump 1
AL:22 Alarm pump 2
AL:030 Inlet water temper ature sensor
alarm (ST1)
AL:034 Temp erature sen sor alarm:
evaporator outlet water (ST2)
AL:033 Temp erature sen sor alarm: buffer
tank outlet water (ST4)
AL:035 Pr essure tr ansducer alarm
AL:037 Inlet water recover y temp eratur e
sensor alarm (ST8)
Cut-in
Set-point s et too l ow
Sens or faulty
Sens or detac hed from connector B1
Sens or faulty
Sens or detac hed from connector B5
Faulty sensor
Sens or detac hed from connector B4
Transduc er faulty
Transduc er detac hed from connector B6
Sens or faulty
Sens or detac hed from connector B8
AL:041 Compressor 1 m aintenan ce signal
AL:042 Compressor 2 m aintenan ce signal
AL:055 Clock card alarm
AL:056 Ph ase sequence alarm
AL:057 Min/max voltage alarm
AL:060 Inlet water high temper ature alar m
rec/d es
62
Indicates that following the AL: 005 alarm the
pump may be faulty. T he alarm is r eset manuall y
from the keyboard.
Note: the alar m will be automatic ally res et 3 ti mes
in the region of an hour and will then need to be
reset manuall y.
Replace the sensor
Insert terminal into connector B1
Replace the sensor
Insert terminal into connector B5
Replace the sensor
Insert terminal into connector B4
Replace the transducer
Insert tr ansducer into c onnector B6
Replace the sensor
Insert terminal into connector B8
This alarm does not i ndicate a malfunction but
onl y signals that the number of wor king hours of
the c ompressor has exceeded the set value. T he
unit c ontinues to operate as nor mal.
Contac t an authorised s er vice c entre for
maintenanc e inter vention.
Press the ALARM key to deacti vate the signal.
Indicates that the cloc k card ( accessor y) is faulty:
cut off and resume the unit's power. If the alar m
persists, contact an authorised ser vice c entr e and
the cl oc k card will be replaced. T he alarms are
reset automaticall y.
Indicates that L1-L2-L3 phas e s equenc e
all’interruttore gener ale is inc orrect.
Cut the unit off, adj ust the s equence and resume
power. T he alarms are res et automaticall y.
Indicates that the general power s uppl y voltage
(in volt) is outside the set range. Chec k power
line. The al arms are reset automaticall y.
Indicates that the rec over y inl et water
temperature has exceeded the safety thres hold.