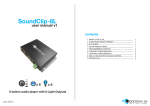
1
FRONT VIEW
Background Track
MicroSD Card
Speaker 1
MicroSD Card
Speaker 2
MicroSD Card
Speaker 3
MicroSD Card
Speaker 4
MicroSD Card
Page 2
To access the jumper you must unscrew the rear of the soundscape and pull
out the board (it will slide out). The jumper is located near the trigger input.
Move the jumper from this position
To this position
Status LED’s for each track
REAR VIEW
Volume Speaker 1 - 2
Trigger Delay
Volume Speaker 3 - 4
The SoundScape will now power a 12v PIR.
12V DC in
Speaker 1 - 2
Speaker 3 - 4
Optional trigger input (3.5mm)
Volume
Background Track
1.Powering Your SoundScape
Connect the supplied 12V DC Adapter to the ‘12V DC in’ to give power to the
device.
2.Connecting Speakers
Wire speakers to the Speaker 1 - 4 terminal blocks, follow the + and directions if appropriate, insert wires and screw in place with provided
screwdriver.
3. Adjusting Volume
Each ‘zone’ of audio including the background track has its own volume control
as shown. Turn clockwise to increase volume and counter clockwise to
decrease. (See section 6 for more information).
4.Connect Triggers
To utilise button or PIR activation of the SoundScape, you must connect your
3.5mm device to the appropriate input. As standard the SoundScape can
power a 5v PIR. Adjusting a jumper on the board can change this to 12v.
5.Adjust ‘Trigger Delay’
This is used in conjunction with either button or PIR activation. It determines
how long between a full play of the programmed content, the SoundScape
will wait until it can be activated again. (See section 6 for more information).
6. Add content to your SoundScape
To add content to your SoundScape you must program the supplied MicroSD
cards and insert these into the appropriate MicroSD slots: see the ‘Programming Content’ section below for more details.
5. PROGRAMMING CONTENT
Content for your SoundScape is stored on the supplied MicroSD cards. To add
content you will need;
1) Audio Content in .mp3 format
2) A PC or laptop with Windows OS
3) 5 x MicroSD Cards (supplied)
4) MicroSD to USB convertor (supplied)