1
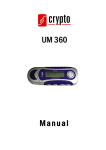
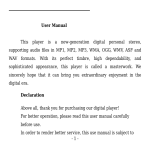
MP3 & Video Player
M994S & M994B
User Manual
FEATURES SUMMARY .................................................................................
3
INTRODUCTION .............................................................................................
4
•
Display screen ................................................................................ 4
•
Battery indicator ...........................................................................
4
MAIN FUNCTIONS .....................................................................................…… 5
•
Enter the menu ................................................................................ 5
•
Display preview ............................................................................... 5
•
Volume adjustment ......................................................................... 9
•
Power ON/OFF ..............................................................................
9
•
Play/Pause .....................................................................................
9
•
Record/Pause ................................................................................. 9
•
Buttons and controls definition ............................................…….. 9
•
Music playback…………................................................................
9
•
Display song name ……………….................................................
10
•
Model of audio…………………………………………………………… 10
•
Repeat Mode (Playback submenu) .............................................. 11
•
Play speed ………………...............................................................
11
•
A-B Repeat ……………….............................................................
11
•
Movie……………………………………………………………………… 12
•
Voice recording ................................................................................ 14
•
ο
Recording……………………………............................................ 14
ο
Select record type………………................................................ 14
ο
Playback Recorded file………………........................................ 14
Photo Browser………………………………………………………………16
• System Settings ………………………………….....................................
17
•
Entry on system settings …………….............................................. 17
•
System settings list ……………….................................................... 17
•
System settings explanation ............................................................ 17
•
E-book……………………………………………………………………… 17
•
Use MP3 player as a USB Disk …................................................ 18
TROUBLESHOOTING …………………………................................................
19
SPECIFICATIONS ……………………………………………..............................
20
FEATURES SUMMARY
● Compact size.
● .MTV video function
● Support browsing JPEG & BMP photos
● Supports music file formats: MP3 & WMA.
● Use with Microsoft Windows® 2000 and newer operating systems. The MP3 player can also be used as a removable USB
disk
● Disk encrypt and Disk partition. Using the enclosed software tools it is possible to encrypt and partition the disk space as
you like.
● Record/Repeat. With built-in voice recorder the recorded files can be saved in WAV file formats.
● Equalizer settings include; Natural, Pop, Rock, Soft, Classic, Jazz, Bass
● Music repeat modes include Normal, Repeat one, Repeat All, Random All, Dir Normal, Dir Repeat, Dir Random.
●Timing off. Automatic off time can be set.
INTRODUCTION
Congratulations on purchasing of this MP3 player! Before starting to use it please read this manual carefully. Due to the
constant production improvement, the MP3 Player you have purchased might be slightly different then the one described in
this manual.
Controls overview
Display screen
• Battery indicator
Displays the battery charging status.
When the battery is fully charged it will be displayed as on the picture (blue square).
When the battery is low, the square will become empty.
MAIN FUNCTIONS
•
Enter the Menu
Press “Menu” button to enter the menu. There is the main menu and lots of submenus.
•
Display preview
o
The main menu screen looks like this:
o
Music mode screen:
o
Record mode screen:
o
Recording playback mode screen:
o
View Picture:
o
System settings screen:
o
E-book:
o
Connection with PC screen:
•
Volume adjustment
Press “VOL”,
then press ”NEXT/” to increase the volume.
then press”PRE/” to decrease the volume.
•
Power ON/OFF
Press and hold “►” button to turn the MP3 player on.
While the MP3 is playing, press and hold the “►” to turn the MP3 player off.
•
Play/Pause
In the Music mode, press the “►” button to playback the music.
•
Record/Pause
In the Record mode, press the “►” button to start or pause recording, press “Menu” or “VOL” to stop the
recording.
In any mode, press the “Menu” button for 2 seconds (long time press) to enter the main menu.
•
Buttons and controls definition
- Express Forward; - Express Backward; ► - Play/Pause
1. “►”: Power ON/PLAY/STOP/OFF.
2. “Menu”: General confirmation button.
3. “VOL”: volume control.
4. “USB”: USB plug.
5. “Earphone jack”: Standard earphone connector.
6. “ON/OFF” power on/off.
Buttons usage definition
The buttons can be used in 3 different ways:
Press: Press the button then release it immediately.
Long time press: Press and hold the button for about 2 seconds, then release it.
Press and hold: Press and keep holding the button.
•
Music playback
Please, follow the steps below
1.
Connect your earphone to the earphone jack of the MP3 player.
2.
Press the “►” button for 2 seconds (long time press) to turn your MP3 player on, enter the Music mode,
then press “►” again to playback the music.
3.
•
Select music:
Press the button to select the next, to select the previous one.
Display of the song name and song text
This MP3 Player supports .LRC file format song text, with the .LRC file the MP3 player can display the song text
synchronously with the song playback.
How to use the song text file (*.LRC)
o
The .LRC should have the same file name as the song.
For example:
If the song name is: Big Big World.mp3
Then the song text file should be: Big Big World.lrc
How to make sure the MP3 player has recognized the .LRC file with the song text?
o
The MP3 player will recognize the .LRC file with the song text by self-reacting when the .LRC have the same file
name as the song. Then long time press “Menu” button, the panel will show lyrics, press “Menu” button again lyrics
display turn off
z
Model of audio
•
1.
Music playing:
2.
Press the“Menu”
3.
Press the button to select “Equalizer”
4.
EQ setting:
5.
Press the button to select, enter the “Mode” button
Repeat Mode (Playback submenu)
During music and recorded file playback, it is possible to choose a number of special “playback modes” (e.g.
repeat, shuffle etc.)
During the music playback, press the “Menu” button to enter the “repeat” submenu, and then press the “Menu”
button again to select one of the following options:
○
REPEAT
(No Repeat)
○
•
Playback one song one after another. Having finished
all of them, stop.
(One)
Repeat one song.
(Dir)
Play all the songs in this folder
(Dir Repeat)
Repeat all the songs in the same folder
(All)
Repeat all the songs in the MP3 player
SHUFFLE
(Random)
Play the songs at random
(Dir Random)
Play the songs at random in this folder.
Playback speed
During the music playback (only for the MP3 file), it is possible to choose different playback speeds (speed up or slow
down), the volume will not change.
1.
During the music playback press the “Menu” button to enter the menu.
2.
Press the button to select “Play Rate” menu.
3.
Press the“Menu”” button to enter the “Play Rate” submenu.
4.
Press the button to “speed up” or press the to slow down.
Note: The playback speed will be saved in the MP3 player memory and it won‘t change until you set it again.
•
ο
Repeat Mode
■
During the music playback press the “Menu” button to enter the “repeat mode”.
■
The following choices are possible:
A-B Repeat
Using this function it is possible to mark the music fragment for subsequent playback. To do that, please follow the steps
below:
1. During the music or recorded file playback long time press the “VOL” button to confirm the point A. You will see the icon
and the letter “A” will blink.
2. Long time press the “VOL” button again to confirm the point B. On the icon
the letter “B” will now start blinking.
3. Long time press the “VOL” button the 3rd time to exit A-B Repeat mode
•
Movie
This unit can play .MTV files in the movie mode. The basic operation of the movie mode is the same as the music mode.
When movie is playing, the following buttons are available.
PLAY:stop play. Long press power off.
MODE:press enter the movie file list. Long press enter the main menu.
PRE/NEXT:pre/next song.
NOTE: Use the file conversion utility for converting other movie/video file formats for proper play.
MTV Video Converter:
Usage steps for conversion:
1. Input Video
2. Select the output frame size
* Cut Image: (Only 128X128)
Cut the parts of left and right sides of images for the better look.
3. Select output frame rate
4. Select Output Audio Quality
5. Select a music file to replace the original background audio of the input video clip. (Go to 6. if you want to keep the original
audio of the video input clip.)
* Click on the check box to enable the function.
6. Select a time period to convert (Go to 7. if you want to convert the whole video input clip.)
7. Start Conversion
•
Voice recording
The MP3 player can save up to 9999 recorded files in its memory.
ο
Recording
1. Enter the Main menu:
2. Press the“Menu” button to enter the record mode:
3. Press the “►” to start/stop recording.
Recorded file will be saved in the MICIN.DIR directory.
If you get the message “No Space” on the screen, that means there is
not enough space to save the recorded file, you should delete files to get
the space.
If you get the message “Directory full” on the screen, that means that the recorded files quantity exceeded 9999, you
should save the recorded file to another directory.
During the recording, the “/” button can not be used.
ο
Select recording type
1. Enter the main menu then enter the Record menu
2. Press the “” button to select the record type, press “Menu” button to confirm the choice:
(128 kbps): Fine Rec., WAV file format, the best quality sound but creates much bigger files.
(032 kbps): Long Rec., WAV file format, average quality sound.
3. Press the “Play” button to start recording.
ο
Playback the recorded file
1.
Enter the main menu.
2.
Press the button until you select “voice”
3.
Press the “Menu” button to enter the submenu.
4.
Press the “►” button to start the playback.
5.
Press “/” to select the recorded file.
Photo Browser
•Enter the Main menu:
It is empty content if there is not file.
►: enter playing photos status.
/ : choose.
Other buttons are not effective.
Playing photos status:
Sort press / button: choose.
Sort press ► button: return files choosing status.
Long press MENU button: return main-menu.
SYSTEM SETTINGS
•
How to change the System settings
1. Enter the main menu
2. Press the button to select “Sys set”
3. Press “Menu” button to enter the “Sys set” system settings submenu.
•
The system settings are listed below
•
Power Setting
Sets the time of the auto-power off.
Language
Sets the language
Display
Sets the timing of the backlight and Brightness of LCD.
Record Type
Sets record type
Sys Tools
Sets format, Reset, and display system info
System settings explanation
○ setting “Display”
1.brightness
Brightness
2.backlight
The backlight LED will turn off if no button is pushed after a time
which can be set by user.
○
Setting “Language”. Please, operate in a similar fashion as the “Model of audio” setting.
○
Setting “Power off“. There are two settings here:
Off time: Set your auto-off time, the unit is in seconds
○
“Sys Tools” Sets disk format, system reset, and shows the percentage of the disk storage space which is currently
used and free.
Press “Menu” button to confirm your setting, then press “►” button to exit the submenu.
E-book
1. Enter E-Book from Main menu.
2. Press “Menu” button to enter TXT file from the E-Book menu.
3. Press / button to select desired text file to read, and the press ► button to enter text
interface.
4. Press / button to turn the pages in sequence.
When playing picture, long press “Menu” to fast exit from picture interface and return to the
main menu; press play button to exit from picture interface also.
•
Use MP3 player as a USB Disk
This MP3 player can be used as a USB disk.
The MP3 player can use the USB port power, so when it is connected to the PC the battery is not used. If you want to
playback the music when MP3 player is connected to the computer, during the “wait mode” press the “Mode” button, then you
will enter the main menu.
After connection with the PC has been established, there are three kinds of MP3 modes which are shown on the screen in the
following way:
1.Waiting status
2.A file being downloaded
3. A file being uploaded
TROUBLESHOOTING
No power
1.Check battery
2.Check your power switch
No music is heard in the
1.Check the Volume level
earphones
2.Check the connection (earphone to the earphone jack)
3. Check if the music file can be played by the MP3 player.
Wrong language
Set correct language
FM radio is not very clear
Check if you have any interference with the nearby electric power
devices
Can‘t download music
1.Check if the USB cable is properly connected to your computer
2.Check if you have installed the driver (under Windows 98)
3.Check if you have enough disk space to download the music file
SPECIFICATIONS
Outside Dimensions
Weight
Display area
1.5” screen
Computer interface
High speed USB2.0
Memory
Flash memory: 128M – 4GB
Battery lifetime
The longest Playback up to 6 hours
Recording
MP3,WMA,WAV
FM Radio
Music formats supported
Rate
8-44.1KHz
Record format
WAV(32-128K bps)
Record time
35 Hours (WAV(32Kbps) for 128M Flash)
Earphone max power
(L)10mW + (R)10mW(32Ohm)
MP3 bit rate
8Kbps – 320Kbps
WMA, WAV bit rate
5Kbps – 320Kbps
Frequency response
20Hz - 20KHz
Signal to Noise ratio
85dB
FM frequency range.
87MHz–108MHz
Total number of radio stations
25
Earphone Max Power
(L)10mW+(R)10mW(32Ohm)
Signal to noise ratio
45dB
MP3, WMA
Movie formats supported
MTV
Temperature range
-5 ~ +40 Degree
Language support
English, German, Chinese
Operating system
Windows 2000/XP/Vista or newer
LIMITED 90 DAY WARRANTY
We warrant this product to be free from defects in material and workmanship under normal use for a 90-day
period after purchase. We will repair or replace the unit free of charge should it become defective under this
warranty, providing you submit proof of purchase (sales slip) along with the unit and all accessories.
During the initial 90 day period after original purchase, we will service or exchange, at no charge. To obtain
warranty service or replacement within the duration of the 90-day warranty, return the product freight
prepaid to the address below.
ATAK USA
823 Old Settlers Trail
Suite 100
Hopkins, Minnesota 55343
Please enclose a copy of the sales receipt with the date of purchase and provide a detailed description of
the problem. Failure to enclose required information will result in delay of your shipment. Please allow 4-6
weeks for product service or replacement.
This warranty does not cover any product, which has been subject to damage due to an act of Nature,
misuse, neglect, accident, abuse, commercial use, or modification of, or to, any part of the product,
including the antenna. Damage to external devices such as speakers and other memory devices are not
covered nor is the cost incurred in shipping the unit for warranty repair. Under no circumstances shall ATAK
USA, be liable for any loss (direct, indirect, incidental, foreseen, unforeseen, special or consequential) or for
any damage arising out of, or in connection with, the use of this product.
UNDER NO CIRCUMSTANCES WILL ATAK USA BE LIABLE FOR ANY INCIDENTAL OR
CONSEQUENTIAL DAMAGES.
This warranty does not cover re-manufactured units, or product sold ‘As Is’.
This warranty is valid only in the United States and grants specific legal rights.