1
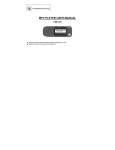
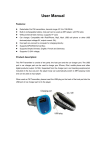
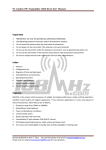
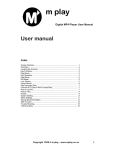
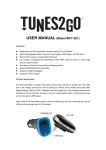
MMS-201
MP3 Player Speaker Box Set
User manual
English
For information and support, www.lenco.eu
1.
Basic controls and interfaces of the player
Item Description
1
2
Item Description
Speaker (Mono)
9
Button (Play/ Pause, Power On/Off)
Button (Volume Up)
10
LCD Display
3
MENU Button (Menu / Enter)
11
Memory Card Slot (SD Card)
4
REC Button (Record, Record Stop and Save)
12
USB Port (for USB Disk)
5
MODE Button (Change mode)
13
Mini USB Port (PC Connection / Charge)
6
Button (Back, Fast-Backward, Down)
14
Battery Compartment
7
Button (Next, Fast-Forward, Up)
15
Line In Jack
8
Button (Volume Down)
16
Earphone
2.
Detachable Rechargeable Battery
The player comes with a detachable rechargeable lithium battery. When using the device for
the first time, charging it for 3 - 4 hours or until the battery icon is show the battery is in full.
Battery Is In Full
A. Install the Rechargeable Battery:
•
Open the cover door of battery compartment which located at the back of the player. And then
place the rechargeable lithium battery into battery compartment.
•
Make sure contact plate is inserted into the pins connector correctly.
•
Close the cover door.
Note: The player continues to use battery power after it’s been turned to off, if unit isn’t used for a
while, the battery might need to be charged.
B. Charging the Battery:
You can charge the player battery in two ways:
•
•
Connect player to your computer.
Use the USB power charger. (not included)
C. Connection and Charging:
•
Once you have connected player with computer / Power charger, then you will see the
“Connecting Mode” or any one of the “Mode” screen on LCD display.
•
In connect / mode screen, you can see the bar levels are running in battery icon, the battery is
in charging.
•
The battery icon will show “Full” when the charging is completed. Disconnect the USB cable
when it is done.
Connecting Mode Screen
Important: The battery cannot be charged when your computer is in sleep mode. The USB port on
most keyboards does not provide enough power to charge the player. Connect player direct to a
USB port on your computer only to prevent charging problem.
3.
Insert Micro SD Memory Card / USB Disk
MMS-201 is design without an internal memory, it need to have a USB disk or a SD memory
card insert into the USB port or the card slot. Upload your desired music files to the USB disk / SD
memory card direct from the computer then insert to player.
Important: When both SD card and / or the USB disk have inserted to device and the device is
connected to the computer by uses the USB cable; only a “Removable Driver” of SD card can be
detected and use for data transfer with the computer. Due to the same data pins are used as sharing
in-between the mini USB and the computer, the USB disk is cannot be detected and use for data
transfer.
•
“Card/USB is pulled” message will show when you remove the SD memory card / USB disk
from player.
•
“Format Error” message may show when you insert the SD memory card / USB disk in not
good way or incorrectly. Take them out and plug them in again.
•
“No file in disk” message will show, if you do not put Micro SD memory card / USB disk into
the player’s memory card slot / USB port, when you want to change mode to music play.
Note: The player functional may dead halt if you plug and unplug the card or USB incorrectly.
Power reset the player by take out the rechargeable battery if happened.
4.
Connecting and Disconnecting
Connect the player to your computer to upload music files to your player, or to download
recorded voice memos to your computer, when the SD memory card or USB disk is in use.
A. Connecting the player
•
Plug the USB cable to the Player’s mini USB port and into a USB port on your computer, then
the computer will detect and install the driver automatically. Once the installation is complete
the player will be displayed in “My Computer” or for MAC users on the desktop.
•
•
Now the player is ready for music files upload / download with your computer.
Transfer the music files by using the computer mouse use drag and place, or copy and paste, in
between the player and your computer. Disconnect it when you’re done.
Note: The player will disconnect with PC and go into clock display mode or operation mode, when
press / Pressing “MENU” button if in connecting mode. Unplug the USB cable and plug it in again
to return to connecting mode if you want.
B. Disconnecting the player
•
•
Do not disconnect the player while it’s uploading or downloading files with your computer.
Windows system PC, disconnect the player by clicking the “Safely Remove Hardware” icon in
the Windows system tray.
•
•
Mac system PC, disconnect the player by dragging the player icon on the desktop to the Trash.
Now it is safe to unplug the USB cable.
Note: If you do not “Safely remove hardware” before disconnecting, data can be lost!
5.
Getting Started
A. Turning the player ON and OFF
•
Press and hold
button to turn the player “On and Off”.
•
When the player is turned On, first the opening screen and then it will enter to “Radio / Music
/ Line In” mode which is available.
•
•
Example, the player will enter to Radio mode, if no SD memory card and USD disk is in use.
When you turn Off the player, the last status will be recorded and the last status shall be recall,
when you start up the player again.
Note: The last status memory will be changed if you have take away the SD memory card and / or
USB disk.
B. Change Function Mode
•
Press the “MODE” button to change to “FM Radio or Music” function mode here is in easily
way.
C. Auto Mode
•
The player has designed “Auto Mode” function, the player will direct switch to related mode,
when you plug in the source of SD memory card, USB disk or Line In cable. This means that
the mode will change according to the last source have plugged.
D. Enter to Clock Display and Mode Menu
•
In function mode, press and hold the “MENU” button to enter to clock display and mode menu,
then you will see the clock is displaying.
Clock Display
•
In clock display mode, press “MENU /
/
/
” button will enter to mode menu.
•
Then you can find “Calendar / Music / Recorder / FM Radio / System” mode menu here to
choose. Press
/
button to select your desired mode and press “MENU” button to
enter.
Mode Menu
Note: In menu mode, Press
button to back to previous item / menu, press “MENU” button to
enter the selected item. Press and hold “MENU” button to return to “Clock Display” mode.
E. Mode Menu
Calendar
•
In mode menu, choose “Calendar” to view the Year, Month, Date and Time” in one screen.
Music
•
In mode menu, choose “Music” to enter to music mode.
Recorder
•
In mode menu, choose “Recorder” to enter to record mode.
FM Radio
•
In mode menu, choose “FM Radio” to enter to radio mode.
System
You might need to set some settings for player’s system, such as date and time…etc.
•
In Clock Display mode, press “MENU” button to enter to mode menu.
•
In mode menu, press
to use.
/
button to select “System”, a system settings menu is appears
a. System Time
•
In system settings menu, choose “System Time” by using
“MENU” button, a date & time setting screen appears to use.
•
Press “MENU” button to change the highlight to year, and then adjusting the number to
current year by pressing the
/
button.
•
And, repeating the adjusting methods by “MENU” and
/
button again for finished
those items; Month, Date, Hour, Minute and seconds setting adjustment.
•
Finally, you need to press the MENU button to confirm the adjustment and back to system
menu.
/
button and then press
b. Backlight
You can set the backlight to illuminate the screen for a certain amount of time as you desired
or make the backlight to always ON when every time you turn ON the player.
•
In system settings menu, choose “Backlight”, a level bar with number appear, choose “0
(always On) / 3 / 6 / 9 / 12 / 15 / 18 / 21 / 24 / 27 / 30 (seconds)” as you desired by using
“MENU” and
•
/
buttons.
Choose “0” to prevent the LCD backlight from turning to off. Choosing this option will
decrease battery performance.
c. Language
This player can use difference languages.
•
In system settings menu, choose “Language” and then choose your desired OSD language.
d. Tool
In system setting menu, choose “Tool”, then you will see the tool menu is appear to use.
Power Off Set (Sleep)
The “Power Off Set” provides sleep function, countdown timer, to turn Off the device as you
desired time which set.
•
In Tool menu, choose “Power Off Set”, a levels bar with number menu appear, then choose
“10 / 20 / 30 / 40 / 50 / 60 / 70 / 80 / 90 / 100 / 110 / 120 (minutes)” as you want by using
MENU and
/
buttons.
Alarm
In tool menu, choose “Alarm”, then you will see the alarm menu is appears to use.
- Alarm Off / Alarm On•
Once you choose “Alarm”, then you will see either one of them “Alarm Off / Alarm On” is
display. It will switch to “Alarm Off / Alarm On”, when every time you’re choosing one of
them and press MENU button.
•
•
The “Alarm Off” is disabling the alarm wake up function.
The “Alarm On” is enabling the alarm wake up function by the selectable alarm signal
“default ringing tone” or your desired MP3 file.
- Time –
• Choose “Time” to set the alarm time as you want.
- Cycle Choose “Cycle” > choose “Every Day / One Time / Cycle”, the alarm wake up cycle as you
want.
- Alarm Signal - (wake up sound by ringing tone / music file)
•
•
Choose “Alarm Signal” > choose “Ring Embedded / Card Folder / USB Folder / Exit” as you
want.
•
•
Choose “Ring Embedded” to have the default ring tone signal as wake up sound.
The Card Folder item will exist when SD memory card is in use. Choose “Card Folder” >
folder and WMA/MP3 file which you want it as wake up sound.
•
The USB folder item will exist when USB disk is in use. Choose “USB Folder” > folder and
WMA/MP3 file which you want it as wake up sound.
• Choose Exit to exit from Alarm Signal menu and back to previous menu.
• Press MENU button to turn Off the activated wake up ringing tone / music sound.
- Volume - (wake up sound level)
•
Choose “Volume” to set wake up alarm signal / sounds level, a levels bar with number menu
appear, adjust the volume level what you want.
- Exit •
Choose this to exit from Alarm menu and back to previous menu.
Note: The alarm duration time is 10 minutes.
Time FM Set
- Close Time FM / Open Time FM - (wake up by FM Radio)
•
Once you choose “Time FM Set”, then you will see either one of them “Open Time FM /
Close Time FM” is display. It will switch to “Open Time FM / Close Time FM”, when every
time you’re choosing one of them and press MENU button.
•
The “Open Time FM” is enabling the timer function to turn On the FM radio as alarm ring
sounds.
• The “Close Time FM” is disabling the timer function.
- Close FM Record / Open FM Record – (FM radio Timer Record)
•
Once you choose “Time FM Set”, then you will see either one of them “Open FM Record /
Close FM Record” is display. It will switch to “Open FM Record / Close FM Record”,
when every time you’re choosing one of them and press MENU button.
•
The “Open FM Record” is enabling the timer function to turn On the FM radio and FM record
function.
• The “Close FM record” is disabling the timer function.
- FM Time –
•
To set the alarm time for FM radio, choose FM Time > choose “Hour and Minute” what time
as you desired to turn On the FM radio.
- Tuner Region•
Choose “Tuner Region” > choose “Common Band / Japan Band”, and then selects the known
frequency of radio station which will be recording, and will be used as wake-up radio station of
“Time FM Set”, when the set alarm time coming.
- Exit•
Choose this to exit from Time FM Set menu and back to previous menu.
Exit
•
Choose “Exit” to exit Tool menu.
e. Contrast
•
In system menu, choose “Contrast”, a level bar with number appear, choose “1 – 15” as you
/
buttons.
desired by using “MENU” and
f. Firmware Version
•
Choose “Firmware Version” to view the firmware information.
g. Default Setting
•
Choose “Default Setting” to enter to reset function, a confirm dialog box is appear, press
/
buttons to select “Yes / No”.
•
Choose “Yes” to confirm and all changed system settings will back to factory default. Choose
“No” to cancel.
h. Exit
•
Choose “Exit” to back to Clock Display mode.
6.
Music Mode
•
Press the “MODE” button to switch to the “Music” mode, the music will player automatically.
A. Play / Pause Music file
• Press
button to pause the playing music.
• Press
button again to play if in pause mode.
B. Change Next / Previous and Fast-Forward / Fast Backward
•
•
•
Press
button to play next file.
Press
button to play previous file.
Press and hold
button to play fast-forward.
• Press and hold
C. Change Volume
button to play fast-backward.
• Press / pressing the
/
D. Lyric / ID3 info Display
button to increase / decrease volume levels.
•
The ID3 information of the title, artist and album are displaying on LCD screen, when the
playing of normal music.
•
The lyrics are displays automatically, when the lyrics file is available and synchronize with the
playing music.
7.
Music Submenu in Music Playing Mode
•
Press MENU button to call up the music submenu, and then the submenu “Cycle Mode / EQ
Settings / Repeat Mode / Back / Exit” is appear to use. (for 8 – 10 seconds)
• Press
/
A. Cycle Mode:
•
button to choose one of them and then press MENU button to entering.
Choose cycle mode, then choose “Normal / Repeat One / Folder / Repeat Folder / Repeat
All / Intro” as you want.
B. EQ Settings:
•
Choose EQ mode, then choose “Natural / Rock / Pop / Classic / Soft /Jazz / DBB” as you
want.
C. Repeat Mode: (Repeat A – B)
•
Choose replay mode, then a letter “A” is flashing at a icon in LCD, then press
select the starting point of track “A”.
button to
•
And then a letter “B” is flashing once “A” is selected, use
button again to select the
ending point of track “B” which you want by using
button. And now the A – B distance of
track is repeating. (it will repeat for few time and then will back to normal play)
•
To create another A – B distance of track to repeat, press
new created A – B distance of track is repeating.
•
To cancel the repeat A – B function, press the MEMU /
button again and then again. a
button.
D. Exit:
•
Choose “Exit” to back to music mode screen
8.
Music Submenu in Music Stop Mode
•
Press MENU button to call up the music submenu, and then the submenu “Card Folder / USB
/ Delete / Delete All / Exit” is appear to use. (for 8 – 10 seconds)
•
Press
/
button to choose one of them and then press MENU button to entering.
A. Card Folder:
•
Choose Card folder to changes / selects where the folder and file is going to play.
B. USB Folder:
•
Choose USB folder to changes / selects where the folder and file is going to play.
C. Delete File:
•
Choose delete file to delete the current music file, a dialog box appears to confirm. And then
press
/
to choose “Yes / No” then press MENU button.
D. Delete All:
•
Choose delete all to delete all music files, a dialog box appears to confirm. And then press
/
to choose “Yes / No” then press MENU button.
E. Exit:
•
Choose exit to back to music mode screen
Note: The sub-item of the “Card Folder / USB Folder” will not appear, if no USB / SD memory
card has plugged onto the related port / slot.
9.
FM Radio
A. FM Antenna and Earphone
•
This player in-built a high performance “Coil Antenna” for FM radio us, so you can receives
FM radio stations available if they are in normal signal strength.
•
In the case that some FM stations under an area of low signal strength, you can try to use
earphone, plug it into earphone jack, acts like an antenna that can enhance the FM signal. But,
you can only enjoy FM radio sounds from earphone.
B. Radio Function
•
Press the “MODE” button to switch to the “Radio” mode.
Radio Mode Screen
•
In radio mode screen, press “MENU” button to call up the radio submenu, and then the
submenu “Save Channel / FM Record / Delete Channel / Delete All / Auto Search /
Common Band / Japan Band / Exit” is appears to use. (for 8 – 10 seconds)
•
Press
/
button to choose one of them and then press MENU button to entering.
C. Set Radio Region:
•
Choose “Common Band / Japan Band” to suit your region frequency.
Note: Common Band = frequency from 87MHz to 108MHz. Japan Band = frequency 76MHz to
92MHz. All stored stations may be deleted when every time the region has set or changed.
D. Auto Search Stations:
•
Choose “Auto Search” to enter to auto search and auto preset mode, the radio is searching
stations in the range of frequency “76MHz – 92MHz or 87MHz – 108MHz”.
•
All found radio stations will be stored at the channel list into player’s memory. The radio
searching will stop and show the first received radio station to listening.
E. Manual Search Stations:
•
Press and hold
/
button to tuning up / down to receive next station. The radio search
will stops show the next received radio station to listening.
F. Save Channel:
•
Choose “Save Channel” to store the tuned radio station into player’s memory. The tuned radio
station will be stored at the last empty location in channel list internally.
Note: In default internal channel list there have total 30 preset stations, CH01 – CH30, can be used
to store the wanted radio stations.
G. Delete Channel
•
Choose “Delete Channel” to delete the unwanted stations. The current receiving frequency
will be deleted immediately, when the “Delete Channel” is chosen.
H. Delete All
•
Choose “Delete All” to delete the unwanted stations. The current receiving frequency will be
deleted immediately, when the “Delete Channel” is chosen.
I. FM Record
•
Choose you desired radio station by press the
/
button.
•
Press “MENU” button to call up radio submenu and choose “FM Record” to enter and start
the FM record, the radio mode screen will changed to record mode screen and the FM record
function is starting.
•
•
Press
button to pause the recording if you want. Press
button again to continue.
Press “REC” button to stop and store the recorded file into player’s memory, the “Save”
dialog box appear for seconds. The file is saved and display will changed back to radio mode
screen.
Note: The volume control function will be disabled during in the FM recording.
J. Exit:
•
Choose “Exit” to back to radio mode screen.
K. Playback Record File
•
Same methods as mentioned in item of “Record Mode” as below. Please see the methods
“Locate Voice Folder and Playback Record File” in record mode.
L. Change Volume
•
Press / pressing the
/
button to increase / decrease volume levels.
10. Recorder Mode
This player provides one key record function for voice memo. You can immediately start the
voice memo record, at any mode, by press one button only.
A. Start Voice Record
•
Press the “REC” button to enter and start the voice memo record. The mode screen will
switched to the record mode screen and the voice memo record is started.
•
•
Press
button to pause the recording if you want. Press
button to continue.
Press “REC” button to stop and store the recorded file into player’s memory, the “Save”
dialog box appear for seconds. The file is saved and display will changed back to previous
mode screen.
B. Locate Voice Folder and Playback Record File
•
•
Press “MODE” button to switch to music mode and stop the playing file.
Press “MENU” button > choose “Card Folder / USB folder” > choose “Voice”, a file list
screen appears > choose your desired record file to play by using the
/
and
“MENU” button.
•
Press / pressing the
/
button to increase / decrease volume levels.
Note: The player’s defaulted folder, “Voice” folder, to be created in the root directory of the SD
memory Card / USB Disk, when FM record / Voice Record function has been activated. All record
files to be stored in “Voice” folder.
11. Line In Mode
This player is provides a smart Line In function, the player will switch to Line In mode
automatically, when the plug of line in cable is plugged into the input socket on player. Also, it has
independent last volume control level memory.
•
•
Plug the line in cable plugs to the source device and to the line in socket on player.
Once the line in cable plug is connected to line in socket, the player will switch to “Line In”
mode from current mode automatically. You can see the mode status on LCD display.
•
Open and play the source device, make sure the source volume level is set properly. Now, you
can enjoy the source audio sounds is producing from the player’s power speaker.
•
Press / pressing the
/
button to increase / decrease volume levels.
Note: You may need to reduce the output level of the source device when you found that the highest
distortion sounds is resulting from the player’s power speaker.
12. Troubleshooting
Play cannot turn ON
No
sound
is
•
heard
from •
headphone
Check battery is it charged with enough energy.
Check whether Volume is set “0” and connect the
headphone plugs firmly.
•
Check whether the headphone plug is dirty.
•
Corrupted MP3 may make a static noise and the sound
may cut off. Make sure that the music files are not
corrupted.
No sound is heard from Speaker
•
Check whether Volume is set “0” and connect the
headphone plugs firmly.
•
Check whether power speaker is manually turned off by
“Mode” function. Press and hold the “Mode” button to
turn On power speaker if it in Off mode.
Characters in LCD are corrupted
•
Check whether the right language has been selected.
Download of music files fails.
•
Check whether USB cable is damaged and is connected
properly.
•
•
Check whether driver is installed correctly.
Check whether USB disk or SD memory card have
inserted firmly
•
Check whether USB disk or SD memory card is in full.
Alarm / Time FM function not •
proper working
Check whether clock time and cycle settings are set
correctly.
13. Specifications
Display
Dots Matrix LCD, 64 x 128 pixels
Dimension
163mm (W) x 58.5mm (H) x 40mm (D)
Weight
150g
PC Connection
USB 2.0 (High Speed)
External SD Memory Card (up to 8GB)
Store Memory
External USB Disk (up to 8GB)
DC Power Input
At Mini USB, DC 5V, 500mA
Rechargeable Battery
Detachable Lithium Battery
DC 3.7V, 1000mAh
Voice Recording Format
WMA
128kbps
MP3
32kbps - 320kbps
WMA
32kbps - 320kbps
Earphone Output Power
275 mVrms +/-10% x 2 (32Ohm)
Power Speaker Output Power
1.5W (Maximum)
Frequency response
20Hz – 20,000Hz
SNR
> 70dB (Earphone)
Music Format
Audio
Line In Level
Maximum: 500mVrms
Earphone Impedance
32 Ohm
Speaker Impedance
4 Ohm (Mono)
Operation Temperature
0
OSD Languages
Multi Languages
Operation Systems
Windows 2000 / XP / Vista or higher, Mac OS 9.2 or higher
℃ - 40℃
14. DISCLAIMER
Updates to Firmware and/or hardware components are made regularly. Therefore some of the
instruction, specifications and pictures in this documentation may differ slightly from your
particular situation. All items described in this guide for illustration purposes only and may not
apply to particular situation. No legal right or entitlements may be obtained from the description
made in this manual
15. RECYCLING
If at any time in the future you should need to dispose of this product, please
note that: Waste electrical products should not be disposed of with household waste.
Please recycle where facilities exist. Check with your Local Authority or Retailer
for recycling advice. (Waste Electrical and Electronic Equipment Directive)