1
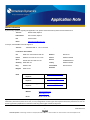
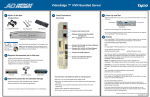
Application Note: 8200-0959-26 A0
Date Issued:
19 November, 2012
VideoEdge NVR 4.1 to 4.21 Migration
Product
Model
Software
Part Number(s)
VideoEdge
NVR
4.1, 4.21
Various
Purpose
This application note provides instructions on how to perform migration from VideoEdge NVR version 4.1 to VideoEdge
NVR version 4.21:
Known Limitations
1. V4.1 VideoEdge User Accounts will not be migrated, therefore copy the User Account details before starting the
migration and then recreate them in V4.21 victor.
2. V4.1 VideoEdge Camera Password Groups will not be migrated, therefore copy the Camera Password Group
details before starting the migration and then manually reconfigure them in the V4.21 NVR.
3. V4.1 VideoEdge Scheduler will not be migrated, therefore copy the Scheduler details before starting the
migration and then manually reconfigure them in the V4.21 NVR.
4. V4.1 VideoEdge Archive Video will not be migrated, therefore export the Archived Video before starting the
migration.
5. V4.1 VideoEdge License file will not be compatible after migration, therefore save the V4.1-generated NVR id file
or locate the V4.1 license file before starting the migration.
Note:
After migration, do the following:
a. Save the V4.21-generated VideoEdgeNVRHostID.txt file
b. Go online at www.americandynamics.net to Register A Product and select VideoEdge V4 or victor to
go the online registration form.
c. Select (VideoEdge Only, Update Existing License, V4.2 Software)
d. To auto-fill the form, enter your unique and valid VideoEdge software serial number and click search.
After the required information fields are filled in:
e. Enter email address for recipient(s) of the license file.
1
8200-0959-26 A0
American Dynamics • 6 Technology Park Drive • Westford, MA 01887 • USA • Tel: 978-577-4000 • Fax: 978-577-4392 • www.americandynamics.net
f. Enter the VideoEdge software serial number.
g. Attach the VideoEdgeHostID.txt file.
h. Click <submit> and then check your email for the license file and instructions on how to apply it.
6. VideoEdge Failover recorded video will not be supported for migration. Therefore the administrator will need to
complete the V4.21 migration as follows:
a. Start migration on the first active V4.1 NVR that is monitored by the failover NVR. During this process, the
active V4.1 NVR will go offline causing the VideoEdge Failover NVR to get activated.
b. After the first active NVR is migrated to V4.21, proceed to do the following:
- Retrieve any required recorded video from the failover NVR
Note: Refer to the NVR 4.1 Installation and User Manual for procedure
- Remove the first active NVR’s IP address from the monitoring list
- Terminate the failover mode to allow the newly migrated V4.21 NVR to take back control of its cameras
- If there are any additional NVR’s being monitored, then proceed to enable the failover mode to continue
monitoring the remaining V4.1 NVR(s)
c. Start the migration for the next active V4.1 NVR that is monitored by the failover NVR by repeating steps “a”
and “b” above.
d. When all active V4.1 NVRs have completed migration to V4.21, then proceed to migrate the failover NVR
over to V4.21.
e. Follow the instructions in V4.21 Installation and User Manual on how to setup the V4.21 NVR as a failover.
NOTE: Stored video is migrated as standard
FROM VIDEOEDGE NVR
Hardware Prerequisites
1. Upgrade to 8GB of Memory:
• VideoEdge Bundled Servers (PE2950 and R710)
• Supplied by American Dynamics for authorized V4.21 Migration Customers
NOTE: Refer to Addendum A at the end of this document for details on installing the additional memory and BIOS
settings.
2. Bootable V4.21 VideoEdge NVR installation media (USB or DVD)
2
8200-0959-26 A0
American Dynamics • 6 Technology Park Drive • Westford, MA 01887 • USA • Tel: 978-577-4000 • Fax: 978-577-4392 • www.americandynamics.net
Before Migration
Follow the steps below:
1. From your client PC, please log into the VideoEdge NVR Server via the web browser and gracefully shutdown the
V4.1 NVR.
NOTE: Refer to the Known Limitations section at the top of this document before starting the V4.21 VideoEdge
Migration
2. On the NVR server, insert bootable V4.21 VideoEdge NVR installation media
• USB: Flash Disk attached to front USB port
• DVD: Load optical media into CD/DVD drive
Begin Migration
Follow the steps below:
1. Ensure that the following items are attached from previous stage:
a. Power cable
b. Network cable (LAN0, LAN1, and if applicable LAN2, LAN3)
c. Monitor
d. Keyboard
e. Mouse
2. Power on the V4.1 VideoEdge NVR (press the front power button)
3. If using the bootable USB installation media:
• Press <F11> when the BIOS is displayed to select the boot sequence
• Scroll down to select <Front USB: Flash Disk>
• Press <ENTER> to choose this boot device
• NOTE: Wait for Linux loading screen to be displayed
4. If using the bootable optical V4.21 installation media:
• The NVR should boot from the CD/DVD drive
NOTE: Wait for the Linux loading screen to be displayed
5. From the Linux desktop, click on <NVR Live Installer> and wait for Linux loading screen.
6. From the Linux desktop, click on <4.1 Upgrade Tool> to invoke the V4.21 migration process.
3
8200-0959-26 A0
American Dynamics • 6 Technology Park Drive • Westford, MA 01887 • USA • Tel: 978-577-4000 • Fax: 978-577-4392 • www.americandynamics.net
7. Wait for the script to load and then click <OK>
Note: This process may take some time depending on the size of the current V4.1 database.
8. On the Backup screen, click <OK>
9. On the migration screen, type “Y” and press <Enter> to continue to start the VideoEdge installation wizard
10. On the Welcome screen, click <Next>
11. On the Time Zone screen <Next>
Note:
If the time zone, date or time is not accurate, then proceed to make the necessary corrections before
moving onto the next step.
12. On the Disk screen, click on the <Import Partition Setup> option and then <Next>
13. On the Mount Point screen, click <Import> and then <Next>
14. On the Installation Settings screen, click <Install>
15. On the Confirm Installation screen, click <Install>
16. On the Perform Installation screen, click <Next>
17. On the Reboot screen, click <OK>
18. The utility will now begin migrating the database from V4.1 over to V4.21
WARNING:
This step may take a while depending on the size of the database, so the display may not
show any activity. Do do not power off or attempt to access the system during this
process.
19. On the 4.1 to 4.2 Pre-Boot Upgrade complete screen, click <OK>
20. On the Reboot now? screen, type “Y” and then click <ENTER>
IMPORTANT: Do not remove the bootable V4.21 VideoEdge installation media (USB or DVD)
21. Go to the front of the VideoEdge NVR server and wait for BIOS message to be displayed before removing
bootable V4.21 VideoEdge installation media (remove USB or eject DVD).
Completing the SuSE Linux Enterprise Installation
22. On the Automatic Configuration screen, click <Yes> and then <Next>
23. On the License Agreement screen, click <Yes>
4
8200-0959-26 A0
American Dynamics • 6 Technology Park Drive • Westford, MA 01887 • USA • Tel: 978-577-4000 • Fax: 978-577-4392 • www.americandynamics.net
24. On the Administrative Password screen, type the new password for the default root user account and then click
<Next> and <Yes>
25. On the Optional User screen, no need to create one, so proceed to click <Next> and <Yes>
26. On the Suse Enterprise Linux login screen, enter the credentials:
• Username: root
and click <Log In>
• Password:
<Refer to #24>
and click <Log In>
Complete the remaining steps on the remote client PC
FROM REMOTE CLIENT PC
27. On the remote client, launch Internet Explorer web browser and enter the VideoEdge NVR IP Address.
28. On the V4.21 VideoEdge NVR Login screen, enter the following credentials:
• Username: admin
• Password:
VIDEO!edge23
Password for “admin” is different on V4.21
Note:
When accessing the VideoEdge NVR server web page for the First Time after the V4.21 migration, it
may give an ERROR message. Proceed to click <F5> and it will refresh the browser window and resolve
the error.
VE NVR V4.2 GUI
29. On the Welcome screen, click <Start>
30. On the Setup (License) screen, click on the <Generate Host ID> button to save the new VideoEdgeNVRHostID.txt
file to your local PC.
Note:
Use this file to register online to generate your V4.2.x compatible license file. Refer to Known Limitation
#5 at top of this document for details.
31. On the Setup (License) screen, click <Continue>
32. Continue with the rest of the setup wizard to complete configuring the upgraded V4.21 VideoEdge NVR Server.
5
8200-0959-26 A0
American Dynamics • 6 Technology Park Drive • Westford, MA 01887 • USA • Tel: 978-577-4000 • Fax: 978-577-4392 • www.americandynamics.net
ADDENDUM A
WARNING: Power off and disconnect the power cable from the server and use proper anti-static protection when
installing the memory:
After installing the memory, reattach the power cord and power on the server. Check the BIOS to confirm that 8GB of
memory is recognized by the server:
6
8200-0959-26 A0
American Dynamics • 6 Technology Park Drive • Westford, MA 01887 • USA • Tel: 978-577-4000 • Fax: 978-577-4392 • www.americandynamics.net
Contact Information
If you have any questions regarding this application note, please contact American Dynamics Technical Services at:
Toll Free
800-507-6268, Option 2
International
561-912-6259, Option 2
Fax
450-444-2029
Email
[email protected]
In Europe, contact EMEA Technical Support at:
Toll Free
+800-2255 8926 or +31 47 535 2722
Local Direct dial numbers
UK
08081 013 753 and 08701 238 787
Bahrain
800-04127
France
0800 90 79 72 and 04 72 79 14 83
Greece
00800-31229453
Spain
900 99 39 61 and 900 10 19 45
Russia
81080020521031
Germany
0800 1806 757
Turkey
00800-31923007
Italy
0800 874 091
800-03107123
Belgium
0800 76 452
United Arab
Emirates
Email
Technical Post-Sales
Inquiries
[email protected]
Technical Pre-Sales
Inquiries
[email protected]
Technical Training
Inquiries
[email protected]
Website
www.tycoemea.com
www.calltyco.com
Hours
08:00 – 18:00 CET
Important Note: Information furnished by American Dynamics is believed to be accurate and reliable. However, no responsibility is
assumed by American Dynamics for its use, nor any infringements of other rights of third parties which may result from its use. No
license is granted by implications or otherwise under any patent rights of American Dynamics.
7
8200-0959-26 A0
American Dynamics • 6 Technology Park Drive • Westford, MA 01887 • USA • Tel: 978-577-4000 • Fax: 978-577-4392 • www.americandynamics.net