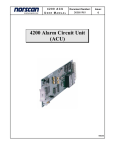
1
4200 CMS USER MANUAL Document Number: Revision: D00805R02.01 02.01 4200 Cable Management System (CMS) with AUIC Application & Operation P/N 99041 4200 CMS USER MANUAL Document Number: Revision: D00805R02.01 02.01 TABLE OF CONTENTS 1. INTRODUCTION ..............................................................................................................................................1 1.1 1.2 2. 4200 CMS SUMMARY ......................................................................................................................................1 4200 CMS SPECIFICATIONS .............................................................................................................................2 HARDWARE COMPONENTS AND FUNCTION ........................................................................................3 2.1 2.2 2.3 3. 4200 CMS CHASSIS .........................................................................................................................................3 LINE INTERFACE CARD (LIC) ...........................................................................................................................4 ADVANCED USER INTERFACE CARD (AUIC) ...................................................................................................4 AUIC ACCESS AND SECURITY ....................................................................................................................8 3.1 3.2 4. AUIC ACCESS ..................................................................................................................................................8 AUIC SECURITY ..............................................................................................................................................9 INSTALLATION .............................................................................................................................................11 4.1 4.2 4.3 4.4 4.5 4.6 4.7 5. RACK MOUNTING ...........................................................................................................................................11 TERMINAL BLOCK CONNECTIONS (NORTH AMERICAN VERSION) ...................................................................12 TERMINAL BLOCK CONNECTIONS (UK AND EUROPEAN VERSION) .................................................................13 OTHER REAR PANEL CONNECTIONS ...............................................................................................................14 LIC CONFIGURATION .....................................................................................................................................14 INSTALLATION AT CABLE VAULT OR CABLE ENTRY LOCATION .....................................................................15 AUIC INSTALLATION .....................................................................................................................................17 SYSTEM STARTUP/SHUTDOWN AND INITIAL CONFIGURATION..................................................18 5.1 5.2 6. SYSTEM STARTUP/SHUTDOWN .......................................................................................................................18 INITIAL NETWORK CONFIGURATION ...............................................................................................................19 4200 SYSTEM ACCESS..................................................................................................................................22 6.1 6.2 6.3 6.4 7. USER ACCESS PRIVILEGES .............................................................................................................................22 MODEM CONNECTION ....................................................................................................................................22 SERIAL PORT CONNECTION ............................................................................................................................23 TELNET CONNECTION ....................................................................................................................................24 CONFIGURING AN AUIC EQUIPPED 4200 CMS ....................................................................................25 7.1 7.2 7.3 8. SYSTEM CONFIGURATION ...............................................................................................................................25 NETWORK CONFIGURATION ...........................................................................................................................28 DATE/TIME CONFIGURATION .........................................................................................................................29 ALARM PROCESSING ..................................................................................................................................31 8.1 8.2 8.3 8.4 8.5 8.6 9. ALARM TARGET CONFIGURATION ..................................................................................................................31 EVENT CONFIGURATION (PLUS VERSION) .......................................................................................................33 ALARM REPORTS............................................................................................................................................39 ALARM LOGS (PLUS VERSION) ........................................................................................................................39 DRY ALARM CONTACTS .................................................................................................................................41 VIEWING ALARM STATUS ...............................................................................................................................41 AUIC REPORTS (PLUS VERSION) .............................................................................................................43 9.1 03/2013 STATUS REPORT .............................................................................................................................................43 Page i 4200 CMS USER MANUAL 9.2 9.3 9.4 10. Revision: D00805R02.01 02.01 ACTIVE ALARM REPORT ................................................................................................................................44 ALARM HISTORY REPORT ..............................................................................................................................45 LIST REPORT ..................................................................................................................................................46 SYSTEM ADMINISTRATION ......................................................................................................................47 10.1 10.2 10.3 10.4 11. Document Number: SOFTWARE UPGRADES ..............................................................................................................................47 SYSTEM BACKUP (PLUS VERSION) .............................................................................................................50 SYSTEM RESTORE (PLUS VERSION) ............................................................................................................52 DIAGNOSTIC FUNCTIONS ...........................................................................................................................53 TROUBLESHOOTING...................................................................................................................................55 11.1 POWER RELATED PROBLEMS......................................................................................................................55 11.2 CMS NOT BOOTING UP...............................................................................................................................55 11.3 INCORRECT SLOT INFORMATION. ...............................................................................................................55 11.4 MODEM COMMUNICATION PROBLEMS. ......................................................................................................55 11.5 SERIAL COMMUNICATION PROBLEMS. ........................................................................................................56 11.6 NOT SENDING MODEM REPORTS ................................................................................................................56 APPENDIX A ............................................................................................................................................................ 57 APPENDIX B ............................................................................................................................................................ 61 ABBREVIATIONS AND SPECIAL TERMS ........................................................................................................ 68 CONTACT INFORMATION .................................................................................................................................. 70 03/2013 Page ii 4200 CMS USER MANUAL Document Number: Revision: D00805R02.01 02.01 List of Figures: Figure 1: 4200 CMS Rear Panel............................................................................................................ 3 Figure 2: Rack Mounting 4200 CMS ................................................................................................... 11 Figure 3: LIC Current Limit Jumper Setting ....................................................................................... 14 Figure 4: Transmitter Protection Assembly at Cable Vault (Building Entry) ..................................... 16 Figure 5: Boot-up Screen ..................................................................................................................... 18 Figure 6: Main AUIC Screen ............................................................................................................... 18 Figure 7: Line Status Screen ................................................................................................................ 18 Figure 8: Front Panel Menu ................................................................................................................ 19 Figure 9: Power Off Message .............................................................................................................. 19 Figure 10: Shutdown in progress ......................................................................................................... 19 Figure 11: Shutdown Complete............................................................................................................ 19 Figure 12: System Config Menu .......................................................................................................... 20 Figure 13: Network Config Menu ........................................................................................................ 20 Figure 14: IP Address Configuration .................................................................................................. 20 Figure 15: Netmask Configuration ...................................................................................................... 20 Figure 16: Default Gateway Configuration ......................................................................................... 21 Figure 17: DNS Server Configuration ................................................................................................. 21 Figure 18: Network Config Menu ........................................................................................................ 21 Figure 19: 4200 CMS Main Menu ....................................................................................................... 25 Figure 20: System Configuration Menu ............................................................................................... 26 Figure 21: Comms Configuration Menu .............................................................................................. 28 Figure 22: Date and Time Configuration Menu .................................................................................. 29 Figure 23: Select Time Format ............................................................................................................ 30 Figure 24: Select Date Format ............................................................................................................ 30 Figure 25: Alarm Target Configuration Menu .................................................................................... 31 Figure 26: Set Target Description ....................................................................................................... 31 Figure 27: Add Alarm Target Menu .................................................................................................... 32 Figure 28: Simple Event Configuration Menu ..................................................................................... 33 Figure 29: Advanced Event Configuration Tree .................................................................................. 34 Figure 30: Advanced Event Configuration Example 1 ........................................................................ 35 Figure 31: Advanced Event Configuration Example 2 ........................................................................ 35 Figure 32: Advanced Event Configuration Example 3 ........................................................................ 36 Figure 33: Advanced Event Configuration Menu ................................................................................ 37 Figure 34: Expanded Event Configuration Menu ................................................................................ 37 Figure 35: Edit Targets Menu.............................................................................................................. 37 Figure 36: Add alarm targets Menu .................................................................................................... 38 Figure 37: Edit Targets Menu with Target .......................................................................................... 38 Figure 38: Event Configuration Menu with Targets ........................................................................... 38 Figure 39: Standard Alarm Report ...................................................................................................... 39 Figure 40: Short Form Alarm Report .................................................................................................. 39 Figure 41: Select Log file Menu........................................................................................................... 39 Figure 42: Alarm Log Menu ................................................................................................................ 40 Figure 43: Viewing alarm logs ............................................................................................................ 40 Figure 44: 4200 CMS Main Menu With Alarms .................................................................................. 41 03/2013 Page iii 4200 CMS USER MANUAL Document Number: Revision: D00805R02.01 02.01 Figure 45: Line Control Menu With Alarms ........................................................................................ 42 Figure 46: Status Report ...................................................................................................................... 43 Figure 47: Active Alarm Report ........................................................................................................... 44 Figure 48: Alarm History Report ......................................................................................................... 45 Figure 49: List Report .......................................................................................................................... 46 Figure 50: Diagnostic Menu ................................................................................................................ 47 Figure 51: TeraTerm Send File Menu Option ..................................................................................... 48 Figure 52: FTP/HTTP upgrade ........................................................................................................... 48 Figure 53: Card Upgrade Menu .......................................................................................................... 49 Figure 54: Firmware Download .......................................................................................................... 49 Figure 55: System Configuration Menu ............................................................................................... 50 Figure 56: Backup System Menu ......................................................................................................... 50 Figure 57: Editing Scheduled Backups ................................................................................................ 50 Figure 58: Editing Backup Days.......................................................................................................... 51 Figure 59: Editing the Backup Time .................................................................................................... 51 Figure 60: Perform Backup Menu ....................................................................................................... 51 Figure 61: Restore System Menu ......................................................................................................... 52 Figure 62: Restore via FTP Menu ....................................................................................................... 53 Figure 63: Diagnostic Menu ................................................................................................................ 54 Figure 64: Card Connect Menu ........................................................................................................... 54 Figure 65: LIC Current Limit Jumper Setting ..................................................................................... 56 List of Tables: Table A: TB1-Terminal Block Connections (North American version) ............................................... 12 Table B: TB1-Terminal Block Connections (UK & European version) .............................................. 13 Table C: Serial Port Pin-Out Description ........................................................................................... 14 Table D: LIC Monitor/Ground Jumper Block ..................................................................................... 15 03/2013 Page iv 4200 CMS USER MANUAL 1. Document Number: Revision: D00805R02.01 02.01 Introduction 1.1 4200 CMS Summary The 4200 Cable Management System (CMS) is a full-featured cable monitoring system that continuously monitors the integrity of outside plant cable installations and provides early warning detection of any damage. The 4200 CMS is designed for use in smaller offices and long haul applications where a monitoring capacity for one or two cable routes of up to 78 miles or 125 kilometers each is required. The entire system is housed in a rack mounted 3 1/2-inch high (2 units) chassis. The 4200 CMS has a modular design to accommodate a variety of plug in cards or modules. By selecting the card types or modules, the system can be tailored to specific requirements. Additional capacity or features can be added as needs change, via remote reprogrammable firmware on all the installed cards. The 4200 Alarm Circuit Unit (ACU) plug-in card will provide both armor and splice enclosure monitoring. The ACU can monitor up to 78 miles or 125 kilometers of cable armor and 799 sensor devices. The ACU employs Digital Signal Processing (DSP) circuitry that allows for adjustable filtering and for future enhancements to measurement and operation capabilities. Operating over any metallic circuit, such as a metal armor or shield, the system will detect and warn the user of any damage to the protective cable jacket ensuring adequate preparation time for repair. By providing cathodic protection, the system protects the damage site, which inhibits corrosion of the armor until a repair can be carried out. The 4200 Multi Tone Module (MTM) is a tone generating system that provides a wide range of tone frequencies to continuous outside plant cable installations, when below grade cable locating is required. The 4200 MTM is designed for use in offices where tone cable locating capabilities for one to four cable routes of up to 60 miles or 100 kilometers each is required (actual distances can vary depending on cable armor/sheath condition). Operating over any metallic circuit such as metal armor, shield or twisted copper pair the 4200 MTM will generate frequencies to match your hand held receiver units. 03/2013 Page 1 of 70 4200 CMS USER MANUAL 1.2 Document Number: Revision: D00805R02.01 02.01 4200 CMS Specifications Physical Rack Mount Width Height Depth Center or flush 19 inches 3 ½ inches (2 Units) 12 inches Operating Temperature 15˚ C to 30˚ C @ up to 90% relative humidity (Non-condensing) Electrical Input Voltage Max. Induced AC Voltage -46 to -56 V dc 16V rms Max. Input Voltage on armor sheath ± 180 V dc Dry Alarm contact Alarm contact state Electro Static Discharge ESD protected 200 mA, 120 V ac or 110 V dc Normally ~ OPEN, Alarm state ~ SHORTED Communication RS232 Serial Port: Modem: Ethernet: LCD Display & Keypad 03/2013 Male DB-9 connector; 9,600 baud, no parity, 8 data bits, 1 stop bit Tip & Ring terminal block; 33.6 kbps Female RJ-45connector; 10/100 Mbps 40 character LCD Display 4 button keypad Page 2 of 70 4200 CMS USER MANUAL 2. Document Number: Revision: D00805R02.01 02.01 Hardware Components and Function The following section describes the standard components (Chassis, LIC and AUIC) that make up the 4200 CMS and explains their function. For details on the individual expansion components (ACU and MTM) please see the user manual for that component. 2.1 4200 CMS Chassis The 4200 Chassis is a pre-wired chassis that can be mounted in a standard 19” or 23” rack. All active components except the MTM exist as plug-in cards so that the chassis does not need to be removed for the majority of servicing requirements. The front panel of the 4200 chassis contains a 4x40 character LCD display that displays the status of the 4200 CMS. The rear panel of the 4200 chassis holds the connections to the outside plant: • Terminal Block to connect to the monitored cable shields, phone line, and dry alarm contact outputs • 9 pin RS232 Serial Communications Port • Main Power switch • Chassis Ground connection Figure 1: 4200 CMS Rear Panel The chassis contains six available slots for the plug-in cards and internal mount brackets for module installations. The first two slots are dedicated to the Line Interface Card (LIC) and the Advanced User Interface Card (AUIC). The remaining four slots can be used for additional ACU cards (Figure 1). The MTM module is mounted within the 4200 CMS chassis. 03/2013 Page 3 of 70 4200 CMS USER MANUAL 2.2 Document Number: Revision: D00805R02.01 02.01 Line Interface Card (LIC) The Line Interface Card provides over-voltage protection and noise filtering to all Input/Output lines. These Input/Output lines include -48 V dc, Ground, four armor access lines (Line 1, 2, 3 and 4), CPS Anode Ground, phone line (Tip and Ring) and two dry alarm contacts (Equipment Alarm, Monitoring Alarm and Alarm Common). The dry alarm contacts can be configured to be normally open or normally closed in a non-alarm state. The LIC card contains a circuit to provide loop current attenuation in the phone line for the instances where the 4200 CMS is installed in close proximity to the Telco switch. The LIC card is keyed and can only be installed in slot 1 of the 4200 CMS chassis. 2.3 Advanced User Interface Card (AUIC) The 4200 Advanced User Interface Card (AUIC) plugs into a 4200 shelf to provide a user interface to the 4200 monitoring hardware and control operation of the other cards. The AUIC software can be purchased as the Standard or Plus version depending on the requirements of the user. The following table highlights the different features that are available on the Standard or Plus versions of the AUIC. 03/2013 Page 4 of 70 4200 CMS USER MANUAL Feature Connectivity Options Keypad Serial Modem Ethernet Document Number: Revision: D00805R02.01 02.01 AUIC Standard AUIC Plus Alarm Report Targets Audible Dry alarm contacts Modem Numeric Pager Email Short Message Service (SMS) SNMP Trap Logfile Scheduled Reports Status Report Active Alarm Report Alarm History Report List Report Administrative System Description Common Language Location (CLLI) Code Date & Time Formatting Backup & Restore Detailed alarm target configuration Sensor database Database information included in reports IVR tone activation IVR remote customization Armor monitoring support Tone locating support 03/2013 Page 5 of 70 4200 CMS USER MANUAL Document Number: Revision: D00805R02.01 02.01 2.3.1 Connectivity The 4200 AUIC has four connectivity options that provide several different kinds of user interface: 1. RS-232 serial port • Interactive text terminal. 2. 33.6 Kbps Voice Modem • Interactive text terminal. • Interactive Voice Response (IVR) for control of tone location functions. • Text alarms and reports. • Pager alarms and reports 3. LCD/keypad • Allows control of tone location functions. • Used to “shut down” the system before power off. • Allows configuration of TCP/IP networking. 4. Ethernet port • Interactive text terminal via telnet. • Email alarms and reports. • Simple Network Management Protocol (SNMP) configuration and control. • Alarm reports sent via SNMP traps. 2.3.2 Alarm Reporting The AUIC software employs an alarm subsystem that allows very detailed control of how events are reported to the user. Some of the features are: 1. Virtually unlimited number of email*, modem, pager and SNMP report targets. 2. Detailed alarm target configuration allowing individual line or sensor report targets (Plus version). 3. Alarm report logging (Plus version). * Under normal conditions, message delivery should occur in seconds. However, due to inconsistencies of the Internet, message delivery can take longer and is not guaranteed. 2.3.3 Database The AUIC has a database for sensor descriptions in both the Standard and Plus versions. This database will store user-defined descriptions for all sensors installed on a line. Exclusively with the Plus version, the AUIC will send a detailed report using the customized descriptions when an event occurs, such as an intrusion into a cabinet or moisture in a splice enclosure. This detailed report provides the user with the information required to rectify the situation quickly and efficiently. 03/2013 Page 6 of 70 4200 CMS USER MANUAL Document Number: Revision: D00805R02.01 02.01 2.3.4 Scheduled Reports (Plus version) Another feature available with the Plus version is the ability to schedule reports. The user can program the AUIC to run reports on specific days and times and then send the reports to specific targets. The following four reports are available: Status: The status report allows the user to display the status of the system. This report actually performs status tests (i.e. termination tests) to check the termination sensor on each line. Only sensors in alarm and/or termination sensors are displayed in a status report. If a tone is being applied, the status report will reflect this. Active Alarms: The active alarm report displays a report that lists any alarms currently detected by the system. This report includes alarms for the various cards supported by the AUIC (ACU and MTM). This “scheduled alarm” report can be distinguished from an actual “unscheduled alarm” report by the report header. Alarm History: The alarm history report displays the alarm history for the entire system. Since all alarms are captured to non-volatile memory, they are available even if the system power is cycled. List: The list command allows the user to list all system information. 2.3.5 Administration Features Both the Standard and Plus versions of the AUIC have a date and time configuration that allows various date and time formats. There are also additional fields provided for Common Language Location (CLLI) Codes and location information. With the Plus version there is also the capability of managing log files. The Plus version of the AUIC has the capability for a complete system backup and restore. The system can be backed up via email, FTP or modem file transfer. Backups can be performed manually or can be scheduled to run automatically. 03/2013 Page 7 of 70 4200 CMS USER MANUAL 3. Document Number: Revision: D00805R02.01 02.01 AUIC Access and Security 3.1 AUIC Access When logging on to the 4200 CMS with AUIC via modem or Telnet, the user is prompted for a login name and password. Currently the login name is not used for system access, it has been included for future enhancements. Press enter when prompted for a login name and the password prompt will appear. The password entered at login will determine the access level granted to the user. The three levels of access are: 1. Operator - allows a user to activate and view all monitoring and tone locating services. Default password is <blank>. 2. Administrator - allows a user to activate, view and configure all monitoring and tone locating services. Default password is administrator. 3. Diagnostic - allows a user full access to the AUIC functions including software upgrades, specific card information and security options. Use caution when assigning diagnostic access to users. Configuration damage can occur if incorrect actions are taken in diagnostic mode. Default password is diagnostic. To prevent unauthorized access to the 4200 CMS the default passwords should be changed as soon as possible. To change the login passwords see section 7.1 – System Configuration. When a user connects to the 4200 CMS using a serial connection, diagnostic access is automatically granted. The following table summarizes the functions available with each of the three levels of user access. 03/2013 Page 8 of 70 4200 CMS USER MANUAL Function Locate Tone View Locate Tone Status Activate Locate Tone Select Locate Tone Frequency Configure Locate Tone Frequencies Configure Locate Tone Settings Armor Monitoring View Armor Monitoring Status Activate Armor Monitoring Execute Status Test Initialize Outside Plant Line Configure Armor Monitoring Settings AUIC Configuration AUIC System Configuration AUIC Network Configuration Date & Time Configuration Enable Data Modem Connection Enable Telnet Connection AUIC Software Upgrade Expansion Card Firmware Upgrade Card Connect Remote Reboot of AUIC 3.2 Document Number: Revision: D00805R02.01 02.01 Operator Administrator Diagnostic ● ● ● ● ● ● ● ● ● ● ● ● ● ● ● ● ● ● ● ● ● ● ● ● ● ● ● ● ● ● ● ● ● ● ● ● ● ● AUIC Security When the AUIC is connected to a local area network, some security precautions should be observed. Be sure to discuss network security concerns with the network administrator before installing the AUIC. First, select good passwords for the operator, administrator and diagnostic access levels. A good password should consist of at least eight characters, and be a combination of letters and numbers. Avoid using words or names as passwords. Limit the administrator access to users that will perform configuration tasks, and diagnostic access to users that will perform configuration tasks and software upgrades. Data modem connections can be disabled on the AUIC for those systems installed on a local area network. Allowing data modem connections on an AUIC installed on a local area network can compromise network security if the logon passwords are available. To maximize network security, disable data modem connection in the comms config menu (see Section 7.2). When the data modem connection is disabled, modem connections to the AUIC will not be allowed, but tone activation via Interactive Voice Response will still be available. Data modem connections are disabled by default from the factory. 03/2013 Page 9 of 70 4200 CMS USER MANUAL Document Number: Revision: D00805R02.01 02.01 Telnet access to the AUIC can be disabled on the AUIC to prohibit system access via the Ethernet network. To maximize network security, disable the Telnet connection in the comms config menu (see Section 7.2) or using the front keypad (see Section 5.2). When the Telnet connection is disabled, the Telnet terminal connection to the AUIC will be unavailable; all other Ethernet based services such as SNMP and email will still be available. Telnet connections are disabled by default from the factory. 03/2013 Page 10 of 70 4200 CMS USER MANUAL 4. Document Number: Revision: D00805R02.01 02.01 Installation This section describes the typical installation of the Norscan 4200 CMS in an Office Equipment environment. The installation method can be modified to suit individual requirements. For specific connection details for armor monitoring, tone locating or optical monitoring please refer to the corresponding user manual. 4.1 Rack Mounting The 4200 CMS can be flush or center mounted in a standard 19” (483 mm) or 23” (585 mm) relay rack and comes equipped with convertible mounting brackets. The 4200 CMS is two units or 3.5” (89mm) high, 19” (483 mm) wide, and 12”(305 mm) deep (Figure 2). Note: When the MTM module is installed in a 4200 CMS chassis, at least one inch of clearance above and below the chassis is required for heat venting and dissipation purposes. 19" or 23" Rack Mount (Center or Flush) 4200 CMS Cable Management System MENU OK 3.5" or 2 Units Figure 2: Rack Mounting 4200 CMS The 4200 CMS equipment is designed for installation in a controlled office environment. This may include buildings or environmentally controlled cabinet housings or remote switching stations. Contact Norscan for details on installation in remote buildings or cabinets. Warning! Potential for electrical shock exists when handling cables while the Alarm Circuit Unit (ACU) card is activated or the Multi Tone Module (MTM) is transmitting tone frequencies. Make sure that the ACU card is set to OFF and that the MTM is not transmitting tone on the cable that is being handling at that particular time. Always take DC and AC measurements using a Norscan 1303 System Test Set or a Multi-meter to determine what AC or DC voltages are present before handling the cable. Note: Induced AC and transient voltages can also be present on the cable armor. Temporarily hard ground the cable armor before handling the cable in the central office, outside plant splice or remote termination location. Once the work is completed, remove the hard ground connection to the cable armor. Remove the cable armor connection first and then the local ground connection. 03/2013 Page 11 of 70 4200 CMS USER MANUAL 4.2 Document Number: Revision: D00805R02.01 02.01 Terminal Block Connections (North American version) Connect all wires carefully to the terminal block according to your cable system network. A description of each connection is explained in Table A. POSITION FUNCTION DESCRIPTION TB1-1 -48 Vdc Central office battery voltage connection to -48 Vdc supply. Use a minimum 16 American Wire Gauge (AWG) wire. Must be fused at 5 amps. TB1-2 GND Earth or Station ground connection. Use a minimum 16 American Wire Gauge (AWG) wire. Note: Not to be confused with CPS Anode GND. TB1-3 LINE 1 Input connection line for ACU armor monitoring or MTM tone access line. Use a minimum 24 AWG wire. Warning: Must be connected to a Transmitter Protection Assembly unit at the cable vault area (see Section 4.6). TB1-4 LINE 2 Input connection line for ACU armor monitoring or MTM tone access line. Use a minimum 24 AWG wire. Warning: Must be connected to a Transmitter Protection Assembly unit at the cable vault area (see Section 4.6). TB1-5 LINE 3 Input connection line for ACU armor monitoring or MTM tone access line. Use a minimum 24 AWG wire. Warning: Must be connected to a Transmitter Protection Assembly unit at the cable vault are. (see Section 4.6). TB1-6 LINE 4 Input connection line for ACU armor monitoring or MTM tone access line. Use a minimum 24 AWG wire. Warning: Must be connected to a Transmitter Protection Assembly unit at the cable vault area (see Section 4.6). TB1-7 CPS ANODE GND Cathodic protection sacrificial Anode Ground connection. Use a minimum 10 AWG wire to connect Anode Ground to this terminal. Note: Not to be confused with GND. TB1-8 EQUIPMENT ALARM Output for an external supervisory alarm system. Use a minimum 24 AWG wire. Relay is in normally open state by default. TB1-9 ALARM COMMON Common connection for an external supervisory alarm system. Use a minimum 24 AWG wire. TB1-10 MONITORING ALARM Output for an external supervisory alarm system. Use a minimum 24 AWG wire. Relay is in normally open state by default. TB1-11 PHONE TIP Input connection phone tip line for using modem communication. Use a minimum 24 AWG wire. TB1-12 PHONE RING Input connection phone ring line for using modem communication. Use a minimum 24 AWG wire. Table A: TB1-Terminal Block Connections (North American version) 03/2013 Page 12 of 70 4200 CMS USER MANUAL 4.3 Document Number: Revision: D00805R02.01 02.01 Terminal Block Connections (UK and European version) Connect all wires carefully to the terminal block according to your cable system network. A description of each connection is explained in Table B. POSITION FUNCTION DESCRIPTION TB1-1 -48 Vdc Central office battery voltage connection to -48 Vdc supply. Use a minimum 16 American Wire Gauge (AWG) wire. Must be fused at 5 amps. TB1-2 GND Earth or Station ground connection. Use a minimum 16 American Wire Gauge (AWG) wire. Note: Not to be confused with CPS Anode GND. TB1-3 LINE 1 Input connection line for ACU armor monitoring or MTM tone access line. Use a minimum 16 AWG shielded twisted pair wire (typical length 10 meters). Warning: Must be connected to a LPU and IVF at the cable vault. TB1-4 LINE 2 Input connection line for ACU armor monitoring or MTM tone access line. Use a minimum 16 AWG shielded twisted pair wire (typical length 10 meters). Warning: Must be connected to a LPU and IVF at the cable vault. TB1-5 LINE 3 Input connection line for ACU armor monitoring or MTM tone access line. Use a minimum 16 AWG shielded twisted pair wire (typical length 10 meters). Warning: Must be connected to a LPU and IVF at the cable vault. TB1-6 LINE 4 Input connection line for ACU armor monitoring or MTM tone access line. Use a minimum 16 AWG shielded twisted pair wire (typical length 10 meters). Warning: Must be connected to a LPU and IVF at the cable vault. TB1-7 CPS ANODE GND Cathodic protection sacrificial Anode Ground connection. Use a minimum 10 AWG wire to connect Anode Ground to this terminal. Note: Not to be confused with GND. TB1-8 EQUIPMENT ALARM Output connection for an external supervisory alarm system. Use a minimum 24 AWG wire. (Relay switch is normally in OPEN state) TB1-9 ALARM COMMON Common connection for an external supervisory alarm system. Use a minimum 24 AWG wire. TB1-10 MONITORING ALARM Output connection for an external supervisory alarm system. Use a minimum 24 AWG wire. (Relay switch is normally in OPEN state) TB1-11 PHONE TIP Input connection phone tip line for using modem communication. Use a minimum 24 AWG shielded twisted pair wire (typical length 1.5 meters). TB1-12 PHONE RING Input connection phone ring line for using modem communication. Use a minimum 24 AWG shielded twisted pair wire (typical length 1.5 meters). Table B: TB1-Terminal Block Connections (UK & European version) 03/2013 Page 13 of 70 4200 CMS USER MANUAL 4.4 Document Number: Revision: D00805R02.01 02.01 Other Rear Panel Connections • RS-232 - Serial port connection (9 pin) for direct connection communication. Pin Number DESCRIPTION 2 (RX) Received Data 3 (TX) Transmitted Data 4 (DSR) Data Set Ready 5 (GND) Ground (Signal Common) 6 (DTR) Data Terminal Ready Table C: Serial Port Pin-Out Description • GND - Chassis ground. Used for grounding the chassis when the 4200 CMS is not installed in a rack. Note: Chassis must be grounded. 4.5 LIC Configuration The LIC can be used to change the attenuation of the phone line in cases where the 4200 CMS is located too close to the Telco switch. Jumpers J6 – J9 are used to select the amount of attenuation. The default setting is 150Ω (Figure 3). MODEM CURRENT LIMIT SHORT 150 R J7 J9 J6 J8 330 R 480 R Figure 3: LIC Current Limit Jumper Setting If the 4200 CMS is used for toning only (ACU cable monitoring is not used), the user has the option to ground the lines when the MTM module is not active. The user can set the jumper pins according to their cable network by matching the setting as indicated, see Table D: LIC Monitor/Ground Jumper Block. 03/2013 Page 14 of 70 4200 CMS USER MANUAL Document Number: Revision: D00805R02.01 02.01 POSITION Line Affected DESCRIPTION GND and J12 LINE 1 The cable network that is connected to Line 1 of TB1 is grounded after the MTM module has stopped tone generation to this line. J12 and 1 LINE 1 The cable network that is connected to Line 1 of TB1 will resume ACU cable monitoring after the MTM module has stopped tone generation to this line. GND and J13 LINE 2 The cable network that is connected to Line 2 of TB1 is grounded after the MTM module has stopped tone generation to this line. J13 and 2 LINE 2 The cable network that is connected to Line 2 of TB1 will resume ACU cable monitoring after the MTM module has stopped tone generation to this line. GND and J14 LINE 3 The cable network that is connected to Line 3 of TB1 is grounded after the MTM module has stopped tone generation to this line. J13 and 3 LINE 3 The cable network that is connected to Line 3 of TB1 will resume ACU or CPS cable monitoring after the MTM module has stopped tone generation to this line. GND and J15 LINE 4 The cable network that is connected to Line 4 of TB1 is grounded after the MTM module has stopped tone generation to this line. J13 and 4 LINE 4 The cable network that is connected to Line 4 of TB1 will resume ACU or CPS cable monitoring after the MTM module has stopped tone generation to this line. Table D: LIC Monitor/Ground Jumper Block 4.6 Installation at Cable Vault or Cable Entry Location Installation of a 51200 Transmitter Protection Assembly (includes two Induced Voltage Filters (IVF) and two TI355 Gas Tubes) is recommended at the Cable Vault or Building Entry Location. Installing these devices prevents the potential for stray voltage surges or induced AC voltages from causing serious harm to personnel, equipment and the cable itself. Note: This applies all 4200 CMS systems that are using ACU cards or MTM modules. Mount the 51200 Transmitter Protection Assembly to a wall in close proximity to the cable vault area. Connect the cable armors from the outside plant to the appropriate connection terminals (East/North, West/South) as they are labeled on the front cover of the 51200. Using a feeder cable (usually 22 gauge, 4 wire, twisted pair shielded cable), connect the 4200 CMS line 1, 2, 3 or 4 to the L1 or L2 terminal block (one line per terminal block, Line 1 to L1, Line 2 to L2) in the Transmitter Protection Assembly. When using twisted pair wire, make sure that one wire of the pair is to L1 or L2 and the other wire of the pair is to GND of the terminal block. Ground the entire Transmitter Protection Assembly by connecting the Ground/Earth terminal to Building Ground. See Figure 4 03/2013 Page 15 of 70 4200 CMS USER MANUAL Document Number: Revision: D00805R02.01 02.01 Model 51200 - TRANSMITTER PROTECTION ASSEMBLY 2303 IVF (60 Hz) or 2313 IVF (50 Hz) 2303 IVF (60 Hz) or 2313 IVF (50 Hz) L1-Armor (RING) GND or L1 TIP L2-Armor (RING) GND or L2 TIP L1-Armor (RING) TO 4200 CMS or 2000 MTM EAST/NORTH ARMOR GROUND/ EARTH L2-Armor (RING) WEST/SOUTH ARMOR Label P/N 50129 Rev 3 Figure 4: Transmitter Protection Assembly at Cable Vault (Building Entry) 03/2013 Page 16 of 70 4200 CMS USER MANUAL 4.7 Document Number: Revision: D00805R02.01 02.01 AUIC Installation This section describes the typical installation of the Norscan 4200 AUIC in a 4200 Cable Management System (CMS). This will only be necessary when upgrading a UIC equipped 4200 CMS to an AUIC; new systems ordered with an AUIC will have the AUIC installed at the factory. When using the AUIC in a 4200 system, other expansion cards (ACU and MTM) may require a firmware upgrade to be compatible with the AUIC. Compatible firmware versions for each expansion card are included with the AUIC software. You will want to upgrade the ACU and MTM firmware as soon as possible to provide full functionality between the AUIC and the expansion cards. Warning! ESD sensitive device, use static straps and insure proper grounding when handling circuit boards. Unpack and check the 4200 AUIC for any shipping damage. If there is any indication of shipping damage, please contact Norscan immediately. When upgrading a 4200 CMS from a UIC to an AUIC, turn off the power on the master shelf. Carefully remove the old UIC card from slot 2 and store it in an anti-static container or bag. Carefully insert the new AUIC in slot 2. The AUIC is designed for installation in slot 2 only. Installation in any other slot will not allow the AUIC to connect to the 4200 CMS. Push the card into the slot until you can feel it set into the edge card connector in the back plane of the 4200. Once the card is inserted properly, install the AUIC capable back panel. If the 4200 CMS is to be connected to an Ethernet network, connect an RJ45 patch cable from the Ethernet port on the back of the AUIC to a hub or switch on the network. The card should now be properly in place and you may power on the Master Shelf. 03/2013 Page 17 of 70 4200 CMS USER MANUAL 5. Document Number: Revision: D00805R02.01 02.01 System Startup/Shutdown and Initial Configuration This section describes the system startup and shutdown procedures along with the initial system configuration of the AUIC. A 4200 CMS that is equipped with an AUIC allows configuration of the TCP/IP settings using the front keypad or by connecting via modem or serial cable. 5.1 System Startup/Shutdown After the 4200 CMS is wired correctly (Section 4), and the AUIC is installed, turn on the Power Switch of the 4200 CMS. The 4200 CMS display will show a welcome message (Figure 5) indicating the AUIC is in the boot-up process. ***************************************** * Welcome to the 4200 AUIC * * System Booting * ***************************************** Figure 5: Boot-up Screen When the 4200 AUIC has finished the boot-up process (after approximately 1min 45sec) the 4200 CMS will show the main AUIC screen (Figure 6). Norscan 4200 – unnamed 4200 Ver: 3.0+ (14080) Serial: 1234567890 Press MENU to issue commands Figure 6: Main AUIC Screen If the firmware in the other cards has been upgraded to version 3.00 or greater, the 4200 CMS screen will alternately display the main AUIC screen and the line status screen for each OSP line connected to a service. A typical line status screen for the armor monitoring service is shown in Figure 7. To stop the display from alternating between screens, press OK on the front panel. When the display is stopped, use the arrow keys to change between the main AUIC screen and the Line status screens. Line 1: Default Description Sensor: Standard no alarms Armor: ON 0.00mA >150kR no alarms Figure 7: Line Status Screen Note: R represents resistance in Ohms When the 4200 CMS needs to be powered down, the AUIC must be shutdown properly to prevent file corruption and the loss of data. To prepare the system for shutdown press the menu key on the 4200 CMS front panel, the front panel menu will appear (Figure 8). 03/2013 Page 18 of 70 4200 CMS USER MANUAL Document Number: Revision: D00805R02.01 02.01 -> Tone Control Power Off System Back Figure 8: Front Panel Menu Use the arrow keys to select Power Off System and press OK. A message will appear to confirm the power down cycle (Figure 9). Are you sure you want to power off the system? -> Yes No Figure 9: Power Off Message Select Yes and press OK to power off the system or select No and press OK to resume normal operation. If yes is selected, the shutdown process will begin (Figure 10). Shutdown in progress, Please wait Figure 10: Shutdown in progress When the following message appears, the shutdown process is complete and it is safe to power off the system (Figure 11). It is now safe to power off the system Figure 11: Shutdown Complete 5.2 Initial Network Configuration After the 4200 CMS with the AUIC has completed the boot-up process, network configuration can take place. The following network settings can be configured using the front panel: • System IP Address • Netmask • Gateway • DNS server • Telnet enabled or disabled To configure the network settings using a modem or serial connection see Section 7.2 Network Configuration. 03/2013 Page 19 of 70 4200 CMS USER MANUAL Document Number: Revision: D00805R02.01 02.01 To configure the network settings using the front panel, access the system configuration menu by using the following key sequence: 1. Press and hold the UP arrow. 2. Press and release MENU. 3. Release the UP arrow. The system config menu will appear (Figure 12). Reset Passwords -> Network Config Back Figure 12: System Config Menu Next, select Network Config and press OK. The Network Config menu will appear (Figure 13). All the settings in the Network Config menu must be set to the values assigned to the 4200 CMS by the network administrator. -> Address Netmask Gateway DNS 10.1.1.74 255.255.255.0 10.1.1.6 10.1.1.1 Figure 13: Network Config Menu To change the value for the IP Address, select Address from the Network Config Menu and press OK. The IP Address configuration screen will appear (Figure 14). Use the arrow keys to increase or decrease the value. Press OK to advance to the next number. Press OK on the last number to save the new settings. IP Address Use arrows to set address 10_.1__.1__.74_ Press OK to advance Figure 14: IP Address Configuration To change the value for the Netmask, select Netmask from the Network Config Menu and press OK. The Netmask configuration screen will appear (Figure 15). Use the arrow keys to select one of the 32 possible Netmask values and press OK to save the new settings. Use arrows to set netmask 255.255.255.0__ Press OK when done Figure 15: Netmask Configuration 03/2013 Page 20 of 70 4200 CMS USER MANUAL Document Number: Revision: D00805R02.01 02.01 To change the value for the Default Gateway, select Gateway from the Network Config Menu and press OK. The Default Gateway configuration screen will appear (Figure 16). Use the arrow keys to increase or decrease the value. Press OK to advance to the next number. Press OK on the last number to save the new settings. Default Gateway Use arrows to set address 10_.1__.1__.6__ Press OK to advance Figure 16: Default Gateway Configuration To change the value for the DNS Server, select DNS from the Network Config Menu and press OK. The DNS Server configuration screen will appear (Figure 17). Use the arrow keys to increase or decrease the value. Press OK to advance to the next number. Press OK on the last number to save the new settings. DNS Server Use arrows to set address 10_.1__.1__.254 Press OK to advance Figure 17: DNS Server Configuration To enable or disable Telnet, arrow down to select Telnet from the Network Config Menu and press OK. The Telnet setting will toggle between Off and On. Netmask Gateway DNS -> Telnet 255.255.255.0 10.1.1.6 10.1.1.1 Off Figure 18: Network Config Menu When all the Network settings are correct select Back from the Network Config Menu and press OK to return to the previous menu. If changes were made to the network settings, the AUIC will shut down the networking and restart the networking with the modified settings. To return to the main AUIC screen, select Back from the system config menu and press OK. This completes the TCP/IP configuration of the AUIC. 03/2013 Page 21 of 70 4200 CMS USER MANUAL 6. Document Number: Revision: D00805R02.01 02.01 4200 System Access 6.1 User Access Privileges When logging on to the AUIC there are three levels of user access. The access level is determined by the password entered at login. For details on permissions for each level of user access see Section 3 - AUIC Access and Security. 6.2 • Operator - allows a user to activate and view all line monitoring and tone locating information. • Administrator - allows a user to activate, view and configure all line monitoring and tone locating information. • Diagnostic - allows a user full access to the AUIC functions including software upgrades. Use caution when assigning diagnostic access to users. Configuration damage can occur if incorrect actions are taken in diagnostic mode. Modem Connection Logging onto the 4200 CMS over the built-in modem requires a terminal or a personal computer (PC) equipped with a terminal communications software package. The package should support ANSI terminal emulation. If ANSI emulation is not available, use VT100 mode. Some cursor movements and other features may not be supported by VT100 mode. The following procedure describes how to log onto the 4200 CMS using a modem. This procedure assumes that the user is familiar with computer communication software. If the user is not familiar with computer communication software, they should refer to their communication software manual. 1. Set your terminal software to ANSI emulation. 2. Set the terminal to 57,600 baud, full duplex, hardware handshaking on, echo off, no parity, 8 data bits and 1 stop bit (N81). 3. Set the modem time out to 60 seconds, either in the setup menu or by sending the command ATS7=60 to the modem. 4. Save this setup if possible. 5. Follow the terminal software’s instructions to dial the 4200 CMS phone number. 6. After the 4200 CMS answers, there will be a 30 to 60 second delay to allow for the Interactive Voice Response (IVR) sequence to cycle through. Once complete, 03/2013 Page 22 of 70 4200 CMS USER MANUAL Document Number: Revision: D00805R02.01 02.01 the login screen will appear prompting you for a login name. Currently the login name is not used for system access, it has been included for future enhancements. Press enter when prompted for a login name. 7. Next, the AUIC will prompt the user for a password. The entered password will determine the access available to the user. The default passwords are: 1. Operator password – <blank> 2. Administrator password – administrator 3. Diagnostic password – diagnostic Note: Use caution when assigning diagnostic access to users. Configuration damage can occur if incorrect actions are taken in diagnostic mode. 8. Type in a password and press the enter key to access the main menu. 6.3 Serial Port Connection A personal computer (PC) equipped with a terminal communication software package that supports the ANSI terminal emulation is required. The user can directly connect to the 4200 CMS through the RS232 serial port on the rear panel of 4200 CMS. The following procedure describes how to log onto the 4200 CMS using the RS232 serial port direct connection. This procedure assumes that the user is familiar with computer communication software. If the user is not familiar with computer communication software, they should refer to their communication software manual. 1. If you are using a PC, a 9 pin female-to-female serial cable is required to connect to the 4200 CMS. 2. Attach the serial cable between the RS232 port and the serial port on the PC. 3. Set the terminal BAUD RATE to 9600 baud. 4. Set the data format to full duplex, handshaking off, echo off, no parity, 8 data bits and 1 stop bit (N81). 5. Press the ENTER key to log on. Note: When logging on to the 4200 CMS via the serial port, diagnostic access is automatically granted. 03/2013 Page 23 of 70 4200 CMS USER MANUAL 6.4 Document Number: Revision: D00805R02.01 02.01 Telnet Connection A personal computer (PC) equipped with a telnet communication package is required. The user can connect to the 4200 CMS through the TCP/IP network after the AUIC network settings have been configured and Telnet access has been enabled (see section 5.2 Initial Network Configuration). The following procedure describes how to log onto the 4200 CMS using telnet. This procedure assumes that the user is familiar with telnet software. If the user is not familiar with telnet software, they should refer to their telnet software manual. 1. Start the telnet software 2. Enter the IP address that has been assigned to the 4200 CMS into the telnet software. 3. Establish a connection to the 4200 CMS. 4. The login screen will appear prompting you for a login name. Currently the login name is not used for system access, it has been included for future enhancements. Press enter when prompted for a login name. 5. Next, the AUIC will prompt the user for a password. The entered password will determine the access available to the user. The default passwords are: 1. Operator password – (blank) 2. Administrator password – administrator 3. Diagnostic password – diagnostic Note: Use caution when assigning diagnostic access to users. Configuration damage can occur if incorrect actions are taken in diagnostic mode. 6. Type in a password and press enter to access the main menu. 03/2013 Page 24 of 70 4200 CMS USER MANUAL 7. Document Number: Revision: D00805R02.01 02.01 Configuring an AUIC Equipped 4200 CMS This user manual is based on a 4200 CMS equipped with two ACU cards and a MTM module. The optional cards included in the system can be modified to suit your system monitoring network requirements. When the 4200 CMS is installed and all the Input/Output connections are secured, you can power up the 4200 CMS unit. You must log onto the 4200 CMS in order to configure it for the first time or change values according to your monitoring network specifications. (See section 6 - 4200 System Access) When you have logged onto the 4200 CMS, the main system menu is displayed. The main system menu for the diagnostic login of the plus version is shown in Figure 19. The menu options will vary based on the access granted at user login and the hardware components in the 4200 system. -> Line Line Line Line 1. 2. 3. 4. Default Default Default Default Main Description Description Description Description Menu - no - no - no - no cards cards cards cards connected connected connected connected System Configuration Comms Configuration Date/Time Configuration Tone Frequency Configuration Alarm Target Configuration Event Configuration Report Scheduling Alarm Logs Diagnostics Quit Figure 19: 4200 CMS Main Menu 7.1 System Configuration The System Configuration Menu allows the user to view and configure the system description and the system passwords (Administrator or Diagnostic login only). To configure the System Settings, highlight the System Configuration option from the 4200 Cable Monitoring System Main Menu and press enter. The System Configuration menu will appear (Figure 20). Use the Up and Down Arrow keys to move between menu items. 03/2013 Page 25 of 70 4200 CMS USER MANUAL Document Number: Revision: D00805R02.01 02.01 System Config System Description unnamed 4200________________ Location unknown location___________ CLLI Code ____________________________ Operator Password ____________________________ Administrator Password administrator_______________ Diagnostic Password diagnostic__________________ IVR Password _____ SNMP Read-Only Community String public_____________________ SNMP Read/Write Community String system_____________________ Audible Alarms ( ) Report Cleared Alarms (x) Report Tone Alarms (x) Use Graphical Characters ( ) <Backup System> <OK> <Restore System> <CANCEL> Figure 20: System Configuration Menu System Description: Enter the description of the 4200 CMS to uniquely identify the unit and press enter. This field will be used in alarm reports to identify the 4200 system that is sending the report. Location: Enter a location description for the 4200 CMS and press enter. This field will be used in alarm reports to indicate a location for the 4200 system that is sending the report CLLI Code: Enter a CLLI Code for the 4200 CMS and press enter. The CLLI (Common Language Location) Code is used as a standardized geographic identifier that uniquely identifies the geographic location and certain functional categories of the 4200 system. Operator Password: Enter a password for operator access to the AUIC and press enter. Operator access allows a user to activate and view all line monitoring and tone locating information. Leave blank for no password. Default is <blank>. Administrator Password: (Administrator or Diagnostic login only) Enter a password for administrator access to the AUIC and press enter. Administrator access allows a user to activate, view and configure all line monitoring and tone locating information. Leave blank for no password. Default is administrator. Diagnostic Password: (Diagnostic login only) Enter a password for diagnostic access to the AUIC and press enter. Diagnostic access allows a user full access to the AUIC functions including software upgrades and the command shell prompt. Use caution when assigning diagnostic access to users. Configuration damage can occur if incorrect actions are taken in diagnostic mode. Leave blank for no password. Default is diagnostic. 03/2013 Page 26 of 70 4200 CMS USER MANUAL Document Number: Revision: D00805R02.01 02.01 Note: If the diagnostic password has been forgotten, the password can be changed through a serial port connection or all the passwords can be reset using the front panel. Using the front panel press and hold the up arrow then press MENU then OK to access the system config menu. Select reset passwords and press OK. IVR Password: Enter a password for Interactive Voice Response (IVR) and press enter. Must be four digits. Leave blank for no password. Default is <blank>. SNMP Read-Only Community String: Enter the SNMP Read-Only Community String and press enter. Default is public. SNMP Read/Write Community String: Enter the SNMP Read/Write Community String and press enter. Default is system. Audible Alarms: Press enter to enable or disable the audible alarm. The audible alarm is enabled when an ‘x’ is shown. Default is disabled. Report Cleared Alarms: Press enter to select or deselect this option. If this option is selected (indicated by an ‘x’), reports will be sent to all programmed alarm targets when an alarm is triggered and when the alarm condition has cleared. When this option is deselected, alarm reports are only sent when an alarm is triggered. Default is selected. Report Tone Alarms: Press enter to select or deselect this option. If this option is selected (indicated by an ‘x’), reports will be sent to all programmed alarm targets when the locate tone has been activated. When this option is deselected, alarm reports are not sent for tone activation or deactivation. Default is selected. Use Graphical Characters: Press enter to select or deselect this option. If this option is selected (indicated by an ‘x’), graphical characters will be used to draw the AUIC menus while connected via serial, modem or Telnet. If the terminal program being used does not properly display graphical characters turn this option off to display only ASCII text characters. Default is disabled. System Backup and Restore (plus version): The system backup can be sent to an email address, an FTP server or downloaded via modem. The system can be restored via modem or FTP uploads. See section 10.2 for details on completing system backups. Press enter on <OK> to save the system configuration, or press enter on <CANCEL> to cancel changes made to the system settings. 03/2013 Page 27 of 70 4200 CMS USER MANUAL 7.2 Document Number: Revision: D00805R02.01 02.01 Network Configuration The network settings for the 4200 CMS are available through the Comms Configuration Menu. This menu allows the user to view and configure the network and email settings for the 4200 CMS (Administrator or Diagnostic login only). To configure the Network Settings, highlight the Comms Configuration option from the 4200 Cable Monitoring System Main Menu and press enter. The Comms Configuration menu will appear (Figure 21). Use the Up and Down Arrow keys to move between menu items. Address Netmask Gateway DNS Comms Config 10.1.1.74______________ 255.255.255.0__________ 10.1.1.6_______________ 10.1.1.254_____________ Enable NTP NTP Server 1 NTP Server 2 NTP Server 3 ( ) 0.0.0.0________________ 0.0.0.0________________ 0.0.0.0________________ SMS/Email Server SMS/Email From Address _______________________ auic@localhost Enable Data Modem Enable Telnet Telnet Port ( ) ( ) _________________ <OK> <CANCEL> Figure 21: Comms Configuration Menu Address: Enter the IP address assigned to the 4200 CMS by your network administrator and press enter. Netmask: Enter the network mask assigned to the 4200 CMS by your network administrator and press enter. Gateway: Enter the default gateway address and press enter. DNS: Enter the address of the domain name server and press enter. Enable NTP: Select this option if the 4200 AUIC time is to be synchronized with a NTP (Network Time Protocol) server. NTP Server x: Enter the IP address of up to three NTP servers (one per line). 03/2013 Page 28 of 70 4200 CMS USER MANUAL Document Number: Revision: D00805R02.01 02.01 SMS/Email Server: Enter the address of the SMTP (outgoing mail) server the AUIC will use to send email reports and press enter. This setting is required for email or SMS reports. SMS/Email From Address: Enter the return address the AUIC should use when sending email or SMS alarm reports and press enter. The default address is auic@localhost. Enable Data Modem: Diagnostic access only. Press enter to select or deselect this option. If this option is selected (indicated by an ‘x’) modem connections to the 4200 AUIC are allowed. Disabling the data modem connection will not affect the IVR access to the MTM for tone locating operation. See section 3.2 for security implications. Default is disabled. Enable Telnet: Diagnostic access only. Press enter to select or deselect this option. If this option is selected (indicated by an ‘x’) Telnet connections to the 4200 AUIC are allowed. Disabling the Telnet connection will not affect SNMP or email functionality. See section 3.2 for security implications. Default is disabled. When all the network settings have been entered press enter on <OK> to save the network settings or press enter on <CANCEL> to discard the changes. If the user accepts the changes made to the network settings, the AUIC will reset the network connection and the user will be disconnected if they are connected via a Telnet connection. 7.3 Date/Time Configuration The Date/Time Configuration Menu allows the user to configure the system date and time (Administrator or Diagnostic login only). Note: Cannot modify if NTP is enabled. To configure the Date and Time, highlight the Date/Time Configuration option from the 4200 Cable Monitoring System Main Menu and press enter. The Date and Time Config menu will appear (Figure 22). Use the Up and Down Arrow keys to move between menu items. Date and Time Config Time Format Date Format Time Zone [HH:MM:SS (12 Hour)] [YYYY-MM-DD ] [Canada/Central ] Time Date [08]:[05] [AM] [2013]-[03]-[01] <OK> <CANCEL> Figure 22: Date and Time Configuration Menu 03/2013 Page 29 of 70 4200 CMS USER MANUAL Document Number: Revision: D00805R02.01 02.01 To change the time format, press enter on the time format menu item and the Time Format Menu will appear (Figure 23). Select the desired time format and press enter. HH:MM:SS (12 Hour) HH:MM:SS (24 Hour) Figure 23: Select Time Format To change the date format, press enter on the date format menu item and the Date Format Menu will appear (Figure 24). Select the desired date format and press enter. MM-DD-YY YYYY-MM-DD DD-MON-YYYY Figure 24: Select Date Format After selecting the date and time formats, the correct date and time can be entered. Use the up and down arrow keys to select the time or date field that needs to be changed and press enter. Select the correct number from the list and press enter. Use the same procedure to change the other time and date fields. Press enter on <OK> to save the date and time settings, or press enter on <CANCEL> to cancel changes made to the date and time. If NTP is enabled in the network setup the date and time cannot be manually adjusted. The message “Using NTP Server, Cannot Modify Time/Date Values” will appear on the Date and Time Config menu. 03/2013 Page 30 of 70 4200 CMS USER MANUAL 8. Document Number: Revision: D00805R02.01 02.01 Alarm Processing The 4200 CMS with AUIC is able to alert users of alarm conditions by sending reports via email, Short Message Service (SMS), modem and SNMP. The user can also be alerted to alarm conditions using dry alarm contacts or by monitoring the system using a direct serial connection or telnet connection. 8.1 Alarm Target Configuration The alarm reporting settings for the 4200 CMS are available through the Alarm Target Configuration Menu (Administrator or Diagnostic login only). All alarm reports will be sent to the alarm targets specified in this menu when using the standard version of the AUIC. If the plus version is installed, the Event Configuration menu (section 8.2) allows specific alarm types to be sent to various alarm targets. To configure the alarm reporting settings, highlight the Alarm Target Configuration option from the 4200 Cable Monitoring System Main Menu and press enter. The Alarm Target Configuration menu will appear (Figure 25). This menu will show all the programmed alarm targets. Alarm Target Configuration -> Add Alarm Target Back Figure 25: Alarm Target Configuration Menu To add an alarm report target, select Add Alarm Target and press enter. A dialog box will appear prompting for a target description (Figure 26). Enter a description that uniquely describes the target, for example “John’s Email”. Please enter a unique target description: _______________________________________ <OK> <CANCEL> Figure 26: Set Target Description Press enter on <OK> to save the target description, or press enter on <CANCEL> to cancel changes made to the target description. After a description has been entered, the target type must be selected. The Add Alarm Target Menu will appear (Figure 27). 03/2013 Page 31 of 70 4200 CMS USER MANUAL Document Number: Revision: D00805R02.01 02.01 Add Alarm Target -> SNMP Trap Email Modem Short Message Service (SMS) Numeric Pager Logfile Back Figure 27: Add Alarm Target Menu Use the up and down arrow keys to select one of the target types and press enter. A dialog box will appear prompting for target details. Use the arrow keys to select fields and press enter to change the values. When all the target details as described below have been entered press enter on <OK> to save the alarm target. SNMP Trap: Enter the IP address of the SNMP management station given by the SNMP administrator. Enter the SNMP Trap Community String. (Use only for SNMP managed systems) Email: Enter the email address that will receive alarm reports. To send email reports to multiple email targets, enter up to five email addresses separated by commas in this field. Note: Under normal conditions, message delivery should occur in seconds. However, due to inconsistencies of the Internet, message delivery can take longer and is not guaranteed. Modem: Enter the phone number that will be called to receive the alarm reports (include area code, no dashes or spaces required). Note: Tone dialing is the default method. If you are using a pulse dialing system you must precede the phone number with the letter ‘p’ (p12041234567). Select the port speed (default is 9600 baud). Select the serial format you would like to use: 8N1 (8 Bit word length, No parity and 1 Stop Bit), 7E1 (7 Bit word length, Even parity and 1 Stop Bit) or 7O1 (7 Bit word length, Odd parity and 1 Stop Bit). Default setting is 8N1. Short Message Service (SMS): Enter the Short Message Service (SMS) address that will receive alarm reports. To send duplicate SMS reports to multiple SMS targets, enter up to five SMS addresses separated by commas in this field. Note: Under normal conditions, message delivery should occur in seconds. However, due to inconsistencies of the Internet, message delivery can take longer and is not guaranteed. Numeric Pager: Enter the seven-digit pager phone number with no spaces or hyphens. To send duplicate pages to multiple pagers, enter up to five pager numbers separated by commas in this field. Also enter the numeric string that will be sent to the numeric pager. 03/2013 Page 32 of 70 4200 CMS USER MANUAL Document Number: Revision: D00805R02.01 02.01 Log file (plus version): Enter the name of the log file and the number of alarms to save in the log file. The AUIC will save a list of alarms that are targeted to the log file. Select Alarm Logs from the main AUIC menu to view and manage the log files (see section 8.4 - Alarm Logs). 8.2 Event Configuration (plus version) Event configuration on the plus version of the AUIC can be set to one of two modes, simple or advanced. When the simple event user interface is selected, all alarm reports are sent to all alarm targets just as they are on the standard AUIC version. When the advanced event user interface is selected, users can perform detailed alarm event configuration so specific alarm reports can be sent to specific alarm targets. When the Event Configuration Menu item is selected from the main menu, the Event configuration menu will appear (Figure 28). Press enter on this menu item to toggle the event user interface between SIMPLE and ADVANCED. The default setting is simple. Event Configuration -> Event User Interface: SIMPLE Back Figure 28: Simple Event Configuration Menu 8.2.1 Understanding Advanced Event Configuration This section will explain the advanced event configuration concepts. For configuration instructions refer to Section 8.2.2 Completing the Advanced Event Configuration. The advanced event configuration menu is organized in a hierarchical tree manner. The tree is made up of events and default groups. A sample event configuration tree is shown in Figure 29. The default groups are shown in bold text and the events are shown in normal text. If a plus sign (+) appears next to a default group, it indicates that there are events in that default group that are not shown. If a minus sign (-) appears next to a menu item it indicates that all the events in that group are being displayed. Note: The entries in the event configuration tree will vary depending on the cards and modules installed in the 4200 CMS. 03/2013 Page 33 of 70 4200 CMS USER MANUAL Document Number: Revision: D00805R02.01 02.01 - Global Defaults Equipment Failure - Line 1 default Tone activation Cable alarm Line alarm - Sensor default STU code 99 SSU code 245 SSU code 376 + Line 2 default + Line 3 default + Line 4 default Figure 29: Advanced Event Configuration Tree Alarm targets can be assigned to any of the following events: • Equipment failure • Tone activation • Cable alarms • Line alarms • Individual sensor alarms If a specific event does not have an alarm target associated with it, the AUIC will check the default group directly above the event for a target. If an alarm target exists in the default group, the report will be sent to that target. If an alarm target does not exist in the default group, the AUIC will check the next default group further up the tree and so on until a target is found. The global default group is the last group the AUIC will check for an alarm target. If there is no alarm target assigned to the global default group, the alarm report will not be sent. Assigning an alarm target to the global default group is highly recommended so alarm reports will not be missed if an event does not have a specific alarm target. Note: Targets assigned to default groups including the global default group will not receive alarm reports if a target has been assigned to the specific event where the alarm has occurred. 03/2013 Page 34 of 70 4200 CMS USER MANUAL Document Number: Revision: D00805R02.01 02.01 The following examples illustrate the alarm processing of the AUIC when the advanced event configuration has been activated and configured. Example 1 For this example refer to Figure 30. Suppose alarm targets have been assigned to the global default group and the tone activation event for line 2. When a cable alarm occurs on line 2, the AUIC will check for an alarm target assigned to the cable alarm on line 2. There is no target assigned to the cable alarm so the AUIC moves up the tree and checks the line 2 default. There is no target assigned to the line 2 default so the AUIC moves up the tree and checks the global default. There is a target assigned to the global default so the alarm report is sent to that target. Alarm Step 3: Target found Send report - Global Defaults Equipment Failure + Line 1 default - Line 2 default Tone activation Cable alarm Line alarm + Sensor default + Line 3 default + Line 4 default Step 2: No Target found Check next default Step 1: No Target found Check next default Figure 30: Advanced Event Configuration Example 1 Example 2 For this example refer to Figure 31. Suppose alarm targets have been assigned to the global default group and the cable alarm event for line 2. When a cable alarm occurs on line 2, the AUIC will check for an alarm target assigned to the cable alarm on line 2. There is a target assigned to the cable alarm so the alarm report is sent to that target. Alarm - Global Defaults Equipment Failure + Line 1 default - Line 2 default Tone activation Cable alarm Line alarm + Sensor default + Line 3 default + Line 4 default Step 1: Target found Send report Figure 31: Advanced Event Configuration Example 2 03/2013 Page 35 of 70 4200 CMS USER MANUAL Document Number: Revision: D00805R02.01 02.01 Example 3 For this example refer to Figure 32. Suppose alarm targets have been assigned to the global default group and the sensor default group for line 1. When SSU code 376 is triggered on line 1, the AUIC will check for an alarm target assigned to the SSU code 376 on line 1. There is no target assigned to the SSU so the AUIC moves up the tree and checks the sensor default. There is a target assigned to the sensor default so the alarm report is sent to that target. Alarm - Global Defaults Equipment Failure - Line 1 default Tone activation Cable alarm Line alarm - Sensor default STU code 99 SSU code 245 SSU code 376 + Line 2 default + Line 3 default + Line 4 default Step 2: Target found Send report Step 1: No Target found Check next default Figure 32: Advanced Event Configuration Example 3 03/2013 Page 36 of 70 4200 CMS USER MANUAL Document Number: Revision: D00805R02.01 02.01 8.2.2 Completing the Advanced Event Configuration Ensure the Advanced event user interface is selected and the advanced menu appears for detailed alarm event configuration (Figure 33). Event Configuration -> Event User Interface: ADVANCED + Global Defaults Back Figure 33: Advanced Event Configuration Menu If a plus sign (+) appears next to a menu item it indicates the menu can be expanded. Press the plus key or right arrow when the menu item is highlighted to expand the menu. If a minus sign (-) appears next to a menu item it indicates the menu can be collapsed. Press the minus key or left arrow when the menu item is highlighted to collapse the menu. Figure 34 shows a partially expanded event configuration menu. Event Configuration -> Event User Interface: ADVANCED - Global Defaults Equipment Failure + Line 1 default + Line 2 default + Line 3 default + Line 4 default Back Figure 34: Expanded Event Configuration Menu To set an alarm target for a specific event or default group, select the menu item and press enter. The Edit Targets Menu will appear. Figure 35 shows the menu for the global defaults group; menus for all other alarm events and default groups will be similar. Edit targets for global defaults -> Add target Back Figure 35: Edit Targets Menu Press enter on Add target to apply an alarm target to the specific event or default group. The Add alarm targets menu will appear (Figure 36). 03/2013 Page 37 of 70 4200 CMS USER MANUAL Document Number: Revision: D00805R02.01 02.01 Add Alarm Targets to Event -> NOC Email John’s Email Field tech pager All targets No targets Back Figure 36: Add alarm targets Menu All alarm targets that have been setup in the Alarm Target Configuration will be shown (See Section 8.1). Select the target to add or select all or no targets and press enter. After selecting a target, the Edit Targets Menu will be shown again, now with the selected targets added to the target list (Figure 37). Continue to add targets to the event or default group as required. When all the required targets have been added, select back and press enter. Edit targets for global defaults -> NOC Email Add target Back Figure 37: Edit Targets Menu with Target An asterisk (*) next to an event or default group indicates a target has been assigned. A tilde (~) next to a default group indicates that an alarm target has been assigned to an alarm event under that default group. The event configuration menu will now show an asterisk (*) next to the event or group that has targets assigned to it (Figure 38). Event Configuration -> Event User Interface: ADVANCED - Global Defaults * Equipment Failure + Line 1 default + Line 2 default + Line 3 default + Line 4 default Back Figure 38: Event Configuration Menu with Targets Select another event to configure and press enter or select back and press enter to return to the main menu. 03/2013 Page 38 of 70 4200 CMS USER MANUAL 8.3 Document Number: Revision: D00805R02.01 02.01 Alarm Reports The 4200 CMS with AUIC can send alarm reports in two different formats, standard and short. The standard format is used for email and modem reports, the short format is used for SMS devices. Figure 39 shows a typical standard alarm report. Norscan 4200 CMS – Alarm Report (Unscheduled) -----------------------------------------System ID: unnamed 4200 CLLI Code: Alarm Date: 14:57:05 – 2013-03-22 -----------------------------------------Line 2: Default Description Sensor alarm, code 123 -----------------------------------------End of report Figure 39: Standard Alarm Report The standard report indicates the user-programmed system ID, the date and time of the alarm, the line number and description along with the type of alarm. A short form of the standard report is sent to SMS devices (Figure 40). The short form of the report indicates the type of alarm, line description and the system ID. Sensor alarm 123 Line: 2.Default Description SysDesc: unnamed 4200 Figure 40: Short Form Alarm Report 8.4 Alarm Logs (plus version) The alarm log menu item allows the user to view, download and clear alarm logs. This option is only available on the Plus Version of the AUIC. To access the alarm log menu, highlight Alarm Log from the 4200 Cable Monitoring System Main Menu and press enter. A list of available log files will appear (Figure 41). Select Log file ->System alarm log Back Figure 41: Select Log file Menu Any log file alarm targets that have been created will be listed in addition to the system log file. See Section 8.1 Alarm Target Configuration for details on log file alarm targets. The system alarm log will show the last 300 system alarms. An alarm target log file will store the alarms that were sent to that specific alarm target to a maximum number set by the user 03/2013 Page 39 of 70 4200 CMS USER MANUAL Document Number: Revision: D00805R02.01 02.01 Select a log file from the menu and press enter. The alarm log menu will appear (Figure 42). Use the Arrow keys to move between menu items and press enter to select an item. Operation to Perform -> View System Alarm Log Download System Alarm Log Clear System Alarm Log Back Figure 42: Alarm Log Menu View Alarm Log: Select this menu item to view the alarm history stored in the log file. An alarm history log will appear showing all the alarms that have been targeted to the selected log file (Figure 43). Press CTRL-n to see the next page of history or CTRL-p to see the previous page of history. CTRL-b and CTRL-e will move to the beginning and end of the log file respectively. If the log file entry is too long for a single line use the right and left arrow keys to scroll the text to the right or left. To exit the view alarm log screen press enter. -> 2013-01-15 2013-01-15 2013-01-13 2013-01-13 2013-01-05 2013-01-05 09:24:13 09:23:43 03:43:18 12:18:33 05:24:54 11:34:22 AM AM PM PM PM AM System alarm log Cable alarm on line 1, Sensor alarm triggered Cable alarm cleared on Cable alarm on line 2, Tone cleared on line 1 Tone activated on line CTRL-n: Next page CTRL-b: Beginning CTRL-p: Previous page CTRL-e: End current = -2.24mA on line 1, sensor code:428 line 2 current = -1.28mA 1 <- ->: Scroll text RETURN: Exit Figure 43: Viewing alarm logs Download Alarm Log: Select this menu item to display the contents of the alarm history log file on the screen with no formatting or page breaks. This gives the user the capability of capturing the log file data to a text file. Before selecting this option start the logging function on the terminal program. Press enter and the log file will be displayed on the terminal screen. When all of the history data has been displayed, stop the logging function on the terminal program and press enter to return to the alarm log menu. Clear Alarm Log: Select this menu item to clear the alarm history stored in the selected log file. 03/2013 Page 40 of 70 4200 CMS USER MANUAL 8.5 Document Number: Revision: D00805R02.01 02.01 Dry Alarm Contacts The 4200 CMS with AUIC can notify the user of Equipment Alarms and Monitoring Alarms through the use of dry alarm contacts. Simply connect a bell, buzzer, light or an alarm supervisory system to TB1-8 and TB1-9 on the rear panel of the 4200 CMS for equipment alarms or to TB1-9 and TB1-10 for monitoring alarms. Maximum 120Vac or 110Vdc and 200mA. The equipment alarm contacts are normally open and will short if an equipment alarm occurs. Equipment alarms occur under the following conditions: • Loss of supply voltage • ACU or MTM card failure The monitoring alarm contacts are normally open and will short if a monitoring alarm occurs. Monitoring alarms occur under the following conditions: 8.6 • Cable alarms • Line alarms • Sensor alarms Viewing Alarm Status Using a direct serial connection, modem connection or telnet connection, a user can view the current status of any alarms on the 4200 CMS. If an alarm report is received, connect to the 4200 CMS with AUIC to obtain further details. When an alarm has occurred the main menu will indicate which line has an alarm by showing an exclamation mark (!) next to the line (Figure 44). ->!Line Line Line Line 1. 2. 3. 4. Default Default Default Default Main Description Description Description Description Menu - ARMOR - no cards connected - no cards connected - no cards connected System Configuration Comms Configuration Date/Time Configuration Tone Frequency Configuration Alarm Target Configuration Alarm Log Diagnostics Quit Figure 44: 4200 CMS Main Menu With Alarms 03/2013 Page 41 of 70 4200 CMS USER MANUAL Document Number: Revision: D00805R02.01 02.01 Select the line in alarm and press enter. The Line Control Menu will appear (Figure 45). Line 1 Sensor Armor Tone Line Control Menu :Default Description :Standard no alarms :ON –1.34mA 34.06kR cable alarm! :OFF ->Deactivate armor monitoring Reset alarms Perform termination test View test results Activate tone (577Hz) Activate tone safety lock Configure line… Back Figure 45: Line Control Menu With Alarms The Line Control Menu will show details on the status of the alarm condition. For specific details on alarms or alarm conditions, please see the user manual that corresponds to the card type that is in alarm. 03/2013 Page 42 of 70 4200 CMS USER MANUAL 9. Document Number: Revision: D00805R02.01 02.01 AUIC Reports (Plus Version) The plus version of the AUIC is able to send four types of reports: Status, Active Alarm, Alarm History, and List. The reports can be sent on demand or scheduled to run at any time. 9.1 Status Report The AUIC status report will list the status of each line in the 4200 CMS. Before sending the status report, the AUIC will initiate a termination test on all the armor monitoring lines in the system. The termination test will take approximately 3 minutes for each termination sensor on the line. The following example shows the sheath monitoring current on lines 1 and 2 (Figure 46). The report also includes the system ID and CLLI code along with the time and date of the report. -----------------------------------------Norscan 4200 CMS - Status Report -----------------------------------------System ID : unnamed 4200 CLLI Code : Report Date : 12:00:00 PM – 2013-03-21 -----------------------------------------Line 1 - Default Description: Armor monitoring Current : -0.14 mA Resistance : >150 kR Cable alarm : No alarms Line alarm : No alarms -----------------------------------------Line 2 - Default Description: Sheath monitoring Current : -0.17 mA Resistance : >150 kR Cable alarm : No alarms Line alarm : No alarms -----------------------------------------Line 3 - Default Description: No services allocated -----------------------------------------Line 4 - Default Description: No services allocated -----------------------------------------end of report. Figure 46: Status Report 03/2013 Page 43 of 70 4200 CMS USER MANUAL 9.2 Document Number: Revision: D00805R02.01 02.01 Active Alarm Report The active alarm report will list the current alarm status of each line in the 4200 CMS. The following example shows no sheath monitoring alarms on line 1; line 2 did not receive the termination code and measured high line resistance on the last termination test (Figure 47). The report also includes the system ID and CLLI code along with the time and date of the report. --------------------------------------------Norscan 4200 CMS - Active Alarm Report --------------------------------------------System ID : unnamed 4200 CLLI Code : Report Date : 12:00:00 PM – 2013-03-21 --------------------------------------------Line 1 - Default Description: Armor monitoring Cable alarm : No alarms Line alarm : No alarms --------------------------------------------Line 2 - Default Description: Armor monitoring Cable alarm : No alarms Line alarm : Active Missed code detected for: - unconfigured sensor code 99 High resistance detected for: - unconfigured sensor code 99 --------------------------------------------Line 3 - Default Description: No services allocated --------------------------------------------Line 4 - Default Description: No services allocated --------------------------------------------end of report. Figure 47: Active Alarm Report 03/2013 Page 44 of 70 4200 CMS USER MANUAL 9.3 Document Number: Revision: D00805R02.01 02.01 Alarm History Report The alarm history report (Figure 48) shows up to the last 300 monitoring and system alarms stored in the AUIC. Each alarm in the history report will indicate the time and date of the alarm and a brief description of the alarm. The report also includes the system ID and CLLI code along with the time and date of the report. ----------------------------------------------------------------Norscan 4200 CMS - Alarm History Report ----------------------------------------------------------------System ID : unnamed 4200 CLLI Code : Report Date : 12:00:00 PM – 2013-03-21 ----------------------------------------------------------------#1. 2013-03-21 08:33:35 AM - Line #4 - Tone activated on line 4 #2. 2013-03-21 08:54:47 AM - Line #4 - Tone cleared on line 4 #3. 2013-03-21 08:59:13 AM - Line #4 - Tone activated on line 4 #4. 2013-03-21 09:20:15 AM - Line #4 - Tone cleared on line 4 #5. 2013-03-21 11:45:02 AM - Line #1 - Line alarm on line 1 #6. 2013-03-21 12:45:33 PM - Line #1 - Line alarm cleared on line 1 #7. 2013-03-21 01:12:59 PM - Line #1 - Tone activated on line 1 #8. 2013-03-21 01:14:17 PM - Line #1 - Tone cleared on line 1 #9. 2013-03-21 01:15:22 PM - Line #1 - Tone activated on line 1 #10.2013-03-21 01:35:35 PM - Line #1 - Tone cleared on line 1 end of report. Figure 48: Alarm History Report 03/2013 Page 45 of 70 4200 CMS USER MANUAL 9.4 Document Number: Revision: D00805R02.01 02.01 List Report The list report will list the services that are assigned to each line in the 4200 CMS. The following example shows armor monitoring on lines 1 and 2 (Figure 49). The report also includes the system ID and CLLI code along with the time and date of the report. ---------------------------------------Norscan 4200 CMS - List Report ---------------------------------------System ID : unnamed 4200 CLLI Code : Report Date : 12:00:00 PM – 2013-03-21 ---------------------------------------Line 1 - Default Description: Armor monitoring ---------------------------------------Line 2 - Default Description: Armor monitoring ---------------------------------------Line 3 - Default Description: No services allocated ---------------------------------------Line 4 - Default Description: No services allocated ---------------------------------------end of report. Figure 49: List Report 03/2013 Page 46 of 70 4200 CMS USER MANUAL Document Number: Revision: D00805R02.01 02.01 10. System Administration 10.1 Software Upgrades The Diagnostics Menu allows the user to perform software upgrades and diagnostic functions on the AUIC (Diagnostic login only). Warning! Use caution when accessing diagnostic functions as configuration settings may be lost or software damage may occur. To perform software upgrades on the AUIC or firmware upgrades on the expansion cards, highlight the Diagnostics option from the 4200 CMS Main Menu and press enter. The Diagnostics menu will appear (Figure 50). Select the upgrade function using the up and down arrow keys and press enter. Diagnostics Menu -> Card Connect Upgrade AUIC Software Via ZModem Upgrade AUIC Software Via Kermit Upgrade AUIC Software Via FTP/HTTP Server Card Firmware Upgrade Unscheduled reports include unconfigured sensors: no Reboot Activate Full Version Back Figure 50: Diagnostic Menu 10.1.1 AUIC Software Upgrades To upgrade the AUIC software via a Z-Modem or Kermit file transfer ensure the AUIC upgrade file is available on the local computer then select Upgrade AUIC Software Via Z-Modem or Upgrade AUIC Software Via Kermit from the diagnostic menu. The AUIC will prompt the user to start the Z-Modem or Kermit file transfer. Characters may appear on the screen as the AUIC waits for the file transfer to begin. Start sending the latest AUIC software file from the local computer using the Z-Modem or Kermit file transfer protocol. Refer to the terminal software user manual for file transfer details. See Figure 51 for the Tera Term Send File Menu Option. 03/2013 Page 47 of 70 4200 CMS USER MANUAL Document Number: Revision: D00805R02.01 02.01 Figure 51: TeraTerm Send File Menu Option When the file transfer is complete the AUIC will process the upgrade file and automatically reboot. After rebooting the new software version will be active. To upgrade the AUIC software using a FTP or HTTP server determine the correct URL for the AUIC upgrade file then select Upgrade AUIC Software Via FTP/HTTP Server from the diagnostic menu. The AUIC will prompt the user for the URL of the upgrade file. Enter the URL and press enter See Figure 52. Figure 52: FTP/HTTP upgrade When the file transfer is complete the AUIC will process the upgrade file and automatically reboot. After rebooting the new software version will be active. 03/2013 Page 48 of 70 4200 CMS USER MANUAL Document Number: Revision: D00805R02.01 02.01 10.1.2 Card Firmware upgrades The firmware of the expansion cards in the 4200 CMS may be upgraded from the AUIC using a FTP/HTTP server or a Kermit file transfer. Warning: Upgrading an expansion card or module with the incorrect firmware may cause the card to be inoperable. Be sure the firmware being uploaded is correct for the card or module being upgraded. To upgrade the firmware of the expansion cards in the 4200 CMS select Card Firmware Upgrade from the diagnostic menu, the Card Upgrade Menu will appear (Figure 53). Each expansion card or module in the 4200 CMS will be shown with its serial number, hardware revision number and firmware version number. Check the Norscan website at www.norscan.com for the latest firmware versions. Card Upgrade Menu -> Slot 3: ACU/STU #01039 Rev 3.02 Ver 4.02 Slot 4: ACU/STU #02250 Rev 4.02 Ver 5.07 Slot 7: MTM #00529 Rev 2.04 Ver 3.02 Back Figure 53: Card Upgrade Menu If an upgrade is required, use the arrow keys to select the card to be upgraded and press enter. An option will be shown to upgrade the firmware from a URL (ftp/http) or a Kermit download (Figure 54). Please select the firmware to program -> Download and upgrade from URL (ftp/http) Download and upgrade using Kermit Back Figure 54: Firmware Download After selecting an option, a dialog box will appear prompting for the URL of the firmware to download or prompting to start downloading the firmware using Kermit. When the upgrade has been completed, a message will appear indicating whether the upgrade was successful or not. Press enter on OK to return to the previous menu. 03/2013 Page 49 of 70 4200 CMS USER MANUAL 10.2 Document Number: Revision: D00805R02.01 02.01 System Backup (plus version) To complete a system backup highlight the System Configuration option from the 4200 Cable Monitoring System Main Menu and press enter. The System Config menu will appear (Figure 55). System Config System Description unnamed 4200________________ Location unknown location___________ CLLI Code ____________________________ Operator Password ____________________________ Administrator Password administrator_______________ Diagnostic Password diagnostic__________________ IVR Password _____ SNMP Read-Only Community String public_____________________ SNMP Read/Write Community String system_____________________ Audible Alarms ( ) Report Cleared Alarms (x) Report Tone Alarms (x) Use Graphical Characters ( ) <Backup System> <OK> <Restore System> <CANCEL> Figure 55: System Configuration Menu To backup the AUIC settings and database information, select Backup System and press enter. The Backup System menu will appear (Figure 56). Backup System -> Setup Scheduled Backup Perform Backup Back Figure 56: Backup System Menu Setup Scheduled Backup: This option allows the user to set scheduled backups to run automatically on the AUIC. The AUIC will send the system backup file as an Email file attachment on the day and time specified by the user. When this option is selected, the Edit Scheduled Backups menu will appear (Figure 57). Edit -> Email Address Backup Days Backup Time Scheduled Backups : [PRESS ENTER TO SET] : [PRESS ENTER TO SET] : [PRESS ENTER TO SET] Back Figure 57: Editing Scheduled Backups 03/2013 Page 50 of 70 4200 CMS USER MANUAL Document Number: Revision: D00805R02.01 02.01 Select Email Address and press Enter to specify the email address where the backup file will be sent. Next, set the day when the system backup will be executed by selecting the Backup Days menu item, the Backup Days menu will appear (Figure 58). Use the up and down arrow keys to move between days then press the space bar to select the backup for a specific day. After all the desired days have been selected press Enter on Ok to save the changes. Edit Scheduled Backup Days Sunday: Monday: Tuesday: Wednesday: Thursday: Friday: Saturday: <OK> ( ( ( ( ( ( ( ) ) ) ) ) ) ) <CANCEL> Figure 58: Editing Backup Days Finally, set the time when the system backup will be executed by selecting the Backup Time menu item, the Backup Time menu will appear (Figure 59). Use the up and down arrows to select hours or minutes then press enter to change the values. Edit Backup Time Use the up/down arrows to move between fields Press enter to change the field value Backup Time: [02]:[30] [AM] < OK > <CANCEL> Figure 59: Editing the Backup Time Perform Backup: This option will perform an immediate backup of the AUIC via email, Z Modem file transfer, or transfer to an FTP site. When this option is selected, the Perform Backup menu will appear (Figure 60). Perform Backup -> Email Zmodem Kermit FTP Site Back Figure 60: Perform Backup Menu 03/2013 Page 51 of 70 4200 CMS USER MANUAL Document Number: Revision: D00805R02.01 02.01 Select the destination for the system backup and press enter. Email: The AUIC will prompt for an email address and the backup file will be sent as an Email file attachment to that email address. Z modem: The AUIC will begin a Z modem file transfer. Start the receive Z modem function on the communications software being used to connect to the AUIC. The backup file will be saved to the local computer. Kermit: The AUIC will begin a Kermit file transfer. Start the receive Kermit function on the communications software being used to connect to the AUIC. The backup file will be saved to the local computer. FTP Site: The AUIC will prompt for an FTP server, login name and password, destination directory, and the filename. The AUIC will send the backup file to the FTP server. 10.3 System Restore (plus version) To complete a system restore, highlight the System Configuration option from the 4200 Cable Monitoring System Main Menu and press enter. The System Config menu will appear (Figure 55). To restore the AUIC settings and database information, select Restore System and press enter. The Restore System menu will appear (Figure 61). Restore System -> Zmodem Kermit FTP Site Back Figure 61: Restore System Menu Z-Modem: Restore AUIC settings and database information via a Z-Modem file transfer. Ensure the AUIC backup file is available on the local computer, and then select this menu item to restore the AUIC data. The AUIC will prompt the user to select OK then start the Z-Modem file transfer. Characters may appear on the screen as the AUIC waits for the file transfer to begin. Start sending the backup file from the local computer using the ZModem file transfer protocol. When the file transfer has been completed, the AUIC will display a message indicating whether the restore was successful or not. If the restore was successful, reboot the AUIC to activate the restored AUIC settings. Kermit: Restore AUIC settings and database information via a Kermit file transfer. Ensure the AUIC backup file is available on the local computer, and then select this menu item to restore the AUIC data. The AUIC will prompt the user to select OK then start the Kermit file transfer. Characters may appear on the screen as the AUIC waits for the file transfer to begin. Start sending the backup file from the local computer using the Kermit file transfer protocol. When the file transfer has been completed, the AUIC will display a 03/2013 Page 52 of 70 4200 CMS USER MANUAL Document Number: Revision: D00805R02.01 02.01 message indicating whether the restore was successful or not. If the restore was successful, reboot the AUIC to activate the restored AUIC settings. FTP Site: Restore AUIC settings and database information via an FTP server. Ensure the AUIC backup file has been stored on the FTP server, and the username and password for the FTP server are available. When this menu item is selected, the AUIC will display the Restore via FTP menu (Figure 62). Server Login Password Directory Filename Restore via FTP _______________________________ ___________________ ___________________ _______________________________ _______________________________ <OK> <CANCEL> Figure 62: Restore via FTP Menu Enter the FTP server address, the login name, password, directory where the backup file is stored, and the backup filename. When all the information has been entered press enter on OK to restore the AUIC data. When the file transfer has been completed, the AUIC will display a message indicating whether the restore was successful or not. If the restore was successful, reboot the AUIC to activate the restored AUIC settings. 10.4 Diagnostic Functions The Diagnostics Menu allows the user to perform software upgrades and diagnostic functions on the AUIC (Diagnostic login only). This section will explain some of the diagnostic functions of the AUIC. See Section 10.1 for details on AUIC software upgrades and expansion card firmware upgrades. Warning! Use caution when accessing diagnostic functions as configuration settings may be lost or software damage may occur. To access the diagnostic functions, highlight the Diagnostics option from the 4200 CMS Main Menu and press enter. The Diagnostics menu will appear (Figure 63). Select a diagnostic function using the up and down arrow keys and press enter. 03/2013 Page 53 of 70 4200 CMS USER MANUAL Document Number: Revision: D00805R02.01 02.01 Diagnostics Menu -> Card Connect Upgrade AUIC Software Via ZModem Upgrade AUIC Software Via Kermit Upgrade AUIC Software Via FTP/HTTP Server Card Firmware Upgrade Unscheduled reports include unconfigured sensors: no Reboot Activate Full Version Back Figure 63: Diagnostic Menu Card Connect: Allows the user to access card information for troubleshooting and diagnostic purposes. To access the cards installed in the 4200 CMS, highlight the Card Connect option and press enter. The Card Connect menu will appear (Figure 64). Card Connect Menu -> 1. LIC <no direct connection> 2. AUIC (currently active) 3. ACU/STU 0: Not Connected 4. ACU/STU 0: Not Connected 5. No Card Installed 6. No Card Installed 7. MTM Multi Tone Module – Standby Mode Back Figure 64: Card Connect Menu The numbers 1 - 6 on the left side refer to the slots on the 4200 CMS Backplane. Slots 1 and 2 are reserved for LIC and AUIC cards in that order. Slots 3 to 6 are reserved for the ACU card(s). Number 7 on the menu refers to the MTM. For further details please refer to the user manuals that correspond to the cards installed in the 4200 system. Warning: Do not use the card connect menus to make configuration changes to any of the 4200 modules. Configuration settings may be lost if changes are made through these menus. Unscheduled reports include unconfigured sensors: Press enter to toggle between yes and no. When no is selected, sensor alarm reports will only be sent if the sensor code in alarm is found in the sensor database. When yes is selected all sensor alarms will be reported. Reboot: Performs a soft reboot of the AUIC. Activate Full Version: Select this item to activate the “Plus” version of the AUIC. Contact Norscan for upgrade details and pricing. 03/2013 Page 54 of 70 4200 CMS USER MANUAL Document Number: Revision: D00805R02.01 02.01 11. Troubleshooting This section will assist in diagnosing any problems relating to the 4200 CMS chassis. 11.1 Power related problems. • Verify proper connection of -48 V dc and ground on TB1 - 1 and 2 • Verify with a voltage meter that the -48 V dc is present across TB1 - 1and 2 • Verify that the Office Equipment battery supply or AC adapter supply is present • With the power to the 4200 CMS chassis off, make sure that all cards are seated properly in 4200 CMS chassis 11.2 CMS not booting up. • Check for any activity on the LCD display of the 4200 CMS • Verify with a voltage meter that the -48 V dc is present at TB1 - 1and 2 • With the power to the 4200 CMS chassis off, make sure that all cards are seated properly in the 4200 CMS chassis 11.3 Incorrect slot information. • With the power to the 4200 CMS chassis off, make sure that all cards are seated properly in 4200 CMS chassis • Verify that the physical slot location of the installed card corresponds with the slot designation on the LCD display of the 4200 CMS 11.4 Modem communication problems. • Verify that the phone Tip and Ring lines on TB1 - 11 and 12 are connected • Verify that the phone line is working – dial tone is present • Verify that the correct phone number is being used • Verify that the proper communication protocol (ANSI or VT100) is being used • Try connecting to the 4200 CMS at a lower baud rate. 03/2013 Page 55 of 70 4200 CMS USER MANUAL • Document Number: Revision: D00805R02.01 02.01 If the carrier signal is dropping, or if the modem frequently gives a No Carrier message, try a different current limiting setting on the LIC (Figure 65). Default should be set to 150 ohms. MODEM CURRENT LIMIT SHORT 150 R J7 J9 J6 J8 330 R 480 R Figure 65: LIC Current Limit Jumper Setting 11.5 Serial communication problems. • Verify that the serial cable connection is secure • Verify that the proper serial cable is being used (straight through only, not a Null cable) • Verify that the communication port and software are working properly on your personal computer (PC) • Verify that the proper communication protocol is being used. (Handshaking or flow control set to none, no parity, 8 data bits, 1 stop bit) 11.6 Not sending modem reports • Verify that the phone Tip and Ring lines on TB1 - 11 and 12 are connected • Verify that the phone line is working – dial tone is present • Verify that the correct phone number is being used • Verify that Alarm processing is set to on • Verify that alarm targets have been set up properly. 03/2013 Page 56 of 70 4200 CMS USER MANUAL Document Number: Revision: D00805R02.01 02.01 Appendix A – SNMP Reference 1. Setting up the 4200 CMS for SNMP 1.1 Configure TCP/IP networking. Refer to Section 5.2 Initial Network Configuration for detailed instructions. 1.2 In the System Configuration menu of the 4200 CMS, setup the SNMP read-only and read-write community strings. If these are left blank the defaults “public” and “system” will be used. 1.3 Acquire the Management Information Base (MIB) files NORSCAN-GLOBAL-REG.txt and NORSCAN-CMS-MIB.txt. These files can be obtained from the 4200 AUIC’s builtin web server. Using a web browser, enter the IP address of the 4200 and select the MIB files to download. 1.4 Install the MIBs into your network management software. Refer to the documentation that came with your network management software to do this. 2. Quick Tour of the MIBs This section describes the overall structure of information available from the 4200 CMS through SNMP. Detailed descriptions for every object in the MIB can be found in the object description field of the MIB. A MIB viewer can be used to browse the MIBs and view the MIB objects explained in this section. 2.1 MIB Objects The topmost object that encapsulates all cable monitoring objects is norscanCMSMIB. norscanCMSObjs . norscanCMSLineObjs or just norscanCMSLineObjs. norscanCMSLineObjs has members lineCount and lineTable. lineCount returns the number of lines that can be monitored (always 12 for the 4200 CMS), and lineTable contains objects for each line. Lines are numbered starting from “1”. Drilling down into lineTable will reveal a host of different objects. Objects fall into one of several categories depending on their function, and each object is prefixed with the name of its category. 2.1.1 lineXXX – Generic line related objects. The most important one here is lineDescription that is a settable string for the user to identify the line. 2.1.2 sheathXXX – All objects relating to cathodic protection and sheath monitoring provided by 4200 ACU’s and CPC’s are in this category. 03/2013 Page 57 of 70 4200 CMS USER MANUAL Document Number: Revision: D00805R02.01 02.01 2.1.3 sensorXXX – Information about sensors is in this category. Note that this is a table with one row per sensor, so this is really a 2 dimensional table with “line” as the first index and “sensor code” as the second. The most important object in this category is sensorDescription that the user can use to help identify the location of sensors. 2.1.4 toneXXX – Objects relating to tone location are in this category. Most important are toneState for turning tone on and off and toneFrequency for selecting the frequency. 3. 4200 CMS Events The 4200 AUIC supports standard SNMP events (such as start up, shutdown, etc) as well as 4 cable monitoring events. In addition to the objects listed, each event includes a unique ID. 3.1 sheathEventCableAlarm The sheathEventCableAlarm event is triggered when the outside plant (OSP) line current (sheathCurrent) rises above the designated threshold (sheathCableThreshold) indicating the presence of a fault to ground. This event is transmitted every 10 minutes until the condition is corrected. The objects transmitted with this event are: lineDescription.x The line description that was previously entered. Also implies line number. sheathCurrent.x The electrical current in microamps presently on the line. sheathCableThreshold.x The maximum allowable electrical current before an alarm situation exists. Where x is the line number in alarm. 3.2 sheathEventLineAlarm The sheathEventLineAlarm event is triggered when the OSP line resistance deviates from its nominal initialized value. The event is associated with a particular STU indicating the specific branch where the problem has occurred. This event is transmitted every 10 minutes until the condition is corrected. The objects transmitted with this event are: 03/2013 Page 58 of 70 4200 CMS USER MANUAL Document Number: Revision: D00805R02.01 02.01 lineDescription.x The line description that was previously entered. Also implies line number. sensorDescription.x.y The sensor description that was previously entered. Also implies line number and sensor code. sensorTestResistance.x.y The electrical resistance of the branch under consideration. sensorNominalResistance.x.y The branch resistance when the line was first initialized. sheathLineThreshold.x The maximum allowable resistance change before an alarm situation exists. Where x is the line number and y is the sensor code in alarm. 3.3 sheathEventSensorCodeAlarm The sheathEventSensorCodeAlarm event is triggered when a sensor has been activated due to moisture detection in a splice enclosure. This event is transmitted every 10 minutes until the condition is corrected. The objects transmitted with this event are: lineDescription.x The line description that was previously entered. Also implies line number. sensorDescription.x.y The sensor description that was previously entered. Also implies line number and sensor code. Where x is the line number and y is the sensor code in alarm. 03/2013 Page 59 of 70 4200 CMS USER MANUAL 3.4 Document Number: Revision: D00805R02.01 02.01 toneEventStateChange The toneEventStateChange event is triggered when tone is turned on or off for any OSP line. This is a one shot event and does not repeat like the others. The objects transmitted with this event are: lineDescription.x The line description that was previously entered. Also implies line number. toneState.x Indicates whether the tone is on or off. Where x is the line number in alarm. 03/2013 Page 60 of 70 4200 CMS USER MANUAL Document Number: Revision: D00805R02.01 02.01 Appendix B – Performing Plug-In Card (ACU and MTM) Firmware Upgrades Via Card Connect To upgrade the firmware on a plug-in card (ACU or MTM) using the Card Connect method, connect to the 4200 CMS using a modem, serial, or Telnet connection (see section 6 4200 System Access). Log onto the 4200 with diagnostic access. Select the diagnostic option from the 4200 Cable Monitoring System Main Menu and press enter. Then select card connect from the diagnostic menu and press enter, the card connect menu will appear. Card Connect Menu -> 1. LIC <no direct connection> 2. AUIC 3. ACU/STU 0: Not Connected 4. ACU/STU 0: Not Connected 5. No Card Installed 6. No Card Installed 7. MTM Multi Tone Module – Standby Mode Back Figure 1: Card Connect Menu The card connect menu will show all the plug-in cards installed in the 4200 CMS and their corresponding slot number (Figure 1). Use the arrow keys to select the card to upgrade and press enter. 1. Alarm Circuit Unit (ACU) Upgrade If an ACU is selected, the following menu will appear. Cable Monitoring Card <no description> 1. View Card Status 2. Setup Mode 3. Setup STUs X.Exit Figure 2: Cable Monitoring Card Menu Press 2 for Setup Mode, the ACU Setup Mode menu will appear (Figure 3). Warning: Do not use the card connect menus to make configuration changes to any of the 4200 modules. Configuration settings may be lost if changes are made through these menus. 03/2013 Page 61 of 70 4200 CMS USER MANUAL Document Number: Revision: D00805R02.01 02.01 ACU Setup Mode ACU/STU #01039 0. 1. 2. 3. 4. 5. 6. 7. 8. 9. F. X. Rev 3.02 Ver 3.01 Line Description ....... Card Type .............. ACU/STU ................ ACU/STU line ........... Alarm Processing ....... Alarm Delay ............ Audible Alarm .......... Sensor Baud/Line type .. Line Alarm Threshold ... Cable Alarm Threshold .. Upgrade Firmware Exit <no description> ACU/STU ON 1 - Connected ON 5 Minute(s) OFF 03 Baud/Normal 400.00Ω Ω 1.00mA Figure 3: ACU Setup Mode Note the firmware version number on the ACU Setup Mode screen. A list of current firmware versions is available on the Internet at www.norscan.com. If a newer firmware version has been released, contact Norscan to obtain the latest version. To upgrade the ACU firmware, ensure the firmware file is available on the local computer. Press F to begin the upgrade process. A warning message will be displayed (Figure 4). Upgrade Firmware Menu Warning! Card may become inoperable if proper procedure is not followed. Please see readme files Enter Password to Continue Figure 4: Upgrade Firmware Menu Enter 4200CMS (case sensitive) when prompted for the upgrade password. The screen will display the Card Connect menu and the ACU card will be in upgrade mode (Figure 5). 03/2013 Page 62 of 70 4200 CMS USER MANUAL Document Number: Revision: D00805R02.01 02.01 Card Connect Menu 1. LIC <no direct connection> 2. AUIC -> 3. ACU Upgrade Mode Ver 1.0 4. ACU/STU 0: Not Connected 5. No Card Installed 6. No Card Installed 7. MTM Multi Tone Module – Standby Mode Back Figure 5: Card Connect Menu for ACU Upgrade Use the arrow keys to select the ACU card that indicates Upgrade Mode and press enter. The ACU Upgrade Mode menu will be displayed (Figure 6). 1. 2. 3. 4. 5. X. 4200ACU Upgrade Mode v1.0 Return to ACU mode Upgrade ACU card Reset Card using Watchdog Timer Display Reset Conditions Clear Reset Conditions Exit Figure 6: ACU Upgrade Mode Menu Press 2 to upgrade the ACU card or press 1 to exit upgrade mode and return to normal ACU operation. If Upgrade ACU Card is selected, the 4200 CRC-Xmodem Upgrade Mode Menu will be displayed (Figure 7). 4200 CRC-XModem Upgrade Mode 1. 2. 3. 4. 5. 6. x. Program all available modules Program 2K only Program 32K only Program 512K only Program External Ram Erase all modules Exit Figure 7: 4200 CRC-Xmodem Upgrade Mode Menu Select 1 to program all available modules. A prompt will appear to start your XmodemCRC transfer (Figure 8). Characters may appear on the screen as the ACU waits for the file transfer to begin. 03/2013 Page 63 of 70 4200 CMS USER MANUAL Document Number: Revision: D00805R02.01 02.01 4200 CRC-XModem Upgrade Mode 1. 2. 3. 4. 5. 6. x. Program all available modules Program 2K only Program 32K only Program 512K only Program External Ram Erase all modules Exit Start your XModem-CRC transfer now. Figure 8: 4200 CRC-Xmodem Upgrade Mode Menu With XModem Transfer Start sending the latest ACU firmware file (acu.bin) from the local computer using the Xmodem-CRC file transfer protocol. See Figure 9 for the Tera Term Send File Menu Option. Figure 9: TeraTerm Send File Menu Option Once the file transfer is complete the ACU will indicate that the card has been programmed. The 4200 CRC-Xmodem Upgrade Mode Menu will reappear (Figure 7). Press x to return to the ACU Upgrade Mode menu (Figure 6), then press 1 to exit upgrade mode and Return to ACU Mode operation. To ensure the card upgraded properly check the firmware version by selecting the ACU and entering Setup Mode by pressing 2. The firmware version should now be the most recent version. 03/2013 Page 64 of 70 4200 CMS USER MANUAL Document Number: Revision: D00805R02.01 02.01 2. Multi Tone Module (MTM) Upgrade If a Multi Tone Module (MTM) is selected for upgrade, the following menu will appear. Multi Tone Module No Line Selected Tone 1: 577 Hz Voltage: 000 V Current: Low Time: 1. Tone OFF – Activate Tone 2. Select Line & Apply Tone 3. Select Tone Frequency 4. Security Options Setup Mode X. Exit Figure 10: MTM Menu Press 5 for Setup Mode, the Multi Tone Module Setup Menu will appear (Figure 11). Warning: Do not use the card connect menus to make configuration changes to any of the 4200 modules. Configuration settings may be lost if changes are made through these menus. Multi Tone Module Setup Mode MTM #00529 Rev 2.01 Ver 3.01 1. Program Line Descriptions 2. Program Tone Settings 3. Auto Shut-Off: 10 hours 4. Upgrade Firmware X. Exit Figure 11: MTM Setup Mode Note the firmware version number on the Multi Tone Module Setup Mode screen. A list of current firmware versions is available on the Internet at www.norscan.com. If a newer firmware version has been released, contact Norscan to obtain the latest version. To upgrade the MTM firmware, ensure the firmware file is available on the local computer. Press 4 to begin the upgrade process. A warning message will be displayed (Figure 12). 03/2013 Page 65 of 70 4200 CMS USER MANUAL Document Number: Revision: D00805R02.01 02.01 Upgrade Firmware Menu Warning! Card may become inoperable if proper procedure is not followed. Please see readme files Enter Password to Continue Figure 12: Upgrade Firmware Menu Enter 4200CMS (case sensitive) when prompted for the upgrade password. The screen will display the Card Connect Menu and the MTM card will be in upgrade mode (Figure 13). Card Connect Menu 1. LIC <no direct connection> 2. AUIC 3. ACU/STU 0: Not Connected 4. ACU/STU 0: Not Connected 5. No Card Installed 6. No Card Installed -> 7. MTM Upgrade Mode Ver 1.01 Back Figure 13: Card Connect Menu for MTM Upgrade Use the arrow keys to select the MTM card and press enter. The MTM Upgrade Mode menu will be displayed (Figure 14). MTM Upgrade Mode 1.01 1. 2. 3. 4. 5. X. Resume Normal Operation Upgrade Reset Display Resets Clear Resets Exit Figure 14: MTM Upgrade Mode Menu Press 2 to upgrade the MTM card or press 1 to exit upgrade mode and return to normal operation. If Upgrade is selected, the 4200 CRC-Xmodem Upgrade Mode Menu will be displayed (Figure 15). 03/2013 Page 66 of 70 4200 CMS USER MANUAL Document Number: Revision: D00805R02.01 02.01 4200 CRC-XModem Upgrade Mode 1. 2. 3. 4. 5. 6. x. Program all Program 2K Program 32K Program 512K Program Ram Erase ALL Exit Figure 15: 4200 CRC-Xmodem Upgrade Mode Menu Select 1 to program all available modules. A prompt will appear to start your XmodemCRC transfer (Figure 16). Characters may appear on the screen as the MTM waits for the file transfer to begin. 4200 CRC-XModem Upgrade Mode 1. 2. 3. 4. 5. 6. x. Program all Program 2K Program 32K Program 512K Program Ram Erase ALL Exit Start your XModem-CRC transfer now. Figure 16: 4200 CRC-Xmodem Upgrade Mode Menu With XModem Transfer Start sending the latest MTM firmware file (mtm.bin) from the local computer using the Xmodem-CRC file transfer protocol (Figure 9). Once the file transfer is complete the MTM will indicate that the card has been programmed. The 4200 CRC-Xmodem Upgrade Mode Menu will reappear (Figure 15). Press x to return to the MTM Upgrade Mode menu (Figure 14), then press 1 to exit upgrade mode and return to normal operation. To ensure the card upgraded properly check the firmware version by selecting the MTM and entering Setup Mode by pressing 5. The firmware version should now be the most recent version. 03/2013 Page 67 of 70 4200 CMS USER MANUAL Document Number: Revision: D00805R02.01 02.01 Abbreviations and Special Terms Abbreviations ACU Alarm Circuit Unit – AUIC Advanced User Interface Card – CMS CO CPC Cable Management System Central Office Cathodic Protection Card – CPM CPS DSP Inom IVF Cathodic Protection Monitor – Cathodic Protection System Digital Signal Processing Nominal Loop Current Induced Voltage Filter – IVR IRIS LED LIC Interactive Voice Response Infrared Intrusion Sensor – Light Emitting Diode Line Interface Card – LPU Line Protection Unit – LRFL Long Range Fault Locator – LTU-0K Line Termination Unit – LTU-FC Line Termination Unit – MDT Moisture Detection Tape – MTM Multi Tone Module – OSP PC PSU SMS SPU SSU STU 03/2013 4200 system card used for armor monitoring and sensor decoding. 4200 system card used to provide communication between the user and the 4200 CMS. Includes Ethernet connectivity and database features. 4200 system card used for cathodically protecting outer armor of a double armored cable. Termination sensor for Cathodic Protection Card. A tuned filter that will ground specific AC voltage frequencies. Security sensor that detects changes in infrared light. 4200 system card that provides over-voltage protection and noise filtering to all input / output lines on the 4200 CMS. An indoor rated protection device that provides a low impedance path to ground for high transient voltages. portable measurement system used to locate resistive sheath faults. Provides a 0 KΩ impedance termination for tone signals, used on single termination networks (no branches). Termination for tone signals on a multiple termination network. Water sensing tape that can be installed in splice enclosures with an SSU to detect the presence of moisture. 4200 system module that provides tone signals for cable locating. Outside Plant Personal Computer Power Supply Unit Short Message Service Station Protection Unit Splice Sensor Unit – Sequence Termination Unit – sensor typically used to detect moisture in a splice enclosure. Termination sensor for STU mode armor monitoring. Page 68 of 70 4200 CMS USER MANUAL TSU UIC Termination Sensor Unit – User Interface Card – Document Number: Revision: D00805R02.01 02.01 Termination sensor for TSU mode armor monitoring. 4200 system card that provides communication between the user and the 4200 CMS. Special Terms 03/2013 Address The TCP/IP address assigned to the 4200 AUIC to uniquely identify it on a network using the TCP/IP protocol. Set in the Comms Configuration Menu. Cable Armor or Sheath Metallic protective layer of a Fiber Optic Cable Cable Alarm The result of a faulted to ground cable armor DNS The address of a Domain Name Service server that will translate domain names into IP addresses. This server is required if an alphabetic email server name is used. Set in the Comms Configuration Menu. Field Equipment Devices generally placed outside of the office such as SSUs, MDT, etc. Gateway The address of the computer that will route data from the 4200 CMS to the outside network. Set in the Comms Configuration Menu. Line Alarm The result of an “open or going open” detection circuit Netmask This mask is used to specify which part of the address is the network number part, and which is the host part. Set in the Comms Configuration Menu. NTP Network Time Protocol used to sync Date & Time with a dedicated NTP Server for accurate date and time readings. Norcomm Norscan Terminal Communication Software Office Equipment Equipment placed in a Central Office, Head End, Repeater or Regeneration Station, Mini Hub site Protection Equipment Devices used to protect personnel, cable and equipment from high voltage surges and induced voltages Sensor Alarm The result of a sensor unit being triggered by water entering the splice enclosure Test Equipment Equipment used during and after installation Page 69 of 70 4200 CMS USER MANUAL Document Number: Revision: D00805R02.01 02.01 If you need further assistance please contact Norscan Instruments Ltd. 30 Prairie Way Winnipeg, MB R2J 3J8 CANADA PH: (204) 233-9138 Fax:(204) 233-9188 email: [email protected] web: http://www.norscan.com 03/2013 Page 70 of 70