1
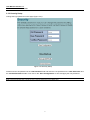
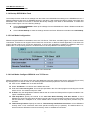
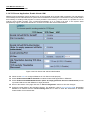
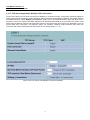
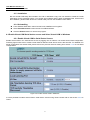
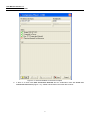
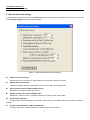
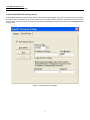
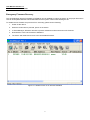
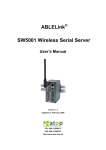
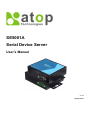
User Manual Version 1.0
SE5001A Serial Device Server
After at least one Virtual COM port is selected, the Control Panel will show (Figure 4.7).
Figure 4.7 Serial/IP Control Panel
The left hand side of the Control Panel shows the list of selected Virtual COM ports. Click on Select Ports to add or
remove Virtual COM ports from the list. The right hand side of the Control Panel shows the configurations of the
selected Virtual COM port marked in blue. Each Virtual COM port can have its own settings.
Note: The changes to Virtual COM ports apply immediately, so there is no need to save the settings manually.
However, if the Virtual COM port is already in use, it is necessary to close the Virtual COM port and open it after the
TCP connection closes completely in order for the changes to take effect.
4.3 Configuring Virtual COM Ports
To Configure Virtual COM ports (Figure 4.7):
i.
If the serial device server is running in TCP Server mode (recommended), Serial/IP should be
the TCP Client connecting to the serial device server. Enable Connect to Server and enter
the IP Address of the serial device server with the Port Number specified. The Port
Number here is the Local Listening Port of the serial device server.
ii.
If the serial device server is running in TCP Client mode, Serial/IP should be the TCP Server
waiting for SE5001A to connect it. Enable Accept Connections and enter the Port Number.
The Port Number here is the Destination Port of the serial device server. Do not enable
Connect to Server and Accept Connections together.
iii.
If Enable VirtualCOM Authentication is enabled in the serial device server (this is only
50