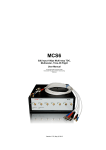
Download 2 Input Multichannel Scaler User Manual
Transcript
MCS4 2 Input Multichannel Scaler User Manual © Copyright FAST ComTec GmbH Grünwalder Weg 28a, D-82041 Oberhaching Germany Version 1.12, December 14, 2015 2 F ComTec GmbH Software Warranty FAST ComTec warrants proper operation of this software only when used with software and hardware supplied by FAST ComTec. FAST ComTec assumes no responsibility for modifications made to this software by third parties, or for the use or reliability of this software if used with hardware or software not supplied by FAST ComTec. FAST ComTec makes no other warranty, expressed or implied, as to the merchantability or fitness for an intended purpose of this software. Software License You have purchased the license to use this software, not the software itself. Since title to this software remains with FAST ComTec, you may not sell or transfer this software. This license allows you to use this software on only one compatible computer at a time. You must get FAST ComTec's written permission for any exception to this license. Backup Copy This software is protected by German Copyright Law and by International Copyright Treaties. You have FAST ComTec's express permission to make one archival copy of this software for backup protection. You may not otherwise copy this software or any part of it for any other purpose. Copyright © 2015 FAST ComTec GmbH D 82041 Oberhaching, Germany All rights reserved This manual contains proprietary information; no part of it may be reproduced by any means without prior written permission of FAST ComTec, Grünwalder Weg 28a, D 82041 Oberhaching, Germany. Tel: ++49 89 66518050, FAX: ++49 89 66518040. The information in this manual describes the hardware and the software as accurately as possible, but is subject to change without notice. F ComTec GmbH 3 Table of Contents 1 Introduction.................................................................................................................................................... 8 2 Installation procedure..................................................................................................................................... 9 2.1 Hard- and Software Requirements........................................................................................................ 9 2.2 Driver Installation................................................................................................................................. 10 2.3 Software Installation............................................................................................................................ 12 2.4 Hardware Installation........................................................................................................................... 12 2.5 Getting Started..................................................................................................................................... 13 2.5.1 Starting the Software................................................................................................................... 13 2.5.2 Multiscaling measurement........................................................................................................... 13 2.6 Installing more than one MCA4 / MCS4 Module..................................................................................15 3 Hardware Description.................................................................................................................................. 16 3.1 Overview.............................................................................................................................................. 16 3.2 Front Panel Connectors....................................................................................................................... 16 3.2.1 MCS Inputs.................................................................................................................................. 16 3.2.2 FEATURE I/O Connector............................................................................................................. 18 3.3 Multichannel scaler.............................................................................................................................. 20 3.3.1 Introduction.................................................................................................................................. 20 3.3.2 Dwell time.................................................................................................................................... 20 3.3.3 Sweep counter............................................................................................................................. 20 3.3.4 Spectrum sequencing.................................................................................................................. 20 4 Software Description.................................................................................................................................... 21 4.1 Server functions................................................................................................................................... 21 4.1.1 Initialization files .......................................................................................................................... 21 4.1.2 Action menus .............................................................................................................................. 22 4.1.3 File menu..................................................................................................................................... 22 4.1.4 Settings Overview........................................................................................................................ 24 4.1.5 MCS Settings............................................................................................................................... 25 4.1.6 System Definition......................................................................................................................... 26 4.2 File formats.......................................................................................................................................... 28 4.3 Control Language................................................................................................................................ 30 4.4 Controlling the MCA4 Windows Server via DDE..................................................................................36 4.4.1 Open Conversation...................................................................................................................... 36 4.4.2 DDE Execute............................................................................................................................... 36 4.4.3 DDE Request............................................................................................................................... 37 4.4.4 Close Conversation..................................................................................................................... 38 4.5 Controlling the MCA4 Windows Server via DLL...................................................................................40 5 MPANT Software......................................................................................................................................... 41 5.1 File Menu............................................................................................................................................. 42 5.2 Window Menu...................................................................................................................................... 45 5.3 Region Menu....................................................................................................................................... 46 5.4 Options Menu...................................................................................................................................... 51 5.5 Action Menus....................................................................................................................................... 62 6 Programming and Software Options............................................................................................................ 64 7 Appendix...................................................................................................................................................... 65 7.1 Absolute Maximum Ratings................................................................................................................. 65 7.2 Recommended Operating Conditions.................................................................................................. 65 7.3 Specifications....................................................................................................................................... 65 7.3.1 GATE / MCS inputs...................................................................................................................... 65 7.3.2 SCA outputs................................................................................................................................. 65 7.3.3 Digital I/O ports............................................................................................................................ 66 7.4 Performance........................................................................................................................................ 66 7.4.1 General........................................................................................................................................ 66 7.4.2 Multichannel scaler...................................................................................................................... 66 7.5 Physical............................................................................................................................................... 68 7.6 Accessories.......................................................................................................................................... 68 7.7 Trouble Shooting.................................................................................................................................. 68 7.8 Personal Notes.................................................................................................................................... 69 4 F ComTec GmbH F ComTec GmbH 5 Table of Figures Fig. 2.1: Device Manager................................................................................................................................ 10 Fig. 2.2: Driver Installation.............................................................................................................................. 10 Fig. 2.3: Choosing the right folder................................................................................................................... 11 Fig. 2.4: Device Manager after successful driver installation..........................................................................11 Fig. 2.5: MCS4 rear panel............................................................................................................................... 12 Fig. 2.6: Software startup screen.................................................................................................................... 13 Fig. 2.7: MCA4 Settings: select MCS Mode.................................................................................................... 14 Fig. 2.8: MCS Settings for a simple measurement..........................................................................................14 Fig. 2.9: Simple MCS spectrum...................................................................................................................... 15 Fig. 2.10: Editing MCA4.INI............................................................................................................................ 15 Fig. 3.1: MCS4 front panel.............................................................................................................................. 16 Fig. 3.2: Circuit diagram of each GATE / MCS input.......................................................................................17 Fig. 3.3: Circuit diagram of the FEATURE I/O port.......................................................................................... 18 Fig. 3.4: Digital I/O port details........................................................................................................................ 19 Fig. 3.5: GO-LINE details................................................................................................................................ 19 Fig. 4.1: MCA4 Server Window....................................................................................................................... 21 Fig. 4.2: MCA4.ini File..................................................................................................................................... 22 Fig. 4.3: Data Operations dialog for MPA data (left) and selected spectra (right)...........................................23 Fig. 4.4: Replay Settings dialog...................................................................................................................... 23 Fig. 4.5: About MCA4 dialog box and Installed items......................................................................................24 Fig. 4.6: Settings overview, left: PHA mode, right: MCS mode, more than one MCA4 module.......................24 Fig. 4.7: MCS Settings for one (left) or two stop inputs (right)........................................................................25 Fig. 4.8: System Definition dialog box............................................................................................................. 27 Fig. 4.9: Opening the DDE conversation with the MCA4 server in LabVIEW..................................................36 Fig. 4.10: Executing a MCA4 command from a LabVIEW application............................................................37 Fig. 4.11: Getting the total number of spectrum data with LabVIEW...............................................................37 Fig. 4.12: Getting the data with LabVIEW....................................................................................................... 38 Fig. 4.13: Closing the DDE communication in LabVIEW.................................................................................38 Fig. 4.14: Control Panel of the demo VI for LabVIEW.....................................................................................39 Fig. 5.1: MPANT main window........................................................................................................................ 41 Fig. 5.2: MPANT Map and Isometric display................................................................................................... 42 Fig. 5.3: File New Display dialog..................................................................................................................... 43 Fig. 5.4: Compare dialog................................................................................................................................. 44 Fig. 5.5: Compare two spectra........................................................................................................................ 44 Fig. 5.6: Print dialog........................................................................................................................................ 45 Fig. 5.7: Slice and rectangular ROI Editing dialog..........................................................................................48 Fig. 5.8: Polygonal ROI Editing dialog............................................................................................................ 48 Fig. 5.9: Single Gaussian Peak Fit.................................................................................................................. 49 Fig. 5.10: Log file Options for the Single Gaussian Peak fit............................................................................50 Fig. 5.11: Colors dialog................................................................................................................................... 51 Fig. 5.12: Color Palette dialog......................................................................................................................... 51 Fig. 5.13: Single Display Options dialog ........................................................................................................ 52 Fig. 5.14: Map Display Options dialog............................................................................................................ 53 Fig. 5.15: Isometric Display Options dialog..................................................................................................... 53 Fig. 5.16: Axis Parameters dialog................................................................................................................... 54 Fig. 5.17: Scale Parameters dialog................................................................................................................. 55 Fig. 5.18: Calibration dialog............................................................................................................................ 56 Fig. 5.19: Comments dialog............................................................................................................................ 57 Fig. 5.20: Settings dialog................................................................................................................................ 58 Fig. 5.21: Data Operations dialog................................................................................................................... 58 Fig. 5.22: System Definition dialog................................................................................................................. 59 Fig. 5.23: Spectra dialog................................................................................................................................. 59 Fig. 5.24: Slice dialog...................................................................................................................................... 60 Fig. 5.25: Replay dialog.................................................................................................................................. 60 Fig. 5.26: Tool Bar dialog................................................................................................................................ 61 Fig. 5.27: Function keys dialog....................................................................................................................... 61 Fig. 5.28: MPANT with four systems enabled.................................................................................................63 Fig. 7.1: MCS noise spectrum (32k range, 50ns dwelltime)............................................................................67 6 F ComTec GmbH Fig. 7.2: MCS differential non-linearity plot (32k range, 50ns dwelltime)........................................................67 Fig. 7.3: MCS DNL distribution........................................................................................................................ 67 F ComTec GmbH 7 Introduction 1 Introduction The MCS4 is a member of a versatile family of advanced USB-connected, software controlled Multichannel Analyzers and Multiscalers. In Multiscaling (MCS) mode the internal memory is used to accumulate spectra of up to 16M bins. An automatic sequential mode allows to acquire up to 65536 sequential spectra – each with a presettable number of sweeps – with no dead-time between each cycle or synchronized with an external signal. The maximum count rate is 400 MHz, dwelltime is > 30 ns for one STOP input or > 50 ns for two STOP inputs. A versatile 8 bit digital I/O port provides controlling external devices or to react on additional external signals. The “GO-LINE” compatibility allows to synchronize begin and end of the experiment across many measurement devices. The 32 bit or 64 bit MPANT Windows Software is able to handle 6 MCS4 providing up to 12 MCS channels. In-field upgrade options enable upgrading of future firmware versions enabling new features. 8 F ComTec GmbH Installation procedure 2 Installation procedure 2.1 Hard- and Software Requirements For operating the MCS4 you need a standard PC with a high-speed USB 2.0 port and Microsoft Windows XP or higher. USB 1.0 ports do not work. The maximum throughput rate is approximately 32 Mbyte/sec. This throughput rate is somewhat dependent on the computer hardware and operating system. We do not expect any problems with host compatibility as we do not use something else than any USB hard disk or memory stick. Of course, it is necessary that the PC has a true USB 2.0 port. Older PCs that do not have USB 2.0 on the motherboard can use a PCI card providing USB 2.0 ports. We have no good experience with such PCI cards, the throughput will be much lower, typically only 15…20 Mbyte/sec. And, some cards may not work at all. So we recommend a computer with true USB 2.0 ports on the motherboard, as is now standard even for laptops. First check you have all shipped equipment available: • Transport case • MCS4 module • Power supply module 100…240 V AC / 12 V DC • Power line cord • USB 2.0 (A/A) cable, 3 m • User manual • CD or USB stick with operating software F ComTec GmbH 9 Installation procedure 2.2 Driver Installation To install the driver, please start the device manager. You can do it by right-clicking the computer shortcut on the desktop and selecting ”Manage” from the drop-down-menu, then ”Device Manager”. Another way is to select in the Start Menu Settings..Control Panel, then System..Device Manager. Fig. 2.1: Device Manager The new device is displayed as ”MCA-4” in a class ”Other devices”. Please right-click it and select ”Update driver” from the drop-down menu. Fig. 2.2: Driver Installation Windows offers to search automatically for updated driver software or browse the computer for the driver software. Don’t try the automatic installation, it will probably not work. Select to browse manually for the driver and select for example for Windows 7 or 8 the wdmdriv\win7 folder on the CD or Software stick. 10 F ComTec GmbH Installation procedure Fig. 2.3: Choosing the right folder Please don’t go deeper into the folder structure, the processor type (x86 , x64, etc.) is found automatically. After pressing ”OK” the driver installation will proceed. The device manager will then show a ”FAST ComTec MCS6 USB Driver” in a class ”FAST ComTec USB Device” as shown in Fig. 2.4. Fig. 2.4: Device Manager after successful driver installation Please check the Power Saving Options in the PC Settings. If the PC goes to sleep during a running acquisition and shuts the USB port down, the software will hang up. So it is recommended to disable automatic going to sleep in the energy options. F ComTec GmbH 11 Installation procedure 2.3 Software Installation To install the MCA4 software on your hard disk insert the installation medium (CD or USB Stick) and start the installation program setup.exe for the 32-bit software or setupx64.exe for the native 64-bit software. A directory called C:\MCA4 for the 32-bit software or C:\MCA4(x64) for the native 64-bit software is created on the hard disk and all MCA4 and MPANT files are transferred to this directory. Drive C: is taken as default drive and \MCA4 as default directory. It is not mandatory that the MCA4 operating software is located in this directory. You may specify a different directory during the installation or may copy the files later to any other directory. The Setup program will install a shortcut on the desktop. The icon directly starts MCA4.EXE. The server program will automatically call the MPANT.EXE program when it is executed. The MCA4 Server program controls the MCA4 module but provides no graphics display capability by itself. By using the MPANT program, the user has complete control of the MCA4 along with the MPANT display capabilities. To run the MCA4 software, simply double click on the “MCA4 Server Program“ icon. To close it, close the MCA4 server in the Taskbar. 2.4 Hardware Installation Fig. 2.5: MCS4 rear panel Installation of the MCS4 is as easy as connecting a cable. Connect the power supply to the “POWER” connector and an USB 2.0 cable to the “USB” port. At the host computer plug in the USB cable into a highspeed capable USB 2.0 port. Since USB is a hot-pluggable interface the sequence of applying power and connecting the USB port is not important. NOTE: At the host computer a high-speed (480 Mbit/s) capable USB 2.0 interface must be used. When the power is applied the “POWER ON” LED on the rear of the MCS4 should be lit and a second later “POWER GOOD” as well. When the software and driver are already installed the computer will detect the MCS4 automatically as soon as it is connected. 12 F ComTec GmbH Installation procedure 2.5 Getting Started 2.5.1 Starting the Software First step is to start the MCA4 software by double clicking the corresponding icon. This will automatically start the MPANT program as well. On startup the MCA4 Server is iconized and one does not have to worry about it since all hardware settings are accessible from the MPANT program which actually is the graphical user interface and which will appear now on your screen. Fig. 2.6: Software startup screen 2.5.2 Multiscaling measurement To setup a simple multiscaling measurement we need a square wave generator that provides 2 synchronous signals. This can be achieved with e.g. a function generator with additional SYNC output. Or you use 1 signal that is connected via a power splitter to the MCS4. In our example we have a function generator that is set to square wave with 0...3.3V amplitude like a low voltage TTL signal and a frequency of 100kHz. We connect the signal output to STOP 1 and the SYNC output to START. F ComTec GmbH 13 Installation procedure Fig. 2.7: MCA4 Settings: select MCS Mode Now click on Options – Hardware Settings... or to get the MCA4 Settings dialog pop up. Select Mode – MCS and click on MCS Settings... (ref. Fig. 2.7) to get to the MCS Settings window (Fig. 2.8). Fig. 2.8: MCS Settings for a simple measurement Set Range = 1024, Dwelltime = 100ns, MCS Inputs Polarity to TTL, Impedance = 50 Ohm and click OK. After starting the measurement a garden fence like spectrum begins to grow (ref. Fig. 2.9). The distance of the peaks is 100 channels corresponding to 100 x 100ns = 10µs or 100kHz. 14 F ComTec GmbH Installation procedure Fig. 2.9: Simple MCS spectrum 2.6 Installing more than one MCA4 / MCS4 Module The software is able to operate up to 6 MCA4 modules with a single computer. Just connect them at an USB port, switch on the power, and install the driver when you are prompted. When starting the software, you will be asked to edit the MCA4.INI file as more than one MCA4 modules are found, and the notepad editor will be automatically started with MCA4.INI loaded. Edit the line "devices=1" accordingly and save the file. Fig. 2.10: Editing MCA4.INI That is all you have to do, next time when you start the software all modules will be found and can be operated. F ComTec GmbH 15 Hardware Description 3 Hardware Description 3.1 Overview The MCA4 series is a family of USB connected multichannel analyzers. All settings are software selectable. No jumper, switch etc. configurations are necessary. Fig. 3.1: MCS4 front panel A 1GBit internal DDR2 RAM is configurable as large FIFO buffer for listmode data transfer or as histogramming memory for onboard spectrum acquisition. Four onboard discriminators at the four rightmost BNC connectors allow for either positive TTL (slow NIM) or negative (fast NIM) GATE / MCS input signals. Four outputs at the feature connector provide several selectable signals (e.g. SCA, BUSY, etc.) for external usage. The legendary 'GO'-line (compatible with other FAST ComTec products) allows for easy synchronization or triggering of other measurement equipment. Furthermore a versatile 8 bit digital I/O port allows for a whole bunch of experimental control, monitoring or whatsoever other tasks. Moreover, the 8 bit digital I/O port can be used for event and spectra tagging to allow for multi-detector configurations, sequential data acquisition etc. 3.2 Front Panel Connectors 3.2.1 MCS Inputs The GATE / MCS inputs provide a switchable 4.7kOhm pullup to +3.3V, 4.7kOhm pulldown to GND or 50Ohm to GND input impedance. Each input is equipped with a fast discriminator. The threshold level can be chosen from +1.3V for TTL signals or -300mV for fast NIM signals. 16 F ComTec GmbH Hardware Description Fig. 3.2: Circuit diagram of each GATE / MCS input In MCS mode these inputs are used as START, STOP 1 & 2 and external channel advance (CHADV). NOTE: For clean switching and oscillation free operation the input slew rate should be higher than 25V/µs. F ComTec GmbH 17 Hardware Description 3.2.2 FEATURE I/O Connector Fig. 3.3: Circuit diagram of the FEATURE I/O port Single-channel-analyzer (SCA) Outputs When a maximum1 of the sampled analog ADC data is detected the corresponding maximum value is evaluated for lower- and upper-level thresholds (LLD and ULD). If the maximum falls in between LLD and ULD the pulse is accepted as valid and a SCA output pulse of 120 ns is initiated. Other signals can be selected at the nominal SCA ports: 1. SCA (120ns pulse for each valid SCA event) 2. ADC BUSY (over-the-threshold OR input FIFO full → dead time) 3. GATE input signal (as discriminated) 4. MCS event (2.5ns pulse for each detected count edge) 5. SVA event (as internally validated) 6. ... Digital I/O ports A very versatile 8 bit digital I/O port is implemented on the FEATURE I/O connector. Since the corresponding resistors are socket mounted they can be easily user configured in a most flexible way. This I/O port is fully software controllable and each single (1-bit) port is individually configurable. It might be used for external alerts, sample changer control, status input / outputs, spectrum / event tagging, etc. As can be seen from Fig. 3.4 each individual bit might be configured as input only (tri-stated output), pull-up (open drain) or driver output (small R-I/O) with readback capability. Wired OR / AND connections are feasible. 1 18 A peak maximum is detected when the actual input data is 6% lower than the previous maximum value since the threshold crossing F ComTec GmbH Hardware Description Fig. 3.4: Digital I/O port details GO-Line Fig. 3.5: GO-LINE details The system-wide open-drain wired-AND 'GO-Line' enables any connected device to start and stop all participating measurment equipment simultanously. The 'GO' line may be enabled, disabled, set and reset under software control. F ComTec GmbH 19 Hardware Description 3.3 Multichannel scaler 3.3.1 Introduction In MCS mode of operation the MCS4 counts STOP events relative to the START (trigger) signal. The time resolution is equal to the selected dwell time. The total measurement time is the spectrum length in time bins multiplied by the dwell time. The maximum STOP count rate is 400MHz. The maximum number of time bins (spectrum length) is 16M. It can be selected in steps of 1. This time granularity allows to optimize the sweep length for the specific experiment. Histogramming is performed in the onboard DDR2 memory providing the low dwell times (30 ns / 50 ns) and high count rates (400 MHz). 3.3.2 Dwell time The internal dwell timer provides automatic time bin advancement in the range of min. 30ns (1 channel MCS) or min. 50ns (dual channel MCS) up to ((248 – 1) x 10ns) = 781h in steps of 10ns. External channel advance is supported via the corresponding CHADV input. Please note that the external channel advance signal is internally synchronized to a free running 100MHz clock. An integrated control circuitry assures the minimum cycle time of 100ns, thus guaranteeing no triggering on too fast, ringing or spiky signals. 3.3.3 Sweep counter The presettable sweep counter is 48 bit wide and increments on each valid START (trigger) event. 3.3.4 Spectrum sequencing Sequences of spectra consisting of a preset number of sweeps may be automatically generated. The number of sequences is in the range of 2 to 65536. When the preset number of sweeps is accumulated the sequence counter is incremented and a new set of sweeps is started. 20 F ComTec GmbH Software Description 4 Software Description The software is a layer of several parts. A driver (MCS6.SYS) provides the communication via the USB port. A server program (MCA4.EXE) controls the hardware and the data. A graphical user interface (MPANT.EXE) controls the server via a DLL (DMCA4.DLL) and provides graphical displays. This chapter describes now the server program. The window of the MCA4 server program is shown here. It enables the full control of the MCA4 to perform measurements and save data. This program has no own spectra display, but it provides - via a DLL (”dynamic link library”) - access to all functions, parameters and data. The server can be completely controlled from the MPANT software that provides all necessary graphic displays. The view of the server window depends on the number of active input channels, here all 4 ADC channels are active. Fig. 4.1: MCA4 Server Window 4.1 Server functions To start the software, just double click a shortcut icon linking to the server program. The server program performs a test whether the hardware works well on this computer, then starts MPANT and gets iconized. Usually you will control everything from MPANT, but it is possible to work with the server alone and independently from MPANT. 4.1.1 Initialization files At program start the configuration files MCA4.INI and MCA4A.SET are loaded. Parameters that can be set by editing the MCA4.INI file are the update rate in msec for the refresh of the status, and the voltage calibration factors. The number of ADC channels and resolution is set automatically. The file MCA4A.SET contains the default settings. It is not necessary to edit this file since it is saved automatically. Instead of this .SET file any other setup file can be used if its name without the appendix ‘A.SET’ is used as command line parameter (e.g. MCA4 TEST to load TESTA.SET). The command line parameter can be used either by calling the program from a “DOS box” or by changing the properties of an icon on the desktop that points to the program. F ComTec GmbH 21 Software Description Fig. 4.2: MCA4.ini File 4.1.2 Action menus The server program normally is shown as an icon in the taskbar. After clicking the icon it is opened to show the status window. Using the “Start” menu item from the Action1 menu a measurement can be started. In the status window every second the acquired events, the counting rate and the time are shown. Clicking the “Halt” menu item the measurement is stopped and via “Continue” proceeded. As it is possible in the System Settings dialog to create up to four systems each containing different MCA's combined for simultaneous starting and stopping, there are four Action menus Action1..Action4. 4.1.3 File menu Clicking in the File menu on the Data... item opens the Data Operations dialog box. This dialog allows to edit the data format settings and perform operations like Save, Load, Add, Subtract, Smooth and Erase. The Radio Buttons MPA, Selected Spectra and New Spectra provide a choice between handling of the complete data set (MPA) or selected spectra, or to load new selected spectra for compare. Mark the checkbox Save at Halt to write a MPA file containing the configuration and all spectra at the stop of a measurement. The file name can be entered. If the checkbox auto incr. is crossed, a 3-digit number is appended to the file name that is automatically incremented with each saving. The format of the data can be ASCII (extension for separated spectra .ASC), binary (.DAT), GANAAS (.SPE), EMSA (.EMSA) and CSV (.CSV). If Separate Header is not checked, the Header and data is saved together in a file with extension .MP, otherwise the file with extension .MP contains only the header and the data is written separately into a file with appropriate extension. The buttons Save, Load, and Erase perform the respective operation. With Add and Sub spectra can be added or subtracted from the present data. The checkbox calibr. can be checked to use a calibration and to shift the data then according to the calibration. The Smooth button performs an n-point smoothing of selected single spectra. The number of points to average can be set with the Pts edit field between 2 and 21. Check the Write Listfile checkbox to write a listfile during a run (presently in PHA mode only). No Histogramming prevents calculating any spectra to save computing time and concentrate the system on writing the list file. 22 F ComTec GmbH Software Description Fig. 4.3: Data Operations dialog for MPA data (left) and selected spectra (right) The menu item File – Replay... opens the Replay dialog. It enables evaluation of list data. The Replay software licence is usually programmed into the MCA4 module or by an optional USB dongle. Fig. 4.4: Replay Settings dialog Enable Replay Mode using the checkbox and specify a File name of a list file (extension .LST) or search one by pressing Browse... With the radio buttons it is possible either to choose the complete list file by selecting All or a selected Start# Range. Specify the sweep range by editing the respective edit fields from: and Preset: . The Replay Speed can be specified in units of 100 kB per sec. To Use Modified Settings enable the corresponding checkbox; otherwise the original settings are used. To start Replay press then Start in the Action menu or the corresponding MPANT toolbar icon. The menu item File – About... opens the About MCA4 window where some information of the System can be found. Particularly the serial number is important for support purposes. This serial number is unique for each MCA4 system. A click on the “Installed...” button opens a dialog showing all installed features. F ComTec GmbH 23 Software Description Fig. 4.5: About MCA4 dialog box and Installed items The MPANT menu item in the file menu starts the MPANT program if it is not running. Fig. 4.6: Settings overview, left: PHA mode, right: MCS mode, more than one MCA4 module. 4.1.4 Settings Overview The Hardware... item in the Settings menu opens the MCA4 Settings dialog box. It enables to switch between PHA mode (left figure) and MCS mode (right). If more than one MCA module are installed, the module (A, B,..) can be selected in the upper right corner as shown right in Fig. 4.6. Via the SCA - combo boxes you can specify the signal you want to observe at the feature connector. See chapter 3.2.2. You can observe for each channel the SCA, ADC BUSY (over-the-threshold), GATE Input, MCS Input or SVA event signals. In PHA mode a List file can be written by checking the corresponding checkbox Write Listfile. The data format can be ASCII or binary depending on the format settings in the data operations dialog. The FIFO size can be selected between Full (128 Mb), Medium (32 Mb) and Small (8 Mb). For real data acquisition the full size is recommended. For adjusting parameters when using Scope mode, a small FIFO size is useful as changes can be observed immediately whereas with a full FIFO size they are delayed by several seconds. Since firmware version 5.16 On-board Histogramming can be selected as an alternative to list mode. Then the spectra are directly acquired in the MCA4 RAM. In this mode it is possible to exit the software and then even to disconnect the USB cable without affecting a running acquisition. When starting later the software, the acquisition is still running. OK takes all settings and closes the dialog. Apply sets all settings without closing the dialog. Cancel cancels all changes. Pressing Save writes all settings into the file MCA4A.SET and MCA4_###.set resp. the entered 24 F ComTec GmbH Software Description setup name. The file name is built by attaching “A.set” and “_###.set” to the shown name, where “###” is the serial number of the MCA4. Browse lets you search for settings files, Load Sett. loads one. When loading a settings file, the file with the serial number fitting to the device in the file name is loaded if one is found, otherwise or when the software is running in demo mode the file MCA4A.SET for the first MCA4 module. 4.1.5 MCS Settings Fig. 4.7: MCS Settings for one (left) or two stop inputs (right) Clicking the MCS Settings button opens the MCS Settings or MCS2 Settings dialog as shown in Fig. 4.7. The Range defines the number of time bins, the Dwelltime can be set in units of 10 ns from 30 ns (MCS) or 50 ns (MCS2). The measurement can be stopped automatically after a specified number of sweeps by checking Sweep preset. If the checkbox ROI Preset is marked, the measurement will be stopped after acquiring more events than specified in the interval between the boundaries defined in the corresponding edit fields. The events are counted only if they are within the ROI limits, i.e. >= the lower limit and < the upper limit. Another possibility is to acquire data for a given time via the Time Preset. A series of measurements can be acquired into separate memory parts by checking Sequential cycles and specifying the number of cycles. Each single measurement should be terminated preferably by a sweep preset condition. The complete run stops after performing the specified number of cycles. The spectra are then shown in a two dimensional view row by row in the MPANT program. As the sequential mode is implemented in the firmware, there is only a very small delay of 30 ns between the time spectra when using a sweep preset. For some measurements it is desired to synchronize the sequential cycles to an external signal from a sample changer or target mover. This can also be done by using the Digital I/O port together with the F ComTec GmbH 25 Software Description “waitpin” command. Just define any of the function toolbar icons in the MPANT program by a command like oncycle waitpin 3000 and click on this toolbar icon. Now in sequential mode when a sweep preset is reached after each individual cycle, the acquisition stops until the voltage level at Dig I/O 7 gets low. If the voltage is still high after 3000 msec, a message box will pop up and warn that a time out happened. See section 4.3 about more details and on the syntax of control language commands. For the MCS Inputs the Polarity can be selected between TTL (+1.3 V threshold) and NIM (-0.3 V) signals. For each of the MCS inputs you can select between the rising and the falling edge. Usually for TTL signals, rising edge should be active and for (negative) fast NIM signals “rising edge” should be deselected as the leading edge has the better timing. OK takes the settings and closes the dialog. Apply sets the parameters in the hardware without closing the dialog. Cancel closes the dialog and cancels all changes. 4.1.6 System Definition The “System...” item in the settings menu opens the System Definition dialog box. Several MCA's can be combined to form up to 4 separate systems that can be started, stopped and erased together. The use of the Digital Input / Output and the GO-Line can be defined: It can be used either to show the ON or OFF status of the systems if the checkbox Status Dig 0..3 is marked. At the respective pins +5 Volt are output if an acquisition is running and 0 V if not. Alternatively, it can be used for example with a sample changer by checking "Value inc. at Stop". Here, the 8-bit value entered in the edit field (a number between 0 and 255) is output at the Dig I/O port. This value will always be incremented by 1 if the MCA4 is stopped. The Invert checkbox allows inverting the logical level. See also the commands pulse and waitpin how to handshake a sample changer or synchronize sequential cycles with a target mover, see the control language in 4.3. The Radio buttons Push-Pull and Open Drain define the output mode of the Dig I/O ports. It is also possible to use the digital input 4 as an external trigger for starting the system (DESY control line). If the corresponding checkbox Start with Dig 4 is marked, a start command for the respective system will not immediately start the system. After the start command, the digital input will be permanently checked for its logical level. If the level changes from high to low, the data for the system is cleared and it will then be started. It will stop if the level returns to high (or vice versa if Invert is marked) and can again be restarted with the next level change. A stop command for the system will finish the digital input checking. By checking Clear before Start the spectra is cleared before the start. As an alternative to controlling Start/stop via digital input 4 also the GO-line can be used by checking Start with GO. This is better as the GO-line controls the hardware directly. The Use of the GO-Line is controlled via the 3 checkboxes Watch, High when ON, and Low at Stop. The GO line gates directly the hardware. "Low at Stop" means that the GO line is immediately pulled down by the hardware when a sweep preset is reached, or as fast as possible by the software at any other stop. 26 F ComTec GmbH Software Description Fig. 4.8: System Definition dialog box F ComTec GmbH 27 Software Description 4.2 File formats The .mpa format is used to save all spectra in a single file. It starts with an ASCII header containing the settings and then the spectra follow one after the other, each proceeded with a header line like [DATA0,16384 ] (This means the first single spectrum with a length of 16384 channels.) [DATA1,16384 ] (This means the second single spectra...) [CDAT0,16384] (This is the first dual parameter or calculated spectra with a length of 16384 channels. The enumeration starts again at zero after all "physical" spectra.) The format of the data itself can be ASCII, Binary, GANAAS, EMSA or CSV (see below). Individual spectra can also be saved into single files. If "separate header" is checked in the data operations dialog, such spectra data is written into two separate files, one with extension .mp containing configuration data and one containing pure spectra data with an extension indicating the chosen format. The .mp file contains the settings in ASCII format using the control language described in section 4.3 Spectra data files with extension .asc contain in each line one decimal number in ASCII containing the corresponding count value in the histogram. Binary data files with extension .dat are written with 4 bytes per data value, as usual in the Intel world in reverse order i.e. the least significant byte comes first. GANAAS data files with extension .spe contain 10 data in ASCII format after a simple header. This format is used by the IAEA gamma spectra evaluation program GANAAS. EMSA data files are in ASCII with extension .emsa and follow the NIST EMSA spectrum file format. Another ASCII file format is the x y format with extension .csv. It can be read for example with Excel and contains the channel number and content as two decimal numbers in ASCII per line separated by a TAB character. List files have the extension .lst and start with a header containing the usual report and configuration data in ASCII as in the .mpa or .mp files. The header ends with a line containing [DATA]. Then follows the data, depending on the format chosen for the data file either in ASCII or binary. In ASCII format one data word is written in hex format per line. In binary format each stop event is written with 8 bytes, as usual in the Intel world in the reverse order, i.e. the least significant byte comes first. A single event is a 64 bit number (8 bytes), or in scope mode a multiple of such 8 byte numbers. The lowest two bits 0 and 1 are the channel number 0..3 for ADC1..ADC4. Bit 2 is a flag for pileup detected. Bit 3 indicates scope mode. If it is on, more data words follow. Bit 4 – 47 is a 44 bit event time. If the RTC option is enabled, it is in units of 8 ns, otherwise in units of 1 msec. With tag bits enabled, the 8 most significant event time bits are used for tagging and represent the 8 dig I/O input bits. Bit 48 – 63 are the 16 bit ADC value or in scope mode the length of the waveform data minus one in units of 16 bit words. This size value can be 4095, 8191, 16383 or 32767. The waveform data follow then next. Here is an example of list file data: [DATA] adf20000000266f0 ad4f0000000266f2 ae0c0000000266f3 ae820000000266f1 ae850000000573a1 ad500000000573b2 ae0e0000000573a3 The software adds at the end of a list file a small data block containing the counter values. 28 F ComTec GmbH Software Description The format follow the scheme of scope mode data, it can be distinguished by the waveform length that is only 12 16-bit words. The lowest two bits 0 and 1 are the channel number 0..3 for ADC1..ADC4. Bit 3 indicates scope mode. It is on, so more data words follow. Bit 4 – 47 are zero. Bit 48 – 63 are the length of the counter data minus one in units of 16 bit words. This size value is 11 or in hex format b for 12 16-bit words or 3 64-bit counter data. The counter data follow then next, real time, live time and event counter. The counter data are 64 bit values Here is an example of a counter data block: 000b000000000008 0000000007735943 00000000075aacad 0000000000002710 000b000000000009 0000000007735943 00000000075aaed3 0000000000002710 000b00000000000a 0000000007735943 00000000075ab725 0000000000002710 000b00000000000b 0000000007735943 00000000075aaf24 0000000000002710 F ComTec GmbH 29 Software Description 4.3 Control Language A sequence of commands that are stored in a file with extension .CTL can be executed by the MCA4 server program or MPANT with the “Load ” or “Run” command. Also the configuration files MCA4A.SET or the header files with extension .MP contain such commands to set the parameters. Each command starts at the beginning of a new line with a typical keyword, the case is ignored. Any other characters in a line may contain a value or a comment. Following methods are available to execute commands: Define one of programmable toolbar icons F1..F12 in the MPANT program with the command and click the icon, see Options..Function keys in the MPANT menu. Load the command file using the Load command in the file menu. Enable remote mode in the server and send commands via the serial connection. A special DLL is necessary which is part of the optional available MPANT EXTERNAL CONTROL software. Open a DDE connection and send the commands via DDE as described in section 4.4. The application name for opening the DDE connection with the standard MCA4 server program MCA4.EXE is MCA4, the topic is MCA4-. Implemented are the DDE Execute to perform any command, and the DDE Request with items RANGE and DATA. Send the commands over a TCP/IP net using a remote shell and the optional available MPANT EXTERNAL CONTROL software. It is necessary to have a TCP/IP Winsock installed and that the remote shell daemon program MPA4NET is running. See the readme file on the installation disk. Send the commands via the DLL interface from LabVIEW, a Visual Basic program or any other application (software including the complete source code of the DLL and examples optional available). From your own Windows application, register a Windows message and then send the command as can be seen in the DLL source code. The file MCA4A.SET contains a complete list of commands for setting parameters. An example is: [MCA4A] 104 samplemode=10f enable_dither=1 pr_ena=0 enb_ch=1 thr1=ad20c62 thr2=b370cc7 thr3=9dc0b6c thr4=9dc0b6c width1=531ffe width2=531ffe width3=531ffe width4=531ffe digio=0 30 ; Device and serial number ; bit 0..3 chn1..4 0: scope-mode, 1: phamode ; bit 4..7 chn1..4 pile-up reject ; bit 8: Software-PHA ; enable dithering, improves the differential linearity of the ADC chip. ; Preset enable flags, MCS mode: ; bit 0: runtime preset enabled ; bit 1: realtime preset enabled ; bit 2: sweep preset enabled ; bit 3: ROI preset enabled ; bit 5: ROI2 preset enabled ; bit0..3: enable ADC chn1..chn4 ; LOWORD: threshold 1 HIWORD: zero in 64 bit ADC LSB's. ; threshold 2 and zero ; threshold 3 and zero ; threshold 4 and zero ; LOWORD: maxwidth1 samples per pulse, HIWORD: minwidth1 ; LOWORD: Use of Dig I/O, GO Line: ; bit 0: status dig 0..3 ; bit 1: Output digval and increment digval after stop ; bit 2: Invert polarity ; bit 3: Push-Pull output ; bit 4: Start System 1 with Dig 4 ; bit 5: Start System 1 with GO ; bit 8: GOWATCH ; bit 9: GO High at Start F ComTec GmbH Software Description digval=0 trigger=6 mcsmode=0 cycles=1 mcspol=10 svapol=f dwellunit=0 dwelltime=10 swpreset=10 timepreset=10.000 unipolar=1 event_cnt_mode=1 fifosize=0 sca1=ffff sca2=ffff sca3=ffff sca4=ffff phafit=0 fitwidth1=29 fitwidth2=29 fitwidth3=29 fitwidth4=29 memsegs=aa ctm8=125 mwidth1=0 mwidth2=0 mwidth3=0 mwidth4=0 gate=0 ctlsca=0 ; bit 10: GO Low at Stop ; bit 11: Clear before triggered start ; 0..255 DIG I/O Output value ; bit 1..4 control_trigger for scope mode. ; bit 0: TRG_EDGE_DOWN ; bit 1: TRG_EDGE_UP ; bit 2..4: TRG_SRC,0=none (softw.), 1..4=CH1..4, 5=extern ; bit 5: 0=normal, 1=auto ; bit 6: single shot ; bit 16: mcs mode ; bit 17: 2mcs mode ; bit 18: sequential mode ; bit 19: ext. clock ; cycles for sequential mode ; bit 0: start with rising edge ; bit 1: stop1 rising edge ; bit 2: stop2 rising edge ; bit 3: ch adv rising edge ; bit 4: FAST NIM ; bit 5: 4k7 MCS Inputs ; for external trigger and SVA: ; bit 0: trigger / ch1 with rising edge ; bit 1: ch2 rising edge ; bit 2: ch3 rising edge ; bit 3: ch4 rising edge ; bit 4: FAST NIM ; bit 5: 1=4k7, 0=50 Ohm ; choice of units in dialog 0=ns, 1=usec, 2=msec, 3=sec ; in units of 10 ns ; sweep preset value ; time preset ; unipolar or bipolar (0) ; count only stored events ; 0=128 MB, 1=32 MB, 2=8 MB ; LOWORD: upperlevel SCA 1, HIWORD: lowerlevel SCA 1 ; bit0..1 chn1: 0=max, 1= fit, 2 flattop, 3 reserved ; bit2..3 chn2 ; bit4..5 chn3 ; bit6..7 chn4 ; LOWORD: fitwidth gaussian, HIWORD, pulsewidth flattop ; Bit0..1: SEGMENTS_CH1, 0..3 = 1x32k/2x16k/4x8k/8x4k segments ; Bit2..3: SEGMENTS_CH2 ; Bit4..5: SEGMENTS_CH3 ; Bit6..7: SEGMENTS_CH4 ; coincidence time in units of 8 ns ; flattop: range for Mean calc LOWORD upper, HIWORD lower ; LOWORD: Bit0..13 meanrange, Bit(15,14) Method 0=left, 1=cft, 2=right ; HIWORD: roileft ; bit 0..3: GATE_ADC1..4, 1=Gate must be active for pulse processing ; bit 4..7: GATE_POL1..4, 1=active high ; bit 8..11: REJECT_ADC1..4, 1=use GATE as reject, e.g. pile-up detected, ; cor. GATE_ADCx must be 0 ; bit 12..15: SVA mode ; bit 0..3: SCA_CH1, 0=SCA, 1=Over-Threshold, 2=GATE Input, 3=MCS Input ; bit 4..7: SCA_CH2, F ComTec GmbH 31 Software Description autoinc=0 savedata=0 mpafmt=asc sephead=0 fmt=dat mpacaluse=0 smoothpts=5 wndwidth=160 wndheight=24 sysdef=0 [MCS1] active=1 range=4096 [MCS2] active=0 range=4096 [CHN1] active=0 range=4096 [CHN2] active=0 range=4096 [CHN3] active=0 range=4096 [CHN4] active=0 range=4096 [ADC1] active=1 range=16384 prena=0 roimin=0 roimax=16384 evpreset=1 rtpreset=1000.000 ltpreset=1000.000 bitshift=2 caloff=0.000000 calfact=1.000000 calfact2=0 calfact3=0 calunit=keV caluse=0 [ADC2] ; bit 8..11: SCA_CH3, ; bit 12..15 SCA_CH4 ; 1=Enable Auto increment of filename ; bit 0: auto save after stop ; bit 1: write listfile ; bit 2: listfile only, no evaluation ; bit 5: drop zero events ; format used in mpa datafiles ; (dat=binary, asc=ASCII, csv=CSV, spe=GANAAS, emsa=EMSA) ; seperate Header ; data format used in separated spectra (extension MP) ; (dat=binary, asc=ASCII, csv=CSV, spe=GANAAS, emsa=EMSA ; use calibration for shifted summing .mpa files according to calibration ; Number of points to average for a smooth operation ; Sets width of server window ; Sets height of server window ; Defines which module belongs to a system, relevant only for more ; modules ; MCS1 parameters ; active ; spectrum length ; MCS2 parameters ; active ; spectrum length (same as MCS1 range) ; Scopemode Channel 1 parameters ; active ; waveform length ; ADC1 parameters ; active ; spectrum length ; bit 0: realtime preset enabled ; bit 1: livetime preset enabled ; bit 2: Event preset enabled ; bit 3: ROI preset enabled ; lower ROI limit for ROI preset ; upper limit: roimin <= channel < roimax ; ROI preset or event count preset ; real time preset (sec) ; live time preset (sec) ; bit shift between ADC LSB's and spectrum resolution ; calibration parameter: offset ; calibration parameter: factor ; calibration unit ; bit 0=1: use calibration, higher bits: calibration formula ; the following section concerns parameters of ADC2 ... The following commands perform actions and therefore usually are not included in the MCA4A.SET file: 32 F ComTec GmbH Software Description start ; Clears the data and starts a new acquisition of system 1. ; Further execution of the .CTL file is suspended until any ; acquisition stops due to a preset. halt ; Stops acquisition of system 1 if one is running. cont ; Continues acquisition of system 1. If a time preset ; is already reached, the time preset is prolongated ; by the value which was valid when the “start“ command ; was executed. Further execution of the .CTL file ; is suspended (see start). erase ; Clears all spectra of system 1. savecnf ; Writes the settings into MCS6A.SET savempa ; Saves all configuration and spectra data. ; An existing file is overwritten. loadmpa ; Loads mpa data; the filename ; must be specified before with a command mpaname=... addmpa ; Adds mpa data to actual spectra; the filename ; must be specified before with a command mpaname=... submpa ; Subtracts mpa data from actual spectra; the filename ; must be specified before with a command mpaname=... MC_A ; Sets actual input channel to MC_A (STOP1) for the rest of ; the control file. MC_B ; Sets actual multichannel analyzer to MC_B (STOP2) savedat ; Saves data of actual channel as separated ; spectrum (extension .MP) An existing file ; is overwritten. loaddat ; Loads data of actual channel, the filename ; must be specified before with a command datname=... adddat ; Adds data into actual spectra; the filename ; must be specified before with a command datname=... subdat ; Subtracts data from actual spectra channel; the filename ; must be specified before with a command datname=... smooth ; Smoothes the data in actual spectra erase ; Clears the data of system 1. exit ; Exits the server (and MPANT) programs alert Message ; Displays a Messagebox containing Message and an OK ; button that must be pressed before execution can continue. waitinfo 5000 Message ; Displays a Messagebox containing Message, an OK ; and an END button. After the specified time (5000 msec) ; the Messagebox vanishes and execution continues. OK ; continues immediately, END escapes execution. beep * ; Makes a beep. The character '*' may be replaced with '?', '!' or ; left empty. The corresponding sound is defined in the WIN.INI ; file in the [sounds] section. delay 4000 ; Waits specified time (4000 msec = 4 sec). pulse 100 ; Outputs a pulse of 100 ms duration at dig 3. waitpin 4000 ; Waits 4000 ms for going the level at dig 7 going low. ; After a timeout a Messagebox warns and waits for pressing OK ; Can be used for connecting a sample changer. waitpin3 4000 ; waits for going the level at pin 3 going low. All Dig I/O ports 0..7 ; can be used this way. F ComTec GmbH 33 Software Description loadcnf configfile ; Loads a configuration stored in a config file like mca4a.set. run controlfile ; Runs a sequence of commands stored in controlfile. This ; command cannot be nested, i.e. it is not possible to execute ; a run command from the controlfile called with a run command, ; only if it was called with a load command. onstart command ; The command is executed always after a start action when the ; acquisition is already running. The command can be any valid ; command, also 'run controlfile' is possible. onstart off ; Switches off the 'onstart' feature. Also a manual Stop command ; switches it off. onstop command ; The command is executed always after a stop caused by a ; preset reached or trigger. This can be used to program measure ; cycles. For example the command 'onstop start' makes a ; loop of this kind. onstop off ; Switches off the 'onstop' feature. Also a manual Stop command ; switches it off. oncycle command ; The command is executed in sequential mode after each cycle. ; can be used together with 'waitpin' command to synchronize with a ; beam- or target mover. oncycle off ; Switches off the 'oncycle' feature. lastrun=5 ; Defines the file count for the last run in a measure cycle. After a ; file with this count or greater was saved with autoinc on, instead ; of the 'onstop command' the 'onlast command' is executed. numruns=5 ; Defines the file count for the last run in a measure cycle. The ; last count is the present one plus the numruns number. After a ; file with this count was saved with autoinc on, instead of the ; 'onstop command' the 'onlast command' is executed. onlast command ; The command is executed after a stop caused by a preset ; reached or trigger instead of the 'onstop command', when the ; last file count is reached with autoinc on. This can be used to ; finish programmed measure cycles. onlast off ; Switches off the 'onlast' feature. Also a manual Stop command ; switches it off. exec program ; Executes a Windows program or .PIF file. ; Example: exec notepad test.ctl ; opens the notepad editor and loads test.ctl. fitrois ; Makes a single peak Gaussian fit for all ROIs in the active ; Display of MPANT and dumps the result into a logfile. This is ; performed by the MPANT program and therefore can be ; made only if this application is running. fitrois MC_A ; Similar to the fitroi command, but using the argument allows to ; specify which spectrum should be evaluated independently of ; which child window is activated in MPANT. MC_A means STOP1 autocal ; Makes a single peak Gaussian fit for all ROIs in the active ; Display of MPANT for which a peak value was entered in the ; MPANT Region Edit dialog and uses the results for a ; calibration. This is performed by the MPANT program and ; therefore can be made only if this application is running. autocal SP_1 ; Similar to the autocal command, but using the argument allows ; to specify which spectrum should be evaluated independently of ; which child window is activated in MPANT deleteallrois ; deletes all ROIs in the active MPANT window. 34 F ComTec GmbH Software Description deleteallrois MC_# ; allows to delete all ROIs of a specified spectra (1 for # means ; A1..). The following commands make sense only when using the serial line or TCP/IP control or DLL control interface: MC_A? ; Sends the status of MC_A via the serial port and make it actual. ... MC_H? ; Sends the status of MC_H via the serial port and ; make it actual. ? ; Send the status of the actual channel sendfile filename ; Sends the ASCII file with name ‘filename’ via the serial line. The execution of a control file can be finished from the Server or MPANT with any Halt command. F ComTec GmbH 35 Software Description 4.4 Controlling the MCA4 Windows Server via DDE The MCA4 program can be a server for DDE (Dynamic Data Exchange). Many Windows software packages can use the DDE standard protocols to communicate with other Windows programs, for example GRAMS, FAMOS or LabVIEW. In the following the DDE capabilities of the MCA4 program are described together with a demo VI (“Virtual Instrument”) for LabVIEW. It is not recommended to use the DDE protocol for LabVIEW, as also a DLL interface is available that is much faster. The following should be seen as a general description of the DDE conversation capabilities of the MCA4 server program. 4.4.1 Open Conversation application: MCA4 topic: MCA4Any application that wants to be a client of a DDE server, must open the conversation first by specifying an application and a topic name. The application name is MCA4 and the topic is MCA4-. Fig. 4.9: Opening the DDE conversation with the MCA4 server in LabVIEW 4.4.2 DDE Execute The DDE Execute command can be used to perform any action of the MCA4 program. Any of the Control command lines described in section 4.3 can be used. For example a sequence of control commands saved in a file TEST.CTL can be executed by specifying the command RUN TEST.CTL The MCA4 program then executes the command and, after finishing, it sends an Acknowledge message to the DDE client. This can be used to synchronize the actions in both applications. 36 F ComTec GmbH Software Description Fig. 4.10: Executing a MCA4 command from a LabVIEW application 4.4.3 DDE Request The DDE Request is a message exchange to obtain the value of a specified item. Only two items are defined for DDE request up to now: RANGE and DATA. The value is obtained as an ASCII string, i.e. it must be converted by the client to get the numbers. All other parameters concerning the setup can be obtained by the client application by reading and evaluating the configuration file. RANGE The RANGE item can be used to obtain the total number of data. Fig. 4.11: Getting the total number of spectrum data with LabVIEW DATA With the DATA item the data is obtained. The value of this item is a multiline string that contains in each line a decimal number as an ASCII string. F ComTec GmbH 37 Software Description Fig. 4.12: Getting the data with LabVIEW 4.4.4 Close Conversation After finishing the DDE communication with the server program, it must be closed. Fig. 4.13: Closing the DDE communication in LabVIEW The following figure shows the “Panel” of the described VI for LabVIEW. 38 F ComTec GmbH Software Description Fig. 4.14: Control Panel of the demo VI for LabVIEW F ComTec GmbH 39 Software Description 4.5 Controlling the MCA4 Windows Server via DLL The MCA4 server program provides access to all functions, parameters and data via a DLL (“dynamic link library”). So the server can be completely controlled by the MPANT software that provides all necessary graphic displays. NOTE: The complete documented source code of the DLL including a library with fundamental VI’s and an example VI for LabVIEW and an example Visual Basic and C program is available as an option. The DLL DMCA4.DLL is an interface providing functions to communicate with the server program. Most of these functions send messages to the server as you do it when operating the server program by sending Windows messages via mouse clicks. Please do not expect any functions in this DLL for controlling the hardware directly. All software using the DLL interface requires that the server program is running. The DLL was mainly developed as an interface between the server program and MPANT, not as a nice developing tool for customers. But by looking at the programming examples and some hints in the DLL documentation it should be easy to develop own programs that are able to control the server like MPANT does. The server program has a built-in command interpreter. The syntax of these commands is described in chapter 4.3, and in the MPANT on-line help (look for: "How to use the command language.."). It is recommended to send commands like "range=16384" to the server via the RunCmd DLL function, i.e. RunCmd(0, "range=16384"); if you want to set parameters like a spectra length. The alternative method is to store all settings parameters into the DLL by calling the DLL function StoreSettingData(setting, 0); and then calling NewSetting(0); to send a message to the server to read new settings from the DLL. This method will not work for changing a spectra length to avoid the problem of any undefined memory pointers. The range parameter should be changed by the server program only (or by sending a "range=.." command). The recommended usage of the DLL is reading parameters like Status, Settings, Strings, Cnt numbers, ROI boundaries using the corresponding DLL functions, but for any actions or setting any parameters the command interpreter should be used. It is important that the DLL is loaded first by the Server program and that it is loaded from the same path by all programs using it. Otherwise it does not work to access the shared memory. The dmca4.dll is installed by the installation program into the standard Windows folder for 32-bit or 64-bit DLLs, respectively. Please make sure that there is nowhere else any file dmca4.dll. 40 F ComTec GmbH MPANT Software 5 MPANT Software The window of the MPANT program is shown here. It enables the full control of the MCA4 via the server program to perform measurements and save data, and shows the data on-line in several windows. Fig. 5.1: MPANT main window The server program MCA4.EXE automatically starts MPANT. If you try to start MPANT before the server is started, a message box warns that you should start the server first. If you want to use the server without the MPANT display program, you may rename the file “mpant.exe” into “mympant.exe”. It will then not be found by the server and not started. MPANT can be closed at any time without affecting the data acquisition and can be restarted out of the server menu or by a shortcut on the desktop. MPANT has viewing capabilities for single- and two-dimensional spectra. For ROI's the ROISum, Net sum and the mean counts per channel (i.e. ROISum divided by number of channels) and the centroid is displayed (<x> for single spectra, <x> and <y> for two dimensional). A single spectrum can be converted into a twodimensional one by specifying the x dimension in the display option dialog. It is possible to drag a rectangle and zoom into this rectangle. Rectangular ROI's can be set and the ROISum and Net ROISum is displayed. The Net Sum is calculated the same way like in the single view, by subtracting a linear interpolated background from the both outmost channels in x-direction. This Net sums are then summed up in y-direction. The ROI editing dialog is changed into a Rectangular Editing dialog for MAP and ISO displays. The Cursor can be moved in x and y direction using the mouse and the arrow keys, in ISO display only using the arrow keys. A status window at the left side gives all information about the status of the MCA4. Below the different counting rates a progress bar shows the filling of the FIFO. F ComTec GmbH 41 MPANT Software Fig. 5.2: MPANT Map and Isometric display A toolbar provides fast access to many used functions in the menu. A status bar at the bottom gives help about the meaning of the toolbar icons. A cursor appears when clicking the left mouse button inside the graphics area. The cursor can be moved using the arrow keys. To get rid of the cursor, make a double click with the right mouse button outside the graphics area. To define a region, press the right mouse button, and while keeping the button pressed, drag a rectangle. In zoomed state a scroll bar appears that allows scrolling through the spectrum. In the following the several menu functions are described together with the corresponding toolbar icons. 5.1 File Menu Load..., Add..., Save Display As..., Save MPA As... These menu items provide the usual functions for loading and saving data, either a complete data set when loading or saving a .MPA data file, or separated spectra when loading or adding a .MP data file. The 'Load' function creates then a new spectrum for compare, whereas the 'Add' functions adds the data to the spectrum selected by the active window. For saving a selected spectrum into a seperated file, click on the respective display window and select “Save Display As..” from the MPANT File menu. If you want to have the data file seperated from the header containing the configuration, first open the data operations dialog using the toolbar icon showing the 4 yellow diskettes, select “Selected Spectra” and check “Seperate Header” as shown in Fig. 5.7. When saving data, you have the choice between several formats like binary (.DAT), ASCII (.ASC), GANAAS (.SPE), EMSA (.emsa) and CSV (.CSV) format by selecting it from “Save type As...”. To read a CSV file with Excel, load it as a text file and configure TAB characters as seperators. When you load data, select a header file (extension .MP). This file contains the information about the size and format of the data file, which is then automatically read. With “Add” the data is added to the present data. 42 F ComTec GmbH MPANT Software The data read from a file is shifted according to the calibration, if it is available and 'Use Calib' is checked in the MCA4 Data Operations dialog, see Fig. 4.3. This dialog can also be used to load spectrum data from a file into an existing display window. New Display: With the Open New menu item or the corresponding icon a new Display window can be created and shown as the active window. In the “Open New Display” dialog box the spectrum for the new display can be selected. Fig. 5.3: File New Display dialog Open All By selecting the Open All menu item, all available Displays are shown. The windows of the last opened Display become active. Close All By selecting the Close All menu item, all Display windows are closed. F ComTec GmbH 43 MPANT Software Compare... The Compare... menu item opens a dialog that enables to show two spectra with different colors in the same window. The active display window can be checked as a primary window and there is a list of other spectrum windows that can be inserted as secondary windows. Fig. 5.4: Compare dialog Using the features of the software it is possible to create a shifted spectrum that has a characteristic peak at the same place as the primary spectrum, see . This way a view as shown in Fig. 5.5 can be created. Fig. 5.5: Compare two spectra 44 F ComTec GmbH MPANT Software Print... The Print menu item opens the print dialog. It allows to arrange several pictures on a page into zones. The number of zones in vertical and horizontal direction can be specified. The Color can be black/white, RGB (colored) or Gray scale. RGB is recommended also for black laser printers. Some info lines containing date, file name and title can be added. For each page a temporary file PRINT1.WMF, PRINT2.WMF... will be created. This file is in Windows Meta file format and can be exported into some other Windows applications. Fig. 5.6: Print dialog Setup Printer... The Setup Printer menu item enables to configure the printer. Exit The Exit menu item exits the MPANT program. The server and any measurement data remain active, MPANT can be easy restarted out of the file menu of the server program. 5.2 Window Menu The Window menu enables arranging the Display windows. Tile With the Tile menu item or by clicking the corresponding icon, all opened and displayed MPANT Display windows are arranged over the full MPANT client area trying to allocate the same size for each window. Cascade The Cascade menu item or respective icon arranges all windows in a cascade display. F ComTec GmbH 45 MPANT Software Open All By selecting the Open All menu item, all Display windows are opened. Window list At the end of the Window menu, all created Display windows are listed with their names, the current active window is checked. By selecting any of the names, this window becomes the active window and is displayed in front of all the others. 5.3 Region Menu The Region menu contains commands for Regions and ROI's (Regions of Interest). A Region can be defined by marking it in a display, with the mouse using the right mouse button and dragging a rectangle over the area one is interested in. A ROI, i.e. an already defined region in a single spectrum can be shown zoomed by double-clicking with the left mouse button on the corresponding colored area in the bar at the bottom of the spectra display. A single mouse click with the left button on the corresponding colored area makes this to the selected ROI and lets the counts contained in this ROI be displayed in the information lines of the respective window. Advance the selected ROI to the next or previous one using the "+" or "-" key from the numeric keypad. Polygonal and curved ROI's in MAP displays are implemented in addition to the rectangular ROI's. The boundaries can be polygonal, circular, annular or pie. Make a choice of the shape using the Menu Region...Shape or the corresponding toolbar icon. Define the ROI using the right mouse button, the TAB and the END key (please read the help in the status bar) and save the ROI using the toolbar icon "Create new ROI" . Advance the selected ROI to the next or previous one using the "+" or "-" key from the numeric keypad. The ROI boundary is displayed by lines or circles and the ROI area can in addition be displayed in inverted color by enabling the checkbox "Invert ROI Pixel" in the MAP Display options dialog. The sum and net sum of counts within the selected ROI is displayed. The net sum is calculated by subtracting a background integral by summing line integrals S(y) for each y coordinate using the mean value of the counts at the lowest and highest x coordinate of the ROI. Zoom The Zoom item or respective icon enlarges a Region to the maximum Spectrum Display size. Back The Back menu item or clicking the corresponding icon restores the last zoom view. Each time a Back command is clicked the view is stepped back one step. Zoom Out The Zoom Out menu item or clicking the corresponding icon enlarges the actual zoom view by a factor 2, if possible. You can also use a mouse wheel for zooming in at out. Home Clicking the Home menu item or the corresponding icon restores a Display to the basic configuration showing the complete spectrum. Shape Selecting the Shape menu item opens a sub menu with the items Rectangle, X-Slice Y-Slice and Rectangle, Polygon, Circle, Annular and Pie to choose the ROI shape. 46 F ComTec GmbH MPANT Software Rectangle Sets the region shape to a rectangle with arbitrary dimensions. To enter the rectangular region, press the right mouse button, drag a rectangle, and release the button to define the region. X-Slice Sets the Region shape to the rectangle with maximal height. Y-Slice Sets the Region shape to the rectangle with maximal width. Polygon Sets the Region shape to polygonal. To enter a polygonal Region using the mouse, press the right button for each point, the TAB key for a next polygon and the END key to close it. Circle Sets the Region shape to circular. To enter a circular Region using the mouse, click the right button at the center, move the mouse and press the END key to finish. Annular Sets the Region shape to annular. To enter an annular Region using the mouse, click the right button at the center and first circle and press the END key at the second circle. Pie Sets the Region shape to pie. To enter a pie Region using the mouse, click the right button at the center and first radial end-point, press the END key at the second radial line end-point. Create The Create menu item creates a new ROI from the current marked Region. Delete By selecting the Delete menu item or the respective icon, the current active ROI is deleted and the previously defined ROI is activated. Edit... With the Edit item, a dialog box is opened which enables editing the ROI list, i.e. create a new or delete, change and activate an existing ROI. Also the peak values for an automatic calibration can be entered here. A ROI can be edited and added to the list. It can also be made to the “Active ROI”, that is the special ROI that is used by the server program to calculate the events within this ROI and look for an event preset. The ROI list can be cleared and it can be written into a file with extension .CTL, which can be directly loaded into the server to restore the ROI list. F ComTec GmbH 47 MPANT Software Fig. 5.7: Slice and rectangular ROI Editing dialog Clicking on it in the ROI list can change the selected ROI. In the MPANT spectrum display the total and net sum of the selected ROI is displayed. ROI names are implemented. The name can be entered in the ROI editing dialog. Press "Modify" to insert a new name from the edit field of the selected ROI into the list. Fig. 5.8: Polygonal ROI Editing dialog For polygonal, circular, annular and pie ROI's there is a special dialog to select and edit all the parameters. The ROI definition parameters can be saved into a .CTL file and reloaded using the File menu like any control file. Note that the selected ROI can be advanced in any activated spectra display by pressing the "+" and "-" key from the numeric keypad. X-projection, Y-Projection Projections of ROI's in dual parameter spectra to the x- and y-axes are implemented. There are menu items "X-Projection" and "Y-Projection" in the Region menu. They create new single spectra displays showing the respective projection of the selected ROI in a dual parameter spectrum in the active window. 48 F ComTec GmbH MPANT Software Fit... By selecting the Fit... menu item or the respective icon, a single Gaussian peak fit with linear background is performed for the currently marked region. The fitted curve is displayed and a dialog box shows the results: Fig. 5.9: Single Gaussian Peak Fit The full width at half maximum FWHM and Position of the Gaussian can be changed and a New Fit can be performed, they even can be fixed to the entered value by marking the respective check box. The Position and FWHM are displayed in channels and also in calibrated units, if a calibration is available. The area of the Gaussian is also shown. For all values also the standard deviations are given. The value of Q is the normalized chi**2. To take into account the systematic error of the line shape, you may multiply the errors with the square root of Q. Click on Save to append a line containing the results to a Log file with the specified name. OK closes the dialog and lets the fitted function in the display also if it is refreshed, whereas after Cancel the curve no longer will be shown in a refreshed display. Options... opens a new dialog box to define the information in the log file: F ComTec GmbH 49 MPANT Software Fig. 5.10: Log file Options for the Single Gaussian Peak fit The several quantities are written in standard text format with Tabs as separators and a Newline character at the end of each line, so the file can be read with standard calculation programs like EXCEL. Click on Print Header to write a header line. Fit ROIs With the Fit ROIs item, for all ROI's a Single Gaussian Peak Fit is performed and the results are dumped into the log file. Auto Calib Makes a Gauss fit for all ROI's in the active Display for which a calibration value was entered in the ROI editing dialog, and performs a calibration using the fit results. You have then only to check “use calibration” in the calibration dialog opened with to use it. 50 F ComTec GmbH MPANT Software 5.4 Options Menu The Options Menu contains commands for changing display properties like scale, colors etc., hardware settings, calibration and comments. Colors... The Colors menu item or respective icon opens the Colors dialog box. Fig. 5.11: Colors dialog It changes the palette or Display element color depending on which mode is chosen. The current color and palette setup may be saved or a new one can be loaded. Fig. 5.12: Color Palette dialog To change on of the colors, select "Palette colors" and click on one of the colors. In the Color Palette dialog box the RGB values can be edited or for a 256 color video driver one of the Physical palette colors can be chosen. Display... The Display menu item or the corresponding icon opens for single spectra the Single view dialog box. F ComTec GmbH 51 MPANT Software Here the graphic display mode of single spectra can be chosen. The 'Type' combo box gives a choice between dot, histogram, spline and line. The 'Symbol' combo box gives a choice between None, Circle, Triangle down, Triangle up, Cross, Snow-flake and Diamond. The symbols can be filled by checking Fill, error bars can be displayed by checking Error Bar. 'Dot' means that each spectra point is shown as a small rectangle or the specified symbol, the size can be adjusted with the size combo box. 'Histogram' is the usual display with horizontal and vertical lines, 'spline I' means linear interpolation between the points, and 'line' means vertical lines from the ground to each spectra point. If the displayed spectra range contains more channels as pixel columns are available in the video graphic display, usually only the maximum value of the channels falling into that pixel columns is displayed. But it can also explicitly specified by marking the check boxes “Max Pixel”, “Mean Pixel” ,“Min Pixel” or “All” which value will be displayed. It is also possible to display all three possible Pixel values in different colors that can be chosen in the colors dialog. For the “Mean Pixel” a Threshold value can be entered; channel contents below this value then aren't taken into account for the mean value calculation. As plotting all values costs a lot of computing time for very large spectra, it is replaces automatically by “Max” and “Min” pixel for spectra with more than 1 million counts. Fig. 5.13: Single Display Options dialog The button labeled Custom Formula... provides spectra that are calculated in a special DLL named FMPA3.DLL. This DLL allows to calculate spectra and to display it with the MPANT program. The source code of this DLL is part of the optional DLL software interface, so it is possible to program customer defined functions. Select a single spectrum and open the Display options dialog. Press then the button labeled "Custom formula...". A dialog box "Custom-transformed spectra" is opened. Here the formula for the calculation can be selected and the parameters can be edited. A new display window showing the calculated spectra can be created. Error Bars can be activated in the display options dialog, for the calculation of the error bars also the DLL is used. Formula #6 calculates a Fourier transform of a wave form acquired in scope mode, see Fehler: Referenz nicht gefunden. It is possible to change to a two dimensional view of the spectrum by specifying the x Dimension and clicking the button ">> MAP" from the Single Display Options dialog. For MAP displays the Display Options dialog is changed and enables a choice between four Graphic types: bitmap dot, vector dot, bitmap contour and vector contour. Bitmap Dot is recommended as a standard, because it makes a good and fast display. The check box Invert Roi Pixel changes the color inside ROI's to make them better visible. Vector Contour paints colored contour lines. To calculate the lines takes a lot of time and causes the mouse pointer changing to an hourglass. But it gives very impressive colored pictures suited especially for presentation and when looking carefully at spectra details. 52 F ComTec GmbH MPANT Software Fig. 5.14: Map Display Options dialog From the MAP View dialog it is possible to change to Single view by clicking ">> Single" or change to Isometric View by clicking ">> Isometric". This can also be done directly via the respective toolbar icon . Fig. 5.15: Isometric Display Options dialog In isometric mode several single spectra are drawn behind each other. The Precession angle around the vertical axis can be chosen in multiples of 90 degrees. This rotation can also be done directly using toolbar icons and . The Tilt angle is between the x and y-axis and can be chosen between 15 and 89 degrees. The Height specifies the percentage of the z-axis length respective to the whole drawing, it can be entered between 0 and 99. With hidden it can be specified whether the hidden parts are not drawn. If "Monochrome" is checked, the spectra are painted monochrome, otherwise in color. Axis... By the Axis... menu item or the respective icon, the Axis Parameters dialog box is opened. F ComTec GmbH 53 MPANT Software Fig. 5.16: Axis Parameters dialog It provides many choices for the axis of a display. The frame can be rectangular or L-shape, the frame thickness can be adjusted (xWidth, yWidth). The font size can be chosen between Small and Large. A grid for x and y can be enabled, the style can be chosen between Solid, Dash, DashDot and DashDotDot. Ticks on each of the four frame borders can be enabled, the tick length and thickness can be chosen. The style of the axis labeling depends on enabled ticks at the bottom respective left side: If no ticks are enabled there, only the lowest and highest values are displayed at the axis, otherwise the ticks are labeled. 'Use calibration' changes the axis ticks and labels into calibrated values. A check box "Start maximized" allows to define if the MPANT main window should start in maximized size. It is necessary to save the MPANT options to make these settings permanent. 54 F ComTec GmbH MPANT Software Scaling... The Scaling menu item or the corresponding icon opens the Scale Parameters dialog box. Fig. 5.17: Scale Parameters dialog It enables changing the ranges and attributes of a Spectrum axis. By setting the Auto scaling mode, the MPANT will automatically recalculate the y-axis maximum value for the visible Spectrum region only. To keep the same height of the visible region for a longer time, deselect the Auto scaling mode. Then with the scroll bar thumb one can quickly change the visible region scale, otherwise the scale will be changed automatically. The Minimum auto scale mode helps to display weak structures on a large background. Lin / Log scale For a Lin scale all data intervals have the same size. With Log scale the intervals will be small for small y values and large for large y values. All options have effect only on the active Display. F ComTec GmbH 55 MPANT Software Calibration... Using the Calibration menu item or the corresponding icon opens the Calibration dialog box. Fig. 5.18: Calibration dialog Choose between several calibration formulas. Enter some cursor positions and the corresponding values. The actual cursor position can be entered by pressing 'Cursor' or the last fitted peak position by pressing 'Fit'. Click on Add to insert the calibration position into the list, then on Calibrate. The obtained coefficients can be inspected together with the statistical error, or they can be changed and entered by hand. If ‘use calibration’ is on, the calibrated values are displayed together with the channel position of the cursor. For MAP spectra the dialog is slightly different and allows to select by two radio buttons between the calibration of x- and yaxis. For a selected parameter there is only one calibration: If any ADC is already calibrated in a single spectrum and it is used also in a MAP spectrum, the calibration is the same here. The fastest way to get a good calibration is to create ROI's around peaks with known energy and enter the energy in the ROI editing dialog, see Fig. 5.7. Then use the “Auto Calib” function in the region menu. You will immediately get a calibration and the dialog opens as shown in Fig. 5.18. 56 F ComTec GmbH MPANT Software Comments... Up to 13 comment lines with each 60 characters can be entered using the Comments dialog box. The content of these lines is saved in the data header file. The first line automatically contains the time and date when a measurement was started. The second line contains the title of the spectra. Note that editing this line changes the spectra name. This is the only method to change the name of physical ADC spectra. The description of each comment line can be changed by editing the file COMMENT.TXT. Fig. 5.19: Comments dialog F ComTec GmbH 57 MPANT Software Hardware... The Hardware settings dialog box allows to make all the respective settings (ref. 4.1.4 ). Fig. 5.20: Settings dialog Data... The Data Operations dialog allows to edit format settings and to load and save spectra data, ref. 4.1.3 . Fig. 5.21: Data Operations dialog 58 F ComTec GmbH MPANT Software System... The System Definition dialog box allows to make all the respective settings, see 4.1.6 . Fig. 5.22: System Definition dialog Spectra... The Spectra dialog box allows editing the list of calculated and dual parameter spectra. Fig. 5.23: Spectra dialog Slice... The Slice option allows to create new single spectra displays, showing a slice in a dual parameter spectrum. Click on a dual parameter spectrum display to make it the active window, then select the Slice menu item or toolbar icon. The Slice dialog box is displayed. Select ”x=const” or ”y=const” for the slice direction, and the coordinate. Clicking the "create" button creates the new display window. In the title bar of the new window the name of the dual parameter spectra and the slice coordinate is shown. F ComTec GmbH 59 MPANT Software The slice position can be changed using the scroll bar in the Slice dialog, or by entering the value in the edit field and pressing the button, which is labeled ”Set” after creation of the slice view. Clicking its close field can close the Slice dialog. Created slice spectra displays remain visible and their coordinates can be changed later using the Slice utility again. The position of the Slice dialog with respect to the MPANT main window can be saved in the MPANT.CFG file. Rectangular ROI's are visible in the slice spectra display and can be created here. Fig. 5.24: Slice dialog Replay... The menu item Options – Replay... opens the Replay settings dialog (ref. 4.1.3 ). Fig. 5.25: Replay dialog 60 F ComTec GmbH MPANT Software Tool Bar... Selecting the Tool Bar Menu item opens the Tool Bar Dialog Box. It enables arranging the icons in the Tool Bar. Fig. 5.26: Tool Bar dialog If it is enabled, an array of icons in the MPANT Menu is shown. Clicking the left mouse button with the cursor positioned on an icon, the user can perform a corresponding MPANT Menu command very quick. It is also possible to include icons for free programmable function keys F1...F12 into the Toolbar. The function keys can be programmed in the Function keys dialog with any one of the commands described in 4.3 . It can be accessed either by clicking the "Function keys..." button or directly from the Options menu. Fig. 5.27: Function keys dialog The functions can be executed by clicking the corresponding icon in the toolbar or by the corresponding function key on the keyboard simultaneously with the CTRL key. The MPANT window must be the active on the desktop and have the focus, i.e. it must be the top window. F ComTec GmbH 61 MPANT Software Status bar With this menu item the Status bar at the bottom of the MPANT main window can be switched on or off. A corresponding check mark shows if it is active or not. The Status bar usually shows if an acquisition is active. When the left mouse button is pressed while the mouse cursor is within a toolbar icon, it displays a short help message what the meaning of the toolbar icon is. Status window The status window at the left side of the MPANT main window can be shown in a small or large size or can be hidden. Save As... Saves all parameters defined in the Options menu to the MPANT.CFG or a user defined config file. Open... Loads a new configuration. 5.5 Action Menus Start The Start toolbar button erases the data and starts a new measurement. Halt The Halt toolbar button stops a measurement. Continue The Continue toolbar button continues a measurement. Erase The Erase toolbar button erases the data. If more than one systems are defined for starting and stopping combined MCAs together, more groups of start / halt / continue / erase icons appear in the toolbar for the respective systems. 62 F ComTec GmbH MPANT Software Fig. 5.28: MPANT with four systems enabled F ComTec GmbH 63 Programming and Software Options 6 Programming and Software Options The MCS4 can be controlled by user-written programs using the DLL software interface with example programs for Visual Basic, LabVIEW and C that is available as an option. Furthermore, LINUX software is available as an option containing a driver, library and console test program. A Windows software similar to the LINUX package that runs without the server using a stand-alone DLL is also available on demand for customers who own one of the two available library packages. 64 F ComTec GmbH Appendix 7 Appendix 7.1 Absolute Maximum Ratings Input voltage: any GATE / MCS input (short duration only): ...................... -1.7 ... +5.52 V any FEATURE I/O port: ...................................................... -0.5 … +5.53 V DC power supply: ............................................................................ +14 V DC input current: any GATE / MCS input: ................................................................. ±70 mA any DIGITAL I/O port: .................................................................... ±10 mA Input power: any GATE / MCS input: ......................................................... max. 0.25 W 7.2 Recommended Operating Conditions Power supply: .............................................................................. nominal +12 VDC / 15 W voltage range: ......................................................................+11 ... +14VDC Operating temperature range: .................................................................................................. 0 to +50°C GO-Line load: .................................................................................... min. 1 kΩ to +5.0 V or ................................................................................... min. 2 kΩ to GND Digital I/O input voltage: ................................................................................................. 0 … +3.3 V 7.3 Specifications 7.3.1 GATE / MCS inputs Input impedance (selectable): (to GND) ............................................................................................ 50 Ω (to GND or + 3.3V) .......................................................................... 4.7 kΩ Input voltage range: positive (TTL, slow NIM) ................................ 0 … +3.3V (5 V compatible) negative (fast NIM) ................................................................ 0 … -800mV Input threshold voltage: positive (TTL, slow NIM) .................................................................. +1.3V negative (fast NIM) ....................................................................... -300mV Pulse width (high, low): (MCS START and CHADV) ..................................................... min. 1.0 ns (MCS STOP 1 and 2) ............................................................... min. 0.8 ns Frequency: (MCS START and CHADV) ................................................ max. 100 MHz (MCS STOP 1 and 2) ......................................................... max. 400 MHz Slew rate requirement: ............................................................................................... min. 25 V/µs 7.3.2 SCA outputs Output voltage (at IC pin): VOH (IOH = -4.0mA) ..................................................................... min. 2.4 V VOL (IOL = 8.0mA) ...................................................................... max. 0.4 V Output impedance: (series resistor) .................................................................................. 22 Ω SCA output pulse width: ........................................................................................................ 120 ns 2 3 respect maximum input power limit Maximum DC undershoot below GND must be limited to either -0.5V or 10mA. During transitions, undershoot to -2.0V or overshoot to +7.0V is allowed, provided this lasts less than 10ns and with the current is limited to 200mA F ComTec GmbH 65 Appendix 7.3.3 Digital I/O ports R Pull: ( default pull-up to +3.3V) ............................................................... 1.0 kΩ R I/O: ( default series resistor) ..................................................................... 22 Ω Input voltage (at IC pin): VIH ............................................................................................. min. 2.0 V VIL ............................................................................................. max. 0.8 V Output voltage (at IC pin): VOH (IOH = -4.0mA) ..................................................................... min. 2.4 V VOL (IOL = 8.0mA) ...................................................................... max. 0.4 V 7.4 Performance 7.4.1 General DDR2 Memory: ................................................................................... 1Gbit = 32M x 32 bit Memory modes: (FIFO) ......................................................................................... Listmode (histogramming) ....................................................................... Cardmode Data throughput: (USB transfer rate) ....................................................................... 32 MB/s 4 Basic operating modes : Multichannel scaling .......................................................................... MCS Reference oscillator: Stability: ....................................................................................... ±50 ppm Aging: .................................................................................. ±3 ppm / year 7.4.2 Multichannel scaler Dwell time modes: .............................................................................. internal (auto), external Internal dwell time: (1 channel MCS) ....................................................................... min. 30 ns (2 channel MCS) ....................................................................... min. 50 ns .................................................................. max. (248-- 1) x 10 ns = 32 days in steps of: ......................................................................................... 10ns External channel advance: edge sensitivity: .................................................................... rising / falling period (internally asured): ....................................................... min. 100 ns uncertainty: .................................................................................... ±5.0 ns Trigger uncertainty: ....................................................................................................... ±5.0 ns Trigger (START) delay: ........................................................................................... 45.0 ns ±5.0 ns Count (STOP) delay: ....................................................................................... 41.25 ns ±1.25 ns Dead time: End-of-sweep: .................................................................................. 10 ns between time bins: ............................................................................ none Sweep repetition time: ....................................................................................... ≥ (Range + 10ns) Differential non-linearity: (channels 2 … 32000, 50ns dwell time, ref. Fig. 7.2) .................. < ±0.1 % Sweep counter: .......................................................................................................... 48 bit Sweep counter preset range: ....................................................................................................... 1 … 248 Spectrum sequencing: .................................................................................... max. 65536 spectra End-of-sequence dead time: (auto sequence mode) ..................................................................... 30 ns 4 66 some modes may be used simultanously F ComTec GmbH Appendix Fig. 7.1: MCS noise spectrum (32k range, 50ns dwelltime) Fig. 7.2: MCS differential non-linearity plot (32k range, 50ns dwelltime) Fig. 7.3: MCS DNL distribution F ComTec GmbH 67 Appendix 7.5 Physical Case material: ................................................................................................... aluminum Size: ....................................................................... 260 mm x 48 mm x 275 mm Weight: .......................................................................................................... 1.7 kg Shipping case: ............................................................ 420 mm x 320 mm x 290 mm, 4 kg 7.6 Accessories Included: • USB 2.0 (A/A) cable, 3m • Power supply 100-240 VAC / 12 VDC , 1.5 A • Power supply cord 7.7 Trouble Shooting 68 • The 'POWER ON' LED does not light up: 1) check that power is applied to the external power supply 2) check the 12V supply cable is properly plugged in 3) check that the external power supply works – check it's output voltage • The MCA4 is not found by the host computer 1) check that the USB cable is properly plugged in 2) Remove the MCA4 power supply, wait until the POWER LED is dark (~10s) and reapply power F ComTec GmbH Appendix 7.8 Personal Notes F ComTec GmbH 69