1
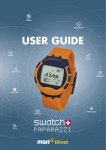
Reference Guide
English - page 1
Français - page 43
Contents
Welcome . . . . . . . . . . . . . . . . . . . . . . . . . . . . . . . . . . . . . . . . . . . . . . . . . . . . . . . 4
Getting Started . . . . . . . . . . . . . . . . . . . . . . . . . . . . . . . . . . . . . . . . . . . . . . . . . . 4
Adjusting the Strap . . . . . . . . . . . . . . . . . . . . . . . . . . . . . . . . . . . . . . . . . . . 5
Button Reference . . . . . . . . . . . . . . . . . . . . . . . . . . . . . . . . . . . . . . . . . . . . . 6
Channels . . . . . . . . . . . . . . . . . . . . . . . . . . . . . . . . . . . . . . . . . . . . . . . . . . . 7
Modes . . . . . . . . . . . . . . . . . . . . . . . . . . . . . . . . . . . . . . . . . . . . . . . . . . . . . 7
Signal Coverage . . . . . . . . . . . . . . . . . . . . . . . . . . . . . . . . . . . . . . . . . . . . . . 8
Status Icons. . . . . . . . . . . . . . . . . . . . . . . . . . . . . . . . . . . . . . . . . . . . . . . . . 9
Using the Time Channel . . . . . . . . . . . . . . . . . . . . . . . . . . . . . . . . . . . . . . . . . . 10
Receiving the Time. . . . . . . . . . . . . . . . . . . . . . . . . . . . . . . . . . . . . . . . . . . 11
Choosing a Watch Face . . . . . . . . . . . . . . . . . . . . . . . . . . . . . . . . . . . . . . . 11
Downloading a Watch Face . . . . . . . . . . . . . . . . . . . . . . . . . . . . . . . . . . . . 12
Using the Chronograph . . . . . . . . . . . . . . . . . . . . . . . . . . . . . . . . . . . . . . . 13
Starting, stopping, and resetting the chronograph. . . . . . . . . . . . . . . 13
Recording laps. . . . . . . . . . . . . . . . . . . . . . . . . . . . . . . . . . . . . . . . . . 14
Using the Alarm . . . . . . . . . . . . . . . . . . . . . . . . . . . . . . . . . . . . . . . . . . . . . 15
Setting the first alarm . . . . . . . . . . . . . . . . . . . . . . . . . . . . . . . . . . . . 15
Setting the second alarm . . . . . . . . . . . . . . . . . . . . . . . . . . . . . . . . . . 16
Turning the alarm on and off . . . . . . . . . . . . . . . . . . . . . . . . . . . . . . . 16
Dismissing the alarm notification. . . . . . . . . . . . . . . . . . . . . . . . . . . . 16
Using the Timer . . . . . . . . . . . . . . . . . . . . . . . . . . . . . . . . . . . . . . . . . . . . . 17
Setting the timer . . . . . . . . . . . . . . . . . . . . . . . . . . . . . . . . . . . . . . . . 17
Starting, stopping, and resetting the timer. . . . . . . . . . . . . . . . . . . . . 18
Dismissing the timer notification . . . . . . . . . . . . . . . . . . . . . . . . . . . . 18
2
About the Battery . . . . . . . . . . . . . . . . . . . . . . . . . . . . . . . . . . . . . . . . . . . . . . .
Changing Watch Settings . . . . . . . . . . . . . . . . . . . . . . . . . . . . . . . . . . . . . . . . .
Changing the Sound Setting . . . . . . . . . . . . . . . . . . . . . . . . . . . . . . . . . . .
Changing the Time Zone . . . . . . . . . . . . . . . . . . . . . . . . . . . . . . . . . . . . . .
Setting the Time. . . . . . . . . . . . . . . . . . . . . . . . . . . . . . . . . . . . . . . . . . . . .
Turning the Radio On and Off. . . . . . . . . . . . . . . . . . . . . . . . . . . . . . . . . . .
Changing the Transition Option . . . . . . . . . . . . . . . . . . . . . . . . . . . . . . . . .
Changing the Time Format . . . . . . . . . . . . . . . . . . . . . . . . . . . . . . . . . . . . .
Changing the Date Format . . . . . . . . . . . . . . . . . . . . . . . . . . . . . . . . . . . . .
Changing the Units Setting . . . . . . . . . . . . . . . . . . . . . . . . . . . . . . . . . . . .
Setting the Time Offset . . . . . . . . . . . . . . . . . . . . . . . . . . . . . . . . . . . . . . .
Checking Watch Information . . . . . . . . . . . . . . . . . . . . . . . . . . . . . . . . . . .
Turning the Watch On and Off . . . . . . . . . . . . . . . . . . . . . . . . . . . . . . . . . .
Frequently Asked Questions . . . . . . . . . . . . . . . . . . . . . . . . . . . . . . . . . . . . . . .
Getting Help . . . . . . . . . . . . . . . . . . . . . . . . . . . . . . . . . . . . . . . . . . . . . . . . . . .
Terms and Conditions . . . . . . . . . . . . . . . . . . . . . . . . . . . . . . . . . . . . . . . . . . . .
Warranty . . . . . . . . . . . . . . . . . . . . . . . . . . . . . . . . . . . . . . . . . . . . . . . . . .
Limitation of Liability . . . . . . . . . . . . . . . . . . . . . . . . . . . . . . . . . . . . . . . . .
Copyright/Disclaimer . . . . . . . . . . . . . . . . . . . . . . . . . . . . . . . . . . . . . . . . .
FCC Part 15 Compliance . . . . . . . . . . . . . . . . . . . . . . . . . . . . . . . . . . . . . .
19
21
21
22
23
25
25
26
26
26
27
27
28
29
35
36
36
40
40
41
3
Welcome
Ready, Set, Go! Wherever life takes you, your new WRIST NET™ watch keeps
you informed. When you sign up for the MSN® Direct service, you choose
exactly which information you want to receive on your watch. This dynamic
wireless technology discreetly displays the information that matters most to
you. With a quick glance at your wrist, stay informed about news, weather,
sports and more, and receive personal messages* and appointment reminders*.
MSN Direct-ready watches are every bit as fun as they are informative. Enjoy
making fashion statements with different watch faces and customizing your
watch to fit your lifestyle.
To learn more about your new watch and how to use it, follow the instructions in
this guide.
* For Windows PC Only
Getting Started
To get acquainted with your new watch and learn about channels, modes, signal
coverage, and status icons, keep reading. If you haven’t already done so, follow
the steps in the Quick Start Guide to charge your watch, activate the MSN Direct
service at www.msndirect.com, and personalize the content you want to receive.
4
Adjusting the Strap (FX3005 and AU4002 only)
1. Press the side pushers on the buckle, opening it on both sides. Lift the
adjustment bar, being careful not to damage the antennae on the underside
of the strap.
2. Move the buckle
�
along the strap
until the desired
�
position is correct
�
for your wrist.
3. When the position
�
is correct, close
the adjustment bar
back into place,
locking the strap
into that position.
�
4. Close both sides
of the buckle and
slide any extra
�
strap through the
strap keeper.
5
Button Reference
PREVIOUS
Go back one screen
Chrono/Timer mode:
start, stop, continue
Alarm mode: turn on,
turn off, change value
Settings mode: scroll up
menu, change value
LIGHT
Activate the light
CHANNEL
Switch channels
View current mode
ENTER
View a channel, mode,
or detail screen
Delete a message or
news story
Watch face: view date
and seconds
Alarm/Settings mode:
accept a selection
NEXT
Go forward one screen
Chrono mode: record
laps, reset
Alarm/Timer mode: set,
reset, change value
Settings mode: scroll down
menu, change value
6
Channels
The information on your watch is organized by channel. Similar to the channels
on your television set, you see different types of content - such as news and
weather - when you switch channels on your watch. When you activate the MSN
Direct service, you select which channels to display on your watch. Each channel
appears on the watch screen with an icon and the name of the channel.
• To view the Time channel from anywhere on
your watch, press and hold Channel.
• To view the next channel on your watch,
press Channel again.
• To display the contents of the current
channel, release Channel.
Modes
Each channel has one or more modes. For example, the Time channel includes the
Face mode, the Chrono mode, the Alarm mode, the Timer mode, and the Settings
mode. The name of the current mode appears on the watch screen.
• To view the current mode, press Channel once.
• To view the next mode within that channel,
press Next.
7
Signal Coverage
The MSN Direct service is delivered over a wireless network that is based on
FM radio broadcast signals. Your watch indicates the strength of the broadcast
signal by displaying a signal strength icon at the top of the screen in Glance
mode, or in the Watch Info mode under the Settings mode (see “Changing Watch
Settings” later in this guide). Even at low signal strength, your watch should
receive information. Signal strength can vary based on your location. Sometimes
topography (hills, valleys), building structure, or nearby electronics can interfere
with the broadcast signal that your watch uses to receive information.
The network sends two types of information to your watch - broadcast and
personal. Broadcast information - such as news stories and current temperatures
- is sent to every watch with MSN Direct, but only the information that you want
to see is actually captured by your watch. Regardless of where you travel in North
America or Canada, as long as you are within an MSN Direct coverage area, you
should receive broadcast information.
Your personal information - such as your messages and calendar appointments is encrypted with a unique key to help maintain your privacy. You receive personal
information when you are within range of your home coverage area. Your home
coverage area is the metropolitan area where you live.
For more information about your home coverage area, including what to do when
you travel, go to the MSN Direct Web site at www.msndirect.com and click the
Help link.
8
Status Icons
Your watch displays various icons. On most watch faces these icons appear in the
upper right corner of the display. The following table describes each icon.
Icon
Description
New Message: Indicates a message has arrived that is unread.
Battery Charging: Indicates that the battery is currently charging.
Battery Low: Appears when the battery level gets down to 30% charge remaining.
You need to charge the watch soon.
Alarm On: Indicates that one of the alarms is set and will sound at the
appropriate time.
Chrono Running: Indicates the chronograph (also known as a stopwatch) is
currently running.
Timer Running: Indicates that the timer countdown is currently running.
Signal Strength: Indicates the strength of the broadcast signal that the watch is receiving.
• A full signal is indicated by
.
• No signal is indicated by
and means that the watch has been out of your
home coverage area longer than 10 minutes and cannot find a signal.
•
means that the watch may not be receiving your personal information.
This can happen before the signal confirms the home coverage area for your
watch, or if you travel out of your home coverage area.
•
means that the watch radio is off and the watch cannot receive a
broadcast signal.
9
Using the Time Channel
Your watch comes with three channels - Time, Messages, and Calendar - that
are available for use even before you activate the MSN Direct service. The Time
Channel is fully operational and ready to go. The Messages and Calendar channels
have limited capabilities until you activate and personalize MSN Direct. The
Messages channel is available for emergency and public service announcements,
and the Calendar channel includes a month view calendar. Once you activate MSN
Direct, you can receive messages from others, view personal appointments, and
view an events calendar for the things that interest you, such as sports schedules,
financial events, and local cultural events. You can also subscribe to a number of
additional channels, such as news, weather, stocks, and sports.
This guide provides instructions for using the Time channel. For instructions on
using the other channels - including Messages and Calendar - go to the MSN
Direct Web site at www.msndirect.com and click the Help link.
Note Before you activate MSN Direct, you also see the Register channel on
your watch. This is a temporary channel that displays the information you need to
activate the service, including the MSN Direct Web site address and your watch
ID. The watch ID is a number that uniquely identifies your watch so that you
receive your personal messages and information. The Register channel disappears
from your watch when you activate MSN Direct.
10
Receiving the Time
When your watch receives a broadcast signal, it should automatically receive
the correct time from an atomic clock. This happens even if you have not yet
activated the MSN Direct service. As long as your watch is receiving a signal,
you do not need to set the time. The time is accurate to a few thousands of a
second and automatically adjusts for daylight savings time and leap years. In
addition, your watch automatically changes to different time zones as you travel
from place to place.
Note When you turn the watch on, it may take a few minutes to receive the time
from an atomic clock.
If your watch is not receiving a signal, you can manually set the time. You can
also change the time display from a 12 hour clock to a 24 hour clock, and you
can override the automatic time zone setting. For details, see “Changing Watch
Settings” later in this guide.
Choosing a Watch Face
You can change the appearance of your watch to reflect your personal style,
environment, or mood. To change the face that displays on your watch:
1. Press and hold Channel to go to the Time channel.
2. Wait for the current watch face to appear.
3. Press Previous or Next until you find a watch face you want to display.
Note For some watch faces, you can press Enter to view the date and seconds.
11
Downloading a Watch Face
When you personalize the MSN Direct service, you can sign up to receive new
watch faces. When you receive a new watch face, the following message appears:
To view the new watch face and decide whether to keep it:
1. When you receive the message, press Enter. The new watch face appears for
a few seconds.
2. Do one of the following:
• To keep the new watch face, press Next (Yes).
• To discard the new watch face, press Previous (No).
Note You can keep just one downloaded watch face at a time on your watch.
If you decide to keep a watch face, the last watch face that you downloaded
is removed.
12
Using the Chronograph
With the chronograph (commonly known as a stopwatch), you can time events such as your daily run - and record lap times. You can start the chronograph, stop
it, and then restart it without having to reset. You can record up to 99 laps.
Starting, stopping, and resetting the chronograph
To use the chronograph:
1. Press and hold Channel to go to the Time channel. Wait for the watch face
to appear.
2. Press Channel to go to the Face mode.
3. From the Face mode, press Next to go to the Chrono mode. The
chronograph appears.
4. To start the chronograph, press Previous (Start).
Minutes and seconds appear as large numbers. Hours appear as small
numbers above the minutes (on the left) and hundredths of seconds appear
as small numbers above the seconds (on the right).
5. To stop the chronograph, press Previous (Stop).
6. Do one of the following:
• To continue using the chronograph and add to the event time, press
Previous (Continue).
• To stop using the chronograph and reset the event time to 00:00, press
Next (Reset).
13
Note When you start the chronograph, the number for hundredths of seconds
appears for 10 seconds and then disappears from the watch face. The number
runs in the background and displays when you stop the chronograph.
Recording laps
To record laps while timing an event:
1. While the chronograph is running, press Next (Lap).
The view freezes for a moment so that you can read the lap value. After a few
seconds, the view resumes with the chronograph still running.
2. Repeat step 1 for each lap you want to record.
After you stop the chronograph, press Enter to review the lap values.
14
Using the Alarm
With an alarm, you can set a time of day when you want a watch sound to notify
you. Your watch includes two alarms that work separately. For example, you can
set one alarm for when you want to get up in the morning and one alarm for when
you need to leave for your carpool.
Setting the first alarm
To set the first alarm:
1. Press and hold Channel to go to the Time channel. Wait for the watch face
to appear.
2. Press Channel to go to the Face mode.
3. From the Face mode, press Next twice to go to
the Alarm mode. The first alarm appears.
4. To set the hour, press Next (Set), press
Previous or Next until you see the hour you
want, and then press Enter.
5. To set the minutes, press Previous or Next
until you see the minutes you want, and then
press Enter.
Note To move up or down in increments of 5 minutes instead of 1 minute,
press and hold Previous or Next.
6. If you are using the 12 hour clock, press Next to choose either am or pm,
and then press Enter.
7. To choose the method of alarm notification, press Previous or Next until you
see the icon ( ), and then press Enter. The alarm is set and is automatically
turned on.
15
Setting the second alarm
• From the Alarm mode, press Enter to go to the second alarm, and then follow
the instructions for setting the first alarm.
Turning the alarm on and off
The alarm is automatically turned on when you set it. A small alarm clock displays
on the watch face to indicate the alarm is turned on. The alarm sounds every 24
hours until you turn it off.
To turn the alarm off:
1. From the Alarm mode, press Previous (Turn off).
2. To turn the alarm back on, press Previous (Turn on) again.
Dismissing the alarm notification
Depending on how you set up the alarm, your
watch emits a sound when the alarm goes off.
The alarm plays for 15 seconds and a notification
message appears on your watch face.
The message automatically disappears when the sound stops. You can dismiss
the alarm before the sound finishes by pressing any button on your watch.
16
Using the Timer
With the timer, a watch sound notifies you after a specific amount of time elapses.
By default, the timer is set to 5 minutes.
Setting the timer
To set the timer:
1. Press and hold Channel to go to the Time channel. Wait for the watch face
to appear.
2. Press Channel to go to the Face mode.
3. From the Face mode, press Next three times
to go to the Timer mode. The Timer appears.
Minutes and seconds appear as large numbers.
Hours appear as small numbers above the
minutes (on the left).
4. To set the minutes, press Next (Set), press
Previous or Next until you see the hour you
want, and then press Enter.
Note To move up or down in increments of 5 minutes instead of 1 minute,
press and hold Previous or Next.
5. To set the seconds, press Previous or Next until you see the seconds you
want, and then press Enter.
Note To move up or down in increments of 5 seconds instead of 1 second,
press and hold Previous or Next.
6. To set the hours, press Previous or Next until you see the hours you want,
and then press Enter.
17
Starting, stopping, and resetting the timer
To use the timer:
1. From the Timer mode, press Previous (Start) to start the timer. A small
hourglass appears.
2. To stop the timer, press Previous (Stop).
3. Do one of the following:
• To continue the timer countdown from where
you stopped it, press Previous (Continue).
• To stop using the timer and reset it to the
most recent setting, press Next (Reset).
Dismissing the timer notification
When the timer countdown reaches zero, your watch emits a series of beeps and
displays a notification message on your watch face.
The message appears for 15 seconds. You can dismiss the timer notification
message sooner by pressing any button on your watch.
Note If you turned off the sound setting, you only see the notification message.
Your watch does not emit the beep tones.
18
About the Battery
Your WRIST NET™ watch is feature rich and has numerous functions. Because
of this, the watch uses more battery power and must be recharged periodically,
much like other devices such as cell phones or walkie-talkies.
Your watch should function fully for at least 2 days on a single charge. The
amount of time the battery lasts between charging sessions varies with a number
of factors, including which watch face you are using, which channel the watch
displays most of the time, the strength of the broadcast signal, and the amount of
information that you receive on the watch.
If you want to extend the battery life between charging sessions, follow these tips:
• Use a simple watch face. Simple watch faces, such as those with traditional
clock faces, take less battery power than elaborate watch faces, such as
those that use animation.
• Stay on the Time channel unless you are viewing content on another channel.
Some channels rotate new information through the screen continually, even
when you are not looking at them, which takes battery power.
• Turn the sound off.
• Turn the radio off. If you are outside of a reception area or not interested in
getting information, you can turn the radio off and the watch stops looking
for a broadcast signal. Remember to turn the radio back on.
• Turn the watch off. If you aren’t wearing the watch, you can turn it off. The
watch maintains your current information for a long time, but the watch
screen is blank and the watch receives no additional information.
19
When the watch battery is fully charged, it is at 100%. When the watch battery is
fully discharged, it is at 0%. Your watch is fully functional from 100% down to a
20% charge. The following table describes how the watch responds at different
battery charge levels.
Battery charge
remaining
Watch response
30%
The low battery indicator (
20%
A notification message appears. The watch goes into low battery mode.
The watch radio turns off and stops receiving new information. The watch
switches to the Time channel after 5 minutes. The watch face may switch
to one that uses less battery power.
10%
The watch turns off and the screen is blank. The watch conserves the
contents of its memory.
) appears.
If your watch has a remaining battery charge of 30% or less, you should charge the
watch as soon as possible. Charging the watch takes up to 6-8 hours.
To charge your watch:
1. Connect the power cord to the charger. Plug the power cord into an
electrical outlet.
2. Rotate the charger arm into the open position.
3. Be sure to close the watch clasp completely. This allows your watch to receive
your information.
4. Place your watch on the charger arm.
5. Make sure that the pushers on the watch match the diagram on the charger arm.
20
6. Wait 6-8 hours for your watch to fully charge.
7. A “Charged” message will display when it is fully charged.
Changing Watch Settings
You can change a number of watch settings including sound, time zone, date
format, time offset, and transitions. The settings are located in the Settings mode
of the Time channel.
To go to the list of watch settings:
1. Press and hold Channel to go to the Time channel.
Wait for the watch face to appear.
2. Press Channel to go to the Face mode.
3. From the Face mode, press Previous once to go to the Settings mode. The
list of settings appears.
4. Scroll thorough the list by pressing Previous or Next.
5. To select an item, press Enter.
Changing the sound setting
With the sound setting, you can indicate if you
want your watch to emit sound and, if so, for which
events. If you select All On, sound emits for all
events that use sound. For example, button presses,
message alerts, and notifications.
21
If you select Alerts Only, sound emits only when there is an alert. If you select
All Off, no sound emits for any events. However, you will still hear sound for any
alarms that you have set.
To change the sound setting:
1. From the Settings mode, press Next to scroll to Sound, and then press Enter.
2. Press Next until you find the sound setting you want, and then press Enter.
Changing the time zone
Because some watch faces can display dual time zones, you can set two time
zones on your watch. When you enter the Time Zone setting, ZONE 1 appears in
the upper-left corner. To switch to ZONE 2, press Enter.
By default, the time zone is set to Auto-set and reflects the time zone that
corresponds to the atomic clock that the watch is currently set to receive. This
means that the time zone updates automatically as you move from place to place.
For example, your watch displays the Pacific Time Zone when you are in San
Francisco and the Eastern Time Zone when you are in New York.
22
If you want your watch to always display the time from one time zone, you can
change from Auto-set to a specific time zone. For example, you may want to stay
in your home time zone while on a trip, or you may take a trip to a location where
there is not MSN Direct coverage. In this case, your watch stays in the specific
time zone until you change it to another time zone or back to Auto-set.
To change the time zone:
1. From the Settings mode, press Next to scroll to Time Zone, and then
press Enter.
2. Press Next until you find the time zone you want, and then press Enter.
Setting the time
If you are receiving a broadcast signal and the watch radio is turned on, you
cannot set the time and date. Your watch automatically receives the correct time
from an atomic clock. If you enter the Set Time setting when it is not available,
you receive the following message:
23
If you enter the Set Time setting and see the date and time display, your watch is
either not receiving a broadcast signal, or the watch radio is off. If so, you can set
the time and date manually.
To set the time and the date:
1. From the Settings mode, press Next to scroll to Set Time, and then press Enter.
2. To set the hour, press Previous or Next until you see the hour you want, and
then press Enter.
3. To set the minutes, press Previous or Next until you see the minutes you
want, and then press Enter.
Note To move up or down in increments of 5 minutes instead of 1 minute,
press and hold Previous or Next.
4. If you are using the 12 hour clock, press Next to choose either am or pm,
and then press Enter.
5. To set the month, press Previous or Next until you see the month you want,
and then press Enter.
6. To set the day, press Previous or Next until you see the day you want, and
then press Enter.
7. To set the year, press Previous or Next until you see the year you want, and
then press Enter.
Note Once your watch receives a broadcast signal again - either because you
moved into an MSN Direct coverage area, or because the radio has been turned
back on - the time you set is automatically replaced with the time from an
atomic clock.
24
Turning the radio on and off
At times, you may want to turn the watch radio off. For example, you may want
to preserve the watch battery when you know that you will be out of range of the
broadcast signal. By default, the radio is turned on.
To turn the radio off:
1. From the Settings mode, press Next to scroll to Radio, and then press Enter.
2. Press Next to turn the radio off, and then press Enter. The no signal icon
( ) is displayed in the upper right corner of most watch views.
Note If you turn the watch radio off, you won’t receive any new information broadcast or personal - until you turn the radio back on. Any information that you
received before you turned the radio off remains on your watch.
Note You may be required to turn off your watch for airline flights.
Changing the transition option
In some of the watch channels, you can choose how the screen transitions when
you move between screens by setting the Transition option.
To change the transition option:
1. From the Settings mode, press Next to scroll to Transition, and then
press Enter.
2. Press Next until you find the transition you want, and then press Enter.
25
Changing the time format
With the Time Format setting, you can choose to display the time using the 12
hour clock or the 24 hour clock.
To change the time format:
1. From the Settings mode, press Next to scroll to Time Format, and then
press Enter.
2. Press Next to choose either 12 hr or 24 hr, and then press Enter.
Changing the date format
With the Date Format setting, you can choose to display the date by month first
(June 16, 2003) or day first (16 June 2003). The date display uses this setting
wherever it appears on your watch.
To change the date format:
1. From the Settings mode, press Next to scroll to Date Format, and then
press Enter.
2. Press Next to choose either mm.dd or dd.mm, and then press Enter.
Changing the units setting
With the Units setting, you can choose to display watch information in U.S. units
(Fahrenheit, inches) or metric units (Celsius, centimeters).
To change the units format:
1. From the Settings mode, press Next to scroll to Units, and then press Enter.
2. Press Next to choose either US or Metric, and then press Enter.
26
Setting the time offset
Many people prefer to set their watch so that it runs a little fast. With the Time
Offset setting, you can set your watch time ahead by 5, 10, or 15 minutes. You
can use this setting, even while the time is being set automatically through the
broadcast signal of an atomic clock.
To set the time offset:
1. From the Settings mode, press Next to scroll to Time Offset, and then
press Enter.
2. Press Next until you find the offset amount you want, and then press Enter.
Checking watch information
The Watch Info setting contains technical information about your watch and your
MSN Direct service. You can use this setting to check the signal strength and
battery life status of your watch.
To view watch information:
1. From the Settings mode, press Next to scroll to Watch Info, and then
press Enter.
2. Press Next and Previous to scroll through the watch information.
3. After you finish, press Enter to return to the Settings mode.
27
Turning the watch on and off
If you are not using your watch, you can turn it off to preserve the battery life.
When you do so, both the display and radio turn off, and the alarms and timers
will stop. You can wake up the watch by pressing any button. If the battery is
low, you need to put the watch back on the charger, but it wakes up automatically
when it has enough charge to start.
To turn the watch off:
1. From the Settings mode, press Next to scroll to Watch Off, and then
press Enter.
2. Press Next. A Turn off watch? message appears.
3. Press Next (Yes). A Press any key to wake up message appears briefly, and
then the watch screen goes blank.
28
Frequently Asked Questions
Here are the most commonly asked questions about your WRIST NET™ watch.
For additional questions and answers, go to the web site at www.fossil.com or
www.abacuswatches.com and click Customer Service. For questions about the
MSN Direct service, go to the MSN Direct Web site at www.msndirect.com and
click the Help link.
• How do I replace or recharge the battery in my watch?
✓ No need to replace the battery - your watch comes equipped with a
rechargeable battery.
✓ To recharge the battery, follow the steps on pages 19 and 20.
• How can I tell if my watch is getting reception?
✓ Check the signal strength icon, which is found in the upper-right corner
of most watch views. A good signal is indicated by
, which means
your watch is getting reception and is receiving information. No signal is
indicated by , which means you are outside an MSN Direct coverage
area or you are temporarily in an area where reception is poor.
means
that the watch may not be receiving your personal information. This
can happen before the signal confirms the home coverage area for your
watch, or if you travel out of your home coverage area.
means that
the watch radio is off and the watch cannot receive a broadcast signal.
✓ Check the Signal strength percentage in Watch Info. For details, see
page 8.
29
• How do I determine remaining battery life?
✓ Check the Battery life percentage in Watch Info. For details, see page 19
• How do I conserve battery life?
✓ For helpful tips about maximizing battery life, see page 18.
• How do I set the time on my watch?
✓ As long as you are in an MSN Direct coverage area, you shouldn’t
have to set the watch time. Your watch acquires the current local time
automatically from an atomic clock. This may take a few minutes to
acquire initially. If the Set Time setting displays Time Set By Network,
then you are in an MSN Direct coverage area.
✓ If you are outside of an MSN Direct coverage area, you can manually set
the time and date on your watch. For details, see page 23.
• What happens when I activate the MSN Direct service?
✓ Your watch receives the personalized information you selected on the
MSN Direct Web site. The following actions take place:
1. Your watch receives a “Welcome” confirmation message.
2. The Register channel disappears from your watch.
3. Your watch starts receiving channel content, such as news stories
and local weather information.
30
• How will I know when my watch is activated?
✓ You will receive a “Welcome” confirmation message on your watch. You
will also receive a confirmation e-mail within 24 hours.
• Can I adjust the volume on my watch?
✓ No.
• Can my watch communicate with other watches enabled with MSN Direct?
✓ No.
• Is my watch waterproof?
✓ No. Your watch is not meant to be submerged in water. However, it will
withstand a little rain while being worn.
• Where do I send my watch for repair service?
✓ In the event that you experience a problem with your watch,
please call Customer Service at (toll free) 1-866-375-4832. For
additional information, go to our web site at www.fossil.com/tech or
www.abacuswatches.com.
• My watch doesn’t show the correct time. What should I do?
✓ When you first turn on your watch, the time reverts to 12:00 A.M.
while the watch attempts to receive the correct local time from a
nearby broadcast signal. When the watch receives a signal, the time
automatically updates to the current local time.
✓ The MSN Direct coverage area includes most major metropolitan areas
throughout the United States and Canada. If your watch is inside any of
these coverage areas, it should automatically receive the correct local
time, unless the watch radio is turned off. By default, the radio is turned
on. If your watch is outside of a coverage area, it will not receive the
31
✓
✓
✓
✓
correct time until you return to the coverage area. For details, see
page 21. For more information about coverage areas, go to the MSN
Direct Web site at www.msndirect.com and click the Help link.
Sometimes topography (hills, valleys), building structure, or nearby
electronics can interfere with the broadcast signal that your watch
uses to receive the correct local time. When that happens, your watch
experiences a delay in receiving the correct time.
If your watch is exactly one or more full hours away from the correct
time, it’s possible that your Time Zone settings are set to a specific time
zone. Make sure that ZONE 1 is set to Auto-set. For details, see page 22.
If your watch time is ahead by exactly 5, 10, or 15 minutes, it is likely
that the Time Offset setting is set. For details, see page 26.
If you are outside of the MSN Direct coverage area, you can manually set
the time on your watch. For details, see page 23.
• My watch battery died before I could recharge it. What should I do?
✓ Don’t worry! Just place your watch on the charger and your watch
begins to charge. All of your information comes back online as soon as
the watch has enough battery power.
32
• My watch isn’t responding to any button presses. What should I do?
✓ Turn your watch off and then turn it back on by completing the
following steps:
1. Simultaneously press and release Next, Enter, and Light. This turns
the watch off.
2. Wait a few seconds, and then simultaneously press and release
Previous, Enter, and Next.
It will take several seconds for the watch to power on, and then a watch
face appears. If your watch still doesn’t respond to any button presses,
call the Customer Service at (toll free) 1-866-375-4832.
• I activated the MSN Direct service, but my watch isn’t receiving any of the
information I selected. What should I do?
✓ You may not have received the activation and configuration message that
was sent when you activated the service. This can happen if you were
outside an MSN Direct coverage area, or if you were temporarily in an
area where reception is poor. You can instruct the MSN Direct service to
resend the configuration message by going to www.msndirect.com and
clicking the link to resend the configuration message.
33
• My watch hasn’t received any new information in a day or more. What
should I do?
✓ The MSN Direct coverage area includes most major metropolitan
areas throughout the United States and Canada. If your watch is
inside any of these coverage areas, it should automatically receive
new broadcast information (news stories, current temperatures). If
your watch is outside of a coverage area, it doesn’t receive any new
broadcast information until you return to the coverage area. For more
information about coverage areas, go to the MSN Direct Web site at
www.msndirect.com and click the Help link.
✓ If you leave your home coverage area and travel to another MSN
Direct coverage area, your watch will not receive personal information
(personal messages, calendar appointments) unless you go to the MSN
Direct Web site at www.msndirect.com and set up a travel schedule.
✓ Sometimes topography (hills, valleys), building structure, or nearby
electronics can interfere with the broadcast signal that your watch uses
to receive information.
34
Getting Help
For additional help with your WRIST NET™ watch, please call Customer Service
at (toll free) 1-866-375-4832 or go to our Web site at www.fossil.com/tech or
www.abacuswatches.com.
For help with the MSN Direct service, go to the MSN Direct Web site at
www.msndirect.com and click the Help link, or contact MSN Customer Support
at 1-866-658-7032 (within the United States). For deaf or hard-of-hearing
customers, call 1-800-877-9580 (within the United States) for technical support
or 1-866-271-7577 (within the United States) for accounts and billing support.
35
Terms and Conditions
LIMITED 90 DAY WARRANTY*
HARDWARE:
Fossil, Inc. (“Fossil”) warrants to the original end user (“Customer”) that new
Fossil branded products will be free from defects in workmanship and materials,
under normal use, for ninety (90) days from the original purchase date.
EXCLUSIONS:
This warranty excludes (1) physical damage to the surface of the product; (2)
replacement or repair of the strap, bracelet, or battery; (3) water-related damage; (4)
damage caused by misuse, neglect, improper installation or testing, unauthorized
attempts to open, repair, or modify the product, or any other cause beyond the
range of the intended use; (5) damage caused by accident, fire, power changes,
other hazards, or acts of God; or (6) use of the product with any non-Fossil device
or service if such device or service causes the problem. Accessory products are
not covered under this Limited Warranty, nor are the SPOT service or any related
service provided by Microsoft. This warranty is limited to hardware only.
REPLACEMENT:
Products or parts may be new or reconditioned or comparable versions of the
defective item. Fossil warrants any replaced or repaired product, part, or software,
for a period of forty-five (45) days from shipment, or through the end of the
original warranty, whichever is longer. Customer must provide dated proof of
purchase (as stated below) in order to receive warranty protection through the
end of the original warranty period.
36
OBTAINING WARRANTY SERVICE:
Customer must contact Fossil Technical Support within the applicable warranty
period to obtain warranty or non-warranty service. You may contact them at
the following number 866-375-4832. Dated proof of original purchase, or a
legible copy thereof, will be required. Fossil reserves the right not to service an
item if a proper receipt, or copy thereof, is not provided. Do not send in original
packaging as it will not be returned. We highly recommend you insure your parcel
shipment since you are liable for getting the item to our Service Center. You are
also responsible for adequately protecting the watch during shipment. Fossil is
not responsible for replacing product lost in-transit. Fossil is not responsible for
Customer products received without a warranty service authorization and may
be rejected. Repaired or replacement products will be shipped to Customer at
Customer’s expense. All products or parts that are replaced become the property
of Fossil. Fossil shall not be responsible for Customer’s software, firmware,
information, or memory data contained in, stored on, or integrated with any
products returned to Fossil for repair, whether under warranty or not.
WARRANTIES EXCLUSIVE:
THE FOREGOING WARRANTIES AND REMEDIES ARE EXCLUSIVE AND IN
LIEU OF ALL OTHER WARRANTIES, EXPRESS OR IMPLIED, INCLUDING
WARRANTIES OF MERCHANTABILITY, FITNESS FOR A PARTICULAR PURPOSE,
CORRESPONDENCE WITH DESCRIPTION, AND NONINFRINGEMENT, ALL OF
WHICH ARE EXPRESSLY DISCLAIMED.
37
LIMITATION OF LIABILITY:
FOSSIL SHALL NOT BE LIABLE FOR INCIDENTAL, CONSEQUENTIAL, INDIRECT,
SPECIAL, OR PUNITIVE DAMAGES OF ANY KIND, LOSS OF INFORMATION OR
DATA, OR OTHER FINANCIAL LOSS ARISING OUT OF OR IN CONNECTION WITH
THE SALE OR USE OF THIS PRODUCT, WHETHER BASED IN CONTRACT, TORT
(INCLUDING NEGLIGENCE) OR ANY OTHER THEORY, EVEN IF FOSSIL HAS BEEN
ADVISED OF THE POSSIBILITY OF SUCH DAMAGES. FOSSIL’S ENTIRE LIABILITY
SHALL BE LIMITED TO REPLACEMENT, REPAIR, OR REFUND OF THE PURCHASE
PRICE PAID, AT FOSSIL’S OPTION.
DISCLAIMER:
Some countries, states, or provinces do not allow the exclusion or limitation of
implied warranties or the limitation of incidental or consequential damages so the
above limitations and exclusions may be limited in their application to you. When
implied warranties may not be excluded in their entirety, they will be limited to
the duration of the applicable written warranty. This warranty gives you specific
legal rights; you may have other rights that may vary depending on local law. Your
statutory rights are not affected.
GOVERNING LAW:
This Limited Warranty shall be governed by the laws of the State of Texas, U.S.A.,
and by the laws of the United States, excluding their conflicts of laws principles.
The United Nations Convention on Contracts for the International Sale of Goods is
hereby excluded in its entirety from application to this Limited Warranty.
38
Metro Service Center
10615 Sanden Drive
Dallas, Texas 75238
United States of America
www.fossil.com/tech
October 2004
*This warranty is subject to change. Please visit our website for the most current
version of our warranty.
39
Limitation of Liability
FOSSIL MAKES NO WARRANTY RESPECTING THE MERCHANTABILITY OF THE
PRODUCT OR ITS SUITABILITY OR FITNESS FOR ANY PARTICULAR PURPOSE
OR USE OR RESPECTING INFRINGEMENT.
BUYER SHALL NOT IN ANY EVENT BE ENTITLED TO, AND FOSSIL SHALL
NOT BE LIABLE FOR, INDIRECT, SPECIAL, INCIDENTAL, OR CONSEQUENTIAL
DAMAGES OF ANY NATURE EVEN IF FOSSIL HAS BEEN ADVISED OF THE
POSSIBILITY OF SUCH DAMAGES. BUYER’S RECOVERY FROM FOSSIL FOR ANY
CLAIM SHALL NOT EXCEED BUYER’S PURCHASE PRICE FOR THE PRODUCT
GIVING RISE TO SUCH CLAIM IRRESPECTIVE OF THE NATURE OF THE CLAIM,
WHETHER IN CONTRACT, TORT, WARRANTY, OR OTHERWISE.
Copyright/Disclaimer
The copyright in all original material contained in this document is held by Fossil,
Inc. and/or by the original creator of the material. Except as stated below, none of
the material may be reproduced, distributed, republished, downloaded, displayed,
posted, transmitted, or copied in any form or by any means, without the prior
written permission of Fossil, Inc. and/or the copyright owner. Permission is granted
to display, copy, distribute, and download the material solely for personal, noncommercial use provided that you make no modifications to the material and that all
copyright and other proprietary notices contained in the material is retained.
40
Any permission granted herein terminates automatically without further notice
if you breach any of the above terms. Upon such termination, you agree to
immediately destroy any printed and/or downloaded materials. Any unauthorized
use of any material contained herein may violate domestic and/or international
copyright laws, trademark laws, the laws of privacy and publicity, and
communications regulations and statutes.
All trademarks, service marks, logos, slogans, domain names, and trade names
(collectively “Marks”) contained herein are the property of their respective
owners. Fossil, Inc. disclaims any proprietary interest in Marks other than its own.
FCC Part 15 Compliance
This device complies with part 15 of the FCC rules. Operation is subject to the
condition that this device does not cause harmful interference.
41