1
cpx 020.qxd
09/08/2006
16:31
Page 2
CPX Engineer’s Reference Guide
IMPOR TANT!
Input:
Nominal Temp Range:
AC230V +/-10% ~50Hz 125mA Max. 35W Max
0 - 50°
eurösec Plastic Versions
For Indoor Use Only
This equipment is intended only for use as a Security Alarm Control Panel. Adequate
ventilation away from heat and humidity must be provided. The unit must be fixed
securely to a non-flammable surface using suitable fixings.
All mains wiring must conform to the relevant current IEEE wiring regulations (or
appropriate international regulatory standards). See Mains Supply Connection section
within this manual for more detailed instructions.
All wiring must be protected from sharp or jagged edges.
All low voltage (alarm) wiring must be to the appropriate international regulatory
standards and comply to good wiring practice and should be routed away from the
mains cables.
Replacement fuses should be of the same type and rating conforming to IEC 127.
The maximum current draw from the unit for all output combinations must not exceed
1A. Please see note: *Power Supply Rating in Specifications chapter.
The unit is intended for use with a suitable re-chargeable lead acid battery
permanently connected to the appropriate terminals.
All documentation and manuals must be thoroughly read by suitably qualified
installation personnel prior to installation.
The unit has no user serviceable parts inside. Internal access should only be by suitably qualified personnel.
Provision is provided for an earth connection within the mains input connector block,
this connection is for protection of the wiring only and is not functional for the unit.
Battery Fuse
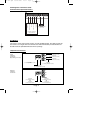
An in-line Battery Fuse has now been incorporated into this product. The fuse rating
is 2 Amp Anti-Surge. The fuse holder is spring loaded, therefore you should ensure
that the battery lead is not under tension in order to maintain a good connection
between the fuse and the holder.To change the fuse push the two halves of the holder together and twist anti-clockwise. Please ensure correct battery charge on completion of the installation and during each service visit.
Page 2