1
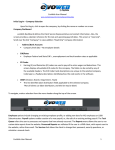
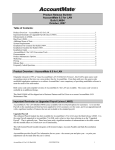
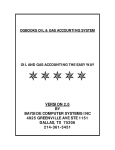
Quick Reference User Guide Table of Contents GETTING STARTED _____________________________________________________________________4 LOGGING IN ______________________________________________________________________________4 USING SECURE PASSWORDS __________________________________________________________________4 NAVIGATION _____________________________________________________________________________5 EMPLOYEE INFORMATION _____________________________________________________________6 NEW EMPLOYEE WIZARD ______________________________________________________________6 EMPLOYEE INFORMATION _____________________________________________________________8 DEMOGRAPHICS ___________________________________________________________________________8 DEPARTMENT/POSITION _____________________________________________________________________9 LABOR ALLOCATION _______________________________________________________________________9 MISCELLANEOUS __________________________________________________________________________9 RATES__________________________________________________________________________________10 AUTO PAYS _____________________________________________________________________________10 FRINGE _________________________________________________________________________________11 DEDUCTIONS ____________________________________________________________________________12 DIRECT DEPOSIT __________________________________________________________________________13 TAXES _________________________________________________________________________________14 ACCRUALS ______________________________________________________________________________15 PAY HISTORY ____________________________________________________________________________16 EMPLOYEE HR INFORMATION ________________________________________________________17 REVIEWS _______________________________________________________________________________17 DEPENDENTS ____________________________________________________________________________17 EDUCATION _____________________________________________________________________________17 EMERGENCY CONTACTS ____________________________________________________________________17 EVENTS ________________________________________________________________________________17 PREVIOUS EMPLOYERS _____________________________________________________________________17 SKILLS _________________________________________________________________________________17 PAYROLL ENTRY ______________________________________________________________________18 PAYROLL BATCHES ___________________________________________________________________19 PAYROLL DATA ENTRY – BATCH PAY ENTRY ___________________________________________________20 EMPLOYEE PAY ENTRY ____________________________________________________________________21 PREPROCESS REGISTER_____________________________________________________________________22 CLOSING AND SUBMITTING PAYROLL _________________________________________________________22 PAYROLL PROCESS CHECKLIST ______________________________________________________23 CHECK CALCULATOR ______________________________________________________________________24 REPORTS ______________________________________________________________________________26 USER PREFERENCES __________________________________________________________________28 EMPLOYEE SELF SERVICE (ESS)______________________________________________________29 COMPANY LEVEL ADMINISTRATION __________________________________________________________29 EMPLOYEE AND PASSWORD POLICIES __________________________________________________________29 SIDEBARS _______________________________________________________________________________29 payentry.com™ Quick Reference User Guide MPAY Software 2006 Version 1.1 2 EMPLOYEE LOGIN_________________________________________________________________________29 LOGGING IN _____________________________________________________________________________30 PASSWORDS _____________________________________________________________________________31 NEW EMPLOYEES _________________________________________________________________________31 ACKNOWLEDGEMENT ______________________________________________________________________31 FORGOTTEN PASSWORD ____________________________________________________________________31 PASSWORD REQUIREMENTS _________________________________________________________________32 HOME PAGE _____________________________________________________________________________33 WHAT CAN AN EMPLOYEE VIEW? ____________________________________________________________33 SAMPLE ESS HOME PAGE __________________________________________________________________34 payentry.com™ Quick Reference User Guide MPAY Software 2006 Version 1.1 3 GETTING STARTED Logging In You must have a web browser and internet access to log in to payentry.com™ and PDF viewer to view reports. Your payroll provider will furnish you with an address to log into payentry.com™. It should look something like this: https://www.payentry.com/XXX or you may be able to access it from your payroll provider’s website. Additionally, you will be assigned a password and company ID. Type in your user name, password and company id, and then click the login button. Using Secure Passwords It is EXTREMELY important that you have a SECURE password. We recommend you do the following to insure your password remains secure: 1. 2. 3. 4. 5. Make passwords at least 8 characters using letters and numbers. Make passwords unpredictable and difficult to guess. Change your password every 60 days. Do not give your password to anyone. Never leave your desk unattended while logged into payentry.com™. To change your password, login to the system and click Preferences in the top right corner. Enter a new password and click Save Changes. payentry.com™ Quick Reference User Guide MPAY Software 2006 Version 1.1 4 Navigation From the Main Menu, you may access all the areas allowed by your payroll provider. Click the icons or the links to navigate to the desired menu. It is important to use the navigation tools within payentry.com™. DO NOT use the Back or Forward buttons on your browser or you will be logged out and changes may be lost. and All pages have links at the top and bottom of the page and bold, underlined items can be chosen to navigate to that area. Remember to SAVE CHANGES on screens where appropriate or you will get a warning and not be allowed to leave that screen until you save or cancel the change. payentry.com™ Quick Reference User Guide MPAY Software 2006 Version 1.1 5 EMPLOYEE INFORMATION Enter the Employee information area from the main menu by clicking on the Employee Information icon or link. The next screen shows a list of your employees. There are numerous options on this page that allow you to filter, sort, and change the number of EE’s shown in the window. For example, you may filter by All or Active EE’s, sort by Name, Dept, EE ID, etc and determine how many EE’s you would like to view at one time. New Employee Wizard You may add new employees here by clicking on the New Employee link. Enter the employee information, and then click Add Employee to save your information. Following are some suggestions regarding entering new employees. ID – The system will assign the next employee number in sequence, but you may override it using numbers, letters or a combination of both. You may not use symbols, spaces or punctuation. Anything on this screen can be changed or updated later except the employee ID number. ID numbers can be six characters or less. You may use leading characters to make the ID six characters, but you may not use trailing spaces or spaces within the ID. payentry.com™ Quick Reference User Guide MPAY Software 2006 Version 1.1 6 Last Name, First Name, Middle – enter as shown on the employee social security card as this will appear on the employee W2 at year end. Birth Date – you may use the calendar icon or type in the birth date. SSN – enter the SSN using the following format: xxx-xx-xxxx. Hire Date – the default value is today’s date. If the hire date is not today, you should change this field to the correct date. Worker Comp Code – use the drop down if applicable. If the code you need is not listed in the drop down, it must be added on the company level. Call your payroll provider if you do not have access to this tab, and they will add it for you. Hours – use this for hourly employees. The default hours field is optional. Using this field for hourly employees will create an “Auto Pay” box on the payroll entry screen. This will automatically populate 40 hours for the employee. If an employee’s hours fluctuate, you may not want to populate this field. Salary – use this for salary employees and type in the amount they will receive per pay period. You may want to record hours for the salary employee as well as dollars. If so, then use the default hours field as applicable (40, 80, 86.67 or 173.33.) Tax Summary – the state tax information typically has a default. If you operate in multiple states, remember to change the employee information accordingly. payentry.com™ Quick Reference User Guide MPAY Software 2006 Version 1.1 7 Federal/State/Local Tax Details – use this area to input filing and exemption status. The system knows the status levels for each state, and there are notes to remind you once a tax is selected. Employee Information Demographics This tab contains the employee name and address along with a few other pieces of demographic data. payentry.com™ Quick Reference User Guide MPAY Software 2006 Version 1.1 8 You may change an employee address, add additional contact information, and insert data into custom fields. Custom Fields – if there is a field in payentry.com™ you would like to track but it is not available, field labels can be set up at the company level. There are four custom fields available on this tab although there are only two shown in the figure below. Department/Position Home Department – change an employees department by using the drop down list. Status – these fields are used to define the employee’s status within the company. Status, Type, and Pay Group – are populated by the drop-downs. Term Date – input the employee’s termination date here along with changing the status type to ‘Terminated.’ Position – this area contains optional fields including the Worker Comp Code. This dropdown is populated on the company level. Labor Allocation Labor Allocation is used to automatically distribute percentages of employee’s earnings, deductions and taxes to multiple cost centers within the company. Employees set up for Labor Allocation will only receive one paycheck. Labor Allocation will take place on all paychecks, unless overrides are submitted. For infrequent allocation of labor it is best to use the input in the pay entry area. Click the new (*) button to create a new labor allocation entry NOTE: If the total of the Labor Allocation percentages is less than 100 %, the shortage amount will be allocated to the employee’s home location. Miscellaneous This tab contains a variety of employee information fields used for a number of purposes. Many of the fields are populated at the company level allowing you to choose from the drop-downs. payentry.com™ Quick Reference User Guide MPAY Software 2006 Version 1.1 9 Memo - Use the Memo area to input reminder notes that can be viewed during the payroll process for a specific employee. This note will remain the same until you change it. Rates This is where the employee pay rate information is stored. Employees may have multiple pay rates active at one time as long as the rate code is different, as in the example below. This tab is also your historical lookup tool, so it is recommended, as a rate change is necessary, that a new version of that rate be added. Do not change or delete existing rates. EXAMPLE: Make a change to the active base rate in the above picture: 1. Choose ‘Base’ from the drop down. 2. Fill in the new salary (manually calculate the hourly rate if it does not automatically calculate – this feature can be turned on at the company level, please call your payroll provider) 3. Change the end date on the old rate. 4. Press ‘Save Changes’ To attach a rate to a specific department/organization level, click on Details. Auto Pays This tab has multiple purposes. First, you may set up an employees default hours here as well as choose to automatically pay them. Additionally, you may enter pay types here that are added to the employee’s paycheck every payroll (i.e. car allowance or phone allowance.) These entries will appear in pay detail when the employee is paid. You can temporarily cancel the payment of a scheduled item in Employee Pay Entry by deleting the pay item or the paycheck in payroll entry. One-time additions to an employee’s paycheck can be done in Payroll Entry and should not be set up here. payentry.com™ Quick Reference User Guide MPAY Software 2006 Version 1.1 10 Base Auto Pay Auto Pay – Hours – choose this option if you want your hourly employee to be paid automatically the number of hours you input here. If you want to key hours for your employee since hours vary by pay period, then do not choose this option. Auto Pay – Salary – choose this option if you want to automatically pay your salary employee the salary indicated here as well as the hours above in the Auto Pay/Hours section. This option is recommended for salaried employees. Auto Pay – None – choose this option for hourly employees whose hours vary by pay period and you would like to key in payroll entry. Employee Auto Pays Choose the appropriate earning/deduction code you would like to automatically pay the employee. Attach hours if necessary and fill in the amount and proper dates fields. Note: The employee will be paid this amount even if you do not input data for a paycheck. Remember to delete the item from pay entry if you do not want them to be paid this amount. Fringe Recurring additional Employee earnings (Car Allowance, GTL, 401k match etc) can be set up here. When set up on this tab they are considered recurring earnings and do not appear on the pay screen when the earning is paid, but will show in the calculation. Note: you must have your payroll provider set up the proper group term life codes if you wish to use the automatic GTL calculator. This feature will look at the full amount of the employee’s GTL (units field) and based on the age of the employee (DOB must be in system), the system will input a GTL earning, tax it appropriately, then deduct it. These entries will appear in pay detail when the employee is paid. You can temporarily cancel the payment of a scheduled item in Employee Pay Entry by going to Edit in Employee Pay Entry and blocking the earning. payentry.com™ Quick Reference User Guide MPAY Software 2006 Version 1.1 11 Deductions Amounts to be deducted from an employee’s paycheck as a scheduled activity are setup here. One-time deductions can be entered in Payroll Entry as needed and should not be setup here. Example – Setting up a Deduction: 1. Choose the deduction from the dropdown. 2. Choose a special calculation code if necessary (i.e. child support, 401k). Leave blank to take a flat amount. 3. Populate the rate/amount. The rate will be a percentage if you choose a percentage calculation code. 4. Let the frequency default to Every Pay Period unless this deduction should have a special frequency, such as the first payroll of the month, then choose as needed. 5. The start date will default to your next payroll and the end date to 12/31/2100 (forever). You may override this if necessary. 6. 7. Click Save Changes. Click on details if you wish to add a goal/target amount to a deduction. The paid field will automatically update with each payroll. Once the Paid field equals the Goal field the deduction will no longer be taken. Additionally, you may attach a deduction to an agency check (i.e. child support, garnishment) and use the Misc. Info field for case numbers or identifiers. payentry.com™ Quick Reference User Guide MPAY Software 2006 Version 1.1 12 Direct Deposit The definitions for employee’s direct deposits are setup here. An employee can have an unlimited amount of direct deposits. Direct Deposits can be coded as a Flat Amount, a percentage of the Net Pay or Net Pay minus a flat amount. To add a direct deposit to an employee, fill in the blank fields as follows: 1. Fill in a priority. Start with zero (0) if you setting up multiple accounts. If only setting up one account for the entire net check use priority ninety-nine (99). In the example above, we have used priority zero (0) for the $50 going to savings and priority ninety-nine (99) for the remainder of the net check. a. The priority of the direct deposit tells payentry.com™ the order in which to perform the Direct Deposit instructions. Priorities are defined numerically. payentry.com™ will create the direct deposits for the employee in priority order, starting with the lowest number first. If multiple direct deposits are setup and have the same priority order there is no way to know which on will happen first. By default, direct deposit has a priority of zero. 2. Input the ABA Transit or Routing number. We recommend getting this information from a voided check, not deposit slips. Note: Do not input a Transit number beginning with five (5.) Transit numbers never begin with five (5). Transit numbers beginning with five (5) are internal banking numbers and will be rejected when your ACH file is sent. 3. Input the Account Number. Again, we recommend getting this information from a voided check. 4. Check the box if the account is a checking account. Do not check it if it is a savings or other type of account. 5. Amount Code: a. Flat Amount i. Choose if the amount to be deposited is a flat amount. b. Percentage i. Choose if the amount to be deposited is a percentage or if this is the net check amount. Make sure you input 100.00 in the Amount field for net checks. c. Net minus flat i. The amount entered represents the dollar amount the employee should receive via check. Anything remaining will be a direct deposit to the account defined on this line. For example, if the amount is $50.00, then the employee will receive a check for $50.00 and the remaining amount will go direct deposit. payentry.com™ Quick Reference User Guide MPAY Software 2006 Version 1.1 13 6. The Prenote Date field will automatically populate with the next payroll. We recommend letting the system automatically prenote this file. You may override the prenote function by inputting a prior date in this field. Please consult your payroll provider as they may not recommend this practice. Taxes Information regarding the employee’s taxes is input here. Tax and taxable wage data is stored at the paycheck level. As a result, all employee and employer taxes that the employee is considered for will be displayed in this tab. Only taxes setup on the company level can be assigned to the employee. Contact your payroll provider to add new or modify current tax set up. The function of adding a new employee will automatically add the employee’s tax codes. Normally, you will only have to make tax adjustments (status changes, additional taxes, etc.) here. Tax Details Filing Status - To make status changes such as Single to Married, use the appropriate drop downs and fill in the exemptions box. Only status codes available for each particular tax are seen in the drop-down. Additional Amounts – input the appropriate flat amount or percentage amount to be taken on each paycheck. Start/End Dates – Typically you do not want to alter these date fields. When you add a new employee the start date will populate with the next check date. The end date will populate with 12/31/2100 or forever (until it is changed.) Any check dates entered between the start and end dates will calculate taxes. If the check date is not within the range, taxes will not calculate which is why you should be very careful when modifying dates. NOTE: Always verify the start/end dates when adding a new tax code. payentry.com™ Quick Reference User Guide MPAY Software 2006 Version 1.1 14 State All the features from above apply. Notice when you use the drop-down the Legend below it populates with informational data. Accruals Use this tab to establish an employee’s participation in a time off accrual type. The Accrual types are setup on the company level by your payroll provider. An employee can participate in an unlimited number of time off types. To add a new accrual, select the accrual type in the drop down, enter the appropriate dates and press the ADD button. To remove a policy type from the employee file, press the Remove button. It may be better, however, to change the end date and leave the policy in the employee record to provide you with a better audit trail. Options are available to override certain aspects of the company level policy accrual at the employee level by going to Details. payentry.com™ Quick Reference User Guide MPAY Software 2006 Version 1.1 15 The Details section allows you to override the policy or adjust an employee’s time off balance. Pay History Any check processed in payentry.com™ for an employee is viewable through this tab. The paycheck history is displayed in reverse chronological order, with the most recent entries displayed at the top of the list. The top section of the screen shows a recap of each check, displaying check type, check date, hours, gross, taxes, deductions, net and check/voucher number. Go to Details if you: • Want to see the detail of a specific check. • Want to VOID a check o This will void the check and place the void in the next payroll process in the VM batch which allows you to process the void with your normal payroll. • Want to VOID and Reissue a check o This will void the check and place the void in the next payroll process in the VM batch which allows you to process the void with your normal payroll and it will reissue a check for the same amount, but assign a new check number. The lower part of the screen allows you to view totals within various date ranges. The default is the current YTD amount. You may change this at the bottom of the page by changing the date ranges and pressing Recalculate. payentry.com™ Quick Reference User Guide MPAY Software 2006 Version 1.1 16 Employee HR Information Reviews The Reviews tab allows you to track employee review information such as Reviewer, Rating, and Next Review Date. Additionally, by clicking on Details you can add pay increase information as well as reviewer and employee notes. Dependents The employee’s dependents can be entered here. This tab is for informational purpose only and includes such items as; name, relationship to employee, telephone number and DOB. Education This tab is used to store the employee’s education information such as; school, years attended, degree and grade point average. Emergency Contacts This tab is used to store emergency contact information for the employee and includes items such as; name, relationship, address and phone number. Events This tab is used to store information regarding various significant events like “Employee of the Month” or “Sales Person of the Year.” Events can also be used to track disciplinary history of an employee by defining event categories relating to disciplinary issues (Verbal Warning, Written Warning, etc). Event Codes are created in the Company > Misc tab. If you do not have access to this tab, contact your payroll provider to set up event codes. Information in the tab is available for reporting purposes and has no affect on the calculation of payroll, taxes, etc. Previous Employers This tab is used to store information regarding previous employment. It includes items such as; name of employer, start and end dates, job title, supervisor, termination reason, notes, etc. Skills The Skills tab is used to hold an inventory of employee skills. This information may be used to search for in house candidates having the skill set required to fill various open positions in the organization. All information in this tab is informational only. payentry.com™ Quick Reference User Guide MPAY Software 2006 Version 1.1 17 PAYROLL ENTRY This is the entry point to the various areas used for the input, balancing and submission of the payroll to your payroll provider. At the end of the section is a Payroll Process Checklist you may use. First, we will discuss each of those steps in detail. Start Payroll – click the green arrow to start the payroll process. Starting Payroll will move you to the Start Payroll Cycle screen. At this point, review your pay period begin and end dates as well as the batch(s). Once you have confirmed the information, click Start Payroll. This will actually initiate the start payroll job and will move you to another screen that gives you the option to Refresh at the bottom of the screen. Do not wait on this screen for a long period of time; click the Refresh button to move on after a few seconds. payentry.com™ Quick Reference User Guide MPAY Software 2006 Version 1.1 18 Payroll Batches You have now moved on to the Payroll Batches screen which offers you several options. This section briefly explains the options on this page. We will review in detail later. Time Clock Import If you use a time clock and your payroll provider has configured your file output to download into payentry.com™ then you will see the Time Clock Import at the top of the page. You will not see this option if you do not use this feature. Click Time Clock Import to import your data. Payroll Data Entry Your payroll may or may not be separated into a series of batches. In our example below, there is only one batch (B=Bi-Weekly Payroll.) You have two pay entry options here. Click the one you would like to use. Keep in mind; you may switch back and forth between the two at any time. Employee Pay Entry – this option shows one employee per page and you advance to the next employee by using the arrows at the top of the page. Batch Pay Entry – this option shows numerous employees on one page (10-50) and allows you to view or key data in a grid format. This method is normally faster although you may have to use the other option to add additional checks, use override functions or view the check detail. Check Calculator This option is for calculating manual checks. You may view the information, save the check information, or in some cases print the manual check and save the information to process with your next payroll. Preprocess Register This report allows you to audit the payroll data in your batch(s) prior to submitting it to your payroll provider. You may print or save the report to view later. Close Payroll The feature is only used once your data input and all employee changes are complete. payentry.com™ Quick Reference User Guide MPAY Software 2006 Version 1.1 19 Payroll Data Entry – Batch Pay Entry Again, this is most frequently used because there is more employee information on one page in a grid format. This allows you to view and key your information quickly. A B C D G E F As you look at the example above, notice the employee’s are in EE ID order based on the Sort method. There are just ten employees on the screen because the page length is set to ten. A The first employee has a reminder note attached to her. You may point to the note with your mouse or double-click on the note and it will appear in pop-up box. This is an hourly employee. B This indicates an Auto Pay Salary employee. If set up properly, you do not have to type anything for this employee unless you want to record sick, vacation, etc. C This indicates an Auto Pay Hourly employee. This should only be used if changes to hours occur infrequently for an hourly employee. D Based on our Page Length filter of ten (10), you have the option to go to another page, as this company has more than 10 employees. E Details will advance you to the Employee Pay Entry area where you can conduct overrides, view the paycheck, delete the paycheck or add new earning or deduction codes not on this screen. F Details will advance you to the Employee Pay Entry area and automatically add a new paycheck so that you may key hours/dollars. G Customize column headings based on your most commonly used codes. Go to Preferences/Batch Pay Entry to customize. payentry.com™ Quick Reference User Guide MPAY Software 2006 Version 1.1 20 Employee Pay Entry This method of entering payroll allows you to see one employee per page. You will have to use this screen at some point, even if you prefer to use the Batch Pay Entry method. The top of the page contains employee notes (if applicable) and demographics. The bottom area allows you to enter hours/dollars, etc. A E B F C A B C D E D Choose New Paycheck if you want to pay the employee hours/dollars on a separate check. You may create as many paychecks as you like. Remember to user the Edit feature to override deductions, etc., if applicable. Set your code column to your most commonly paid earning/deduction codes. Go to Company Setup/Auto Pays to customize. Call your payroll provider if you do not have access to this tab and it will be changed for you. Also, you can add new line items by choosing them from the drop down and clicking the Add button. The hours, rate and amount columns are the default. You may customize this if needed (branch, dept., job coded, etc.). Go to Preferences/Employee Pay Entry to customize. Choose Calculate Check to view the employee gross-to-net amount or the pay detail for this check. Choose Edit for paycheck overrides. You will be able to change tax percentages or frequency, block earnings, deductions, labor allocation, or direct deposit. Additionally, you may create a memo for this specific employee that will show on the check stub. Remember when applying overrides: Save Changes-This Paycheck Only – will apply these overrides to this paycheck only. Save Changes-This Employee Only – will apply these overrides to all paychecks for this employee in the batch. F The remove button will delete the code on that line. payentry.com™ Quick Reference User Guide MPAY Software 2006 Version 1.1 21 Preprocess Register The Preprocess Register report can be viewed by clicking Preprocess Register on the Payroll Batches screen. This report allows you to view and verify your payroll data prior to submitting the information to your payroll provider. You may save this report to your desktop or print it. You may run it for all batches or a specific batch by changing the report properties. Note: Once the payroll has processed, you will not be able to preview this report again. After the payroll processes, you may view the Payroll Register report. Run the Preprocess Register: 1. 2. 3. 4. 5. Click on Preprocess Register on the Payroll Batches screen. The next screen allows you to change the report parameters. The report will run for all batches unless you type a batch in the Value field (i.e. B, M, W, VM, etc.) Click Run Report. The report is Queued. Go to Main Menu/Reports/Pickup Area. Click Download. Closing and Submitting Payroll After payroll totals have been verified for accuracy, you may close and submit the payroll. Close/Submit Payroll 1. Click Close Payroll on the Payroll Batches screen. 2. Click Close Payroll on the next screen as well. 3. The next screen allows you to Submit Payroll, click Submit Payroll. 4. The Submit Payroll screen will give a Refresh option. Click Refresh after a few minutes to ensure your job was successful. 5. A message indicating your payroll was submitted should appear (see below.) a. If a warning message appears, call your payroll provider. 6. Return to Payroll or Main Menu and log out. payentry.com™ Quick Reference User Guide MPAY Software 2006 Version 1.1 22 Payroll Process Checklist 1. Go to: Main Menu/Employee Information Conduct employee maintenance (new hires, terminations, deduction changes, etc.) 2. Go to: Main Menu/Payroll Entry Start the Payroll cycle by clicking Start Payroll 3. Click on the appropriate Batch and Method or Import Time Employee Pay Entry – one employee per page Batch Pay Entry – multiple employees, grid format 4. Input payroll data (Note, payentry.com™ has customizable input sheets that may help make this process faster.) You may leave the payroll process anytime and continue later. Just don’t close the batch until you are completely done. 5. Go to: Main Menu/Payroll Entry/Payroll Batches/Preprocess Register and verify payroll totals with the Preprocess Register Save the Preprocess Register to your desktop or print a copy so you can verify what you sent to your payroll provider later, if needed. 6. Close the batch(s) after verification is complete. 7. Submit the payroll to process. 8. Call your payroll provider if you encounter any problems with submission. This does not have to be done prior to Starting Payroll. Employee Maint. can be done after a payroll batch is opened. The new payroll cycle can be started anytime during the pay period; always verify the last payroll submitted did process before starting a new one Accessing your payroll data after submission: Check with your payroll provider to determine the timeframe for completion and when you may access your data. Processing times vary. NOTES: payentry.com™ Quick Reference User Guide MPAY Software 2006 Version 1.1 23 Check Calculator The Check Calculator is accessed through Payroll Entry. You may access it either before or after starting payroll. There are several options available when using the calculators. 1. 2. 3. View manual calculation only. View and save manual paycheck. View, save and print manual paycheck. Whenever a manual check is saved or saved and printed, it is automatically stored in a VM (Void/Manual) Batch that can be processed with your next payroll so the employee year-todate file is updated with the appropriate wage and tax amounts. Create a Manual Check 1. 2. 3. 4. 5. Manually choose the pay code(s) from the drop down. Choose the Block options if applicable (Automatic Pays, Deductions, Direct Deposit.) Change tax frequency or percentages, if applicable. Press Calculate Check View the calculated check. payentry.com™ Quick Reference User Guide MPAY Software 2006 Version 1.1 24 Save a Manual Check 1. 2. 3. 4. 5. 6. Change the pay period begin/end options, if applicable. Choose – Issue check immediately using the following information The bank account should default to your company account. Assign a check number. If a check number is assigned, it is assumed a check was written and one will not create when the next payroll processes. If you are manually writing the employee a check at this time, then do not choose the print option. If you have the ability to print checks, then that box can be checked. Press Save Check. Do not forget this step or your check will not be saved and included in the next payroll process and the employee year-to-date wages will not be updated! payentry.com™ Quick Reference User Guide MPAY Software 2006 Version 1.1 25 Reports There are currently 68 reports available to view and print. Select the report you want to produce by pressing the Run link. This will queue a request to run the report. The request will be processed and the report will be available for download as soon as the request has been completed. You have the option to change the report parameters. If no changes are made, the report will default to the last payroll processed. You may change date ranges or the sort order, as well as run a detail or summary report. There are also additional options. payentry.com™ Quick Reference User Guide MPAY Software 2006 Version 1.1 26 Additional Options – allow you to customize the report even more by changing the Value column. If If If The value is a blank field The value is a populated drop-down The value is a blank drop-down Then Then Then If The value is a checkbox Then Type in a value based on the description Change it based on the description you want This field does not currently show on the report, but you may choose from the dropdown Check or uncheck based on the description The output format will be PDF. Remember you must have Adobe Acrobat installed on your computer to run reports in payentry.com™. Delivery – you may view the report in the Pick Up area or use the email feature to send the report to yourself. You can work on other things while the report is running and receive the report via email when it is complete. To email, check the email box and type in the appropriate email address. Pressing Run Report will place the report in the Pick Up Area. Reports in the Pick Up Area are stored there for 24 hours and available to run anytime with the criteria you chose. After 24 hours, the report will no longer be available in the Pick Up area and you will have to reenter your specific report criteria to run the report again. Click Download to view the report. payentry.com™ Quick Reference User Guide MPAY Software 2006 Version 1.1 27 User Preferences User Preferences give the user the ability to personalize the payroll entry settings. Preferences – Employee Pay Entry Settings Header columns can be changed to make the keying process more efficient. Preferences – Batch Pay Entry Settings The settings correspond to the Batch Pay Entry header columns and can be setup to match your input sheets for faster input. payentry.com™ Quick Reference User Guide MPAY Software 2006 Version 1.1 28 Employee Self Service (ESS) This feature allows employees to view personal demographic and payroll data online. This is a view only feature, but an employee may print prior check stubs. Depending on your service level, this option may or may not be available to you. Contact your payroll provider if this is an option you would like to offer employees. Company Level Administration Each company has access to the Employee Self Service configuration under the Main Menu. Go to Main Menu -> Additional Options -> Setup. The company configuration allows access to the employee and default password policy, as well as company level sidebars. Employee and Password policies The employee and default password policies can be edited. Normally these are configured by your payroll provider. If the employee login policy is set to Manual, the employees who are allowed to login can be entered on this screen. Once the policies are setup the company administrator can run the Employee Self Service Enrollment report for their employees. This report is a form letter that is used to distribute the default passwords to the employees, greatly simplifying the setup of the system. Note that changes to the employee policy can take up to an hour to take effect. Sidebars Company level sidebars are shown to ALL employees in a company. The company sidebars are shown before the payroll provider sidebars and the company level sidebars are only shown to the company they are configured on. As with payroll provider sidebars, a sidebar can contain HTML, including links and images. Employee Login Employees login and access the self service system using a standard web browser and any Internet connection. Configuring Browser Settings The ESS web site requires that both JavaScript and cookies be enabled on the client web browser. Different browsers have different procedures for enabling these features making it impossible to describe the procedures for all possible browsers on all possible platforms. The following sections outline the procedures for major browsers and platforms. Internet Explorer 6.0 on most versions of Microsoft Windows Note that Internet Explorer has relatively complex security settings, and that these security settings may be overridden and/or disabled by a system administrator. The following procedures describe the settings needed to enable various features, but these settings may not be available or honored due to administrative security policies. Internet Explorer refers to JavaScript as "active scripting". To control active scripting and other security features, Internet Explorer uses the concept of security zones to classify web sites into different groups. Each zone specifies a set of security settings that apply when accessing sites in that zone. The user can either leave the payentry.com™ web site in the default "Internet" zone, or place the payentry.com™ web site in the "Trusted" zone. Placing payentry.com™ in the "Trusted" zone is safer as it does not require enabling scripting for all Internet sites. To place a site in the "Trusted" zone, click on Tools -> Internet Options -> Security -> Trusted Sites -> Sites and add "http://www.payentry.com/". To enable active scripting in a zone, click on Tools -> Internet Options -> Security, select the zone payentry.com™ Quick Reference User Guide MPAY Software 2006 Version 1.1 29 containing payentry.com™, click Custom Level, and then click Enable under Scripting -> Active Scripting. To control the handling of cookies, Internet Explorer applies custom settings for any web site that has been explicitly setup within Internet Explorer; otherwise Internet Explorer will apply the default settings. It is recommended to enter settings for payentry.com™ explicitly to avoid allowing cookies for all web sites. To allow cookies for payentry.com™ explicitly, click on Tools -> Internet Options -> Privacy -> Edit, enter "http://www.payentry.com/" and click Allow. To allow cookies for all web sites, click on Tools -> Internet Options -> Privacy and set the privacy level to Medium High or lower. Netscape Navigator 6.x on Microsoft Windows To enable JavaScript, click Edit -> Preferences -> Advanced and check "Enable JavaScript for Navigator" To enable cookies, click Edit -> Preferences -> Privacy and Security -> Cookies and select either "Enable cookies for the originating web site only", or "Enable all cookies". Opera 7.x on Microsoft Windows To enable JavaScript, click File -> Preferences -> Multimedia -> JavaScript. To enable cookies, click File -> Preferences -> Privacy -> Enable cookies. Note there are additional settings on this screen that may disable cookies for payentry.com™. These settings can be used to enable first-party cookies while disabling third-party cookies. Logging in All employees should go to https://www.payentry.com/ee/ to login. Note that ALL employees in ALL companies use the same login URL. If an employee works for multiple companies on payentry.com™ they will not be able to login to ESS, since the system will not know which company to show information for since the EE email address may be the same across companies. Note that after an employee has first been enabled there is a delay of up to an hour before they can login. payentry.com™ Quick Reference User Guide MPAY Software 2006 Version 1.1 30 Passwords Employees are assigned default passwords which are provided to them in the Employee Self Service Enrollment report. When an employee logs in with a default password the employee is immediately prompted to setup their password. Once a password is set up the default password is no longer valid. New Employees When employees are first granted access to ESS via the Employee Self Service Access Page they will be sent an email message with their default username and password. The employee must acknowledge receipt of the email message before they will be allowed to login to ESS. See the Acknowledgement section for more. The first time a new employee logs into ESS, they will be forced to change their password before being allowed to continue. The employee can change their username or password from the Account page in ESS once they are logged in. See the Account section for more detail. Acknowledgement Employees will be sent an email message with an acknowledgement link in it when: • They are initially granted access to ESS • Their ESS account has been reset from the Employee Self Service Access Page • Their password has been reset or email address has been updated from the Employee Setup Page • They have forgotten their login information and have requested it be sent to them. • They have updated their email address via the ESS Login Page • Their account has been disabled due to too many failed logins – see the ESS Security Enhancements section for more • They have changed their email address via the Account Maintenance Page When one of these events happens, the employee will need to open the email message and click on the acknowledgement link or paste the link in their browser. They will then be presented with a web page informing them that they can now log in. When they log in after acknowledging the receipt of the email message, they will be forced to change their password before being allowed to continue. Forgotten Password On the Login Page to ESS, there is a link to the Request Employee Login Information Page where an employee can navigate to if they do not know their username or password. This page allows the employee to request their username and password be sent to them. The employee must enter their email address. They are then required to further verify their identity by answering a personal question. This question can be set up by the employee in the Account Maintenance Page. If the employee has not set up a question, then the default will be to ask them for their social security number. Once the employee has correctly verified themselves, a message will be displayed in the browser telling them an email message has been sent to them with their login information. The email message is an Acknowledgement message and the employee must acknowledge receipt of the email before they can log in. payentry.com™ Quick Reference User Guide MPAY Software 2006 Version 1.1 31 Password Requirements All passwords will now be required to meet certain minimum requirements to help ensure that they are less likely to be cracked. All passwords must be between 8 and 32 characters in length. They must contain at least one numerical character (1234567890) and at least one non-numerical character. When Passwords are stored in the database they will always be encrypted. This is a oneway encryption method and the password cannot be retrieved from the database. Passwords will expire after a certain amount of time, and the employee will be forced to change it the next time they log in after it has expired. The amount of time allowed before a password expires is configurable per company via the Employee Self Service Company Parameters Page. Passwords cannot be reused for a certain period of time. If the employee enters a password that has been used previously when they change their password, they will be informed that it cannot be used because it has been used in the past and must enter another value. The amount of time allowed before a password can be reused is configurable per company via the Employee Self Service Company Parameters Page. Whenever an employee is forced to change their password, they will be informed as to why they are being forced to change it. Some reasons are: • Password has expired. • For an existing employee, their old password does comply with the new guidelines. • They are initially granted access to ESS • Their ESS account has been reset from the Employee Self Service Access Page • Their password has been reset or email address has been updated from the Employee Setup Page • They have forgotten their login information and have requested it be sent to them. • They have updated their email address via the ESS Login Page • Their account has been disabled due to too many failed logins – see the Account Security section for more • They have changed their email address via the Account Maintenance Page payentry.com™ Quick Reference User Guide MPAY Software 2006 Version 1.1 32 Home Page Employees may customize their home page to view the data that is most important to them. Go to Maintenance/My Home Page to change and save preferences. What can an Employee View? Employees can view the following areas, anytime, by going to Employee/ Contact Information Status and Position Deductions Taxes Direct Deposits Accruals Pay History payentry.com™ Quick Reference User Guide MPAY Software 2006 Version 1.1 33 Sample ESS Home Page The employee in the sample page prefers to see Pay History, Accruals, Direct Deposits, and Taxes, in that order. Pay History is set to display where the other three areas are collapsed. To view check detail information, click on Details. The details show earnings, deductions, taxes, and direct deposits for a specific pay period. The information can be printed by choosing the Print Check Stub option at the bottom of the page. payentry.com™ Quick Reference User Guide MPAY Software 2006 Version 1.1 34